

Avaya PARTNER Advanced Communications System, PARTNER API Installation And Programming Instructions
Page 1
CIB 3243
Comcode 700340102
Issue 2
July 2004
PARTNER
®
Advanced Communications System
Application Programming Interface (API)
The PARTNER Application Programming Interface (API) card is a PCMCIA card, similar to the
Backup/Restore Card, Software Upgrade Card, or PARTNER Remote Access PC Card. It replaces the
Backup/Restore Card (Silver Label/12G Type) that comes with the PARTNER
Communications System (ACS) Release 6 or later Control Unit.
The PARTNER API card enables the following applications to work with PARTNER ACS Release 6 or
later: Screen Pop, Small Call Center, Interactive Voice Response (IVR), 911 Solutions, Call Accounting
and Traffic Reports, and Customer Relationship Management (CRM).
API is a feature enhancement for PARTNER ACS that allows new and existing server based applications
from Avaya’s DeveloperConnection program to work with and enhance the operation of PARTNER ACS
Release 6 or later systems.
The software allows API to be activated in place of Station Message Detail Recording (SMDR). API is a
feature that provides for switch reporting details of incoming, outgoing, transfer and conference traffic on
the switch. It also reports entered account codes and the activation/deactivation of Do Not Disturb. API is
similar to SMDR, except that all events (for example, off hook, time, originating extension, line accessed,
number dialed, Caller ID number, etc.) are sent out the SMDR port (RS232) near real time. SMDR waits
until the call is completed and then sends all the data for the entire call.
®
Advanced
Important Safety Instructions
The following list provides basic safety precautions that should always be followed when using this
product:
1. Read and understand all instructions.
2. Follow all warnings and instructions marked on the product.
3. Do not drop, bend, or crush the card.
4. Keep the card away from moisture, high temperatures, and direct sunlight.
5. Keep the connector on the card clean.
Before starting, verify that you have the batteries properly installed in the processor module. The
display for Extension 10 will show ChgBat W/PowerOn or ReplaceSysBat W/PowerOn if the
batteries need to be replaced, or if they are not installed properly. To avoid damage to the processor
module or to the card, do not install or remove the card when power is on.
SAVE THESE INSTRUCTIONS
PARTNER is a registered trademark of Avaya Inc. in the U.S. and other countries.
1
Page 2
Installing the PARTNER API Card
The PARTNER API card is used with PARTNER ACS Release 6 or later.
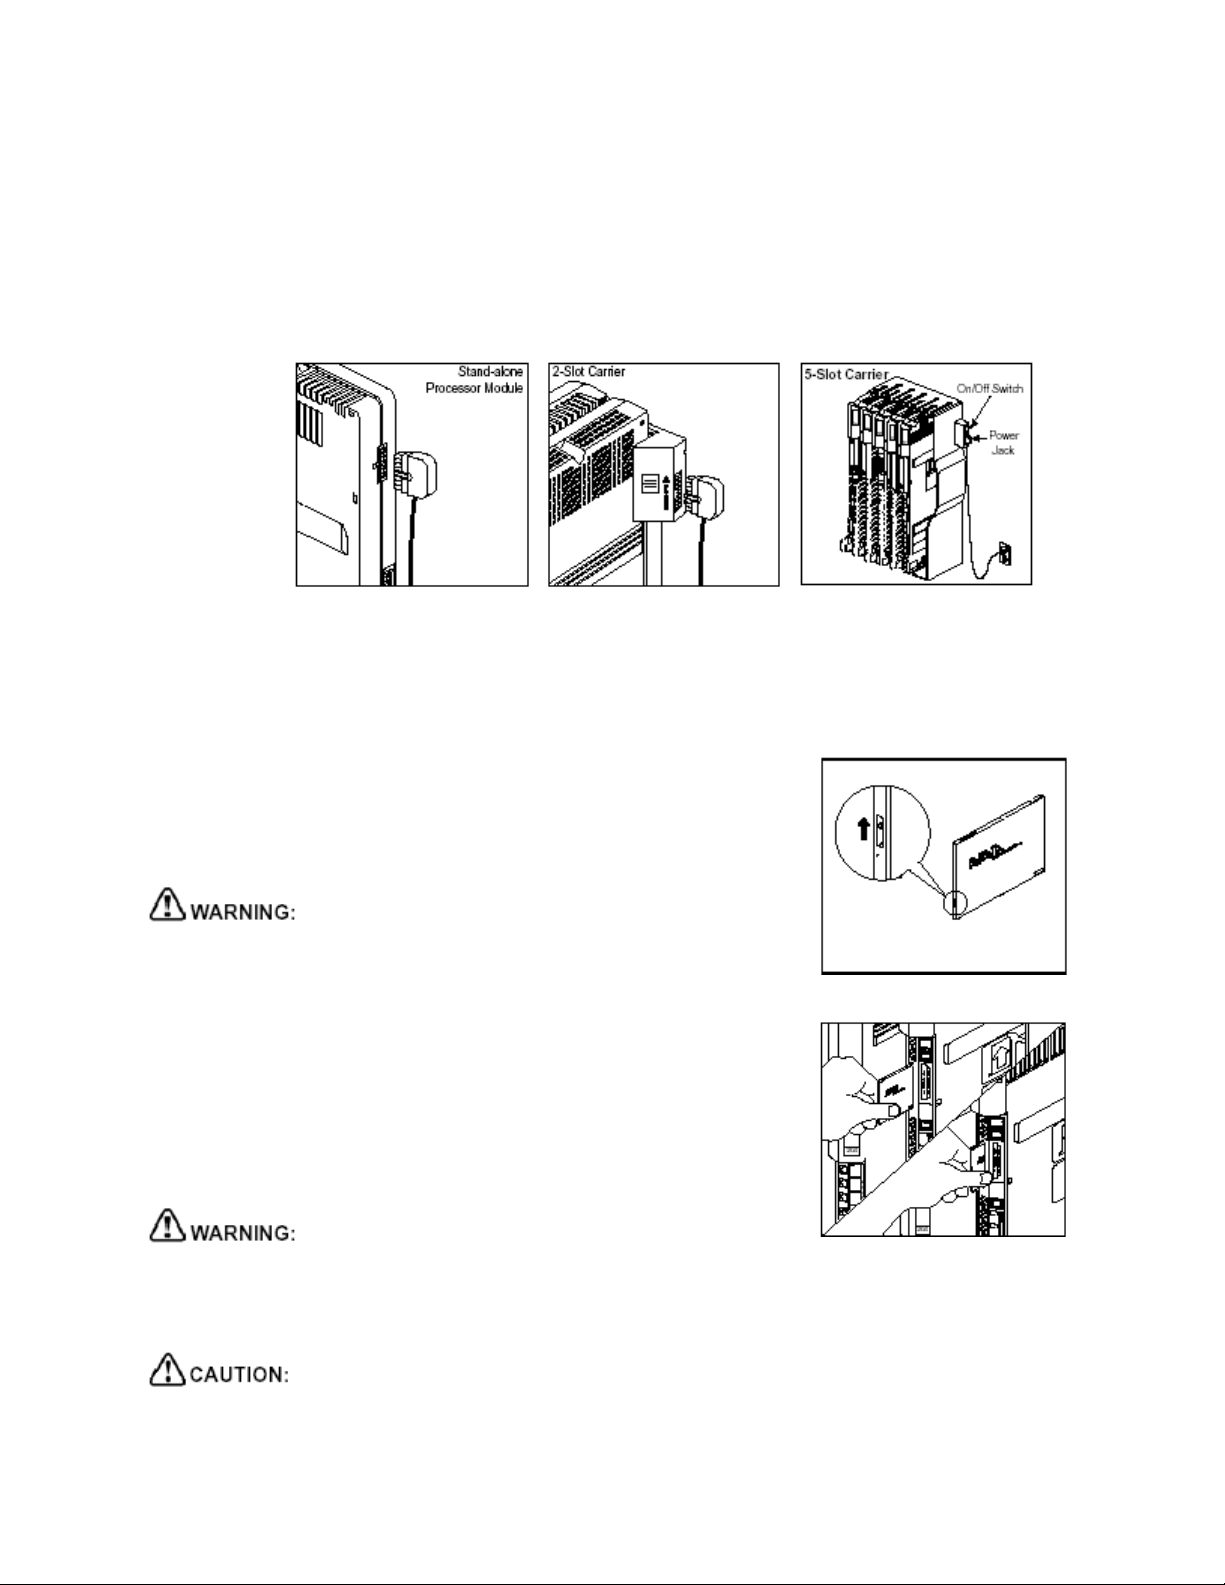
1 Power down the system before inserting or removing a PC Card.
If you have a stand-alone or 2-slot carrier, unplug the power cord from the wall outlet and
disconnect the power cord from the power jack on the carrier.
If you have a 5-slot carrier, move the carrier’s On/Off switch to Off (O) and unplug the
power cord from the wall outlet.
2 Remove the carrier’s cover.
If you do not have a 5-slot carrier, go to Step 3.
If you have a 5-slot carrier, loosen the thumbscrew at the bottom of the carrier cover and
rotate the carrier cover to disengage the tabs at the top of the modules from the openings
on the top of the carrier cover.
3 If your card comes with a write-protect tab, verify that the
write-protect tab on the PC Card is not in the write-protected
position. If it is, use a paperclip or another pointed object to
push the write-protect tab on the end of the PC Card upward
to the unprotected position.
Remove all other PC Cards from the processor before initiating
an upgrade.
4 Remove all other PC Card(s) from the PC Card slot(s)
on the processor module by gently pulling each card
straight out (with the power off).
5 Insert the PC Card by holding it with the label facing, to
the right, and sliding it gently into one of the PC Card
slots on the processor module. When inserted properly,
the PC Card projects about 1-5/8” (4 cm) from the
module.
To initialize the system, you MUST insert the enclosed PC Card before powering up the system for
the first time.
6 Reconnect the power cord to power up the system.
The power cord should hang straight down from the connector, flush against the plastic case for the
entire length of the board. Do not install the power cord at an angle to the case or with a loop in it.
2
Page 3

7 If you have a 5-slot carrier, move the carrier’s On/Off switch to the On (⎯) position.
The PARTNER API Card must remain in the processor. It becomes the Backup/Restore
card. It adds the API function to the existing PARTNER ACS Release 6 or later, provides
the modem for PC Administration and Diagnostics Software, and holds the translations if
the display functions are administered for French. It must remain in the PCMCIA slot if
you use PC Administration software, or French displays.
If a 1600 DSL module resides in the carrier, the module itself may take from 2 to 7
minutes to initialize. However, the module should have a steady green LED in the same
horizontal plane as the other modules during initialization.
If a T1 module resides in the carrier, the module itself may take up to a minute to
initialize.
During the upgrade, the bicolor (red/green) power LED on the processor flashes green
and red alternately.
When the upgrade has finished, the power LED becomes steady green.
8 Verify a successful upgrade.
If you have a display telephone, dial Feature 59.
PACS R6.0.3S C01 is displayed. R6.0.3S signifies the current release.
If you do not have a display phone, wait 30 seconds after the LED becomes steady green
and check all green lights on the front of the module(s). If any lights are out, do the
following:
− If a single light is out, power down the control unit, reseat the module, then power up
the control unit.
− If multiple lights are out, power down the control unit, reseat the leftmost module that
has a light out, and then power up the control unit.
− If the lights are still out, contact your local Authorized Dealer, or for the continental
US only, call the Avaya Customer Care Center at 1 800 628-2888 (PARTNER ACS).
9 Replace the carrier’s cover.
If you have a 2-slot carrier or a stand-alone configuration, you are finished with this
procedure.
If you have a 5-slot carrier, perform the following steps to replace the carrier’s cover:
− Make sure all modules are seated properly.
− Position the carrier cover over the modules so that the openings on the top of the
carrier cover align correctly with the tabs at the top of the installed 5-slot carrier and
modules.
− Rotate the carrier cover into position so that it aligns correctly with the thumbscrew
opening on the bottom of the carrier.
− Tighten the thumbscrew. To ensure proper alignment and safe operation, tighten the
thumbscrew securely.
10 To do a test Backup, a test Restore, and to set up programming for Automatic Backups,
refer to the PARTNER ACS R6 documentation that came with your system.
3
Page 4

Programming
Application Programming Interface (API) (#615)
API is a feature enhancement for PARTNER ACS that allows new and existing server based
applications from Avaya’s DeveloperConnection program to work with and enhance the operation of
PARTNER ACS Release 6 or later systems.
Use this feature in place of Station Message Detail Recording (SMDR).
This feature applies to only PARTNER ACS R6 or later releases that include API functionality.
Considerations
This feature enables and disables API. With API disabled, normal SMDR output is provided. With
API enabled, API events are provided via the SMDR port.
SMDR and API cannot both be active at the same time. Turning either one on will turn the other one
off.
API operates near real time with a load of less than 15 calls per minute.
Programming
1. Press (System Program) (Feature) (0) (0) (Left Intercom) (Left Intercom) (#) (6) (1) (5).
API On is displayed.
2. Enter 1 to turn API On (default). Enter 2 to turn API Off.
Application Programming Interface (API) Internal Monitor (#616)
API Internal Monitor is a feature enhancement for PARTNER ACS that allows new and existing
server based applications from Avaya’s DeveloperConnection program to work with and enhance the
operation of PARTNER ACS Release 6 or later systems.
This feature applies to only PARTNER ACS R6 or later releases that include API functionality.
Considerations
When the Internal Monitor feature is enabled, it increases the events provided by the system.
API performance in larger configurations of PARTNER could be affected when the Internal Monitor
feature is turned on. Check with your applications provider on whether Internal Monitor needs to be
active.
Programming
1. Press (System Program) (Feature) (0) (0) (Left Intercom) (Left Intercom) (#) (6) (1) (6).
API Int Mon is displayed.
2. Enter 1 for All Calls. Enter 2 for External Calls (default).
4
 Loading...