

Page 1

Avaya™ Interaction Center
Release 6.0
Avaya Agent User’s Guide
DXX-1001-03
Issue 1.0
June 2002
Page 2

2002, Avaya Inc.
All Rights Reserved
Notice
Every effort was made to ensure that the information in this book was complete
and accurate at the time of printing. However, information is subject to change.
Preventing Toll Fraud
“Toll fraud” is the unauthorized use of your telecommunications system by an
unauthorized party (for example, a person who is not a corporate employee,
agent, subcontractor, or working on your company's behalf). Be aware that
there may be a risk of toll fraud associated with your system and that, if toll
fraud occurs, it can result in substantial additional charges for your telecommunications services.
Avaya Fraud Intervention
If you suspect that you are being victimized by toll fraud and you need technical
support or assistance, call Technical Service Center Toll Fraud Intervention
Hotline at +1 800 643 2353.
Providing Telecommunications Security
Telecommunications security (of voice, data, and/or video communications) is
the prevention of any type of intrusion to (that is, either unauthorized or malicious access to or use of your company's telecommunications equipment) by
some party.
Your company's “telecommunications equipment” includes both this Avaya
product and any other voice/data/video equipment that could be accessed via
this Avaya product (that is, “networked equipment”).
An “outside party” is anyone who is not a corporate employee, agent, subcontractor, or working on your company's behalf. Whereas, a “malicious party” is
anyone (including someone who may be otherwise authorized) who accesses
your telecommunications equipment with either malicious or mischievous
intent.
Such intrusions may be either to/through synchronous (time-multiplexed and/or
circuit-based) or asynchronous (character-, message-, or packet-based) equipment or interfaces for reasons of:
• Utilization (of capabilities special to the accessed equipment)
• Theft (such as, of intellectual property, financial assets, or toll-facility
access)
• Eavesdropping (privacy invasions to humans)
• Mischief (troubling, but apparently innocuous, tampering)
• Harm (such as harmful tampering, data loss or alteration, regardless of
motive or intent)
Be aware that there may be a risk of unauthorized intrusions associated with
your system and/or its networked equipment. Also realize that, if such an intrusion should occur, it could result in a variety of losses to your company (including but not limited to, human/data privacy, intellectual property, material assets,
financial resources, labor costs, and/or legal costs).
Your Responsibility for Your Company's Telecommunications
Security
The final responsibility for securing both this system and its networked equipment rests with you - an Avaya customer's system administrator, your telecommunications peers, and your managers. Base the fulfillment of your
responsibility on acquired knowledge and resources from a variety of sources
including but not limited to:
• Installation documents
• System administration documents
• Security documents
• Hardware-/software-based security tools
• Shared information between you and your peers
• Telecommunications security experts
To prevent intrusions to your telecommunications equipment, you and your
peers should carefully program and configure your:
• Avaya-provided telecommunications systems and their interfaces
• Avaya-provided software applications, as well as their underlying
hardware/software platforms and interfaces
• Any other equipment networked to your Avaya products.
Avaya National Customer Care Center
Avaya provides a telephone number for you to use to report problems or to ask
questions about your contact center. The support telephone number
is 1-800-242-2121.
Ordering Information
Avaya Publications Center
Voice: +1 800 457 1235
International Voice: 410 568 3680
Fax: +1 800 457 1764
International Fax: 410 891 0207
Email: [email protected]
Write: GlobalWare Solutions
Attention: Avaya Account Manager
200 Ward Hill Avenue
Haverhill, MA 01835 USA
Order: Document No. DXX-1001-03, Issue 1.0, June 2002
To order product documentation online, go to
http://www.avayadocs.com, click on Online Services, and select the appropri-
ate product group.
Warranty
Avaya Inc. provides a limited warranty on this product. Refer to the “Limited
Use Software License Agreement” or other applicable documentation provided
with your package to establish the terms of the limited warranty.
Avaya Web Page
http://www.avaya.com
Trademarks
Avaya, Conversant, CustomerQ, Definity, DefinityOne, Nabnasset, Quintus,
and WebQ are registered trademarks or trademarks of Avaya Inc. in the United
States or other countries or both.
Portions of Avaya Interaction Center include technology used under license as
listed below, and are copyright of the respective companies and/or their licensors:
ActivePerl is a trademark of ActiveState Tool Corp. This product includes
software developed by the Apache Software Foundation
(http://www.apache.org/). Cognos, Impromptu and Powerplay are registered
trademarks of Cognos Incorporated. YACC++ is a registered trademark of
Compiler Resources, Inc. APEX, ComponentOne, VideoSoft, True DBGrid,
VSVIEW, SizerOne, VS-OCX, VSFlexGrid, VSFORUM, VSREPORTS,
VSDOCX, VSSPELL, and TrueDBList are either registered trademarks or
trademarks of ComponentOne LLC. CT Connect, Dialogic, Intel, and Pentium
are trademarks or registered trademarks of Intel Corporation or its subsidiaries
in the United States and other countries. Hummingbird is a registered
trademark of Hummingbird, Ltd. SearchServer is a trademark of Hummingbird,
Ltd. RISC System/6000 and DirectTalk/2 are trademarks of International
Business Machines Corporation in the United States or other countries or both.
IBM, OS/2, AS/400, CICS, WebSphere, CT, VisualAge, and DirectTalk are
registered trademarks of International Business Machines Corporation in the
United States or other countries or both. Lotus and Lotus Sametime are
trademarks or registered trademarks of Lotus Development Corporation and/or
IBM Corporation in the United States, other countries, or both. VisualX is a
registered trademark of Intergroup Technologies, Inc. ActiveX, Visio, Internet
Explorer, Windows, Windows NT, Windows 2000, Win32s, SQL Server,
Visual Basic, Visual C++, Outlook, and FrontPage are either registered
trademarks or trademarks of Microsoft Corporation in the United States and/or
other countries. TimesTen is a registered trademark of TimesTen Performance
Software. Oracle is a registered trademark, and Oracle8i and
Oracle® SQL/Services are trademarks or registered trademarks of Oracle
Corporation. Rogue Wave and .h++ are registered trademarks of Rogue Wave
Software Inc. SourcePro is a trademark of Rogue Wave Software, Inc. Siebel is
a trademark of Siebel Systems, Inc. BasicScript is a registered trademark of
Summit Software Company. Sun, iPlanet, Java, Solaris JRE, J2EE,
JavaServer Pages, and all Java-based trademarks are trademarks or
registered trademarks of Sun Microsystems, Inc. in the United States, other
countries, or both. SPARC is a registered trademark of SPARC International,
Inc. Products bearing SPARC trademarks are based on an architecture developed by Sun Microsystems, Inc. In3D is a trademark of Visual Insights, Inc.
InstallShield® is a registered trademark and service mark of InstallShield
Software Corporation in the United States and/or other countries. ORBacus is a
trademark of IONA Technologies PLC. Formula One is a licensed trademark
and Tidestone Technologies, Inc. Visual Components, First Impression, and
VisualSpeller are registered trademarks of Tidestone Technologies, Inc. JRun
is a trademark of Macromedia, Inc. in the United States and/or other countries.
Intervoice is a registered trademark of Intervoice-Brite, Inc. UNIX is a
registered trademark of The Open Group in the United States and other
countries. Acrobat is a registered trademark of Adobe Systems.
Other product and brand names are trademarks of their respective owners.
Acknowledgment
This document was written by the CRM Information Development group of
Avaya
Page 3

3
BEFORE YOU BEGIN . . . . . . . . . . . . . . . . . . . . . . . . . . . . . . . . . . . . . . . . 9
1O
VERVIEW. . . . . . . . . . . . . . . . . . . . . . . . . . . . . . . . . . . . . . . . . . . . . . . 13
Avaya Agent . . . . . . . . . . . . . . . . . . . . . . . . . . . . . . . . . . . . . . . . . . . . . . . . . . . . . . . . . . . . 14
Using Avaya Agent with Multiple Languages . . . . . . . . . . . . . . . . . . . . . . . . . . . . . . . 16
Avaya Agent Menu . . . . . . . . . . . . . . . . . . . . . . . . . . . . . . . . . . . . . . . . . . . . . . . . . . . . 16
Avaya Agent Status Control Bar . . . . . . . . . . . . . . . . . . . . . . . . . . . . . . . . . . . . . . . . . 17
Task Lists . . . . . . . . . . . . . . . . . . . . . . . . . . . . . . . . . . . . . . . . . . . . . . . . . . . . . . . . . . .18
Softphone . . . . . . . . . . . . . . . . . . . . . . . . . . . . . . . . . . . . . . . . . . . . . . . . . . . . . . . . . . .19
Outbound List Processing . . . . . . . . . . . . . . . . . . . . . . . . . . . . . . . . . . . . . . . . . . . . . . . 20
Avaya™ Outbound Contact Management . . . . . . . . . . . . . . . . . . . . . . . . . . . . . . . . . . 21
Contact History Browser and EDU Viewer . . . . . . . . . . . . . . . . . . . . . . . . . . . . . . . . . 23
Prompter Scripts . . . . . . . . . . . . . . . . . . . . . . . . . . . . . . . . . . . . . . . . . . . . . . . . . . . . . . 23
Web Agent . . . . . . . . . . . . . . . . . . . . . . . . . . . . . . . . . . . . . . . . . . . . . . . . . . . . . . . . . . . . . . 24
The Web Agent While Handling Email . . . . . . . . . . . . . . . . . . . . . . . . . . . . . . . . . . . . 26
The Web Agent While Handling Chat . . . . . . . . . . . . . . . . . . . . . . . . . . . . . . . . . . . . . 28
The Web Agent in Supervisor Mode . . . . . . . . . . . . . . . . . . . . . . . . . . . . . . . . . . . . . . 30
The Web Agent Status Bar . . . . . . . . . . . . . . . . . . . . . . . . . . . . . . . . . . . . . . . . . . . . . . 30
The Web Agent Information Bar . . . . . . . . . . . . . . . . . . . . . . . . . . . . . . . . . . . . . . . . . 32
Web Agent Menus . . . . . . . . . . . . . . . . . . . . . . . . . . . . . . . . . . . . . . . . . . . . . . . . . . . . 32
The Web Agent Toolbars . . . . . . . . . . . . . . . . . . . . . . . . . . . . . . . . . . . . . . . . . . . . . . . 33
2MANAGING AVAYA AGENT . . . . . . . . . . . . . . . . . . . . . . . . . . . . . . . . . 41
Logging In and Logging Out . . . . . . . . . . . . . . . . . . . . . . . . . . . . . . . . . . . . . . . . . . . . . . . . 41
Logging In to Avaya Agent . . . . . . . . . . . . . . . . . . . . . . . . . . . . . . . . . . . . . . . . . . . . . 42
Logging In and Out of Media Channels . . . . . . . . . . . . . . . . . . . . . . . . . . . . . . . . . . . . 44
Logging Out of Avaya Agent . . . . . . . . . . . . . . . . . . . . . . . . . . . . . . . . . . . . . . . . . . . . 45
CONTENTS
Page 4

4 Avaya Agent User’s Guide
Contents
Setting Your Availability . . . . . . . . . . . . . . . . . . . . . . . . . . . . . . . . . . . . . . . . . . . . . . . . . . . 45
Changing Your Agent State . . . . . . . . . . . . . . . . . . . . . . . . . . . . . . . . . . . . . . . . . . . . . 46
Manual Mode . . . . . . . . . . . . . . . . . . . . . . . . . . . . . . . . . . . . . . . . . . . . . . . . . . . . . . . . 48
Automatic Mode . . . . . . . . . . . . . . . . . . . . . . . . . . . . . . . . . . . . . . . . . . . . . . . . . . . . . . 48
Setting Your Channel Loads . . . . . . . . . . . . . . . . . . . . . . . . . . . . . . . . . . . . . . . . . . . . . 49
Opening an Application Focus . . . . . . . . . . . . . . . . . . . . . . . . . . . . . . . . . . . . . . . . . . . . . . 50
Viewing Customer and Contact Information . . . . . . . . . . . . . . . . . . . . . . . . . . . . . . . . . . . . 51
Viewing Active Contact Information . . . . . . . . . . . . . . . . . . . . . . . . . . . . . . . . . . . . . . 52
Viewing Contact History Information . . . . . . . . . . . . . . . . . . . . . . . . . . . . . . . . . . . . . 53
Reloading Layouts in the EDU Viewer . . . . . . . . . . . . . . . . . . . . . . . . . . . . . . . . . . . . . . . . 55
Clearing Current Contacts in the EDU Viewer . . . . . . . . . . . . . . . . . . . . . . . . . . . . . . 55
Reloading EDU Viewer Layouts . . . . . . . . . . . . . . . . . . . . . . . . . . . . . . . . . . . . . . . . . 55
Using the Unified Agent Directory . . . . . . . . . . . . . . . . . . . . . . . . . . . . . . . . . . . . . . . . . . . 56
Looking Up Information . . . . . . . . . . . . . . . . . . . . . . . . . . . . . . . . . . . . . . . . . . . . . . . . 58
Updating UAD Information . . . . . . . . . . . . . . . . . . . . . . . . . . . . . . . . . . . . . . . . . . . . . 66
Using Screen Pops . . . . . . . . . . . . . . . . . . . . . . . . . . . . . . . . . . . . . . . . . . . . . . . . . . . . . . . .67
Wrapping Up Contacts . . . . . . . . . . . . . . . . . . . . . . . . . . . . . . . . . . . . . . . . . . . . . . . . . . . . . 67
Using the WrapUp Dialog Box . . . . . . . . . . . . . . . . . . . . . . . . . . . . . . . . . . . . . . . . . . . 68
Using a WrapUp Prompter Script . . . . . . . . . . . . . . . . . . . . . . . . . . . . . . . . . . . . . . . . . 69
Troubleshooting . . . . . . . . . . . . . . . . . . . . . . . . . . . . . . . . . . . . . . . . . . . . . . . . . . . . . . . . . . 71
Avaya Agent Stops Responding . . . . . . . . . . . . . . . . . . . . . . . . . . . . . . . . . . . . . . . . . . 71
Avaya Agent Stops Responding with Outbound Contact . . . . . . . . . . . . . . . . . . . . . . . 72
3MANAGING INBOUND VOICE CONTACTS . . . . . . . . . . . . . . . . . . . . . . . 73
Using the Phone Task List . . . . . . . . . . . . . . . . . . . . . . . . . . . . . . . . . . . . . . . . . . . . . . . . . . 73
Handling a Basic Voice Contact . . . . . . . . . . . . . . . . . . . . . . . . . . . . . . . . . . . . . . . . . . . . . 75
Handling Contacts With Auto Answer . . . . . . . . . . . . . . . . . . . . . . . . . . . . . . . . . . . . . 75
Handling Contacts Without Auto Answer . . . . . . . . . . . . . . . . . . . . . . . . . . . . . . . . . . 75
Placing a Voice Contact on Hold . . . . . . . . . . . . . . . . . . . . . . . . . . . . . . . . . . . . . . . . . 76
Transferring a Voice Contact . . . . . . . . . . . . . . . . . . . . . . . . . . . . . . . . . . . . . . . . . . . . 77
Using the Softphone Menu . . . . . . . . . . . . . . . . . . . . . . . . . . . . . . . . . . . . . . . . . . . . . . . . . 79
Refreshing Your Softphone Data . . . . . . . . . . . . . . . . . . . . . . . . . . . . . . . . . . . . . . . . . 80
Reconnecting to Your Physical Telephone . . . . . . . . . . . . . . . . . . . . . . . . . . . . . . . . . . 80
Initiating a Voice Contact . . . . . . . . . . . . . . . . . . . . . . . . . . . . . . . . . . . . . . . . . . . . . . . . . . 81
Page 5

Issue 1.0 June 2002 5
Contents
Using Softphone with DEFINITY Switches . . . . . . . . . . . . . . . . . . . . . . . . . . . . . . . . . . . . 82
Sending Numerical Information with DTMF . . . . . . . . . . . . . . . . . . . . . . . . . . . . . . . . 83
Entering Reasons for Becoming Unavailable . . . . . . . . . . . . . . . . . . . . . . . . . . . . . . . . 84
Using the Auto-In Work Mode . . . . . . . . . . . . . . . . . . . . . . . . . . . . . . . . . . . . . . . . . . . 84
Handling Two Voice Contacts . . . . . . . . . . . . . . . . . . . . . . . . . . . . . . . . . . . . . . . . . . . . . . . 86
4MANAGING EMAIL . . . . . . . . . . . . . . . . . . . . . . . . . . . . . . . . . . . . . . . . 87
Being Alerted to a New Email Contact . . . . . . . . . . . . . . . . . . . . . . . . . . . . . . . . . . . . . . . . 88
Using the Email Task List . . . . . . . . . . . . . . . . . . . . . . . . . . . . . . . . . . . . . . . . . . . . . . . . . . 88
Icons in the Email Task List . . . . . . . . . . . . . . . . . . . . . . . . . . . . . . . . . . . . . . . . . . . . . 89
Text in the Email Task List . . . . . . . . . . . . . . . . . . . . . . . . . . . . . . . . . . . . . . . . . . . . . 90
Viewing Email History . . . . . . . . . . . . . . . . . . . . . . . . . . . . . . . . . . . . . . . . . . . . . . . . . . . . 91
Composing a Normal Email Reply . . . . . . . . . . . . . . . . . . . . . . . . . . . . . . . . . . . . . . . . . . . 94
Addressing Emails with the UAD . . . . . . . . . . . . . . . . . . . . . . . . . . . . . . . . . . . . . . . . . . . . 97
Using Resources in Email . . . . . . . . . . . . . . . . . . . . . . . . . . . . . . . . . . . . . . . . . . . . . . . . . 100
Using Global, Agent, or Email Template Resources in an Email . . . . . . . . . . . . . . . 101
Using Suggested Responses . . . . . . . . . . . . . . . . . . . . . . . . . . . . . . . . . . . . . . . . . . . . . . . . 102
Sending an Email to an External Agent . . . . . . . . . . . . . . . . . . . . . . . . . . . . . . . . . . . . . . . 103
Transferring an Email Contact . . . . . . . . . . . . . . . . . . . . . . . . . . . . . . . . . . . . . . . . . . . . . . 105
Deferring an Email . . . . . . . . . . . . . . . . . . . . . . . . . . . . . . . . . . . . . . . . . . . . . . . . . . . . . . . 106
Saving a Draft . . . . . . . . . . . . . . . . . . . . . . . . . . . . . . . . . . . . . . . . . . . . . . . . . . . . . . . . . . 107
Forwarding an Email . . . . . . . . . . . . . . . . . . . . . . . . . . . . . . . . . . . . . . . . . . . . . . . . . . . . . 107
Spell Checking Your Emails . . . . . . . . . . . . . . . . . . . . . . . . . . . . . . . . . . . . . . . . . . . . . . . 109
Requesting More Information from Customer . . . . . . . . . . . . . . . . . . . . . . . . . . . . . . . . . 111
Responding to an Email Alert . . . . . . . . . . . . . . . . . . . . . . . . . . . . . . . . . . . . . . . . . . . . . . 111
Resolving an Email . . . . . . . . . . . . . . . . . . . . . . . . . . . . . . . . . . . . . . . . . . . . . . . . . . . . . . 112
Originating an Outbound Email . . . . . . . . . . . . . . . . . . . . . . . . . . . . . . . . . . . . . . . . . . . . . 113
Approving or Rejecting an Email . . . . . . . . . . . . . . . . . . . . . . . . . . . . . . . . . . . . . . . . . . . 116
Handling a Rejected Email . . . . . . . . . . . . . . . . . . . . . . . . . . . . . . . . . . . . . . . . . . . . . . . . 118
Using Multiple Languages with Email . . . . . . . . . . . . . . . . . . . . . . . . . . . . . . . . . . . . . . . 119
Wrapping Up and Completing an Email Contact . . . . . . . . . . . . . . . . . . . . . . . . . . . . . . . 120
Page 6

6 Avaya Agent User’s Guide
Contents
5MANAGING CHAT SESSIONS . . . . . . . . . . . . . . . . . . . . . . . . . . . . . . . 121
Being Alerted to a New Chat Contact . . . . . . . . . . . . . . . . . . . . . . . . . . . . . . . . . . . . . . . . 122
Using the Chat Task List . . . . . . . . . . . . . . . . . . . . . . . . . . . . . . . . . . . . . . . . . . . . . . . . . . 123
Handling a Basic Chat Session . . . . . . . . . . . . . . . . . . . . . . . . . . . . . . . . . . . . . . . . . . . . . 124
Sharing Browsers with a Customer . . . . . . . . . . . . . . . . . . . . . . . . . . . . . . . . . . . . . . . . . . 128
Technical Issues with Shared Browsing . . . . . . . . . . . . . . . . . . . . . . . . . . . . . . . . . . . 129
Using Auto-Sync . . . . . . . . . . . . . . . . . . . . . . . . . . . . . . . . . . . . . . . . . . . . . . . . . . . . 129
Pushing a Web Page . . . . . . . . . . . . . . . . . . . . . . . . . . . . . . . . . . . . . . . . . . . . . . . . . . 131
Helping Your Customer Enter Information . . . . . . . . . . . . . . . . . . . . . . . . . . . . . . . . 131
Using Resources in a Chat Session . . . . . . . . . . . . . . . . . . . . . . . . . . . . . . . . . . . . . . . . . . 133
Spell Checking Your Messages . . . . . . . . . . . . . . . . . . . . . . . . . . . . . . . . . . . . . . . . . . . . . 135
Using the Phone in a Chat Session . . . . . . . . . . . . . . . . . . . . . . . . . . . . . . . . . . . . . . . . . . 136
Handling a Chat & Phone Session . . . . . . . . . . . . . . . . . . . . . . . . . . . . . . . . . . . . . . . 137
Handling a Chat & VoIP Session . . . . . . . . . . . . . . . . . . . . . . . . . . . . . . . . . . . . . . . . 140
Transferring a Chat Contact . . . . . . . . . . . . . . . . . . . . . . . . . . . . . . . . . . . . . . . . . . . . . . . . 142
Handling a Join Us Conference . . . . . . . . . . . . . . . . . . . . . . . . . . . . . . . . . . . . . . . . . . . . . 144
Handling Simultaneous Chat Sessions . . . . . . . . . . . . . . . . . . . . . . . . . . . . . . . . . . . . . . . 146
Monitoring a Chat Session (Supervisors Only) . . . . . . . . . . . . . . . . . . . . . . . . . . . . . . . . . 147
Starting a Lotus Sametime Session . . . . . . . . . . . . . . . . . . . . . . . . . . . . . . . . . . . . . . . . . . 149
Viewing the Customer’s DataWake Record . . . . . . . . . . . . . . . . . . . . . . . . . . . . . . . . . . . 150
Escalation Page . . . . . . . . . . . . . . . . . . . . . . . . . . . . . . . . . . . . . . . . . . . . . . . . . . . . . . 150
Browse Pages . . . . . . . . . . . . . . . . . . . . . . . . . . . . . . . . . . . . . . . . . . . . . . . . . . . . . . . 151
Using Multiple Languages in Chat Sessions . . . . . . . . . . . . . . . . . . . . . . . . . . . . . . . . . . . 152
Wrapping Up and Completing a Chat Contact . . . . . . . . . . . . . . . . . . . . . . . . . . . . . . . . . 153
6PERFORMING CHAT & EMAIL TASKS. . . . . . . . . . . . . . . . . . . . . . . . . 155
Managing Resources . . . . . . . . . . . . . . . . . . . . . . . . . . . . . . . . . . . . . . . . . . . . . . . . . . . . . 155
Resource Types and Examples . . . . . . . . . . . . . . . . . . . . . . . . . . . . . . . . . . . . . . . . . . 156
Creating New Agent Resources . . . . . . . . . . . . . . . . . . . . . . . . . . . . . . . . . . . . . . . . . 157
Creating New Global Resources (Supervisors Only) . . . . . . . . . . . . . . . . . . . . . . . . . 160
Editing Your Resources . . . . . . . . . . . . . . . . . . . . . . . . . . . . . . . . . . . . . . . . . . . . . . . 161
Deleting a Resource . . . . . . . . . . . . . . . . . . . . . . . . . . . . . . . . . . . . . . . . . . . . . . . . . . 161
Page 7

Issue 1.0 June 2002 7
Contents
Viewing Your Resources . . . . . . . . . . . . . . . . . . . . . . . . . . . . . . . . . . . . . . . . . . . . . . 161
Organizing Your Resources . . . . . . . . . . . . . . . . . . . . . . . . . . . . . . . . . . . . . . . . . . . . 163
Importing Migrated Resources . . . . . . . . . . . . . . . . . . . . . . . . . . . . . . . . . . . . . . . . . . . . . 164
Setting Preferences . . . . . . . . . . . . . . . . . . . . . . . . . . . . . . . . . . . . . . . . . . . . . . . . . . . . . . 165
User Interface Preferences . . . . . . . . . . . . . . . . . . . . . . . . . . . . . . . . . . . . . . . . . . . . . 166
Contact Preferences . . . . . . . . . . . . . . . . . . . . . . . . . . . . . . . . . . . . . . . . . . . . . . . . . . 168
Email Preferences . . . . . . . . . . . . . . . . . . . . . . . . . . . . . . . . . . . . . . . . . . . . . . . . . . . . 169
Chat Preferences . . . . . . . . . . . . . . . . . . . . . . . . . . . . . . . . . . . . . . . . . . . . . . . . . . . . . 170
Other Preferences . . . . . . . . . . . . . . . . . . . . . . . . . . . . . . . . . . . . . . . . . . . . . . . . . . . . 171
Using Web Self-Service . . . . . . . . . . . . . . . . . . . . . . . . . . . . . . . . . . . . . . . . . . . . . . . . . . 172
Finding Documents in Web Self-Service . . . . . . . . . . . . . . . . . . . . . . . . . . . . . . . . . . 173
Submitting Documents to Web Self-Service . . . . . . . . . . . . . . . . . . . . . . . . . . . . . . . 174
Viewing, Editing, or Deleting Your Proposed Documents . . . . . . . . . . . . . . . . . . . . 175
Approving or Rejecting Documents (Supervisors Only) . . . . . . . . . . . . . . . . . . . . . . 176
Viewing Your Own DataWake Record . . . . . . . . . . . . . . . . . . . . . . . . . . . . . . . . . . . . . . . 176
7MANAGING OUTBOUND CONTACT CALLS . . . . . . . . . . . . . . . . . . . . . 179
Using Avaya Agent with Outbound Contact . . . . . . . . . . . . . . . . . . . . . . . . . . . . . . . . . . . 179
Getting Started with Outbound Contact . . . . . . . . . . . . . . . . . . . . . . . . . . . . . . . . . . . . . . . 181
Logging In to Outbound Contact . . . . . . . . . . . . . . . . . . . . . . . . . . . . . . . . . . . . . . . . 181
Making Yourself Available for Outbound Contact Calls . . . . . . . . . . . . . . . . . . . . . . 182
Joining Outbound Jobs . . . . . . . . . . . . . . . . . . . . . . . . . . . . . . . . . . . . . . . . . . . . . . . . 182
Previewing a Customer’s Information . . . . . . . . . . . . . . . . . . . . . . . . . . . . . . . . . . . . 183
Proceeding Through Agent Tasks . . . . . . . . . . . . . . . . . . . . . . . . . . . . . . . . . . . . . . . . . . . 183
Identifying an Unsuccessful Call . . . . . . . . . . . . . . . . . . . . . . . . . . . . . . . . . . . . . . . . 185
Managing the Conversation . . . . . . . . . . . . . . . . . . . . . . . . . . . . . . . . . . . . . . . . . . . . 186
Leaving Outbound Jobs . . . . . . . . . . . . . . . . . . . . . . . . . . . . . . . . . . . . . . . . . . . . . . . 193
Logging Out of Outbound Contact . . . . . . . . . . . . . . . . . . . . . . . . . . . . . . . . . . . . . . . 194
Agent Blending . . . . . . . . . . . . . . . . . . . . . . . . . . . . . . . . . . . . . . . . . . . . . . . . . . . . . . . . . 194
Releasing You from Outbound Contact . . . . . . . . . . . . . . . . . . . . . . . . . . . . . . . . . . . 194
“Acquiring” You from Media Channels . . . . . . . . . . . . . . . . . . . . . . . . . . . . . . . . . . . 195
Task Summary . . . . . . . . . . . . . . . . . . . . . . . . . . . . . . . . . . . . . . . . . . . . . . . . . . . . . . . . . . 195
Performing an Outbound Contact Job . . . . . . . . . . . . . . . . . . . . . . . . . . . . . . . . . . . . . . . . 196
Page 8

8 Avaya Agent User’s Guide
Contents
8MANAGING OUTBOUND LISTS . . . . . . . . . . . . . . . . . . . . . . . . . . . . . . 199
Overview of Outbound List Processing . . . . . . . . . . . . . . . . . . . . . . . . . . . . . . . . . . . . . . . 199
Making Calls with Outbound Lists . . . . . . . . . . . . . . . . . . . . . . . . . . . . . . . . . . . . . . . . . . 201
9USING AVAYA AGENT WITH SIEBEL . . . . . . . . . . . . . . . . . . . . . . . . . 203
Comparing Avaya IC and Siebel Terms . . . . . . . . . . . . . . . . . . . . . . . . . . . . . . . . . . . . . . 205
Logging In to Siebel Call Center . . . . . . . . . . . . . . . . . . . . . . . . . . . . . . . . . . . . . . . . . . . . 205
Logging Out of Siebel Call Center with Pop-Up Menu . . . . . . . . . . . . . . . . . . . . . . . 206
Logging In to Siebel Call Center with Pop-Up Menu . . . . . . . . . . . . . . . . . . . . . . . . 206
Answering Contacts with Siebel Call Center . . . . . . . . . . . . . . . . . . . . . . . . . . . . . . . . . . 207
Handling Screen Pops . . . . . . . . . . . . . . . . . . . . . . . . . . . . . . . . . . . . . . . . . . . . . . . . . 207
Updating a Siebel Contact Record . . . . . . . . . . . . . . . . . . . . . . . . . . . . . . . . . . . . . . . 208
Answering a Chat Contact from a New Customer . . . . . . . . . . . . . . . . . . . . . . . . . . . 209
Viewing Contact Information with Siebel Call Center . . . . . . . . . . . . . . . . . . . . . . . . . . . 211
INDEX . . . . . . . . . . . . . . . . . . . . . . . . . . . . . . . . . . . . . . . . . . . . . . . . . 213
Page 9
9
BEFORE YOU BEGIN
Typographical Conventions
This guide uses the following font conventions:
Notes, Tips, and Cautions
Note: A note calls attention to important information.
Tip: A tip offers additional how-to advice.
Caution: A caution points out actions that may lead to data loss or other serious problems.
Contacting Technical Support
If you are having trouble using Avaya software, you should:
1 Retry the action. Carefully follow the instructions in written or online documentation.
2 Check the documentation that came with your hardware for maintenance or hardware-related
issues.
Font Type Meaning
code This font signifies commands, information that you enter into the computer, or
information contained in a file on your computer.
italics This font is used to add emphasis to important words and for references to other chapter
names and manual titles.
It also indicates variables in a command string.
jump Blue text in online documents indicates a hypertext jump to related information. To view
the related material, click on the blue text.
!
Page 10

10 Avaya Agent User’s Guide
3 Note the sequence of events that led to the problem and the exact messages displayed. Have the
Avaya documentation available.
4 If you continue to have a problem, contact Avaya Technical Support by:
w
Logging in to the Avaya Technical Support Web site http://www.avaya.com/support/qq
w
Calling or faxing one of the following numbers from 8:30 a.m. to 8:30 p.m. (Eastern
Standard Time), Monday through Friday (excluding holidays):
w
Toll free in the U.S. only: 1-888-TECH-SPT (1-888-832-4778)
w
Direct line for international and domestic calls: 512-425-2201
w
Direct line for faxes: 512-997-4330
w
Sending email with your question or problem to [email protected]. You may be asked
to email one or more files to Technical Support for analysis of your application and its
environment.
Note: If you have difficulty reaching Avaya Technical Support through the above URL or email
address, please go to http://www.avaya.com for further information.
Product Documentation
Most Avaya product documentation is available in both printed and online form. However, some
reference material is available only online, and certain information is available only in printed
form. A PDF document with detailed information about all of the documentation for the Avaya
Interaction Center is included in the
Doc directory on the product CD-ROM. This PDF document is
also included on the separate documentation CD-ROM.
Readme File
The Readme file is an HTML file included on the Avaya Interaction Center software CD-ROM.
This file contains important information that was collected too late for inclusion in the printed
documentation. The Readme file can include installation instructions, system requirements,
information on new product features and enhancements, suggested work-arounds to known
problems, and other information critical to successfully installing and using your Avaya software.
You may also receive a printed Addendum to the Readme, containing similar information
uncovered after the manufacture of the product CD-ROM. You should review the Readme file and
the Readme Addendum before you install your new Avaya software.
Electronic Documentation
The electronic documentation (in PDF or HTML format) for each Avaya Interaction Center
product is installed automatically with the program. Electronic documentation for the entire Avaya
product suite is included on the product CD-ROM and the documentation CD-ROM.
You can also view the documentation set online at http://www.avayadocs.com.
Page 11

Educational Services
Issue 1.0 June 2002 11
Printed Documentation
You can purchase printed copies of these manuals separately. For details, see “Ordering
Information” on the back of this manual’s title page.
License to Print the Electronic Documentation
Online copies of documentation are included on the CD-ROM that accompanies every software
release. An Avaya customer who has licensed software (a “Licensee”) is entitled to make this
online documentation available on an internal network or “intranet” solely for the Licensee's use
for internal business purposes. Licensees are granted the right to print the documentation
corresponding to the software they have purchased solely for such purposes.
Right-To-Print License Terms
Documents must be printed “as-is” from the provided online versions. Making changes to
documents is not permitted. Documents may be printed only by any employee or contractor of
Licensee that has been given access to the online documentation versions solely for Licensee's
internal business purposes and subject to all applicable license agreements with Avaya. Both
online and printed versions of the documents may not be distributed outside of Licensee enterprise
or used as part of commercial time-sharing, rental, outsourcing, or service bureau use, or to train
persons other than Licensee's employees and contractors for Licensee's internal business purposes,
unless previously agreed to in writing by Avaya. If Licensee reproduces copies of printed
documents for Licensee's internal business purposes, then these copies should be marked “For
internal use only within <Licensee> only.” on the first page or cover (where <Licensee> is the
name of Licensee). Licensee must fully and faithfully reproduce any proprietary notices contained
in the documentation. The copyrights to all documentation provided by Avaya are owned by
Avaya and its licensors. By printing any copy of online documentation Licensee indicates its
acceptance of these terms and conditions. This license only governs terms and conditions of
printing online documentation. Please reference the appropriate license agreement for terms and
conditions applicable to any other use, reproduction, modification, distribution or display of Avaya
software and documentation.
Educational Services
Avaya University provides excellent training courses on a variety of topics. For the latest course
descriptions, schedules, and online registration, you can get in touch with us:
n
Through the web at http://www.avaya-learning.com/logon_form.asp
n
Over the telephone at 800-288-5327 (within the U.S.) +001 303-406-6089 (outside of the U.S.)
n
Through email at [email protected]
Page 12

12 Avaya Agent User’s Guide
Page 13

13
CHAPTER 1
OVERVIEW
The Avaya Agent, and its integrated component the Web Agent, are installed on your computer
desktop, as part of the Avaya™ Interaction Center (Avaya IC) software suite. The Avaya Agent
and Web Agent make it possible for you to interact with your contact center’s customers. You may
use one or more of the following media or features of the Avaya Agent and the Web Agent:
Telephony, Email Management, Web Management, Outbound List Processing, and Avaya™
Outbound Contact Management.
This chapter briefly describes how the Avaya Agent and the Web Agent display customer contacts
to you for these media. Subsequent chapters present instructions on how to use the two software
components to handle your customer contacts.
With the Avaya Agent and the Web Agent, you can interact with customers in the following ways:
n
Speak with customers whose inbound telephone calls are assigned to you (Telephony).
n
Speak with customers who are called on the telephone by the software (Outbound Contact
Management).
n
Speak with customers whom you call on the telephone (Outbound List Processing).
n
Reply to customer emails (Email Management).
n
Chat with customers over the Web. If desired, speak to these customers on the phone while in a
chat session with them, or share Internet browsers with them (Web Management).
Note: In this manual, the illustrations show the Avaya Agent framework displayed on the right
side and across the bottom of the desktop. The frames, panes, and dialog boxes that you see on
your desktop may look different from the illustrations. Contact your system administrator if you
need help understanding the setup of Avaya Agent that you see on your desktop.
Page 14

Chapter 1 Overview
14 Avaya Agent User’s Guide
Avaya Agent
The Avaya Agent is the application that enables you to handle incoming and outgoing contacts
with customers. The Avaya Agent is displayed as a framework that surrounds the desktop on your
computer monitor. You may see one or all of the following components on the Avaya Agent on
your desktop:
n
Media tab, which contains:
w
Task lists where you receive telephone calls, emails, and chat requests assigned to you
w
Softphone for speaking with customers who have called (inbound calls)
n
Outbound Lists tab for manual outbound calling
n
Outbound Contact tab for automated outbound calling
n
Contact History Browser for information about previous contacts your customers have had
with your company
n
Prompter tab (located on the Contact History Browser) for scripts telling you what to say to
customers
n
EDU (electronic data unit) Viewer for information about your current contacts
The Web Agent opens within the Avaya Agent framework when you handle emails and chat
sessions. For overview information about the Web Agent, see “Web Agent,” on page 24.
You may also work with other Avaya applications, such as CallCenterQ, HRQ, and Siebel Call
Center, which open within the Avaya Agent framework. Similarly, other applications that you
work with, such as Microsoft Word, may be set to open within the Avaya Agent framework.
Tip: Press Alt+Tab to proceed through these applications while looking at the contact information
displayed in the Avaya Agent. You can move the Avaya Agent behind the other applications by
clicking to remove the check mark beside Always on Top in the Avaya Agent menu (see “Avaya
Agent Menu,” on page 16).
Page 15
Avaya Agent
Issue 1.0 June 2002 15
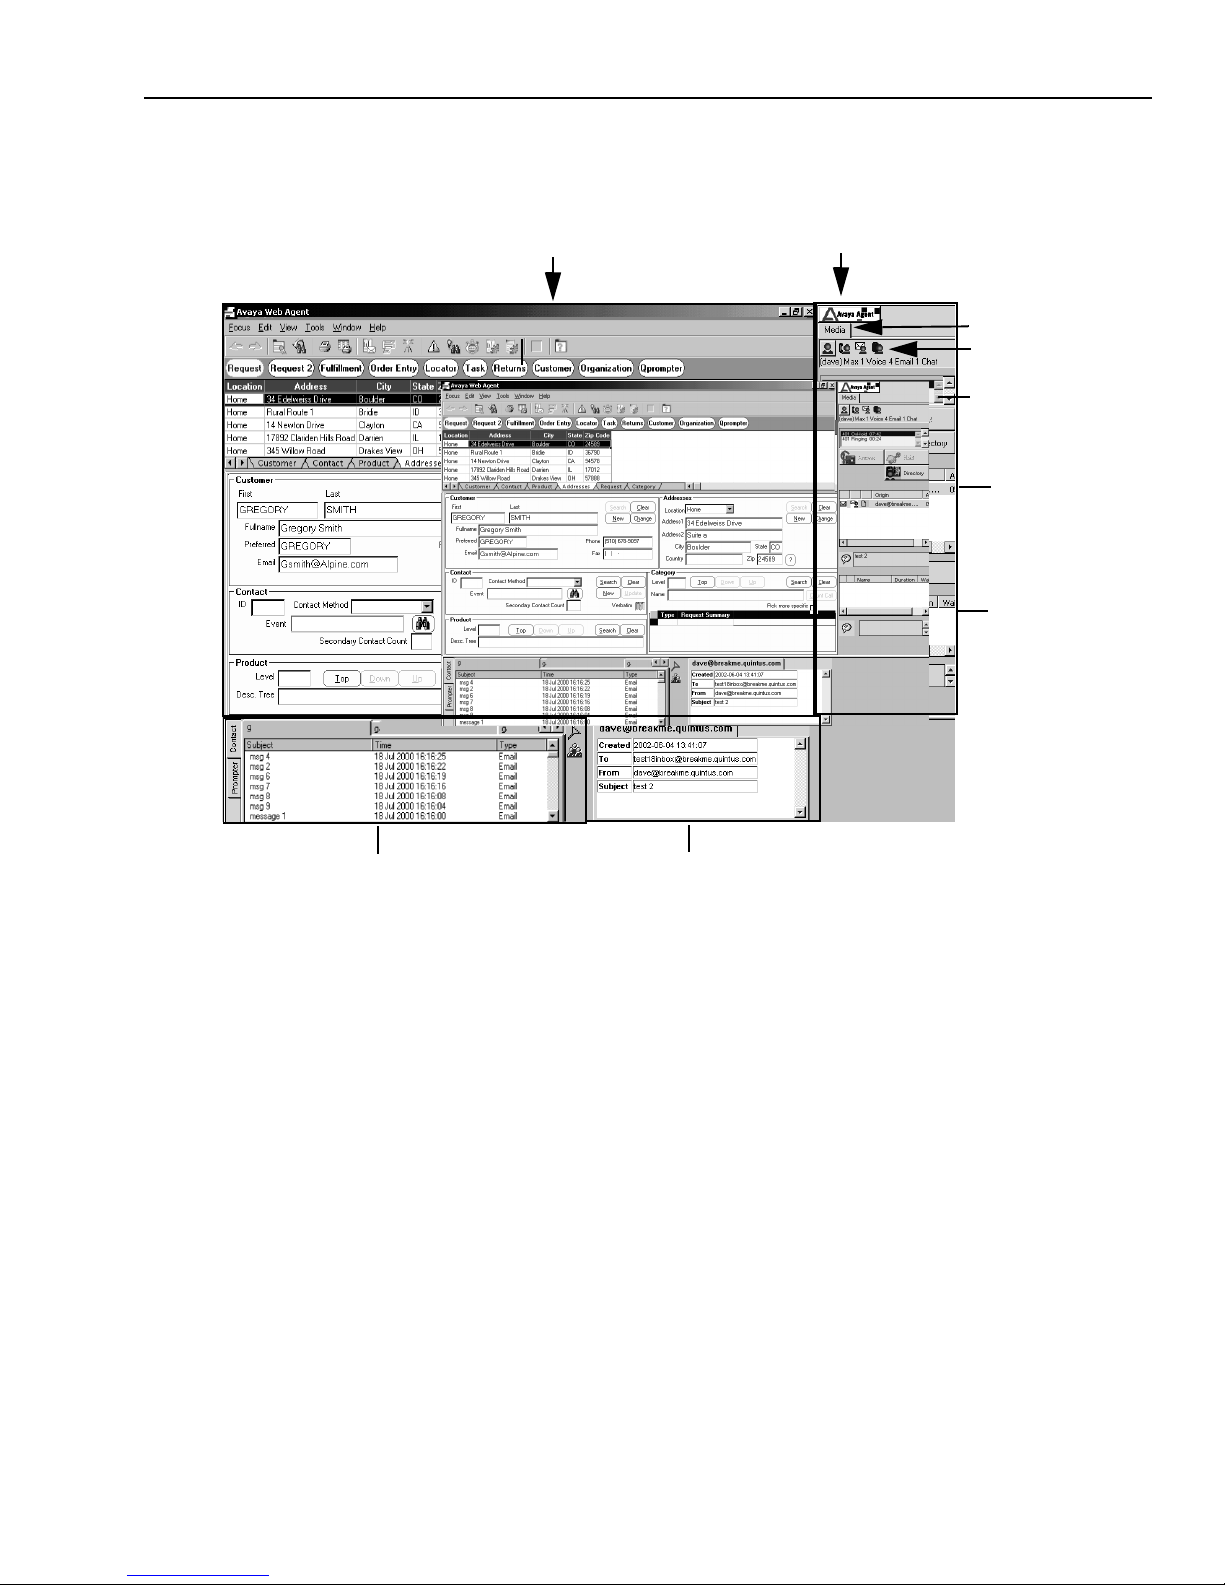
The Avaya Agent with CallCenterQ in the desktop and the Email task list in the Media pane may
look like this:
CallCenterQ application running in
the desktop area
Contact History Browser
Avaya Agent menu
button
Status Control bar in
Media pane
EDU Viewer
Media tab
Email task list
Phone task list
Chat task list
Page 16
Chapter 1 Overview
16 Avaya Agent User’s Guide
Using Avaya Agent with Multiple Languages
You may be able to communicate with customers in more than one language. The main features of
the Avaya Agent and the Web Agent in which you may be able to use more than one language are
as follows:
n
CallCenterQ application
n
Unified Agent Directory
n
Email
n
Chat
n
Spell checking of email and chat contents
n
Auto-Sync and Page Push
n
Global Resources and Agent Resources
n
Email Templates
n
Suggested Responses
n
Web Self-Service database
n
DataWake
n
Chat transcripts that are emailed to customers
Avaya Agent Menu
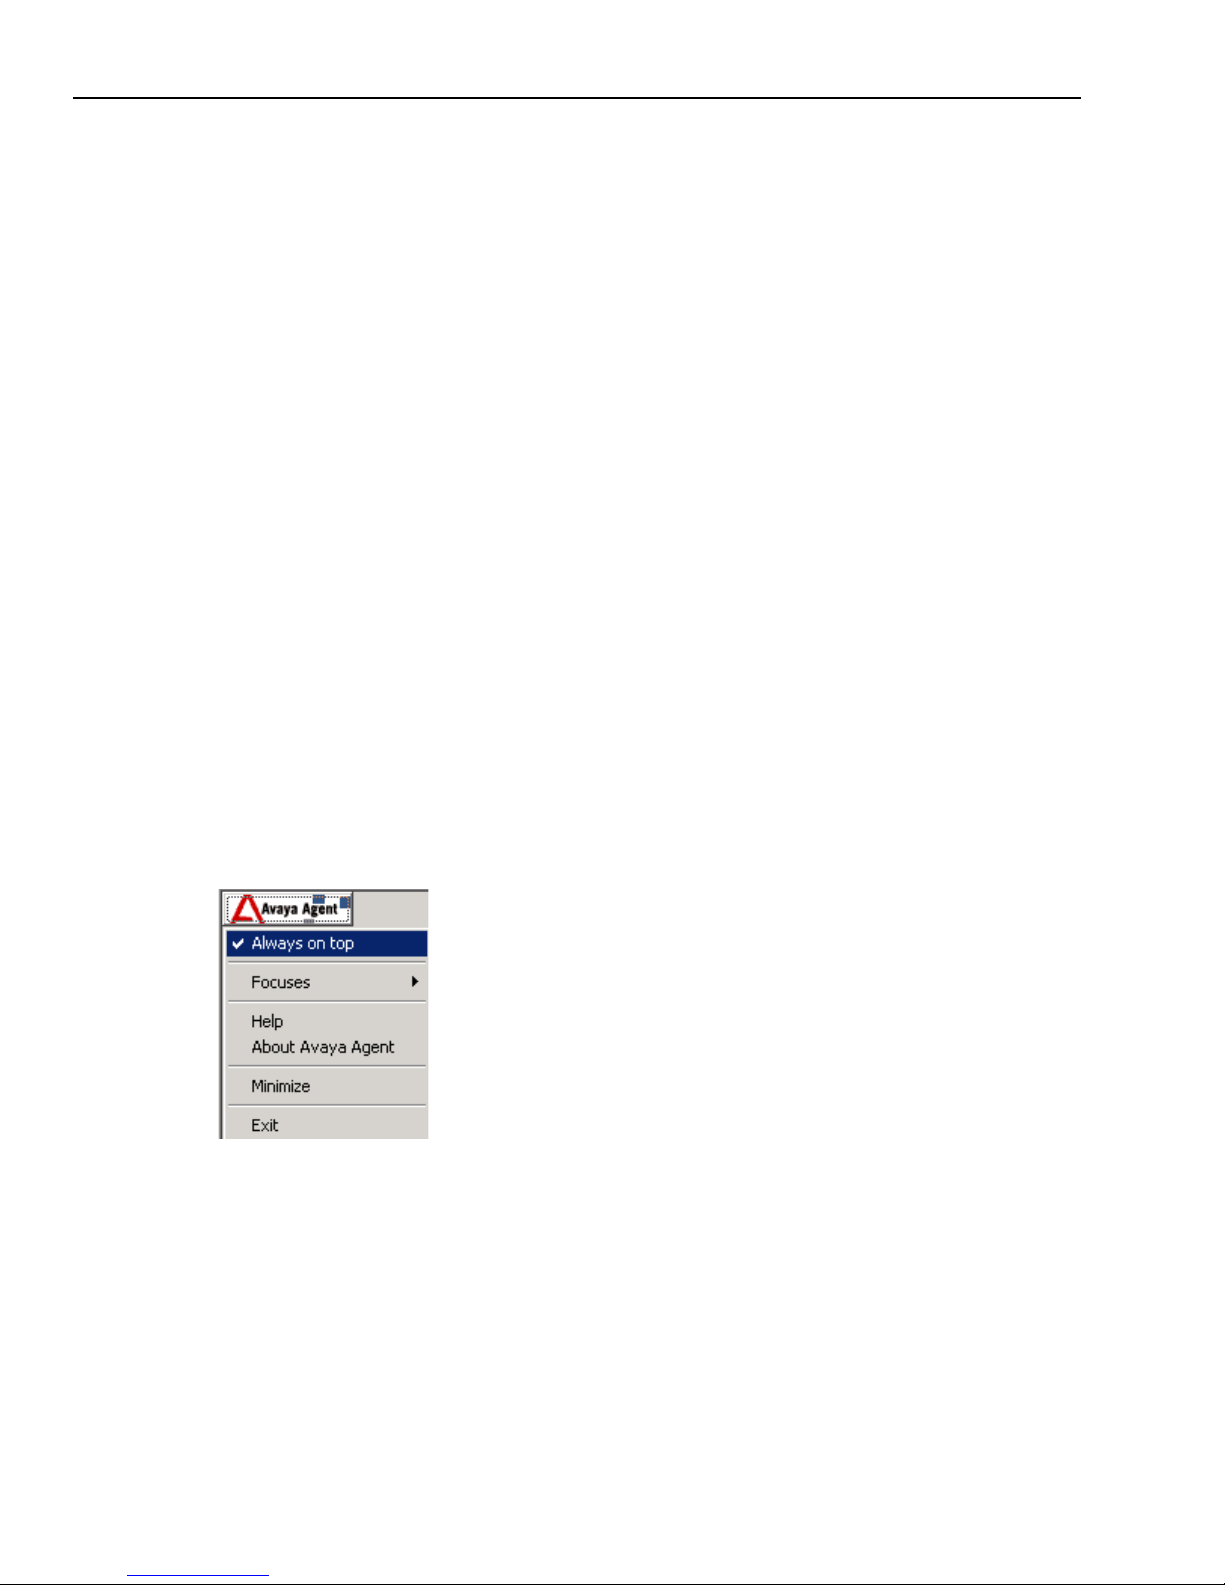
You access the Avaya Agent menu by clicking the Avaya Agent button at the top of the right
frame. The Avaya Agent menu includes the options shown in the following illustration and
described in the following table:
Page 17

Avaya Agent
Issue 1.0 June 2002 17
Avaya Agent Status Control Bar
When either the Media tab or the Outbound Contact tab of the Avaya Agent is selected, you see a
Status Control bar with icons or buttons that display or control your current state and the work you
can do.
The Status Control bar displays different icons and buttons, depending on whether the Media tab
or the Outbound Contact tab is selected.
Media Tab
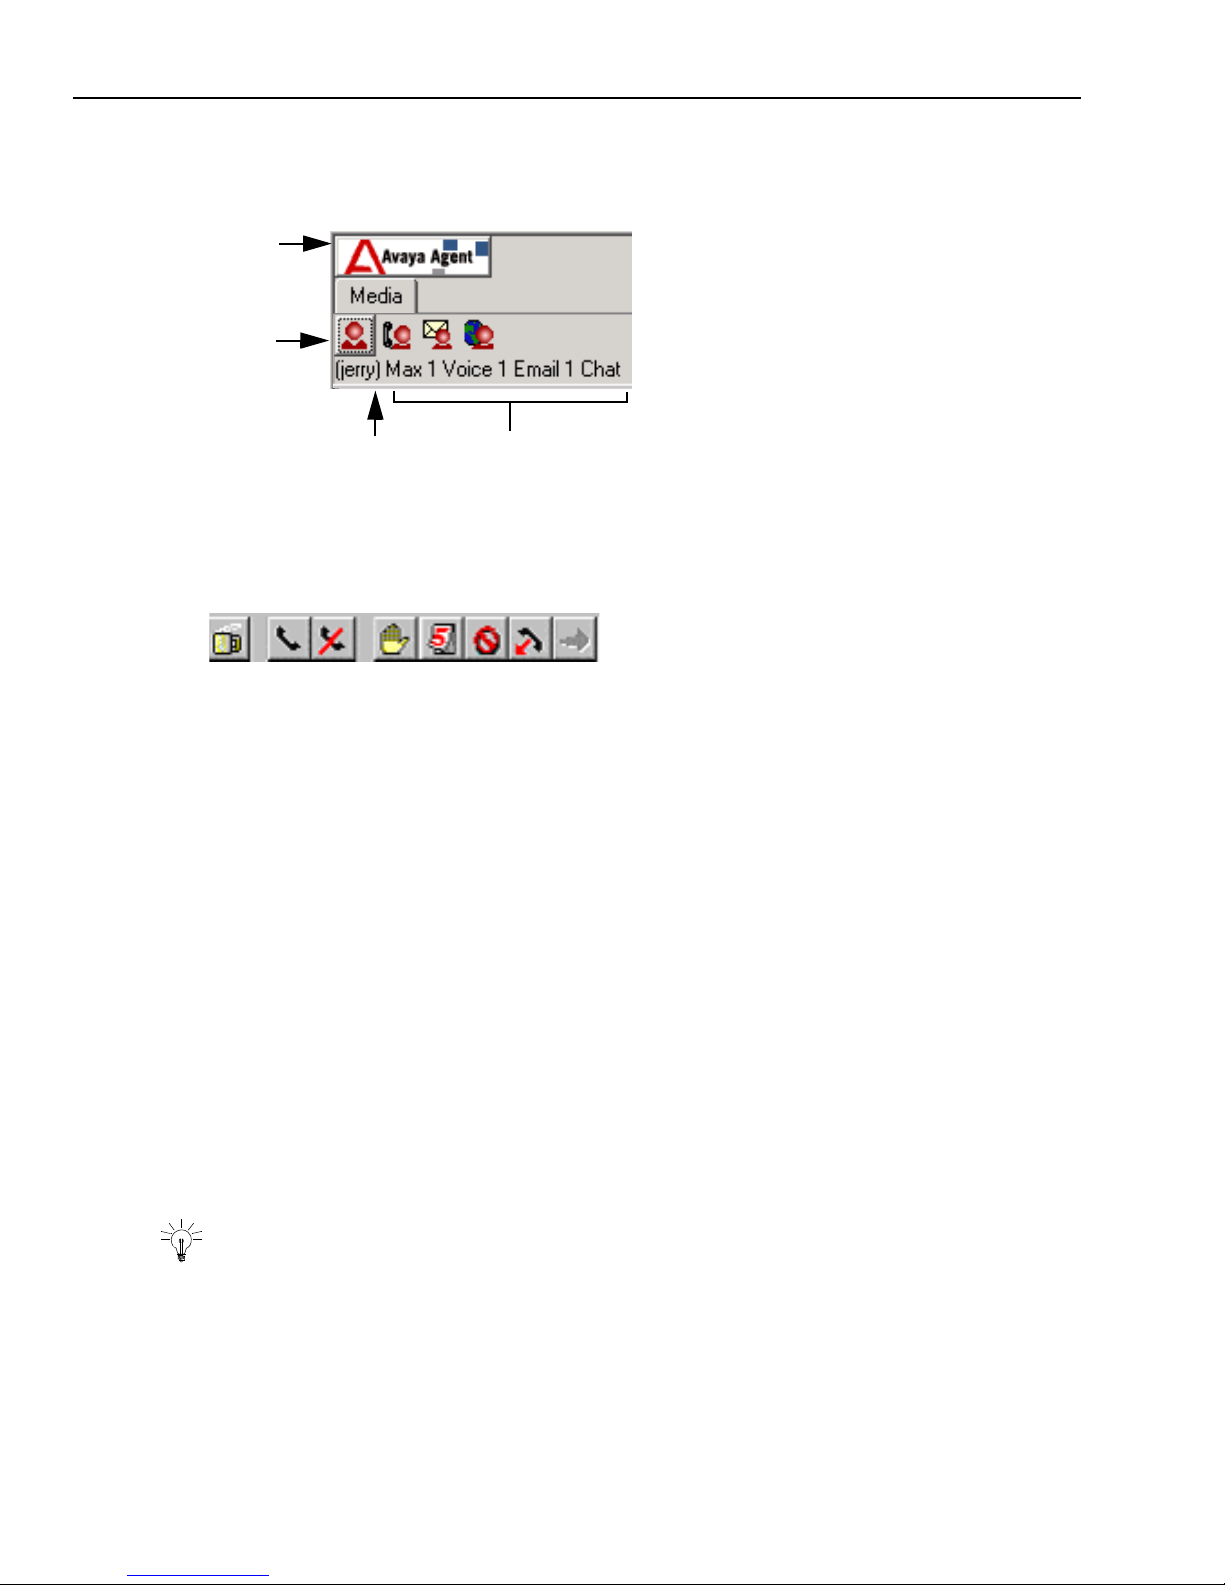
When the Media tab is selected, the Status Control bar displays an Agent button and a button (or
icon) for each inbound media channel (Voice, Email, and Web Chat). (A button is different from an
icon. You can press a button, which has a frame around it, to control your status. An icon does not
have a frame around it and you cannot press it.)
The text below the Status Bar displays the following information:
n
Your login ID
n
Your channel load in the media channels (the maximum number of customer contacts of each
media channel that you can handle at a time)
Menu Item Action
Always on top When this item has a check mark, it ensures that the Avaya Agent always
remains on top of other applications on your desktop. If you want the Avaya
Agent to go behind other applications, click this menu item to remove the check
mark.
Focuses Lets you select a new Business Application focus to display on your desktop. A
focus is a window containing information that you use to complete a particular
job. For example, CallCenterQ is a focus containing information you use when
you respond to a request from a customer. It includes Request, Fulfillment,
Order Entry, Locator, Task, Returns, Customer, and Prompter information.
Help Displays the Avaya Agent online help.
About Avaya Agent Displays information about this Avaya Agent application release.
Minimize Minimizes the Avaya Agent. To restore the Avaya Agent, click the Avaya Agent
icon on the Windows task bar.
Exit Closes Avaya Agent, the Web Agent, and all open Avaya focuses.
Page 18
Chapter 1 Overview
18 Avaya Agent User’s Guide
In the example below, Agent01 is currently available for Voice, Email, and Chat. This agent can
handle up to one voice contact, one email contact, and three chat contacts at the same time.
Outbound Contact Tab
Click the Outbound Contact tab to see a Status Control bar with buttons related to outbound jobs.
The Status Control bar buttons indicate whether you are available to handle outbound calls and
identify the activities that you can complete during the call. The buttons guide you through the
process of handling calls to customers that Outbound Contact Management initiates.
For more information on agent states, see “Changing Your Agent State,” on page 46. For more
information on channel loads, see “Setting Your Channel Loads,” on page 49.
Task Lists
Depending on your company and your responsibilities, you may see any or all of the following
task lists in the Media pane of your Avaya Agent:
n
“Using the Phone Task List,” on page 73
n
“Using the Email Task List,” on page 88
n
“Using the Chat Task List,” on page 123
When incoming contacts are assigned to you, they are displayed in the appropriate task list. The
task list also displays relevant information, such as the time the contact was assigned to you and
the state of the contact. Some of the information is indicated by the icons that represent the
contacts.
Tip: If you select a contact and hold your mouse over it for a moment, you will see a “tool tip”
with some of the same information about the contact. This tool tip may be easier to read than the
information within the task list and it may contain additional information.
Agent
button
Channel loads
Login ID
A
vaya
A
gent
button
Page 19
Avaya Agent
Issue 1.0 June 2002 19
To begin responding to an incoming contact, you must select the contact in the task list and
double-click.
Softphone
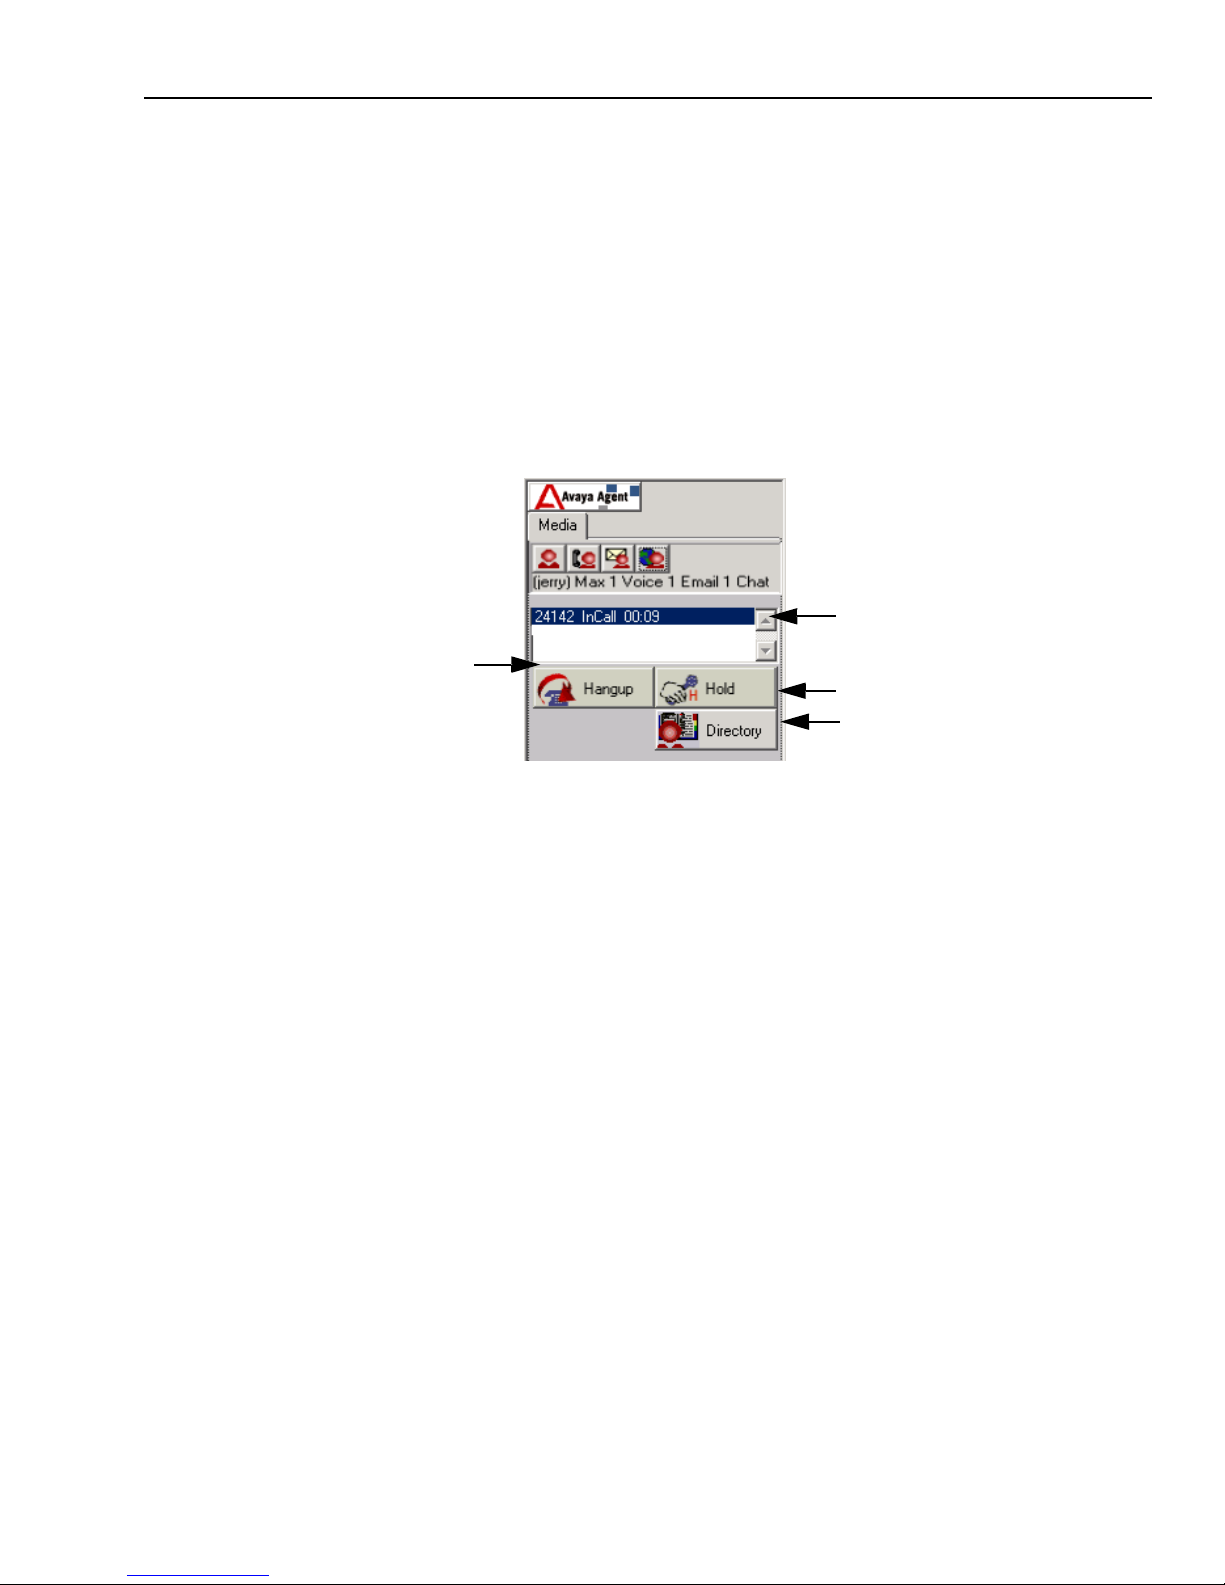
Softphone makes it possible for you to perform standard telephone operations using your computer
instead of a physical telephone. Your Softphone interface is in the Media pane of Avaya Agent.
This interface contains the Phone task list and the telephony buttons that you use to manage your
incoming and outgoing voice contacts.
The out-of-the-box Softphone interface in the Media pane is shown in the following illustration.
Your Softphone may resemble the following illustration, or it may have a different set of buttons.
With the telephony buttons, you can perform various Softphone functions. These buttons can
include:
n
Answer
n
Hang Up
n
Hold
n
Reconnect
n
Ready
n
Busy
n
Directory
Telephony buttons may be available or unavailable to you, depending on the current state of the
active voice contact and on your agent state. For example, the Hold and Hang Up buttons are
available only if the active voice contact is in an InCall state. If it is not in an InCall state, the Hang
Up button is disabled (greyed out), and the Hold button is either disabled or replaced by the
Reconnect button.
Hang up voice contact and
enter WrapUp state
Phone task list with
information about current
voice contacts
Put voice contact on hold
Display Unified Agent Directory (UAD)
Page 20

Chapter 1 Overview
20 Avaya Agent User’s Guide
By clicking the Directory button, you can access the Unified Agent Directory (UAD). From the
UAD, you can do such things as transfer a voice, email, or chat contact; set up a conference call;
initiate a telephone call to a colleague; look up agent information; address an email to a colleague.
For information about the UAD, see “Using the Unified Agent Directory,” on page 56. For
information about using the Softphone, see “Handling a Basic Voice Contact,” on page 75.
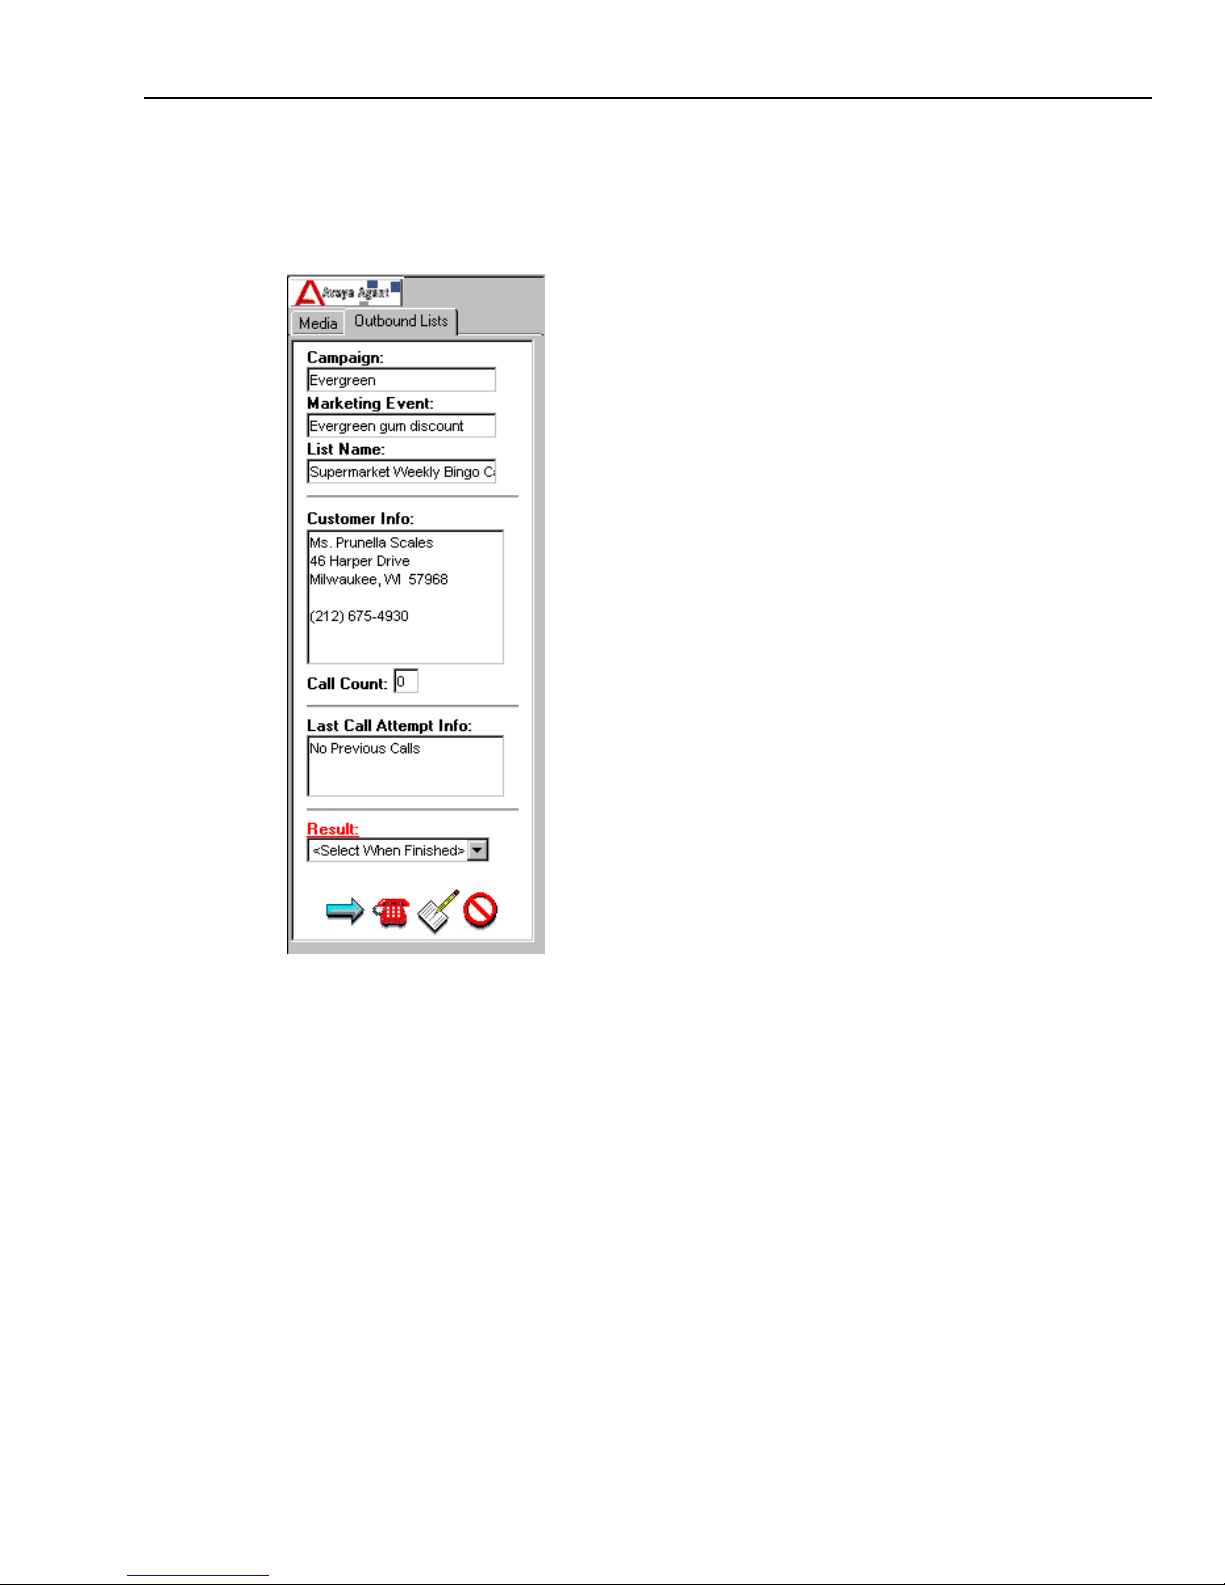
Outbound List Processing
The Outbound List Processing component is available through the Outbound Lists tab, which is
beside the Media tab. Outbound List Processing gives you access to customer lists that you use
with customer contact campaigns, such as outbound calling campaigns to notify customers about
upcoming sales and marketing events.
Your system administrator creates the outbound lists in CallCenterQ, which then passes the lists to
the Outbound Lists pane. Each outbound list contains a group of customers that are related in some
way, such as customers located in the same area, or customers who have purchased the same
product. The lists provide you with information like the following, which you can use during your
interaction with the customer:
n
Campaign name
n
Marketing event
n
List name
n
Customer information
Page 21
Avaya Agent
Issue 1.0 June 2002 21
The out-of-the-box Outbound List Processing component is in the Outbound Lists pane of Avaya
Agent. When you click the Outbound Lists tab, the default Outbound Lists tab looks like this:
For information about using the Outbound List Processing component, see Chapter 8, “Managing
Outbound Lists”.
Avaya™ Outbound Contact Management
Avaya™ Outbound Contact Management (Outbound Contact) automates outbound calling
activities. The software runs outbound jobs that dial customer telephone numbers and display
customer information for you. A job is a list of customers to be called. When you join a job, you
manage automated outbound calls. With Outbound Contact, you can spend more time helping
customers and less time trying to call them.
Page 22
Chapter 1 Overview
22 Avaya Agent User’s Guide
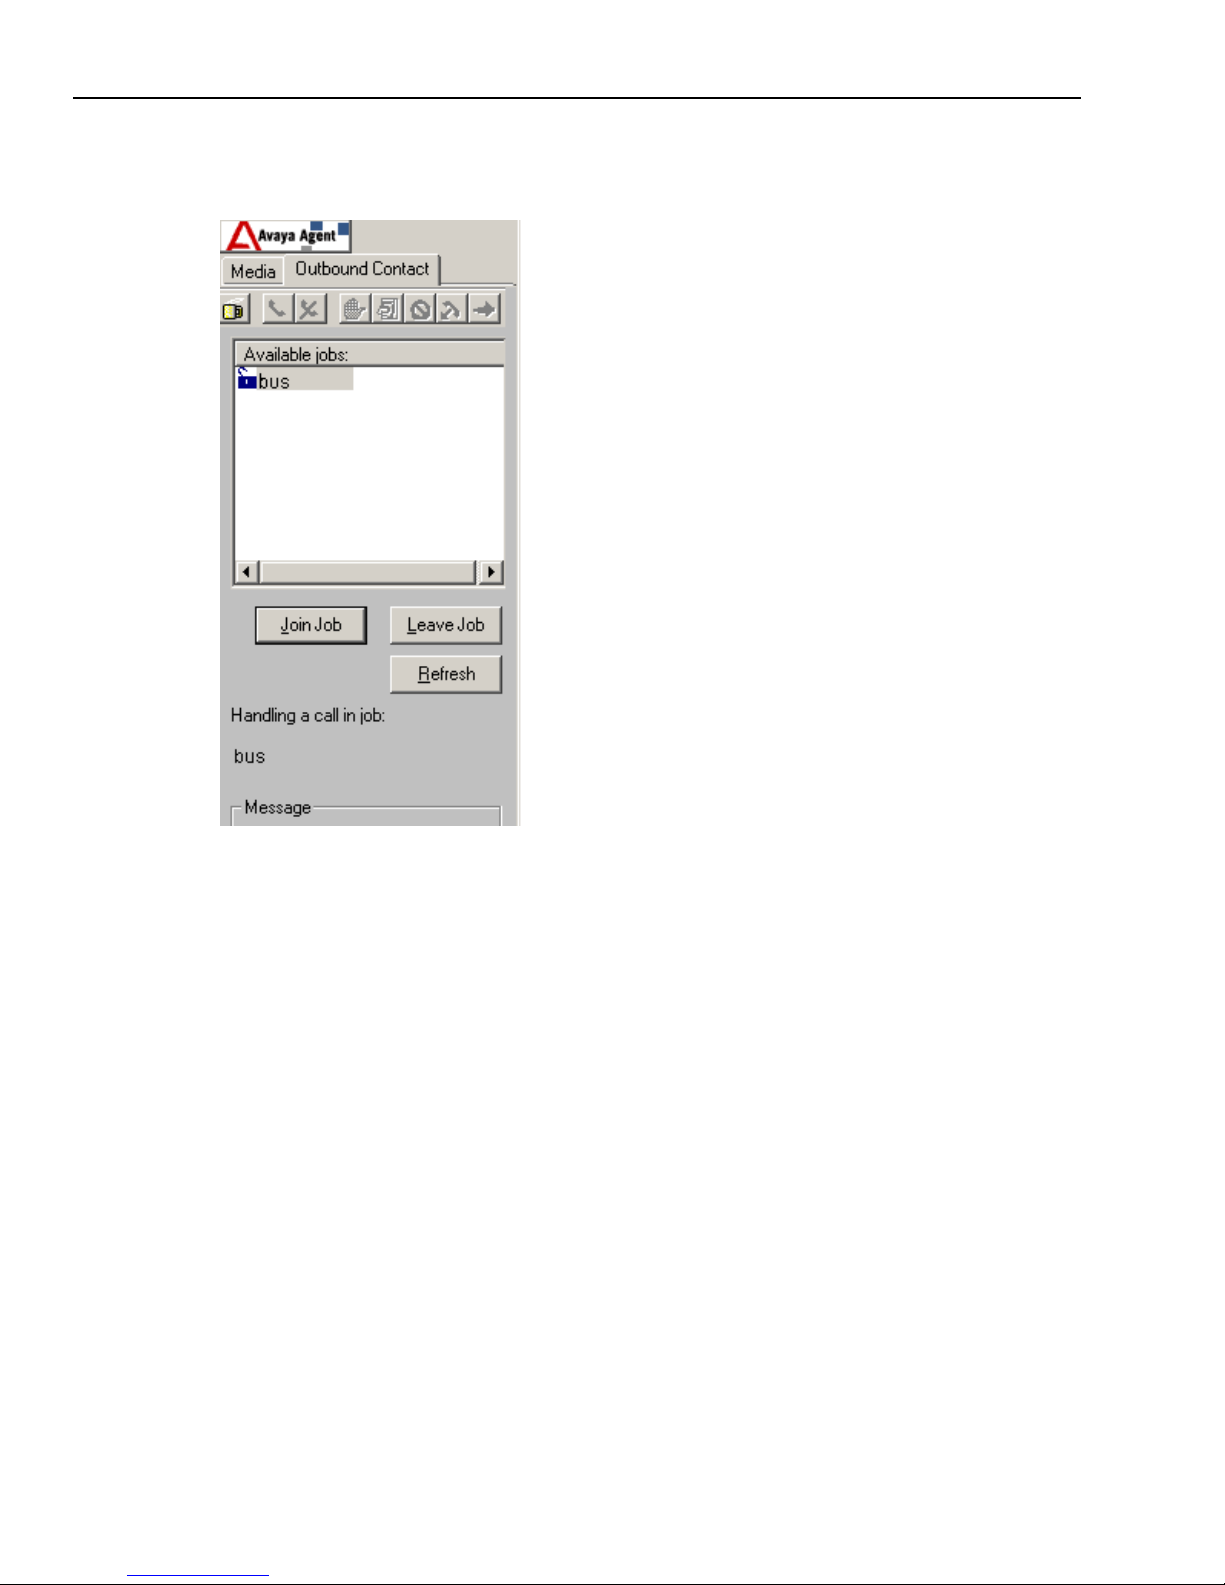
The Outbound Contact Management component is available through the Outbound Contact tab.
The Outbound Contact tab display looks like this:
Outbound Contact Management enables and disables Status Control Bar buttons to guide you
through the tasks as you handle calls. The coffee cup icon identifies your current agent state and
indicates whether you are available to speak with customer. Your agent state can be one of the
following three positions:
n
Off Break (Available) – The coffee cup toolbar button is raised, indicating that you are
available to handle outbound calls and speak with customers.
n
On Break (Unavailable) – The coffee cup toolbar button is depressed, indicating that you are
unavailable to handle outbound calls or speak with customers.
n
Disabled – The coffee cup toolbar button is greyed out, indicating that you have not joined a
job.
The Outbound Contact tab displays the following information:
n
Customer information in the CallCenterQ
n
Other contacts with this customer in the Contact History Browser
n
Agent script on the Prompter tab
Page 23

Avaya Agent
Issue 1.0 June 2002 23
For more information about using Outbound Contact Management, see Chapter 7, “Managing
Outbound Contact Calls”. For information about setting your agent state, see “Changing Your
Agent State,” on page 46.
Contact History Browser and EDU Viewer
You use the Contact History Browser and the EDU (electronic data unit) Viewer to locate
information about the contacts in your task lists. Each tab in the Contact History Browser contains
the history of a current contact in your task lists. Each tab in the EDU Viewer contains information
about a different current contact in your task lists. The EDU Viewer identifies each contact by the
EDU assigned to the contact by the Business Application.
The bottom frame of the Avaya Agent also contains buttons that you use to access the following:
Contact History Filter – Filters the records in the Contact History Browser to access only
the historical information you need for the current customer contact.
Active Contact Viewer – Displays information about an active email contact from the same
customer that was assigned to another agent.
Prompter Scripts
Your system administrator develops Prompter scripts to assist you while you handle contacts. Each
script is designed to provide a consistent method for you and other agents to communicate with
customers. It ensures that you obtain information from customers and give them other information,
as your company requires. Prompter scripts may contain statements for you to say to customers.
They may also contain radio buttons and text fields you use to indicate a customer’s answers, and
a selection of reasons that explain the customer’s question and how you handled the contact.
You may use Prompter scripts to do the following:
n
Collect information about customers
n
Provide answers and information to customers
n
Enter wrap-up information about a contact with a customer
n
Contact a customer for a marketing or sales campaign
Each answer that a customer gives determines the next step in a Prompter script. For example, if a
customer calls with a problem about a product they purchased from your company, the script is
different for a customer who has a valid product warranty than for a customer who does not.
A Prompter script may be displayed automatically at certain times, for example when you answer
a customer contact or when you press the Next Call button in the Outbound Lists pane.
Page 24
Chapter 1 Overview
24 Avaya Agent User’s Guide
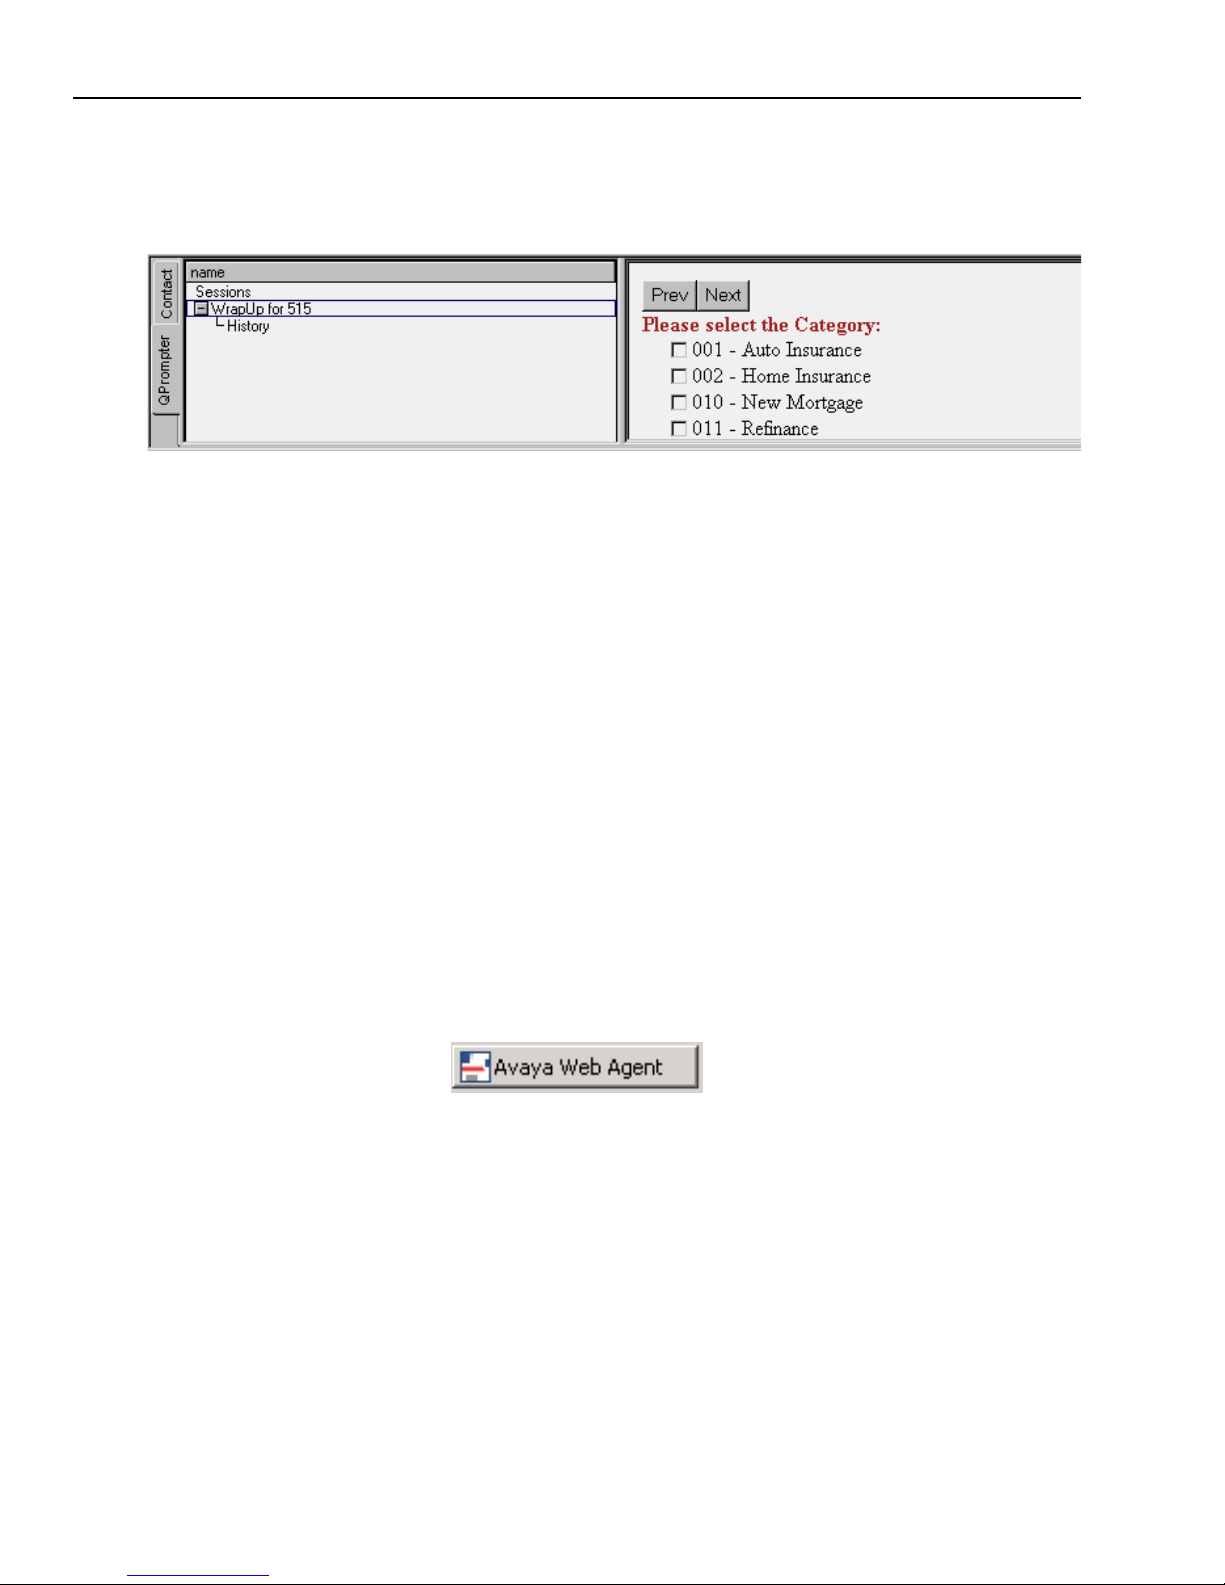
As shown in the following example from a Prompter wrap-up script,
Prompter scripts are displayed in the Prompter pane. In the out-of-the-box Avaya Agent, the
Prompter pane is displayed in the frame that runs across the bottom of your desktop.
Web Agent
The Web Agent is the component of Avaya IC that makes it possible for you to interact with
customers using Email Management or Web Management. With Web Management, you conduct a
chat session with customers. While in a chat session, you can use the following features:
n
Text Chat (exchanging typed messages with your customer in real-time)
n
Voice Chat (talking to your customer, using either Chat & Phone or Chat & VoIP)
n
Shared Browsing (viewing the same Web pages with your customer, using the Auto-Sync, Page
Push, and Collaborative Form Filling features)
Customers send an email or initiate a chat session by clicking an appropriate button on your
company’s Web site. According to your availability for email or chat, some of these emails and
chat requests are assigned to you as email contacts or chat contacts. When you double-click a
contact in your Email task list or your Chat task list, the Web Agent is displayed. The Web Agent
is where you compose your email responses and conduct your chat sessions.
When you log in to Avaya Agent, you log in to the Web Agent automatically. The Web Agent is
minimized when you log in and appears as an icon in the Windows task bar, as shown in the
following illustration.
You can click the Web Agent icon to restore the Web Agent to its normal size at any time. The Web
Agent also opens whenever you click an email contact or a chat contact in the task lists in Avaya
Agent.
Page 25
Web Agent
Issue 1.0 June 2002 25
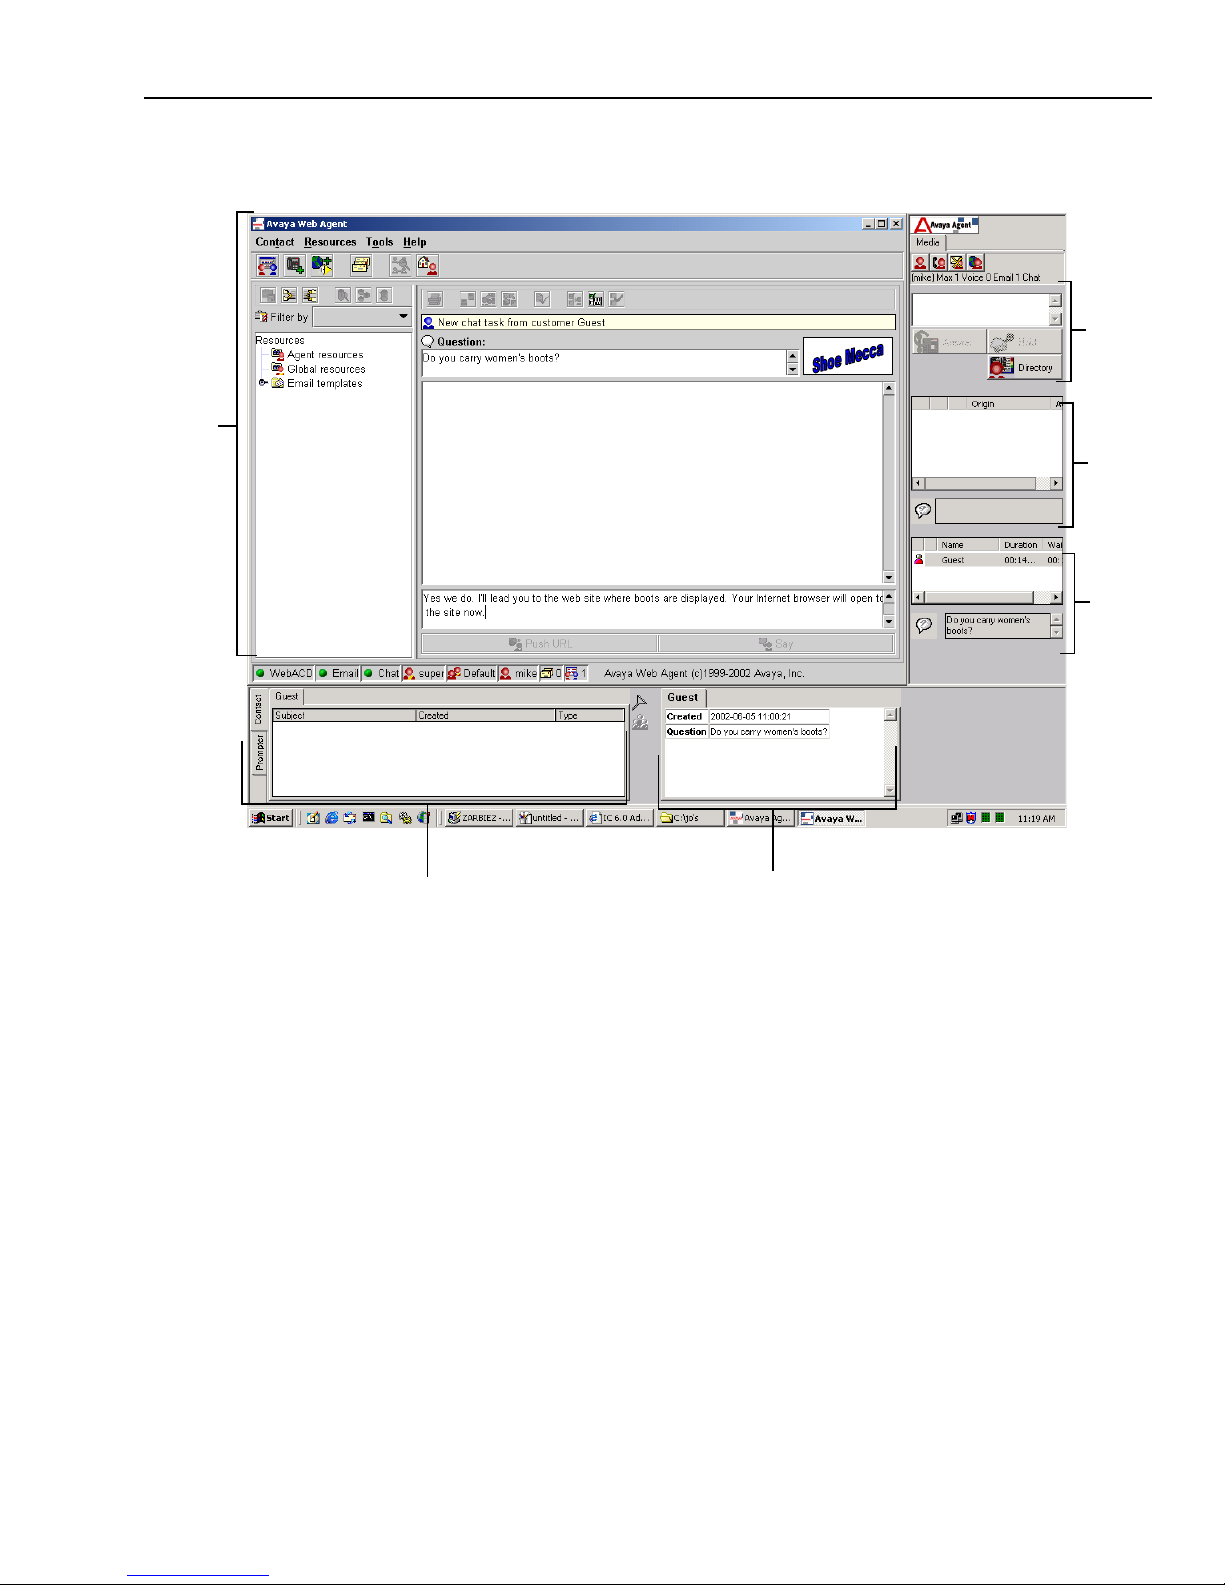
Avaya Agent with the Web Agent and an active chat contact in the desktop looks like this:
The appearance of the Web Agent changes, according to what you are doing. This section explains
the features of the Web Agent window while you are handling email or chat contacts. The section
contains the following topics:
n
The Web Agent While Handling Email
n
The Web Agent While Handling Chat
n
The Web Agent in Supervisor Mode
n
The Web Agent Status Bar
n
The Web Agent Information Bar
n
Web Age n t M en us
n
The Web Agent Toolbars
Contact History Browser and Prompter
EDU Viewer
Web Agent
Softphone
Email
task
list
Chat
task
list
and
Phone
task
list
Page 26
Chapter 1 Overview
26 Avaya Agent User’s Guide
The Web Agent While Handling Email
If you are enabled for email, you will use the Web Agent together with the Avaya Agent to handle
email contacts from customers. You will use two email views in the Web Agent:
n
Email Preview – This is a read-only view of the customer’s email. If you click the Reply, Reply
to All, or Forward buttons in the email toolbar, the view changes to the Email Compose mode.
n
Email Compose – This is where you write a reply to an email, forward an email you have
received, or originate an email.
You can switch between the two views by clicking the Preview tab or the Compose tab. If you are
handling multiple emails simultaneously, each email will have its own Compose tab for your reply.
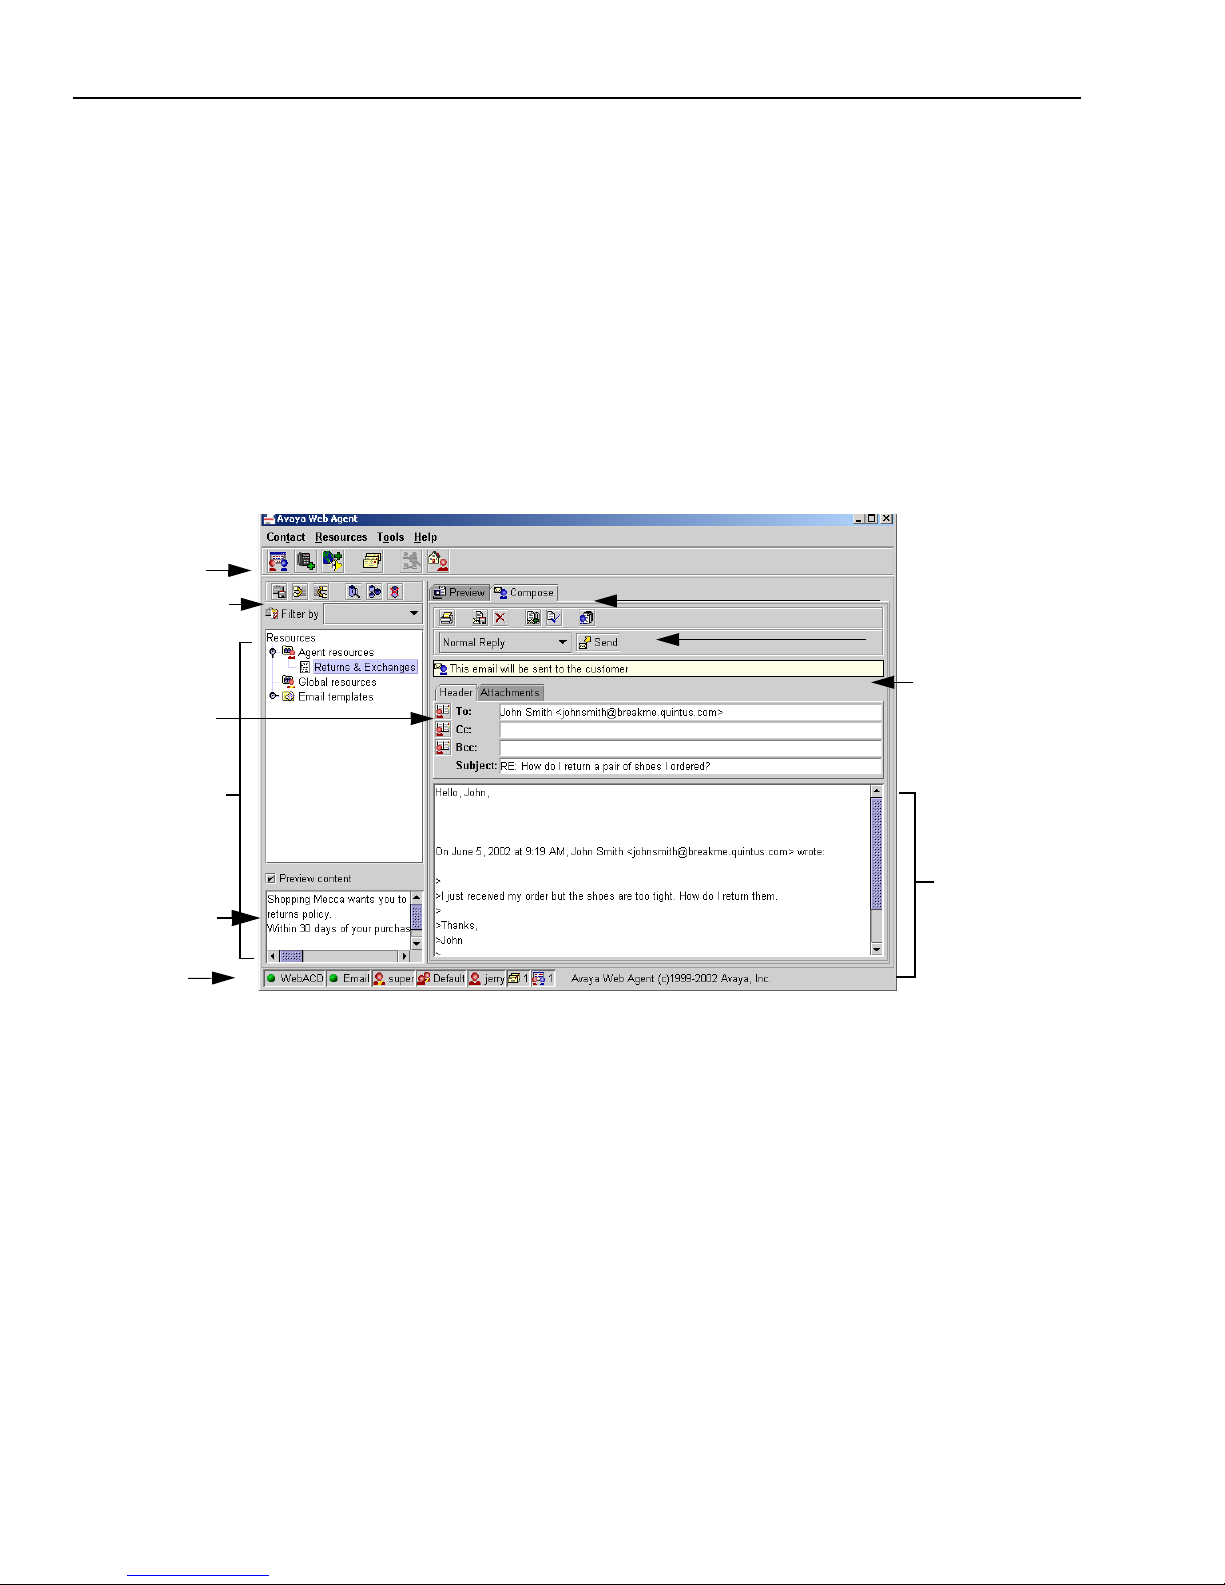
The following illustration shows an email reply that an agent is composing in the Web Agent.
The features of the Web Agent window that are common to the Preview and Compose views are as
follows:
n
Menu Bar – The names of three menus containing commands: Contact, Resources, and Tools.
Click the name of a menu to open it and display the commands.
n
Main Toolbar – Buttons below the menu bar for quick access to frequently used commands.
The toolbar remains the same, whether you are currently in Email mode or a Chat mode. See
“The Main Toolbar,” on page 34.
n
Resource Toolbar and Filters – Buttons for resource-related commands and a Filter menu for
displaying only the type of resources you want to see. See “Resource Toolbar,” on page 39.
Message
Composition
area
Information Bar
Tabs for active email
Status Bar
Main toolbar
Resource toolbar
and filters
Resource area
Email Compose toolbar
and menu
UAD buttons
Resource preview
scroll box
Page 27

Web Agent
Issue 1.0 June 2002 27
n
Resource Area – Frame of window that contains resources, previously prepared text responses,
emails, and URLs (Internet addresses), which you can send to customers. It may contain folders
for each of the following: Agent Resources, Global Resources, Email Templates, and
Suggested Responses.
n
Resource Preview Scroll Box – When you select a resource from a folder and then click the
Preview Contents check box, a scroll box displays the contents of the resource.
n
Information Bar – An area that displays important information about the current email. If you
switch to a chat contact, it displays information about your active chat. See “The Web Agent
Information Bar,” on page 32.
n
Status Bar – Icons that indicate certain aspects of your current Web Agent status. See “The Web
Agent Status Bar,” on page 30.
The following areas are displayed only in Email Preview mode:
n
Company Logo – Area that displays a logo that represents a company. If your contact center
supports different companies or tenants, the logo may change, according to the Web site from
which the customer sent the active email.
n
Email Preview Toolbar – Toolbar with buttons that let you perform various actions to the email,
such as reply to, forward, defer, resolve, or transfer the email, or view previous emails this
customer sent to the contact center. See “Email Toolbars,” on page 35.
n
Customer Email Header Area – Information about the customer’s email, consisting of the email
address of the customer, any other addresses to which the email was sent, the date and time the
email was sent, and the subject that the customer entered for the email. UAD buttons display
the Unified Agent Directory to let you find and add addresses of people in your company. For
detailed technical information on how the email was routed, click the Headers button.
n
Customer Message Area – Box where you can read the customer’s email. You cannot edit the
text in the message in Email Preview mode.
The following areas are displayed only in Email Compose mode:
n
Email Compose Toolbar – The Email Compose toolbar contains buttons that let you perform
various actions to the email, such as reply to, forward, defer, resolve, or transfer the email, or
view previous emails this customer sent to the contact center. See “Email Toolbars,” on
page 35.
n
Drop-down Menu and Send Button – The menu lets you choose whether this is a normal reply,
a message to an external agent, or a request to the customer for additional information. (An
external agent is a person outside the company who has been designated as a subject matter
expert who can help customers when agents request their assistance.) The Send button sends
the email that is currently in the Message Composition area to the addresses in the header
fields.
n
Outbound Email Header Area – Tab that displays information about the email you are
composing, with the addresses to which the email will be sent and the subject of the message.
n
Attachments Area – Tab that lets you attach files to the email and displays information about
any files you have attached.
Page 28
Chapter 1 Overview
28 Avaya Agent User’s Guide
n
Message Composition Area – Area where you compose an email. It may contain the message
that you are replying to in addition to the message that you compose.
The Web Agent While Handling Chat
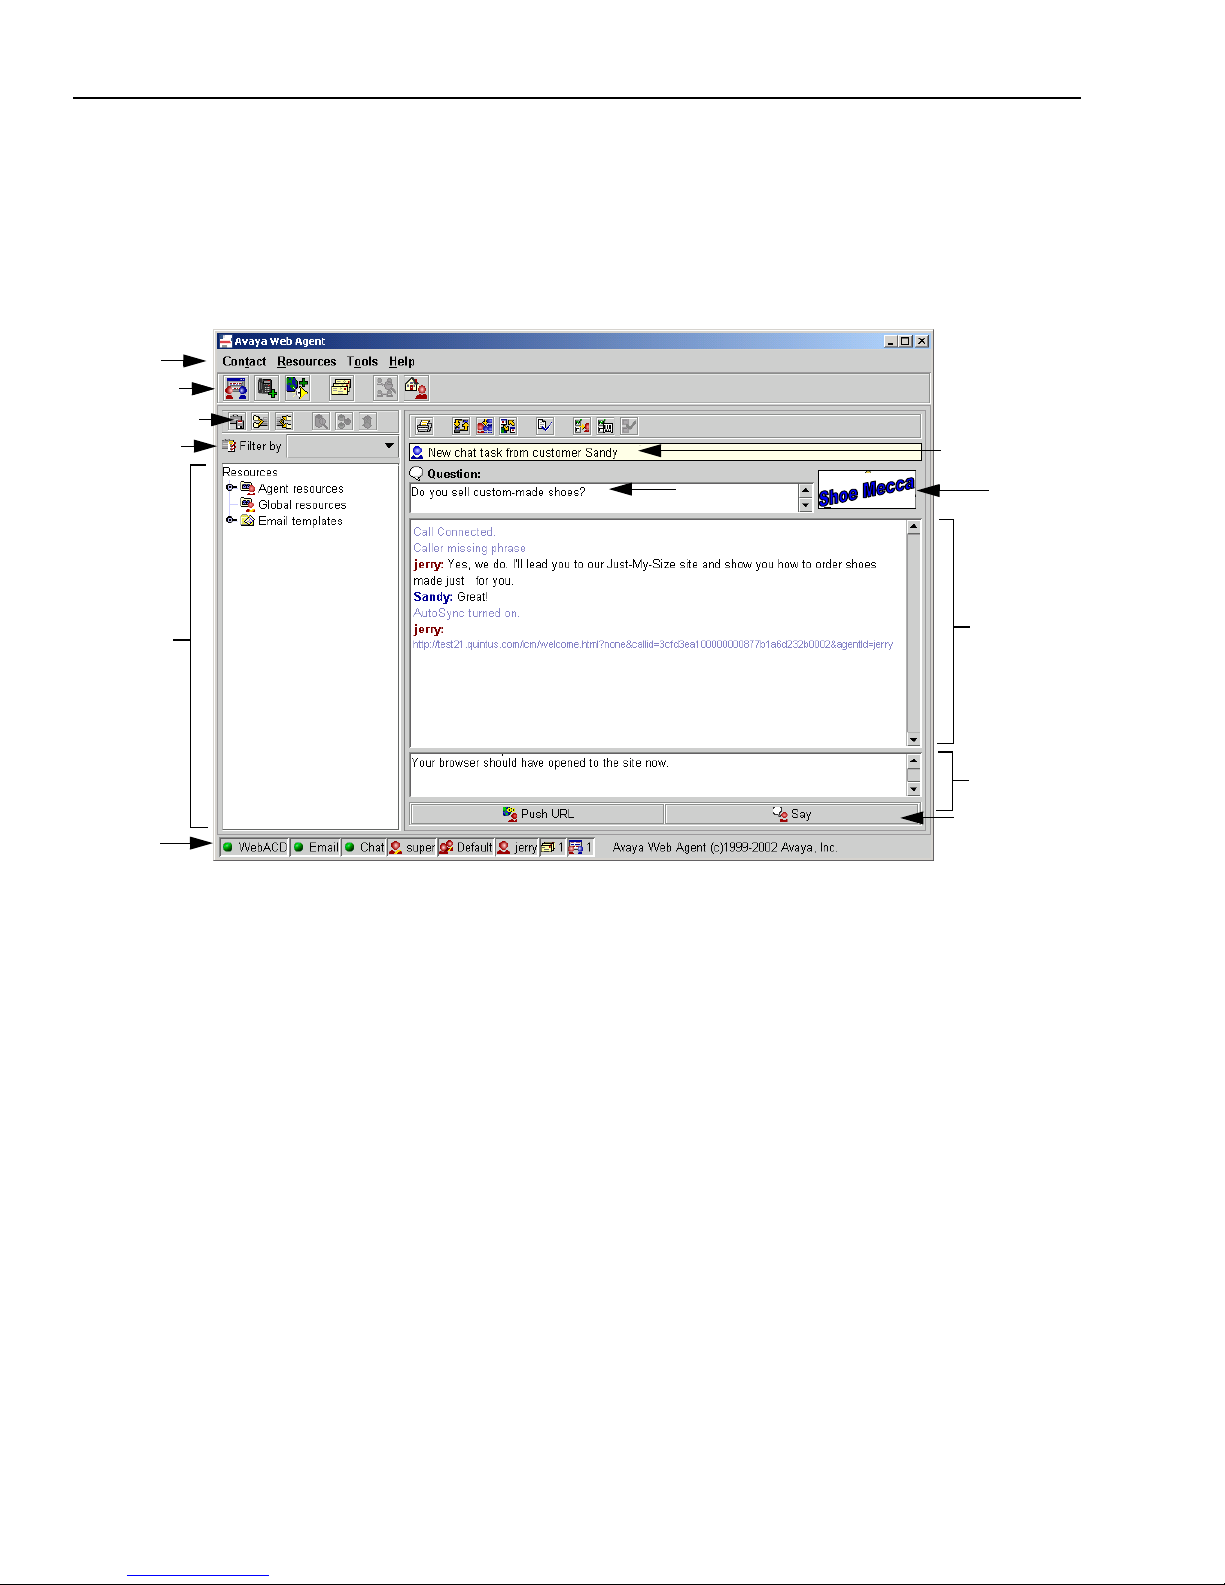
The following illustration shows the Web Agent window during a chat session.
The features of the Web Agent window in Chat mode are as follows:
n
Menus – The names of menus that contain commands. Click the name of a menu to open it and
display the commands.
n
Main Toolbar – Buttons below the menu bar for quick access to frequently used commands for
email or chat. See “The Main Toolbar,” on page 34.
n
Resource Toolbar and Filters – Buttons for resource-related commands and a Filter menu for
displaying only the type of resources you want to see. See “Resource Toolbar,” on page 39.
n
Resource Area – Pane that contains resources, which are previously prepared text responses,
emails, and URLs (Internet addresses) that you can send to customers. The resource area may
contain folders for each of the following: Agent Resources, Global Resources, Email
Templates, and Suggested Responses.
n
Resource Preview Scroll Box (not shown) – When you select a resource from a folder and then
click the Preview Contents check box, a scroll box displays the contents of the resource.
n
Company Logo – Area that displays a logo that represents a company. If your contact center
supports different companies or tenants, the logo may change, according to the Web site from
which the customer requested the current chat session.
Company
Resource
Text Entry area
Main Toolbar
Menu Bar
Send bar
Status Bar
Transcript area
Customer
Question
logo
Area
Resource Toolbar
Information bar
Resource filters
Page 29

Web Agent
Issue 1.0 June 2002 29
n
Chat Toolbars – The main chat toolbar contains buttons for controlling the current chat session.
Additional toolbars are added when you conduct a Chat & Phone or a Chat & VoIP session. See
“Chat Toolbars,” on page 37.
n
Send Bar – Buttons for sending a URL that opens in your customer’s browser and for sending
the text you entered in the Text Entry area to your customer.
n
Information Bar – An area that displays important information about your active chat session.
If you switch to an email contact, it displays information about your active email. See “The
Web Agent Information Bar,” on page 32.
n
Customer Question – Area that displays the original question typed by the customer on the Web
site. This area also displays other information about the customer and the site from which the
customer requested the chat. This information can also help you identify guest users (people
who log on to the company Web site without a user account).
n
Transcript Area – Area that displays the chat conversation that has occurred so far between you
and the customer.
n
Text Entry – Area where you enter text or URLs to send to the customer.
n
Status Bar – Icons that indicate certain aspects of your current Web Agent status.
Page 30

Chapter 1 Overview
30 Avaya Agent User’s Guide
The Web Agent in Supervisor Mode
If you are a supervisor, you can click the Supervisor Mode button whenever you want to monitor a
chat session. The Web Agent displays a Supervisor Mode panel, as shown in the following
illustration, showing all the chat sessions that agents in your workgroup are currently conducting.
When you select the session you want to monitor, the Transcript and Text Entry areas display the
chat session. See “Monitoring a Chat Session (Supervisors Only),” on page 147 for more
information.
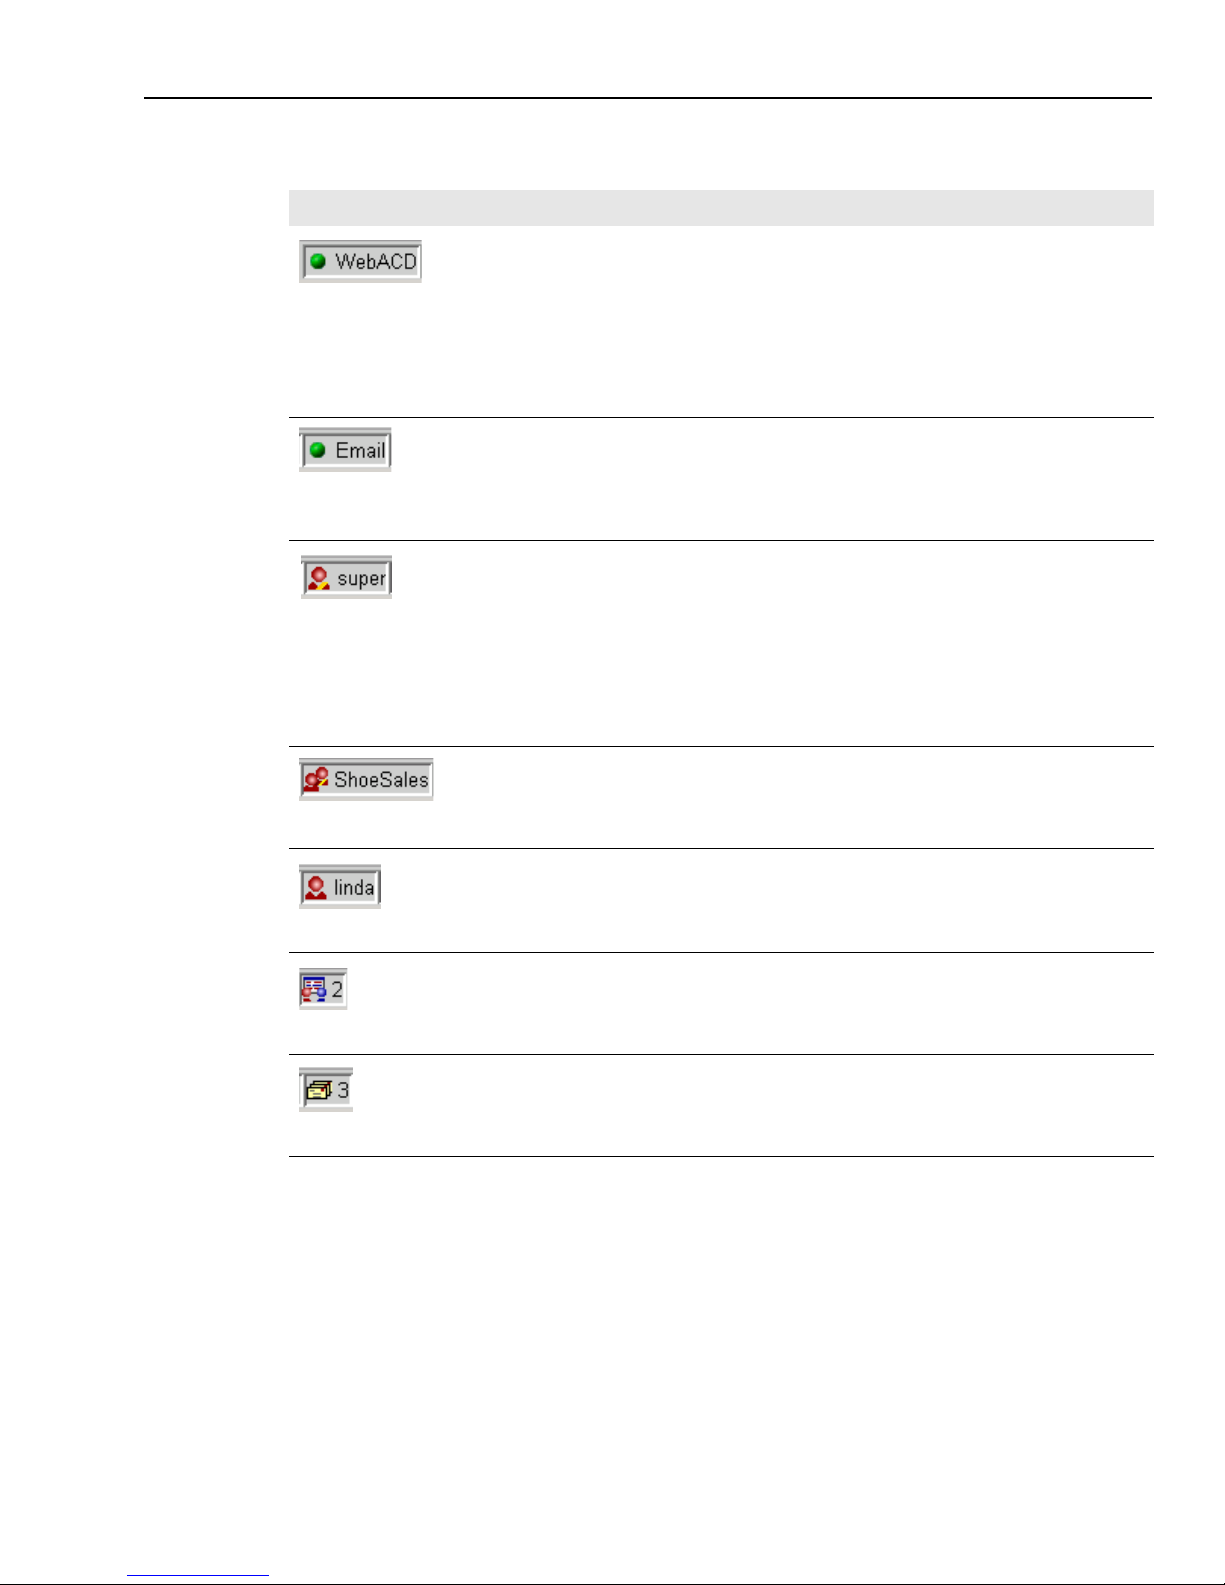
The Web Agent Status Bar
The bottom of the Web Agent, as shown in the above illustration, contains a Status Bar with icons
that show aspects of your current Web Agent status. The Status Bar remains the same, whether you
are currently in Email mode or Chat mode.
Current chat sessions
Agent
Workgroup
Customer
Your workgroup
Your login ID and status
Your current chat contact load
Connection to Email Server
Your supervisor’s login ID and status
Your current email contact load
Connection to WebACD Server
Page 31
Web Agent
Issue 1.0 June 2002 31
The following table describes the icons on the Web Agent Status Bar, from left to right.
Icon Description
WebACD
Connection status
Shows the status of your connection to the WebACD Server (Web Automatic Call
Distribution Server) with the following colors:
n
Red – Your Web Agent is not connected to the WebACD server.
n
Orange – Your Web Agent is in the process of connecting to the WebACD
server.
n
Green – Your Web Agent is connected to the WebACD server.
Email Server
Connection status
Shows the status of your connection to the Email Server, which handles your email
contacts. The colors are the same as for the WebACD Server.
Supervisor status
If you are an agent, shows your supervisor’s login ID and indicates whether the
supervisor is currently online. The supervisor icon has a stripe on the shirt so you
can distinguish it from your own icon. The shirt color indicates your supervisor’s
login status, as follows:
n
Grey – Your supervisor is not online.
n
Red with yellow stripe – Your supervisor is online.
If you are a supervisor, the Status Bar does not have a Supervisor icon.
Workgroup
The name of the workgroup to which you belong. The icon does not change color.
Agent status
Displays your login ID and login status with the following shirt colors:
n
Grey – You are not logged in to the Web Agent.
n
Red/Yellow – You are logged in and available to take at least one contact.
Chat status
Shows your availability for chat and, if you are available, your chat channel load
(the maximum number of chat customers you can currently handle at the same
time). Zero means that you are currently unavailable to help chat customers. The
icon does not change color.
Email status
Shows your availability for email and, if you are available, your email channel load
(the maximum number of email customers you can currently handle at the same
time). Zero means that you are currently unavailable to receive email contacts. The
icon does not change color.
Page 32
Chapter 1 Overview
32 Avaya Agent User’s Guide
The Web Agent Information Bar
The Web Agent has an Information Bar to call your attention to important information, whether
you are in an email contact or a chat contact. The Information Bar may display messages like the
following:
n
“New inbound email from a customer.”
n
“New chat request from customer.”
n
“This email will be sent to customer.”
n
“Response rejected during quality assurance.”
n
“Transfer request successful.”
Web Agent Menus
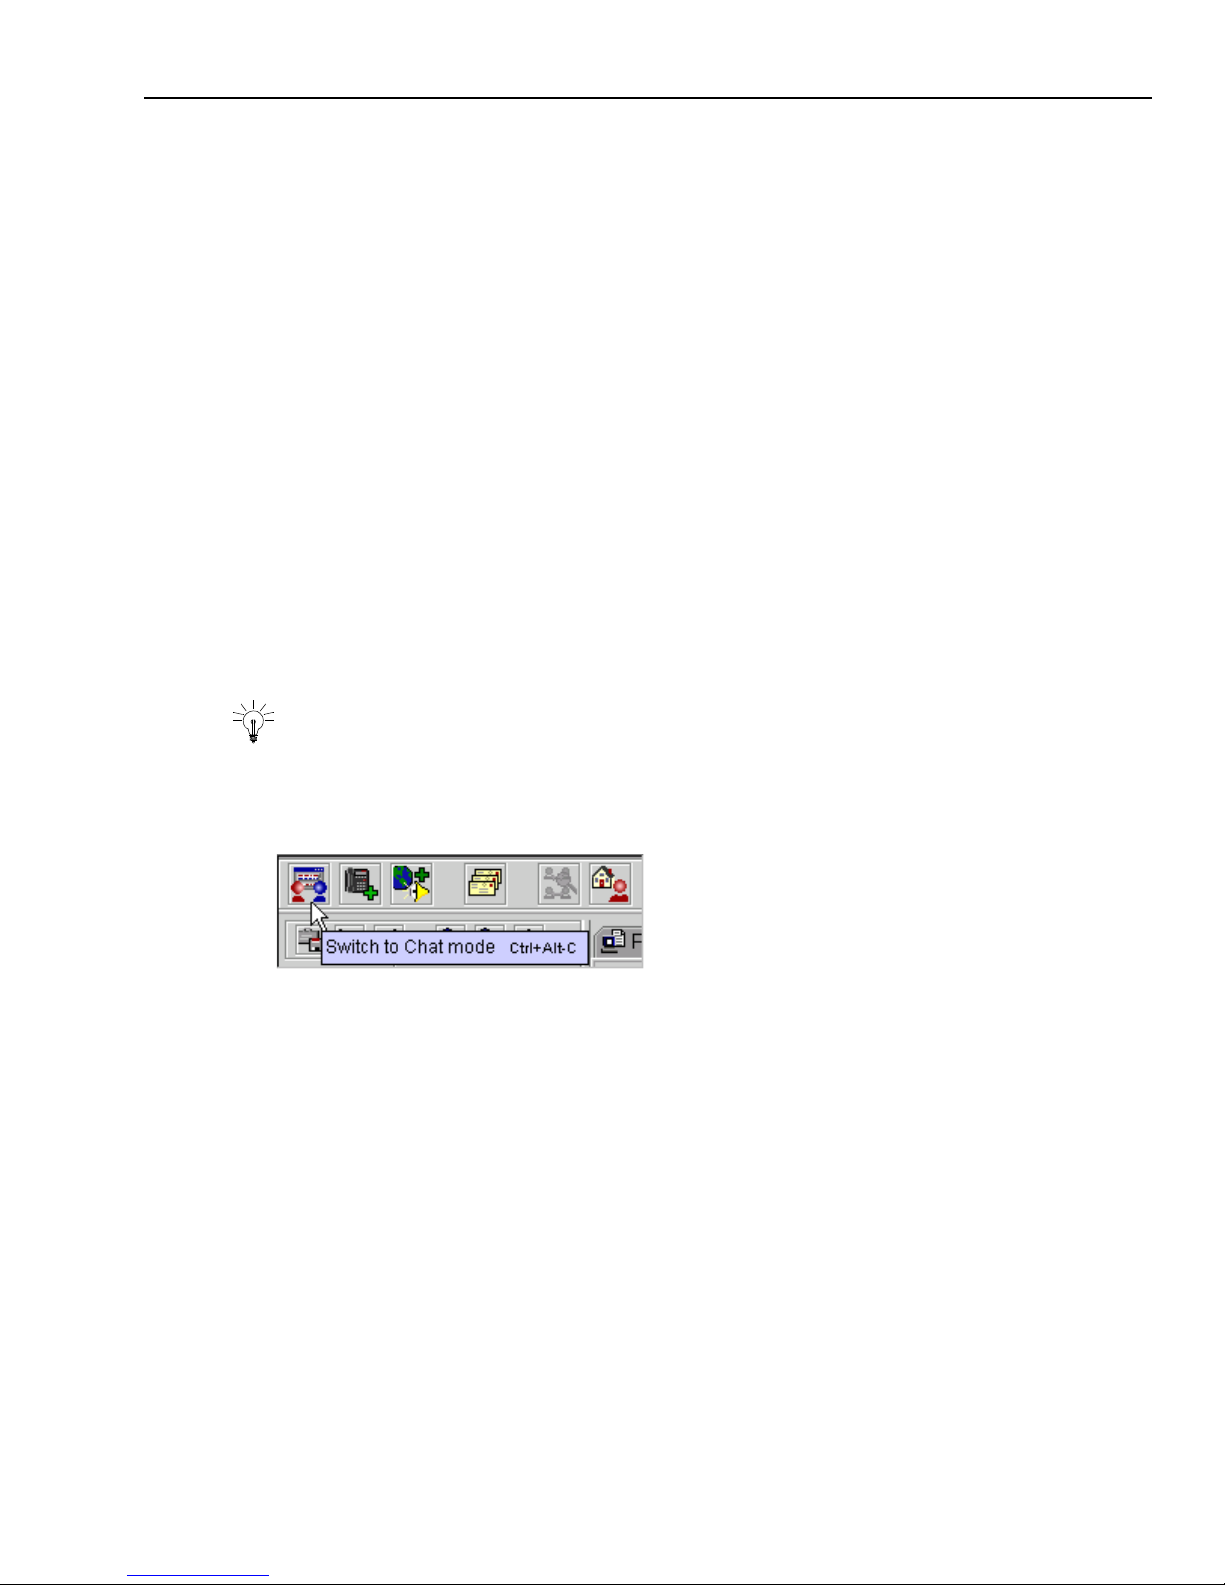
The Web Agent has three menus, available from the menu bar at the top of the window: Contact,
Resources, and Tools. Many of the menu options perform the same action as buttons in the
toolbars.
Tip: You can use shortcut keys to access menus and their options quickly. To open a menu, press
the Alt key and then the letter that is underscored in the menu name (Alt-T opens the Contact
menu, Alt-R opens the Resources menu, and Alt-O opens the Tools menu). When the menu opens,
you can use the shortcut key beside the option you want to select.
The menus are as follows:
n
Contact menu – This menu displays commands related to chat and email contacts. The Print
command prints whatever is displayed in the current window. When you have an active chat
contact, you can use the Auto-Sync, Join Us, and Lotus Sametime (if installed) commands. See
Chapter 5, “Managing Chat Sessions” for information on these features. You can use the Spell
Check option at any time to check an email or a chat. You can use options to transfer, wrap, and
complete a contact.
n
Resources menu – A set of commands related to resources (pre-written text, URLs, and emails)
that you can send to customers. With one set of options, you can create, delete, save, and view
your own Agent resources. With the Expand All and Collapse All options, you can determine
whether you view all resource folders or only the main folder (or folders). With the Filter
option, you can limit the display to the types of resources you want to see. Note that a
Resources toolbar above the Resource area has some additional commands related to resources.
Page 33
Web Agent
Issue 1.0 June 2002 33
n
Tools menu – A set of commands that help you do your work. The Agent Home command
opens your Internet browser to Web pages designed for agents. The commands in the middle
section of the menu are all related to the Web sites that customers visit. One command takes
you to the current customer’s DataWake
TM
record, which lists the URLs the customer has
visited since they opened their browser. One command opens your browser to the customer
Web Self-Service site where you can submit a document to be included on the database of
frequently asked questions (FAQ). Another command lets you search the FAQ database for
information. The Preferences command displays the preferences dialog box where you can
customize the look of the Web Agent and set various options related to chat and email.
The Web Agent Toolbars
The Web Agent has several toolbars containing buttons that you can click to perform commands.
The main toolbar is always present near the top of the Web Agent. The other toolbars depend on
your current customer interaction. There are toolbars for the following:
n
Email Toolbars
n
Chat Toolbars
n
Voice Chat Toolbars
n
Resource Toolbar
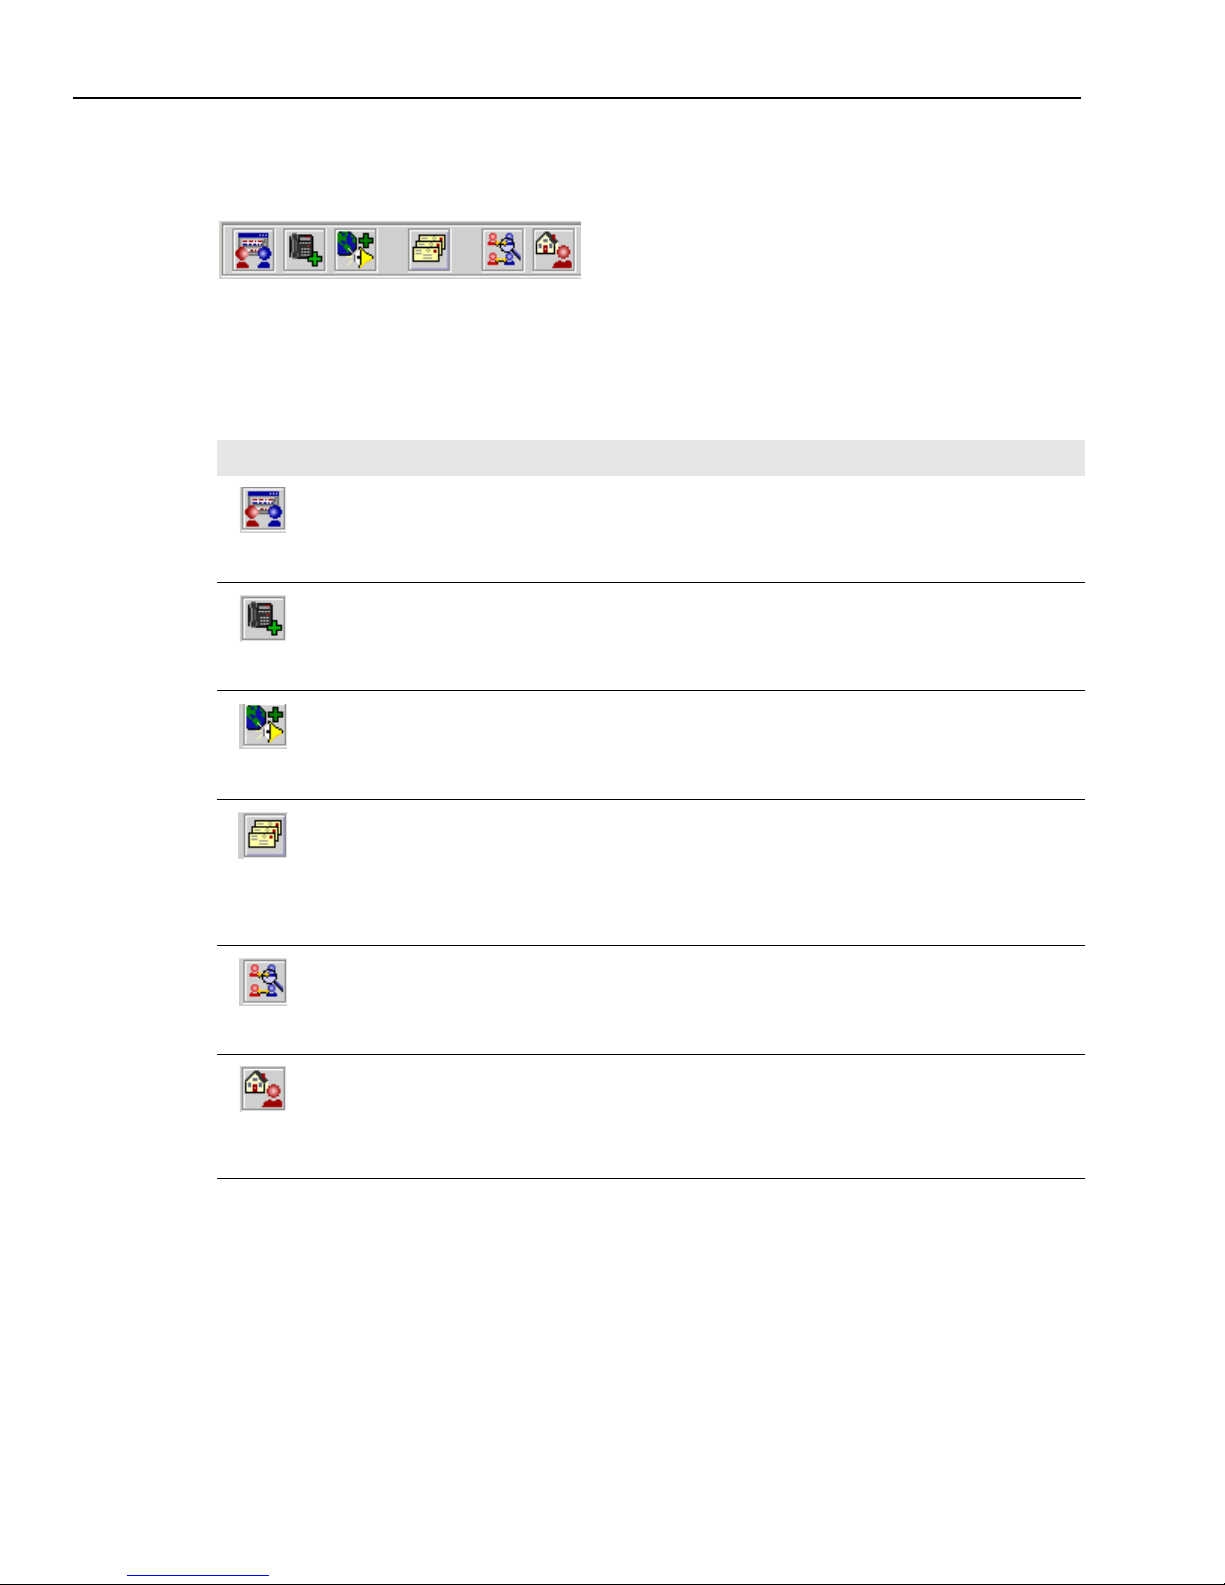
Tip: Any time you do not remember what a button does, hold your cursor over the button for a
moment. The Web Agent displays either the name or a description of the button, as shown in the
following illustration. It also shows the keyboard shortcut that you can use to perform that
command, such as pressing the Control key, the Alt key, and then the letter “c” to switch to Chat
Management.
Page 34
Chapter 1 Overview
34 Avaya Agent User’s Guide
The Main Toolbar
You use the main toolbar in the Web Agent for both Email Management (email) and Web
Management (chat). The buttons in the main toolbar let you quickly access frequently used
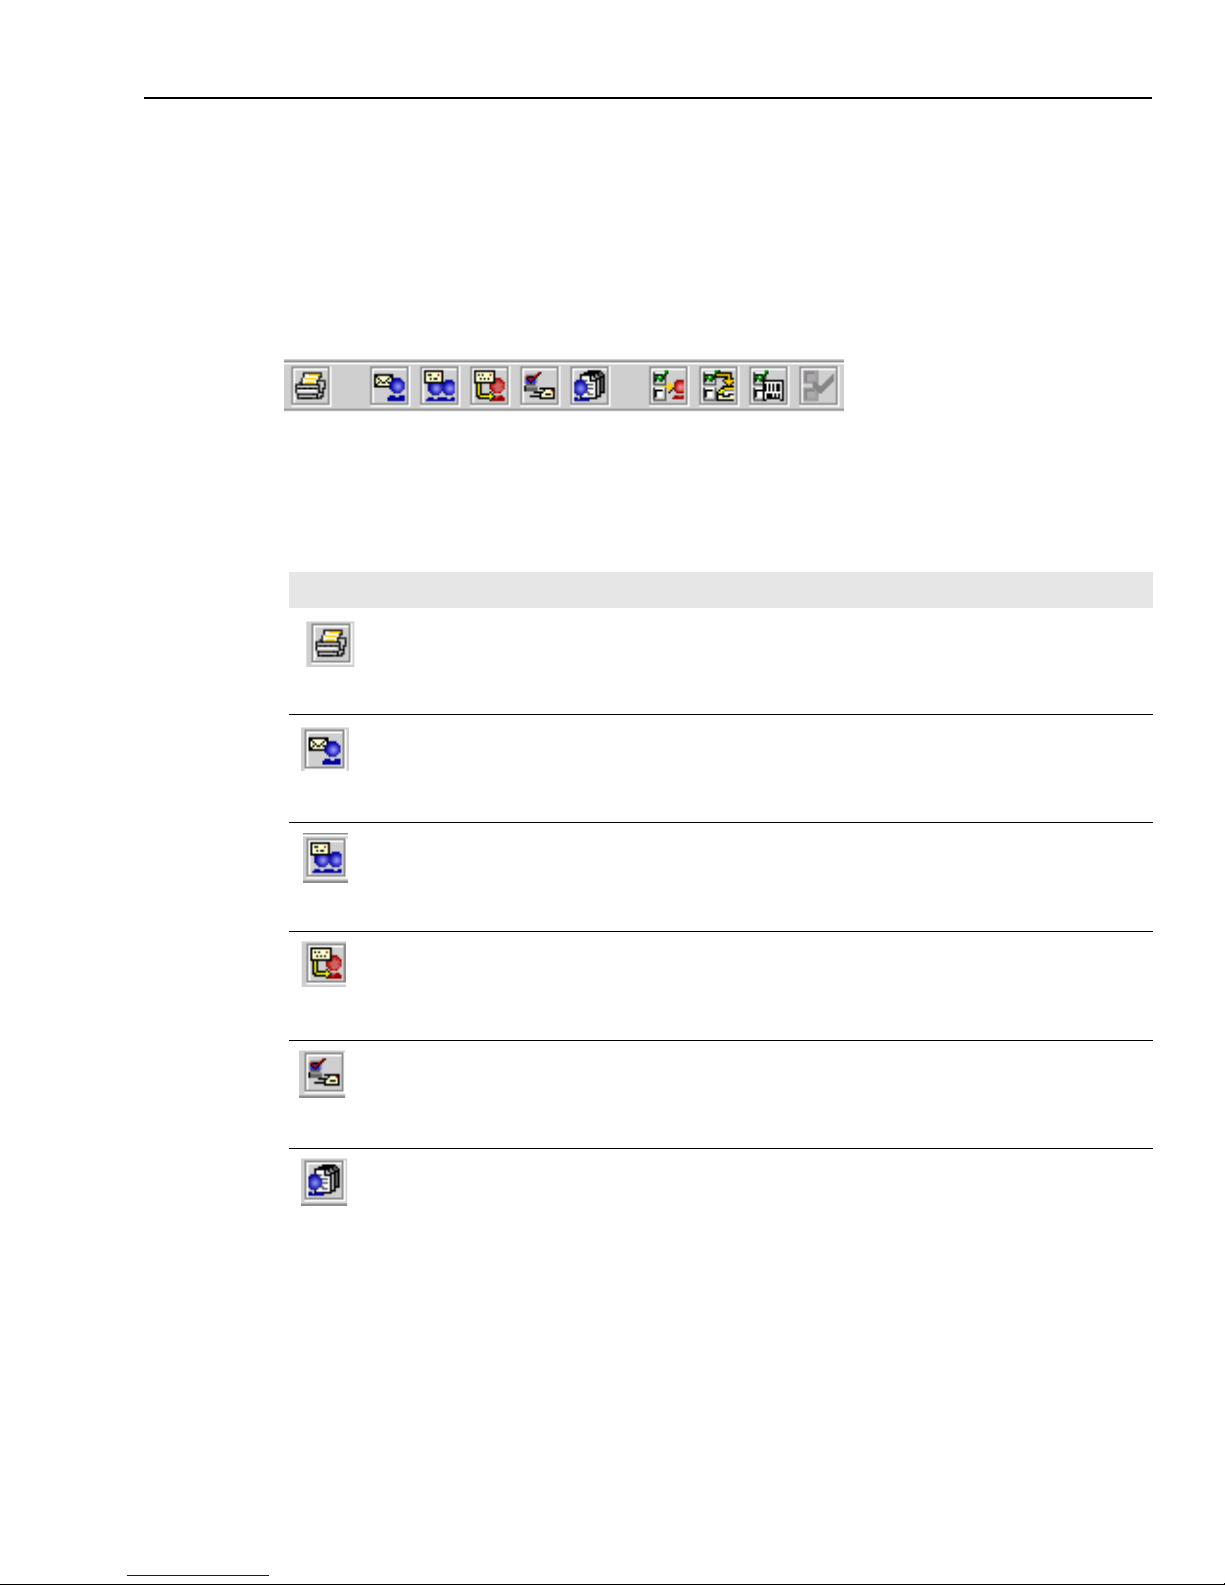
commands that are also available in the menus. The buttons in the main toolbar, from left to right,
are as follows:
Button Action
Chat Mode
Switches the Web Agent to the Chat mode. If a chat contact is selected in the
Chat task list, the current chat session is displayed. If you are currently
handling more than one chat session, you can switch from one session to
another by changing the chat contact that is selected in the Chat task list.
Chat & Phone Mode
Switches the Web Agent to the Chat & Phone mode. This makes it possible
for you to speak with a customer over the telephone while the customer
remains in the chat session with you.
Chat & VoIP Mode
Switches the Web Agent to the Chat & VoIP Mode. This makes it possible for
you to speak with your customer through a connection between your
telephone and the customer’s Internet connection. While you speak with
each other, you and your customer remain in the chat session together.
Email Mode
Switches the Web Agent to the Email Mode. If an email contact is selected in
the Email task list, the current email is displayed. The email may be
displayed in Email Preview mode or Email Compose mode, depending on
your latest view of this email. If you are currently handling more than one
email, you can switch from one email to another by changing the email
contact that is selected in the Email task list.
Supervisor Mode
(Supervisors only. If you are not a supervisor, the button is disabled.) In this
mode, a panel displays icons for the chat sessions that agents in your
workgroup are currently conducting.
Agent Home Page
Opens your Internet browser and displays the Agent Home page, where you
can search for documents to the frequently asked questions (FAQs) on the
Web Self-Service pages or submit your own documents to these pages. Your
documents will be reviewed by an administrator and may be accepted or
rejected.
Page 35
Web Agent
Issue 1.0 June 2002 35
Email Toolbars
The email toolbar has a different set of buttons, depending on whether you are looking at the
customer’s email (in Email Preview mode) or composing an email reply (in Email Compose
mode).
Email Toolbar in Preview Mode
When you click an email contact in your Email task list, the Web Agent displays the customer’s
email in Email Preview mode, as indicated by the tab above the email. This is a read-only view of
the email. Above the tab is the Email Preview toolbar. The buttons in this toolbar, from left to
right, are as follows:
Button Action
Print
Prints a paper copy of the text that is currently displayed in the Information Bar, the
Header fields, and the Message Composition Area.
Reply
Displays the Email Compose mode of the Web Agent window. The default window
in Email Compose mode is a Normal Reply, which addresses your reply to the
sender of the email, and no one else. You can change this to Send to External
Agent or Request Additional Information to compose those special types of email.
Reply to All
Displays the Email Compose mode of the Web Agent window and addresses your
reply to the sender of the email and to all the people listed in the Cc (Copy) or Bcc
(Blind Copy) fields of the message you are replying to.
Forward
Forwards a copy of this email to the people whose addresses you enter in the To,
Cc, and Bcc fields. See
“Forwarding an Email,” on page 107 for information.
Resolve
Lets you apply a status to the email. For example, you may use a status of Dismiss
if a customer sends you a “thank you” and all the customer’s questions have been
answered. See
“Resolving an Email,” on page 112 for information.
Email History
Displays a dialog box with information about a specific email or information about
any previous emails sent from the current customer’s email address. You can also
see copies of the emails. See “Viewing Email History,” on page 91 for more
information.
Page 36
Chapter 1 Overview
36 Avaya Agent User’s Guide
Email Toolbar in Compose Mode
When you are viewing an incoming email in Email Preview mode and you click Reply or Reply to
All, the Web Agent displays the email in Email Compose mode, as indicated by the tab above the
email. This is where you compose your reply to the customer. Above the tab is the Email Compose
toolbar. The buttons in this toolbar, from left to right, are as follows:
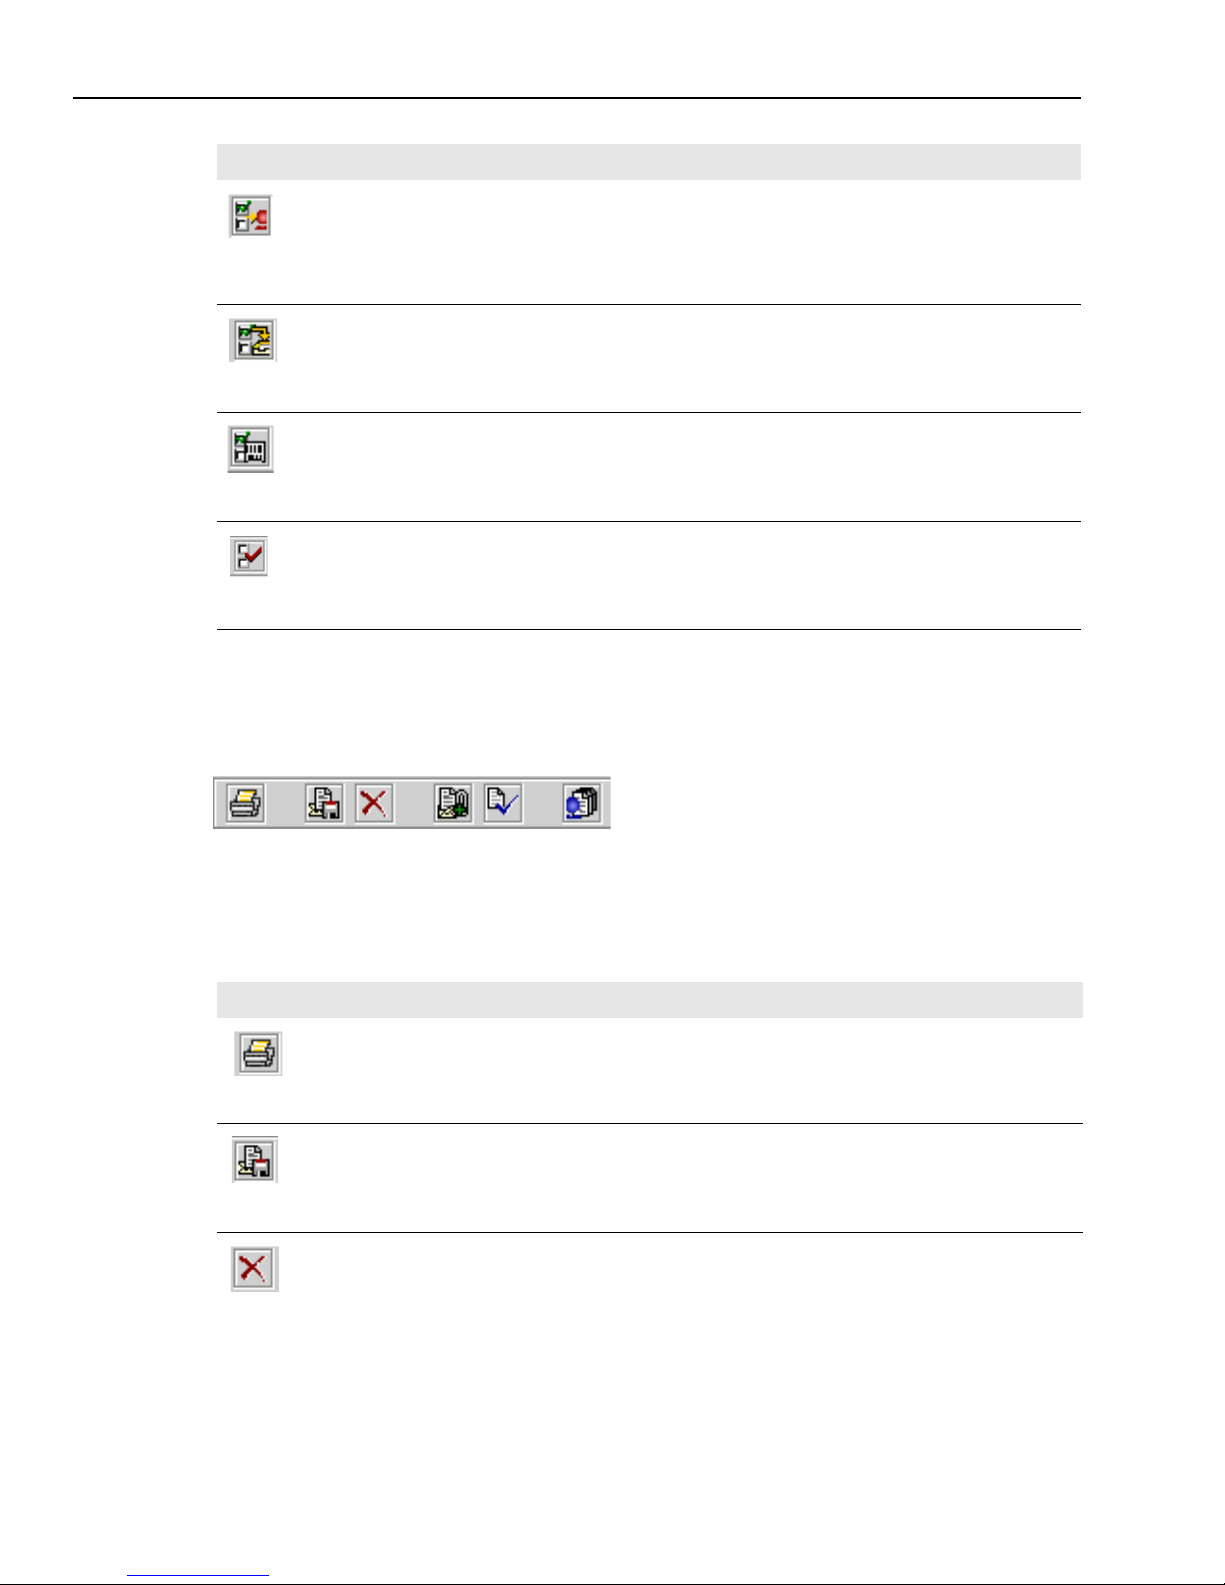
Transfer
Displays the Unified Agent Directory (UAD) so you can transfer this email contact.
You can transfer it to a queue and let Avaya IC route the email to the first available
agent in that queue. You may also be able to transfer it to a particular agent,
supervisor, or external agent.
For information, see “Transferring an Email Contact,” on page 105.
Defer
Puts the current email message on hold, giving you a chance to research the
customer’s question or problem. The message you have composed is saved as a
draft. For more information, see “Deferring an Email,” on page 106.
Wrap
Puts you in WrapUp state. While in WrapUp state, you cannot receive another email
contact to replace this contact. You may be asked to fill out information about this
email contact while you are in WrapUp state. For more information, see “Wrapping
Up and Completing an Email Contact,” on page 120.
Complete
Closes this email contact and removes it from the Email task list. For more
information, see “Wrapping Up and Completing an Email Contact,” on page 120.
Button Action
Print
Prints a paper copy of the text that is currently displayed in the Information Bar, the
Header fields, and the Message Composition Area.
Save Draft
Saves a draft of the current email reply that you are composing.
Note: Immediately after you save a draft, if you want to leave the email for a period
of time and come back to it, use the Defer button.
Cancel
Cancels and deletes the email reply that you are composing.
Button Action
Page 37
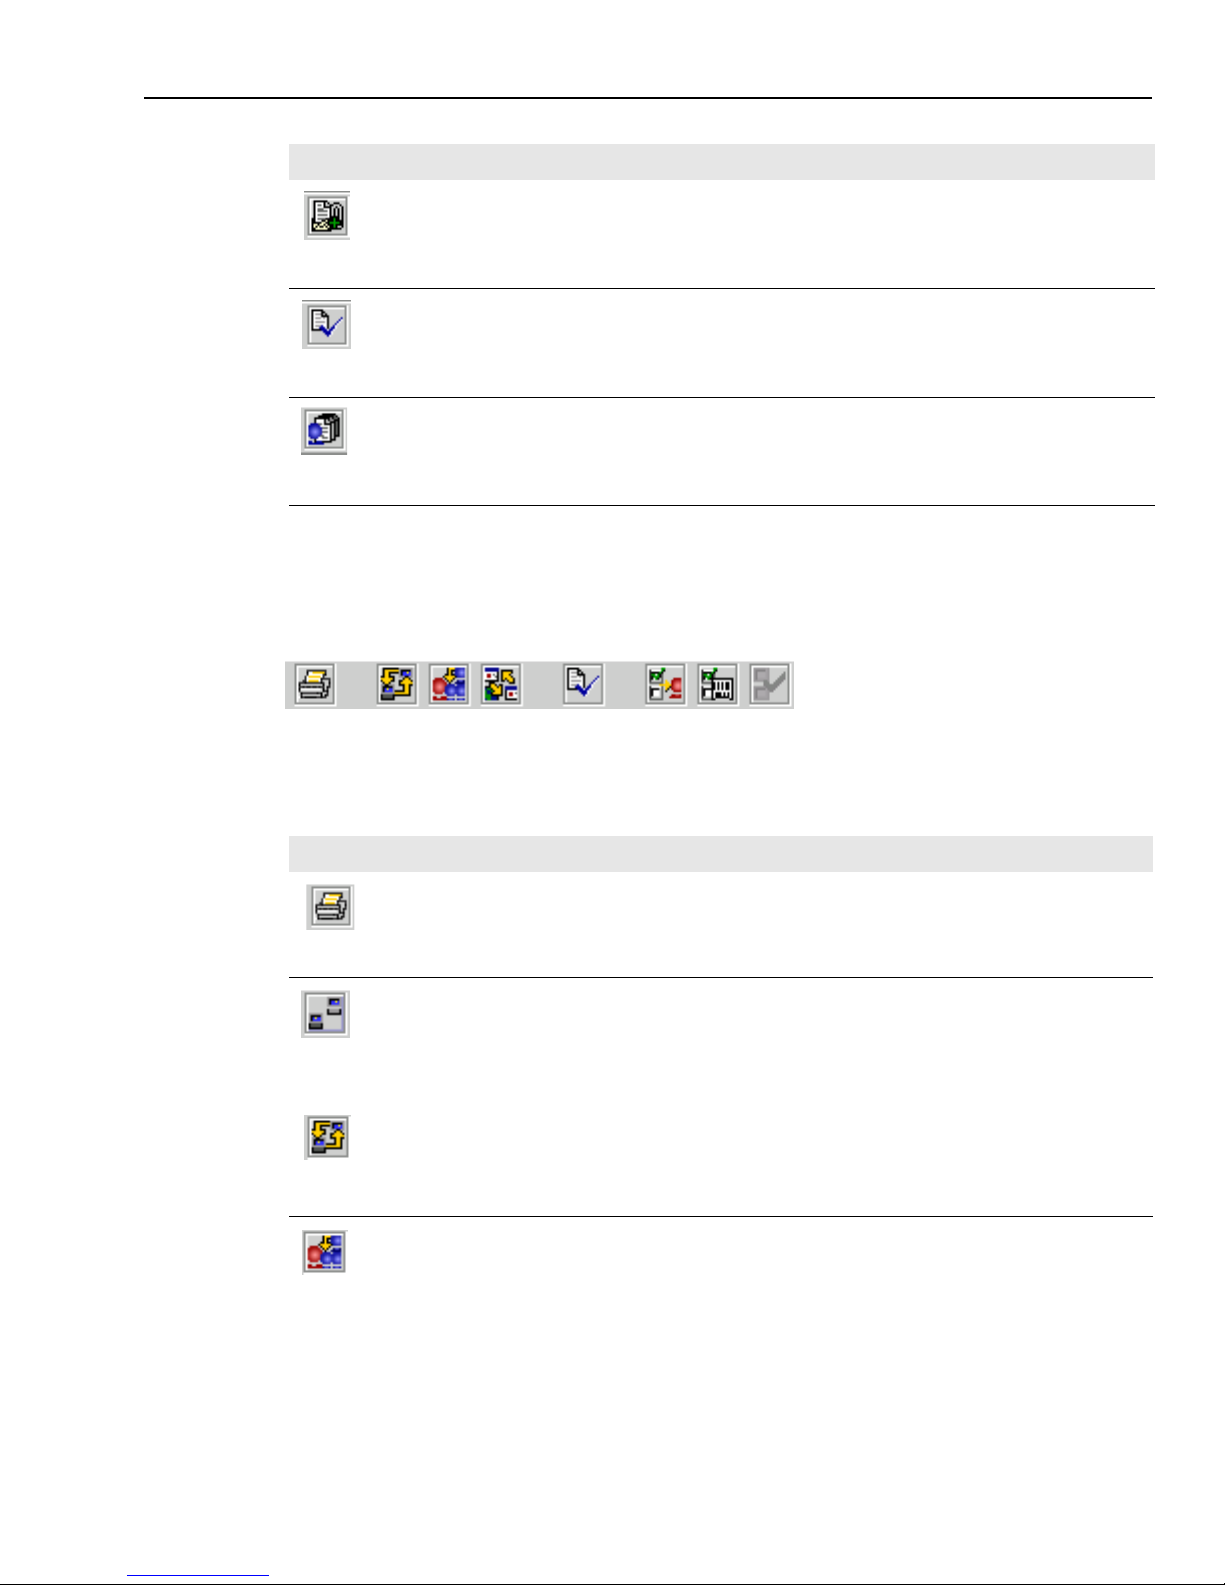
Web Agent
Issue 1.0 June 2002 37
Chat Toolbars
When you are engaged in a chat session, the main chat toolbar is located on the right side of the
Web Agent above the chat transcript area. This toolbar contains buttons you use to control the chat
session. The buttons in the toolbar, from left to right, are as follows:
Attach
Displays a dialog box where you can locate a file and attach it to the current email
reply.
Spell Check
Displays a dialog box that helps you check the spelling of the current email reply,
interactively.
Note: You can set a preference to have this spelling dialog box come up
automatically after you click Send. See “Setting Preferences,” on page 165.
Email History
Displays a dialog box with information about a specific email or information about
any previous emails sent from the current customer’s email address. You can also
see copies of the emails. See “Viewing Email History,” on page 91 for more
information.
Button Action
Print
Prints a paper copy of the text that is currently displayed in the Information Bar, the
Transcript area, and the Text Entry area.
Start Auto-Sync
(You see this button when Auto-Sync is off.) Starts an Auto-Sync session so that your
customer’s browser will display the same Web pages as your browser as you navigate
through Web pages. See “Using Auto-Sync,” on page 129 for more information.
Stop Auto-Sync (You see this button when Auto-Sync is on.) Stops an Auto-Sync session.
Join-Us
Starts a Join Us session in which friends of your customer can join the chat session. See
“Handling a Join Us Conference,” on page 144 for more information.
Button Action
Page 38
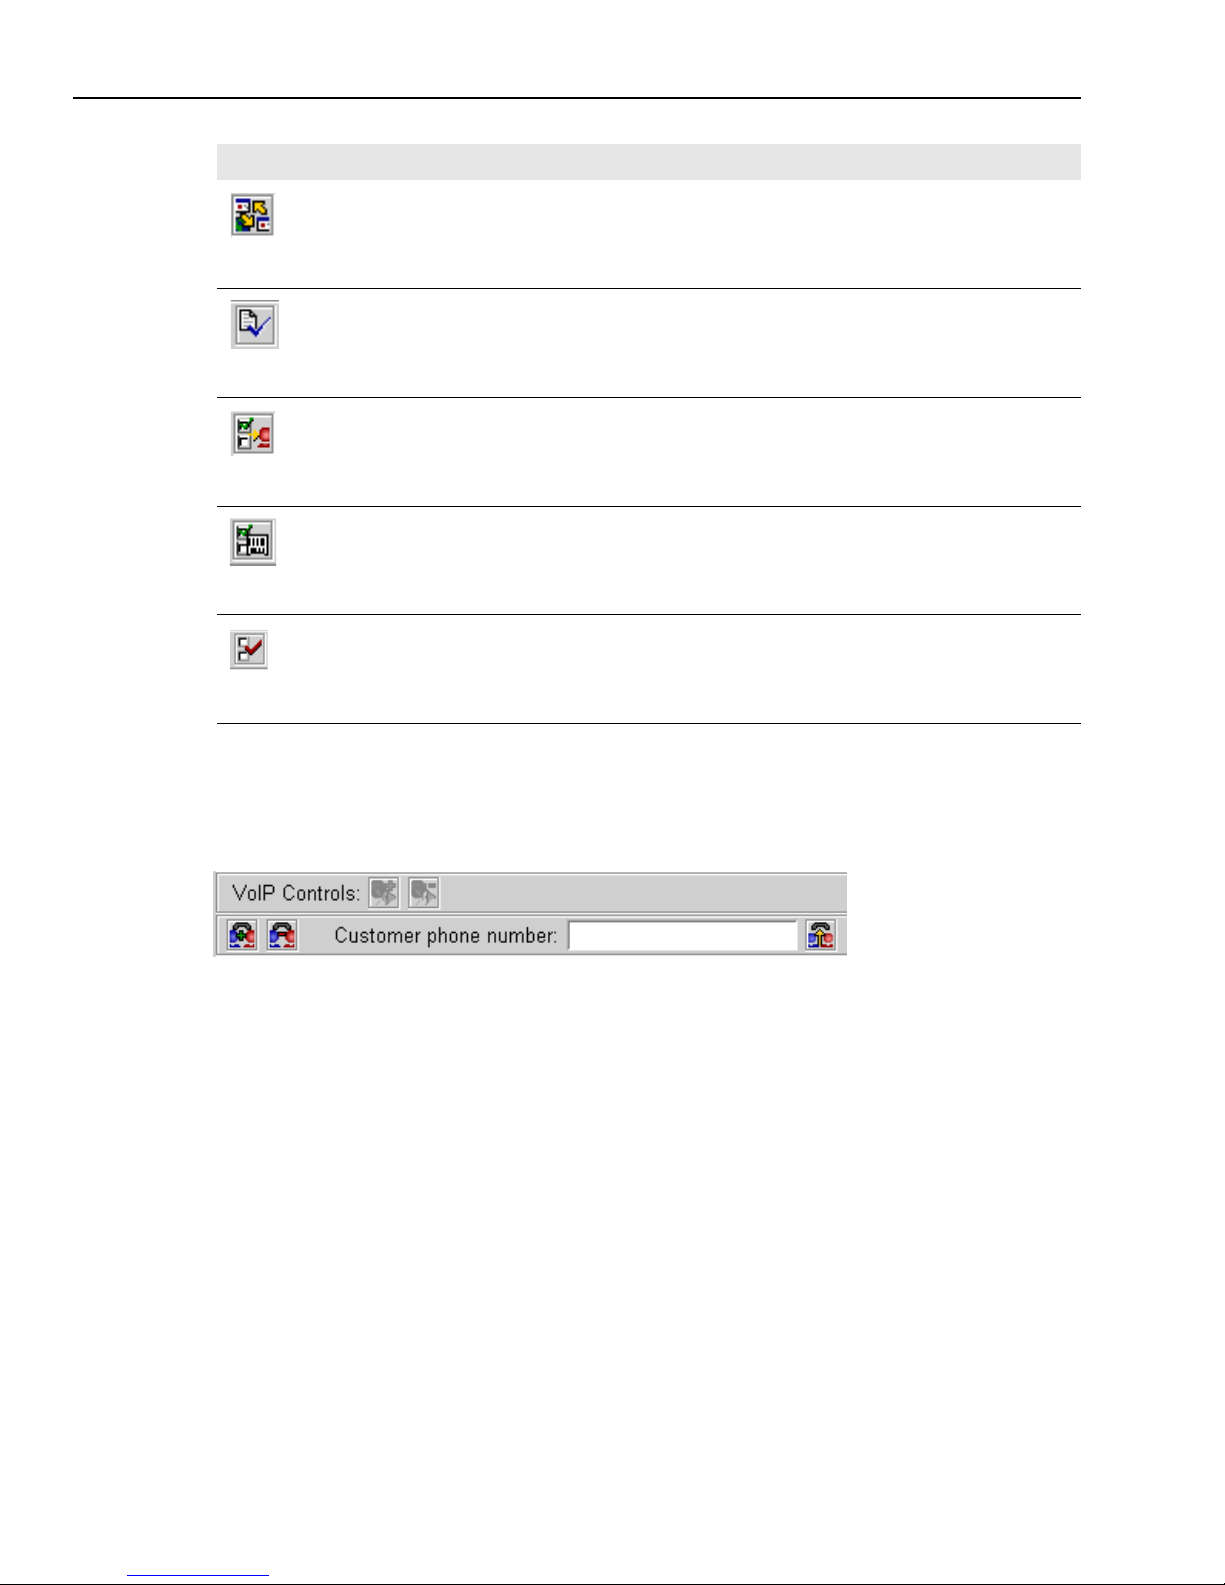
Chapter 1 Overview
38 Avaya Agent User’s Guide
Voice Chat Toolbars
When you are in a chat session, you can handle two types of “Voice Chat”:
n
Chat & Phone – You and your chat customer speak to each other over the telephone.
n
Chat & VoIP – You speak to your chat customer over your telephone while your customer
speaks to you over the Internet.
When you click the Chat & Phone button or the Chat & VoIP button to use those features, the chat
toolbar displays a toolbar for those features. The Chat & VoIP toolbar is shown in the above
illustration.
Sametime
Starts a Lotus Sametime session with your current chat customer. You can only use
Sametime if it is installed and configured on your desktop. See “Setting Preferences,” on
page 165.
Spell Check
Displays a dialog box that helps you check the spelling of text that you have typed in the
Text Entry area before you send it.
Note: You can set a preference to have this spelling dialog box come up automatically
after you click Say. See “Starting a Lotus Sametime Session,” on page 149.
Transfer
Displays the Unified Agent Directory (UAD) so you can transfer this chat contact. You
can transfer it to a queue and let Avaya IC route the chat to the first available agent in
that queue. You may also be able to transfer it to a particular agent, supervisor, or
external agent. For information, see “Transferring a Chat Contact,” on page 142.
Wrap
Puts you in WrapUp state. While in WrapUp state, you cannot receive another chat
contact to replace this contact. You may be asked to fill out information about this chat
contact while you are in WrapUp state. For more information, see “Wrapping Up and
Completing a Chat Contact,” on page 153.
Complete
(This button is only available after you have wrapped up the contact.) Closes this chat
contact and removes it from the Chat task list. For more information, see “Wrapping Up
and Completing a Chat Contact,” on page 153.
Button Action
Page 39
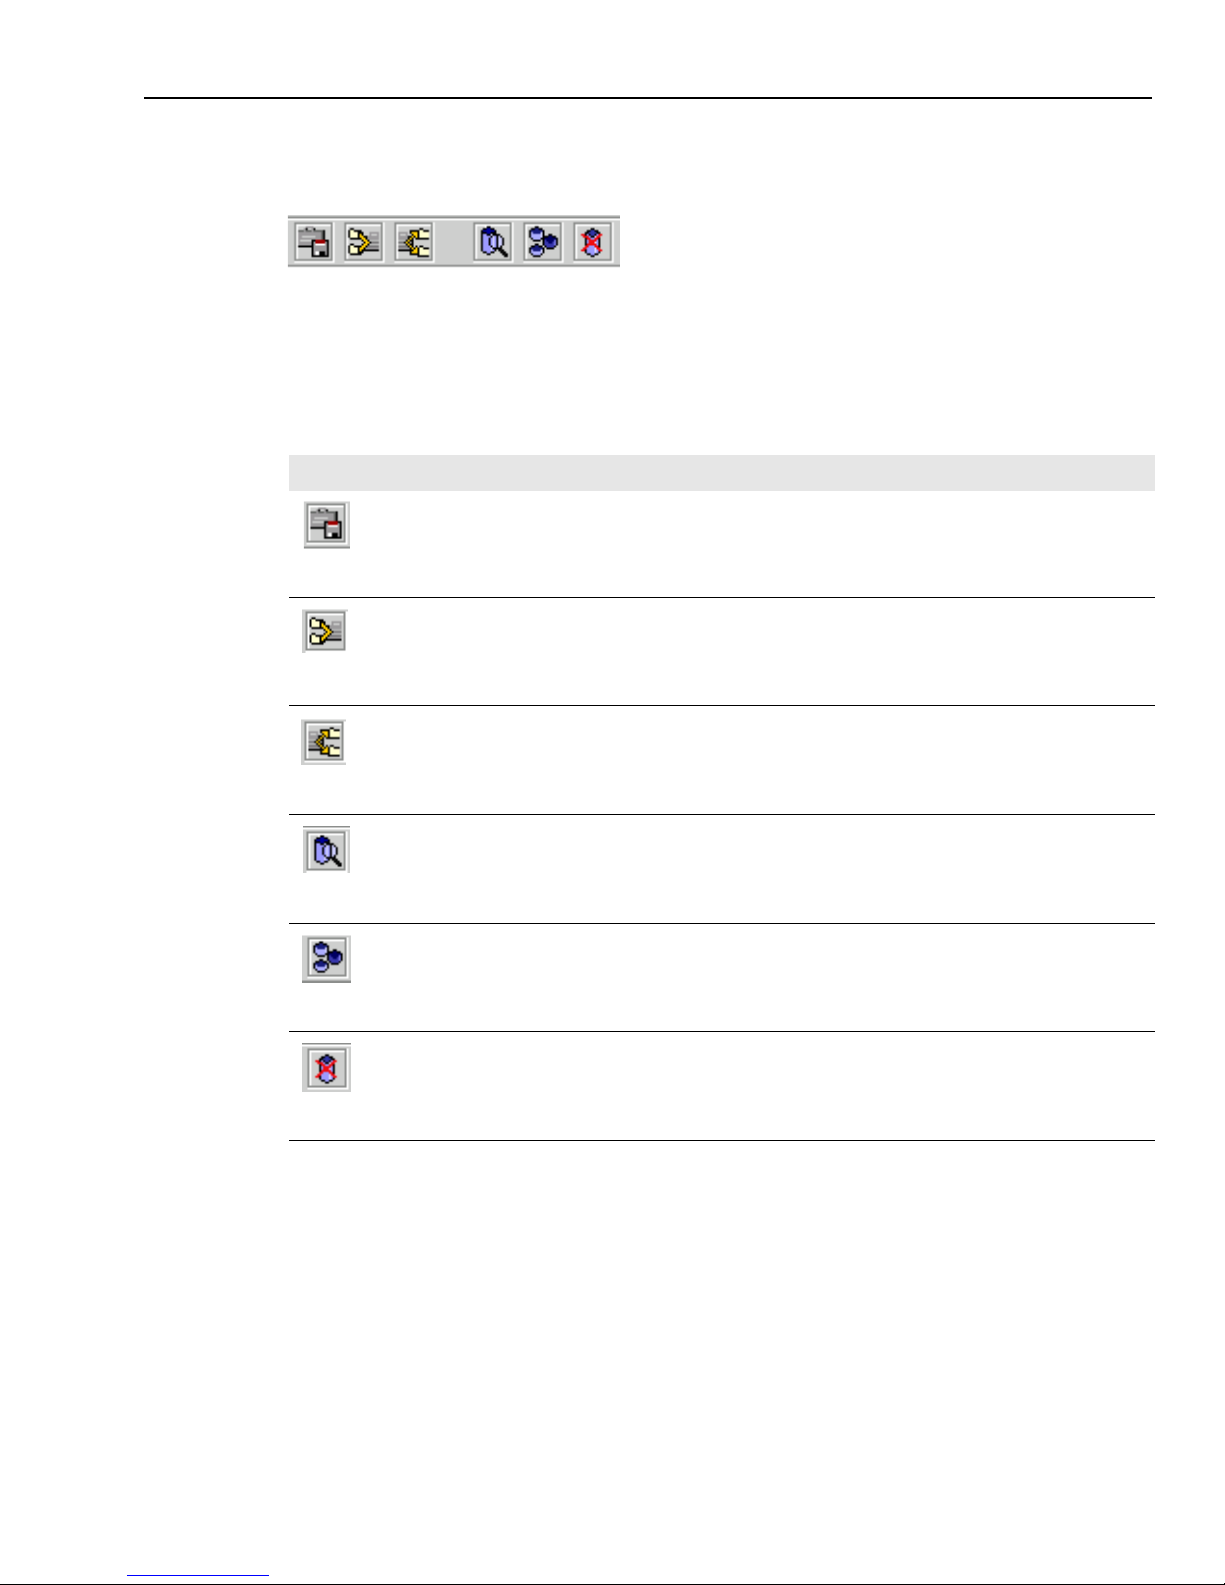
Web Agent
Issue 1.0 June 2002 39
Resource Toolbar
Resources in the Web Agent are previously prepared text, emails, and URLs (Internet addresses)
that you can send to customers whenever the information is needed. This saves you the time and
the tedium that it would take to type the same information repeatedly. The Resources toolbar sits
above the Resource area on the left side of the Web Agent. The buttons in this toolbar, from left to
right, are as follows:
Button Action
Save
Saves the resources that you have created or modified.
Collapse All
Hides all resource folders under the single folder that contains them.
Expand All
Shows all resource folders and all their contents (subfolders and the resources
themselves).
View
When you select a resource and then this button, the Resource dialog box opens to
display the contents of the resource. You cannot modify the resource when you
select this option.
Edit
When you select a resource and then this button, the Resource dialog box opens
and lets you modify the contents of the resource if you want.
Delete
When you select a resource and then this button, the resource is deleted.
Page 40

Chapter 1 Overview
40 Avaya Agent User’s Guide
Page 41

41
CHAPTER 2
MANAGING AVAYA AGENT
This chapter provides you with step-by-step instructions for tasks that you do in Avaya Agent.
These tasks apply to the three media channels (Voice, Email, and Chat).
The tasks include:
n
Logging In and Logging Out
n
Setting Your Availability
n
Opening an Application Focus
n
Viewing Customer and Contact Information
n
Reloading Layouts in the EDU Viewer
n
Using the Unified Agent Directory
n
Using Screen Pops
n
Wrapping Up Contacts
The chapter concludes with a Troubleshooting section with information about what to do if the
Avaya Agent software stops responding.
Note: Depending on how your system administrator defined Avaya Agent for your company,
some of the Avaya Agent components discussed in this chapter may not be available to you.
Logging In and Logging Out
You must log in to Avaya Agent for every work session and log out to end the session. You must
use a login ID and password to log in. You may need to choose a new password within certain
periods of time, such as every 30 days.
Page 42
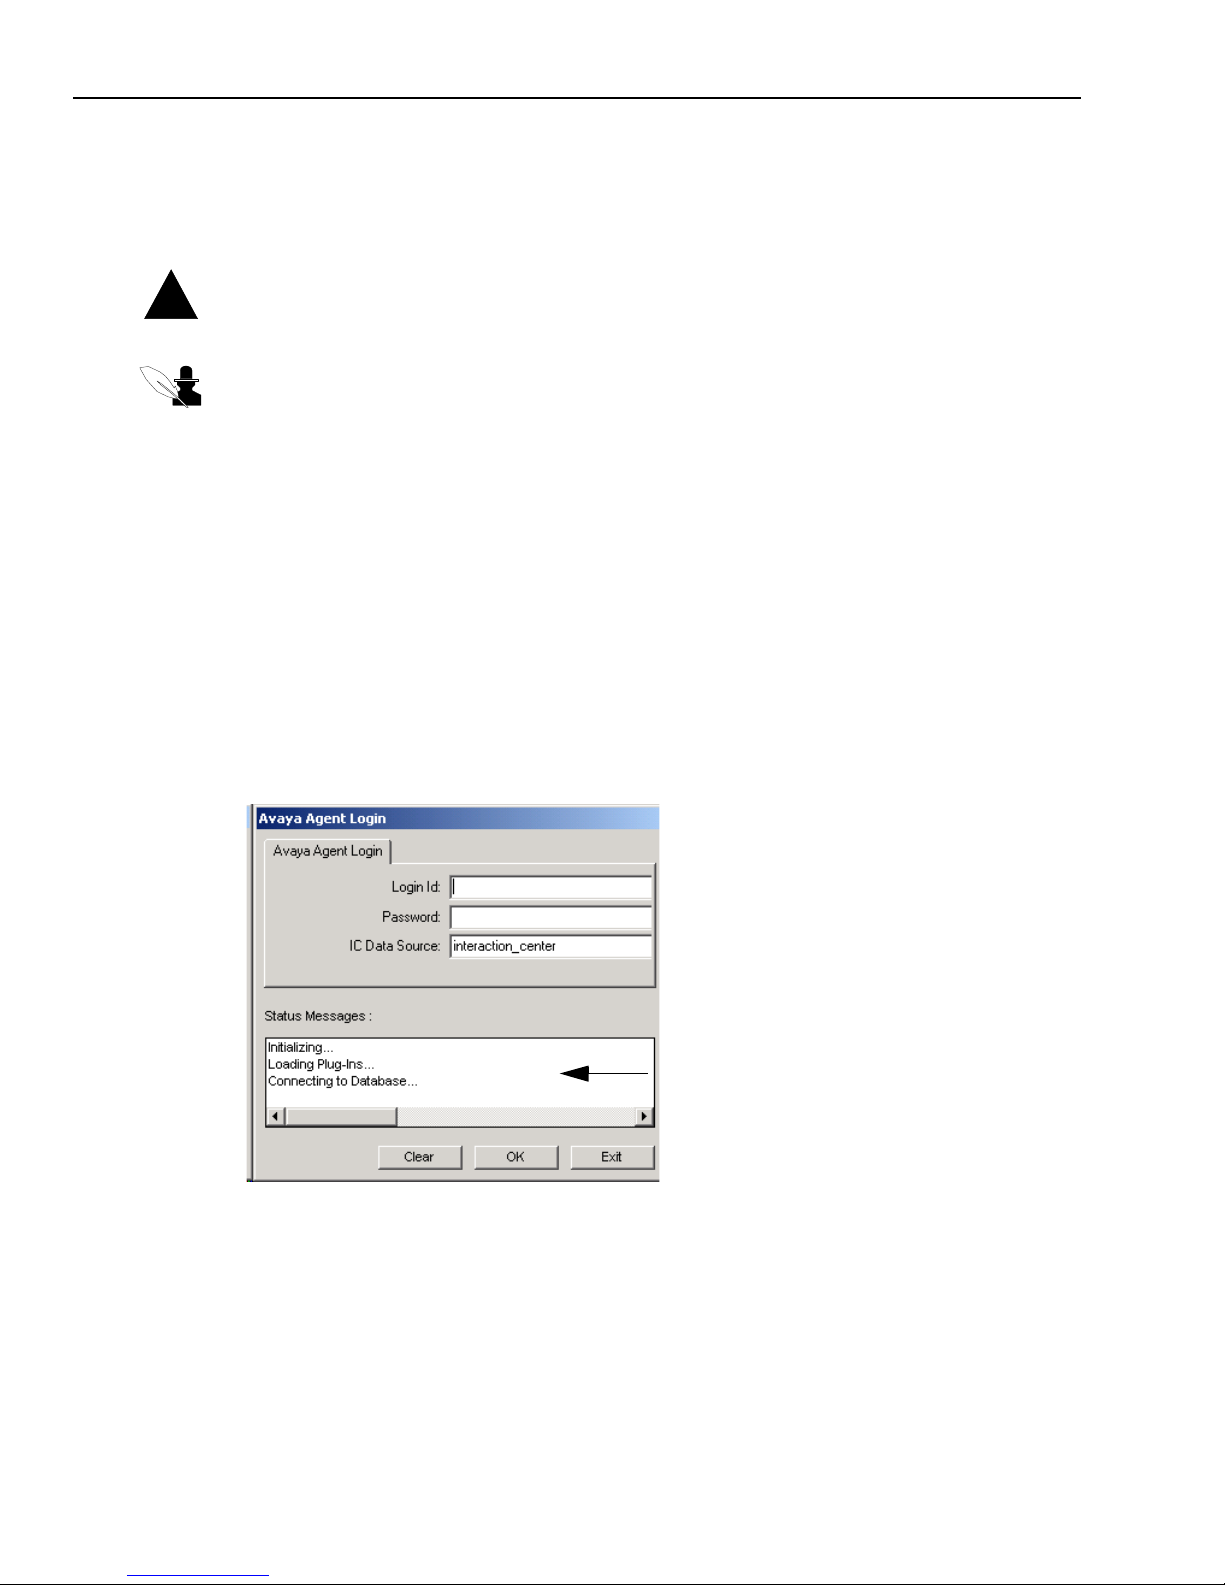
Chapter 2 Managing Avaya Agent
42 Avaya Agent User’s Guide
Your Avaya Agent and Avaya™ Business Applications may use “free seating.” With free seating,
your personal settings and preferences are attached to your login ID and password. Therefore, you
can log in to different workstations at your contact center, and Avaya Agent and your Avaya
Business Applications will open with your personal settings and preferences.
Caution: With free seating, you should only log in to one workstation at a time. If you want to
change from one workstation to another, be sure to log out of the first workstation before you log in
to the second one.
Note: For information about your login ID and password, see your administrator.
When you log in to Avaya Agent, you also log in automatically to your other Avaya applications,
such as an Avaya Business Application and Web Agent. Within Avaya Agent, you also log in to
either Avaya™ Outbound Contact Management (Outbound Contact) or the media channels (Voice,
Email, and Web Chat).
Logging In to Avaya Agent
To log in to Avaya Agent:
1 Double-click the Avaya Agent icon on your desktop.
If your desktop does not have an Avaya Agent icon, click Start > Programs > Avaya Interaction
Center 6.0 > <name of the Business Application, such as CallCenterQ, CustomerQ, or HRQ>.
Your login dialog box may look like this:
!
This area displays any
status messages
generated when you
log in.
Page 43
Logging In and Logging Out
Issue 1.0 June 2002 43
2 In the Avaya Agent Login tab, enter your login ID and your password in the appropriate text
box.
Tip: The IC Data Source field has been set for you. You can ignore this field unless
system administrators indicate that you should change it.
Note: You may be required to change your password.
Avaya Agent automatically adds your login ID and password to the appropriate text boxes in
the other tabs to log you in to the other channels.
3 If your system includes Softphone, you may need to complete the additional fields in the
Softphone tab. These fields may include the following:
4 Click OK.
If your login ID and password are valid, Avaya Agent is displayed on your desktop. Status
messages show the progress of your login.
Note: To use Outbound Contact, you must log in to Avaya Agent at the workstation
that has the Phone Type assigned to your login ID. Contact your administrator if you
cannot log in to Outbound Contact.
5 Check your Avaya Agent Status Bar, located at the top right of your screen, to confirm that you
do not have all zeros for your channel loads. Your channel loads are the number of contacts in a
media channel (Voice, Email, or Chat) that you can handle at the same time.
Note: If your channel loads across all available channels are set to zero, contact your
system administrator to make sure that the servers are running. If the servers are
running, re-set your channel load (see “Setting Your Channel Loads,” on page 49).
Field Name Field Description
Agent ID Logs you on to the telephone switch and makes sure that all voice contacts
assigned to your Agent ID are sent to your telephone.
Agent Password Confirms your identity to the Automatic Call Distributor (ACD) telephone system.
Station ID Identifies the station or equipment number of your telephone.
Page 44
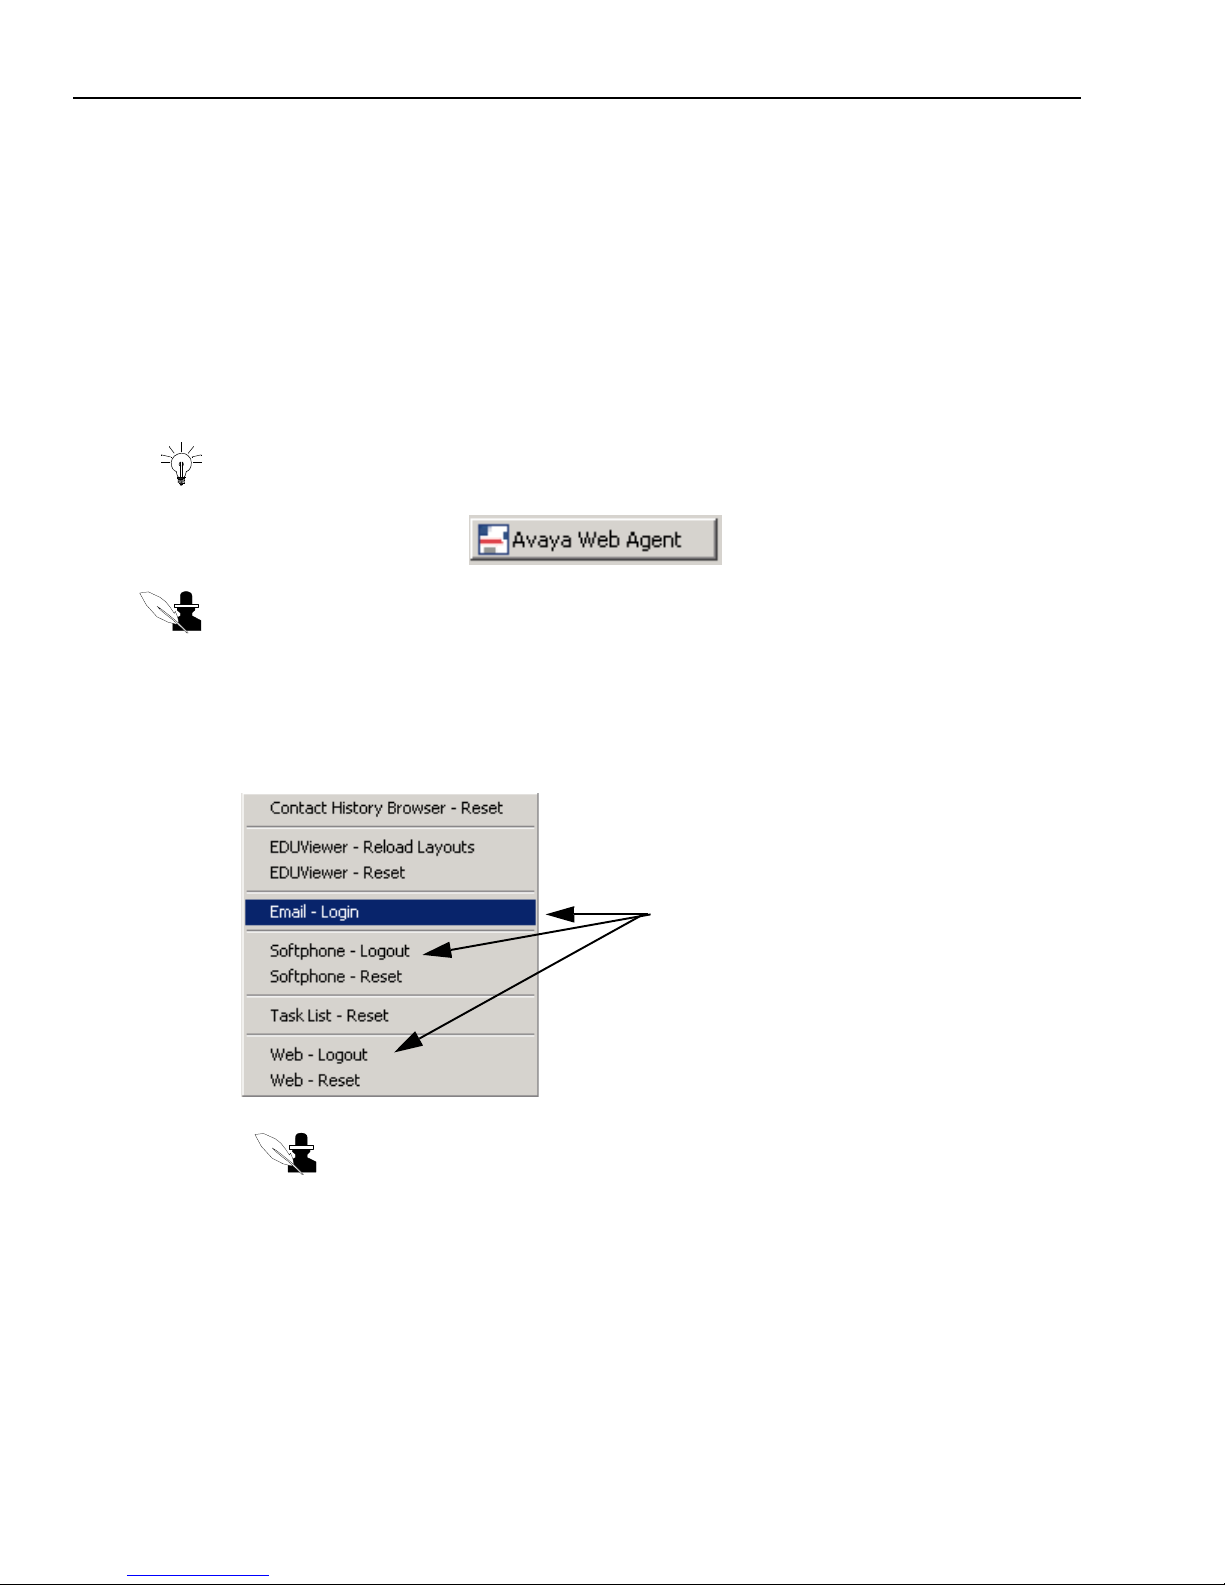
Chapter 2 Managing Avaya Agent
44 Avaya Agent User’s Guide
Logging In and Out of Media Channels
When you log in to Avaya Agent, you log in to all the media channels (Voice, Email, or Chat) for
which you are enabled. However, you can also log in and out of individual media channels if you
want to limit your contacts to one or two channels at a particular time. For example, you may want
to log in to the voice channel and log out of email and chat channels. Then you will receive new
voice contacts only.
The login and logout options in the Avaya Agent pop-up menu change, depending on your current
state in a media channel. For example, if you are logged in to the Email media channel, you see the
Email Logout option in the menu, not the Email Login option.
Tip: If you are logged in to either email or chat, you can see the following Web Agent icon
displayed in the task bar. You can double-click this icon at any time to bring up the Web Agent.
Note: When you log in to Outbound Contact, you cannot log in to the channels on the Media tab.
For more information, see “Logging In to Outbound Contact,” on page 181 and “Logging Out of
Outbound Contact,” on page 194.
To log in or out of a media channel:
1 Right-click any blank area of Avaya Agent to display the pop-up menu, shown in the following
illustration.
Note: If you are logged in to a channel, the menu option for that channel says
“Login.” If you are logged out of the channel, the menu option says “Logout.”
2 From the pop-up menu, click one of the following:
w
Email - Login (or Logout) – Lets you log in to (or log out of) the email channel and respond
to email contacts.
w
Softphone - Login (or Logout) – Lets you log in to (or log out of) the voice (telephony)
channel and respond to voice contacts.
Click the appropriate menu option
to log in or out of a media channel
Page 45
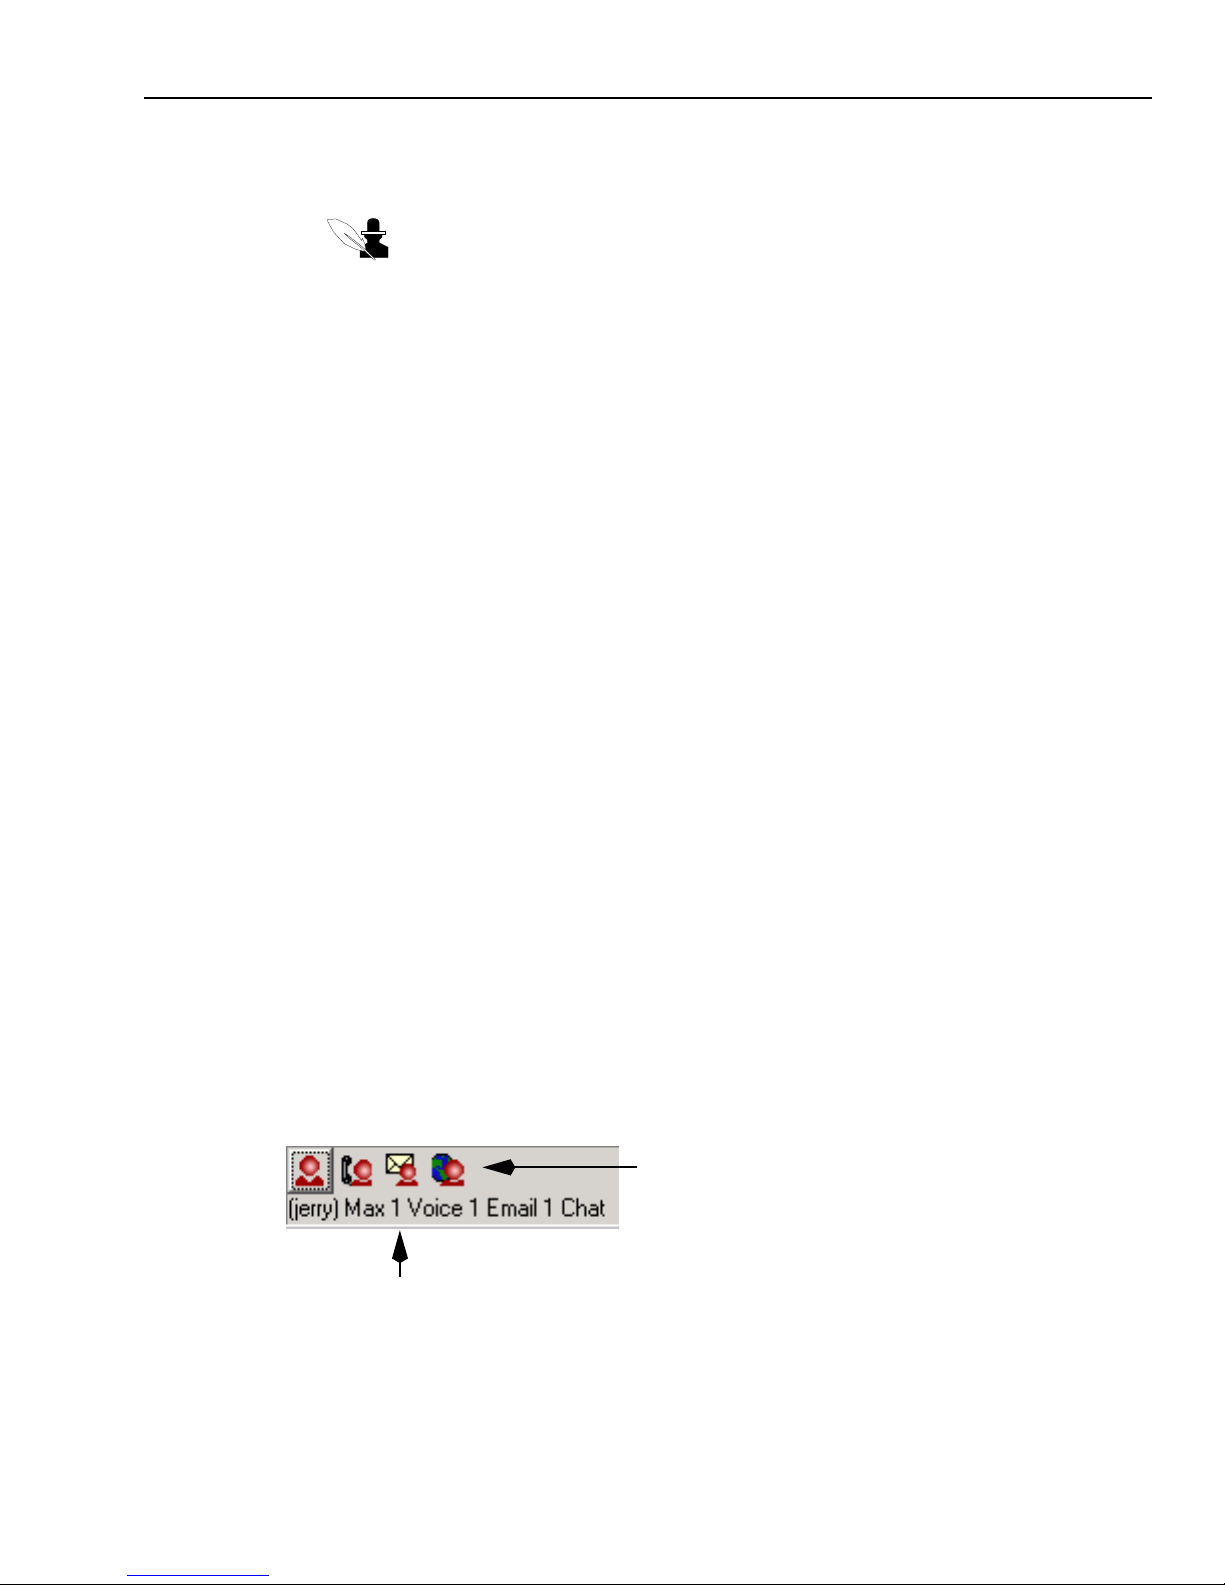
Setting Your Availability
Issue 1.0 June 2002 45
w
Web - Login (or Logout) – Lets you log in to (or log out of) the chat channel and respond to
chat contacts.
Note: Only log out of a media channel if instructed to do so by your administrator or
if you will be handling automated outbound calls using Outbound Contact.
3 In the Avaya Agent Login dialog box, enter your login ID, password, and any other information
required for the media channel.
4 Click OK.
Logging Out of Avaya Agent
When you log out of Avaya Agent, you automatically log out of all your Avaya applications also.
You may need to enter the reason that you are logging out of Avaya Agent.
To log out of Avaya Agent:
1 Click the Avaya Agent button at the top of the Avaya Agent.
2 Select Exit from the Avaya Agent menu.
3 If a Logout dialog box is displayed, select a reason. Then click OK.
Setting Your Availability
At any point in time, you are either available or unavailable to handle contacts in the media
channels. If you are available, contacts are assigned to you by the system.
You can set two basic types of availability:
n
Your channel loads – The maximum number of contacts you can handle in a media channel at
any one time. For example, if you have a channel load of 3 emails, you could have a maximum
of three emails assigned to you at one time.
n
Your agent state – Whether you are available at a particular moment to handle contacts. Agent
states are Available, Aux-work (Busy), and Init. aux-work (Transition between Available and
Aux-work). Your agent state may apply to all media channels or to a single media channel.
You control your channel loads and your agent state through the Avaya Agent media frame, shown
below
Right-click a channel button (voice, email, or chat) to
Maximum channel loads
change a channel load.
Page 46
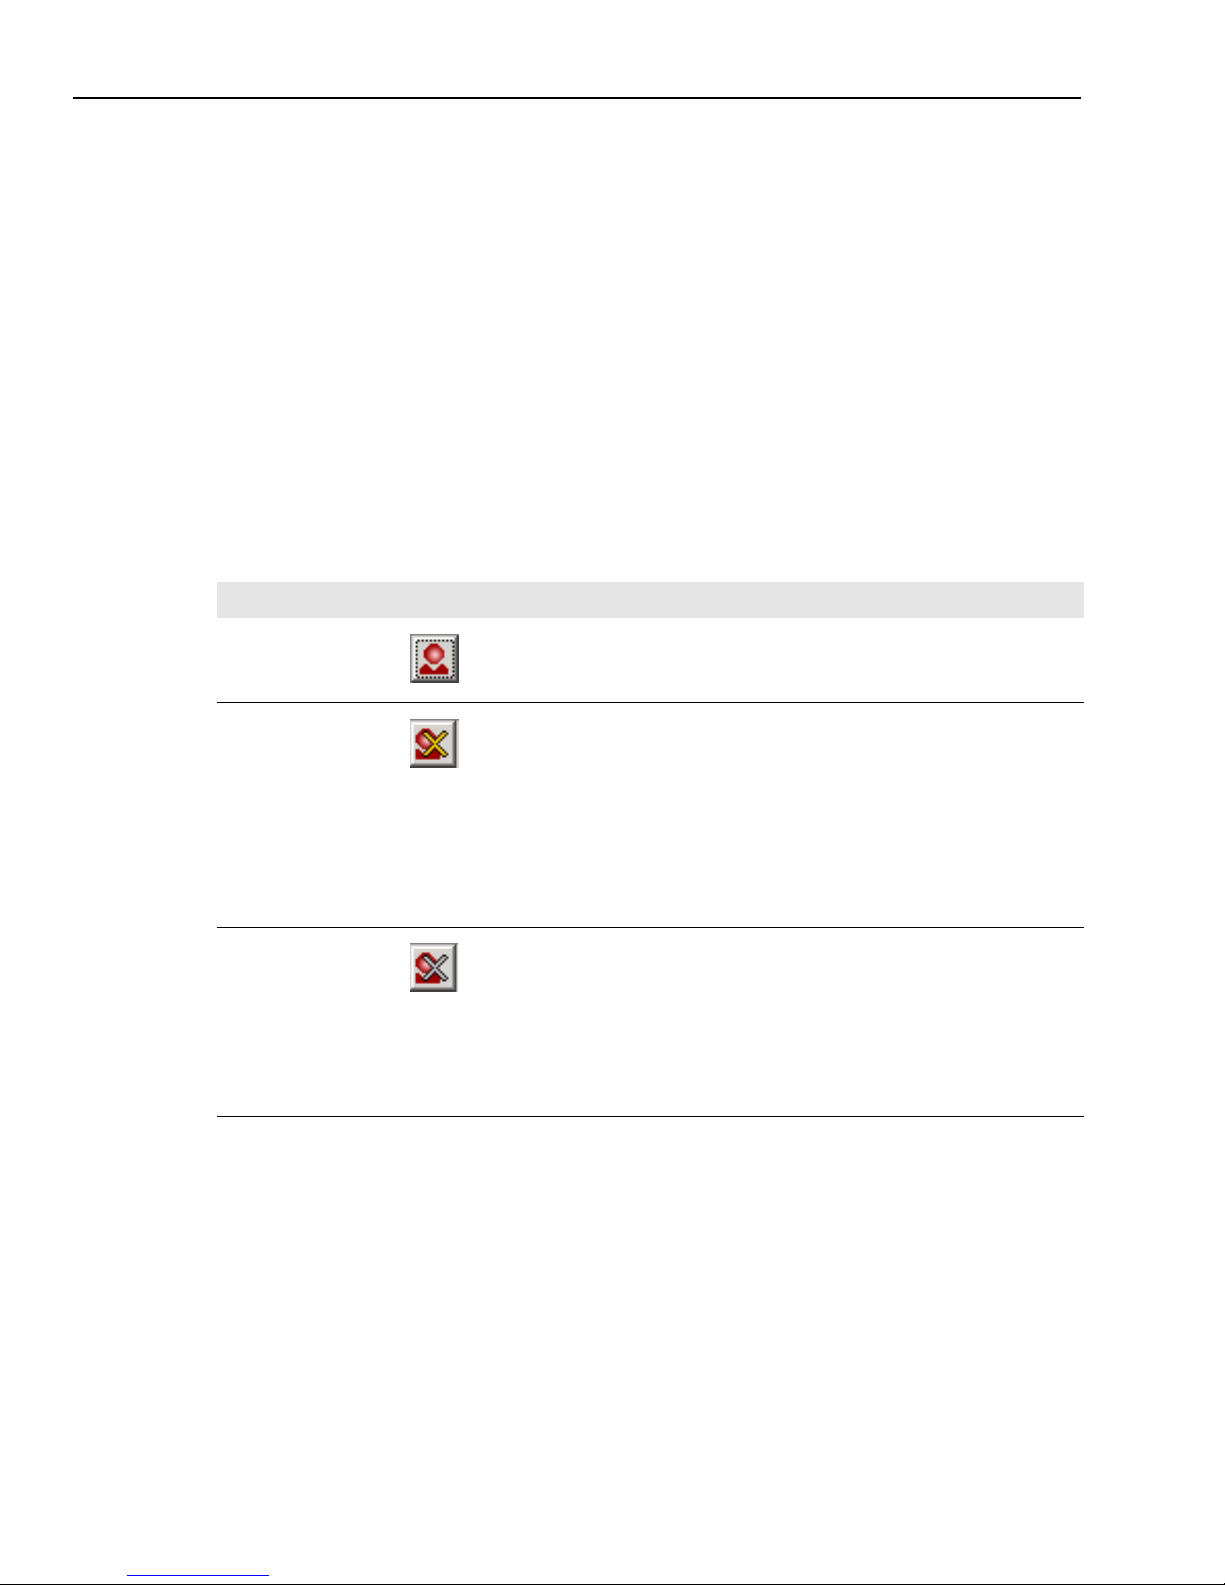
Chapter 2 Managing Avaya Agent
46 Avaya Agent User’s Guide
Changing Your Agent State
You can make yourself available or unavailable to receive voice, email, or chat contacts or to make
outbound calls. Your current state of availability to handle contacts is called your agent state.
The Agent button in the Status Control bar indicates your current agent state. If you are in
automatic mode, when you click the Agent button, you set your agent state for all channels
simultaneously. See “Changing State Across All Media Channels,” on page 47 for more
information.
If your administrator has given you permission to enter manual mode, you can also change your
agent state for single channels individually. This would allow you to click media channel buttons
to make yourself Available for one channel (Voice, for example), while you are in Aux-work
(Busy) for other channels (Email and Web Chat, for example). See “Changing State in a Single
Media Channel,” on page 47 for more information.
The three agent states are shown in the following table:
For information on making yourself available for outbound calling through Outbound Contact, see
“Joining Outbound Jobs,” on page 182.
Agent State Agent Button Description
Available You are available to accept new contacts. In manual mode, some
media channels may be unavailable, as shown by an X on the
buttons.
Aux-work (Busy) You are busy and are unavailable to accept contacts. In
automatic mode, you are unavailable in all media channels so
the Agent button and all media channels have
an X. In manual
mode, the Agent button and any unavailable media channels
have
an X.
Click to enter Aux-work when you go to lunch, handle Outbound
Contact calls, research a customer’s problem, or do any activity
where you cannot handle a contact. Wrapping up a contact is not
considered Aux-work.
Init. aux-work
(Transition)
You are in a transition state between Available and Aux-work.
For example, you have attempted to log out with one or more
contacts that need to be wrapped up. In both automatic and
manual modes, the Agent button has a grey X when you are in
this state.
At your contact center, you may need to enter the reason for
entering Aux-work and wrap up all active contacts on your
desktop.
Page 47
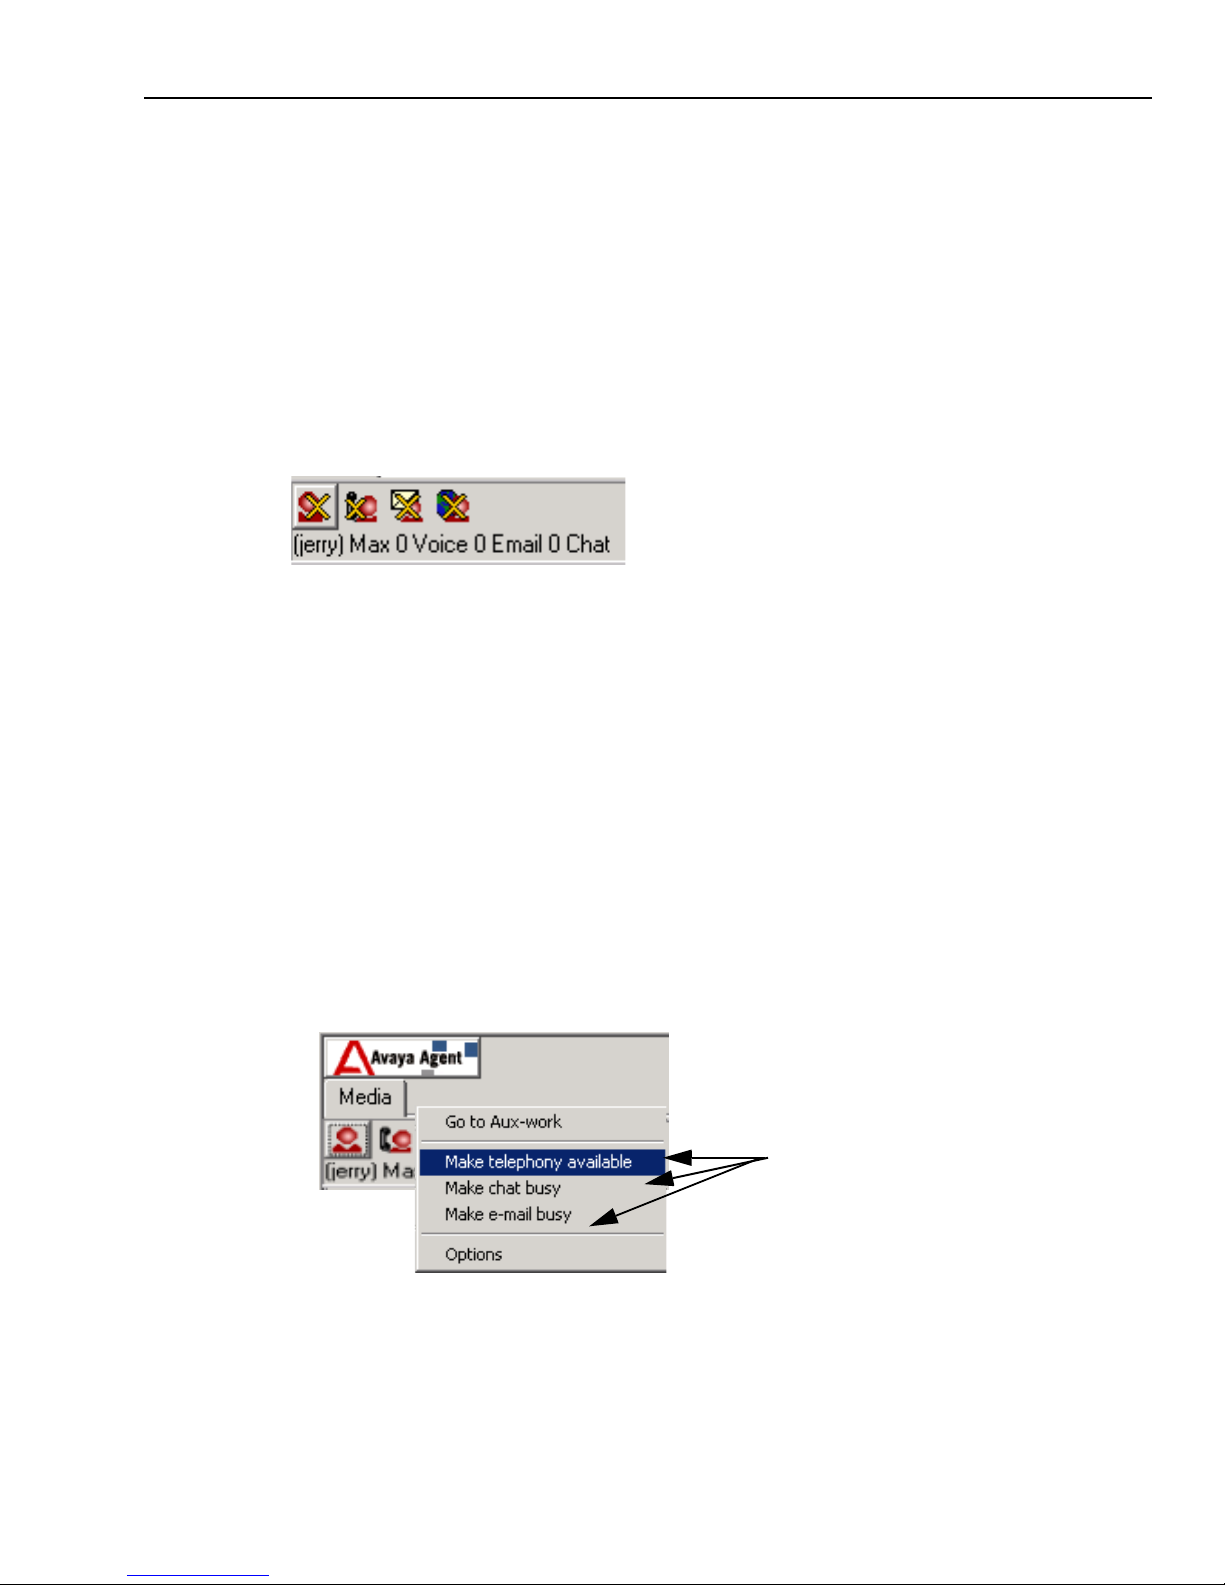
Setting Your Availability
Issue 1.0 June 2002 47
Changing State Across All Media Channels
Your mode of operation determines how much control you have over your agent state. Depending
on how Avaya Agent is configured, you may work in either of the following modes of operation:
n
Manual mode
n
Automatic mode
In automatic mode, the Agent button is the only one you can click. Click the Agent button until the
icon changes to the desired agent state. The other media channels change to the same state.
The Status Control bar for an agent in automatic mode set to Aux-work (Busy) in all media
channels looks like this:
Changing State in a Single Media Channel
To change your agent state for one media channel (manual mode only):
n
Click the media channel button on the Status Control bar until the button changes to the desired
agent state:
w
Available – The button does not have a yellow X.
w
Aux-work (Busy) – The button has a yellow X.
w
Init. aux-work (Transition) – The button has a grey X as your state changes between
Available and Aux-work.
OR
n
Right-click the media channel button in the Status Control bar. Then click the pop-up menu
option to change your agent state for that media channel.
The pop-up menu options change according to your agent state for each media channel.
Click one of these menu options to
change your agent state for that
media channel
Page 48
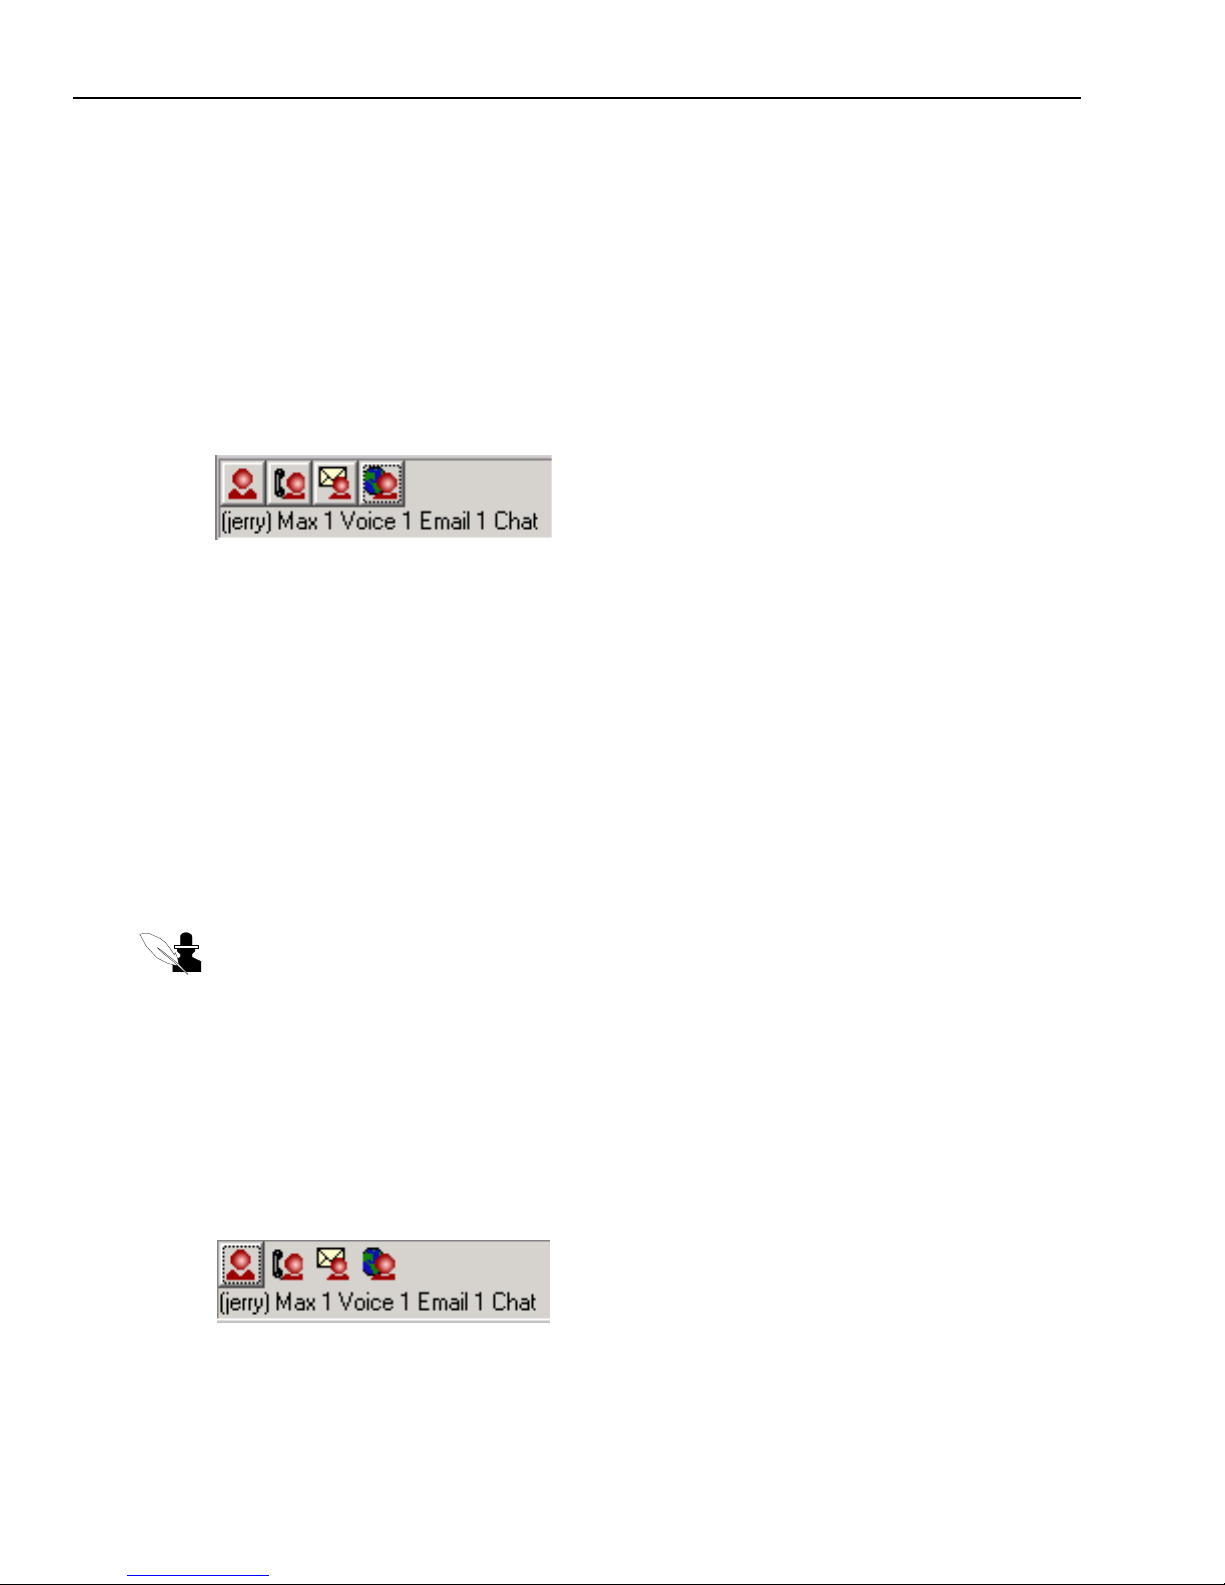
Chapter 2 Managing Avaya Agent
48 Avaya Agent User’s Guide
Manual Mode
If your administrator has given you permission to use manual mode, you can set your agent state
and channel loads manually. This means that you can reduce your channel loads if you want. In
manual mode, you can also change each of the Voice, Email, and Web Chat channels individually
from Available to Busy, and from Busy to Available. In other words, you can be Busy in one
channel while Available in other channels.
You must select a check box to enter manual mode. When you are in manual mode, the Status
Control bar contains channel buttons that you can click. The following illustration shows the
Status Control bar in manual mode:
In manual mode, you can do the following things:
n
Set your agent state across all media channels
n
Set your agent state for only one media channel
n
Set your channel load
To enter manual mode:
1 Right-click in the Avaya Agent Status Control bar.
2 Click Options in the menu to open the Channel Load dialog box.
3 In the Channel Load dialog box, select the Manual Mode check box.
4 Click Apply.
Note: If you cannot access the Manual Mode check box, your administrator has set your channel
load. Contact your administrator for further assistance.
Automatic Mode
In automatic mode, when you click the Agent button, you can only change your agent state across
all media channels at the same time. You cannot change your agent state for a single channel.
Therefore, you are always in the same agent state in all media channels.
When you are in automatic mode, the Status Control bar on the Media tab has only button—the
Agent button. The Voice, Email, and Web channels are icons that you cannot click.
Page 49
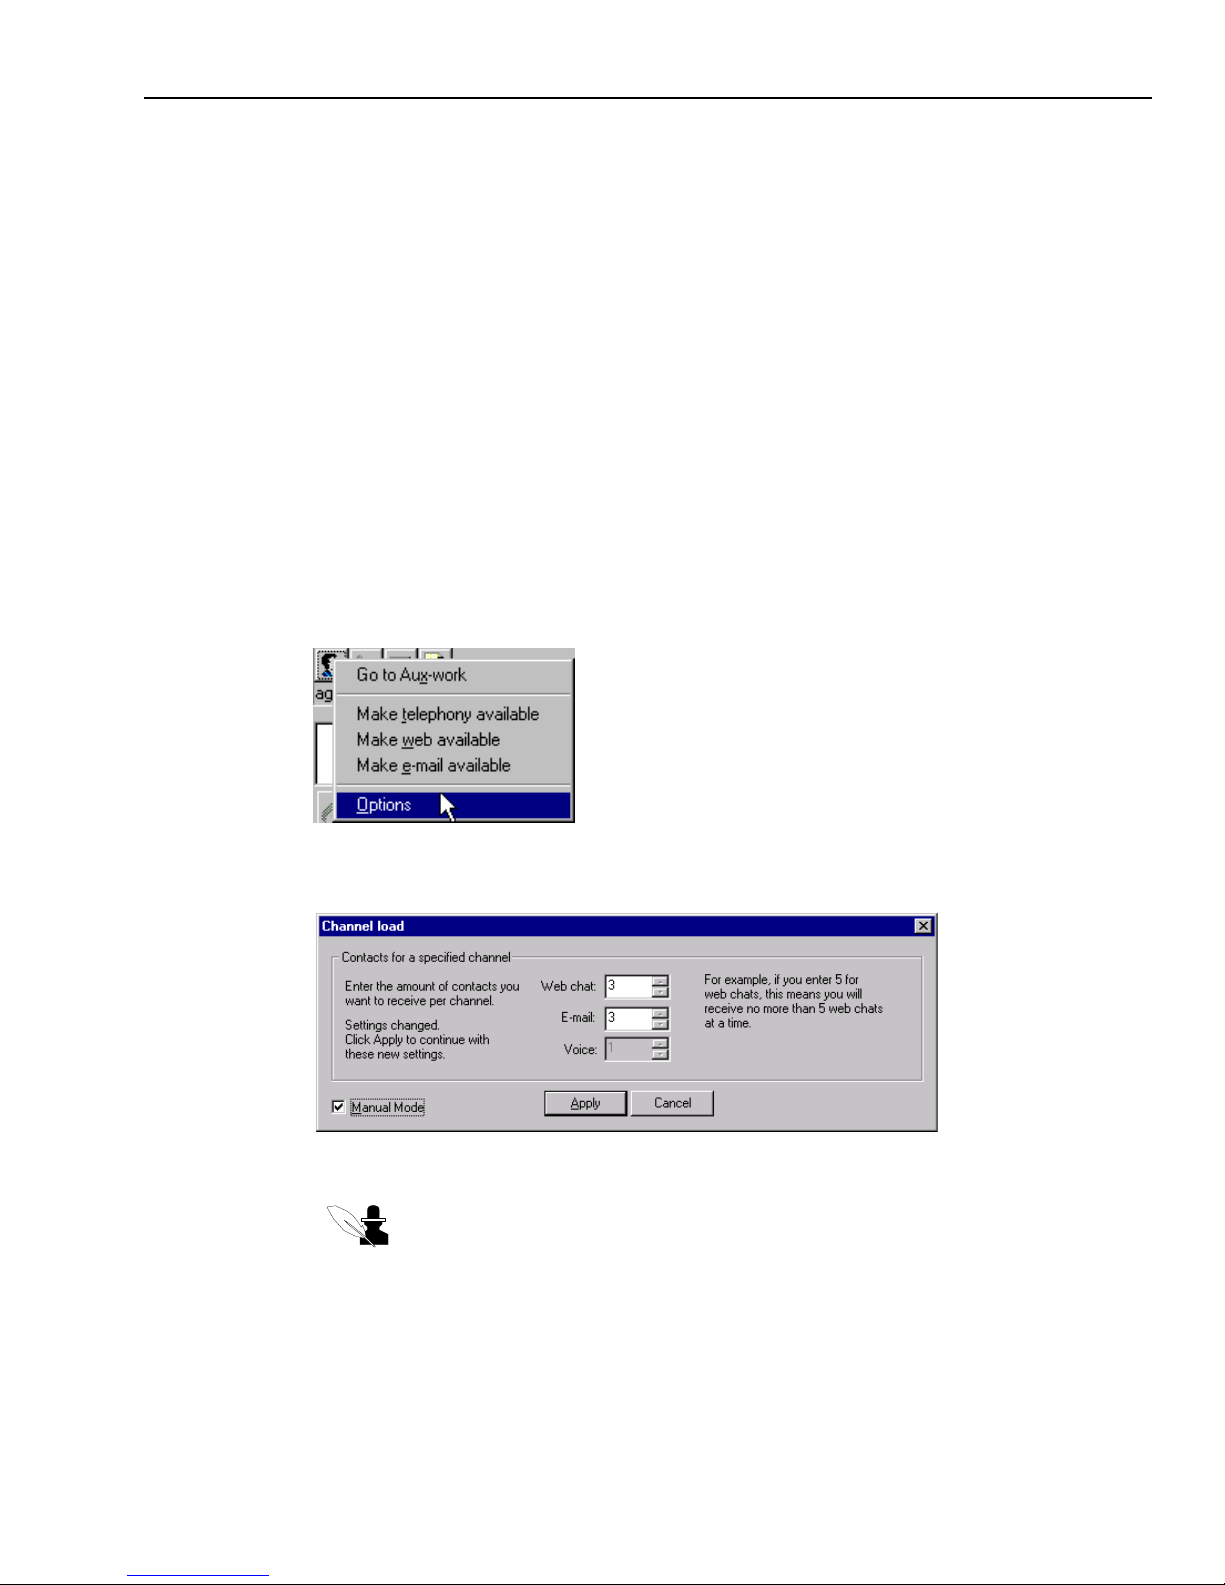
Setting Your Availability
Issue 1.0 June 2002 49
Setting Your Channel Loads
For each type of contact that you handle, you have a channel load, which is the number of contacts
in that media channel that you are enabled to handle at one time. You may be able to adjust your
channel loads, but they can never be higher than channel ceilings that your administrator set for
you. (The channel ceiling is the absolute maximum number that you can ever handle at one time.)
For example, if your administrator has set up your account so that the channel ceiling for chat
contacts is three, you may be able to set your chat channel load to three, two, one, or even zero.
But with a ceiling of three, you can never handle four chat contacts.
To be able to adjust your channel loads, your user account must be set up for permission to work in
manual mode. If you can select the Manual Mode check box in the Channel Load dialog box, that
means that you have permission to adjust your channel load.
To set your channel loads:
1 Right-click a media channel button in the Avaya Agent Status Control bar.
2 Click Options from the pop-up menu.
The Channel load dialog box is displayed.
3 Select the Manual Mode check box if it is not already selected.
Note: If you cannot select the Manual Mode check box, you cannot adjust your
channel load. Contact your administrator for further assistance.
Page 50
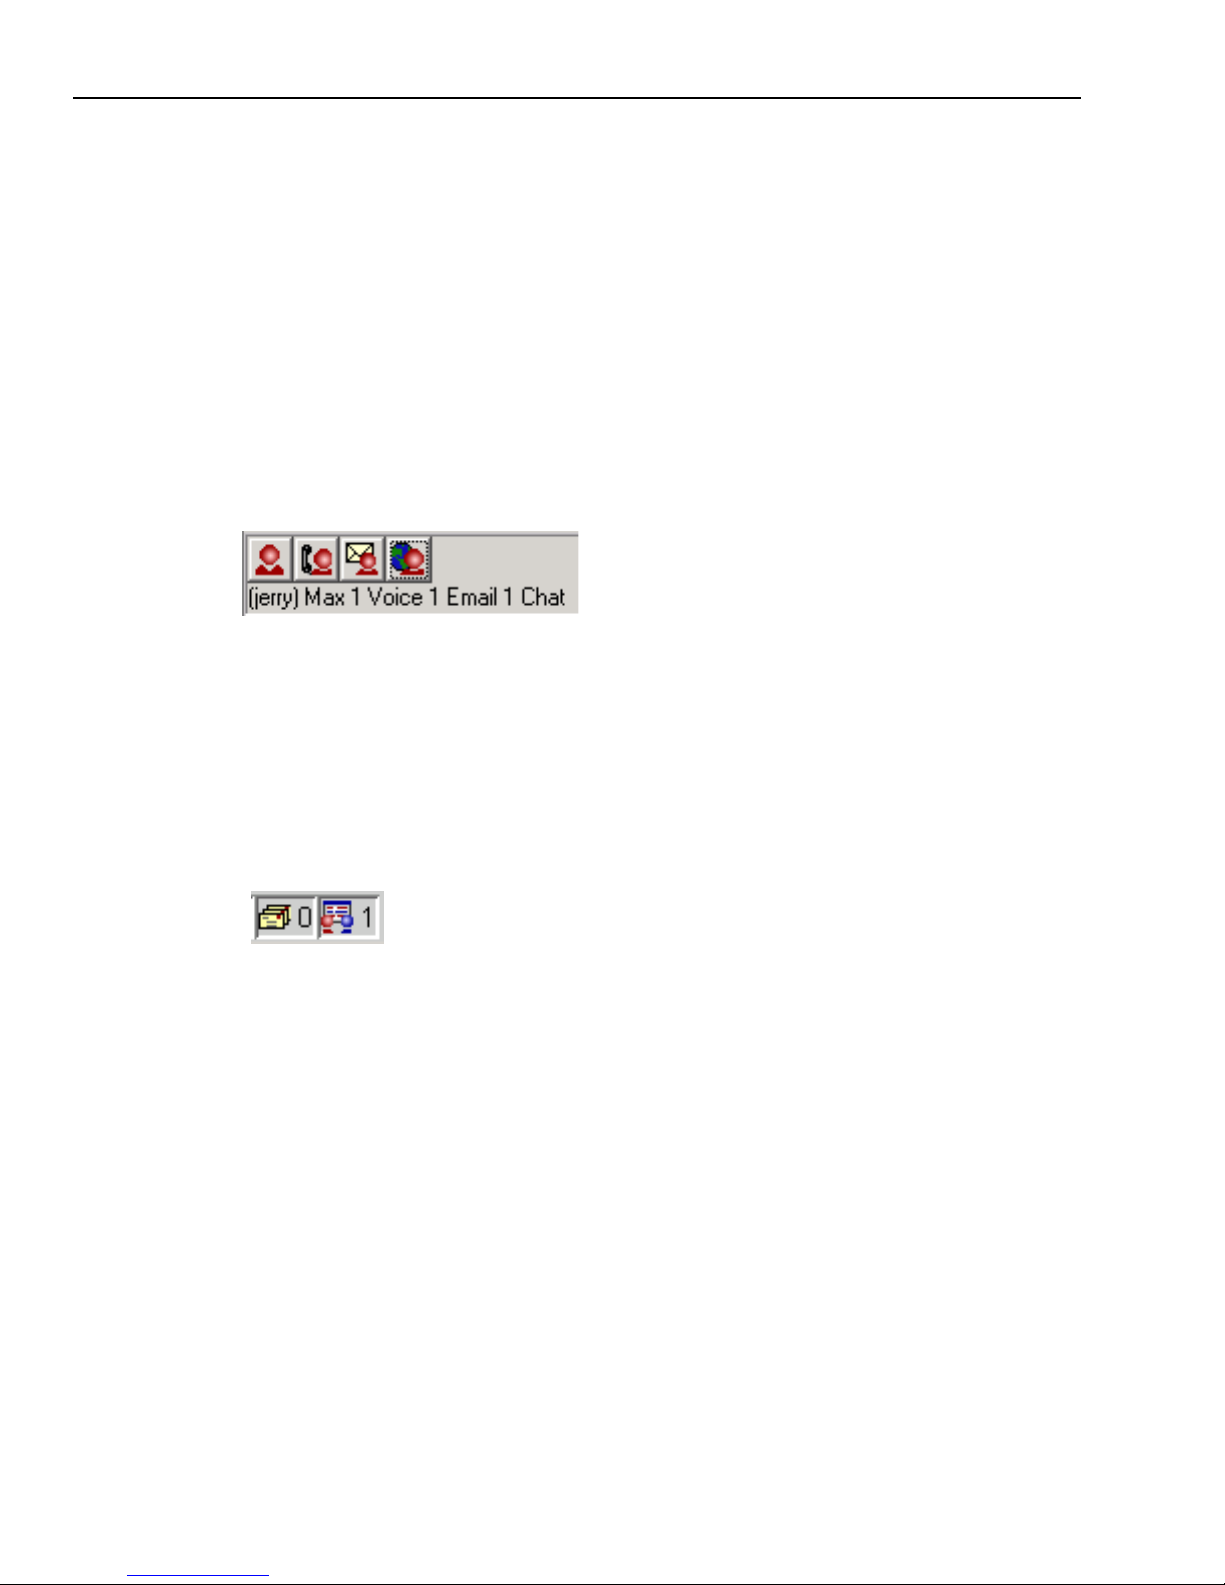
Chapter 2 Managing Avaya Agent
50 Avaya Agent User’s Guide
4 Enter the maximum number of contacts you want to be able to handle in the text box next to the
appropriate channels. Click the up arrow to increase the number or the down arrow to decrease
the number.
If the number stops changing when you click the arrow, you have reached the ceiling that your
administrator set for you. For example, you may not be able to set more than 1 or 2 chats.
If any field is disabled, you are not set up to handle sessions in that channel.
5 Click Apply.
The Avaya Agent Status Control bar shows the channel loads that you entered, which is the
maximum number of contacts that you can handle for each channel. The following illustration
of the Avaya Agent Status Control bar shows that the agent can handle a maximum of 1 voice
contact, 1 email contact, and 1 chat contact.
The Web Agent Status Control bar shows your current contact loads for chat and email, as set
by the program rules. The routing servers can reduce this number at any time according to
program rules that consider the number and type of contacts you are handling, the number of
contacts currently in the system, and so on. Therefore, the numbers can change while you are in
your current login session. Your current contact loads as shown in the Web Agent may be less
than the channel loads shown in the Avaya Agent. The following illustration of Web Agent
Status Control bar icons indicate a current contact load of 0 emails and 1 chat session. At the
current time, this agent cannot receive any email contacts, but later he may be able to receive
one again.
Opening an Application Focus
You can open a new Avaya Business Application focus from the Avaya Agent menu. (A focus is a
window containing information that enables you to complete a particular job.) The first time you
open a focus, it is maximized to use all available desktop space. If you resize the focus and save
the settings (from the application’s Focus menu), the focus automatically opens in the size that you
specified whenever you open the focus.
Whenever you open Avaya Agent, your initial focus remains minimized on your task bar until
Avaya Agent is running. Then the focus opens in the desktop.
If you open a new focus, it opens on top of any open focuses in your desktop. For example, if the
Avaya Agent focus is open in CallCenterQ and then you open the Customer focus, the Customer
focus opens on top of the Avaya Agent focus.
Page 51
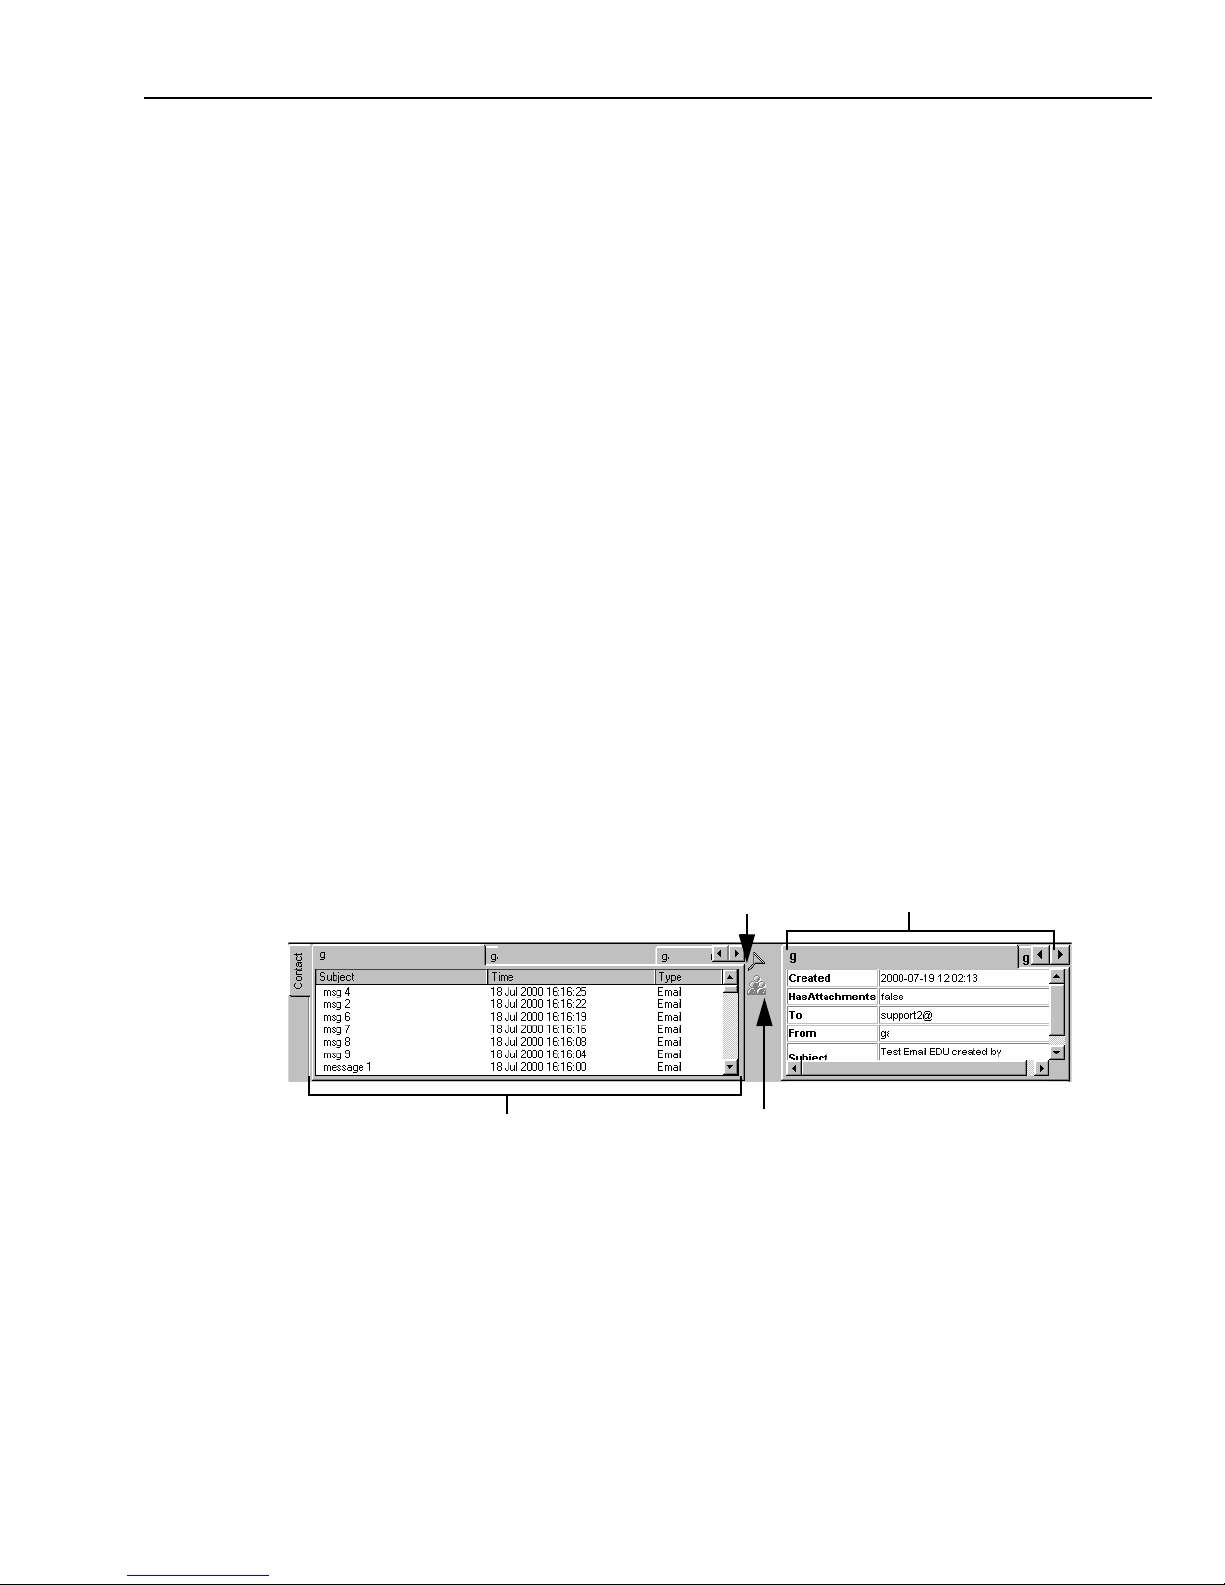
Viewing Customer and Contact Information
Issue 1.0 June 2002 51
To open a new Avaya Business Application focus:
1 Click the Avaya Agent button.
2 In the Avaya Agent menu, click Focuses.
3 From the Focuses submenu, click the desired application focus.
Viewing Customer and Contact Information
When a contact arrives in the Avaya™ Interaction Center (Avaya IC) contact center, an electronic
data unit (EDU) is created for that contact. The application then forwards the contact to an
available agent, using the rules that have been set up by your system administrator.
The Avaya Agent on your desktop displays information about the currently active contacts that
have been assigned to you. The task lists in the Media pane display the basic information about
each contact. The Contact pane that is displayed near the bottom of the Avaya Agent contains three
areas where you can access more detailed information:
n
The EDU Viewer displays detailed information about the active contact, including the creation
date and time.
n
The Contact History Browser provides information about previous contacts with the same
customer.
n
The Active History Browser becomes available only when another agent is currently handling
an email contact with the same customer. The Active History Browser provides information
about the other active email contact or contacts.
To view the information in the Contact pane, click a contact in the task list to bring it into focus.
Contact History Filter
Active Contact ViewerContact History Browser
EDU Viewer
Page 52

Chapter 2 Managing Avaya Agent
52 Avaya Agent User’s Guide
Viewing Active Contact Information
You can use the EDU Viewer for most information about your active contacts. You may need to
check the Active Email Viewer to see all active email contacts.
Using the EDU Viewer Information
When you select a contact in a task list, the EDU Viewer brings the tab containing information
about the active contact to the front.
Using the Active Contact Viewer
Another agent may have deferred an email contact from a customer that you are handling by voice,
email, or chat. The agent who has deferred the email plans to reply to the customer at a later time.
The deferred email remains in the other agent’s Email task list. Deferred emails are not displayed
in the Contact History Browser because they have not been completed.
You can see information about the deferred email contacts in the Active Contact Viewer. For each
active email contact from that customer in another agent’s Email task list, the Active Contact
Viewer di s p l a y s :
n
The date and time when the email contact was created
n
Whether there are any attachments
n
The contents of the “To” field
n
How many times the email contact has been forwarded
n
The sender’s email address
n
The subject line
If the customer has several active email contacts in the system, information about each contact is
displayed in a separate tab.
To view information about a deferred email contact:
1 Double-click the new email contact to open it in your desktop and view information about that
contact in the EDU Viewer.
2 Click the Active Contact Viewer button, which is located between the two boxes in the Contact
pane.
Note: If the button is disabled, there is no other active email contact from the customer in the
contact center.
If any deferred email contacts from this customer exist, the Active Contact Viewer dialog box
opens and displays information about them.
Page 53

Viewing Customer and Contact Information
Issue 1.0 June 2002 53
Viewing Contact History Information
The Contact History Browser contains information about completed contacts that your current
customer has had with the contact center. Contacts that have not yet been wrapped up are not
listed.
The Contact History Browser contains a tab for each of your current contacts. Each tab contains
the history of that contact, that is, the previous contacts the customer has had with the contact
center. Avaya Agent automatically brings the tab for the active contact to the front of the Contact
History Browser. To view information about another contact, click the appropriate tab. To view
more details of a previous contact, double-click the email or chat contact in the Contact History
Browser.
Note: Current information about an active customer contact does not appear in the Contact
History Browser until you have wrapped up that contact.
The information you see depends on the type of contact:
n
Voice contact – Provides only the information shown in the Contact History Browser.
n
Email contact – When you double-click, displays the History dialog box, which contains two
tabs:
w
Tracking Number History tab, which provides a more detailed description of each contact
w
Customer History tab, which provides a detailed customer history
n
Chat contact – When you double-click, displays your Internet browser and displays a transcript
of the previous chat session.
Filtering Contact History Information
If the current customer has a large number of contacts in the Contact History Browser, you can use
the Contact History Filter to filter records before they are displayed. For example, if you click
Email in the Media Type filter and enter May 1, 2002 and May 31, 2002 in the Time filter, the
Contact History Browser displays only email contacts received from a customer in the month of
May.
You can filter and display records by:
n
Media type
n
Date and time the contacts were received
n
Last x contacts made by a customer (for example, the last five contacts)
Page 54
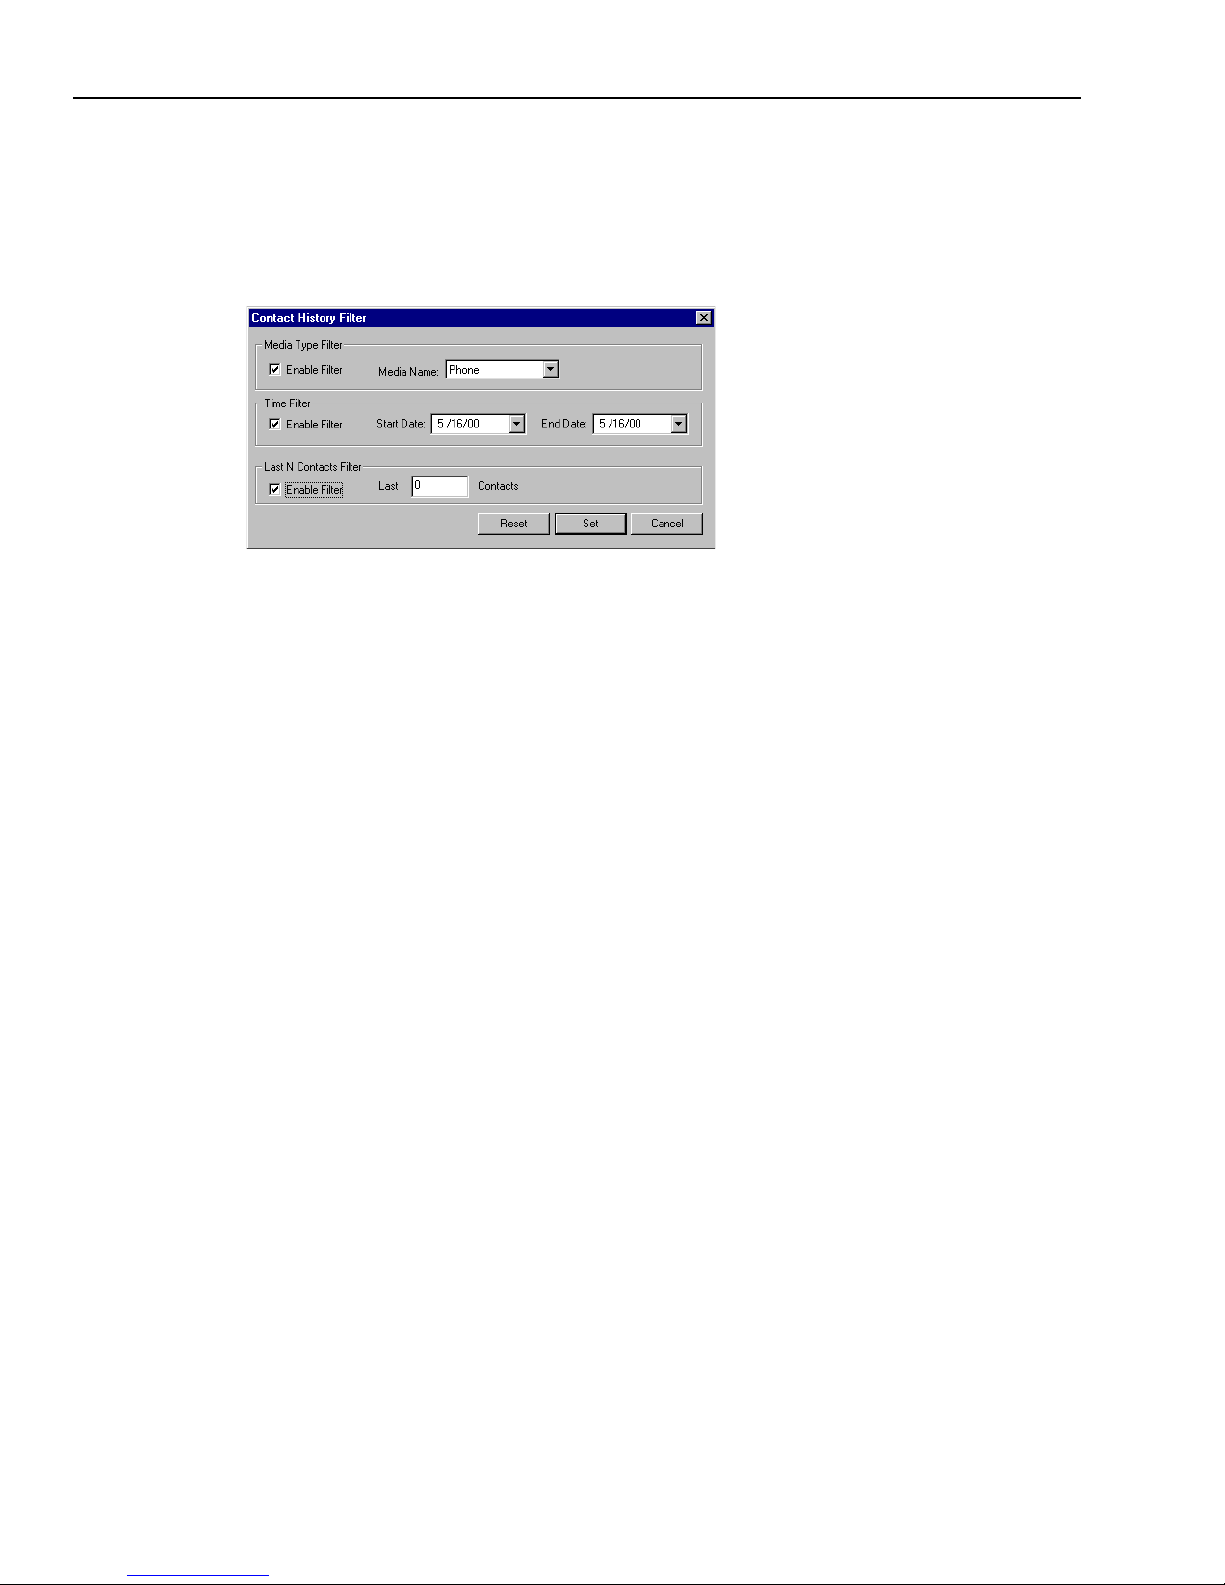
Chapter 2 Managing Avaya Agent
54 Avaya Agent User’s Guide
To filter contacts in the Contact History Browser:
1 Click the Contact History Filter button. This is the top button between the two boxes of the
Contact pane.
The Contact History Filter dialog box is displayed.
2 Select the Enable Filter check box for the desired filter or filters.
3 Complete the required fields for the selected filter or filters, as follows:
w
Media Type Filter – Select Phone, Email, or Web from the Media Name list.
If you want to view contacts of all media types, do not click this filter.
w
Time Filter – Click a start date and an end date in the drop-down lists.
w
Last N Contacts Filter – Enter a numerical value for the last number of contacts you want to
view (for example, enter 10 to view the customer’s last ten contacts).
4 Click Set.
Clearing Contact History Filters
To clear all contact history filters:
1 Click the Contact History Filter button.
2 In the Contact History Filter dialog box, click Reset.
Page 55
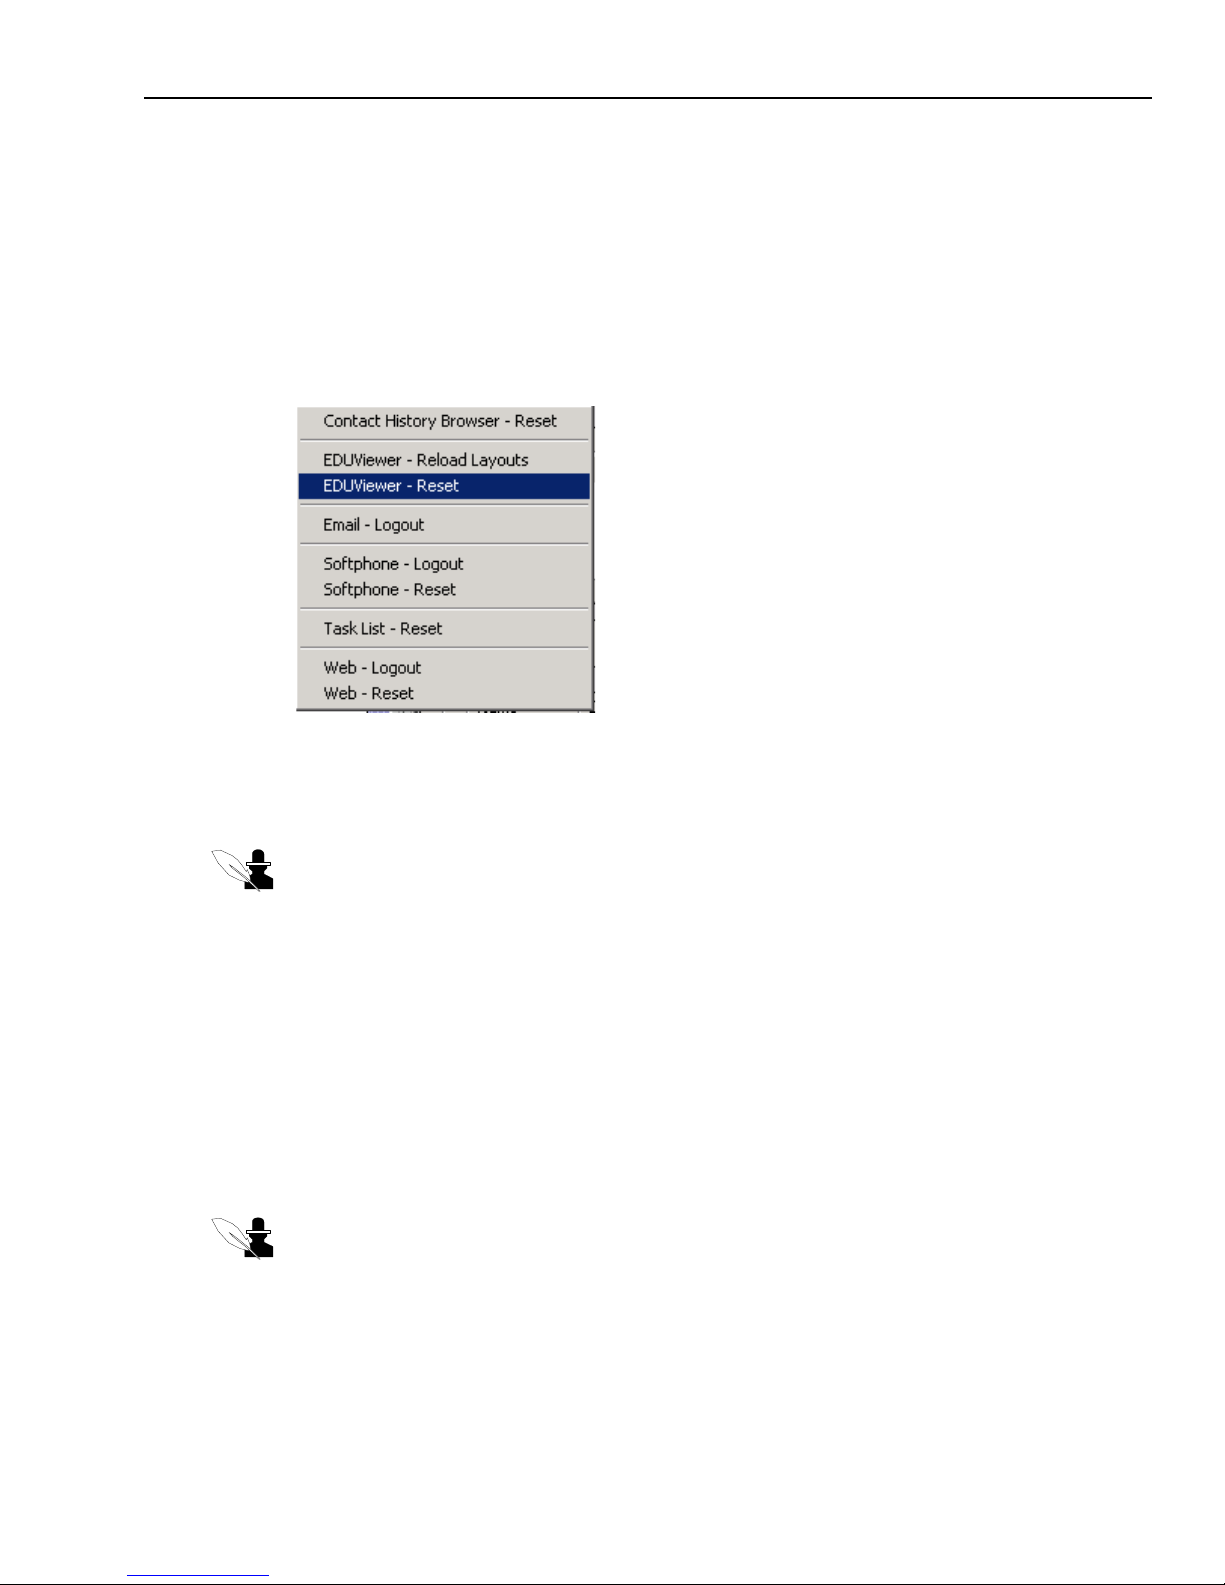
Reloading Layouts in the EDU Viewer
Issue 1.0 June 2002 55
Reloading Layouts in the EDU Viewer
In addition to displaying details of your current contacts in your task lists, the EDU Viewer
contains the instructions that the software uses to display them. (The instructions are not visible to
you.)
If your administrator instructs you to clear all current contacts from the EDU Viewer or to reload
updated layouts, you use options in a pop-up menu to do these tasks, as described in the following
sections.
Clearing Current Contacts in the EDU Viewer
You use the EDUViewer - Reset command to clear all tabs of the EDU Viewer.
Note: Only use the EDUViewer - Reset command if your administrator instructs you to do so.
To clear your current contacts:
1 Right-click in an empty part of the Avaya Agent.
2 Click EDUViewer - Reset from the menu.
3 Click OK.
Reloading EDU Viewer Layouts
You use the EDUViewer - Reload Layouts command to reload the EDU Viewer formats onto your
desktop after your administrator has changed them.
Note: Only use this command if your administrator instructs you to do so.
To reload the EDU Viewer formats:
1 Right-click an empty part of the Avaya Agent.
Page 56

Chapter 2 Managing Avaya Agent
56 Avaya Agent User’s Guide
2 Click EDUViewer - Reload Layouts from the menu.
The revised templates are loaded onto your system.
3 Click OK.
Using the Unified Agent Directory
The Unified Agent Directory (UAD) is a directory full of information about resources in your
contact center. Depending on the set-up at your company, the UAD may contain information about
the following:
n
Queues, which are groups of agents with certain similar skills or knowledge that are used for
routing contacts
n
Agents, including:
w
Administrators
w
Supervisors
w
External agents, who are people, usually outside of your company, who possess special
knowledge or skills
w
Agents with particular skills, such as speaking other languages or knowing a particular
operating system
w
“Devices” that handle customers automatically, such as IVRs (Interactive Voice Response
Units)
The UAD offers several methods of looking up information, such as using the Find dialog box to
do a search for specific types of agents and saving your search as a new tab on the UAD. It is a
good idea to become familiar with these methods. See “Looking Up Information,” on page 58.
Page 57
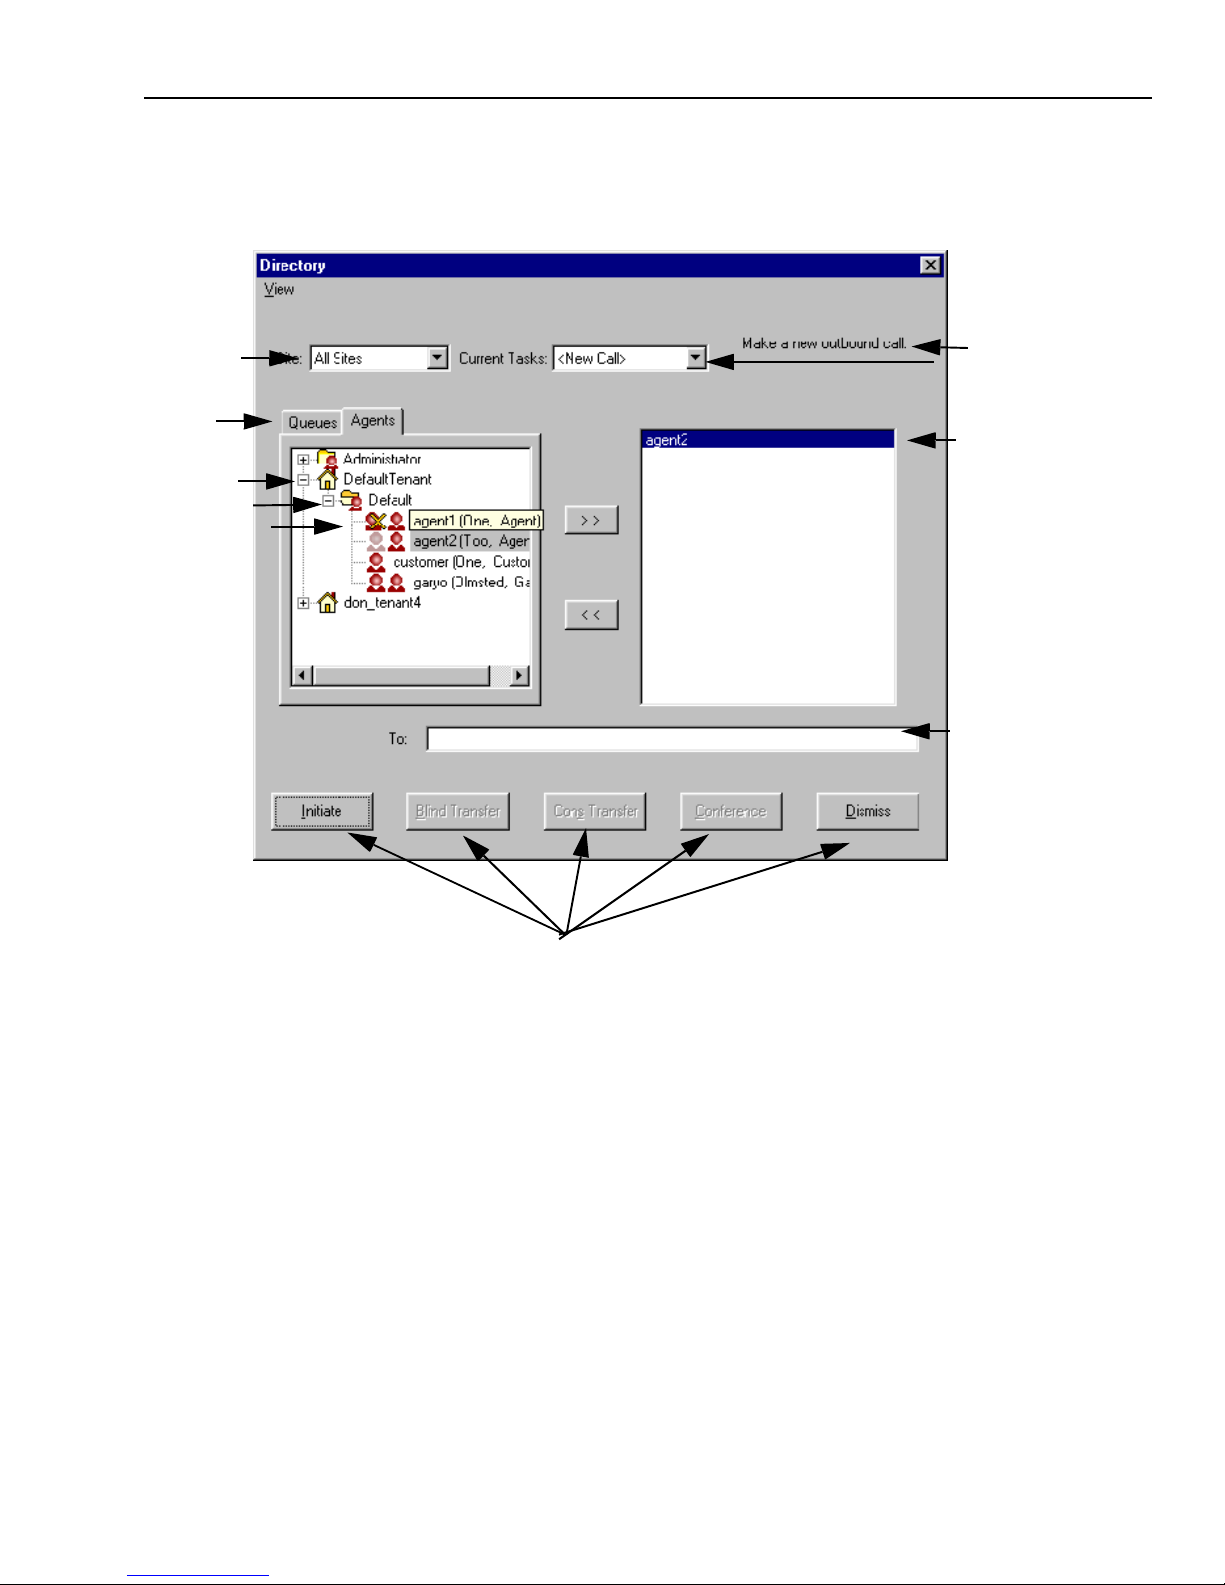
Using the Unified Agent Directory
Issue 1.0 June 2002 57
You can use the UAD in various ways, depending on how it is set up at your contact center and
what you want to do. An agent is using the UAD in the following illustration to initiate a voice
contact:
You can use the UAD for the following purposes:
n
“Looking Up Information,” on page 58
n
“Initiating a Voice Contact,” on page 81
n
“Transferring a Voice Contact,” on page 77
n
“Transferring a Chat Contact,” on page 142
n
“Sending an Email to an External Agent,” on page 103
n
“Transferring an Email Contact,” on page 105
n
“Originating an Outbound Email,” on page 113
Task description
Selected item
Text field for name, address,
telephone number
Command buttons for various operations, depending on media and task you are performing
Tenant
Tabs
Workgroup
Agent
Site menu
Menu of current contacts
Page 58

Chapter 2 Managing Avaya Agent
58 Avaya Agent User’s Guide
Looking Up Information
Whether or not you are currently handling contacts, you can use the UAD to look up information
about resources at your company. You may be able to find contact information, such as email
addresses and phone numbers, of other agents, supervisors, external agents, or agents with
particular skills.
This section explains how to look up information in the UAD, under the following topics:
n
“Looking Up Queues with the Queues Tab,” on page 58
n
“Looking Up Agents with the Agents Tab,” on page 59
n
“Looking Up Agents with the Find Option,” on page 62
n
“Filtering Data Displayed in Tabs,” on page 60
n
“Updating UAD Information,” on page 66
To display the UAD, click the Directory button on the Avaya Agent. Your UAD may have the
following tabs:
n
Queues tab – The UAD always has a Queues tab. When this tab is selected, the UAD displays
queues. For example, there may be a Hardware Sales queue, a Software Sales queue, a
Hardware Support queue, and a Software Support queue, each containing agents who handle a
particular type of customer.
n
Agents tab – The UAD on your desktop may or may not have an Agents tab. If the tab is
present, it contains lists with many items of information about the Avaya IC users in your
contact center.
n
Contact list tabs for individual workgroups – Your contact center may have set up contact list
tabs in the UAD. Each contact list tab contains information about agents in a specific
workgroup. For each agent, the contact list shows the agent’s login name, display name, and
primary email address.
Looking Up Queues with the Queues Tab
The Avaya IC software routes incoming customer contacts to various queues. A queue is a group
of agents with similar skills and knowledge assigned to handle specific types of customer contacts.
For example, there may be a Hardware Sales queue, a Hardware Support queue, a Software Sales
queue, and a Software Support queue, each containing agents who handle a particular type of
customer.
The Queues tab of the UAD lists the queues that administrators at your contact center have set up
in the database and marked for inclusion in the UAD (marked as “addressable”). Queues include
agents enabled to handle a single media type (Voice, Email, or Chat) or the combination of Voice
and Chat.
You use the Queues tab when you want to transfer a voice contact or email contact to a queue. The
transfer will be assigned to the first available agent in that queue. (Chat is the exception. You
cannot transfer a chat contact to a queue.) For information, see “Transferring an Email Contact,”
on page 105 or “Transferring a Voice Contact,” on page 77.
Page 59
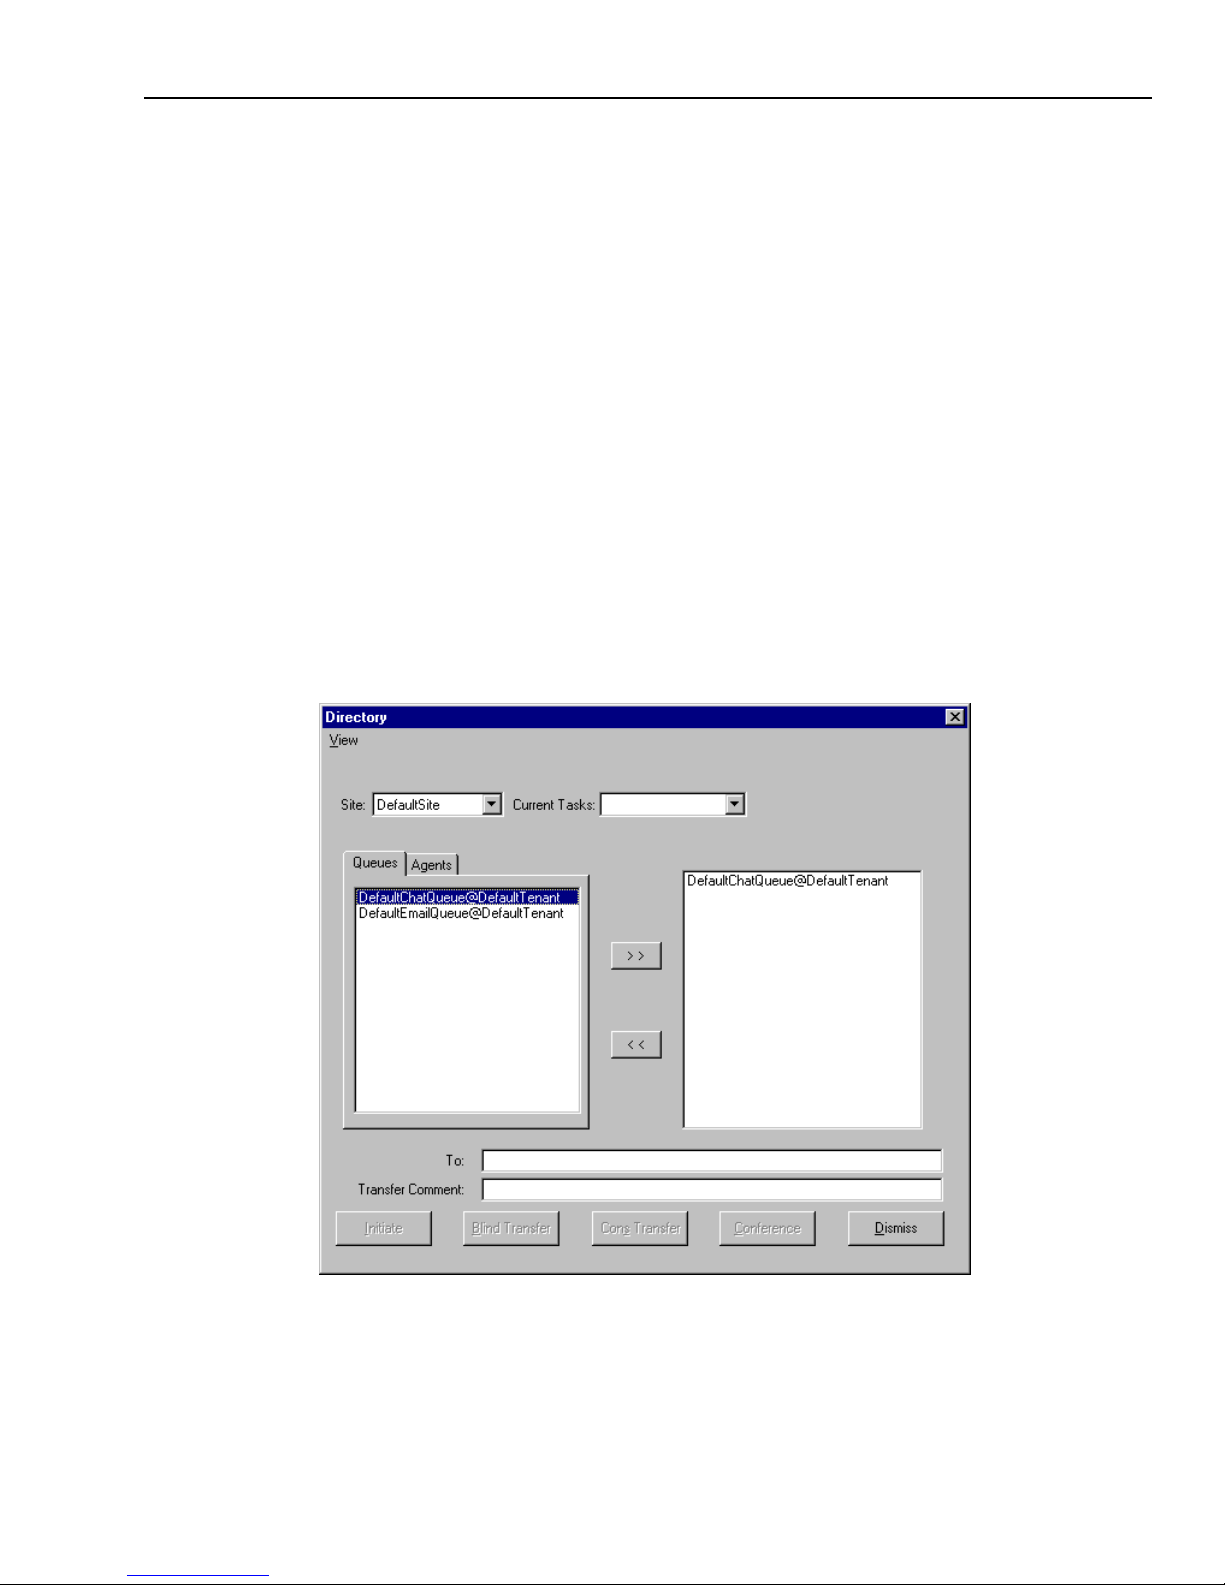
Using the Unified Agent Directory
Issue 1.0 June 2002 59
By default, the Queues tab displays only the queues that handle the same media channels that you
are currently handling. If you want to change what is displayed in the Queues tab, see “Filtering
Data Displayed in Tabs,” on page 60.
Looking Up Agents with the Agents Tab
If your UAD has an Agents tab, you can use it to look up information about people who work for
the contact center. Typically, you will find the following types of information about each person
who is listed in the Agents tab: General agent information (such as last name, first name, login ID)
n
Telephone numbers (such as primary, secondary, mobile, pager, and fax)
n
Email addresses (such as internal and personal)
If your UAD does not have an Agents tab, use the instructions in “Looking Up Agents with the
Find Option,” on page 62.
To look up agent information in the Agents tab of the UAD:
1 Click the Directory button in the Avaya Agent Media pane.
The UAD is displayed.
Your Unified Agent Directory may look like this when you open it.
Page 60

Chapter 2 Managing Avaya Agent
60 Avaya Agent User’s Guide
2 Click the Agents tab (or the tab of a workgroup, if you have one you want to use).
The tenant and workgroups that you belong to, and the agents within these groups, are
displayed in a tree structure in the left side of the window. A house icon represents tenants and
an icon of a folder beside an agent represents workgroups.
Note: A tenant may be a company, a location (such as New York or Boston), or a
workgroup (such as Sales or Support).
3 If the person you are looking for does not belong to this tenant or these workgroups, make an
appropriate selection from the Site drop-down menu. If you are not certain which of these
tenants and workgroups the person belongs to, select All Sites.
4 Navigate through the tree structure on the left. Click on the plus button (+) beside any tenant or
workgroup to display its contents. Use the scroll bars as necessary to see more information.
A red icon of a person represents an agent. There may be two side-by-side icons for an agent.
Agents who have logged in have an agent state, and the first icon indicates that agent state, as
follows:
w
Agent head with check mark = Available
w
Agent head with a yellow X = Aux-work (Busy)
w
Shaded out agent head = Logged-out
5 When you find the name of a person you want information about, right-click the name and click
Properties.
The Properties dialog box is displayed for this person.
6 Click the appropriate tab in the Properties dialog box to find the desired information about this
person.
Tip: If you leave the UAD open for awhile, the information may not be current. You can rightclick a workgroup and select Update to update the information in that workgroup. For more
information, see “Updating UAD Information,” on page 66.
Filtering Data Displayed in Tabs
You can use the Filter dialog box to modify what you see in the Queues tab and the Agents tab of
the UAD, as follows:
n
Queues tab – You can filter queues displayed in the Queues tab by media type only. By default,
the Queues tab displays only the queues that handle the media that you are currently handling.
For example, if you are currently handling a voice contact, you only see queues of agents who
handle Telephony. If you are currently handling both Voice and Chat, you only see queues for
those two media. If you change your active contact from one media type to another while
displaying the UAD, the queues that you see change to that media type as well.
n
Agents tabs – You can filter agents displayed in the Agents tab by the media type that they
handle, their current agent state, and their agent type.
Page 61
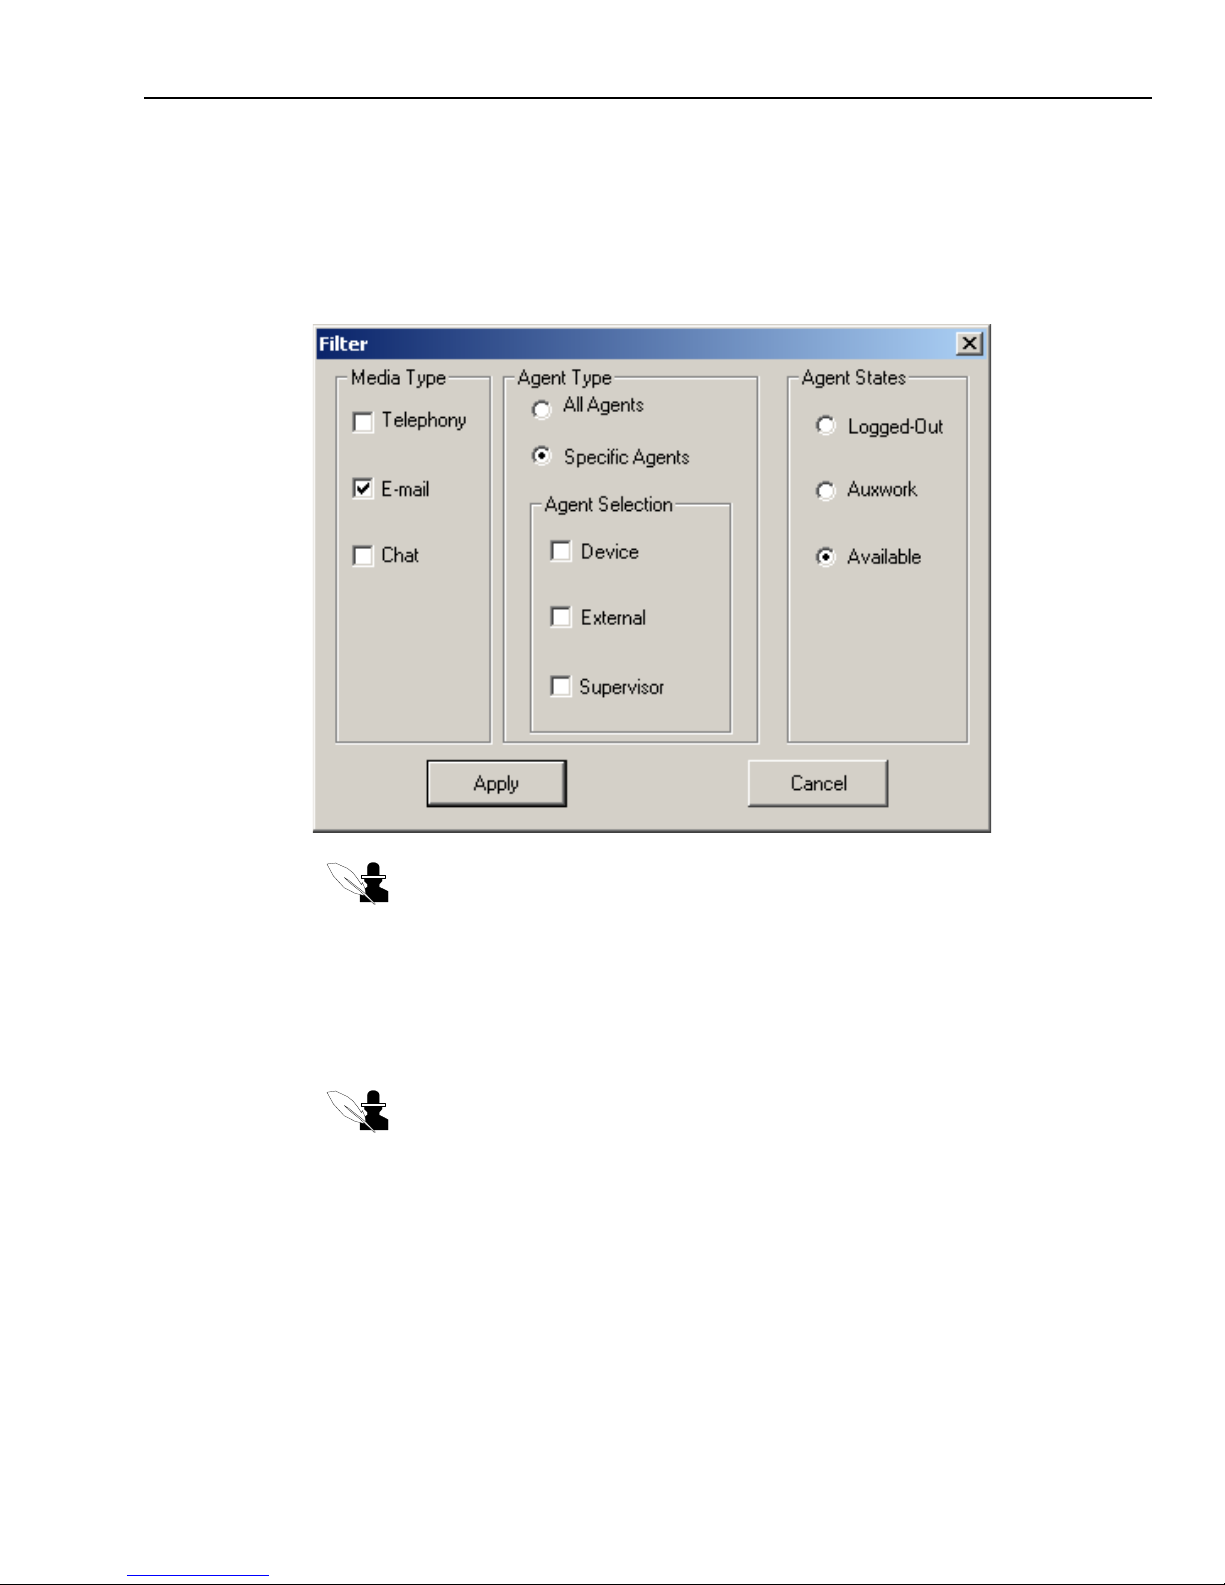
Using the Unified Agent Directory
Issue 1.0 June 2002 61
To filter queue or agent information:
1 Click the Directory button on the Avaya Agent to display the Unified Agent Directory (UAD).
2 Click View > Filter.
The Filter dialog box is displayed.
Note: If you do not see a Filter item in the UAD View menu, or if the Filter item is
not enabled, your contact center does not use this feature.
3 If you want to modify the display of the Queues tab, take the following steps:
a In the Media Type frame of the dialog box, select or de-select the types of media whose
queues you want to be displayed.
b In the Agent Type frame, select Specific Agents and then Device.
Note: This is the only selection that applies to the Queues tab. Any other selections
in this dialog box are ignored when you select Device.
c Click Apply.
4 If you want to modify the display of the Agents tab, do the following:
a Click the Media Type check boxes as desired. Agents who handle the media types that are
checked will be displayed in the Agents tab.
Page 62

Chapter 2 Managing Avaya Agent
62 Avaya Agent User’s Guide
b If you want to narrow your search to display only external agents or supervisors, select
Specific Agents and then select either of those check boxes, or both check boxes.
Note: The Devices selection is related to the display of the Queues tab, not the
Agents tab. External agents are people, usually outside of your company, who have
possess special knowledge or skills. They have been appointed as external agents to
assist agents with customer questions and problems.
c If you want to include only those agents who are currently Available, Busy (in Aux-work),
or Logged Out, select those agent states.
5 Click Apply.
The tabs are updated according to your selections.
Looking Up Agents with the Find Option
The Find option offers another method of looking up information about agents at your contact
center. With this dialog box, you can search for agents in the following ways:
n
Media type (Voice, Email, or Chat)
n
Agent type (External, Supervisor, or Device)
n
Current agent state (Available, Busy, or Logged Out)
n
Skills (such as knowledge of a language or an operating system) and skill proficiencies
n
Personal information (First Name, Last Name, and so on)
The Find option finds three pieces of information about each agent: login ID, display name, and
media types that are enabled.
You can save the results of each search as a tab that is added to the main UAD dialog box. The tab
lists all the agents found in the search but provides only their login ID. This can help you find an
agent for a specific need when you need one, such as an agent who is proficient in a specific
language. For example, if you occasionally receive voice contacts from people who speak
German, you could create a German tab for all available agents who speak German proficiently
and who handle Voice. Then when you need to transfer a call to a German speaker, you can find
one in your tab.
Note that the agent state is not updated in the tabs you create. An agent who was available when
you created the tab may not be available when you use it later. See “Updating UAD Information,”
on page 66.
Page 63
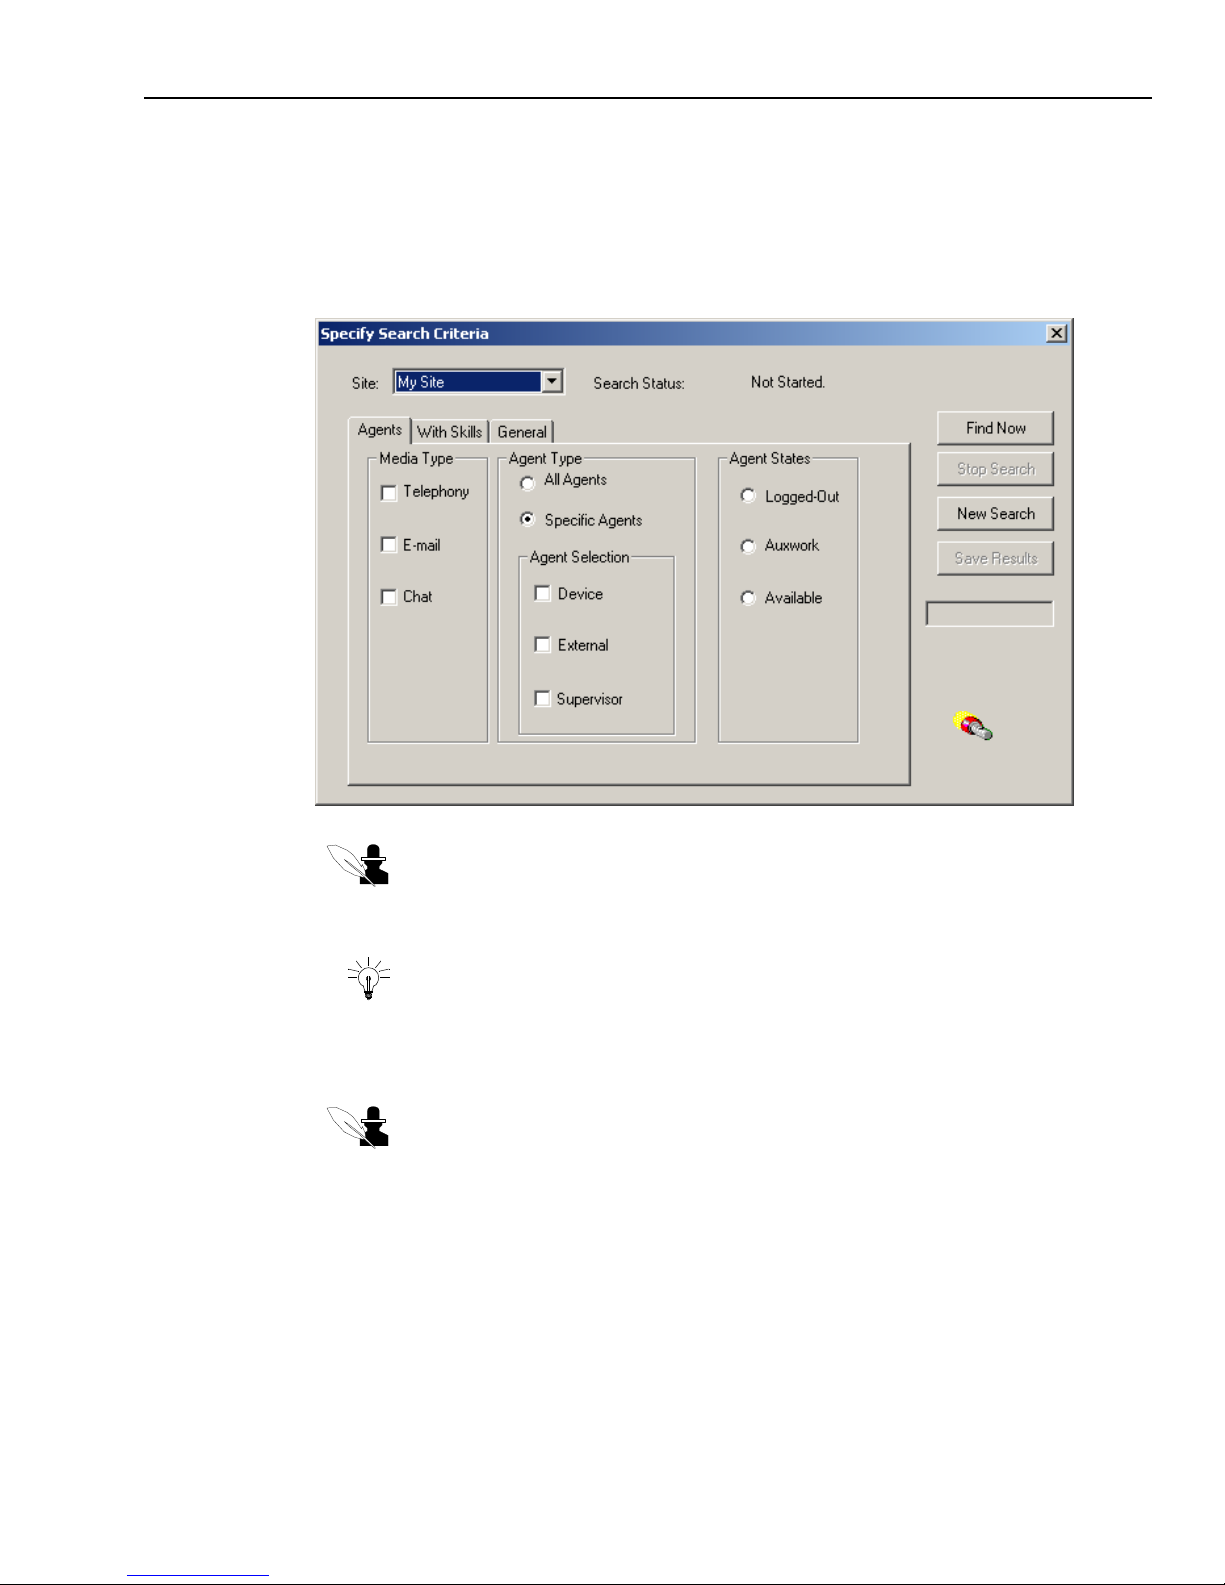
Using the Unified Agent Directory
Issue 1.0 June 2002 63
To look up agent information with the Find option:
1 Click the Directory button on the Avaya Agent to display the Unified Agent Directory (UAD).
2 Click View > Find.
The Specify Search Criteria dialog box is displayed.
Note: If you do not see a Find item in the UAD View menu, or if the Find item is not
enabled, your contact center does not use this feature.
3 From the Site menu, select the location that you want to include in the search.
Tip: You can use any of the three tabs (Agents, Skills, or General) in the Specify
Search Criteria dialog box to select the criteria that will be used to search for the
person you are looking for. The tabs are cumulative, that is, the search will only find
agents that meet the criteria you select in all the tabs when you click the Find Now
button.
Note: Go the appropriate step below about the tabs you want to use. Skip the steps
about tabs you do not want to use.
4 Agents tab – Select all the criteria that you want to include in the Agents tab, as follows:
a In the Media Type section, select the media that agents you are looking for are enabled to
handle.
b In the Agent Type section, select External or Supervisor if you want to find only external
agents or supervisors. Select Device only if you want to find or non-human resource like an
IVR queue.
Search Results
Number will appear
here. Change to a
name for new tab.
Page 64
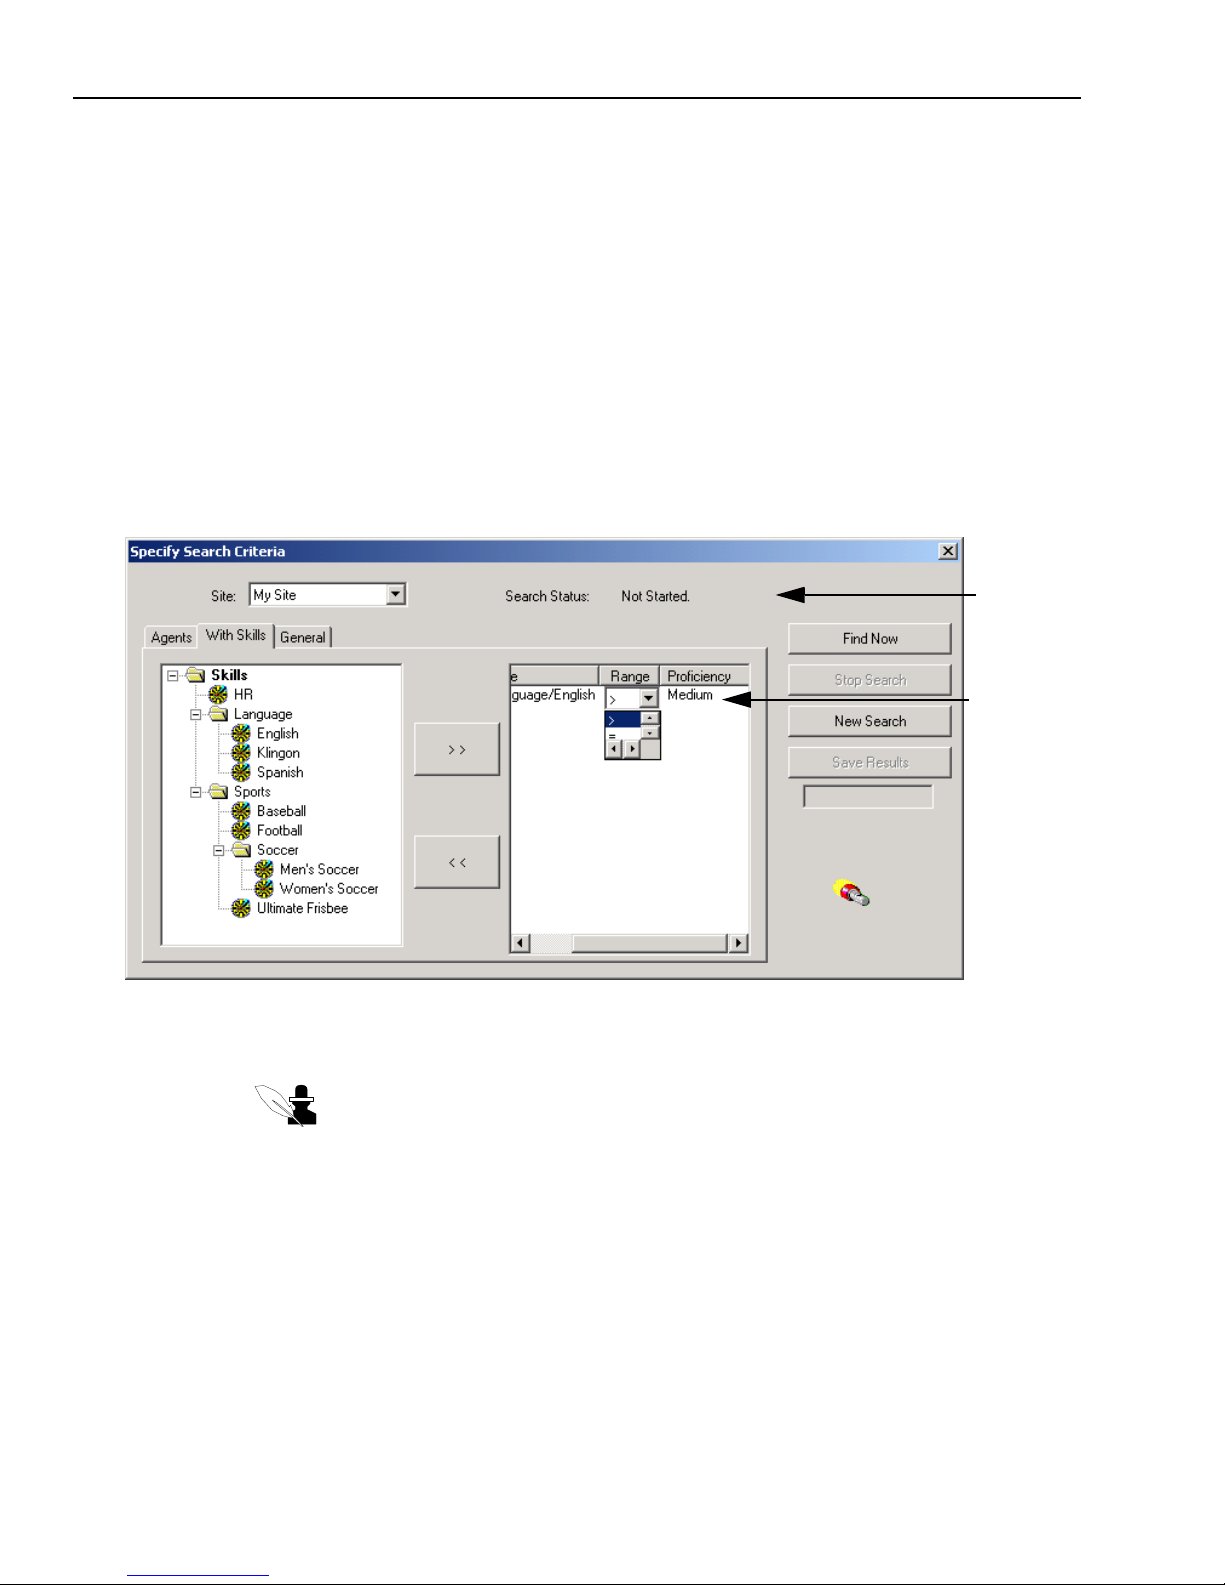
Chapter 2 Managing Avaya Agent
64 Avaya Agent User’s Guide
c If you want to include agents who are currently Available, Busy (in Aux-work), or Logged
Out, select those agent states.
5 Skills tab – If you want to search for agents with certain skills, such as agents who speak
certain languages or agents who support a certain operating system, click the Skills tab and do
the following:
a If necessary, navigate through the folders.
b When you find the skill you want, double-click to select it.
The selected skill moves to the right side of the dialog box.
c Select a Range (> for greater than; = for equal to, or < for less than) and a Proficiency rating
(Expert, High, Low, or Medium) to indicate the level of proficiency you desire, by clicking
in the appropriate columns to bring up a menu and making your selections.
6 General tab – If you want to find a specific person, click the General tab and enter any
information that you know about the person in the appropriate text box.
Note: The information is case-sensitive. If a person’s name is Bob, your search will
not find him if you type
bob instead of Bob.
Search status
Proficiencies
Page 65
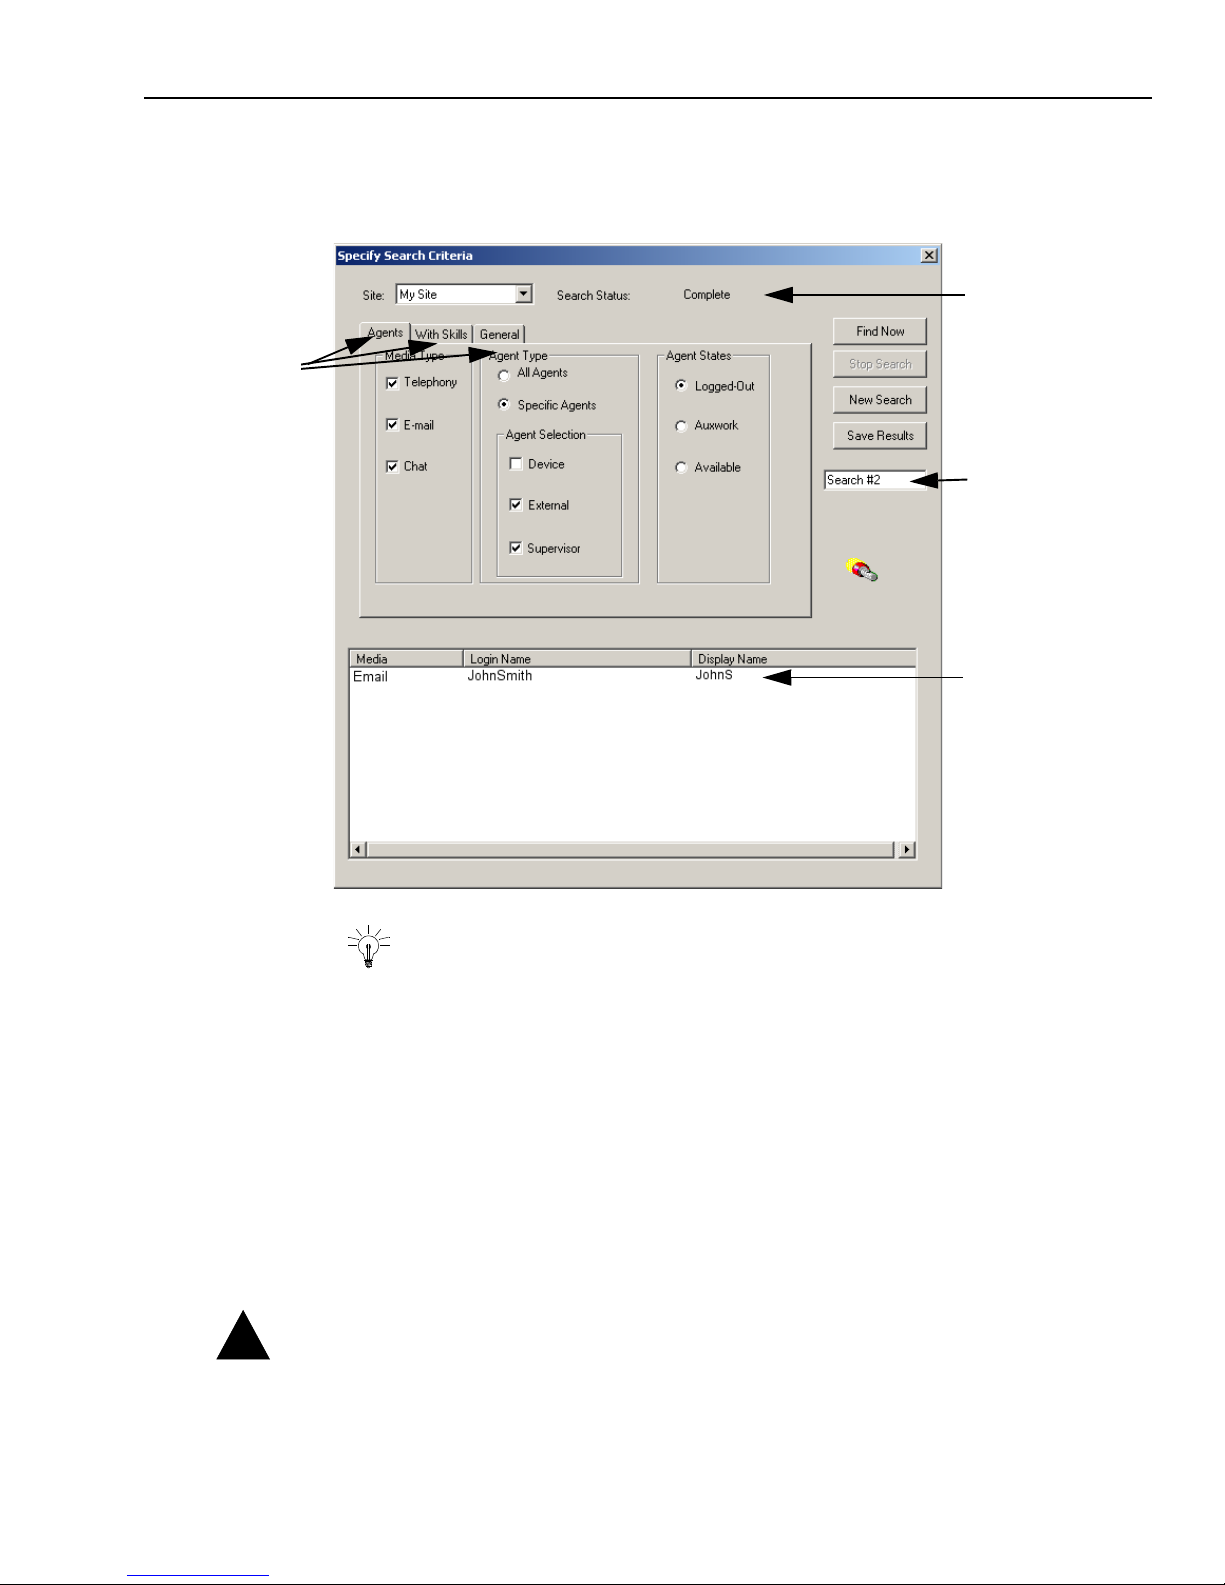
Using the Unified Agent Directory
Issue 1.0 June 2002 65
7 Click Search Now whenever you have entered all the desired search criteria.
When the search is complete, the dialog box expands to display your search results.
Tip: You can always see the status of your searches by looking at the Search Status
near the top of the dialog box.
8 Look at the results of the search at the bottom of the dialog box. If you think that the results will
be useful another time, create a tab with this data, as follows:
a In the text box at the right side of the dialog box, where “Search #X” is displayed, select the
text and type over it to create a name for the new tab.
b Click Save Results.
A tab is added to the main screen of the UAD displaying the information found in the
previous search.
9 If you did not get exactly the results you wanted, change any of your selections in the Specify
Search Criteria dialog box as desired. Then click the Find Now button again.
Caution: Use the New Search button only if you want to clear the previous search criteria and
begin again.
Search status
Save name
Results
Search criteria
!
Page 66

Chapter 2 Managing Avaya Agent
66 Avaya Agent User’s Guide
Deleting Search Results Tabs
If you saved information you found in the Find option, new tabs were created in the UAD with the
results. You can delete any tabs that were created this way.
To remove search results tabs from the UAD:
1 Select the tab that you want to delete.
2 Click View > Delete tab.
The tab is deleted.
Updating UAD Information
The information in the UAD changes over time. New queues or agents may be added, existing
queues or agents may be removed, and information about agents may change. Agent state data
changes frequently as agents log in and become available or unavailable for contacts.
If there is a delay between the time you first open the UAD and the time that you are ready to use
it, the information may not be current. If you have left the UAD open for awhile, you should
“refresh” it to get the most up-to-date information.
If your contact center is large, it may take a moment to refresh all the data. If you only need
information about agents’ current availability, you may prefer to update agent state data only.
Refreshing the Entire UAD
To update all data displayed in the UAD:
1 Click View > Refresh.
The UAD brings in all the latest information.
Updating Agent State Only
To update agent state data in members of a group:
1 Right-click the name of a workgroup in the box on the left side of the UAD.
2 Select Update State from the pop-up menu.
The latest agent state information for members of this workgroup is displayed.
3 Repeat with other workgroups, as desired.
Page 67
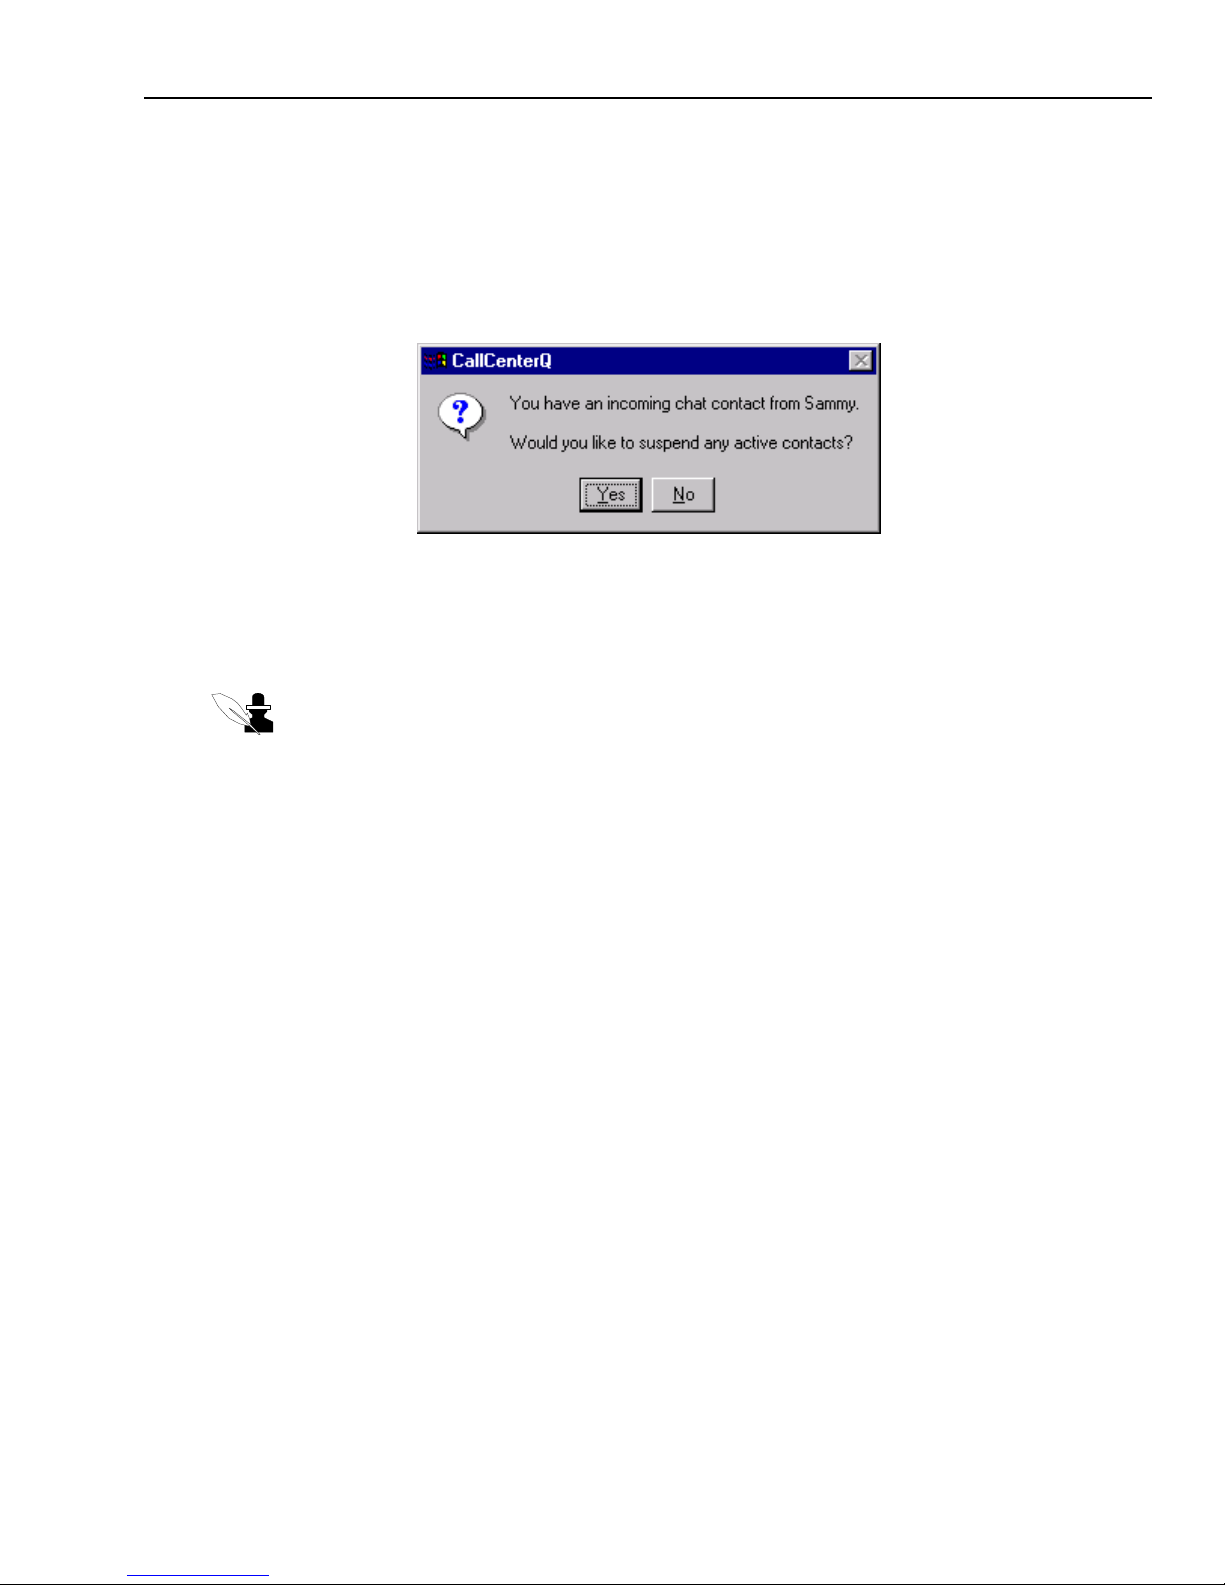
Using Screen Pops
Issue 1.0 June 2002 67
Using Screen Pops
If your contact center has set them up, you may see screen pops, like the one in the following
illustration, when new incoming contacts arrive in your task lists. If you click Yes in a screen pop,
the new contact becomes active. If you are using a Business Application, such as CallCenterQ,
information about that contact is automatically imported into your Business Application.
If you are already responding to a contact when the new contact arrives, and you click No in the
screen pop, Avaya Agent does not display a second screen pop because the new screen pop might
interrupt your current contact. You can manually display a screen pop for the second contact
through the pop-up menu in the Avaya Agent Media pane.
Note: Depending on how your administrator configured your system, you may not see screen
pops.
To perform a manual screen pop for an incoming contact:
1 Click the new contact to make it active.
2 Right-click in any open area of the Avaya Agent.
3 Click Screen Pop in the pop-up menu.
Avaya Agent opens the focus window (for example, the CallCenterQ Agent focus) with
customer information about the incoming contact.
Wrapping Up Contacts
After you complete an incoming voice, email, or chat contact or an Outbound Contact call, your
contact center may require you to wrap up the contact or call by entering information in a WrapUp
dialog box or a Prompter script. The information you enter is added to the contact information in
the database to assist the next agent who handles a contact from that customer. Because each
contact center handles wrap-up information differently, your system administrator determines the
following:
n
Whether you are automatically placed in the WrapUp state after completing a contact
n
Whether you enter information in a dialog box or click buttons in a script to enter customer and
contact information
n
Whether you must record wrap-up information for every contact
Page 68
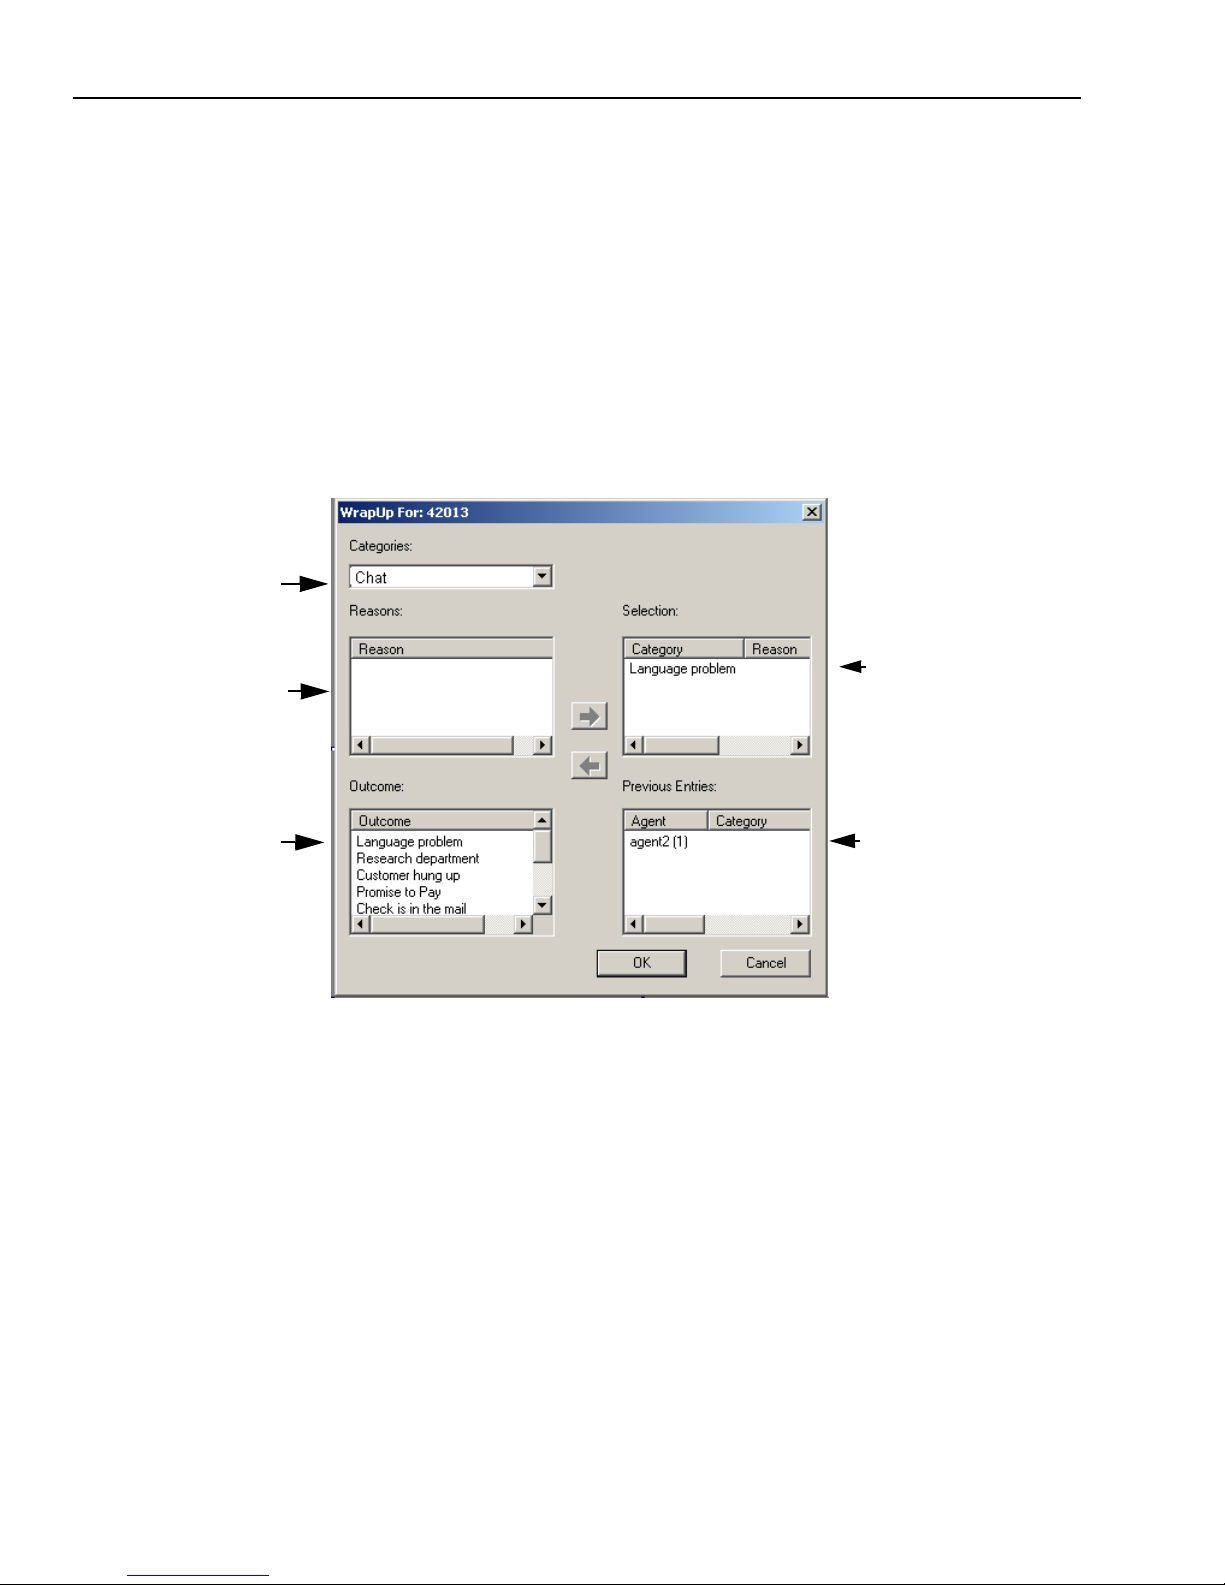
Chapter 2 Managing Avaya Agent
68 Avaya Agent User’s Guide
Using the WrapUp Dialog Box
Most contact centers document the reason and outcome of customer contacts through the use of
one or more of the following wrap-up fields:
n
Category
n
Reason
n
Outcome
The lists on the left side of the WrapUp dialog box contain information available for you to select,
as shown in the following example. The lists on the right side contain the information you selected
and previous entries that you or another agent selected to wrap up previous contacts with the same
customer.
You may need to enter information in one of the following areas, or any combination of these:
n
Category – You may see a category for each of the media channels in this drop-down menu. Of
you may see another type of grouping of a set of reasons (for example, Balance Inquiry or
Cancellation Request).
n
Reason – This information specifies the purpose of a customer’s contact or the intent of the
work you performed.
n
Outcome – This information specifies the action you took or the result of your activity on a
contact.
The Previous Entries field provides the following information:
n
The login ID of the agent who entered the wrap-up information
Information
you selected
Category
Reason
Outcome
Previous
Entries
Page 69

Wrapping Up Contacts
Issue 1.0 June 2002 69
n
The name of the agent who entered the wrap-up information
n
A description of the category, reason, or outcome
If the Previous Entries field is blank, there are no previous wrap-up entries associated with the
contact.
To wrap up a contact using the WrapUp dialog box:
1 Complete your contact.
The WrapUp dialog box opens automatically.
2 From the lists on the left side of the WrapUp dialog box, click the correct information in one or
more of the following lists:
w
Category
w
Reason
w
Outcome
3 Click the right-arrow button to add this item to the Selections list.
4 Click OK.
To close the WrapUp dialog box without adding information, click the Cancel button.
Note: If your Avaya Agent is configured for more than one type of information, you may need to
choose from all available lists before you can add the entries to the Selections list.
To de-select an item and remove it from the Selection list:
1 Click the item in the Selection list.
2 Click the left-arrow button.
3 Click OK.
Using a WrapUp Prompter Script
If your system is configured for a WrapUp Prompter script, the script is displayed in the Prompter
pane when you wrap up a contact.
The WrapUp Prompter script contains a series of questions about contacts specifically designed by
your company. You proceed through the script by clicking radio buttons, selecting check boxes, or
typing text in fields to provide information about the contact. Generally, the answers to the script
questions require you to select reason, category, and outcome information, similar to the
information fields in the WrapUp dialog box (see “Using the WrapUp Dialog Box,” on page 68).
Note: Because WrapUp Prompter scripts are designed by your company, the script you follow
may look and function differently from the example presented below.
Page 70
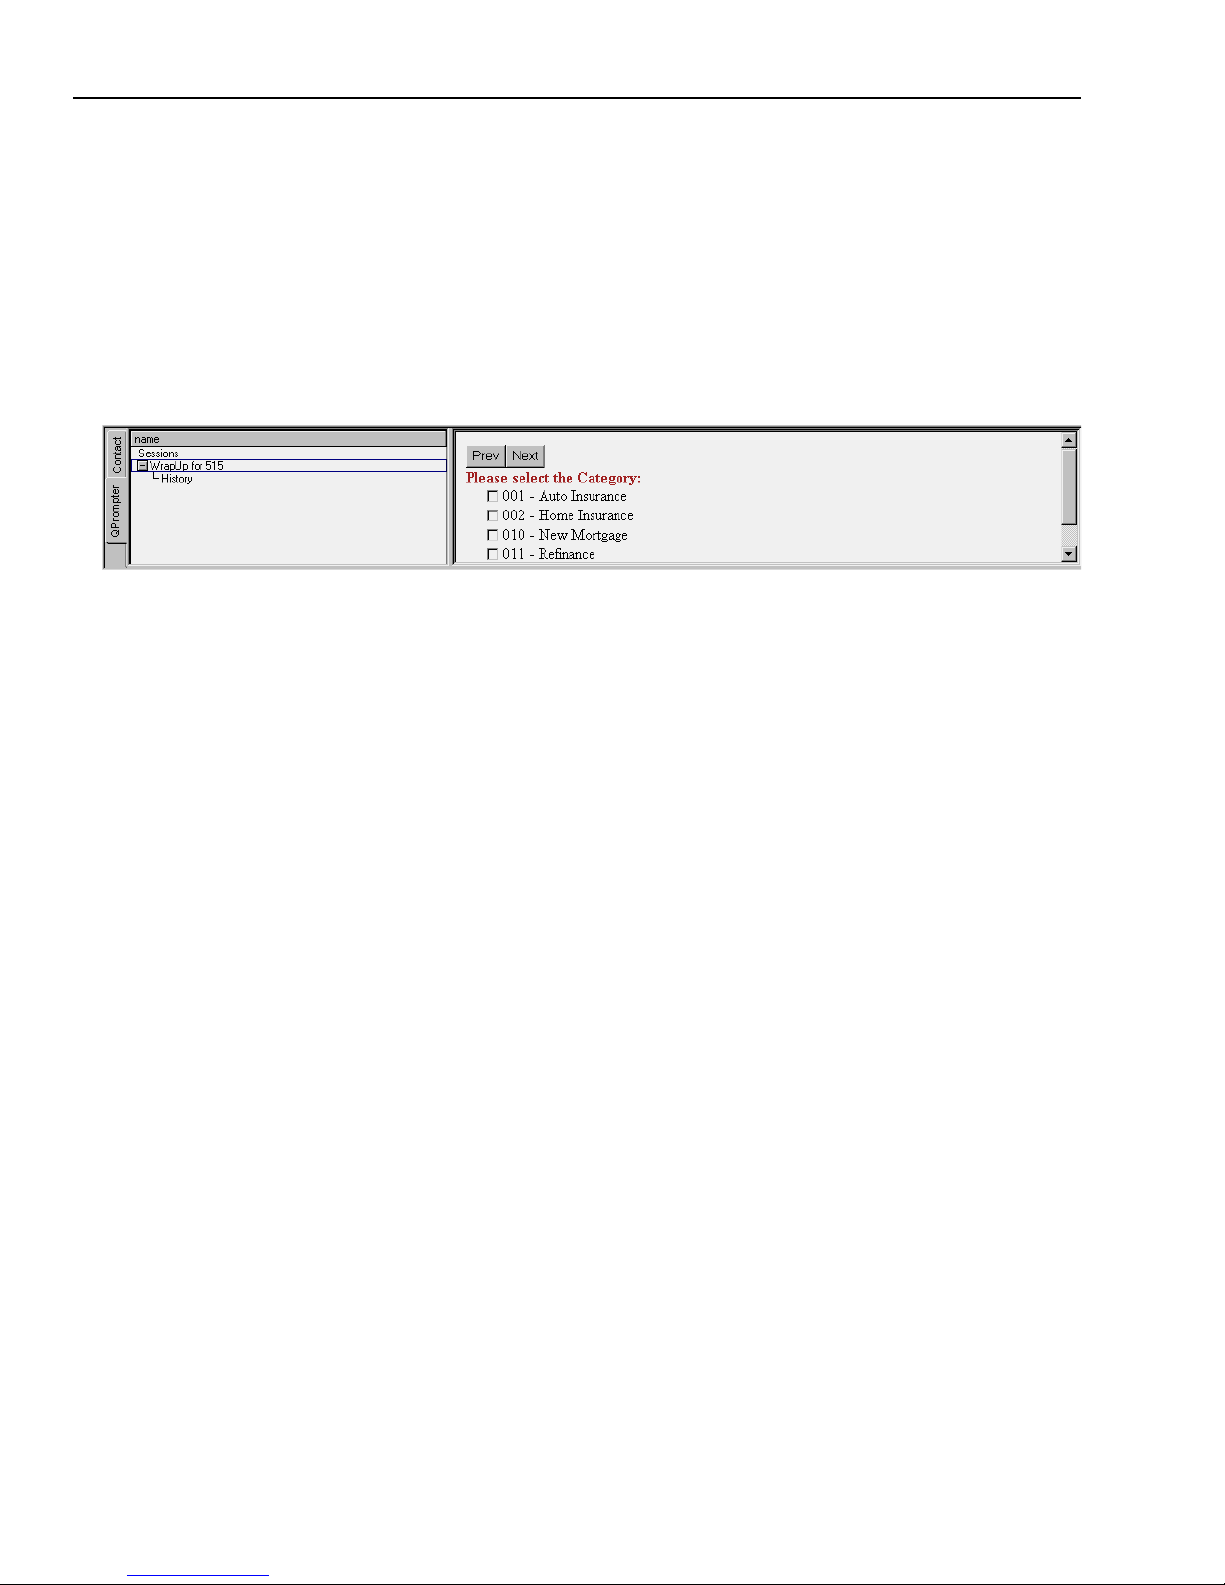
Chapter 2 Managing Avaya Agent
70 Avaya Agent User’s Guide
To wrap up a contact using the WrapUp Prompter script:
1 Click the HangUp button to complete the voice contact.
You automatically enter the WrapUp state, and the WrapUp Prompter script opens in the
Prompter tab of the Contact pane.
2 If necessary, click the Prompter tab to bring it to the foreground of the Contact pane.
Follow the script, selecting or entering the appropriate information. The following illustration
shows a Prompter script. Your script may not resemble this example.
Page 71

Troubleshooting
Issue 1.0 June 2002 71
Troubleshooting
On occasion, Avaya Agent may fail to work properly. Follow the set of instructions that applies to
your situation to return your Avaya Agent to normal
Avaya Agent Stops Responding
Occasionally, you may have trouble with the display of the Avaya Agent. You may not be able to
use the software as you usually do. You can restore the Avaya Agent to its normal condition by
ending certain processes that your computer’s operating system uses to support the Avaya Agent.
You must have administrative privileges to do the following procedure. Contact your administrator
if you do not have these privileges or if you need assistance with the following procedure. If you
cannot get an administrator’s assistance, shut down your machine and restart it.
To restore the Avaya Agent to its normal condition:
1 Exit from the Avaya Agent if you can.
Note: If you cannot exit from the Avaya Agent, open the Windows Task Manager
and end the application task.
2 Open the Windows Task Manager.
3 In turn, end the qui, vtel, and mshta processes.
4 Log in to the Avaya Agent.
5 If the Avaya Agent is too large, take the following steps:
a Hold your cursor over the Windows task bar until you see an arrow with two ends, one
pointing up and one pointing down.
b Click your mouse and drag the cursor upwards, until the task bar becomes larger.
c Repeat Step a.
d Click your mouse and drag the cursor downwards, until the task bar returns to its original
size.
The Avaya Agent should operate correctly and it should be the normal size again.
Page 72

Chapter 2 Managing Avaya Agent
72 Avaya Agent User’s Guide
Avaya Agent Stops Responding with Outbound Contact
If the Avaya Agent suddenly stops working or suddenly exits while you are making calls with
Outbound Contact, take the following steps.
To restore Avaya Agent and return to your Outbound Contact jobs:
1 Exit from Avaya Agent if it is running and if you exit.
Note: If you cannot exit from the Avaya Agent, open the Windows Task Manager
and end the application task.
2 Log in to Avaya Agent.
3 If you get an error message when trying to log back in, wait a moment and then try again.
4 Change your agent state for the incoming media channels.
5 Select and join jobs, as you did before.
Page 73
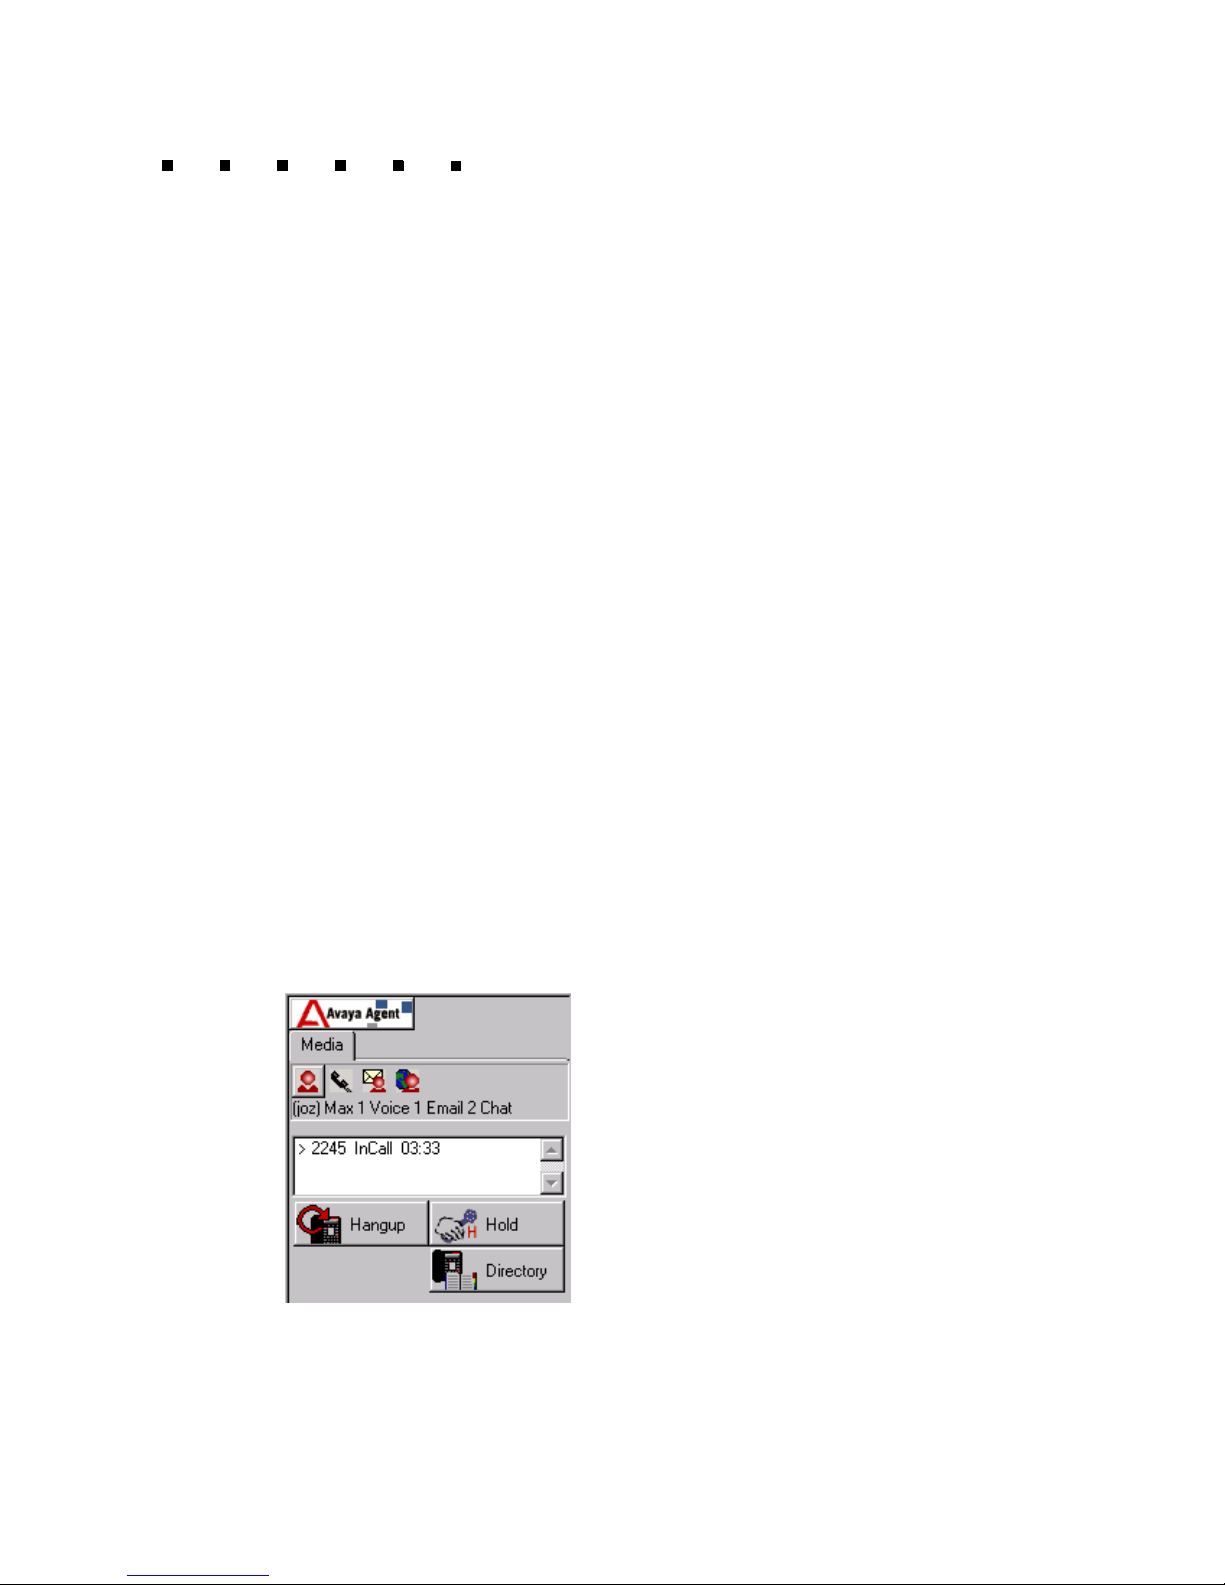
73
CHAPTER 3
MANAGING INBOUND VOICE CONTACTS
This chapter provides step-by-step instructions on using Avaya™ Computer Telephony for IC to
manage your inbound telephone (voice) contacts.
When customers make telephone calls that come in to the contact center, their calls are routed by
the Avaya™ Interaction Center (Avaya IC) software to agents who are available to handle voice
contacts. Voice contacts that are routed to you are displayed in your Phone task list.
This chapter includes the following topics:
n
Using the Phone Task List
n
Handling a Basic Voice Contact
n
Initiating a Voice Contact
n
Using Softphone with DEFINITY Switches
Using the Phone Task List
When your contact center application forwards a voice contact to your desktop, the contact is
displayed in the Phone task list, which is located in the Softphone interface, as shown in the
following illustration:
The status of the new contact in the task list is Ringing.
Page 74

Chapter 3 Managing Inbound Voice Contacts
74 Avaya Agent User’s Guide
The Phone task list displays information about all voice contacts you are currently handling. Each
entry in your Phone task list corresponds to a different voice contact. The information about each
contact that is displayed in your Phone task list depends on the telephone switch used by your
contact center. The Phone task list can display the following information about each contact:
n
Caller’s Number – Telephone number of the contact to whom you are speaking.
n
Call ID – Number that identifies the contact to the software.
n
Call State – State of the contact (such as Ringing, Ready, Busy, OnHold, InCall, WrapUp)
Note: The terms used to describe telephone states vary among contact centers and
telephony equipment. For example, Ready may be known as Available. Busy may be
known as Auxiliary Work or Idle. The WrapUp state may be known as After Call
Work.
n
Time-in-call – The period of time that you have been on the call with the customer in minutes
and seconds.
Tip: If you select a contact and hold your mouse over it for a moment, you will see a “tooltip”
with some of the same information about the contact. This tooltip may be easier to read than the
information within the task list and it may contain additional information.
You double-click a contact in the Phone task list to answer a call (unless you are using Auto
Answer, which answers the call for you). Then you begin talking. The contact becomes
highlighted in the task list. A closed angle bracket (<) shows that this is the active voice contact.
You use the buttons in Softphone to control the active voice contact. All Softphone buttons affect
the active contact. For example, if you click the HangUp button, the system hangs up the active
voice contact, but any other contacts in your Phone task list remain.
If you receive a second voice contact while you are still handling your first voice contact, you can
select the second voice contact by clicking it one time. This allows you to see information about
the second contact in the EDU Viewer or Contact History Browser while you are still engaged with
your first contact.
If you double-click the second voice contact, it becomes the active contact, while the first contact
is put on hold. You should tell your first customer that you will put them on hold before you
double-click a second voice contact.
If you move your cursor away from the Phone task list, the current voice contact is no longer
highlighted. Even when it is not highlighted, you can tell which contact is the active contact by the
angle bracket.
If you see “CTI - Server Failure” in the Phone task list, contact your administrator.
Page 75

Handling a Basic Voice Contact
Issue 1.0 June 2002 75
Handling a Basic Voice Contact
This section explains how to handle a basic incoming voice contact, under the following topics:
n
Handling Contacts With Auto Answer
n
Handling Contacts Without Auto Answer
n
Placing a Voice Contact on Hold
n
Transferring a Voice Contact
Handling Contacts With Auto Answer
If you have Auto Answer turned on, Softphone automatically answers an incoming voice contact
and makes that your active contact. Softphone does the following:
n
Answers the voice contact.
n
Makes it the active contact.
n
Highlights the contact in the list and adds an open angle bracket (>) to help you identify this as
the active contact.
n
Changes the contact’s status in the Phone task list to InCall.
n
Opens the CallCenterQ Agent focus and displays the customer’s information.
To answer a new Softphone contact with Auto Answer turned on:
1 Begin speaking with the customer.
2 When you have finished the call, click the HangUp button in Softphone.
Handling Contacts Without Auto Answer
If you do not have Auto Answer turned on, follow this procedure.
To answer a new Softphone contact:
1 Double-click the new voice contact in the Phone task list.
2 Begin speaking with the customer.
3 When you have finished the call, click the HangUp button in Softphone.
Note: If you see “CTI - Server Failure” in the Phone task list, contact your administrator.
Page 76
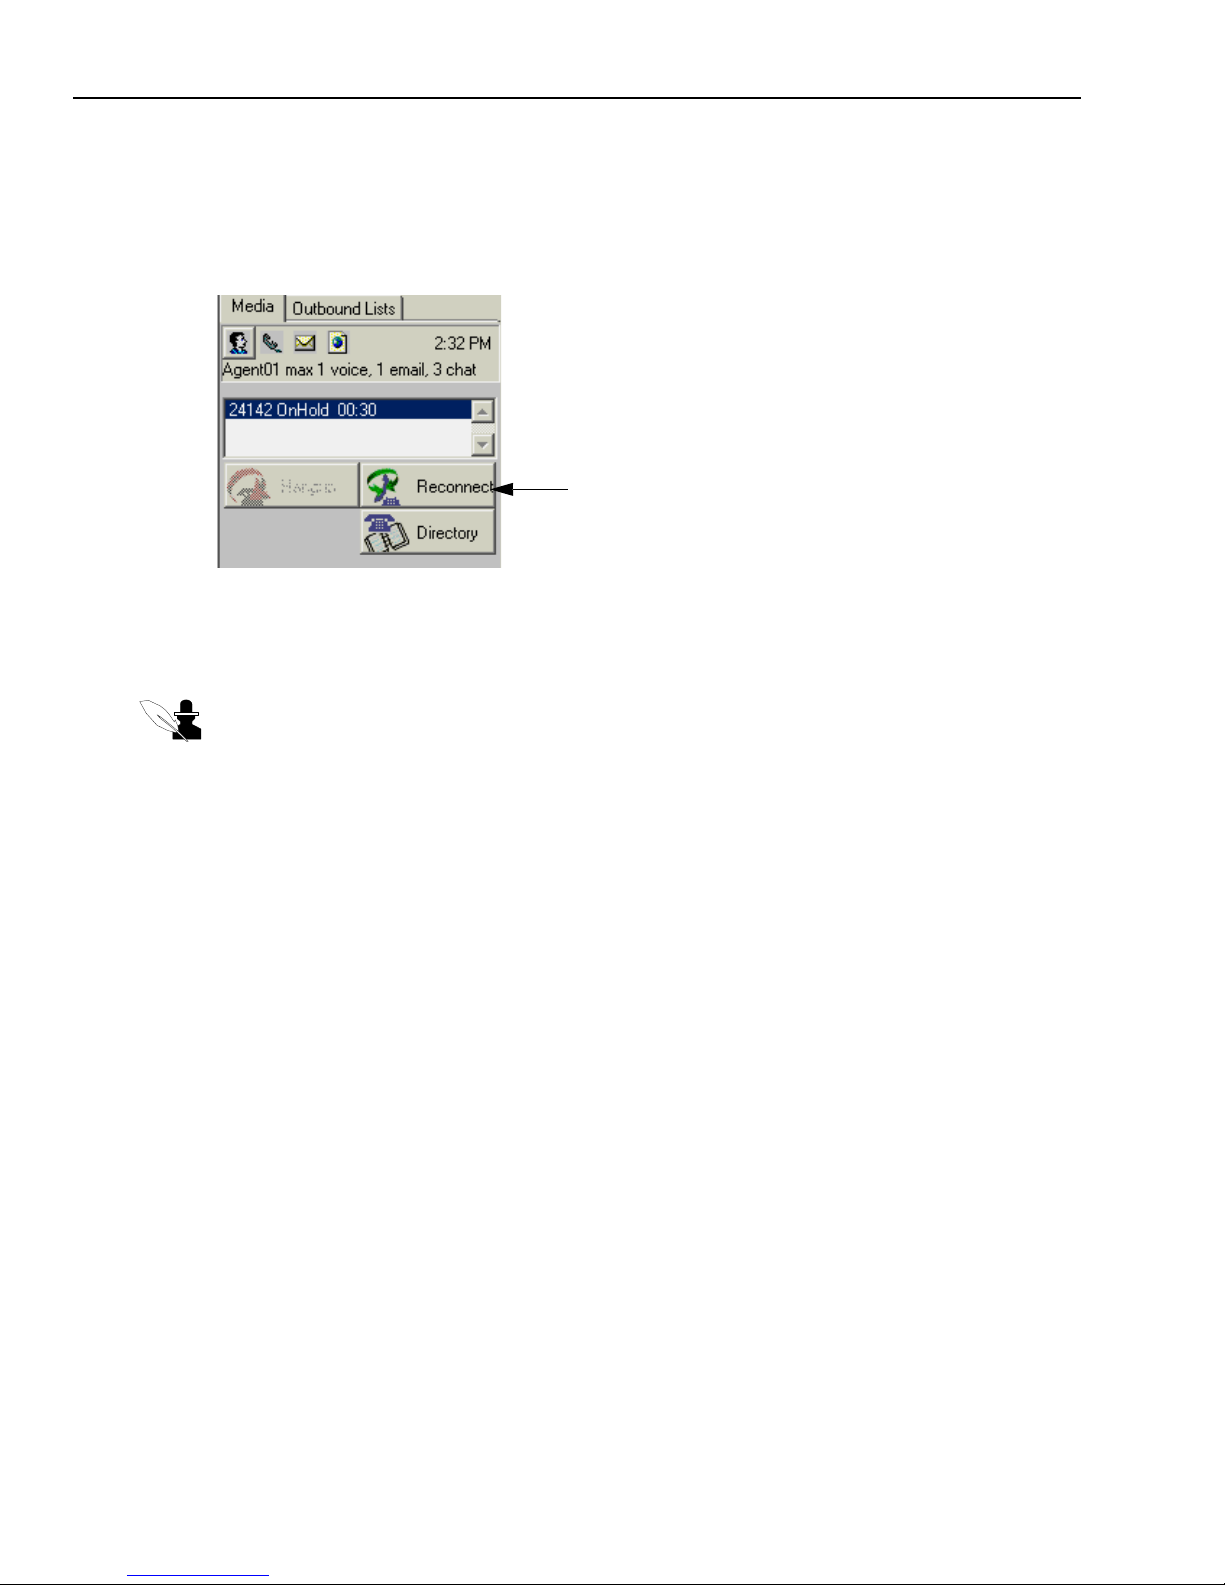
Chapter 3 Managing Inbound Voice Contacts
76 Avaya Agent User’s Guide
Placing a Voice Contact on Hold
You can place a voice contact on hold while you look up information, answer another contact, or
transfer the voice contact to another agent. The contact’s status in the Phone task list changes to On
Hold, as shown in the following illustration:
A button in Softphone changes its label between Hold and Reconnect. When you click the Hold
button, the label changes to Reconnect. When you click the Reconnect button, the label changes to
Hold.
Note: If you are using an Aspect switch, you cannot use the Hold and Reconnect buttons. Instead,
to put a current voice contact on hold and connect to a new voice contact, double-click the new
contact. To reconnect to the first voice contact and put the second contact on hold, double-click the
first contact.
To place a customer on hold while you speak to another customer:
1 Ask the customer with whom you are speaking if you may put them on hold for a moment.
2 Click the Hold button.
3 Double-click the new voice contact in the Phone task list.
4 Begin speaking with the second customer.
5 Return to the first customer as soon as possible, as follows:
a Either finish the call with the second customer or tell that customer you will put them on
hold.
b Click Hold if you did not finish the call with the second customer.
c Select the first phone contact in the Phone task list.
d Click Reconnect.
e Continue your conversation with the first customer.
6 If the second customer is on hold, return to that customer as soon as possible.
When you click this button to
reconnect to a customer
, the button
label changes to Hold.
Page 77

Handling a Basic Voice Contact
Issue 1.0 June 2002 77
For more complete information on handling two simultaneous phone calls, see “Handling Two
Voice Contacts,” on page 86.
Transferring a Voice Contact
At certain times, you may need to transfer a voice contact to another agent who is more qualified
to handle it or to your supervisor to handle a customer who needs more attention.
You use the Unified Agent Directory (UAD) to transfer calls. The UAD opens with the following
information:
n
The location name assigned to your contact center is displayed in the Site drop-down menu.
The other site names so that you can transfer a call to agents at other locations.
n
The telephone number of the current contact is displayed in the Current Tasks field. This field
lists all of your currently active contacts. When you complete a contact, it is removed from this
list.
Note: Always tell the customer that you are transferring them before proceeding.
Transfer Options
The UAD provides the following call transfer options:
n
Blind Transfer – To transfer the call and have the telephone contact removed from your Phone
task list immediately. The call waits in a queue until the agent to whom you transferred the call
is available to answer it.
n
Conference – To transfer the call, have the ability to remain on the call with the customer and
the selected agent, and have the ability to add other agents to the call.
n
Cons Transfer (Consultative Transfer) – To transfer the call and have the ability to speak as you
transfer the telephone contact. You can introduce the customer to the other agent and explain
the nature of the call.
You can transfer a call to:
n
A queue, which is a group of agents with similar skills, to route the transfer to anyone currently
available in that queue
n
A specific agent
n
An agent with a specific skill, such as someone who speaks a particular language or supports a
particular product
n
Multiple agents, by conference call
Note: If you want to transfer a call to someone with a particular skill, use the Find option instead
of the following procedure. See “Looking Up Agents with the Find Option,” on page 62.
Caution: When using Outbound Contact, do not transfer a call to another outbound agent or
create a conference call. See “Caution About Transferring a Call,” on page 190 for information.
!
Page 78

Chapter 3 Managing Inbound Voice Contacts
78 Avaya Agent User’s Guide
To transfer a call to a queue or an agent:
1 Tell the customer that you are going to transfer them to someone who will help them.
2 Click the Directory button on the Avaya Agent to display the Unified Agent Directory (UAD).
The Site drop-down menu displays the site where you are located. The Current Tasks dropdown menu displays your current voice contact.
3 If the queue or agent to whom you want to transfer the call is located at a different site, select
the site from the Site drop-down menu. Select All Sites if you do not know where the agent or
queue is located.
4 Check that the contact that you want to transfer is displayed in the Current Tasks field. By
default, the Current Tasks field displays the telephone number of the current caller.
5 If you are certain you know the telephone number of an agent to whom you want to transfer the
voice contact, you can enter the number in the To field, and then skip to Step 9 in this
procedure.
6 Click the Queues tab to transfer the call to the first available agent in a queue or the Agents tab
to transfer the call to a particular agent. Then follow the step below that applies to the tab you
selected.
7 Queues tab – Double-click the name of the queue or agent you want (or select it and click the
>> button).
The name moves to the box on the right of the UAD.
Tip: If you discover that this is the wrong person, click the << button to remove the
person from this box.
8 Agents tab – Open the tenant or workgroup to which the agent belongs. Then double-click the
name of the agent to whom you want to transfer the call to move the agent to the box on the
right side of the UAD.
Tip: Tenants are represented by a house icon, workgroups are represented by an icon
of a folder beside an agent head, and agents are represented by an agent head or two
agent heads side-by-side.
Tip: If you do not see the name of the person you are looking for in the list, that
person may not be logged in or may not be available for a telephone call.
Tip: If you are not certain about the name (login ID) of the person to whom you
want to transfer the call, right-click the name. The Properties pop-up menu is
displayed with only the menu title. Click this to display a dialog box with information
about this person.
Page 79
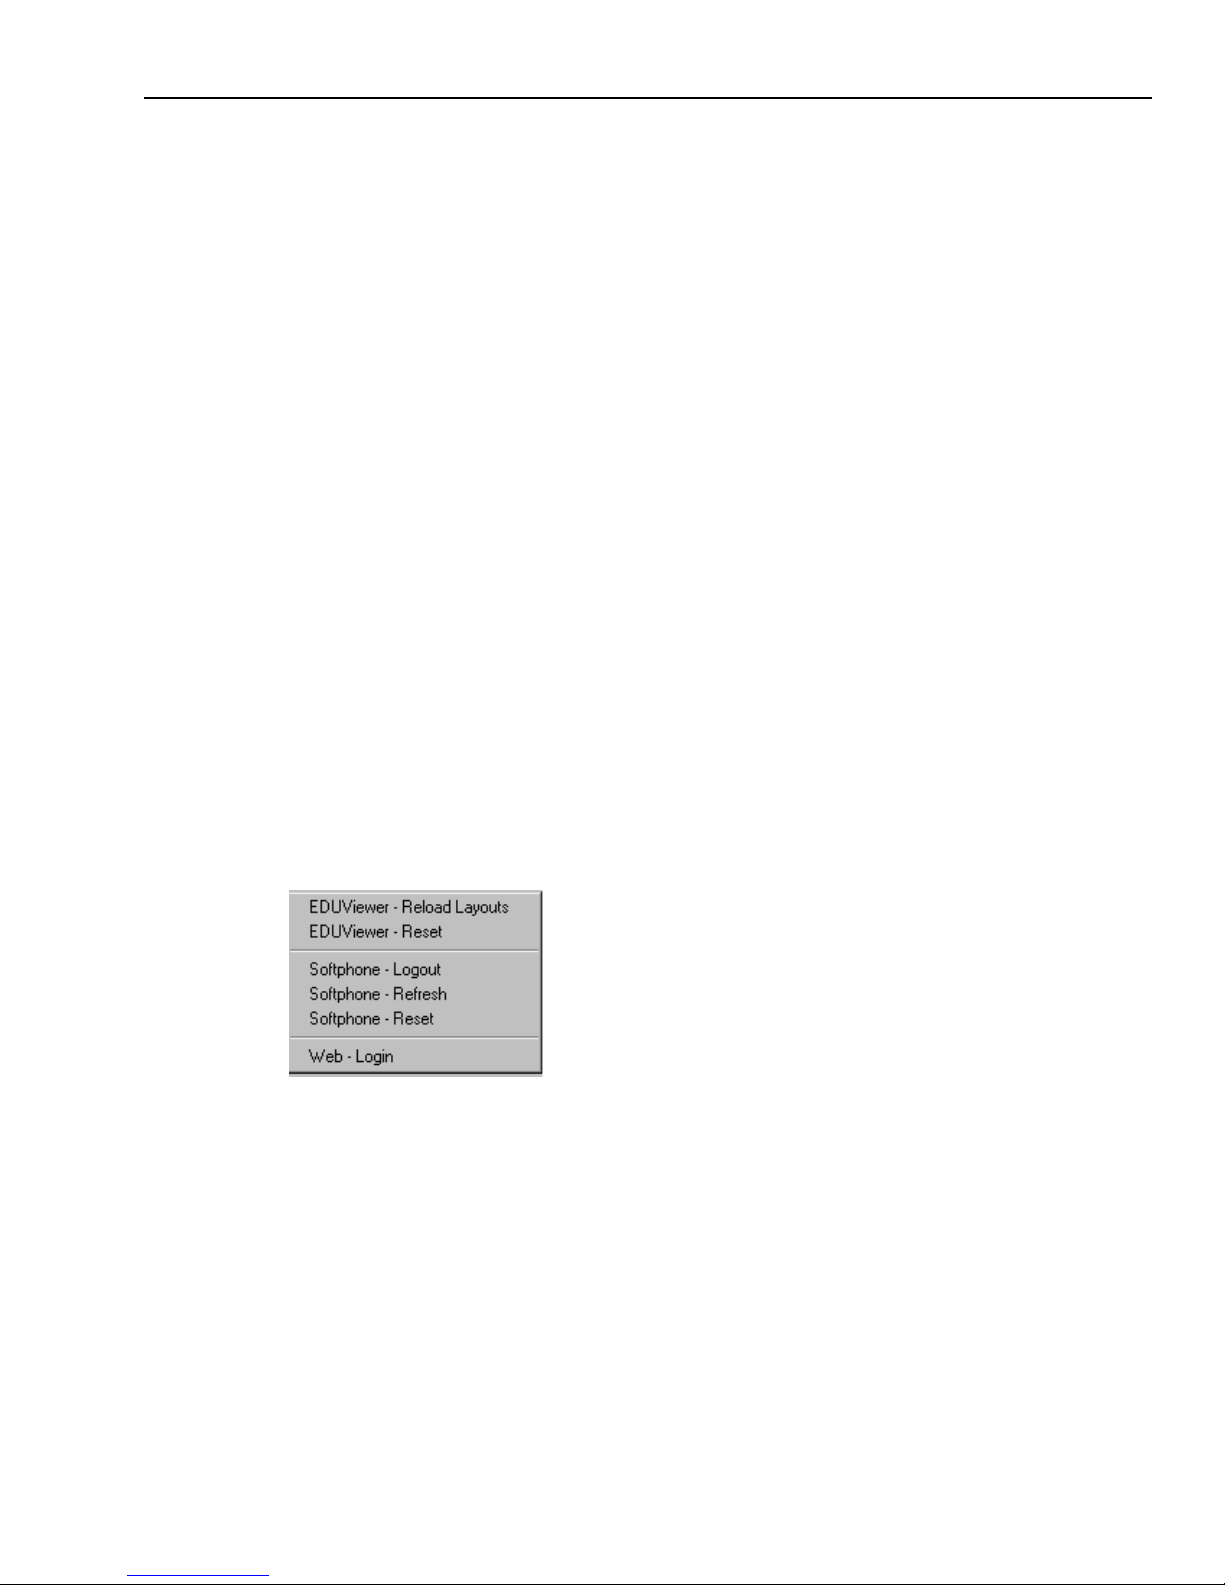
Using the Softphone Menu
Issue 1.0 June 2002 79
9 Click one of the following buttons and follow the instructions for that button:
w
Blind Transfer – To transfer the call to the selected person and have the voice contact
removed from your Phone task list immediately. The call waits in a queue until the agent to
whom you transferred the call is available to answer it. If the agent is busy and cannot take
the contact, you can cancel the transfer or remain in session with the call until the agent is
available.
w
Conference – To transfer the call and have the ability to remain on the call with the customer
and the selected agent or agents. In the dialog box that is displayed, click Complete to
complete the transfer. To add more agents to the call, repeat the above procedures. Use the
Softphone HangUp button to hang up whenever you want.
w
Cons Transfer (Consultative Transfer) – To transfer the call and have the ability to speak as
you transfer the voice contact. You can introduce the customer to the other agent and
explain the nature of the call. In the dialog box that is displayed, click Complete to complete
the transfer. Use the Softphone HangUp button to hang up whenever you want.
Using the Softphone Menu
With the Softphone component of Avaya Agent, you can perform standard telephone functions
without a physical telephone. The Softphone menu is part of the Avaya Agent pop-up menu. You
see this menu if you right-click (use the right mouse button to click) any blank section of Avaya
Agent. The pop-up menu contains the following menu options:
n
Softphone - Login/Logout
n
Softphone - Refresh
n
Softphone - Reset
This section explains the Refresh and Reset options. For information on logging in and out of
Softphone, see “Logging In and Out of Media Channels,” on page 44.
Page 80

Chapter 3 Managing Inbound Voice Contacts
80 Avaya Agent User’s Guide
Refreshing Your Softphone Data
You use the Softphone - Refresh option in the pop-up menu to refresh the data in the WrapUp
dialog box and, if it is used, the DEFINITY Log/Aux dialog box.
When you log in to Avaya Agent, the Softphone retrieves the data for the WrapUp and DEFINITY
Log/Aux dialog boxes from the database and stores them in your workstation’s memory. Because
administrators may make changes to the data during the course of the day, you may need to refresh
your Softphone data frequently to ensure that you have access to the most current information.
To refresh your Softphone data:
1 Right-click in an empty part of the Avaya Agent frame.
2 In the pop-up menu, click Softphone - Refresh.
Your Softphone data is refreshed with the updated information.
3 Click OK.
Reconnecting to Your Physical Telephone
You use the Softphone - Reset option to re-establish and synchronize the connection between your
Softphone and your physical telephone when communications are disrupted and your Softphone
fails to function properly.
You can identify a communication failure when:
n
Softphone cannot perform a telephone operation.
n
Softphone appears to be “locked up” for any length of time.
Note: If your Softphone and your physical telephone are set differently, Softphone may become
unresponsive when you use both your physical telephone and Softphone. To avoid this problem,
ask your administrator to confirm that the preset state settings for your physical telephone and
Softphone are identical.
To reset the communication between your Softphone and the telephone:
1 If you are in a voice contact, complete your voice contact with the physical telephone.
2 Set your agent state to Unavailable (see “Changing Your Agent State,” on page 46).
Note: The Softphone - Reset option clears all current activity from the Softphone
and terminates all calls. You must complete Steps 1 and 2 before using Softphone Reset.
3 Right-click in an empty part of the Avaya Agent.
4 In the pop-up menu, click Softphone - Reset.
5 Click OK.
If this does not resolve the problem, contact your administrator.
Page 81

Initiating a Voice Contact
Issue 1.0 June 2002 81
Initiating a Voice Contact
If you are enabled for voice contacts, you can use your contact center telephones to make a voice
contact. You can use the UAD to find the telephone number of another agent, supervisor, or
external agent who works for your company.
Note: If you are looking for information about making outbound calls as part of your job duties,
see Chapter 7, “Managing Outbound Contact Calls” or Chapter 8, “Managing Outbound Lists”.
To initiate a call:
1 Click the Directory button on the Avaya Agent to display the Unified Agent Directory (UAD).
2 Select <New Call> from the Current Tasks menu, if this option is not already displayed.
3 If you know the telephone number of the person you want to call, enter that number in the To
box at the bottom of the UAD. Then skip to Step 9 of this procedure.
4 If you want to call a specific agent, and there is an Agents tab above the scroll box on the left
side of the UAD, click on that. If you do not see an Agents tab, search for the person as
described in “Looking Up Agents with the Find Option,” on page 62 or “Filtering Data
Displayed in Tabs,” on page 60.
5 If the person is not located in your site, select the name of the site from the Site drop-down
menu. If you do not know where the person is located, select All Sites.
6 Navigate through the tree structure in the scroll box on the left. Click any group to display the
agents in that group. Use the scroll bar as necessary.
7 When you see the name of the person you want to call, you may want to check that this is the
correct person. To do so:
a Right-click the name and click Properties in the pop-up menu.
Page 82
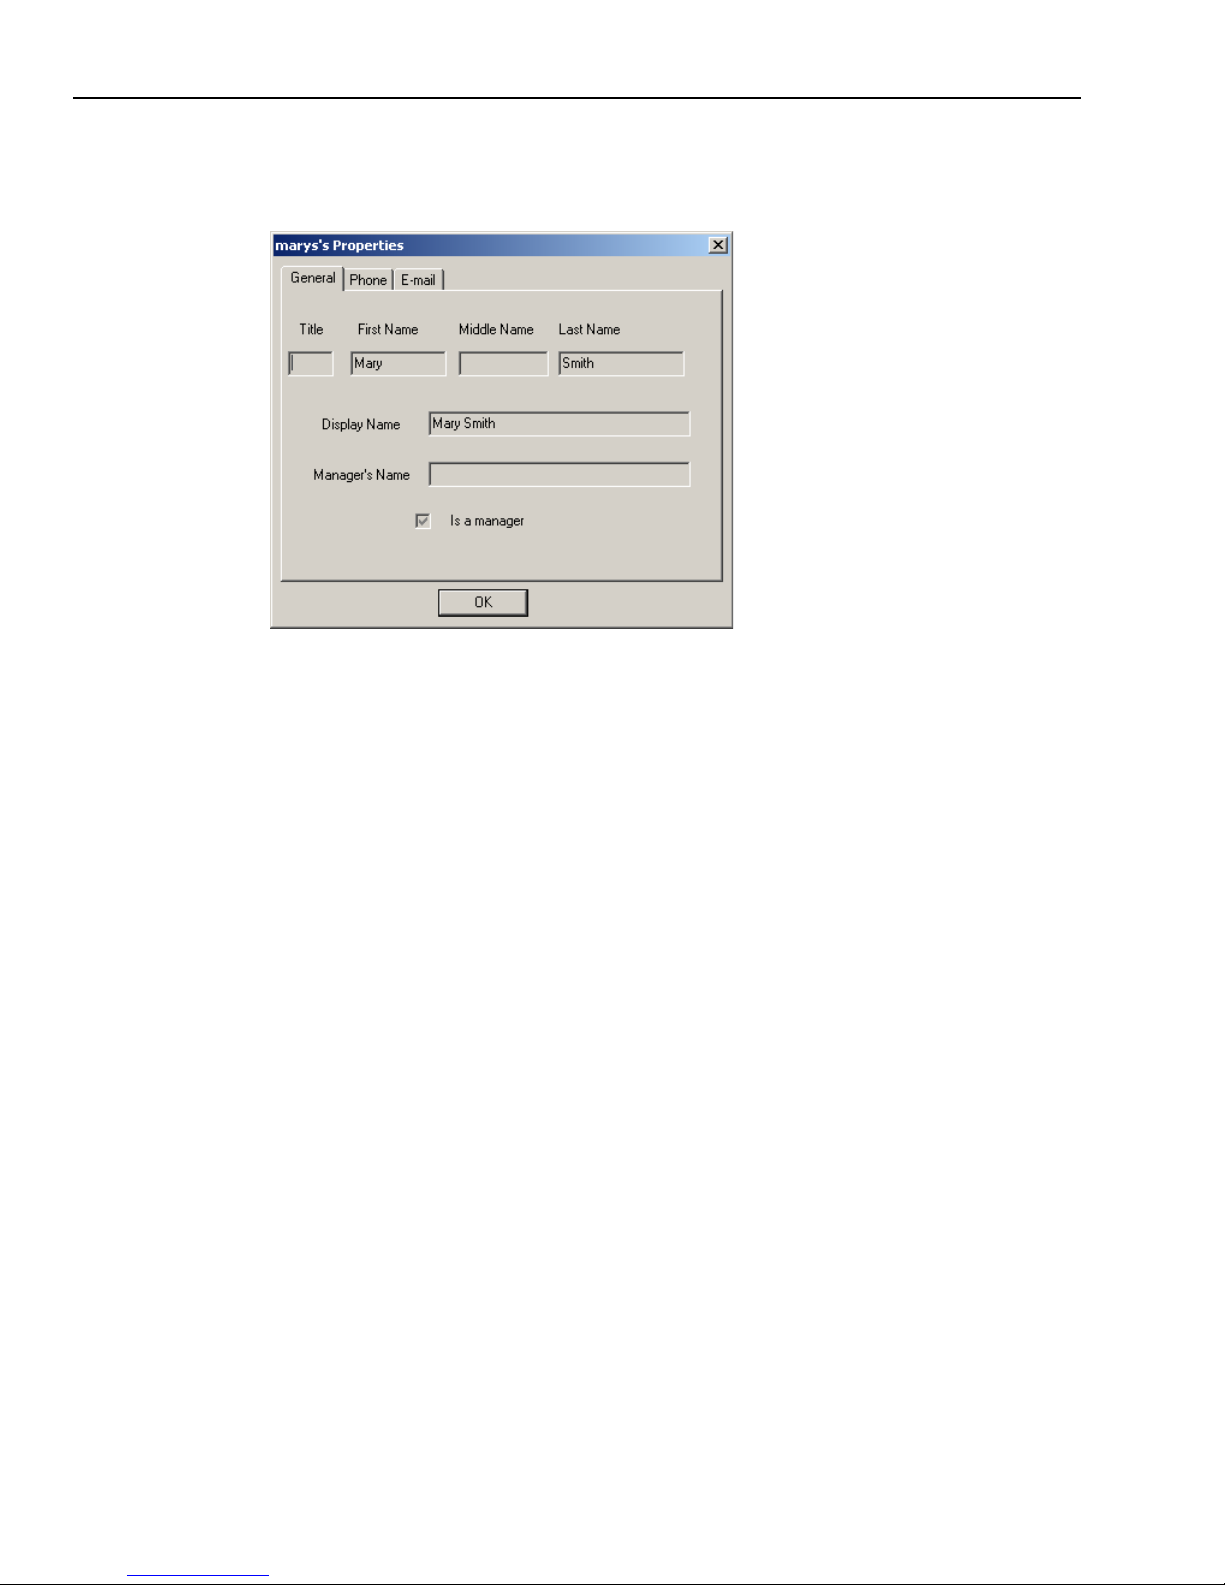
Chapter 3 Managing Inbound Voice Contacts
82 Avaya Agent User’s Guide
b Click the Phone and E-mail tabs of the dialog box as necessary so you can check that this is
the person you want to call.
8 When you find the correct name, double-click the name to move it to the scroll box on the right.
9 Click Initiate (or Dismiss if you change your mind and do not want to make the call).
10 When you are finished speaking, click the Softphone HangUp button.
Using Softphone with DEFINITY Switches
If your Softphone system uses an Avaya™ DEFINITY telephone switch, you may need to do the
following tasks:
n
Softphone’s DTMF (Dual-Tone Multi-Frequency)
n
DEFINITY reasons
n
The Auto-In work mode
Page 83
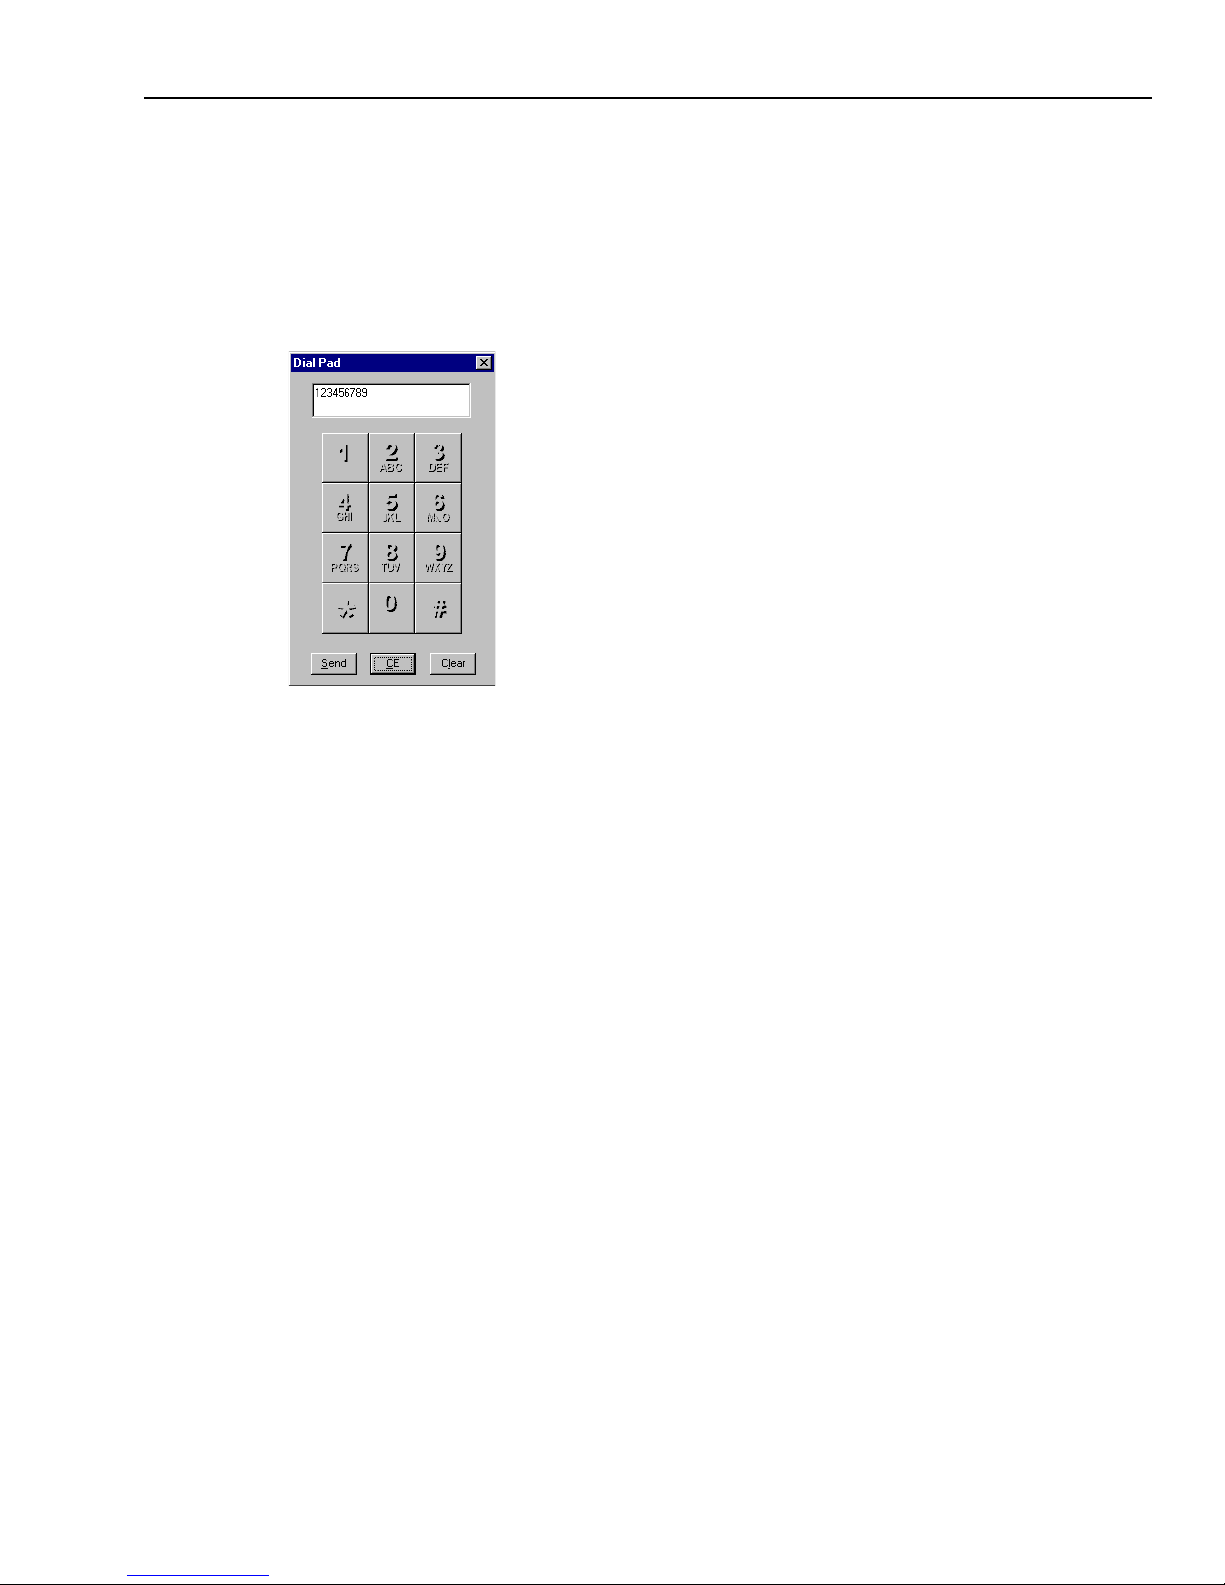
Using Softphone with DEFINITY Switches
Issue 1.0 June 2002 83
Sending Numerical Information with DTMF
If your Softphone uses a DEFINITY telephone switch, your administrator may have implemented
DTMF. You use DTMF to enter numerical information, such as a customer’s account or
identification number, on the numeric keypad of the Dial Pad dialog box. DTMF sends this
numerical information to a selected device, such as an Interactive Voice Response (IVR) unit, as if
you had dialed the tones on your telephone.
To send numerical information with DTMF:
1 In Avaya Agent, click the DTMF button.
2 In the Dial Pad dialog box, enter the numbers in either of the following ways:
w
Click in the entry field. Then type the digits on your keyboard.
OR
w
Click the numeric buttons in the keypad window.
If you type an incorrect number, click the CE (Clear Entry) button to clear one number at a time
or click the Clear button to completely clear everything that is displayed.
3 Click the Send button to transmit the number across the telephone line.
Page 84
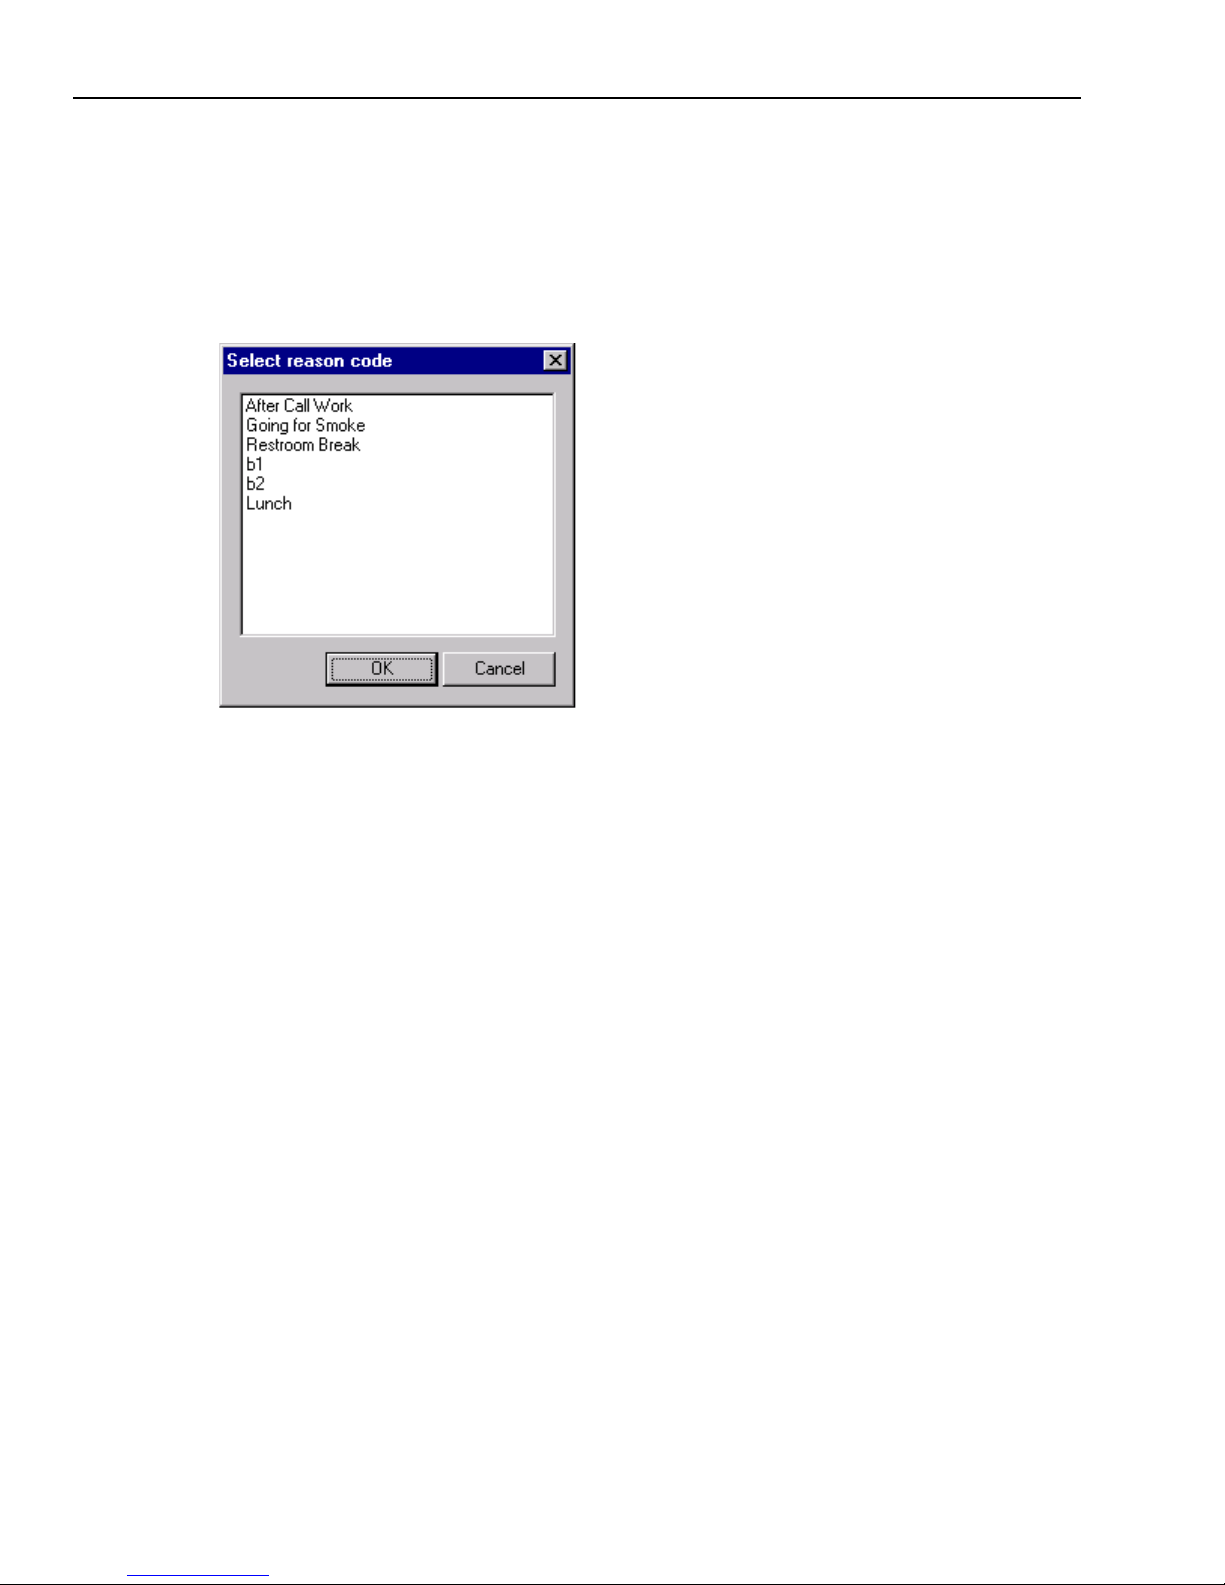
Chapter 3 Managing Inbound Voice Contacts
84 Avaya Agent User’s Guide
Entering Reasons for Becoming Unavailable
If your Softphone uses a DEFINITY telephone switch, you may see a DEFINITY dialog box
whenever you log out or click the Busy button on the Softphone.
In this dialog box, you must select a reason before you can log out or set your telephone to the
Busy state.
To select a DEFINITY Reason:
1 Click the desired reason in the Select Reason field.
2 Click OK.
To clear the dialog box and select another reason, click the Cancel button.
Using the Auto-In Work Mode
This section applies to you only if you are using a DEFINITY telephone switch and you can set the
Auto-In and Manual-In work modes. You may set these work modes by pressing buttons on your
telephone, by entering codes on your telephone, or by using Softphone. The work modes have
been set up at your contact center to correspond to agent states in specified ways. For example, the
AuxWork button on the telephone corresponds, in part, to the Aux-work agent state. See the table
below for the exact changes in agent state that happen when you push the work mode buttons.
The Auto-In work mode automatically assigns you to specific Automatic Call Distributor (ACD)
queues. It makes you available immediately after the end of a call. Therefore, with Auto-In, you
may get another call as soon as you hang up.
If you plan to take a break after your current call while in Auto-In mode, you can change your
work mode or agent state while on the call. The operation does not take effect, however, until you
complete the call. For example, while on a call, you can click the Agent button in the Avaya Agent
to change your agent state to Aux-work. You are placed in Aux-work only after the current call is
completed.
Page 85

Using Softphone with DEFINITY Switches
Issue 1.0 June 2002 85
In Auto-In mode, you cannot preset the Softphone while in a call to change from a Busy telephone
state to an Available telephone state. You see an error message if you try to do this. You must reset
the Softphone to change to and from the Aux-work state. See “Reconnecting to Your Physical
Telephone,” on page 80.
Be aware of the following issues when using Auto-In mode:
n
You should not use this mode when you are handling outbound calls.
n
If you are logged in to email or chat, you should log out of those media before using Auto-In.
n
Presets from your physical telephone while your voice contact is in the InCall state do not
work.
n
If your Avaya Agent is not configured for WrapUp, you cannot set a WrapUp preset on your
physical telephone while in automatic mode. (For an explanation of automatic and manual
modes, see “Changing State Across All Media Channels,” on page 47.)
n
Other buttons you push on your physical telephone while wrapping up in automatic mode may
not work.
n
If your system uses the WrapUp dialog box and you press the AutoIn and ManualIn buttons, a
voice contact may be assigned to you while you are handling another call. You will see a
WrapUp dialog box for the first call after it ends, but a second call may arrive before WrapUp is
complete. This will not happen on subsequent calls.
The following table shows how your agent state changes when you press a telephone button in
either manual or automatic mode.
Initial Agent State Phone Button Pushed Changed Agent State
Available AutoIn
ManualIn
AfterCall
AuxWork
No change
No change
No change
Aux-work
Aux-work AutoIn
ManualIn
AfterCall
AuxWork
Aux-work
Aux-work
No change
No change
Init aux-work AutoIn
ManualIn
AfterCall
AuxWork
Available
Available
No change
No change
Outbound AutoIn
ManualIn
AfterCall
AuxWork
Available
Available
No change
Aux-work
Page 86

Chapter 3 Managing Inbound Voice Contacts
86 Avaya Agent User’s Guide
Handling Two Voice Contacts
With Softphone, you can handle more than one incoming voice contact at the same time, using
either the telephony buttons or keyboard shortcuts. By following this example, you can take two
incoming voice contacts using the Softphone telephony buttons.
The following example assumes that you are using Avaya Agent with CallCenterQ as your
Business Application. A voice contact comes into the contact center. Your Softphone is in the
Ready state. CallCenterQ routes the voice contact to you. Your Phone task list displays the caller’s
telephone number and the contact’s status as Ringing.
To answer two simultaneous voice contacts:
1 If Auto Answer is not turned on, double-click the contact to answer it manually.
2 Ask for information from the customer, who is following up on a previous contact. Use the
Contact History Browser to look up the record on the previous contact.
While you are looking up the customer’s history, another voice contact is assigned to you.
3 Click the Hold button to place the first voice contact on hold so that you can answer the second
voice contact.
4 Double-click the new incoming voice contact to answer it.
5 Click the Hold button to place the second voice contact on hold while you complete the first
voice contact.
6 To return to the first voice contact, select it in the Phone task list. Then click the Reconnect
button.
7 When you have completed the first voice contact, click the HangUp button.
8 If your company requires you to enter wrap-up information for each contact, you enter the
WrapUp state, and the WrapUp dialog box is displayed. Select the reason and click OK.
When you complete WrapUp, this information is entered into the customer’s record. (For more
information about wrapping up contacts, see “Wrapping Up Contacts,” on page 67.)
9 Click the second voice contact in the Phone task list to make it the active contact. Click the
Reconnect button to speak to the customer.
If you do not have the information the customer needs, click the Directory button to open the UAD
and transfer the second voice contact to another agent (see “Transferring a Voice Contact,” on
page 77).
Page 87

87
CHAPTER 4
MANAGING EMAIL
If your account is enabled for Email Management, you use the Web Agent to interact with
customers by email.
Some customers send email from the company’s Web site while others send it from a corporate or
personal mail account. The email is routed by the Avaya™ Interaction Center (Avaya IC) software
to agents who are available to handle email. Email contacts that are routed to you are displayed in
your Email task list.
This chapter explains the features you can use with Email Management under the following topics:
n
Being Alerted to a New Email Contact
n
Using the Email Task List
n
Viewing Email History
n
Composing a Normal Email Reply
n
Addressing Emails with the UAD
n
Using Resources in Email
n
Using Suggested Responses
n
Sending an Email to an External Agent
n
Transferring an Email Contact
n
Deferring an Email
n
Saving a Draft
n
Forwarding an Email
n
Spell Checking Your Emails
n
Requesting More Information from Customer
n
Responding to an Email Alert
n
Resolving an Email
n
Originating an Outbound Email
n
Approving or Rejecting an Email
n
Handling a Rejected Email
Page 88
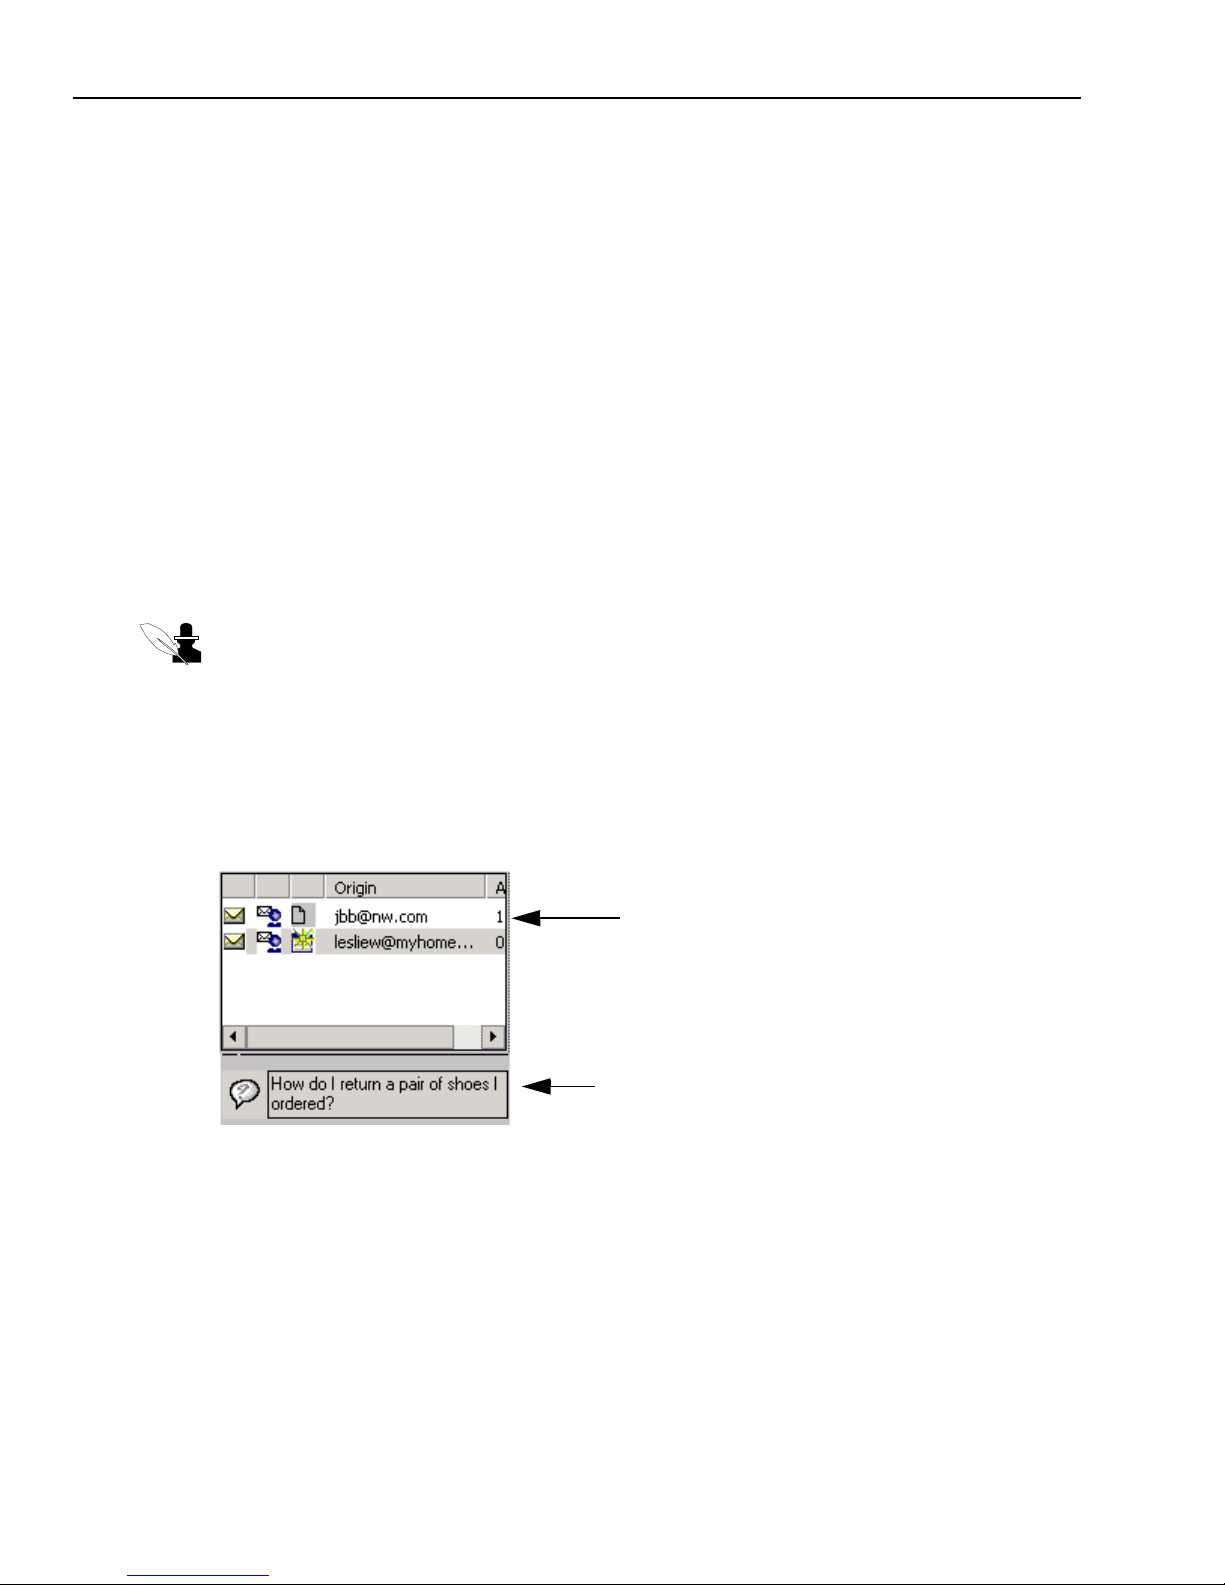
Chapter 4 Managing Email
88 Avaya Agent User’s Guide
n
Using Multiple Languages with Email
n
Wrapping Up and Completing an Email Contact
Being Alerted to a New Email Contact
Email that customers send from the company Web site may be routed to you whenever you are
available for email.
Depending on how the Avaya IC software has been set up at your contact center, you may be
alerted to an incoming email in two ways:
n
By a sound. For information on changing the way that you are alerted, see “Contact
Preferences,” on page 168.
n
By a screen pop. This is a dialog box that asks if you want to suspend your other contacts to
begin handling the new email contact. You may be able to control whether you receive this
dialog box, with the “Wait for confirmation before accepting a contact” preference. For
information, see “Contact Preferences,” on page 168.
Note: If you are alerted to an email contact but do not acknowledge it within a preset amount of
time, the contact is assigned to another agent and removed from your Email task list. The amount
of time is set by the administrator of the WebACD Server configuration.
Using the Email Task List
The Email task list displays the email contacts currently assigned to you. A typical Email task list
is shown in the following illustration:
If you click a contact in the Email task list, it becomes selected. The subject line of the selected
contact is displayed when you click the contact. All tasks that you perform to the email in the Web
Agent apply to the selected email contact. (When you double-click a contact, the Web Agent
window opens and displays this contact to the Email Preview mode.)
Subject line of
selected email contact
Oldest contact
Page 89
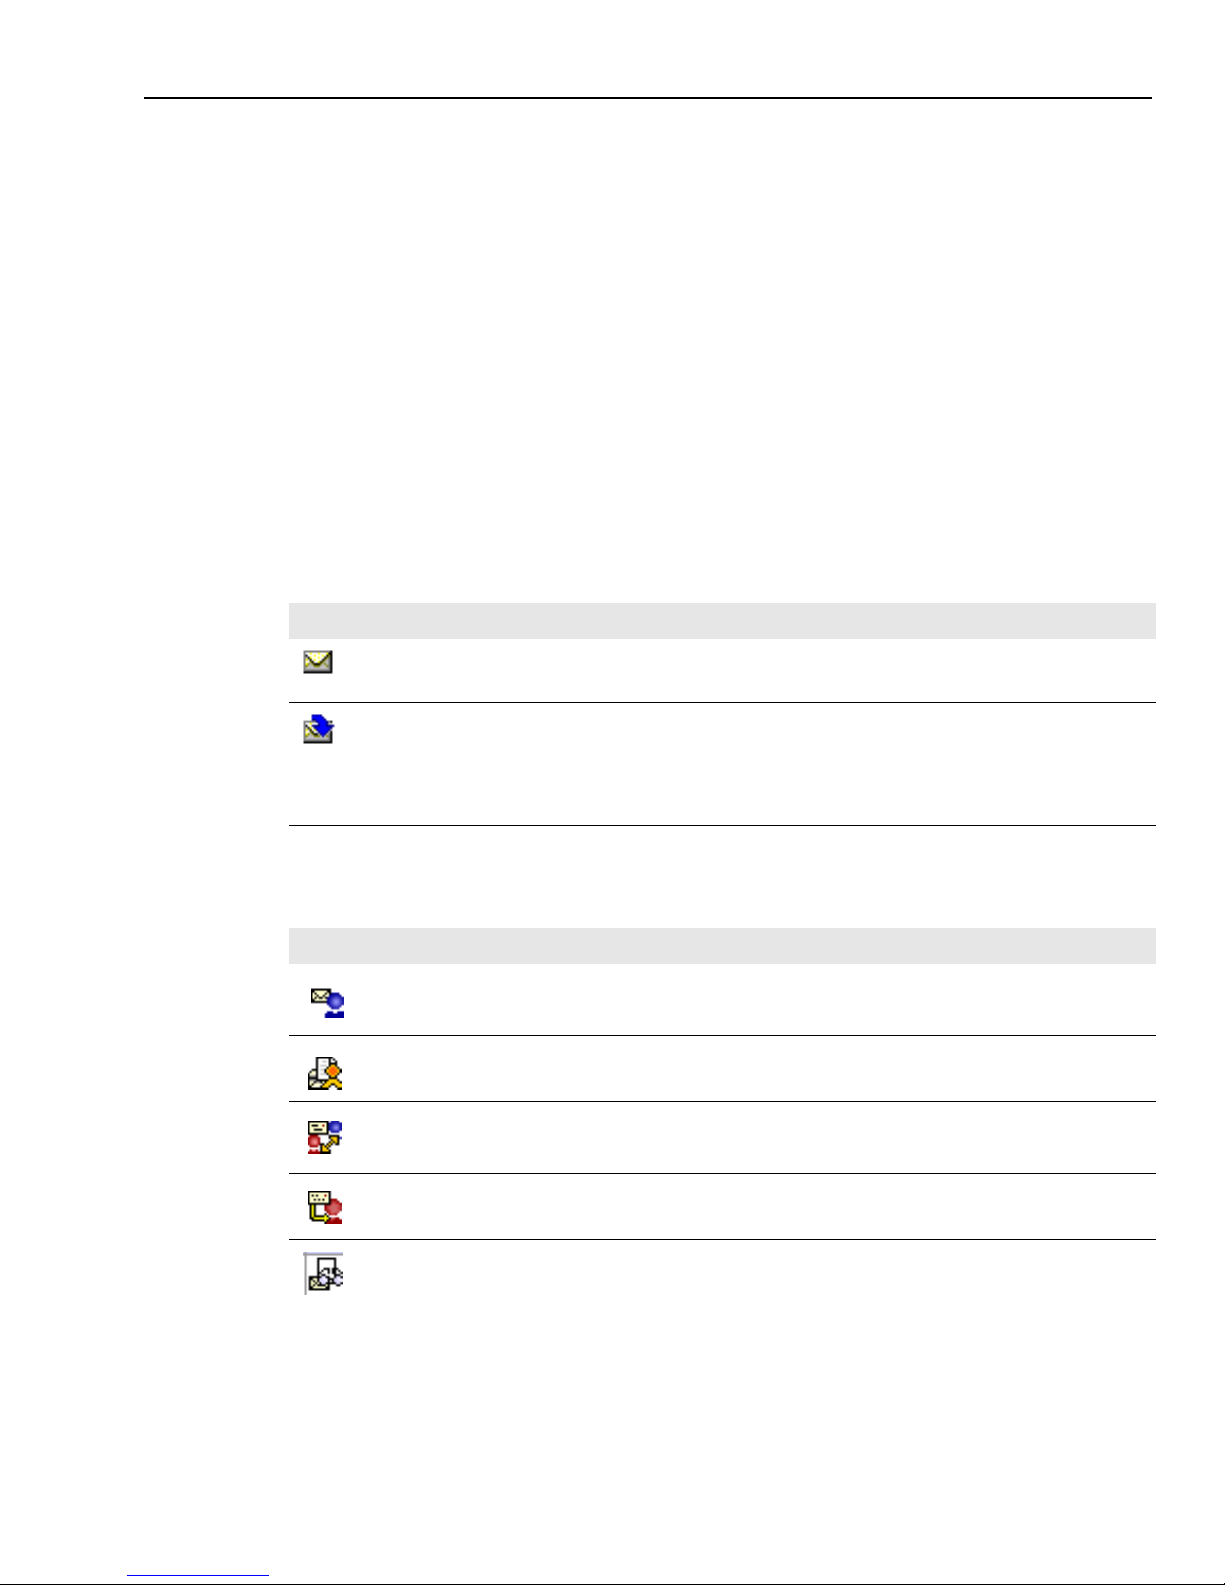
Using the Email Task List
Issue 1.0 June 2002 89
A good deal of information about your email contacts is displayed in the small space of the Email
task list by visual cues, including icons and text.
Icons in the Email Task List
If you pay attention to the icons in the task list, you can see at a glance a lot of useful information.
There are three columns of icons in the Email task list, which are as follows:
n
First column – The icon in the first column is an envelope to indicate that this is an email. If the
email has been transferred, an arrow is displayed to the side of the envelope.
n
Second column – The icons indicate the source of the email, such as a reply from an external
agent or an email that has been rejected during Quality Assurance.
n
Third column – The icons in the third column show the status of the email, such as whether it is
deferred or wrapped.
The icons in the first column of your Email task list tell you the state of each email contact, as
shown in the following table:
The icons in the second column give you information on the source of each email contact. You
may see icons representing the following sources:
Icon Description
The email contact is active.
You have transferred this email to your supervisor or to another agent. The contact remains in
your task list until you wrap it up.
Note: If “malformed error” is displayed when you transfer an email to another agent, contact
your administrator to validate that this agent has been assigned a valid email address in IC
Manager.
Icon Description
A reply to a normal email sent to the customer by the agent
A reply from an external agent
A reply from a customer to a request for additional information
A reply to an email you forwarded.
An email composed by another agent and forwarded to you for approval (Quality Assurance)
Page 90
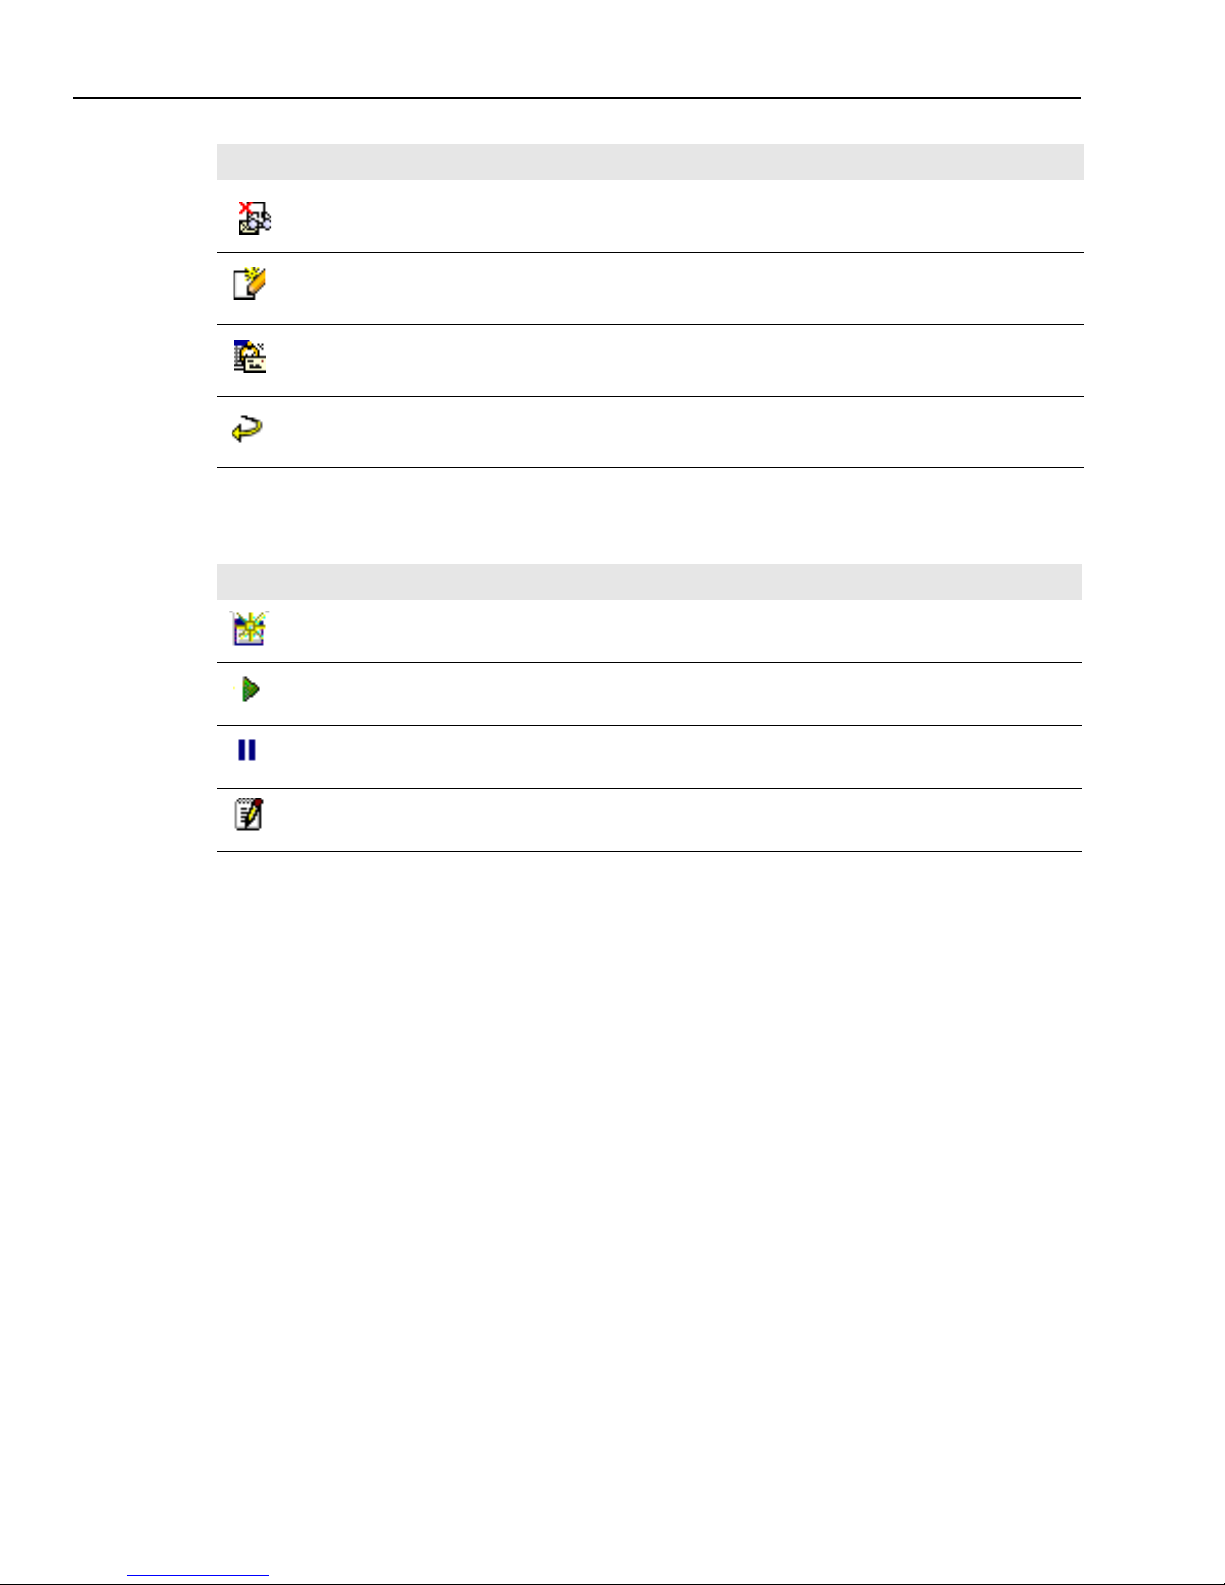
Chapter 4 Managing Email
90 Avaya Agent User’s Guide
The third column indicates the current status of each email contact, as shown in the following
table.
Text in the Email Task List
The following areas give you text information about a selected email contact:
n
Origin – The email address from which the email was sent.
n
Age – The length of time the contact has been assigned to you. The time runs continuously
until you complete the contact.
n
Customer question – The text the selected customer typed in as the subject of their email.
An email rejected during Quality Assurance and sent to you for correction
A reply to an email that you originated.
An email alert, notifying you that an email requested from a customer or an external agent is
overdue.
A reply from an automatic response email that was sent to the customer from the Avaya IC
system.
Icon Description
New, unopened email contact.
Open, active email contact. This is the contact you are currently handling in the Web Agent.
Deferred email contact. You must return to it when you can and complete it.
Email contact in WrapUp state. You are wrapping up this email in the Web Agent.
Icon Description
Page 91

Viewing Email History
Issue 1.0 June 2002 91
Viewing Email History
If you want to see tracking information about an email contact in your contact list or copies of
recent emails sent by the current customer, you can use the Email History dialog box, which has
the following tabs:
n
Tracking History – Detailed tracking information about this email and other emails sent from
this customer
n
Customer History – Copies of previous emails the customer has sent to your company and
copies of the emails themselves
Note: Another agent may have deferred an email contact from this customer. You cannot see
deferred email contacts in the Email History dialog box but you can see them in the Active Contact
Viewer. It is a good idea to check the Active Contact Viewer when you are looking for information
about a customer’s recent contacts. See “Viewing Active Contact Information,” on page 52.
To see the tracking history or previous emails of an email contact:
1 Display the email you want information about in the Email Preview mode.
2 Click the Email History button in the email toolbar to display the Email History dialog box.
The Email History dialog box opens with the Tracking History tab displayed.
3 To see the maximum amount of information in the Tracking History tab, do any of the
following:
w
To see all available information in a table column, hold your cursor at the right edge of any
column title. When you see a two-sided arrow, click and drag to the right.
w
To see tracking information about past emails sent by this customer, click the View Full
Email History check box.
Page 92
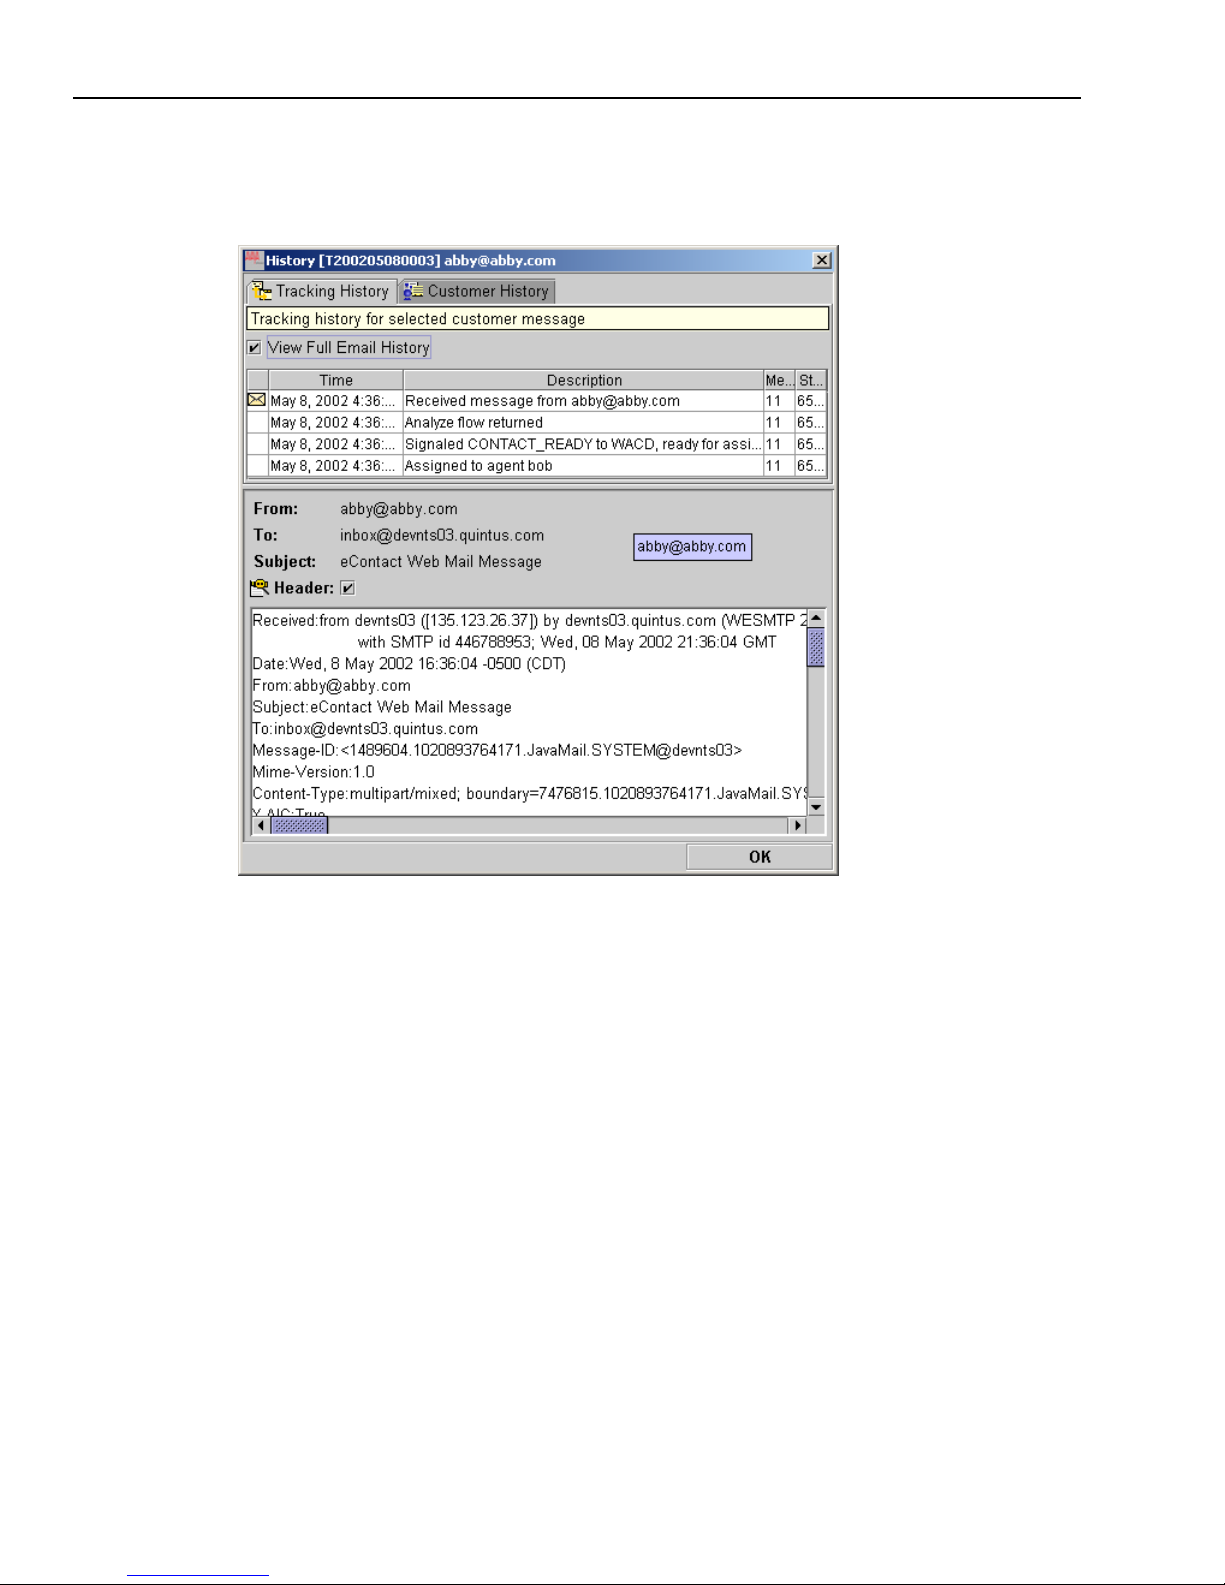
Chapter 4 Managing Email
92 Avaya Agent User’s Guide
4 To see complete technical information about the routing of any email selected in the table, click
the Header check box. When there is a problem, this information may be helpful for
supervisors or administrators.
Page 93
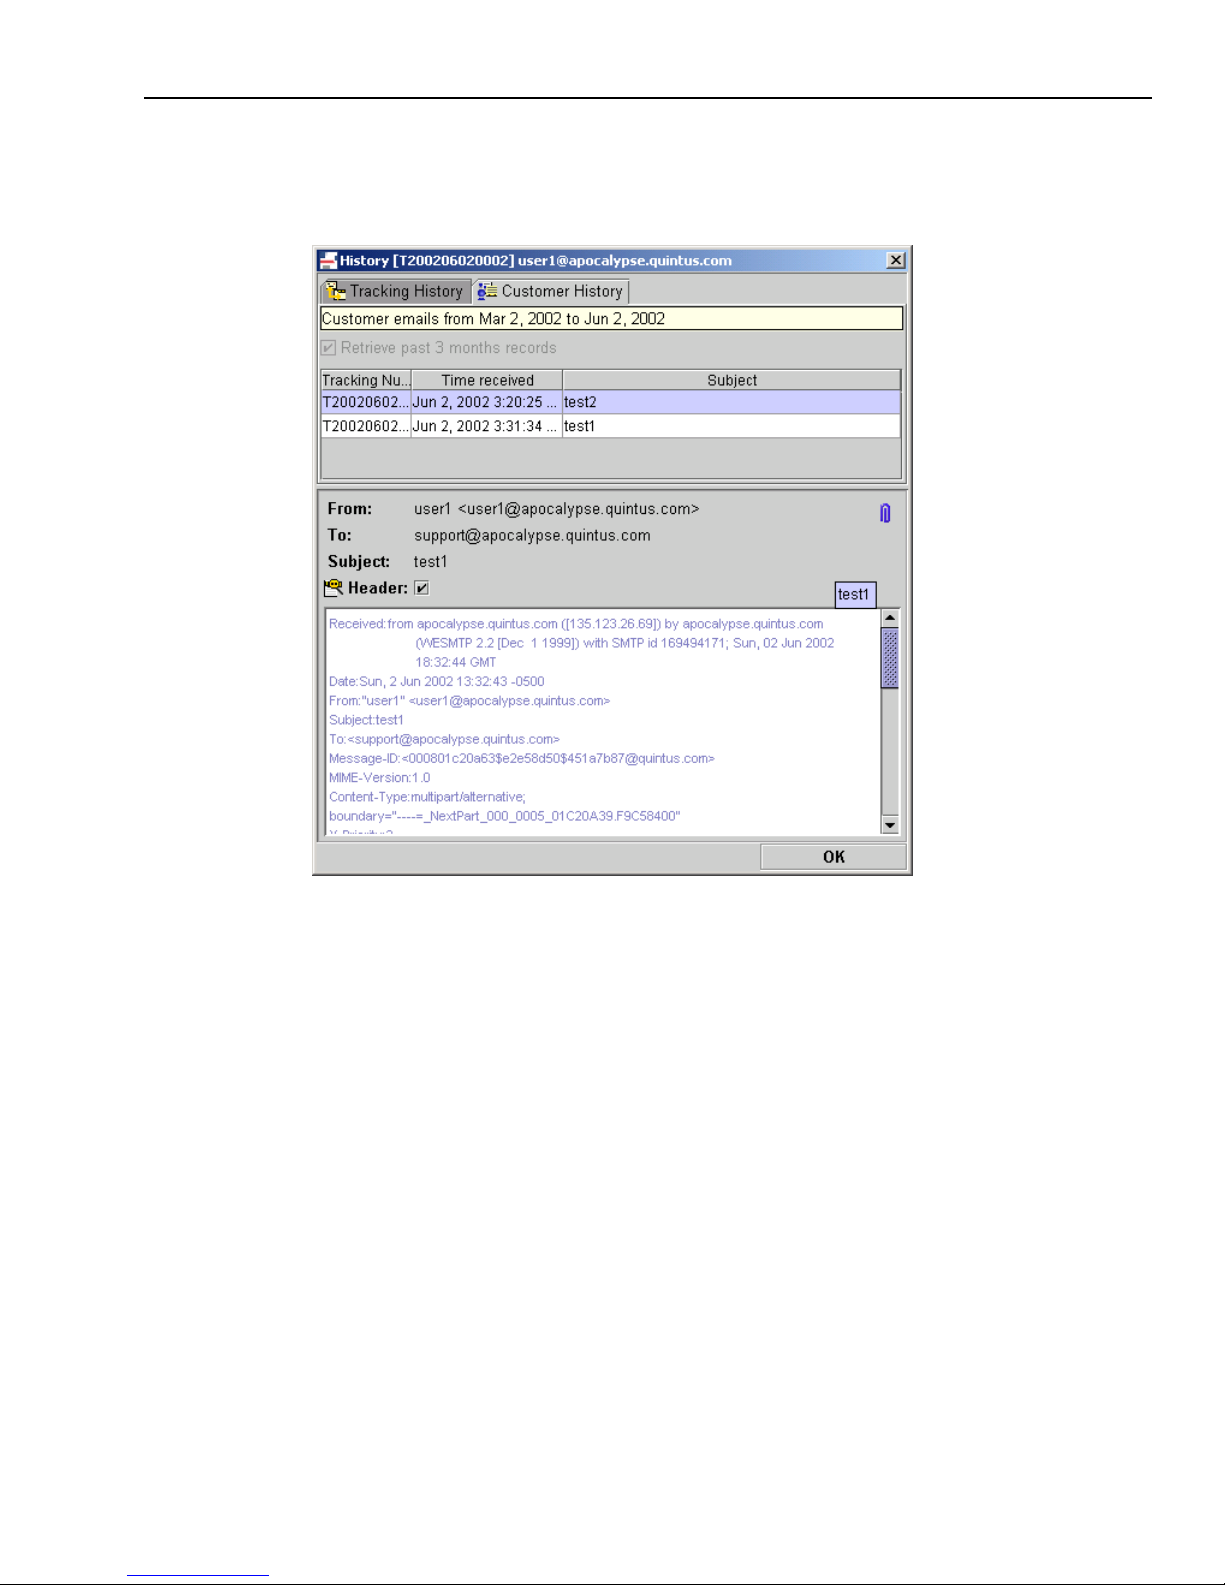
Viewing Email History
Issue 1.0 June 2002 93
5 To see copies of emails this customer sent to your company in the recent past, click the
Customer History tab. Select any email in the box at the top to see a copy of the email itself in
the scroll box at the bottom, as shown in the following illustration.
6 Check your dialog box to see the time range of the emails displayed. For example, the dialog
box may display emails that were received in the past three months. If you want to see emails
that arrived before this time range, clear the check box to specify a longer time range.
Page 94

Chapter 4 Managing Email
94 Avaya Agent User’s Guide
Composing a Normal Email Reply
The following procedure explains how to compose a normal reply to a customer email using
features available in the Email reply screen.
To compose a basic email reply to a customer:
1 Make sure that you are available to handle email by looking at the Email Channel button in
Avaya Agent. If the button shows a yellow X, click the button to make yourself available for
email.
You are now available to receive the number of email contacts that is set for you in your
channel load. See “Setting Your Channel Loads,” on page 49 for information about channel
loads. After you become available, any email contacts that are routed to you show up in the
Email task list.
2 In Avaya Agent, select a contact in the Email task list. If there is more than one contact, the
contacts are listed in reverse chronological order, that is, with the oldest contact at the top.
For information about the meaning of the icons, and the text displayed in the Origin and Time
columns, see “Being Alerted to a New Email Contact,” on page 88.
The Web Agent window opens in the Email Preview mode to show you information about this
email. The Information Bar displays “New inbound message from customer.”
3 Read the message using the scroll bar, if necessary, to see the entire message.
4 Before you begin your reply, you can use any of the following buttons in the email toolbar, as
needed. You can also return to this Preview tab later to use these buttons.
w
Print – Prints a paper copy of the text that is currently displayed in the Information Bar, the
Header fields, and the Message Composition Area.
w
Resolve – Lets you apply a status to the email. See “Resolving an Email,” on page 112 for
information.
w
Email History – Displays a dialog box with tracking information about this email or copies
of previous emails sent from the current customer’s email address. See “Viewing Email
History,” on page 91 for more information.
w
Transfer – Displays the Unified Agent Directory so you can transfer this email contact to a
particular agent, or transfer it to a queue and let Avaya IC route the email to the first
available agent in that queue. For information, see “Transferring an Email Contact,” on
page 105.
w
Defer – Defers your reply to this email contact until a later time. The contact remains in
your Email task list but you are available for another email to replace this one. For more
information, see “Deferring an Email,” on page 106.
w
Wrap – Wraps up this email contact. See “Wrapping Up and Completing an Email Contact,”
on page 120 for information.
w
Complete – This button is only available when you are in WrapUp state.
Page 95

Composing a Normal Email Reply
Issue 1.0 June 2002 95
5 To begin your reply, click one of the two reply buttons in the email toolbar:
w
Reply to customer – Addresses your reply to the sender of the email and no one else.
w
Reply to all – Addresses your reply to the sender of the email and to all the people listed in
the Cc (Copy) or Bcc (Blind Copy) fields of the message you are replying to. See Step 6 of
this procedure for an explanation of these fields.
The window changes to the Email Compose mode where you will write your email reply. Note
that the drop-down menu indicates that this is a Normal Reply.
6 If you want to add the email address of anyone in your company, so that they will receive a
copy of this email, add their email address easily to any of the address fields by using the UAD.
See “Addressing Emails with the UAD,” on page 97 for information.
7 Look in the Resource area of the window to see if there are any Suggested Responses. If you
see Suggested Responses, refer to “Using Suggested Responses,” on page 102 for instructions
about choosing a response or responses.
8 If you do not see Suggested Responses, look for any resources that are relevant to the
customer’s question in the Email Templates folder, Global Resources folder, or Agent
Resources folder. For information on viewing resources, see “Viewing Your Resources,” on
page 161.
9 If you found a resource that you want to use, add it to your message. For information on adding
resources to an email, see “Using Resources in Email,” on page 100.
10 If you added a resource, read the message in the Message Composition area and modify it
appropriately, if necessary.
11 Type your message to the customer in the Message Composition area. Be sure that you address
the customer’s question or problem.
Tip: If you added a resource or an attachment, you may want to begin with a short
introduction to explain the resource or the attachment.
12 Look over the buttons in the email toolbar to decide whether you want to execute any of the
commands before you send your message. The buttons are as follows:
w
Print – Prints a paper copy of the email as it is currently displayed.
w
Save – Saves a draft of your message. The contact remains in your Email task list. The next
time you click this contact and then begin to reply to this customer’s email (by clicking
Reply, Reply to All, or Forward), the Email Compose window opens with the message you
saved.
w
Cancel – Cancels the reply. A dialog box asks if you wish to save a draft of the reply you are
composing.
Page 96
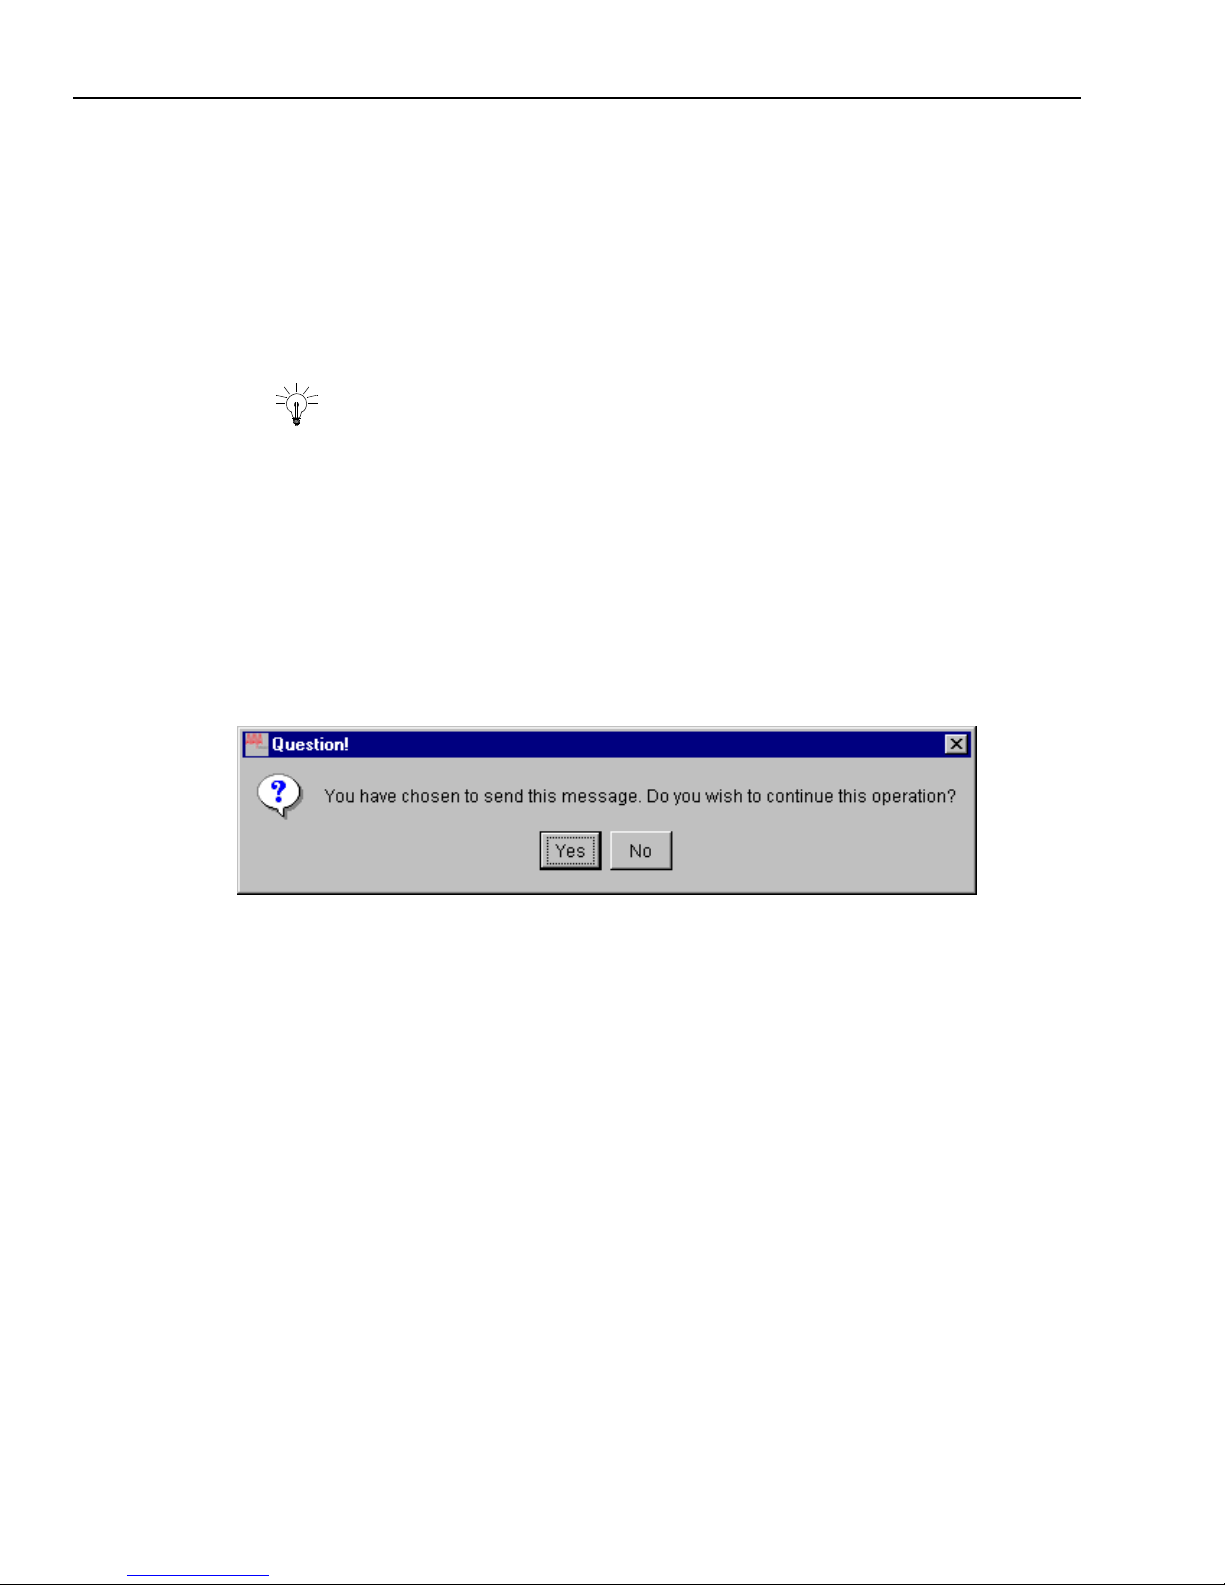
Chapter 4 Managing Email
96 Avaya Agent User’s Guide
w
Add Attachments – Attaches a file from your computer’s hard drive or from the hard drive
of any computer that you can access on the network. When you press the Attach button, a
window is displayed where you can browse to the file and select it. You can click the View
button to open the file in the program associated with that type of file on your computer.
Contact your administrator if you do not know what type of file this is and you want to open
it.
w
Spell Check – Helps you check and correct the spelling of your message. For information,
see “Spell Checking Your Emails,” on page 109.
Tip: You can select an option in the Preferences dialog box (available under the
Tools menu) to bring up the Spell Checker automatically before your messages are
sent. If you select this option, you will not forget to spell check your messages. See
“Email Preferences,” on page 169.
13 When the message is complete, click the Send button.
If the “Spell check before sending an email” option is selected in your Preferences, the Spell
Checker is displayed so you can check the spelling in your message. Check the spelling,
referring to “Spell Checking Your Emails,” on page 109 if necessary.
If the Confirm Before Sending option is selected, a dialog box like the following asks if you are
sure you want to send the message. Click Yes.
To change the preferences that determine whether the Spell Checker or the confirmation dialog
box are displayed whenever you start to send an email, see “Setting Preferences,” on page 165.
Your response is sent to the customer. The window switches to the WrapUp state. The email
you just sent is still displayed, but now it is read-only.
14 If you see information in the Prompter window in Avaya Agent, fill in any requested
information as appropriate. For information about filling in a Prompter script, see “Using a
WrapUp Prompter Script,” on page 69.
15 Wrap up and complete the email contact, using the following buttons:
w
Wrap – Puts you in WrapUp state. While in WrapUp state, you cannot receive another email
contact to replace this contact. You may be asked to fill out information about this email
contact while you are in WrapUp state.
w
Complete – Closes this email contact and removes it from the Email task list. For more
information, see “Wrapping Up and Completing an Email Contact,” on page 120.
Page 97

Addressing Emails with the UAD
Issue 1.0 June 2002 97
Addressing Emails with the UAD
When you address emails to people at your contact center, the Unified Agent Directory (UAD) can
help you find and add the addresses quickly and easily, and without errors. The UAD opens in a
special Email Addressing mode for this purpose. This is useful for the following tasks:
w
Composing a Normal Email Reply
w
Sending an Email to an External Agent
w
Transferring an Email Contact
w
Forwarding an Email
w
Originating an Outbound Email
Note: In the Email Addressing mode, the UAD displays only queues and agents that are enabled
for email and it contains only their email addresses.
Note: The following procedure explains how to add email addresses, not how to do other tasks
such as transfer emails or send them to external agents. See the appropriate sections for those
procedures.
Page 98
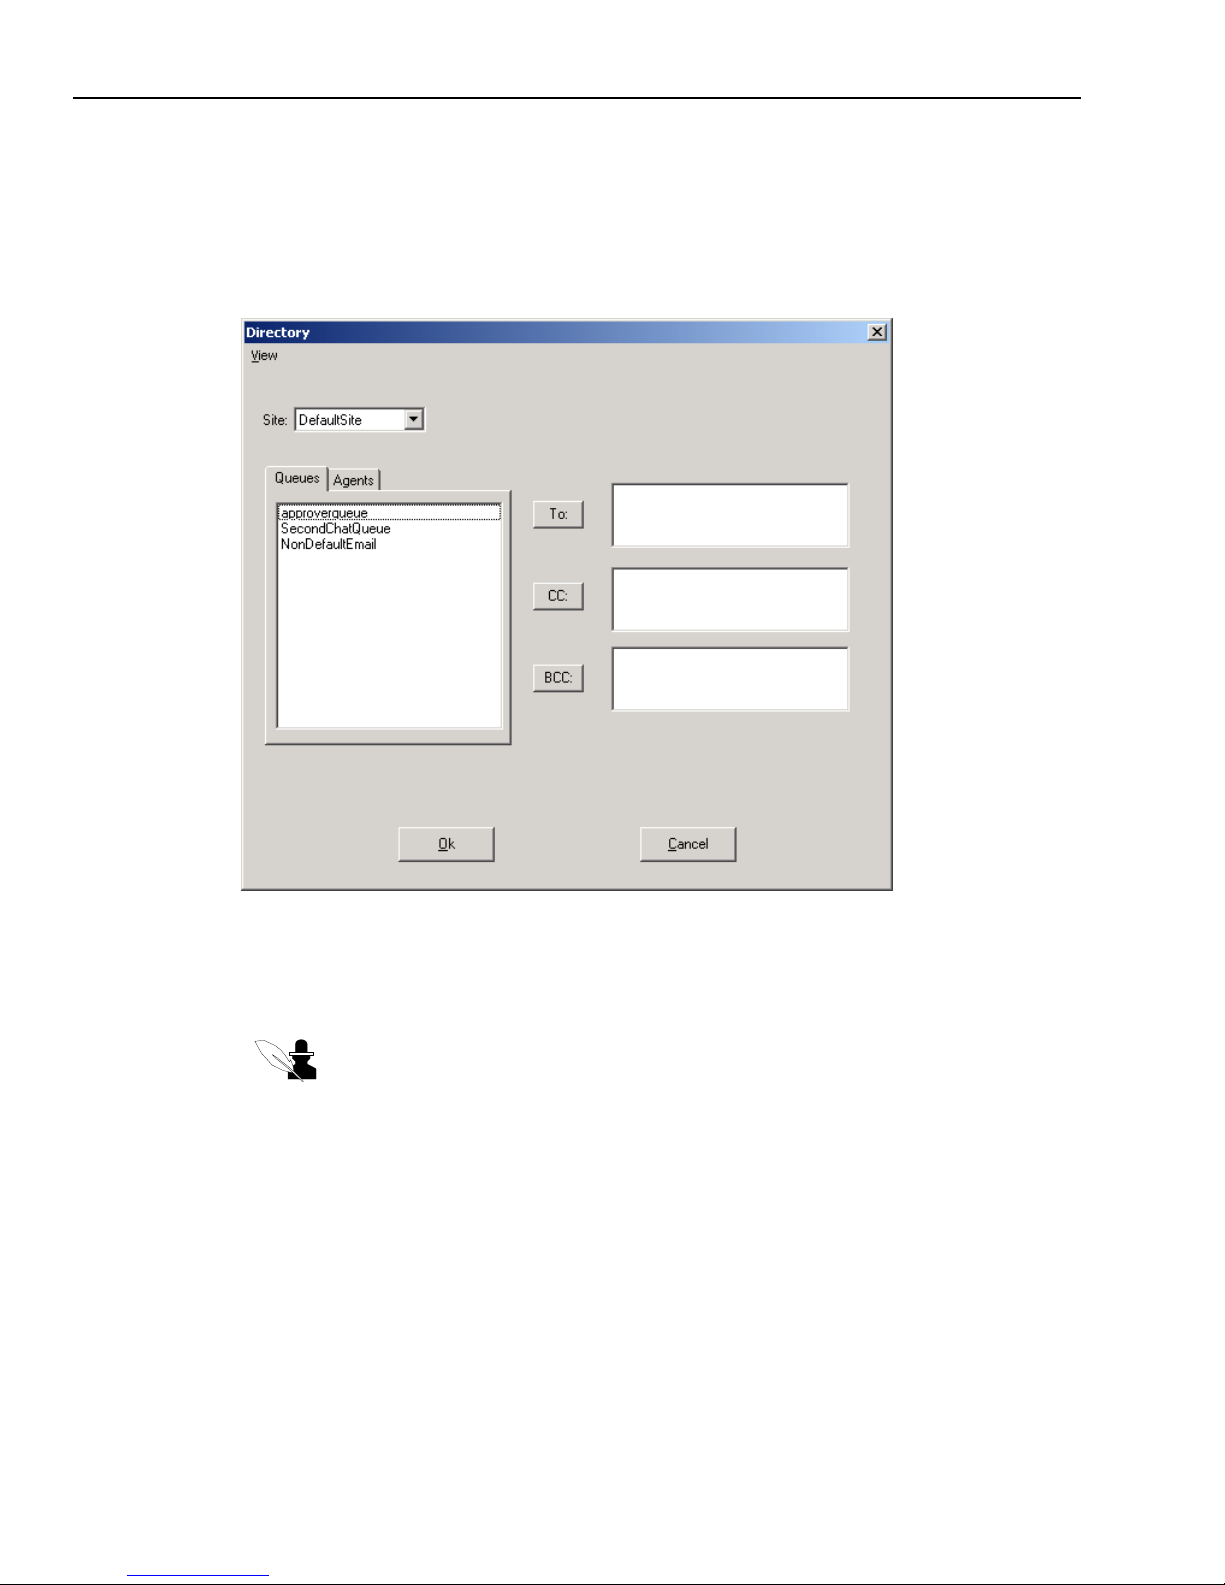
Chapter 4 Managing Email
98 Avaya Agent User’s Guide
To address an email using the UAD:
1 Display the email you are responding to in the Email Compose window.
2 Click the button beside the Cc or Bcc fields to display the UAD.
The UAD is displayed in Email Addressing mode, as shown in the following illustration:
The meaning of these fields is as follows:
w
To – If enabled, this field is for the address of anyone to whom you want to address this
message directly.
Note: The “To” field is disabled for a Normal Reply and for a Request for Additional
Information because the email is automatically addressed to the customer to whom
you are replying.
w
Cc (Copy) – This field is for the address of any person (or any queue) that you want to
receive a copy of this email.
w
Bcc (Blind Copy) – This field is for the address of any person (or any queue) that you want
to receive a copy of this email, without anyone else seeing their address.
3 If the queue or person you are looking for is not located in your site, select the name of the site
from the Site drop-down menu. If you do not know where the queue or person is located, select
All Sites.
Page 99
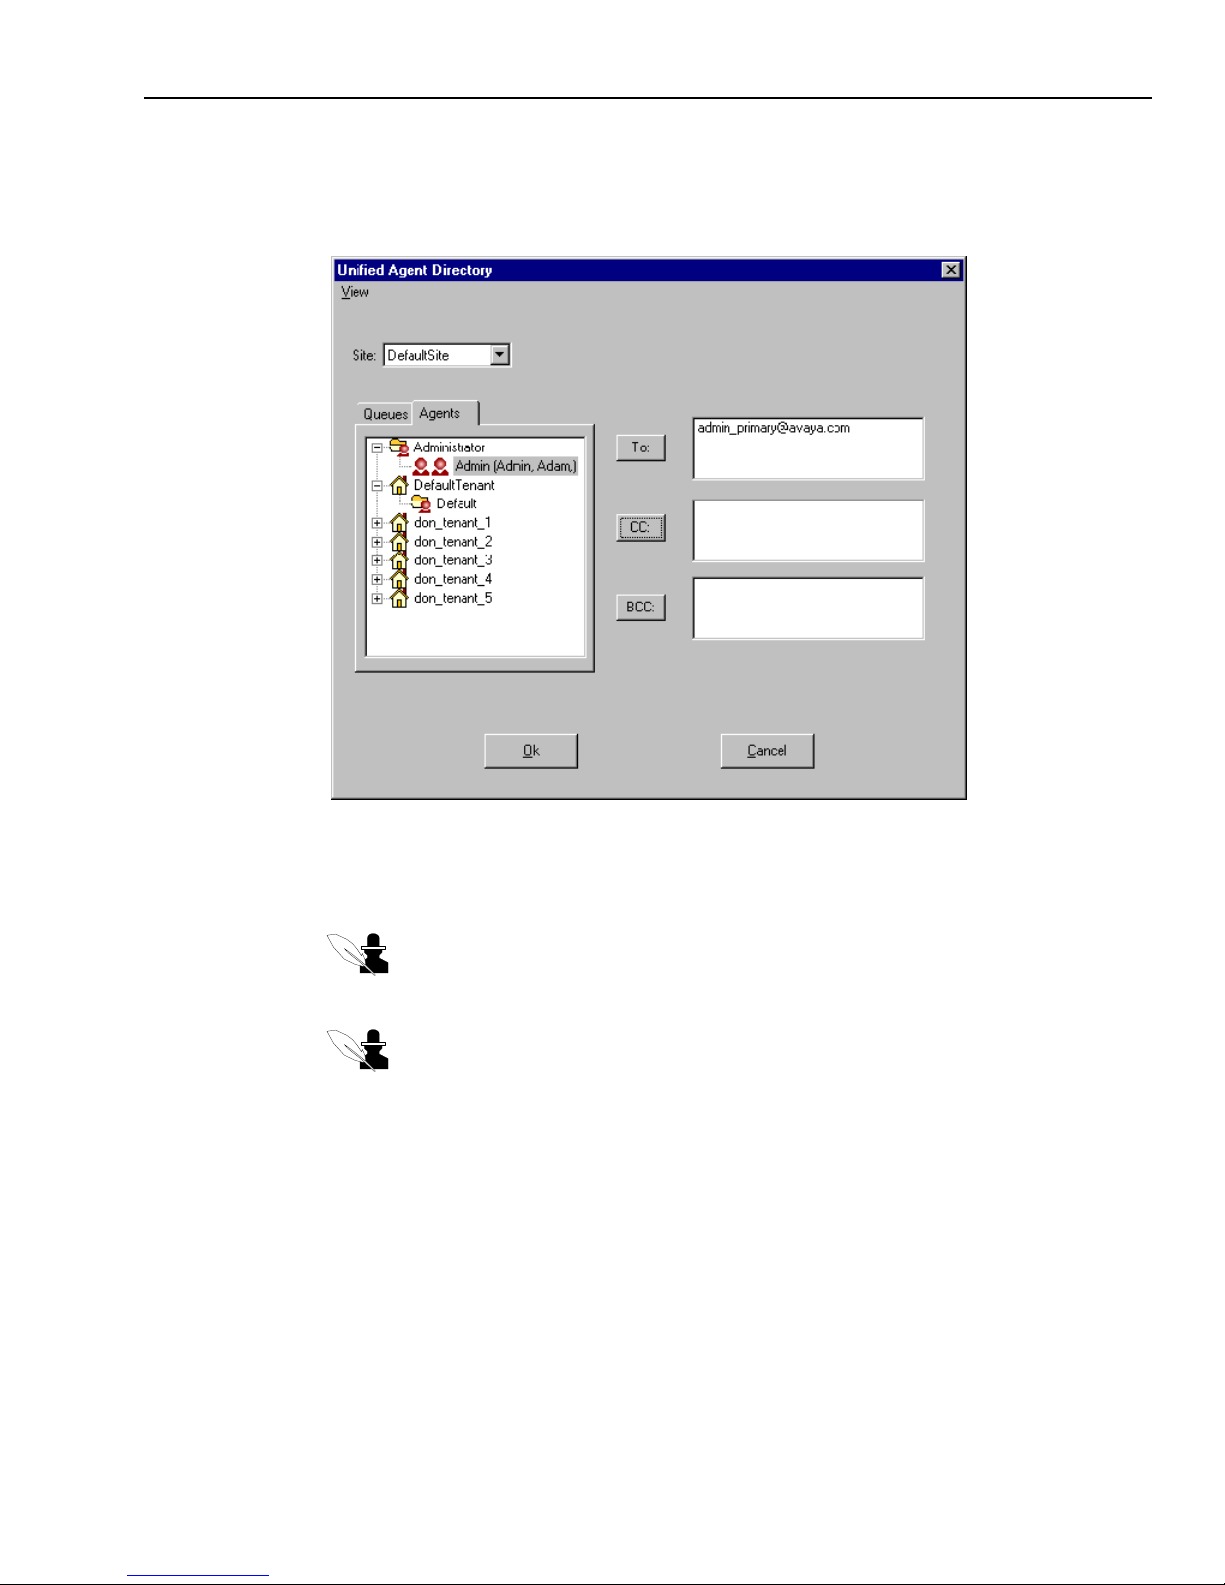
Addressing Emails with the UAD
Issue 1.0 June 2002 99
4 Navigate through the Queues, Agents, or any other tab available to you, opening groups as
necessary, until you find the queue or person to whom you want to address this email. In the
following illustration, the administrator has been selected in the To field:
5 Select the desired name and then click the To, Cc, and Bcc button to add that person’s email
address to the box on the right side of the window. (You can double-click to automatically add
the name to the To box.)
Note: The “To” field is disabled for a Normal Reply and for a Request for Additional
Information because the email is automatically addressed to the customer to whom
you are replying.
Note: If you want to remove a name you added to the right side of the window, select
it and press the Delete key on your keyboard.
6 Repeat the above steps as desired to add the addresses of all the intended recipients to your
email.
7 Click Ok.
The email addresses are added to the email you are composing.
8 If you are doing any of the following tasks, return to the appropriate section to finish your
email and send it:
Page 100

Chapter 4 Managing Email
100 Avaya Agent User’s Guide
w
“Composing a Normal Email Reply,” on page 94
w
“Sending an Email to an External Agent,” on page 103
w
“Transferring an Email Contact,” on page 105
w
“Forwarding an Email,” on page 107
w
“Originating an Outbound Email,” on page 113
Using Resources in Email
Resources are previously prepared text, emails, and URLs (Internet addresses) that you can send
repeatedly to different customers by chat or email. Resources save you the time and tedium of
typing the same things again and again. Text and email resources may contain such things as
greetings, closings, and answers to frequently asked questions. Email resources may have
information already entered in the To, Cc, and Bcc fields, and they may contain attachments. URL
resources may be links to company Web pages. For example a URL may link to a page about
exchange policies.
When you are composing an email, you may see any or all of the following types of resource
folders:
n
Global Resources – This folder is for email, text, and URL resources created for you and other
agents by administrators or supervisors. If you are an agent, you cannot create or modify these
resources.
n
Agent Resources – This folder is for email, text, and URL resources that you create for
yourself. These resources are saved with your login ID. You are the only person who can see or
use the resources you create.
n
Email Templates – This folder is for a type of email resources called email templates. These are
created for you and other agents by administrators. An email template is a prewritten email
response that becomes customized when you use it. For example, your current customer’s
name and the current date may be automatically entered into the email resource whenever you
use it. Your company may also send a copy of an email template when you apply a status to a
customer’s email. For information, see “Resolving an Email,” on page 112.
n
Suggested Responses – (If your company is not using the Content Analyzer, you never see this
folder.) This folder is for email resources that are created by an Avaya software product, called
the Content Analyzer, in response to a particular email. When these resources exist, you must
consider using them before you consider using resources in any of the other folders. For more
information, see “Using Suggested Responses,” on page 102.
n
Migrated Resources – You see this folder after you import migrated resources. Your
administrator will inform you if you need to do this. See “Importing Migrated Resources,” on
page 164.
 Loading...