

Page 1

GuestWorks® and
®
DEFINITY
Enterprise Communications Server
Release 9
Hospitality Operations
555-231-742
Comcode 108898941
Issue 1
November 2000
Page 2

Copyright 2000, Avaya Inc.
All Rights Reserved
Notice
Every effort was made to ensure that the information in this book was complete
and accurate at the time of printing. However, information is subject to change.
Preventing Toll Fraud
“Toll fraud” is the unauthorized use of your telecommunications system by an
unauthorized party (for example, a person who is not a corporate employee,
agent, subcontractor, or is not working on your company's behalf). Be aware that
there may be a risk of toll fraud associated with your system and that, if toll fraud
occurs, it can result in substantial additional charges for your telecommunications
services.
Avaya Fraud Intervention
If you suspect that you are being victimized by toll fraud and you need techni cal
assistance or support, in the United States and Canada, call the Technical Service
Center's Toll Fraud Intervention Hotline at 1-800-643-2353. Outside of the
United States and Canada, contact your Avaya representative.
Providing Telecommunications Security
Telecommunications security (of voice, data, and/or video communications) is
the prevention of any type of intrusion to (that is, either unauthorized or
malicious access to or use of your company's telecommunications equipment) by
some party.
Your company's “telecommunications equipment” includes both this Avaya
product and any other voice/data/video equipment that could be accessed via this
Avaya product (that is, “networked equipment”).
An “outside party” is anyone who is not a corporate employee, agent,
subcontractor, or is not working on your company's behalf. Whereas, a
“malicious party” is anyone (including someone who may be otherwise
authorized) who accesses your telecommunications equipment with either
malicious or mischievous intent.
Such intrusions may be either to/through synchronous (time-multiplexed and/or
circuit-based) or asynchronous (character-, message-, or packet-based)
equipment or interfaces for reasons of:
• Utilization (of capabilities special to the accessed equipment)
• Theft (such as, of intellectual pro pe rty, financial assets, or toll-facility access)
• Eavesdropping (privacy invasions to humans)
• Mischief (troubling, but apparently innocuous, tampering)
• Harm (such as harmful tampering, data loss or alteration, regardless
of motive or intent)
Be aware that there may be a risk of unauthorized intrusions associated with your
system and/or its networked equipment. Also realize that, if such an intrusion
should occur, it could result in a variety of losses to your company (including but
not limited to, human/data privacy, intellectual property , material assets, financial
resources, labor costs, and/or legal costs).
Your Responsibility for Your Company’s Telecommunications Security
The final responsibility for securing both this system and its networked
equipment rests with you - an Avaya customer's system administrator, your
telecommunications peers, and your managers. Base the fulfillment of your
responsibility on acquired knowled ge and resourc es from a varie ty of so urc es
including but not limited to:
• Installation documents
• System administration documents
• Security documents
• Hardware-/software-based security tools
• Shared information between you and your peers
• Telecommunications secur ity experts
To prevent intrusions to your telecommunications equipment, you and your peers
should carefully program and configure your:
• Avaya-provided telecommunications systems and their interfaces
• Avaya-provided software applications, as well as their underlying
hardware/software platforms and interfaces
• Any other equipment networked to your Avaya products.
Federal Communications Commission Statement
Part 15: Class A Statement. This equipment has been tested and found to com-
ply with the limits for a Class A digital device, pursuant to Part 15 of the FCC
Rules. These limits are designed to provide reasonable pro tect ion agai nst harmful interference when the equipment is operated in a commercial environment.
This equipment generates, uses, and can radiate radio frequency energy and, if
not installed and used in accordance with the instruction manual, may cause
harmful interference to radio communications. Operation of this equipment in a
residential area is likely to cause harmful interference, in which case the user will
be required to correct the interference at his own expense.
Part 68: Network Registration Number. This equipment is registered with the
FCC in accordance with Part 68 of the FCC Rules. It is identified by FCC registration number AV1USA-43023-MF-E.
Canadian Department of Communications (DOC)
Interference Information
This digital apparatus does not exceed the Cl ass A limits for radio noise emissions set out in the radio interference regulations of the Canadian Department of
Communications.
Le Présent Appareil Nom
érique n’é
met pas de bruits radioélectriques dépassant
les limites applicables aux appareils numériques de la class A préscrites dans le
reglement sur le brouillage radioélectrique édicté par le ministére des Communications du Canada.
Trademarks
DEFINITY and GuestWorks are registered trademarks of Avaya and Lucent
Technologies.
INTUITY is a trademark of Avaya and Lucent Technologies.
Ordering Information
Call: Avaya Publications Center
U.S. Voice: 1 888 582 3688
U.S. Fax: 1 800 566 9568
Canada Voice: +1 317 322 6619
Europe, Middle East, Africa Voice: +1 317 322 6416
Asia, China, Pacific Region, Caribbean,
Latin America Voice: +1 317 322 6411
Non-U.S. Fax: +1 317 322 6699
Write: Avaya Publications Center
2855 N. Franklin Road
Indianapolis, IN 46219
U.S.A.
Order: Document No. 555-231-742
Comcode 108898941
Issue 1, November 2000
For more information about Avaya documents, refer to the section entitled
“Related Documents” in “About This Document.”
You can be placed on a Standing Order list for this document and other documents you may need. Standing Order will enable you to automatically receive
updated versions of individual documents or document sets, billed to account
information that you provide. For more information on Standing Orders, or to be
put on a list to receive future issues of this document, please contact the Avaya
Publications Center.
Technical Suppo rt
In the United States and Canada, Avaya technicians and customers should
call 1-800-242-2121, and dealer technicians should call 1-877-295-0099. Outside
the United States and Canada, Avaya technicians should contact their Center of
Excellence (COE), and customers and dealer technicians should contact their
Avaya authorized representative.
European Union Declaration of Conformity
The “CE” mark affixed to the equipment described in this book indicates that the
equipment conforms to the following European Union (EU) Directives:
• Electromagnetic Compatibility (89/336/EEC)
• Low Voltage (73/23/EEC)
• Telecommunications Terminal Equipment (TTE) i-CTR3 BRI and
i-CTR4 PRI
For more information on standards compliance, contact your local distributor.
Comments
To comment on this document, return the comment form.
Avaya Web Page
http://www.avaya.com
Acknowledgment
This document was prepared by the Information Development Organization for
Global Learning Solutions
Bell Laboratories.
Page 3

GuestWorks and DEFINITY ECS Release 9
Hospitality Operations
Contents
555-231-742
Contents
Contents iii
Hospitality Operations 1
■ About This Document 1
Reasons for Reissue 1
Purpose 1
Organization 2
Conventions 2
Related Documents 4
■ Hospitality Services Overview 5
Telephone Support 5
Issue 1
November 2000
iii
Guest Services 5
PMS Integration 6
Messaging Services 7
Flexibility 7
■ Guest Operations 9
Automatic Wakeup 9
Do Not Disturb 13
Emergency Access to the Attendant 14
Retrieving Messages 15
Dial by Name 20
■ Front Desk Operations 21
Attendant Backup 22
Check-In/Check-Out 23
Automatic Wakeup 30
Controlled Restrictions 44
Do Not Disturb 51
Message Waiting Notification 56
PMS Alarms 57
Call Accounting Alarms 57
Crisis Alert 57
Maid Status, Housekeeping Status, and
Room Occupancy 58
Recorded Announcements 59
Page 4

GuestWorks and DEFINITY ECS Release 9
Hospitality Operations
555-231-742
Contents
■ Voice Messaging Oper ations 63
Administrative Mailbox on an INTUITY
System 63
Connecting Guests to the Voice Mess agi ng
System 64
Restoring a Deleted Voice Message 66
Retrieving Messages for Checked-Out Guests 67
■ Call Accounting Operations 69
Night Audit Procedures 69
End-of-Week/End-of-Month Audit Procedures 70
Printing Key Reports 71
■ Housekeeping Staff Operations 75
Issue 1
November 2000
iv
Status Codes 76
■ Reports 79
Administration Reports 79
Printe r R ep o rts 83
■ Guest Operations Artwork 87
Guest Operations Artwork 88
Index 95
Page 5

GuestWorks and DEFINITY ECS Release 9
Hospitality Operations
Hospitality Operations
555-231-742
Hospitalit y Operations
About This Document
Issue 1
November 2000
1About This Document
This document contains the procedures for using the hospitality features of the
GuestWorks
®
of products. These services include a group of switch-based features that support
the lodging and health industries. Hotels, motels, and hospitals use these features
to improve their property management and to provide assistance to their
employees and clients.
Reasons for Reissue
This document is being reissued due to t he addition of the fol lowing new features:
■ Users can change a telephone’s class of restriction (COR) by using a
feature access code (FAC).
■ A new Custom Selection of VIP DID Numbers feature allows hotel
personnel to explicitly specify what DID number is assigned for a special
guest. This feature makes it possible to, for example, give a frequent guest
the same DID number each time he/she stays at a hotel.
Purpose
and DEFINITY® Enterprise Communications Server (ECS) fami ly
Each procedure in this document is intended for one of the following groups of
users:
■ Guests (or patients)
■ Attendants and front desk personnel
■ Housekeeping staff members.
Page 6

GuestWorks and DEFINITY ECS Release 9
Hospitality Operations
555-231-742
Hospitality Operations
The hospitality services are described in this document for the system managers,
attendants, and front desk personnel who use the services and explain the
procedures to guests and housekeeping staff. Guests and housekeeping staff will
have access to simplified instructions for the specific procedures they use.
NOTE:
This document does not ad dre ss ba sic telephone or attendant console
operation.
Attendants and front desk per son nel should receive s p ec if ic t raining in hos pi tal i ty
operations.
Organization
This document is orga niz ed under the following major topics:
Issue 1
November 2000
2About This Document
Conventions
The following conventions are used in this document:
■ Hospitality Services Overview
■ Guest Operations
■ Console Operations (attendant and backup)
■ Voice Mes sa ging Operations
■ Call Accounting Operations
■ Housekeeping Staff Operations
■ Administration Options
■ Reports
■ Guest Operations Artwork.
■ Unless specified otherwise, the term “switch” signifies the DEFIN ITY
ECS or GuestWorks.
■ The term “attendant c ons ole ” signifies the Mo del 30 2 or PC console that is
usually found at the front desk. The term “backup telephone” signifies
either a Model 6408D+ or a Model 6424D+ telephone with attendant-type
feature buttons. Other multiappearance telephones can be used, but the
preferred models are the 6408D+ and the 6424D+.
■ Buttons you press on the console or backup telephone are shown as
follows:
Release
Page 7

GuestWorks and DEFINITY ECS Release 9
Hospitality Operations
Hospitality Operations
555-231-742
The buttons shown in this document use default label designations. Since
the button label s can be customize d for ea ch site, some butto n labeli ng may
have different designations.
Some button labels, such as Serial Call, span two lines. Because of line
spacing in this document, they are shown across one line of text, such as
Serial Call.
■ Administration command path s and o ptions you en ter i n the adminis trat ion
forms are shown as follows:
change system-paramete rs hos pita lity
■ The term “dial keypad” refers to the touch-tone keypad where you dial
(enter) telephone numbers and feature access codes.
■ When a procedure refers to a “room number,” the reference is to the
extension in the room. The two numbers are not always the same.
Issue 1
November 2000
3About This Document
■ Times entered for features such as Automatic Wakeup and Do Not Disturb
consist of the hour followed by minutes in a multiple of 5 minutes; minute
entries that are not multiples of 5 minutes are rounded off by the switch to
the nearest multiple of 5.
For example, to enter 7:00 a.m., press the
11:30 a.m., press the
2 2 1 5 buttons.
1 1 3 0 buttons. To enter 10:15 p.m., press the
0 7 0 0 buttons. To enter
Depending on the how you enter the time of day, the switch can interpret
the inform ation in two ways as follo ws:
■ Times entered in the range from 13:00 to 00:59 represent 1:00 p.m.
to 12:59 a.m.
■ Times entered in the range from 01:00 to 12:59 could represent
either a.m. or p.m., so the switch prompts you to designate whether
the desired time is a.m. or p.m.
In all of the procedures in which you enter the time of day, 12:00 a.m. is
midnight, and 12:00 p.m. is noon.
■ You hear the following tones during normal operation:
— Dial tone — a steady tone you hear when you select an idle call
appearance.
— Ringback tone — th e no rmal ringing tone y ou he ar af ter you dial an
extension or outside number.
— Busy tone — a slow on-off-on-off tone you hear when the number
you are calling is busy.
— Reorder tone — a fast on-off-on-off tone you hear when calling
facilities are not available or are out of order.
Page 8

GuestWorks and DEFINITY ECS Release 9
Hospitality Operations
Hospitality Operations
555-231-742
— Confirmation tone — a three-burst tone you hear after successfully
using a feature access code.
— Intercept tone — a high-to-low tone you hear when a call or feature
access code is not accepted.
■ The following table lists the features described in this document. Ask your
administrator for these codes a nd write them down in th is table.
Feature Feature Access Code
Announcement
Automatic Wakeup Call
Emergency Access to Attendant
Group Control Restrict
Issue 1
November 2000
4About This Document
Activation
Deactivation
Trunk Answer Any Station (TAAS)
User Control Restrict
Activation
Deactivation
Verify Wakeup Announcement
Voice Do Not Disturb
Related Documents
■ Security Handbook — 555-025-600
■ DEFINITY
■ PC Console Quick Reference User’s Guide — 555-230-795
■ DEFINITY
®
Console Operations — 555-230-700
®
Console Operations Quick Reference — 555-230-890
■ GuestWorks
®
INTUITY™ Lodging Call Accounting User’s Guide —
555-231-205
■ DEFINITY
■ DEFINITY
■ INTUITY™ Lodging Administ ratio n and Feature Operatio ns — 585-31 0-577
■ INTUITY™ Lodging Guest Artwork Package — 585-310-739.
®
ECS System Description — 555-233-200
®
ECS Administrator’s Guide — 555-233-506
Page 9

GuestWorks and DEFINITY ECS Release 9
Hospitality Operations
Hospitality Operations
555-231-742
Hospitality Services Overview
Keeping guests satisfied is the key to a successful lodging establishment, and
providing full guest services through up-to-date communications enhances guest
satisfaction. Gues tWorks and DEFINITY ECS offer the lodgin g operator th e most
advanced hospitality communications package currently available. The package
was designed to assist lodging management with sales, housekeeping, and guest
services with a minimum of assistance from the property’s communications staff.
Issue 1
November 2000
5Hospitality Services Overview
The switch provides a digital telephony base for the property where I
Lodging Voice Messaging, I
services are integrated with the switch. The hospitality package provides th e
custom hospitality features with or without a Property Management System
(PMS) or a call accounting system.
Telephone Support
The switch supports two types of telephones: multiappearance and single-line.
Single-line telephones allow a user to handle two simultaneous calls: one active
and one on hold. Some single-line sets have a data/fax jack on the set to allow
business people to keep in touch with their offices.
Multiappearance telephones are equipped with multiple buttons that can be used
for call appearan ces or feat ures. Multi appearanc e telephon es can also be equipped
with a digital display. Depending on the type of call and the feature being used,
the display will show who is calling, the time of day, the length of a call, and the
trunk group currently in use. The Model 6408D+ and the Model 6424D+ are
recommended for office staff use. The Model 6408D+ and the 6424D+ have
digital displays and access to additional features by using special softkey buttons.
NTUITY™
NTUITY Lodging Call Account ing, and enhan ced gues t
Guest Services
The switch provides automatic wakeup for guest rooms from which guests can
request their own wakeup calls. The request process can use either the Speech
Synthesizer circuit pack or confirmation tones to prompt the guest through the
request. The wakeup call can be as simple as a silent wakeup call, or as elaborate
as a custom sales message in the native language of the guest, tailored to the time
of day and day of the week.
NOTE:
In this document where native language is discussed, it should be
understood that the switch can deliver the different languages if the
messages are recorded into the Announcement circuit pack. It is the
customer’s responsibility to record the messages.
Page 10

GuestWorks and DEFINITY ECS Release 9
Hospitality Operations
Hospitality Operations
555-231-742
An important featu r e of the switch is the a bility to activate Do Not Distur b. This
feature assures that Do Not Disturb will turn off at the predetermined time. Do
Not Disturb is just that — it turns off ringing at a station (a form of terminating
restrictio n). When activated, it allows only Priority Callin g and Automatic
Wakeup calls to ring at the station. This restriction ensures fewer distractions
when a guest does not want to be disturbed.
When not using a PMS, you can have a check-in and check-out button on the
attendant console or back up tele phone. When a gues t is check ed in, t he de sk clerk
presses the check-in button; the switch prompts for an extension number, marks
the room as occupied, and turns the telephone on. At check-out, the reverse
happens.
For the business traveler, the Model 6416D+M and the Model 6424D+M
telephones provi de added f lexibil ity for voice an d data ca lls. These telepho nes use
digital technol ogy to provi de simu ltane ous voi ce cal ls an d da ta ca lls o ver on e pa ir
of wires. These telephones can replace existing analog room telephones without
the need for rewiring your prop erty.
Issue 1
November 2000
6Hospitality Services Overview
After cleaning a room, housekeeping personnel can use the telephone and dial a
feature access c ode to change the ro om statu s from “di rty” to “cl ean and read y for
occupancy.”
A GuestWorks feature, called Dial by Name, allows guests to call other guests in
the hotel by entering the guest’s name instead of the extension number. Dial by
Name uses the Call Vectoring feature to give guests another option when placing
calls.
PMS Integration
When a PMS is added, many of the previou sly-menti oned switch fe ature s become
enhanced for the needs of lodging management. When the guest checks into the
hotel, all information is entered in the PMS and is then transferred to the switch. If
the PMS has the names registration feature, the guest’s name is transferred
automatically to the switch and is added to the station screen.
This means that when Jim Smith calls for room service, the person answering the
telephone sees “Jim Smith” in the digital display and answers “How can I help
you, Mr. Smith.” This kind of personalized service can help distinguish one hotel
from another.
Page 11

GuestWorks and DEFINITY ECS Release 9
Hospitality Operations
Hospitality Operations
555-231-742
Messaging Services
When a guest has a messag e, the message waitin g la mp o n a gue st’s t eleph one c an
be turned on by the I
NTUITY Lodging messaging system, by the PMS, or by the
console attenda nt. Wh en guest s retriev e all o f th eir messa ges, the voice mes saging
system turns their message waiting lamps off. The I
greetings (the pr ompts hear d when gues ts retriev e their mess ages) a re avai lable in
a number of languages. You can use one language as the default , but you can also
specify other languages as required by your guests.
NOTE:
To provide guest fax messaging services, a separate telephone
number for receiving these messages must be provided.
If your switch is not equipped with voice messaging, the fr ont des k personnel can
take messages manua ll y and can t u r n on t he g uest ’s message waiting lamp. When
a guest cal ls t he fr ont de sk to get his or her messa ges, the front desk pers onne l can
manually turn off the guest’s message waiting lamp.
Issue 1
November 2000
7Hospitality Services Overview
NTUITY Lodging system
Flexibility
In hotels with meeting facilities where there is an occasional need for telephone
service in the meeting rooms, the T erminal Translation Initialization (TTI) feature
is available. With TTI, ports are translated as “administered, but inactive.” When
the port needs to be activated, a hotel communications staff member plugs a
telephone into the desired jack. He or she enters a feature access code, a security
password, and an extensio n number. The telephone now is ava ilable for that r oom.
When the telephone is to be removed, the removal code is entered, followed by
the password and the extension number. This arrangement requires that the hotel
have a port from the switch wired to every possible jack in the meeting rooms,
which can have up-front costs but which will provide a good level of customer
service. One way to limit the cost is to provide a limited number of ports to the
meeting room area. A patch panel would allow hotel staff to wire extensions to
specific jacks on a flexible basis. You can still serve several jacks with a limited
number of ports.
Page 12

GuestWorks and DEFINITY ECS Release 9
Hospitality Operations
555-231-742
Hospitality Operations
Issue 1
November 2000
8Hospitality Services Overview
Page 13

GuestWorks and DEFINITY ECS Release 9
Hospitality Operations
Hospitality Operations
555-231-742
Guest Opera ti ons
Guests can schedul e wakeup cal ls for themse lves, blo ck unwanted i ncoming calls,
make emergency calls, and retrieve voice and fax messages from their extensions
or from telephones outside of the property. The specific procedures required for
each of these features depends on the type of telephone a guest is using. Room
telephones should be supplied with user instructions.
NOTE:
It is the responsibility of the property owner to provide these
instructions in so mething s imilar to a Guest Servic es Handbook or on
a user card that is plac ed nex t to the r oom telep hone. Refe r to ‘‘Guest
Operations Artwork’’ on page 87 for some examples of what can be
provided to your guests.
Issue 1
November 2000
9Guest Operation s
Automatic Wakeup
Guests can en te r their own wakeup times, but the oper at io n i s different depending
on whether you have a Speech Synthesizer circuit pack installed in your switch:
■ With a Speech Synthesizer circuit pack, guests can enter one wakeup call
using the voice prompts of the circuit pack.
■ If a Speech Synthesizer circuit pack is not installed in your switch, guests
can enter one or two wakeup ca ll s usi ng th e sta ndard call progress tones to
prompt them through the process (for example, dial tone and confirmation
tone). For this operation, your switch must have the Dual Wakeup and
Wakeup Activation via Tones features enabled.
Page 14

GuestWorks and DEFINITY ECS Release 9
Hospitality Operations
Hospitality Operations
555-231-742
With Speech Synthesizer
Provide the following procedures to your guests for activating and deactivating a
wakeup call.
NOTE:
Guests cannot enter two wakeup calls when using the Speech
Synthesizer circuit pack. Only attendants can enter two wakeup calls
with this configuration.
Add Your Wakeup Call
Access to the Automatic Wakeup feature may be from a button on the guest
telephone or by using a feature access code.
1. Pick up the handset of your telephone, and press the wakeup button, or
enter the Automatic Wakeup Call feature access code _____.
Issue 1
November 2000
10Guest Operation s
■ Listen to the wakeup instructions. You will hear “You have reached
the automatic wak eup service. Pl ease enter t he time for your wake up
call followed by the pound sign.”
2. Using the dial keypad, enter the time that you wish to receive a wakeup
call, followed by the
# button. If you make a mistake, hang up and start
over.
■ If you entered a time between 13:00 and 00:59, you will hear a
message saying “Thank you. Your request for _____ is confirmed.”
You can hang up.
If you used a time between 01:00 and 12:59, the pro mpt says “A.M.,
press 2; P.M., press 7.”
3. Press the
2 button for an A.M. wakeup call or the 7 button for a P.M.
wakeup call.
■ You will hear a message saying “Thank you. Your request for
_____ is confirmed.” You can hang up.
4. Hang up the telephone.
When your wakeup time arri ves, your tel ephone will al ert you with spe cial 3-bu rst
ringing. Answer the call (and listen to the message, if you like), then hang up.
Your wakeup call is now finished and will not be repeated. If you do not answer
the wakeup call within 30 seconds, it is repeated two more times at 5-minute
intervals.
Page 15

GuestWorks and DEFINITY ECS Release 9
Hospitality Operations
Hospitality Operations
555-231-742
Change or Delete Your Wakeup Call
1. Pick up the handset of your telephone, and press the wakeup button, or
enter the Automatic Wakeup Call feature access code _____.
■ Listen to the wakeup instructions. You will hear “You have reached
the automatic wakeup service. Your current reque st for a wake -up
call is _____. Press the
delete.”
Issue 1
November 2000
11Guest Operation s
2 button to change; press the 3 button to
2. If you want to change the wakeup time that you entered earlier, press the
button.
■ You will now go through the original procedure for entering a
wakeup time again. Your new time will replace the old time.
3. If you want to delete your wakeup call completely, press the
■ You will hear the message “Thank you. Your request has been
canceled.” You can hang up.
4. Hang up the telephone.
With Wakeup Activation Via Tones
Provide the following procedures to your guests for activating and deactivating
wakeup calls if the Wakeup Activation via Tones feature is activated. The Dual
Wakeup feature is required if you want to allow your guests to have two wakeup
calls. Guests cannot activate a Daily Wakeup or a VIP Wakeup.
Add or Change Your Wakeup Call
2
3 button.
Access to the Automatic Wakeup feature may be from a button on the guest
telephone or by using a feature access code.
1. Pick up the handset of your telephone, and press the wakeup button, or
enter the Automatic Wakeup Call feature access code _____.
■ You will hear recall dial tone (three short tones, followed by dial
tone).
2. Using the dial keypad, enter the time that you wish to receive a wakeup
call. The time must be entered using the 24-hour clock format (for
example, 0900 is 9 a.m. and 2230 is 10:30 p.m.).
■ You will hear confirmation tone (three short tones, followed by
silence).
■ If you make a mistake, you may hear intercept tone. Hang up and
start over.
■ If you hear reorder tone (fast busy), the switch cannot accept your
request at this time. Try again later, or call the front desk.
Page 16

GuestWorks and DEFINITY ECS Release 9
Hospitality Operations
Hospitality Operations
555-231-742
3. Hang up the telephone.
4. If you wish to have a second wakeup call, pick up the handset of your
telephone and press the wakeup button, or enter the Automatic Wakeup
Call feature access code _____.
■ You will hear recall dial tone (three short tones, followed by dial
tone).
Issue 1
November 2000
12Guest Operation s
5. Press the
* button.
6. Enter the time that you wish to receive your second wakeup call. The time
must be entered using the 24-hour clock format (for example, 0900 is 9
a.m. and 2230 is 10:30 p.m.).
■ You will hear confirmation tone (three short tones, followed by
silence).
■ If you make a mistake, you may hear intercept tone (siren tone).
Hang up and start over.
■ If you hear reorder tone (fast busy), the switch cannot accept your
request at this time. Try again later, or call the front desk.
7. Hang up the telephone.
When your first wakeup time arrives, your telephone will alert you with
special 3-burst ringing. Answer the call (and listen to the message, if you like),
then hang up. Your wakeup call now is fi nished and will not be repeate d. If you do
not answer the wakeup call within 30 seconds, it is repeated two more times
at 5-minute intervals. Your second wakeup call follows the same procedure.
Delete Your Wakeup Call
1. If you wish to delete your first wakeup call, pick up the handset of your
telephone, and press the wakeup button, or enter the Automatic Wakeup
Call feature access code _____.
■ You will hear recall dial tone (three short tones, followed by dial
tone).
2. Press the
■ You will hear confirmation tone (three short tones, followed by
# button to delete your first wakeup call.
silence).
3. Hang up the telephone.
4. If you wish to delete your second wakeup call, pick up the handset of your
telephone, and press the wakeup button, or enter the Automatic Wakeup
Call feature access code _____.
■ You will hear recall dial tone (three short tones, followed by dial
tone).
Page 17

GuestWorks and DEFINITY ECS Release 9
Hospitality Operations
Hospitality Operations
555-231-742
5. Press the * button, followed by the # button.
■ You will hear confirmation tone (three short tones, followed by
silence).
6. Hang up the telephone.
Do Not Disturb
If your switch is equipped with the Speech Synthesizer circuit pack, guests can
enter their own Do Not Disturb requests. The following instructions should be
provided to your guests so they can access this feature.
During the Do Not Disturb period, all calls except for the following are blocked
from ringing your telephone:
Issue 1
November 2000
13Guest Operation s
■ Emergency calls, cleared through the front desk
■ Wakeup calls scheduled before your Do Not Disturb period ends.
The Do Not Disturb feat ure is ac cesse d by using a fe ature access code or by usi ng
a feature button on the guest telephone.
Enter a Do Not Disturb Request (Feature Dial
Access Code)
1. Pick up the handset of your telephone, and enter the Voice Do Not Disturb
feature access code _____.
■ Listen to the Do Not Disturb instructions. You will hear “You have
reached t he Do Not Disturb service. Ple ase enter the time you wish
Do Not Disturb to end, followed by the pound sign.”
2. Using the dial keypad, enter the time that you want the Do Not Disturb
time to end, followed by the
# button. If you make a mistake, hang up and
start ove r.
■ If you used a time between 13:00 and 00:59, you will hear a
message saying “Thank you. Do Not Disturb is activated. It will be
turned off at _____.” You can hang up.
■ If you used a time between 01:00 and 12:59, you will hear a
message saying “A.M., press 2; P.M., press 7.”
3. Press the
■ You will hear a message saying “Thank you. Do Not Disturb is
2 button fo r A.M. or the 7 button for P.M.
activated. It will be turned off at _____.” You can hang up.
Page 18

GuestWorks and DEFINITY ECS Release 9
Hospitality Operations
Hospitality Operations
555-231-742
Change or Cancel a Do Not Disturb Request
(Feature Dial Access Code)
1. Pick up the handset of your telephone and enter the Voice Do Not Disturb
feature access code _____.
■ Listen to the instructions. You will hear “You have reached the Do
Not Disturb service. The current time for deactivation is _____.
Press 2 to change; press 3 to deactivate the service now.”
Issue 1
November 2000
14Guest Operation s
2. If you want to cha nge the t ime your Do Not Distur b period ends, pres s the
button.
■ You will now go through the original procedure for entering the
time. Your new time will re place the old time.
3. If you want to cancel Do Not Disturb completely, press the
■ You will hear a message saying “Thank you. Your request has been
3 button.
canceled.” You can hang up.
Activate Do Not Disturb (Feature Button)
Press the Do Not Disturb button.
■ The lamp next to the Do Not Disturb button lights. Do Not Disturb
is now activated.
Deactivate Do Not Disturb (Feature Button)
When the Do Not Disturb lamp is on, press the Do Not Disturb button.
■ The lamp next to the Do Not Disturb button goes off. Do Not
Disturb is now deactivated.
2
Emergency Access to the Attendant
In an emergency si tu ation, you can send the att endant an ur gent call fo r help. Thi s
call does not automati cally pl ace a cal l to an e mer gency ser vice age ncy; a se parate
call is required. The attendant will receive both audible and visible signals that
indicate the emergency call. There are two ways to place an emergency call:
■ Pick up the handset of your telephone and enter the Emergency Access to
Attendant feature access code _____. The switc h then se nds the emer gency
call to the attendant.
■ If you cannot enter the code, take t he handset off the telep hone. After being
off-hook for the admin ist er ed time interval, the swit ch a u to matically sends
an emergency signal to the attendant.
This feature has administerable parameters that are documented in the DEFINI TY
Enterprise Communications Server Administrator’s Guide.
Page 19

GuestWorks and DEFINITY ECS Release 9
Hospitality Operations
Hospitality Operations
555-231-742
Retrieving Messages
Usually, guests will retrieve their voice m essages from their r ooms, but they may
also need to retrieve their messages from other guest rooms, from a house
telephone, or from a location away from the property. When retrieving messages
from other lo cations, passwords assigned at check -in a re used f or guest security. If
personal greetings are allowed on the voice messaging system, guests also can
create a personal greeting that callers will hear during the guest’s stay.
NOTE:
The procedures given in this section apply to the INTUITY Lodging
voice messaging p roduct. If y our install ation is usin g a dif ferent voic e
messaging system, use the instructions provided with that system.
Refer to the I
NTUITY Lodging Administration and Feature Operations
for more information about voice and fax messaging services.
Issue 1
November 2000
15Guest Operation s
These procedures need to be communicated to your guests. You also can provide
them a Guest Quick Reference Card to help them use the I
messaging.
Retrieving Messages from Your Room
1. Call the message retrieval telephone number.
■ Listen to the message retrieval greeting and the notification of the
number and type of messages. Messages may be voice, fax, or text.
Text messages are usually written messages collected at the front
desk.
■ Messages are played one at a time. Each message is prefaced with
the time, day, and date it was received. Fax messages are always
presented after the voice messages have been accessed. Refer to
‘‘Retrieving Fax Messages’’ on page 17
2. After each message is played, you may do any of the following:
■ Press the 2 button to replay the message.
NTUITY Lodging voice
.
■ Press the 3 button to delete the message and listen to the next
message.
■ Press the 4 button to save the current message and listen to the next
message (this option is administerable and may not be available on
every system).
■ Press the 0 button to transfer to an attendant for assistance or to
retrieve text messages.
Page 20

GuestWorks and DEFINITY ECS Release 9
Hospitality Operations
Hospitality Operations
555-231-742
If no keys are pressed, the current message is saved (if the system is
administered to save old messages), and the new one is played. To keep
your mailbox space free for new messages, delete unwanted messages.
If the system is not a dministered to save old mess age s, once you listen to a
message, the message is deleted automatically, and the next message is
played.
3. After the last messag e, you will hear a closing message.
Retrieving Messages from Locations Other
Than Your Room
1. Call the operator, give your name, and tell the operator that you want to
retrieve your voice messages. The operator will do one of two operations:
■ The operator transfers your call immediately to the voice messaging
system. Continue with Step 2.
Issue 1
November 2000
16Guest Operation s
■ The operator will ask you for your room number and your voice
messaging password. The operator calls the voice messaging
system, enters your room number and your password, and then
transfers you to the voice messaging system. Continue with
Step 3.
2. Enter your room number followed by your password.
!
SECURITY ALERT:
T o protect against abuse of voice mailboxes, passwords should be assigned.
If the voice-messaging mailbox you are accessing does not have a
password, contact the front desk personnel to request that a password be
assigned.
■ The system prompts you with the message “Press 1 to listen.”
3. Press the
1 button to listen to your voice messages. Messages are played
one at a time.
4. After each message is played, you may do any of the following:
■ Press the 2 button to replay the message.
■ Press the 3 button to delete the message and listen to the next
message.
■ Press the 4 button to save the current message and listen to the next
message (this option is administerable and may not be available on
every system).
■ Press the 0 button to transfer to an attendant for assistance or to
retrieve text messages.
Page 21

GuestWorks and DEFINITY ECS Release 9
Hospitality Operations
Hospitality Operations
555-231-742
If no keys are pressed, the current message is saved (if the system is
administered to save old messages), and the new one is played. To keep
your mailbox space free for new messages, delete unwanted messages.
If the system is not a dministered to save old mess age s, once you listen to a
message, the message is deleted automatically, and the next message is
played.
5. After the last messag e, you will hear a closing message.
Retrieving Fax Messages
1. Call the message retrieval telephone number.
■ Listen to the message retrieval greeting and the notification of the
number and type of messages. Messages may be voice, fax, or text.
Text messages are usually written messages collected at the front
desk.
Issue 1
November 2000
17Guest Operation s
■ Messages are played one at a time. Each message is prefaced with
the time, day, and date it was received. Fax messages are always
presented after the voice messages have been accessed.
2. After all of the voice messages have played, press the
prompted to retrieve your fax messages.
3. After pressing the
■ Press the 1 button to receive the messages on the same telephon e
6 button, you may do any of the following:
call. To do this, you must be calling from a fax machine or from a
telephone that has a data port connected to your computer. The
computer must have fax software that can receive the messages.
■ Press the 2 button to print the messages to an in-room fax machine.
■ Press the 3 button to send the messages to the guest services fax
machine (usually at the front desk).
■ Press the 4 button to send the messages to a machine outside of the
hotel. You will be prompted to enter the fax machine’s telephone
number.
6 button when
All fax messages in your mailbox are printed as a group.
4. Depending on the option selected, you will hear a closing message, or the
call will disconnect after all fax messages are delivered.
Page 22

GuestWorks and DEFINITY ECS Release 9
Hospitality Operations
555-231-742
Hospitality Operations
Recording a Personal Greeting
NOTE:
To use this feature, the INTUITY Lodging system must have software
Release 1.1 or later.
1. Call the message retrieval telephone number.
■ Listen to the message retrieval greet ing.
Issue 1
November 2000
18Guest Operation s
2. When prompted, press the
5 button to hear the personal greeting and
change password options. The following personal greeting options are
given:
■ To record your personal greeting, press the 1 button.
■ To listen to your personal greeting, press the 2 button.
■ To erase your personal greeting, press the 3 button.
3. Press the
1 button to record a personal greeting. You are then prompted to
record your personal greeting after the tone.
!
SECURITY ALERT:
When recording your personal greeting, if is recommended that you do not
give out your room number or any other information that could compromise
your personal security.
4. When recording is completed, you may do any of the following:
■ To re-record, press the 1 button.
■ To review your recording, press the 2 button.
■ To erase and go back (to your messages), press the 3 button.
■ To save and go back (to your messages), press the 4 button.
5. Once you are satisfied with your personal greeting, press the
save your personal greeting. You will receive a confirmation message and
will be re turned to message retrieval.
6. If you already have a personal greeting, press the
personal greeting.
■ After listening to your personal greeting, you are returned to
message re trieval.
7. If you already have a personal greeting, press the
personal greeting.
■ After erasing your personal greeting, you are returned to message
retrieval.
4 button to
2 button to listen to your
3 button to erase your
Page 23

GuestWorks and DEFINITY ECS Release 9
Hospitality Operations
Hospitality Operations
555-231-742
Changing Your Password
At check-in, you were assigned a 4-digit password to use when retrieving your
messages while away from your room.
NOTE:
To use this feature, the INTUITY Lodging system must have software
Release 1.1 or later. Passwords cannot be the same as your room
number and cannot be the same four digits. For security, it is
recommended that you use a random number pattern.
To change your password, do the following:
1. From your room, call the message retrieval telephone number.
■ Listen to the message retrieval greet ing.
Issue 1
November 2000
19Guest Operation s
2. When prompted, press the
5 button to hear the personal greeting and
change password menu.
3. Press the
■ You are given instructions on how to change your password.
4 button to change your password.
4. Enter a valid 4-digit password.
5. Enter your new password a second time.
■ You will receive a confirmation message stating that your password
has changed.
6. Press the
5 button to go back to your messages, or hang up if finished.
Page 24

GuestWorks and DEFINITY ECS Release 9
Hospitality Operations
Hospitality Operations
555-231-742
Dial by Name
If you can not remember at which room your associate is staying, you can use the
Dial by Name feature to place a call. This feature is only available on
GuestWorks.
1. Call the Dial by Name extension as provided by the hotel.
You are routed to the auto-attendant procedure and are prompted to enter
the perso n’s name.
2. Enter the first four characters of the perso n’s last na me.
If only one name matches the four characters entered, the call is placed to
that person. Otherwise, continue with step 3.
3. If there is m ore than one match for the first four characters, you are
prompted to enter the rest of the characters in the person’s last name. After
you enter the rest of the characters, press the
Issue 1
November 2000
20Guest Operation s
# button.
If only one name matches the characters entered, the call is placed to that
person. Otherwise, go to step 4.
4. If there are still multiple matches, you are prompted to enter the first two
characters of the person’s first name.
If only one name matches the characters entered, the call is placed to that
person. Otherwise, the call cannot be completed using Dial by Name.
NOTE:
When a group of telephones are designated as a suite of telephones
(for example, one room with several telephones, all with different
extension numbers), only the name assigned to the primary suite
telephone extension is accessible with Dial by Name. The secondary
suite extension names have an asterisk (*) prepended to the name and
cannot be searched with Dial by Name.
Page 25

GuestWorks and DEFINITY ECS Release 9
Hospitality Operations
555-231-742
Hospitality Operations
Front Desk Operations
Almost all operations that are done from a traditional “attendant console”
(Model 302 or PC con sole) can n ow be done from an Atte ndant Backup t elephone
(a telephone that has “console” permissions). The operations given in this section
include the following:
■ Attendant Backup
■ Check-In and Check-Out
■ Automatic Wakeup
■ Failed Wakeup Notification
■ Controlled Restrictions
■ Do Not Disturb
Issue 1
November 2000
21Front Desk Operations
■ Message Waiting Notification
■ PMS Alarms
■ Call Accounting Alarms
■ Maid Status and Room Occupancy
■ Recorded Announcements.
Refer to the DEFINITY Console Operations and DEFINITY Console Operations
Quick Reference for standard console feature operations not related to hospitality.
Page 26

GuestWorks and DEFINITY ECS Release 9
Hospitality Operations
Hospitality Operations
555-231-742
Attendant Backup
The Attendant Backup feature allows you to access most attendant console
features from one or more speciall y-a dmin ist ered multiappearance telephones.
Using this ba ckup mode , you ca n an swer calls fast er, thus pro vid ing be tter servi ce
to your guests and prospective clients.
The recommended telephones are the Model 6408D+ and the Model 6424D+.
When calls terminate at the attendant console during normal operation, users at
the backup telephones can answer overflow calls by pressing a button or entering
a feature access code. You can then process the calls as if you are at the attendant
console. Procedures for basic feature operation are documented in the quick
reference guides for each telephone.
NOTE:
The Attendant Backup features cannot be used from guest rooms
administered as “client” rooms even if those rooms have
multiappearance telephones.
Issue 1
November 2000
22Front Desk Operations
When the attendant cons ole is i n the day mode (the Nig ht lamp is of f), you cannot
answer overflow calls at the backup telephones until the number of calls waiting
in the atte ndant queue has reached an administered threshold. Until the threshold
is reached, the only indication the backup telephones receive that there are calls
waiting in queue is that the Att enda nt Queue Calls and the Attendant Queue Time
lamps turn on. You can press the
Attendant Queue Time button to see how many calls
are waiting and how long the oldest call has been waiting, but you cannot answer
the call. The Attendant Queue Time lamp starts flashing when the time in que ue
warning level has been reached (this is usually set for 15 seconds), but you still
cannot answer the call.
When the calls waiting in queue threshold has been reached, the backup
telephones will be ep every 10 seconds as l ong as the number of cal ls waiti ng stays
above the threshold. You then can answer calls using the Trunk Answer Any
Station (TAAS) feature access code _____ or an automatic dialing button
administered with that feature access code. You can turn off the beeping by
pressing the
Ringer Cutoff button.
When the attendant consol e is in the night mode (the Night lamp i s on), all call s to
the attendant console immediately beep at the backup telephones, and the
Attendant Queue Calls and the Attendant Queue Time lamps go on. You then can
answer calls using the TAAS feature access code _____ or an automatic dialing
button administered with that feature access code.
You also can install an external ringi ng devi ce that sounds whene ver the atte ndant
queue limit is reached and when calls can be answered with the TAAS feature
access code. Attendant Backup is an optional feature.
Page 27
GuestWorks and DEFINITY ECS Release 9
Hospitality Operations
Hospitality Operations
555-231-742
Check-In/Check-Out
Use the following p rocedures to check h otel g uests in and out. If your sw itch h as a
PMS that supports check-in and check-out, use this feature from the PMS. The
only exc eption to this is if the link to the PMS is not operational.
Check-In
When a guest checks in and is assigned a room, the room’s status changes to
occupied, and the room’s telephone controlled restriction changes to No
Restriction.
Issue 1
November 2000
23Front Desk Operations
1. If you are not sure which rooms are available, press the
button.
■ The lamps associated with the rooms already occupied will display
on the DXS selector console. Determine an unoccupied room from
this information.
2. Press the
■ The Check In lamp goes on.
■ The following displays:
CHECK IN - Ext:
3. Enter the ro om number followed by the
■ One of the following displays:
CHECK IN COMPLETE
Check In button.
# button.
This indicates that the check-in procedure was successful.
INVALID EXTENSION - TRY AGAIN
Occupd Rooms
This indicates that you entered the wrong extension. Press the
button to start over.
CHECK IN: ROOM ALREADY OCCUPIED
This indicates that check-in has already been done for this room.
CHECK IN FAILED
This indicates that something failed with the check-in procedure. Press the
Check In button to start over.
■ The console returns to the normal operating mode.
Check In
Page 28

GuestWorks and DEFINITY ECS Release 9
Hospitality Operations
Hospitality Operations
555-231-742
Assigning DID Numbers to Guest Rooms
Two methods can be used to assign a Direct Inward Dialing (DID) number to a
guest’s room:
■ Automatic selection of DID numbers by the switch or via the PMS
■ Custom selection of VIP DID numbers by the person checking in the gu est .
Automatic Selection of DID Numbers for Guest Rooms allows you to give a
guest, upon check-in, a phone number that provides direct dial access to the
guest’s room. In the case of Automatic Selection of DID Numbers, the switch
automaticall y chooses a number from a rotat ing list of availab le DID numbers that
can be assigned to a guest’s room. In the case of Custom Selection of VIP DID
Numbers, the person checking the guest in chooses a number from a special
reserved list of numbers available for ass ign me nt t o a gues t’s room. Both of these
processes provide a measure of privacy to your guests because providing the
phone number does not give away the room number.
Issue 1
November 2000
24Front Desk Operations
Callers would use a 7- t o 10-digit number from out side of the hot el. For call s from
inside the hotel, the callers would use either the room/extension number or the
DID number.
For example, in the case of Automatic Selection of DID Numbers, when a
check-in is done via the
Chec k-in button on the console or via a PMS, the switch
assigns a DID number to the checked-in room from a list that is assigned at the
switch. All calls made to the DID number are directed to the room as if the room
were called directly.
Similarly, in the case of Custom Selecti on of VIP DID Numbers, when a che ck-in
is done via t he
VIP Check-in button on the console or vi a a PMS, th e person c hecking
the guest in assig ns a VIP DID number to the checke d-in room from a rese rved list
of numbers that can be used for special guests. As is the case with Automatic
Selection of DID Numbers, all calls made to the VIP DID number are directed to
the room as if the room were called directly.
NOTE:
The following process is written based on the assumption that you
have established a dial plan and that you have administered all DID
numbers as XDID station types and all VIP DID numbers as
XDIDVIP station types on the Station screen. Neither the XDID nor
the XDIDVIP extension numbers should have a “Client Room” cla ss
of service.
Page 29
GuestWorks and DEFINITY ECS Release 9
Hospitality Operations
Hospitality Operations
555-231-742
Checking in a Guest Room and Assigning a DID Number
Automatically
An automatic assig nment of a DID number t o a guest r oom allows a guest to have
a phone number not associated with his/her room number.
To check in a guest and provide a DID number to a guest in room 6022, do the
following:
Issue 1
November 2000
25Front Desk Operations
1. Press the
check-in button on the console.
CHECK IN - Ext:
2. Enter the guest’s room number and press the
# button.
The following displays:
DID?
3. Press 9 (yes) or 6 (no).
If yes, the DID number is assigned. The following displays:
CHECK IN COMPLETE: DID= 7452
If no, the following displays:
CHECK IN COMPLETE
Checking in a Guest Room and Custom Selecting a VIP DID Number
Custom selection of a VIP DID number and having that number assigned to a
guest room allows a guest to have a phone number not associated with his/her
room number. To check in a guest and custom select a VIP DID number for the
guest in a particular room, do the follow ing:
1. Press the
VIP Check-in button on the console.
VIP CHECK IN - Ext:
2. Enter the guest’s room number, and press the
The following displays:
SPECIFY VIP DID:
3. Enter the desired VIP DID, and press the
The following displays:
CHECK IN COMPLETE: DID= 6499
If an incorrect VIP DID is speci fi ed , or if no VIP DID is speci fi ed , and the
# button is pressed, the following displays:
CHECK IN COMPLETE, INVALID DID
If you do not choose to assign a DID number now, but want to assign one
later, see “Changing DID Assignments.”
# button.
# button.
Page 30
GuestWorks and DEFINITY ECS Release 9
Hospitality Operations
Hospitality Operations
555-231-742
If you try to assign a VIP DID that is already in use , the followi ng displ ays:
CHECK IN COMPLETE, DID UNAVAILABLE
Viewing DID Number Assignments
To find out what DID number is assigned to a room, do the following:
Issue 1
November 2000
26Front Desk Operations
1. Press the
DID VIEW: EXT?
DID View button. The following displays:
2. Enter the room extension number that you wish to view followed by the
button. The following displays:
DID: 5321 CHANGE?
3. Press 6 (no) or the
# button after viewing the DID number. The following
displays:
DID VIEW DONE
Changing to a New Automatic DID Number
NOTE:
Please keep in mind that you can change a DID in any of the
following ways:
■ Automatic to Automatic
■ VIP to VIP
#
■ Automatic to VIP
■ VIP to Automatic.
To change the DID number assigned to a room, do the following:
1. Press the
DID VIEW: EXT?
DID View button. The following displays:
2. Enter t he room ext ension nu mber tha t you wish to change followed by the
button. The following displays:
DID= 6499 CHANGE?
3. Press 9 (yes) to change the DID number. The following displays:
AUTOMATIC ASSIGN(1), SELECT(2)?
4. To automatically assign, press 1 (ASSIGN). The following displays:
DID= 2245 CHANGE?
5. Enter 9 (yes) repeatedly to step through the list of available DID numbers.
#
Page 31
GuestWorks and DEFINITY ECS Release 9
Hospitality Operations
Hospitality Operations
555-231-742
6. When the display shows the number that you want to use, press the #
button. The following displays:
DID CHANGED
Changing to a New VIP DID Number
NOTE:
Please keep in mind that you can change a DID in any of the
following ways:
■ Automatic to Automatic
■ VIP to VIP
■ Automatic to VIP
Issue 1
November 2000
27Front Desk Operations
■ VIP to Automatic.
To change a VIP DID number, do the following:
1. Press the
DID VIEW: EXT?
DID View button. The following displays:
2. Enter t he room ext ension nu mber tha t you wish to change followed by the
button. The following displays:
DID= 6499 CHANGE?
3. Press 9 (yes) to change the VIP DID number. The following displays:
AUTOMATIC ASSIGN(1), SELECT(2)?
4. Press 2 (SELECT). The following displays:
SPECIFY VIP DID:
5. Enter the VIP DID that you want to use, and press the
# button. The
following displays:
DID CHANGED
#
Removing a DID Number Assignment
To remove a DID number assignment, do the following:
1. Press the
DID REMOVE: EXT:
DID REMOVE button. The following displays:
2. Enter t he room ext ension nu mber tha t you wish to change followed by the
button. The following displays:
DID REMOVED
If no DID is assigned to the room extension, the following displays:
INVALID EXTENSION - TRY AGAIN
#
Page 32

GuestWorks and DEFINITY ECS Release 9
Hospitality Operations
Hospitality Operations
555-231-742
Suite Check-In
Suite Check-In allows you to have the switch automatically check-in more than
one phone, associat ed wit h the same room, with one check-in command (whether
from your PMS or an on-switch check-in from an attendant).
When a room phone is checked in, the switch looks for a hunt-to extension
associated with that phone. If it finds one, the switch also checks in the phone
found in the hunt-to field. The switch also does the following:
■ Removes controlled outward restriction
■ Adds the guest’s name to the phone record for that extension
■ Stores the call coverage path
■ Removes any Leave Word Calling (LWC) messages
Issue 1
November 2000
28Front Desk Operations
■ Marks the room as “occupied.”
If the hunt-to (second or subsequent) phone has an extension in the hunt-to field,
that phone is also checked in. This continues until all phones in the hunt-to chain
are checked in. You can have up to 30 phones, including the primary extension,
checked-in at one time as part of a suite.
Your system manager programs Suite Check-In to occur automatically when you
do the regular check-in procedures described in ‘‘Check-In’’ on page 23
check-out is done on a suite of telephones, all telephones in the suite are checked
out as described in ‘‘Check-Out’’ on page 29
Station Hunt Before Coverage
Station Hunt Before Coverage provides that when a call is made to a busy phone,
the switch checks to see if there is a hunt-to phone assigned to the busy phone. If
there is, the switch tries to connect to t he h unt-to phone before going to coverage.
If the hunt-to phone is also busy, the switch continues hunting down the hunt-to
chain. If all phones in the hunt-to chain are busy, then the call goes to the
principal’s coverage.
. When a
.
Your system manager programs this feature to occur automatically.
Page 33
GuestWorks and DEFINITY ECS Release 9
Hospitality Operations
Hospitality Operations
555-231-742
Check-Out
When a guest checks out, the room’s status changes to vacant, and the room’s
telephone controlled restriction changes to Outward Restriction. This applies
whether the room has one telephone or a suite of telephones. Outward restriction
prevents unauthorized users in the room from making outgoing calls. Check-out
also cancels any Wakeup and Do Not Disturb requests and turns off the room
telephone’s message waiting lamp.
NOTE:
When guests are checked out and they have wakeup calls active, the
wakeup is canceled, and the journal printer reports the event as
canceled by PMS.
To check a guest out of the hotel, do the following:
Issue 1
November 2000
29Front Desk Operations
1. Press the
■ The Check Out lamp goes on.
■ The following displays:
Check Out button.
CHECK OUT - Ext:
2. Enter the ro om number followed by the
■ One of the following displays:
# button.
CHECK OUT COMPLETE: MESSAGE LAMP ON
This indicate s that the re are unopened messages for the gue st. Access t hose
messages and give them to the guest before the guest leaves.
CHECK OUT COMPLETE: MESSAGE LAMP OFF
This indicates that there are no messages for the guest.
INVALID EXTENSION - TRY AGAIN
This indicates that you entered the wrong extension. Press the
Check Out
button to start over.
CHECK OUT: ROOM ALREADY VACANT
This indicates that check-out has already been done for this room.
CHECK OUT FAILED
This indicates that something failed with the check-out procedure. Press
Check Out button to start over.
the
■ The console returns to the normal operating mode.
Page 34

GuestWorks and DEFINITY ECS Release 9
Hospitality Operations
Hospitality Operations
555-231-742
Automatic Wakeup
Wakeup calls can be activated by guests from their own rooms, or by front desk
personnel using the attendant console or a backup telephone. Depending on how
the system is administered, a single wakeup request, two wakeup requests, daily
repeated requests, or a special VIP request can be set.
Guest activation of wakeup calls is allowed under two conditions:
■ If the switch has a Speech Synthesizer circuit pack, guests are allowed to
activate one wakeup call. The Speech Synthesizer circuit pack uses voice
prompts to guide the guest through t he steps r equired t o activa te or canc el a
wakeup call.
■ If the switch does not have a Speech Synthesizer circuit pack, the guests
can use the Wakeup Activation via Tones feature to activate or ca ncel their
wakeup calls. If the Dual Wakeup feature is enabled, guests can cr eate two
wakeup calls. Guests cannot ac tivate a Daily Wakeup or a VIP Wakeup. An
attendant must activate Daily Wakeup or VIP Wakeup.
Issue 1
November 2000
30Front Desk Operations
Refer to ‘‘Automatic Wakeup’’ on page 9
for guest procedures related to
Automatic Wakeup.
Activation of wakeup calls from the attendant console is done the same way
whether or not the switch has a Speech Synthesizer circuit pack. These attendant
console procedures start on page 32
.
Depending on your switch and software, if many guests request the same wakeup
time, not all of the guests will receive a wakeup call precisely at the time they
request; some will receive the wakeup call a little later. For example, if many
guests select 6:00 a.m. for a wakeup call, some of the wakeup calls will arrive a
little afte r 6:00 a.m.
Once a wakeup call is requested, there are several ways the wakeup call can be
delivered:
■ The Speech Synthesizer circuit pack, with the wakeup message depending
on the time of day.
■ The Announcement circuit pack, which provides customized wakeup
messages. The messages can range from a very simple message to an
elaborate message in various languages.
■ Music on hold, in which the guest hears music when the wakeup call is
made, but hears no other special message.
Page 35

GuestWorks and DEFINITY ECS Release 9
Hospitality Operations
Hospitality Operations
■ Customized announcements recorded on the Audichron recording device
555-231-742
which delivers sales pitches for various hotel functions along with the
wakeup call. Audichron can be equipped with time and temperature
circuitry which enables the wakeup announcement to give the time and
temperature. Audichron uses all four ports on an Auxiliary Trunk circuit
pack.
■ Silence, which is the least expe nsive method. The te lephone only ri ngs and,
when answered, the guest hears silence. When setting up wakeup calls with
silence, you do not select or confirm an announcement number.
W ak eup ca lls ring at a gu est’s room tel ephone for 30 second s. I f the gu est does not
answer the call, the wakeup call is repeated two more times in 5-minute intervals.
If the guest does not ans wer any of the thr ee wakeup calls, a lamp on the attendant
console and the backup telephones goes on. The attendant or backup telephone
user presses the
Failed Wakeup button, and the display shows the failed wakeup
information. With this notification, you can contact the guests to see if there are
any problems since they did not answer their wakeup call.
Issue 1
November 2000
31Front Desk Operations
NOTE:
The Failed Wakeup button is administered as an Automatic Message
Waiting extension. All failed wakeups send a message to that
extension, and the lamp goes on at the attendant console or backup
telephone.
The Announcement circuit pack is the most flexible of all wakeup
announcements. With this type of a nnouncemen t, it i s poss ible for the at tenda nt to
select from a variety of wakeup announcements. When the attendant enters a
wakeup time, he or she designates the appropriate message based on the time of
the wakeup call o r t he language required. The Announcement circuit pa ck has the
following recording time limits based on the sampling rate used:
■ 8 minutes, 32 seconds at 16 kHz
■ 4 minutes, 16 seconds at 32 kHz
■ 2 minutes, 8 seconds at 64 kHz.
The Announcement circuit pack also has the ability to operate in the repeat mode
which allows the message to repeat for a fixed amount of time before the guest is
disconnected from the ca ll . Th er e is al so a barge-in function in whic h the wakeup
announcement is conne cted at the poin t at which the messa ge is current ly playing ,
without waiting to start at the beginning of the message.
Page 36
GuestWorks and DEFINITY ECS Release 9
Hospitality Operations
Hospitality Operations
555-231-742
User Operation
Wakeup requests can be entered, changed, and canceled from the console or
backup telephone. Wakeup announcements can use a standard announcement or
can be customized (for example, announcements that play at certain times, or
announcements in different languages). See your supervisor for a list of the
different announcements.
Single Wakeup
NOTE:
The following procedure is written based on the assumpti on that Dual
Wakeup, Daily Wakeup, and VIP Wakeup features ar e not en abled. I f
any or all of these features are enabled, you will receive additional
queries during the procedure.
Issue 1
November 2000
32Front Desk Operations
To add or change a wakeup call, do the following:
1. Press the
■ The Auto Wakeup lamp goes on.
■ The following displays:
AUTO WAKEUP - Ext:
Auto wakeup button.
2. If you are already on an active call with the guest requiring the wakeup
call, the extension number displays automatically. Press the
# button to
select the displayed extension for wakeup.
If you are not connected to the room requiring wakeup, enter the room
number, followed by the
wakeup
AUTO WAKEUP - Ext: <ext> Time: --:--
button again, and start over.)
■ The following displays:
# button. (If you make a mistake, press the auto
If a wakeup request al ready exis ts for the room, the tim e field will
show the time of the request.
3. Enter the wakeup time in the 4-digit hh:mm format (hour:minute).
■ If you entered a time between 13:00 and 00:59, the following
displays:
WAKEUP MESSAGE: XXXX
Go on to Step 5.
■ If you entered a time between 01:00 and 12:59, the following
displays:
AUTO WAKEUP - Ext: <ext> Time: <hh:mm> -M
Page 37
GuestWorks and DEFINITY ECS Release 9
Hospitality Operations
Hospitality Operations
555-231-742
4. Press the 2 button for an A.M. wakeup call, or press the 7 button for a P.M.
wakeup call.
■ The following displays:
WAKEUP MESSAGE: XXXX
5. The displ ay s hows t he def aul t wa keup message number. If you want to use
the defau lt message, go to Step 6.
If you want to use a different wakeup message, enter the wakeup message
number.
NOTE:
You cannot specify a different wakeup message when setting
up a wakeup call from a backup telephone. You can use only
the default wakeup message.
Issue 1
November 2000
33Front Desk Operations
6. Press the
■ One of the following displays:
# button to confirm the wakeup request.
WAKEUP REQUEST CONFIRMED
This indicates that the wakeup procedure was successful.
WAKEUP ENTRY DENIED - TOO SOON
This indi cates that the time en tered is within 2 1/2 minutes of the
current ti me.
WAKEUP ENTRY DENIED - INTERVAL FULL
This indicates that the maximum number of messages for this
15-minute interval has been reached.
WAKEUP ENTRY DENIED - SYSTEM FULL
This indicates that the maximum number of wakeup calls has been
reached for the switch.
■ The console returns to the normal operating mode.
Page 38
GuestWorks and DEFINITY ECS Release 9
Hospitality Operations
Hospitality Operations
555-231-742
Dual Wakeup
To add or change a wakeup call when the Dual Wakeup feature is enabled, do the
following:
Issue 1
November 2000
34Front Desk Operations
1. Press the
■ The Auto Wakeup lamp goes on.
■ The following displays:
Auto wakeup button.
AUTO WAKEUP - Ext:
2. If you are already on an active call with the guest requiring the wakeup
call, the extension number displays automatically. Press the
# button to
select the displayed extension for wakeup.
If you are not connected to the room requiring wakeup, enter the room
number, followed by the
wakeup
AUTO WAKEUP - Ext: <ext> Time: --:--
button again, and start over.)
■ The following displays:
# button. (If you make a mistake, press the auto
If a wakeup request al ready exis ts for the room, the tim e field will
show the time of the request.
3. Enter the wakeup time in the 4-digit hh:mm format (hour:minute).
■ If you entered a time between 13:00 and 00:59, the following
displays if the request is accepted; if the request is denied, see the
reasons under step 11:
WAKEUP MESSAGE: XXXX
Go on to Step 5.
■ If you entered a time between 01:00 and 12:59, the following
displays:
AUTO WAKEUP - Ext: <ext> Time: <hh:mm> -M
4. Press the
2 button for an A.M. wakeup call, or press the 7 button for a P.M.
wakeup call.
■ The following displays if the request is accepted; if the request is
denied, see the reasons under step 11:
WAKEUP MESSAGE: XXXX
5. The displ ay s hows t he def aul t wa keup message number. If you want to use
the defau lt message, go to Step 7.
Page 39
GuestWorks and DEFINITY ECS Release 9
Hospitality Operations
Hospitality Operations
555-231-742
6. If you want to use a different wakeup message, enter the wakeup message
number.
NOTE:
You cannot specify a different wakeup message when setting
up a wakeup call from a backup telephone. You can use only
the default wakeup message.
Issue 1
November 2000
35Front Desk Operations
7. Press the
■ The following displays:
# button to confirm the wakeup request.
CONFIRMED. 2nd WAKEUP: Time: --:--
If a second wakeup request already exists for the room, the time
field wil l show the ti me of the re quest.
8. Enter the second wakeup time in the 4-digit hh:mm format (hour:minute).
■ If you entered a time between 13:00 and 00:59, the following
displays if the request is accepted; if the request is denied, see the
reasons under step 11:
WAKEUP MESSAGE: XXXX
Go on to Step 10.
■ If you entered a time between 01:00 and 12:59, the following
displays:
AUTO WAKEUP - Ext: <ext> Time: <hh:mm> -M
9. Press the
2 button for an A.M. wakeup call, or press the 7 button for a P.M.
wakeup call.
■ The following displays:
WAKEUP MESSAGE: XXXX
10. The displ ay s hows t he def aul t wa keup message number. If you want to use
the defau lt message, go to Step 11.
If you want to use a different wakeup message, enter the wakeup message
number.
NOTE:
You cannot specify a different wakeup message when setting
up a wakeup call from a backup telephone. You can use only
the default wakeup message.
Page 40
GuestWorks and DEFINITY ECS Release 9
Hospitality Operations
Hospitality Operations
555-231-742
11. Press the # button to confirm the wakeup request.
■ One of the following displays:
WAKEUP REQUEST CONFIRMED
This indicates that the wakeup procedure was successful.
WAKEUP ENTRY DENIED - TOO SOON
This indi cates that the time en tered is within 2 1/2 minutes of the
current ti me.
WAKEUP ENTRY DENIED - INTERVAL FULL
This indicates that the maximum number of messages for
this 15-minute interval has been reached.
WAKEUP ENTRY DENIED - SYSTEM FULL
Issue 1
November 2000
36Front Desk Operations
This indicates that the maximum number of wakeup calls has been
reached for the switch.
■ The console returns to the normal operating mode.
Page 41
GuestWorks and DEFINITY ECS Release 9
Hospitality Operations
Hospitality Operations
555-231-742
Daily Wakeup
Daily Wakeup allows a guest to request a wakeup time that will be delivered the
same time every day until canceled or changed.
To add a daily wakeup call, do the following:
Issue 1
November 2000
37Front Desk Operations
1. Press the
■ The following displays:
AUTO-WAKEUP but t o n.
AUTO WAKEUP - Ext
2. If you are already on an active call with the guest requiring the wakeup
call, the extension number displays automatically. Press the
# button to
select the displayed extension for wakeup.
If you are not connected to the room requiring wakeup, enter the room
number, followed by the
wakeup
AUTO WAKEUP - Ext: <ext> Time: --:--
button again, and start over.)
■ The following displays:
# button. (If you make a mistake, press the auto
If a wakeup request al ready exis ts for the room, the tim e field will
show the time of the request.
3. Enter the wakeup time in the 4-digit hh:mm format (hour:minute).
■ If you entered a time between 13:00 and 00:59, the following
displays:
DAILY:N
Go on to Step 5.
■ If you entered a time between 01:00 and 12:59, the following
displays:
AUTO WAKEUP - Ext: <ext> Time: <hh:mm> -M
4. Press the
2 button for an A.M. wakeup call, or press the 7 button for a P.M.
wakeup call.
■ The following displays:
DAILY:N
5. Enter 9 (yes) or 6 (no).
■ The display shows a Y/N rather t han a nu meric e ntr y. The f ollowi ng
displays:
DAILY:Y
Page 42
GuestWorks and DEFINITY ECS Release 9
Hospitality Operations
Hospitality Operations
555-231-742
6. Press the # button to receive the next prompt.
■ The following displays:
WAKEUP MESSAGE: XXXX
7. The displ ay s hows t he def aul t wa keup message number. If you want to use
the defau lt message, go to Step 9.
If you want to use a different wakeup message, enter the wakeup message
number.
■ The following displays:
WAKEUP MESSAGE: 53201
8. Enter the extension of the announcement to be played for the wakeup call.
Issue 1
November 2000
38Front Desk Operations
9. Press the
■ One of the following displays:
# button to confirm the wakeup request.
WAKEUP REQUEST CONFIRMED
This indicates that the wakeup procedure was successful.
WAKEUP ENTRY DENIED - TOO SOON
This indi cates that the time en tered is within 2 1/2 minutes of the
current ti me.
WAKEUP ENTRY DENIED - INTERVAL FULL
This indicates that the maximum number of messages for this
15-minute interval has been reached.
WAKEUP ENTRY DENIED - SYSTEM FULL
This indicates that the maximum number of wakeup calls has been
reached for the switch.
■ The console returns to the normal operating mode.
Page 43
GuestWorks and DEFINITY ECS Release 9
Hospitality Operations
Hospitality Operations
555-231-742
VIP Wakeup
VIP Wakeup provides the hotel the option of placing a personal call to awaken a
special guest, rather than awakening that guest with a standard announcement.
To add a VIP wakeup call, do the following:
Issue 1
November 2000
39Front Desk Operations
1. Press the
■ The Auto Wakeup lamp goes on.
■ The following displays:
Auto wakeup button.
AUTO WAKEUP - Ext:
2. If you are already on an active call with the guest requiring the wakeup
call, the extension number displays automatically. Press the
# button to
select the displayed extension for wakeup.
If you are not connected to the room requiring wakeup, enter the room
number, followed by the
wakeup
AUTO WAKEUP - Ext: <ext> Time: --:--
button again, and start over.)
■ The following displays:
# button. (If you make a mistake, press the auto
If a wakeup request al ready exis ts for the room, the tim e field will
show the time of the request.
3. Enter the wakeup time in the 4-digit hh:mm format (hour:minute).
■ If you entered a time between 13:00 and 00:59, the following
displays:
VIP:N
Go on to Step 5.
■ If you entered a time between 01:00 and 12:59, the following
displays:
AUTO WAKEUP - Ext: <ext> Time: <hh:mm> -M
4. Press the
2 button for an A.M. wakeup call, or press the 7 button for a P.M.
wakeup call.
■ The following displays:
VIP:N
5. Enter 9 (yes) or 6 (no).
■ The display shows a Y/N rather t han a nu meric e ntr y. The f ollowi ng
displays:
VIP:Y
Page 44
GuestWorks and DEFINITY ECS Release 9
Hospitality Operations
Hospitality Operations
555-231-742
6. Press the # button to receive the next prompt.
■ The following displays:
WAKEUP MESSAGE: XXXX
7. The displ ay s hows t he def aul t wa keup message number. If you want to use
the defau lt message, go to Step 9.
If you want to use a different wakeup message, enter the wakeup message
number.
■ The following displays:
WAKEUP MESSAGE: 53201
8. Enter the extension of the announcement to be played for the wakeup call.
For a VIP request, the announcement must be a repeating announcement.
Issue 1
November 2000
40Front Desk Operations
9. Press the
■ One of the following displays:
# button to confirm the wakeup request.
WAKEUP REQUEST CONFIRMED
This indicates that the wakeup procedure was successful.
WAKEUP ENTRY DENIED - TOO SOON
This indi cates that the time en tered is within 2 1/2 minutes of the
current ti me.
WAKEUP ENTRY DENIED - INTERVAL FULL
This indicates that the maximum number of messages for
this 15-minute interval has been reached.
WAKEUP ENTRY DENIED - SYSTEM FULL
This indicates that the maximum number of wakeup calls has been
reached for the switch.
■ The console returns to the normal operating mode.
10. At the appointed time, the VIP reminder call rings at the attendant.
■ The following displays:
VIP WAKEUP: Mike Jones x8113
11. Answer the VIP wakeup notification call.
Page 45

GuestWorks and DEFINITY ECS Release 9
Hospitality Operations
Hospitality Operations
555-231-742
12. Press the flashing VIP-Wakeup lamp to place a priority call to guest Mike
Jones.
■ The VIP-Wakeup lamp goes out, and the VIP-Retry lamp begins to
flash.
■ When the guest answers, the VIP-Retry lamp goes out. The
attendant can add a personal touch wishing the guest “Good
morning, Mr. Jones.”
Issue 1
November 2000
41Front Desk Operations
13. If the guest does not answer, press the
VIP Retry button to set up a standard
wakeup request. The standard wakeup will retry 5 minutes later.
Page 46
GuestWorks and DEFINITY ECS Release 9
Hospitality Operations
Hospitality Operations
555-231-742
Canceling Wakeup Calls
Once a wakeup call has been successfully delivered, the request is canceled
automatically. However, you can cancel a wakeup call manually before it is
delivered by doing the following:
NOTE:
With Dual Wakeups, you can delete only one wakeup call at a time.
You must do this procedure twice to delete both wakeup calls.
Issue 1
November 2000
42Front Desk Operations
1. Press the
■ The Auto Wakeup lamp goes on.
■ The following displays:
auto wakeup button.
AUTO WAKEUP - Ext:
2. If you are already on an active call with the guest requiring the
cancellation, the extension number is displayed automatically. Press the
button to select the displayed extension.
If you are not connected to the room requiring wakeup, enter the room
number, followed by the
wakeup
AUTO WAKEUP - Ext: <ext> Time: <hh:mm>
button again, and start over.)
■ The following displays:
3. To cancel the displayed wakeup call, press the
# button. (If you make a mistake, press the auto
delete button. To skip that
wakeup call, go to Step 4.
■ The following displays:
#
WAKEUP REQUEST CANCELED
■ If the Dual Wakeup feature is enabled, you must repeat this
procedure starti ng with Step 1.
normal operating mode.
4. Press the
■ The following displays:
CONFIRMED. 2nd WAKEUP: Time: <hh:mm>
# button twice to skip the first wakeup call.
5. To cancel the displayed wakeup call, press the
■ The following displays:
WAKEUP REQUEST CANCELED
■ The console returns to the normal operating mode.
Otherwise, the console returns to the
delete button.
Page 47
GuestWorks and DEFINITY ECS Release 9
Hospitality Operations
Hospitality Operations
555-231-742
Failed Wakeup Notification
A wakeup call rings for 30 sec onds at a gu est’s tele phone. I f the wakeu p call is not
answered after three attempts (the attempts are spaced 5 minutes apart), a record
of the failed attempt is printed on the journal printer. To notify the front des k
personnel about the f ailed wakeup, a s pecia l exte nsion n umber wit h an Automati c
Message Waiting (AMW) lamp is assigned for the purpose of receiving and
storing in formation about fa iled wakeu p calls. An appearance of this e xtension is
administered on both the attendant console and on the backup telephones. The
button is labeled
failed wakeup.
When a failed wakeup occurs, the Failed Wakeup lamp goes on, and you should
do the following:
Issue 1
November 2000
43Front Desk Operations
1. Press the
■ The following displays:
failed wakeup button.
MESSAGES FOR EXT XXXX
2. Press the
■ The following displays:
next button to display the failed wakeups.
EXT <ext> <name><date><time> <#fail> CALL
3. After fol lo w ing your local proc edu res t o handle failed wa keup calls, delete
the message by pressing the
■ The following displays:
DELETED
4. Search for other failed call messages by pressing the
5. When all messages have been read and deleted, press the
delete button.
next button.
normal mode
button.
■ The Failed Wakeup lamp goes off.
■ The display goes blank.
■ The console returns to the normal operating mode.
Page 48

GuestWorks and DEFINITY ECS Release 9
Hospitality Operations
Hospitality Operations
555-231-742
Controlled Restrictions
The Controlled Restrictions feature allows you to activate different types of
calling restrictions on guest room telephones. The restriction types include the
following:
■ Outward — The guest cannot place calls to the public network.
■ Station-to-Station — Guests cannot place or receive calls between guest
rooms or administrative staff telephones.
■ Termination — The guest cannot receive any calls.
■ Total — The guest cannot place or receive any calls.
■ Toll — The guest cannot place toll calls, but can place free local calls.
Issue 1
November 2000
44Front Desk Operations
The ways to activate controlled restrictions are as follows:
■ When you check in a guest, all contr olled res trictions a re removed from t he
room telephone. When the guest checks out, Outward Restriction is
enabled for the room telephone.
■ When you or a guest sets up a Do Not Disturb request, Termination
Restriction is enabled for the room telephone.
■ Using a feature access code from the atten dant co nsole or from a t elepho ne
with console permissi ons, you can enable any of the contr olled restrictions
for a guest room telephone.
■ Using a feature access code from the atten dant co nsole or from a t elepho ne
with console permissi ons, you can enable any of the contr olled restrictions
for the telephones in a group of gue st rooms. This grouping i s b ased on the
administered Class of Restriction (COR).
■ Using the PMS, you can enable any of the indivi dual cont rolled r estrictio ns
plus some predefined combinations. These combinations include the
following:
— Outward and station-to-station or toll
— Outward and termination
— Station-to-station or toll and termination.
NOTE:
Since current PMS products do not automatically recognize the Toll
Restriction feature, PMS terminal users must be instructed that Toll
Restriction may be substituted for eith er Ou twar d or
Station-to-Station Restriction.
Page 49

GuestWorks and DEFINITY ECS Release 9
Hospitality Operations
555-231-742
Hospitality Operations
When a guest tries to make a cal l from a st ation that is restr icted , the call is rout ed
to one of the following, depending on how the system is administered:
■ The attendant
■ A recorded announcement
■ Another extension (for example, one of the backup telephones)
■ Intercept tone.
User Operation
The user operation for enabling controlled restrictions using the PMS is given in
the PMS documentation provided with the PMS terminals. Since current PMS
products do not automatically recognize the Toll Restriction feature, PMS
terminal users must be instructed that Toll Restriction may be substituted for
either Outward or Station-to-Station Restriction. Check with your administrator
for a list of active restriction types.
Issue 1
November 2000
45Front Desk Operations
Activate Controlled Restriction for One Person
To activate a controlled restriction for one room using the attendant console or a
telephone with console permissions, do the following:
1. Press the
■ You hear dial tone.
■ The call appearance lamp goes on.
■ The Position Available lamp goes off.
start button or an idle call appearance button.
2. Enter the User-Controlled Restriction activation feature access code
_____ followed by one of these four digits:
■ Press the 1 button for Outward/Toll Restriction.
■ Press the 2 button for Total Rest riction.
■ Press the 3 button for Termination Restriction.
■ Press the 4 button for Station-to-Statio n/Toll Restriction.
Page 50

GuestWorks and DEFINITY ECS Release 9
Hospitality Operations
555-231-742
Hospitality Operations
3. After hearing the second dial tone, enter the room number.
■ A confirmation tone indicates that the restriction was activated. An
intercept tone indicates that the room number already has a
restriction assigned, or you dialed an improper digit. If the request
fails, press
■ The call appearance lamp goes off.
■ The display goes blank.
■ The Position Available lamp goes on.
■ The console returns to the normal operating mode.
RELEASE or CANCEL, and start over.
Cancel Controlled Restriction for One Person
To deactivate a controlled restriction for one room, do the following:
Issue 1
November 2000
46Front Desk Operations
1. Press the
■ You hear dial tone.
■ The call appearance lamp goes on.
■ The Position Available lamp goes off.
start button or an idle call appearance button.
2. Enter the User-Controlled Restriction deactivation feature access code
_____ followed by the digit that represents the current restriction:
■ Press the 1 button for Outward/Toll Restriction.
■ Press the 2 button for Total Restriction. Canceling Total Restriction
will remove all calling restrictions.
■ Press the 3 button for Termination Restriction.
■ Press the 4 button for Station-to-Statio n/Toll Restriction.
3. After hea ring th e second di al ton e, enter the room number. Y ou hear on e of
the following:
■ Confirmation tone if the restriction code was accepted.
■ Intercept tone if you entered an improper restriction code number.
Press the
4. Press the
■ The call appearance lamp goes off.
■ The display goes blank.
■ The Position Available lamp goes on.
■ The console returns to the normal operating mode.
release button.
cancel button, and start over again.
Page 51

GuestWorks and DEFINITY ECS Release 9
Hospitality Operations
555-231-742
Hospitality Operations
Activate Controlled Restriction for a Group of Rooms
To activate a controlled restriction for a group of rooms, do the following:
!
CAUTION:
If you use this feature, be sure that you understand which rooms are
in a particular COR. Since this feature is controlled by the COR, all
telephones in the same COR will have the selected restriction applied.
This could lead to guest service problems if not applied correctly.
Issue 1
November 2000
47Front Desk Operations
1. Press the
■ You hear dial tone.
■ The call appearance lamp goes on.
■ The Position Available lamp goes off.
start button or an idle call appearance button.
2. Enter the Group Controlled Restriction activation dial access code _____
followed by one of these four digits:
■ Press the 1 button for Outward/Toll Restriction.
■ Press the 2 button for Total Rest riction.
■ Press the 3 button for Termination Restriction.
■ Press the 4 button for Station-to-Statio n/Toll Restriction.
3. After hearing the second dial tone, enter the 2-digit COR number of the
group.
■ A confirmation tone indicates that the restriction was activated. An
intercept tone indicates that the group of rooms already has a
restriction assigned, or you entered an improper digit.
■ The call appearance lamp goes off.
■ The display goes blank.
■ The Position Available lamp goes on.
■ The console returns to the normal operating mode.
Page 52

GuestWorks and DEFINITY ECS Release 9
Hospitality Operations
555-231-742
Hospitality Operations
Cancel Controlled Restriction for a Group of Rooms
To deactivate a controlled restriction for a group of rooms, do the following:
Issue 1
November 2000
48Front Desk Operations
1. Press the
■ You hear dial tone.
■ The call appearance lamp goes on.
■ The Position Available lamp goes off.
start button or an idle call appearance button.
2. Enter the Group Controlled Restriction deactivation feature access code
_____ followed by the digit that represents the current restriction:
■ Press the 1 button for Outward/Toll Restriction.
■ Press the 2 button for Total Restriction. Canceling Total Restriction
will remove all calling restrictions.
■ Press the 3 button for Termination Restriction.
■ Press the 4 button for Station-to-Statio n/Toll Restriction.
3. After hearing the second dial tone, enter the 2-digit COR number of the
group. You hear one of the following:
■ Confirmation tone if the restriction code was accepted.
■ Intercept tone if you entered an improper restriction code number.
Press the
4. Press the
■ The call appearance lamp goes off.
■ The display goes blank.
■ The Position Available lamp goes on.
■ The console returns to the normal operating mode.
cancel button, and start over again.
release button.
Page 53

GuestWorks and DEFINITY ECS Release 9
Hospitality Operations
Hospitality Operations
555-231-742
Change Class of Restriction (COR) by Feature Access Code (FAC)
A user with console permissions (COS) can change, via his/her telephone or
attendant console, Class of Restriction (COR) values for one or more telephones
or attendant consoles. This is done using a feature access code that has been
defined by the system administrator. After COR values for other local users have
been changed, t hose users will be permit te d to use additional features and/or have
additional calling abilities. Previously, only a system administrator could change
COR values by using the system access terminal (SAT).
To change a COR by FAC, do the following:
Issue 1
November 2000
49Front Desk Operations
1. Press the
■ You hear dial tone.
■ The call appearance lamp goes on.
■ The Position Available lamp goes off.
start button or an idle call appearance button.
2. Enter the Change Class of Restriction Feature Access Code
_____ .
■ The system will then verify that you have COS permissions.
— If you have COS console permissions, the system will then
verify that you are local to the system.
— If you do not have COS permissions, you will hear intercept
tone, and the call wi ll be dr opped. I f this is the case, pr ess t he
cancel button, and start over again.
■ If the system determines that you are lo cal to the syste m, continue t o
Step 3.
3. If the password option is enabled, you will hear dial tone a second time.
Enter the password for the feature. If the password option is not enabled,
continue to Step 4.
If the password you en tered is inc orrect, you w ill hear intercept tone, and
the call will be dropped. If this is the case, press the
up, and start over again.
cancel button, or hang
Page 54

GuestWorks and DEFINITY ECS Release 9
Hospitality Operations
555-231-742
Hospitality Operations
4. You will hear dial tone a third time. After hearing the third dial tone, enter
the extension number of the station whose COR value is to be changed.
You will hear one of the following:
■ Confirmation tone if the extension exists, and the telephones or
attendant consoles are local on the system. Continue to Step 5.
■ Intercept tone if you entered the number for an extension that does
not exist or if the station is not a simple user or attendant local on the
system. If this is the case, press the
start over again.
5. You will hear dial tone a fourth time. Enter the new COR value.
■ The system will verify that the new COR value is valid (within the
range of 0-95). If the COR is valid, continue to Step 6.
Issue 1
November 2000
50Front Desk Operations
cancel button, or hang up, and
■ If th e COR value is not valid, you will hear inte rcept tone, and the
call will be dropped. If this is the case, press the
hang up, and start over again.
6. Press the
■ The call appearance lamp goes off.
■ The display goes blank.
■ The Position Available lamp goes on.
■ The console returns to the normal operating mode.
cancel button, or
release button, or hang up.
Page 55

GuestWorks and DEFINITY ECS Release 9
Hospitality Operations
Hospitality Operations
555-231-742
Do Not Disturb
The Do No t Disturb feature permits hotel guests to request that calls directed to
the room be blocked for a predetermined period of time. This can be done from
the attendant console, a backup telephone, or by guests themselves. If the switch
has a Speech Synth esi ze r ci r cui t pack, guests can apply t hei r own Do Not Disturb
requests.
This feature may be app lied t o indivi dual rooms or to groups of rooms hav ing the
same class of restriction (COR). Some telephones also have a
can be used to prevent calls from terminating at that telephone.
When the room with Do Not Disturb receives an automatic wake-up ca ll, the Do
Not Disturb feature is turned off. If the room with Do Not D i sturb receives a
priority call, th e call will rin g at the guest’s room. Most ca lls coming to thi s station
(from another room , from the outside, or from the attendant), receive intercept
treatment (the cal l is routed to the attend ant, to a recor ded announce ment, to voi ce
messaging, or to intercept tone).
Issue 1
November 2000
51Front Desk Operations
DND Me button that
The switch creates an audit trail report of all telephones that are in the Do Not
Disturb mode. Refer to ‘‘Reports’’ on page 79
User Operation
The user operation for applying Do Not Disturb requests using the PMS is given
in the PMS documentation.
If your switch has a PMS that supports Do Not Disturb, use this feature from the
PMS, not from the attendant console. The only exception to this is when the link
to the PMS is not operational.
.
Page 56
GuestWorks and DEFINITY ECS Release 9
Hospitality Operations
Hospitality Operations
555-231-742
Activate Do Not Disturb for One Room
NOTE:
Do Not Disturb cannot be activated using the PC console.
To add or change a Do Not Disturb request, do the following:
Issue 1
November 2000
52Front Desk Operations
1. Press the
■ The DND Ext lamp goes on.
■ The following displays:
dnd ext button.
DO NOT DIST- Ext:
2. If you are alre ady on an active call with the guest requ iring Do Not Disturb,
the extension number displays automatically. Press the
# button to select
the displayed number for Do Not Disturb.
If you are not connected to the room requiring Do Not Disturb, enter the
room number, and then the
button again, and start over.)
ext
■ The following displays:
DO NOT DIST- Ext: <ext> Time: --:--
# button. (If you make a mistake, press the dnd
If a Do Not D isturb request already exists for the ro om, the
cancella tion time field will be filled in.
3. Enter the time when the Do Not Disturb period is to end (the cancellation
time) in the 4-digit hh:mm format (hour:minute).
■ If you entered a time between 13:00 and 00:59, the following
displays:
DO NOT DIST- Ext: <ext> Time: <hh:mm>
Go to Step 5.
■ If you entered a time between 01:00 and 12:59, the following
displays:
DO NOT DIST - Ext: <ext> Time: <hh:mm> -M
4. Press the 2 button for A.M., or press the
■ The display now shows an AM or PM designator.
7 button for P.M.
Page 57
GuestWorks and DEFINITY ECS Release 9
Hospitality Operations
Hospitality Operations
555-231-742
5. Press the # button to confirm the Do Not Disturb request.
■ One of the following displays:
THANK YOU - DO NOT DIST ENTRY CONFIRMED
This indicates that the Do Not Disturb procedure was successful.
DO NOT DISTURB DENIED - TOO SOON
This indi cates that the time en tered is within 2 1/2 minutes of the
current ti me.
DO NOT DISTURB DENIED - SYSTEM FULL
This indicates tha t the maximum number of Do Not Dist urb requests
has been reached for the switch.
■ The console returns to the normal operating mode.
Issue 1
November 2000
53Front Desk Operations
Cancel Do Not Disturb for One Room
Once a Do Not Disturb period has timed out, the request is canceled
automaticall y . However , before the req uest times out, yo u can manually c ancel the
request using the following procedure:
1. Press the
■ The DND Ext lamp goes on.
■ The following displays:
DO NOT DIST- Ext:
dnd ext button.
2. If you are alrea dy on a n active call with the guest re questing cancell ation of
Do Not Disturb, the extension number displays automatically. Press the
#
button to select the displayed number for Do Not Disturb.
If you are not connected to the room requesting cancellation of Do Not
Disturb, enter the room number, then press the
mistake, press the
■ The following displays:
dnd ext button again, and start over.)
# button. (If you make a
DO NOT DIST - Ext: <ext> Time: <hh:mm>
3. Press the
■ The following displays:
delete button.
THANK YOU - DO NOT DIST REQUEST CANCELED
■ The console returns to the normal operating mode.
Page 58
GuestWorks and DEFINITY ECS Release 9
Hospitality Operations
Hospitality Operations
555-231-742
Activate Do Not Disturb for a Group of Rooms
A typical application of this procedure is applying Do Not Disturb to a group of
conference ro oms whe re meet ings are in session during the day, and the attendees
do not want to be disturbed with telephone calls.
!
CAUTION:
If you use this feature, be sure that you understand which rooms are
in a particular COR. Since this feature is controlled by the COR, all
telephones in the same COR will have Do Not Disturb applied. This
could lead to guest ser vic e problems if not appl ie d cor rectly. Another
way to restrict groups of telephones is by using the Controlled
Restrictions feature (refer to page 44
Issue 1
November 2000
54Front Desk Operations
).
To add or change a Do Not Disturb request, do the following:
1. Press the
■ The DND Group lamp goes on.
■ The following displays:
DO NOT DIST - Group:
dnd group button.
2. Using the dial keypad, enter the gr oup’ s 2-dig it Class of Restricti on (COR),
and press the
■ The following displays:
DO NOT DIST - Group: <COR> Time:
# button.
If a Do Not Disturb request already exists for the group, the time
field will be filled in.
3. Enter the time when the Do Not Disturb period is to end (the cancellation
time) in the 4-digit hh:mm format (hour:minute).
■ If you entered a time between 13:00 and 00:59, the following
displays:
DO NOT DIST - Group: <COR> Time: <hh:mm>
Go to Step 5.
■ If you entered a time between 01:00 and 12:59, the following
displays:
DO NOT DIST - Group: <COR> Time: <hh:mm> -M
4. Press the
■ The display now shows an AM or PM designator.
2 button for A.M., or press the 7 button for P.M.
Page 59
GuestWorks and DEFINITY ECS Release 9
Hospitality Operations
555-231-742
Hospitality Operations
5. Press the # button to confirm the Do Not Disturb request.
■ One of the following displays:
THANK YOU - DO NOT DIST ENTRY CONFIRMED
This indicates that the Do Not Disturb procedure was successful.
DO NOT DISTURB DENIED - TOO SOON
This indi cates that the time en tered is within 2 1/2 minutes of the
current ti me.
DO NOT DISTURB DENIED - SYSTEM FULL
This indicates tha t the maximum number of Do Not Dist urb requests
has been reached for the switch.
■ The console returns to the normal operating mode.
Issue 1
November 2000
55Front Desk Operations
Cancel Do Not Disturb for a Group of Rooms
Once a Do Not Disturb period has timed out, the request is canceled
automaticall y . However , before the req uest times out, yo u can manually c ancel the
request using the following procedure:
1. Press the
■ The DND Group lamp goes on.
■ The following displays:
DO NOT DIST - Group:
dnd group button.
2. Using the dial keypad, enter the gr oup’ s 2-dig it Class of Restricti on (COR),
and press the
■ The following displays:
DO NOT DIST - Group: <COR> Time: <hh:mm>
3. Press the
■ The following displays:
# button.
delete button.
THANK YOU - DO NOT DIST REQUEST CANCELED
■ The console returns to the normal operating mode.
Page 60
GuestWorks and DEFINITY ECS Release 9
Hospitality Operations
555-231-742
Hospitality Operations
Message Waiting Notification
You can notify a guest that a message is waiting by turning on the message
waiting lamp on that guest’s telep hone. The gues t retrie ves the message by ca lling
the front desk or by calling the voice mail system.
NOTE:
If your switch has a voice mail system, it is recommended that you
leave all guest messages in the voice mailboxes of those guests. This
takes the responsibility away from the front desk personnel and
allows guests to access their messages with one telephone call.
To turn on a guest’s message waiting lamp, do the following:
Issue 1
November 2000
56Front Desk Operations
1. Press the
■ The MW ACT lamp goes on.
■ The following displays:
mw act button.
MESSAGE NOTIFICATION ON- Ext:
2. Enter the room number, and press the
■ The following displays:
# button.
MESSAGE LAMP ON
■ The console returns to the normal operating mode.
To turn off a guest’s message waiting lamp, do the following:
1. Press the
■ The MW DEAC lamp goes on.
■ The following displays:
MESSAGE NOTIFICATION OFF - Ext:
mw deac button.
2. Enter the room number, and press the
■ The following displays:
MESSAGE LAMP OFF
■ The console returns to the normal operating mode.
# button.
Page 61

GuestWorks and DEFINITY ECS Release 9
Hospitality Operations
Hospitality Operations
555-231-742
PMS Alarms
Issue 1
November 2000
57Front Desk Operations
You may have a
telephones. If the link between the switch and the PMS goes down, this button
lamp will light until the link is restored. If this lamp remains lit for more than a
few seconds, it is recommended that you call your PMS vendor and the Avaya
support line (refer to ‘‘Hospitality Services Overview’’ on page 5
remains down for one hour, a minor alarm is generated.
Call Accounting Alarms
You may have a
telephones. If the link between the switch and the call accounting system goes
down, this button lamp will light until the link is restored. If this lamp remains lit
for more than a few second s, it is recommende d that y ou cal l your call accou nti ng
vendor and the Avaya support line (refer to ‘‘Hospitality Services Overview’’ on
page 5).
Crisis Alert
The Crisis Alert feature notifies hotel personnel when someone dials an
emergency service agency (for example, 911). The attendant console, backup
telephones, and digital pagers can be set up to receive this notification, which
includes from where the call was made. This will help hotel personnel assist
emergency pe rs onne l when the emergency personnel arrive at the hot el . For mor e
information abo ut thi s feat ure, s ee the DEFINITY ECS Cons ole Oper ations Quick
Refer ence .
pms alarm button assigned to your attendant consoles and backup
). If the link
cas alar m button assigned to your attendant consoles and backup
NOTE:
You should never set up Crisis Alert to Pager as your only option.
You should always set up at least one attendant console or telephone
to receive crisis alert messages.
Page 62

GuestWorks and DEFINITY ECS Release 9
Hospitality Operations
Hospitality Operations
555-231-742
Maid Status, Housekeeping Status, and
Room Occupancy
The Maid Status/Housekeeping Status feature records the status for up to six
housekeeping codes. These status codes are usually entered by the housekeeping
staff from the guest room or from a designated telephone, but they can also be
updated by the front office personnel using the attendant console or a backup
telephone. Six status codes can be used from guest rooms, and four status codes
can be used from telephones that are designated for status update calls.
You must decide on a definition for each status code. For example, the definition
for status code 1 could be “room being cleaned,” and it might have a feature
access code of *31. Status code 2 could be “ready for inspection,” and it might
have a feature access code of *32. If the room status is being reported from the
designated telephone and not from the guest room, the feature access code for
status code 1 might be #31 a nd st atus code 2 might be #32. When a hous ekeeping
staff member updates the status, you can also record who updated the status by
assigning identification codes for your personnel. After the person updates the
current status, he or she can input his or her identification code. (This option can
be administered.)
Issue 1
November 2000
58Front Desk Operations
On a switch that has a PMS, this information is passed from the switch to the
PMS. Front desk personnel ca n then view this information on t he PMS terminal. If
there is no PMS, room status is viewed by pressing the
maid status button on the
attendant console or backup telephone. You can also view this information
through administrat ion by usin g the
list pms-down command. If there is a log
printer, this information is printed when the housekeeping staff updates the status.
Page 63
GuestWorks and DEFINITY ECS Release 9
Hospitality Operations
Hospitality Operations
555-231-742
User Operation
The user operation for updating and viewing housekeeping status using the PMS
is given in the PMS documentation.
You can check the current status of all rooms based on the housekeeping status
codes defined for your switch (refer to ‘‘Status Codes’’ on page 76
information about status codes).
NOTE:
If your switch has a PMS that sup ports Hou sekeepi ng Stat us, use thi s
feature from the PMS, not from the console. The only exception to
this is if the link to the PMS is not operational.
To check the current room status, do the following:
Issue 1
November 2000
59Front Desk Operations
for more
1. Press the
■ The Maid Status lamp goes on.
■ The following displays:
maid status button.
Enter Desired Room State (1-6)
2. Press a number between 1 and 6 (refer to page 75
for the sta tus code
definitions).
■ The following displays:
<requested room status>
3. Press one of the DXS hundreds select buttons on the selector console.
■ The LEDs in the upper part of the selector console light for all
rooms that match the requested status.
4. You can enter different status codes to see the rooms that are in the
different housekeeping states.
5. Press the
normal mode button when finished.
■ The console returns to the normal operating mode.
6. If you are not sure which rooms are available, press the
■ The lamps associated with the rooms already occupied will display
on the DXS selector console. Determine an unoccupied room from
this information.
Recorded Announcements
The Recorded Announcements feature allows you to create several different
recorded announcements for wakeup calls and Call Vectoring procedures. For
example, you may want to have different messages for different times of day. For
occupd rooms button.
Page 64

GuestWorks and DEFINITY ECS Release 9
Hospitality Operations
Hospitality Operations
555-231-742
early morning wakeup calls, you can advertise breakfast at your coffee shop. For
afternoon wakeup calls, you can advertise dinner at your restaurant. These
announcements are recorded using the Announcement circuit pack and are
assigned manually to wakeup cal ls when the wakeup calls are scheduled using the
attendant console or a backup telephone.
There are many other ways you can use recorded announcements, For example,
you can announce special events at the hotel or announce the dinner menu at the
restaurant, or you can create a fixed set of recorded announcements that you can
change as needed. You can also publish those announcement numbers in your
“directory of guest services.” Guests can enter the announcement numbers from
their rooms to hear the recorded information.
NOTE:
Messages provided by the Speech Synthesizer circuit pack are fixed
in content and cannot be changed.
Issue 1
November 2000
60Front Desk Operations
User Operation
You can verify the proper operation and content of the wakeup announcements.
The operation is different for the Announcements and Speech Synthesizer circuit
packs.
For the Announcement circuit pack, do the following from a telephone that has
console permissions:
1. Lift the telephone handset, and enter the Announcement feature access
2. Enter the extension number of the announcement that you need to record.
3. Press th e
4. After wai ting 1 5 secon ds, ente r the ext ension number of the an nouncemen t
5. Listen to t he re cordi ng. If yo u need to r e-re cord t he mes sage, rep eat s teps 1
code _____.
1 button, and record af ter t he tone. Hang up , press the drop button,
or press the switchhook when finished.
you just recorded.
through 3.
6. If the message is satisfactory, hang up and repeat steps 1 through 3 to
record the rest of the messages.
Page 65

GuestWorks and DEFINITY ECS Release 9
Hospitality Operations
555-231-742
Hospitality Operations
The Announcements cir cuit pack has the following re cording ti me limits bas ed on
the sampling rate used:
■ 8 minutes, 32 seconds at 16 kHz
■ 4 minutes, 16 seconds at 32 kHz
■ 2 minutes, 8 seconds at 64 kHz.
For the Speech Synthesizer circuit pack, do the following:
1. At a telephone, enter the Verify Wakeup Announcements feature access
code _____.
Issue 1
November 2000
61Front Desk Operations
2. Press the
■ Listen to the announcement. There may be a short delay before you
1 or 2 button.
hear the announcement.
3. If the wakeup announcement is absent, distorted, inaudible, or defective in
any way, contact your system administrator to correct the problem.
Page 66

GuestWorks and DEFINITY ECS Release 9
Hospitality Operations
555-231-742
Hospitality Operations
Issue 1
November 2000
62Front Desk Operations
Page 67

GuestWorks and DEFINITY ECS Release 9
Hospitality Operations
Hospitality Operations
555-231-742
Voice Messaging Operations
To assist a guest when retrieving his or her voice messages, there are a few
procedures that you will do regularly. These procedures include the following:
■ Connecting a guest to the voice messaging system
■ Restoring a deleted message
■ Retrieving messages for a checked-out guest.
Issue 1
November 2000
63Voice Messaging Operations
Refer to I
NTUITY Lodging Administration and Feature Operations for more
information about these procedures. Instructions describing how the guests
retrieve t heir messa ges are found in ‘‘Retrieving Messages’’ on page 15
NOTE:
The operations given in this section apply only to the INTUITY
Lodging voice messaging product. See your product documentation
for other voice messaging products.
Administrative Mailbox on an INTUITY
System
To retrieve messages for guests, an administrative mailbox extension and
attendant password must be assigned for you. This is done through lodging
administration on t he INTUITY system. Fo r details, re fer to Chap ter 3 of
INTUITY Lodging Administration and Feature Operations.
You must assign a dummy extension to the Administrator Extension field,
a 4-digit password to the Attenda nt Password field, and a 4-digit p assword to the
Administ rator Password field.
.
Page 68

GuestWorks and DEFINITY ECS Release 9
Hospitality Operations
Hospitality Operations
555-231-742
Connecting Guests to the Voice Messaging
System
There are two ways you can connect a guest to the INTUITY voice messaging
system:
■ Y ou can conne ct a gues t direc tly to t he syste m, and th e guest t hen enter s his
or her room number and password, or
■ For a guest who calls in using a rotary-dial telephone, you can enter the
guest’s room number and password before you transfer him or her to the
voice messaging system. This method is recommended only for callers
with rotary-dial telephones. Callers with touch-tone telephones should be
connected directly to the system.
!
SECURITY ALERT:
Only a limited number of extensions and the attendant console can be
administered to retrieve guest messages. Attendants receiving requests for
connection to the voice messaging system should be trained to be on alert
for unauthorized callers who may be trying to “hack” the voice messaging
system. Refer to the Security Handbook for additional information.
Issue 1
November 2000
64Voice Messaging Operations
To connect a guest directly to the INTUITY v oice messaging syste m to let the
guest enter his or her own room number and password, do the following:
1. When a guest calls to retrieve his or her messages, ask the guest for his or
her name and room number.
2. Verify that the guest name and room number are valid.
3. Ask the guest to please hold while the call is transferred to the voice
messaging system.
4. Press the
start button at the attendant console or the transfer button on a
backup telephone.
■ You hear dial tone as a new call appearan ce is sele cted.
■ The Split lamp goes on at the attendant console.
5. Enter the message retrieval numbe r.
■ You hear ringback tone.
■ The display shows the number you are calling.
6. Press either the
release button from the attendant console or the transfer
button from a backup telephone.
■ The guest is connected to the voice messaging system and can now
enter his or her room number and password to retrieve messages.
Page 69

GuestWorks and DEFINITY ECS Release 9
Hospitality Operations
Hospitality Operations
555-231-742
To connect a guest who cal ls using a rotary-dial t el ephone to the voice messagi ng
system, do the following:
1. When a guest calls to retrieve his or her messages, ask the guest for his or
her name, room number, and his or her voice messaging password.
2. Verify that the guest name and room number are valid.
3. Ask the guest to please hold while the call is transferred to the voice
messaging system.
Issue 1
November 2000
65Voice Messaging Operations
4. Press the
start button at the attendant console or the transfer button on a
backup telephone.
■ You hear dial tone as a new call appearan ce is sele cted.
■ The Split lamp goes on at the attendant console.
5. Enter the message retrieval numbe r.
■ You hear ringback tone.
■ The display shows the number you are calling.
6. After the voice messaging system answers, enter the extension number for
the guest.
■ A message confirms that thi s is a “c urrent” gue st (regi stered through
the PMS).
7. Enter either the guest’s password or the attendant password.
8. You can now transfer the call to the guest so he or she can retrieve
messages. Press either the
transfer button from a backup telephone.
release button from the attendant console or the
■ The guest is connected to the voice messaging system and can now
retrieve messages by following the voice messaging prompts.
Page 70

GuestWorks and DEFINITY ECS Release 9
Hospitality Operations
Hospitality Operations
555-231-742
Restoring a Deleted Voice Message
Deleted voice messages are stored until midnight of the day they were deleted,
except for messa ges delet ed afte r 1 1:00 p.m., whic h can be r estored unt il midni ght
of the followin g day. For example, you can retrieve a messa ge that a guest delet ed
at 6:00 p.m. up to midnight of that evening.
If the INTUITY system is administered to save fax messages in the guest’s
mailbox after delivery, a fax deleted by the guest will not be deleted from the
system until midnight of that day. If the INTUITY system is administered to not
save fax messages after delivery, the fax is deleted from the system immediately
after the guest deletes the fax. The system defaults to not saving faxes.
Deleted messages are stored on a last-in first-out basis. The last message that a
guest deleted is the first message restored. Because messages are stored this way,
and because messages can only be restored one at a time, it is important that you
ask the guests h ow many message s the y have delet ed sin ce the message they want
restored. If th e mes sage was the l ast one delet ed, foll ow the pr ocedur e on ce. If the
desired message was not the last message deleted, ask the guests how many
messages have been deleted since that one and do the procedure that many times.
It is much easier to res tor e t hre e messages in a row and let the guests sort through
them than it is to restore number 1, find out that it is not the right one, then restore
number 1 over again in order to get to number 2.
Issue 1
November 2000
66Voice Messaging Operations
To restore deleted messages, do the following:
1. When a guest calls to have a deleted message restored, ask him or her for
the room number, the guest’s voice messaging password, and the number
of messages tha t t he gue st needs r estor ed. Sugg est to t he gues t that you ca n
restore all of the messages and allow the guest to sort through the
messages.
2. Verify that the guest name and room number are valid.
3. Inform the guest that you will notify him or her when the messages are
restored. You can either place the call on hold or call the guest back.
4. Select an idle call appearance.
■ You hear dial tone.
5. Enter the message retrieval numbe r.
■ You hear ringback tone.
■ The display shows the number you are calling.
6. After the voice messaging system answers, press the
0 button followed by
the guest’s room extension.
■ A message confirms that thi s is a “c urrent” gue st (regi stered through
the PMS).
Page 71

GuestWorks and DEFINITY ECS Release 9
Hospitality Operations
Hospitality Operations
555-231-742
7. Enter either the guest’s password or the attendant password.
■ If you hear “Last deleted message has been restored,” listen for the
message “Ready for message retrieval.”
■ If you hear the message “This guest has no deleted messages,” call
the guest and inform him or her that the messages could not be
restored.
8. Repeat thi s pr oce dur e for the number of messages the guest nee ds re stored.
9. When finished, call the guest and let him or her know that the messages
have been restored.
Retrieving Messages for Checked-Out Guests
Voice messages for a former guest are stored in an “old mailbox” for at least 24
hours after the guest checks out or until the next guest checks out from the same
room, whichever comes first. At midnight, all old mailboxes that are at least 24
hours old are purged from the system, and those messages are no longer
retrievable.
Issue 1
November 2000
67Voice Messaging Operations
If the INTUITY system is administered to save fax messages in the guest’s
mailbox after delivery, a deleted fax will be stored for 24 hours. If the INTUITY
system is administered to not save fax messages after delivery, the fax is deleted
from the system immediately after the guest deletes the fax. The system defaults
to not saving faxes.
If a former guest call s the hotel wi thin th e prescrib ed time perio d requesti ng his or
her messages, do the following:
!
SECURITY ALERT:
Only extensions that have been properly administered on the INTUITY
System and the attendant console can retrieve guest messages. Attendants
receiving requests for connection to the voice messaging system should be
trained to be on alert for unauthorized callers who may be trying to “hack” the
voice messaging system. Refer to the Security Handbook for additional
information.
1. When a guest calls to retrieve his or her messages, ask the guest for his or
her room number and voice messaging password.
2. Verify that the guest name and room number are valid.
3. Ask the guest to please hold while the call is transferred to the voice
messaging system.
Page 72

GuestWorks and DEFINITY ECS Release 9
Hospitality Operations
555-231-742
Hospitality Operations
4. Press the start button at the attendant console or the transfer button on a
backup telephone.
■ You hear a dial tone as a new call appearance is selected.
■ The Split lamp goes on at the attendant console.
5. Enter the message retrieval numbe r.
■ You hear a ringback tone.
■ The display shows the number you are calling.
Issue 1
November 2000
68Voice Messaging Operations
6. After the voice messaging system answers, press the
* button followed by
the extension number for the guest.
■ A message confirms that this is a “previous” guest.
7. Enter either the guest’s password or the attendant password.
8. At this point, you can transfer the call to th e gues t so the guest can retri eve
the messages. Press either the
transfer button from a backup telephone.
the
■ The guest is connected to the voice messaging system and can now
release button from the attendant console or
retrieve messages by following the voice messaging prompts.
Page 73

GuestWorks and DEFINITY ECS Release 9
Hospitality Operations
Hospitality Operations
555-231-742
Call Accounting Operations
This section gives you the procedures used to perform the following INTUITY
Lodging Call Accounting operations:
■ Night Audit
■ End-of-Week/End-of-Month Audit
■ Printing Key Reports
■ Deleting Call Records.
Refer to the GuestWorks INTUITY Lodging Call Accounting User’s Guide for
more information about these and other procedures.
NOTE:
The operations given in this section apply only to the INTUITY
Lodging Call Accounting product. See your product documentation
for other call accounting products.
Issue 1
November 2000
69Call Accounting Operations
Night Audit Procedures
The following procedures should be done nightly to produce a call accounting
report. This rep ort is t hen used t o verify gu est room ca ll char ges. You should try to
do this procedure at the same time every night.
1. If this property is using Hilton Corporation (formerly Promus) equipment,
press the
system terminal Ma in Menu, and con tinue with step 2. Otherwise, c ontinue
with step 6.
2. At the Utilities menu, press the
options.
3. Press the
system and the PMS.
4. Press the
5. Press the
6. Press the
6 button to enter the Utilities subsystem from the call accounting
4 button to select the Miscellaneous
p button to stop call record transfer between the call accounting
q button to exit from the Miscellaneous options.
8 button to return to the Main Menu.
5 button to enter the Reports subsystem.
7. Press the
8. Press the
4 button to select the Audit repo rt.
1 button to run and print the current summary report.
9. While the re port i s runni ng, pres s the
cumulative report. Refer to ‘‘End-of-Week/End-of-Month Audit
Procedures’’ on page 70 for more information about this report.
10. From the Main Menu, press the
c button to add this daily re port t o the
5 button to enter the Reports subsystem.
Page 74

GuestWorks and DEFINITY ECS Release 9
Hospitality Operations
Hospitality Operations
555-231-742
11. Press the 7 button to display the second list of Report options.
Issue 1
November 2000
70Call Accounting Operations
12. Press the
13. Press the
14. Press the
15. Press the
5 button to select the Chronological (CHRO NO) report.
3 button to select the Config option.
2 button to select the Range option.
I button to select the Interval option (this is the letter I, not the
number 1).
16. Press the
17. Press the
1 button to set the Interval at 1 (1 equals an interval of 24 hours).
7 button to run the Chronological report.
18. If this property is using Hilton Corporation (formerly Promus) equipment,
press the
6 button to ente r t he Utiliti es s ubsyst em fr om the Main Men u, and
continue with step 19. Otherwise, continue with step 22.
19. At the Utilities menu, press the
4 button to select the Miscellaneous
options.
20. Press the
t button to restart the call record transfer between the call
accounting system and the PMS. You may receive a confirmation message
(pms.pause 644 mode). If you do, press the
y button.
21. Press the
22. Press the
q button to exit from the Miscellaneous options.
8 button to return to the Main Menu.
End-of-Week/End-of-Month Audit Procedures
Depending on the number of call records generated at your property, you should
run a cumulative report every week or every month (or both, if necessary). This
should be done after you have run the nightly audit reports. To run a cumulative
report, do the follow ing:
1. If this property is using Hilton Corporation (formerly Promus) equipment,
press the
6 button to enter the Utilities subsystem from the call accounting
system terminal Ma in Menu, and con tinue with step 2. Otherwise, c ontinue
with step 6.
2. At the Utilities menu, press the
4 button to select the Miscellaneous
options.
3. Press the
p button to stop call record transfer between the call accounting
system and the PMS.
4. Press the
5. Press the
6. Press the
7. Press the
q button to exit from the Miscellaneous options.
8 button to return to the Main Menu.
5 button to enter the Reports subsystem.
4 button to select the Audit repo rt.
Page 75

GuestWorks and DEFINITY ECS Release 9
Hospitality Operations
Hospitality Operations
555-231-742
8. Press the 2 button to run and print the current cumulative report.
Issue 1
November 2000
71Call Accounting Operations
9. While the report is running, press the
report.
10. If this property is using Hilton Corporation (formerly Promus) equipment,
press the
continue with step 11. Otherwise, continue with step 14.
11. At the Utilities m enu, press the
options.
12. Press the
accounting system and the PMS. You may receive a confirmation message
(pms.pause 644 mode). If you do, press the
13. Press the
14. Press the
Printing Key Reports
This section contains procedures to print the following reports:
c button to clear the cumulative
6 button to ente r t he Utiliti es s ubsyst em fr om the Main Men u, and
4 button to select the Miscellaneous
t button to restart the call record transfer between the call
y button.
q button to exit from the Miscellaneous options.
8 button to return to the Main Menu.
■ Detail Reports
■ Cost Reports.
Refer to the GuestWorks INTUITY Lodging Call Accounting User’s Guide for
information on the procedures for printing other reports.
Detail Reports
To print Detail reports, do the following:
1. At the call accounting system terminal Main Menu, press the
2. At the Reports menu, press the
3. Press the
4. Press the
5 button to
enter the Reports subsystem.
2 button to select the Detail option.
3 button to select the Config func tion.
1 button to enter the report setup. Set the following:
■ Post Call = N
■ Live Calls = Y
■ Send to Printer = Y
■ Com pact Version = Y
■ Save on Disk = Y
■ All Peg Counts = N.
Page 76

GuestWorks and DEFINITY ECS Release 9
Hospitality Operations
Hospitality Operations
555-231-742
5. Press the 2 button to set the Range for the reports.
Issue 1
November 2000
72Call Accounting Operations
10. Press
11. Press the
Cost Reports
To print Cost reports, do the following:
6. Press the
c button to enter a start date and an end date. Use the MMDDYY
format.
7. Enter a start time and an end time . Use the HHMM format for a 24-hour
clock.
8. Press the
9. At the “Division#” prompt, press
button to select gues t cal ls; press the
or press the
4 button to select the Division option.
Enter to sel ect all records; press the enter
1 button to select meeting room calls;
3 button to select administration staff calls.
Enter to co mplete the request.
7 button to execute the request. You should now be back at the
Main Menu.
1. At the call accounting system terminal Main Menu, press the
5 button to
enter the Reports subsystem.
2. At the Reports menu, press the
3. Press the
4. Press the
■ Com pact Version = Y or N
■ Send to Printer = Y
■ Save on Disk = Y
■ Printer Name = (locally defined).
5. Press the
6. Press the
3 button to select the Config func tion.
1 button to enter the report setup. Set the following:
2 button to set the Range for the reports.
c button to enter a start date and an end date. Use the MMDDYY
6 button to select the Cost option.
format.
7. Enter a start time and an end time . Use the HHMM format for a 24-hour
clock.
8. Press the
9. At the “Division#” prompt, press
button to select gues t cal ls; press the
or press the
3 button to select the Division option.
Enter to sel ect all records; press the 1
2 button to select meeting room calls;
3 button to select administration staff calls.
10. Press
11. Press the
Main Menu.
Enter to co mplete the request.
7 button to execute the request. You should now be back at the
Page 77

GuestWorks and DEFINITY ECS Release 9
Hospitality Operations
Hospitality Operations
555-231-742
Deleting Call Records
T o sa ve space a nd to reduc e confusi on over old infor mation, you should d elete old
call records on a re gul ar basis. This should be done once a week or once a month,
depending on your call volume.
!
CAUTION:
Please use extr eme caut ion when deletin g call r ecor ds. This shou ld be
done only after you have costed and distributed the current call
records for use in billing customers.
Issue 1
November 2000
73Call Accounting Operations
1. At the call accounting system terminal Main Menu, press the
4 button to
enter the Maintenance subsyst em.
2. At the Maintenance menu, press the
3. Press the
2 button to delete records by Division.
2 button to select the Delete function.
4. Enter a “before date” value. This represents the date up to which all call
records will be deleted. Use the MMDDYY format.
5. Enter a “be f ore time” value. This represents the time on the “before date”
up to which all call records will be deleted. Use the HHMM format for
a 24-hour clock. We recommend that you use the value
6. At the “Division#” prompt, press
button to delete gues t c alls; press the
or press the
7. Press
Enter to co mplete the request.
8. Press the
9. Press
CTRL + E to exit from deleti ng records.
3 button to delete administration staff calls.
y button to confirm the save.
Enter to delete all records; press the 1
2 button to delete meeti ng room cal ls;
2359.
10. Press the
8 button to return to the Main Menu.
Page 78

GuestWorks and DEFINITY ECS Release 9
Hospitality Operations
555-231-742
Hospitality Operations
Issue 1
November 2000
74Call Accounting Operations
Page 79

GuestWorks and DEFINITY ECS Release 9
Hospitality Operations
Hospitality Operations
555-231-742
Housekeeping Staff Operations
Housekeepers can update housekeeping status information in two ways:
■ Using telephones in guest rooms
■ Using designated telephones i n other loc ations, s uch as a laun dry room or a
house telephone.
If guest room telephones are used, six status feature access codes can be assigned
for the housekeeper to use for transmitting information. If designated telephones
are used, four status feature access codes can be assigned. You can assign any
meaning to the codes, but the meanings must match those assigned in the PMS.
NOTE:
The guest room feature access codes can be used only from rooms
that have a “client-room” class of service. The designated telephone
feature access codes can be used from any telephone that has
console-permission class of service.
Issue 1
November 2000
75Housekeeping Staff Operations
After a feature access code has been entered from a guest room, the housekeeper
can be prompted, by a second dial tone, to send more data by using six additional
digits. These digits can carry information such as a personal identification code.
After a status feature access code has been entered from a designated telephone,
the switch prompts th e house keeper for a room e xtensi on number and, i f re quired ,
additional digits.
The instructions on ‘‘How to Call In Your Work Status’’ on page 76
describe how
to enter the different housekeeping codes. On ‘‘Housekeeping Status Codes and
Meanings’’ on page 77, fill in your specific housekeeping status feature access
codes and meanings, photocopy both pages, and then give them to your
housekeeping staff.
Page 80
GuestWorks and DEFINITY ECS Release 9
Hospitality Operations
Hospitality Operations
555-231-742
Status Codes
Although the housekeeping status codes may be defined to represent any of
several different states, here is a suggested way to use the different housekeeping
status codes. Note th at the sugges ted mean ing s of t he fir st f our cod es are the sa me
whether entered from a designated telephone or from a guest room. The feature
access codes shown are only examples.
Feature Access Code
Issue 1
November 2000
76Housekeeping Staff Operations
Guest
Room
Designated
Telephone
31 21 Needs cleaning
32 22 Being cleaned
33 23 Clean
34 24 Needs plumber
35 N/A Needs inspection
36 N/A On hold for repairs
How to Call In Your Work Status
While you are cleaning the guest rooms, you need to let your supervisor know
where you are and the condition of the guest rooms. To do this, use the telephone
in the room you are cleaning or a designated telephone assigned by your
supervisor (in the laundry room, fo r example). You do not have to say anything —
you enter the numbers tha t your sup ervisor wi ll give you. Each of the numb ers has
a specific meaning. Your message will go to a computer, and your supervisor will
get the status later.
Suggested Meaning
To update your work status from a guest room, do the following:
1. Using the telephone in the guest room, pick up the handset and enter the
status feature access code that corresponds with your current status. For
example, if you check the room and it needs cleaning, press
2. If you hear another dial tone, enter your identification code (a 1- to 6-digit
number). Once the code has be en accepted, you will hear confirmation tone
(a 3-burst tone). Hang up the handset, and continue with your work.
NOTE:
You should wait until you hear a confirmation tone to ensure
that the update was ac cepte d by the system. I t may take up t o 4
seconds to hear the confirmation tone.
31.
Page 81
GuestWorks and DEFINITY ECS Release 9
Hospitality Operations
Hospitality Operations
555-231-742
3. As you complete various phases in cleaning the room, update the status by
repeating steps 1 and 2.
If you were told to use a designated telephone (any telephone other than a guest
room telephone) to report your status, do the following:
1. Using the designated telephone, pick up the handset, and enter the status
feature access code that corresponds with the room’s current status. For
example, if you have finished cleaning a room, press
2. After you hear a dial tone, enter the room number.
3. If you hear another dial tone, enter your identification code (a 1- to 6-digit
number). Once the code has been accepted, you will hear a confirmation
tone (a 3-burst tone). Hang up the handset, and continue with your work.
NOTE:
You should wait until you hear a confirmation tone to ensure
that the update was ac cepte d by the system. I t may take up t o 4
seconds to hear the confirmation tone.
Issue 1
November 2000
77Housekeeping Staff Operations
23.
4. Repeat steps 1 through 3 as necessary to report new room status
information.
Housekeeping Status Codes and Meanings
The following table contains your specific status feature access codes and their
meanings. If any of the code s are not ident ified, contact your supervi sor. Note that
you have only four status codes when using a designated telephone.
Feature Access Code
Guest
Room
N/A
Designated
Telephone
Meaning
N/A
Page 82

GuestWorks and DEFINITY ECS Release 9
Hospitality Operations
555-231-742
Hospitality Operations
Issue 1
November 2000
78Housekeeping Staff Operations
Page 83

GuestWorks and DEFINITY ECS Release 9
Hospitality Operations
Hospitality Operations
555-231-742
Reports
This section gives examples of administration reports you can display on the
administration t ermina l or pr int on t he Log Pr inter or the Journa l/Sche dule Pr inter.
Administration Reports
Whether using an SAT or software emulator on a PC, you can view the following
reports:
Command Description
list pms-down Shows switch activity and housekeeping sta-
Issue 1
November 2000
79Reports
tus even wh en there is n o PMS link; this can
be used to help diagnose communication
errors
list do-not-disturb station Shows all current Do Not Disturb requests for
stations
list do-not-disturb group Shows all current Do Not Disturb requests for
groups
list wakeup incomplete Shows all failed wakeups over the last 24
hours
list wakeup requests Shows all current wakeup requests
list wakeup station XXXX Shows an audit of wakeup call activity for
station XXXX
list emergency Shows a history of emergency calls
list integrated-annc-boards Displays the integrated announcement circuit
pack extension assignments
status station XXXX Shows the current status of station XXXX
The following screens show examples of the reports you can view.
Page 84
GuestWorks and DEFINITY ECS Release 9
Hospitality Operations
555-231-742
Hospitality Operations
list pms-down
PROPERTY MANAGEMENT SYSTEM ACTIVITY
Extension Event Reason Date/Time
2900 from room, code 1 active - nopms 18/20:10 PM
3100 from sta., code 2 active - nopms 18/21:00 PM
3344 checkout, MWL off PMS Link Out 18/21:25 PM
3302 room check in PMS Link Out 18/21:34 PM
3320 PBX chng stn rstr active - nopms 18/22:00 PM
list do-not-disturb station
Issue 1
November 2000
80Reports
DO-NOT-DISTURB STATIONS
Extension Type Until
4550 MANUAL 6:00 AM
3256 MANUAL 11:30 AM
4224 MANUAL 2:15 PM
4225 GROUP 3:00 PM
4226 GROUP 3:00 PM
4227 BOTH 3:00 PM
list do-not-disturb group
DO NOT DISTURB GROUP
COR Until
5 9:30 AM
12 3:15 PM
10 6:00 PM
list wakeup incomplete
Extension Time of Attempts
3315 02:30 PM
3315 02:35 PM
3315 02:40 PM
WAKEUP INCOMPLETIONS
Page 85
GuestWorks and DEFINITY ECS Release 9
Hospitality Operations
555-231-742
Hospitality Operations
list wakeup requests
Extension Time Annc Daily VIP
3311 04:45 AM 4000 n y
2247 05:30 AM 4001 n y
1435 08:00 AM 4001 n y
list wakeup station 4565
Extension = 4565
Issue 1
November 2000
81Reports
WAKEUP REQUESTS
WAKEUP STATION AUDIT
Event Reason Time Orig Ext Attempt Swap Extension Skip Time
request ok 6:45 AM 4565
change ok 7:00 AM 4565
cancel ok 7:15 AM 4565
incompl noanswer 7:15 AM 1
answer ok 7:20 AM 2
request ok 8:00 AM 2
list emergency
EMERGENCY ACCESS CALLS
Extension Event Type of Call Time
3315 attd night service off-hook alert 04:18 P
3355 call abandoned off-hook alert 04:19 P
3350 call completed off-hook alert 04:20 P
7000 call abandoned feature access code 06:09 P
7400 call completed feature access code 06:10 P
7001 attd night service feature access code 11:45 P
7104 crisis alert feature access code 01:37 a
Page 86
GuestWorks and DEFINITY ECS Release 9
Hospitality Operations
555-231-742
Hospitality Operations
list integrated-annc-boards
Issue 1
November 2000
82Reports
Board Location: 01A07 Time Remaining at 32 Kbps: 187
Internal Announcement Length in
Number Extension Name Rate Seconds
1 4800 Greeting 32 5
2 4801 Dinner 32 20
3 4802 Breakfast 32 17
4
5
6
7
8
status station 1005
Type: 2500 Service State: in-srv/on-hook
Extension: 1005 Download Status: not-applicable
Port: 01B0601 SAC Activated? no
Call Parked? no User Cntrl Restr: outward
Ring Cut Off Act? No Group Cntrl Restr: none
CF Destination Ext:
INTEGRATED ANNOUNCEMENTS
GENERAL STATUS
Message Waiting:
Connected Ports:
HOSPITALITY STATUS
AWU Call At:
User DND: not activated
Group DND: not activated
Room Status: occupied
Any of these reports can be printed, either on an SAT printer or on the system
printer. T o print on the SA T printer, add the
pr command aft er the report command
string. For example, if you want a printed copy of the station status report, type
status station XXXX pr (XXXX is the extension number). The report will be
printed on the SAT printer.
To print o n th e system printer, add th e
sched command after the rep ort co mman d
string. For example, if you want a printed copy of the station status report, type
status station XXXX sched (XXXX is the extension number). The report will be
printed on the system printer.
Page 87
GuestWorks and DEFINITY ECS Release 9
Hospitality Operations
Hospitality Operations
555-231-742
Printer Reports
Printer reports keep track of several hospitality events. These reports are used to
track patterns of service problems and to keep track of room status. From the
switch’s perspective, there are two types of printers that may be accessed for
hospitality reports: a log printer, and a journal/schedule printer. These two printer
functions can be combined on one phys ical pr inter, or they can be assigned to two
different printers. If you have only one printe r, the status events print out as they
occur as part of one listing. If you have two printers, the log reports print on one
printer, and the journal (and scheduled) reports print on the other printer.
Log Printer
The log printer has one report which is a record of the housekeeping status. This
report occurs automatically as the housekeeping staff updates the status of guest
rooms. The following is an example of a log printer report:
Issue 1
November 2000
83Reports
2900 from room, code 1 activity - nopms 18/20:10 PM
3100 from sta., code 2 activity - nopms 18/21:00 PM
3106 from room, code 4 activity - nopms 18/21:45 PM
Journal Schedule Printer
The journal/schedule printer prints two types of reports: journal reports, and
scheduled reports. A journal report is a running summary of hospitality events
such as wakeup call requests, wakeup calls that complete, wakeup calls that fail,
Do Not Disturb requests, and emergency access attempts. A scheduled report is a
report that is scheduled through administration and usually occurs at the same
time every day.
The scheduled reports are assigned at an administration terminal (either the SAT
or a PC with emulation software) using the
hospitality
command. On Page 2 of this administration screen, you can
administer the time of day when you want the following reports to print:
change system-paramete rs
■ Automatic wakeup activity
■ Automatic wakeup summ ary
■ Emergency access summary.
Page 88
GuestWorks and DEFINITY ECS Release 9
Hospitality Operations
555-231-742
Hospitality Operations
The following is an example of a journal printer report:
AWU 11/21/96 10:25 401 REQUEST 10:40 BY Att 1
AWU 11/21/96 10:25 402 REQUEST 10:40 BY Att 1
EAT 11/21/96 10:26 7400 attd crisis alert ars alrt call type
EAT 11/21/96 10:26 7401 0 failed - originator abandoned call off-hook
AWU 11/21/96 10:26 401 CHANGE 10:45 BY Att 1
PMS 11/21/96 10:26 368 FROM ROOM: CODE 1 PMS link out of service 0
PMS 11/21/96 10:26 368 FROM ROOM: CODE 2 PMS link out of service 0
PMS 11/21/96 10:26 3540 FROM ROOM: CODE 1 PMS link out of service 0
EAT 11/21/96 10:27 7401 Att 1 successful call off-hook alert
PMS 11/21/96 10:26 401 FROM STATION: CODE 1 PMS link out of service 0
AWU 11/21/96 10:40 402 NO ANSWER 1
AWU 11/21/96 10:44 401 BUSY 1
AWU 11/21/96 10:45 402 NO ANSWER 2
AWU 11/21/96 10:48 410 CANCEL 02:00 BY PMS
Issue 1
November 2000
84Reports
These codes are used to define the status events:
■ AWU — Automatic wakeup events
■ EAT — Emergency access to attendant and crisis alert events
■ PMS — PMS events
■ PMS chng stn rstr — Station restrictions changed by the PMS
■ PMS room change — Room status message from PMS
■ PMS link out — The PMS link is out of service
■ PMS prot vio — The PMS sustained a protocol violation.
Buffering Messages During Printer Failure
If the printer goes do wn (for exam ple, powe r los s or pr inter runs out of paper) and
the Data Terminal Ready (DTR) lead goes low, the switch recognizes that the
printer is out of service. When this happens, the switch will buffer Automatic
Wakeup messages destined for the printer until the printer is back in service. On
the smaller systems (csi or si), up to 2400 messages are buffered. On the larger
system (r), up to 15000 messages are buffered.
Page 89
GuestWorks and DEFINITY ECS Release 9
Hospitality Operations
Hospitality Operations
555-231-742
The following table summarizes which printer types report which status events.
Printer Type Status Events
Journal/Schedule 1, 2, 3, 4, 5, 8, 9
Log Only 6, 7, 10
Combined Journal/Schedule and Log 1, 2, 3, 4, 5, 6, 7, 8, 9, 10
Events:
1. Emergency Alert or Crisis Alert successful call off-hook alert (EAT)
2. Emergency Alert or Crisis Alert Failed originator abandoned call
off-hook alert (EAT)
3. Auto WAKEUP Failed (AWU)
4. Auto WAKEUP Request (AWU)
5. Auto WAKEUP Completed (AWU)
6. Room Status Fm Room (PMS)
7. Room Status Fm Station (PMS)
8. Summary Reports (AWU, EAT)
9. Auto WAKEUP Activity Report (AWU)
10. PMS Down (PMS)
Issue 1
November 2000
85Reports
Page 90

GuestWorks and DEFINITY ECS Release 9
Hospitality Operations
555-231-742
Hospitality Operations
Issue 1
November 2000
86Reports
Page 91

GuestWorks and DEFINITY ECS Release 9
Hospitality Operations
Hospitality Operations
555-231-742
Guest Operations Artwork
The following pages contain artwork masters that you can use to create “tent
cards” for your guest rooms. These artwork masters contain the following
procedures:
■ Automatic Wakeup and Do Not Disturb using voice prompts (the Speech
Synthesizer cir cui t pack is required)
■ Automatic Wakeup using the Wakeup Activation via Tones and Dual
Wakeup features (no additional hardware required)
■ Emergency Access to Att endant and eme r gen cy ser vice agency call ing (f or
example, 911) (requires the Announcement circuit pack for recorded
announcements).
Issue 1
November 2000
87Guest Operations Artwork
To use these artwork masters, do the following:
1. Make copies of the masters from this document.
2. Either type or write the telephone numbers and feature access codes into
the appropriate blanks.
3. Paste your property logo to the upper right-hand corners, if desired.
4. Make copies as needed.
5. Cut and fold as instructed.
Page 92

GuestWorks and DEFINITY ECS Release 9
Hospitality Operations
Hospitality Operations
555-231-742
Guest Operations Artwork
Issue 1
November 2000
88Guest Operations Artwork
Page 93

GuestWorks and DEFINITY ECS Release 9
Hospitality Operations
Hospitality Operations
555-231-742
Issue 1
November 2000
89Guest Operations Artwork
4.Your request is confirmed.Hang up.
3. Press 3 to cancel your request.
2.Your current Do Not Disturb deactivation time is given.
1. Press the button or dial _______.Do Not Disturb
Cancel Do Not Disturb Request
6.Your request is confirmed.Hang up.
5. If prompted, press 2 for AM or 7 for PM.
4. Enter your desired deactivation time using four digits.Press #.
3. Press 2 to change your request.
2.Your current Do Not Disturb deactivation time is given.
1. Press the Do Not Disturb button or dial _______.
Change Do Not Disturb Request
AutomaticWakeup
NewWakeup Call
1. Press the Wakeup button or dial _______.
2. Enter your desired wakeup time using four digits. Press #.
3. If prompted, press 2 for AM or 7 for PM.
4.Your request is confirmed.Hang up.
Change Wakeup Call
1. Press the Wakeup button or dial _______.
2.Your current wakeup request is given.
3. Press 2 to change your wakeup request.
4. Enter your new desired wakeup time using four digits. Press #.
5. If prompted, press 2 for AM or 7 for PM.
6.Your request is confirmed.Hang up.
4.Your request is confirmed.Hang up.
3. If prompted, press 2 for AM or 7 for PM.
2. Enter your desired deactivation time using four digits.Press #.
1. Press the Do Not Disturb button or dial _______.
New Do Not Disturb Request
Do Not Disturb
CancelWakeup Call
1. Press the Wakeup button or dial _______.
2.Your current wakeup request is given.
3. Press 3 to cancel your wakeup request.
4.Your request is confirmed.Hang up.
Page 94

GuestWorks and DEFINITY ECS Release 9
Hospitality Operations
555-231-742
Hospitality Operations
Issue 1
November 2000
90Guest Operations Artwork
Page 95

GuestWorks and DEFINITY ECS Release 9
0
Hospitality Operations
Hospitality Operations
555-231-742
Issue 1
November 2000
91Guest Operations Artwork
5. Hang up.
4.You will hear confirmation tone (three short tones followed by silence).
is 9:00 AM and 2230 is 10:30 PM).
3. Enter your second wakeup time using 24-hour time (for example, 0900
3. Press *.
2.You will hear recall dial tone (three short tones followed by dial tone).
1. Press the Wakeup button or dial _______.
SecondWakeup Call
5. Hang up.
4.You will hear confirmation tone (three short tones followed by silence).
is 9:00 AM and 2230 is 10:30 PM).
3. Enter your first wakeup time using 24-hour time (for example, 0900
2.You will hear recall dial tone (three short tones followed by dial tone).
1. Press the Wakeup button or dial _______.
FirstWakeup Call
AutomaticWakeup - SingleWakeup
NewWakeup Call
1. Press the Wakeup button or dial _______.
2.You will hear recall dial tone (three short tones followed by dial tone).
3. Enter your desired wakeup time using 24-hour time (for example, 090
is 9:00 AM and 2230 is 10:30 PM).
4.You will hear confirmation tone (three short tones followed by silence).
5. Hang up.
Change Wakeup Call
Repeat the above procedure; the old request will be overwritten
with the new request.
CancelWakeup Call
1. Press the Wakeup button or dial _______.
2.You will hear recall dial tone (three short tones followed by dial tone).
3. Press #.
4.You will hear confirmation tone (three short tones followed by silence).
5. Hang up.
AutomaticWakeup - DualWakeup
Page 96

GuestWorks and DEFINITY ECS Release 9
Hospitality Operations
555-231-742
Hospitality Operations
Issue 1
November 2000
92Guest Operations Artwork
Page 97
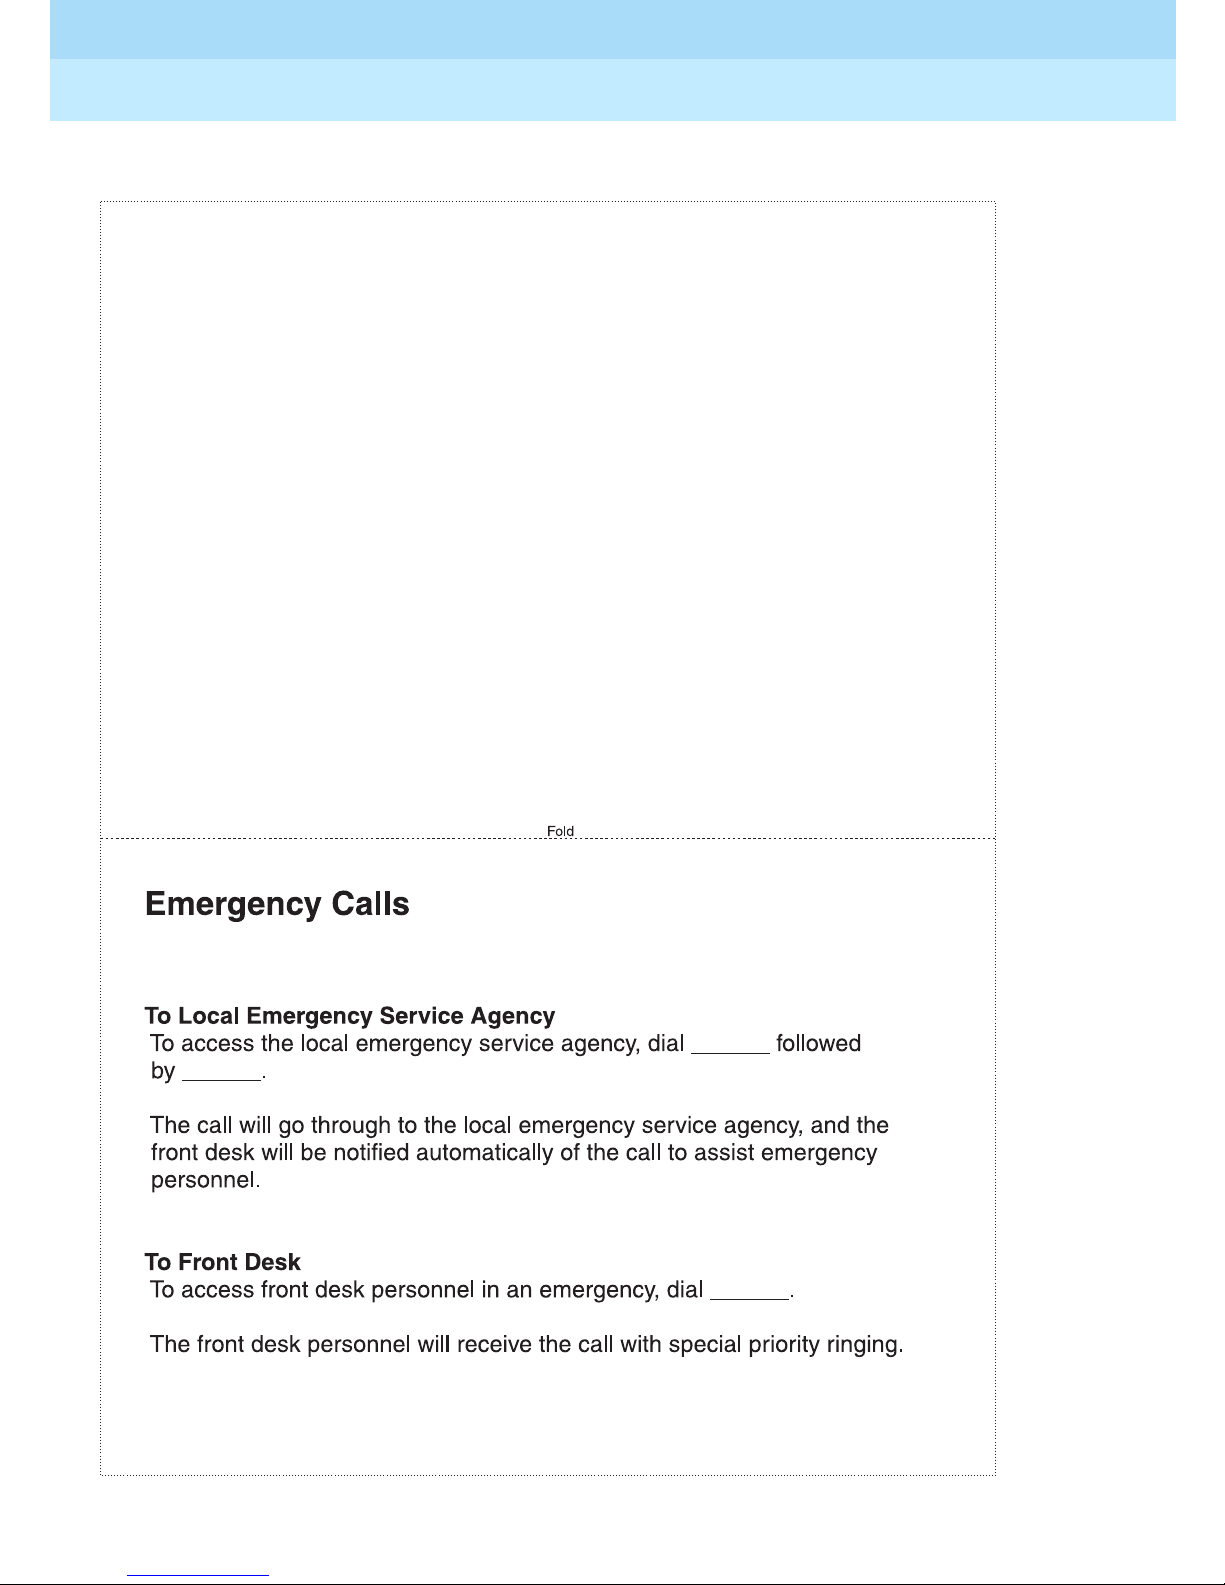
GuestWorks and DEFINITY ECS Release 9
Hospitality Operations
Hospitality Operations
555-231-742
Issue 1
November 2000
93Guest Operations Artwork
to connect to the front desk.
6. If no matches are found, or if there are still multiple matches, press 0
person's first name. If a match is found, the call goes to that person.
5. If there is more than one match, enter the first two letters in the
Press #.If a match is found, the call goes to that person.
4. If there is more than one match, enter the rest of the last name.
If a match is found, the call goes to that person.
3. Enter the first four characters of the person's last name.
2. Follow the instructions, and select the Dial by Name prompt.
1. Dial _____________.
instead of their room number.
Use this procedure to call another guest by dialing their name
Dial by Name
Page 98

GuestWorks and DEFINITY ECS Release 9
Hospitality Operations
555-231-742
Hospitality Operations
Issue 1
November 2000
94Guest Operations Artwork
Page 99

GuestWorks and DEFINITY ECS Release 9
Hospitality Operations
Index
555-231-742
Issue 1
November 2000
95
Index
IN
Numerics
6408 telephones, 22
6424 telephones, 22
8410D telephones, 22
8434 telephones, 22
A
administrative mailbox on INTUITY, 63
announcements, 59
artwork masters, 87, 88
assignments, DID number, viewing, 26
Attendant Backup, 22
Audichron recording, 31
audit
end-of-month, 70
end-of-week, 70
automatic DID number, changing to a new, 26
automatic selection of DID numbers to g uest
rooms, 24
Automatic Wakeup, 5, 9, 30
conventions, 2
cost reports, 72
crisis alert, 57
crisis alert events, 84
D
deleting call records, 73
detail reports, 71
dial by name, 20
DID number assignment, removing a, 27
DID number assignments, automatic selection of
VIP, 24
DID number assignments, viewing, 26
DID number, changing to a new automatic, 26
DID number, checking in a guest room and auto-
matically assigning a
DID numbers, automatic selection of for guest
rooms, 24
DID, changing to a new VIP, 27
Do Not Disturb, 6, 13, 51
documents, 4
Dual Wakeup, 9
, 25
E
B
backup consoles, 22
buffering messages for the printer, 84
C
Call Accounting alarms, 57
call records, 73
Call Vectoring , 59
change class of restriction (COR) by feature
access code (FAC)
changing passwords, 19
changing to a new VIP DID, 27
checking in, 23
regular DID number, 25
VIP DID number, 25
checking out, 6, 29
class of restriction (COR), changing by feature
access code (FAC)
console operations, 21
Controlled Restrictions, 44
, 49
, 49
Emergency Access to the Attendant, 14
end-of-month audit, 70
end-of-we ek audit, 70
F
failed wakeup calls, 31, 43
F ax messages, 66, 67
feature access codes, 4, 77
front desk operations, 21
G
guest operations, 9, 87, 88
H
Hospitality services, 5
housekeeping status, 6, 58, 77, 83
Page 100

GuestWorks and DEFINITY ECS Release 9
Hospitality Operations
Index
555-231-742
Issue 1
November 2000
96
I
INTUITY Lodging Call Accounting, 69
INTUITY Lodging language options, 7
INTUITY Lodging messaging system, 7, 63
J
journal/schedule printer, 83
L
language options, 7
log printers, 83
M
maid status, 58
message buffer for printer, 84
Message Retrieval, 15
Message Waiting
lamps, 7, 56
notification, 56
messages
Fax, 66, 67
restoring deleted, 66
retrieving, 15
retrieving for checked-out guests, 67
multiappearance telephones, 5
P
passwords, 19
personal greetings, 18
PMS
alarms, 57
integration, 6
printer reports, 83
printers
journal/schedule, 83
log, 83
status events, 85
types, 85
printing key reports, 71
R
recorded announcements, 59
recording personal greetings, 18
removing a DID number assignment, 27
reports, 79
cost, 72
detail, 71
printer, 83
printing, 71
restoring deleted messages, 66
retrievi ng messages, 15
retrieving messages for checked-out guests, 67
room occupancy, 58, 59
S
N
names registration, 6
new automatic DID number, c hanging to a, 26
night audit, 69
number assignment, DID, r emoving a, 27
O
occupancy, 58, 59
organization of document, 2
single-line telephones, 5
Speech Synthesizer circuit pa ck, 9, 13, 30, 51
status codes, 58, 77
T
telephones, 22
6408, 22
6424, 22
8410D, 22
8434, 22
Attendant Backup, 21
multiappearance, 5
single-line, 5
types supported, 5
Terminal Translation Initialization (TTI), 7
tones, 3
T runk Answer Any Station (TAAS), 22
 Loading...