

Page 1

IP Telephony
Contact Centers
Mobility
Services
FC1
connected to Integral 3 / 5
Benutzerhandbuch
User’s guide
Manuel utilisateur
Page 2

Getting to know your handset
Integral 5
Important information
Where you can use your handset
The FC1 is suitable for use in the office, outside or in dusty environments. It
complies with protection class IP 65, and is hose- and dust-proof.
Protect from interference
Other electronic devices are usually protected from high-frequency
radiation. However if such a device is insuf
may occur.
Never unscrew the handset housing!
The housing could be damaged as a result. It does not contain any parts
which you can repair yourself.
Tips on location
Put your charger on a non-slip surface, especially if furniture is new or has
been treated with care materials. Varnishes or care materials may contain
substances that can soften the feet of the charger, and the softened feet
may leave undesirable marks on the surface of the furniture. Avaya is not
liable for damage of this kind.
Care
Clean your telephone with a soft, lint-free cloth.
If desired, the cloth may be moistened using a mild household cleaner, plastics cleaner or disinfectant.
Do not use aggressive household cleaners (e.g. scouring agent) or solvents!
ficiently shielded, malfunctions
Scope of delivery
Please check the components included in delivery as soon as you receive
your FC1:
– FC1 handset with hints on operation
– Rechargeable battery – MEMCard
– Charger – Mains plug
– Operating instructions
2
Page 3

Integral 5
Getting to know your handset
Important information
Authorisation and conformity
We, Avaya GmbH & Co. KG, declare that the product FC1 complies with
the basic requirements and other relevant provisions of guideline
1999/5/EU (R&TTE).
This device is suitable for connection to radio-interfaces (DECT
Avaya telecommunications systems and satisfies the fundamental requirements according to EU-guideline 1999/5/EU (Radio and Telecommunications Terminal Equipment, R&TTE).
Due to its design this device is not suitable for direct operation on interfaces
to public telecommunications networks.
In the unlikely event of any problems occurring during operation, please
contact your dealer or your system administrator.
The declaration of conformity can be viewed at the following Internet address: www.avaya.de/gcm/emea/de/includedcontent/conformity.htm
in the index under the keyword: conformity.
This device operates in conformity with the DECT
quency range of 1880 to 1900 MHz. The allocation of this frequency range
in the frequency utilisation plan is initially valid until 2008 and will be extended in accordance with European harmonisation.
t
system with a fre-
continued
) of
t
or look
DECT is a registered trademark of ETSI
3
Page 4

Getting to know your handset
Integral 5
Important information
Restricted use of some functions
These instructions describe all telephone functions which you can use with
the latest system software. Some functions cannot be performed with older
software or with Integral 3! Please contact your system administrator for
more detailed information.
Operating the battery
Initially, charge the battery to full capacity and during the first week of operation always return the handset to the charger nest. New battery cells will
in general reach full capacity only after you have charged/discharged them
several times.
Batteries must be used in the appropriate manner. Avaya is not liable for
any damages which may occur as a result of inappropriate handling of the
battery.
When the batteries are exhausted – Consumer information
Do not throw exhausted batteries into the dustbin! Take them to a municipal
collection centre or to your dealer where they can be disposed of in an
environmentally responsible fashion.
Please dispose of discharged batteries only.
Always dispose of old equipment correctly – keep our environment
tidy
continued
Old electrical and electronic equipment marked with this
symbol can contain substances hazardous to human
beings and the environment. Never dispose of these items
together with unsorted municipal waste (household waste). In order to protect the environment, public collection
points have been set up to ensure the correct disposal of
old electrical and electronic equipment marked with this
symbol.
o reduce the risk of these substances being released into
T
the environment and to reduce the burden on natural resources, it is also possible to participate in Avaya’s used
equipment return system. This system ensures the correct
recycling of old equipment as well as the reutilisation of
individual components.
4
Page 5

Integral 5
Getting to know your handset
Table of Contents
Getting to know your handset
Important information 2. . . . . . . . . . . . . . . . . . . . . . . . . . . . . . . . . . . . . . . . . . .
Overview 7. . . . . . . . . . . . . . . . . . . . . . . . . . . . . . . . . . . . . . . . . . . . . . . . . . . . . .
Display 8. . . . . . . . . . . . . . . . . . . . . . . . . . . . . . . . . . . . . . . . . . . . . . . . . . . . . . .
Commissioning 12. . . . . . . . . . . . . . . . . . . . . . . . . . . . . . . . . . . . . . . . . . . . . . . .
Basic rules of operation 19. . . . . . . . . . . . . . . . . . . . . . . . . . . . . . . . . . . . . . . . .
The functions
Telephoning as usual 25. . . . . . . . . . . . . . . . . . . . . . . . . . . . . . . . . . . . . . . . . . .
Callback 28. . . . . . . . . . . . . . . . . . . . . . . . . . . . . . . . . . . . . . . . . . . . . . . . . . . . . .
Consultation call and call transfer 30. . . . . . . . . . . . . . . . . . . . . . . . . . . . . . . .
Conference 32. . . . . . . . . . . . . . . . . . . . . . . . . . . . . . . . . . . . . . . . . . . . . . . . . . . .
Second call during a conversation 33. . . . . . . . . . . . . . . . . . . . . . . . . . . . . . . .
Abbreviated dialling 34. . . . . . . . . . . . . . . . . . . . . . . . . . . . . . . . . . . . . . . . . . . . .
Local telephone directory 35. . . . . . . . . . . . . . . . . . . . . . . . . . . . . . . . . . . . . . . .
Central telephone directory 43. . . . . . . . . . . . . . . . . . . . . . . . . . . . . . . . . . . . . .
Call list 47. . . . . . . . . . . . . . . . . . . . . . . . . . . . . . . . . . . . . . . . . . . . . . . . . . . . . . . .
Messages 50. . . . . . . . . . . . . . . . . . . . . . . . . . . . . . . . . . . . . . . . . . . . . . . . . . . . .
Sending messages 51. . . . . . . . . . . . . . . . . . . . . . . . . . . . . . . . . . . . . . . . . . . . .
Suppression of call numberdisplay 53. . . . . . . . . . . . . . . . . . . . . . . . . . . . . . .
Follow me (Call diversion from) 54. . . . . . . . . . . . . . . . . . . . . . . . . . . . . . . . . .
Call diversion 57. . . . . . . . . . . . . . . . . . . . . . . . . . . . . . . . . . . . . . . . . . . . . . . . . .
Signalling calls on two telephones (twinning) 61. . . . . . . . . . . . . . . . . . . . . . .
Changing call divert/twinning remotely 62. . . . . . . . . . . . . . . . . . . . . . . . . . . .
Call forwarding 64. . . . . . . . . . . . . . . . . . . . . . . . . . . . . . . . . . . . . . . . . . . . . . . . .
Announcement 65. . . . . . . . . . . . . . . . . . . . . . . . . . . . . . . . . . . . . . . . . . . . . . . . .
Pick-up 66. . . . . . . . . . . . . . . . . . . . . . . . . . . . . . . . . . . . . . . . . . . . . . . . . . . . . . .
Accepting calls from ringing lines 67. . . . . . . . . . . . . . . . . . . . . . . . . . . . . . . . .
DTMF-postdialling 68. . . . . . . . . . . . . . . . . . . . . . . . . . . . . . . . . . . . . . . . . . . . . .
Call charge display 69. . . . . . . . . . . . . . . . . . . . . . . . . . . . . . . . . . . . . . . . . . . . .
Muting the microphone 70. . . . . . . . . . . . . . . . . . . . . . . . . . . . . . . . . . . . . . . . . .
Hear conversation via loudspeaker (handsfree operation) 71. . . . . . . . . . .
Setting the handset 72. . . . . . . . . . . . . . . . . . . . . . . . . . . . . . . . . . . . . . . . . . . . .
Emergency call 88. . . . . . . . . . . . . . . . . . . . . . . . . . . . . . . . . . . . . . . . . . . . . . . .
Personal Identification Number (PIN) 90. . . . . . . . . . . . . . . . . . . . . . . . . . . . .
Locking the handset 91. . . . . . . . . . . . . . . . . . . . . . . . . . . . . . . . . . . . . . . . . . . .
Do not disturb 93. . . . . . . . . . . . . . . . . . . . . . . . . . . . . . . . . . . . . . . . . . . . . . . . . .
Language 94. . . . . . . . . . . . . . . . . . . . . . . . . . . . . . . . . . . . . . . . . . . . . . . . . . . . .
5
Page 6

Getting to know your handset
Integral 5
Table of Contents
Own allocation 95. . . . . . . . . . . . . . . . . . . . . . . . . . . . . . . . . . . . . . . . . . . . . . . . .
Own allocation and call diversion off 96. . . . . . . . . . . . . . . . . . . . . . . . . . . . . .
Disconnecting from hunt groups 97. . . . . . . . . . . . . . . . . . . . . . . . . . . . . . . . . .
Opening the door from the handset 98. . . . . . . . . . . . . . . . . . . . . . . . . . . . . . .
Associated subscriber 99. . . . . . . . . . . . . . . . . . . . . . . . . . . . . . . . . . . . . . . . . .
Subscriber group 102. . . . . . . . . . . . . . . . . . . . . . . . . . . . . . . . . . . . . . . . . . . . .
Code 105. . . . . . . . . . . . . . . . . . . . . . . . . . . . . . . . . . . . . . . . . . . . . . . . . . . . . . .
Voice mail 106. . . . . . . . . . . . . . . . . . . . . . . . . . . . . . . . . . . . . . . . . . . . . . . . . . .
Using the handset in different systems 107. . . . . . . . . . . . . . . . . . . . . . . . . .
Appendix
Codes for your handset 111. . . . . . . . . . . . . . . . . . . . . . . . . . . . . . . . . . . . . . .
Technical data 113. . . . . . . . . . . . . . . . . . . . . . . . . . . . . . . . . . . . . . . . . . . . . . .
Table of characters 115. . . . . . . . . . . . . . . . . . . . . . . . . . . . . . . . . . . . . . . . . . .
Key words 116. . . . . . . . . . . . . . . . . . . . . . . . . . . . . . . . . . . . . . . . . . . . . . . . . . .
continued
6
Page 7
Overview
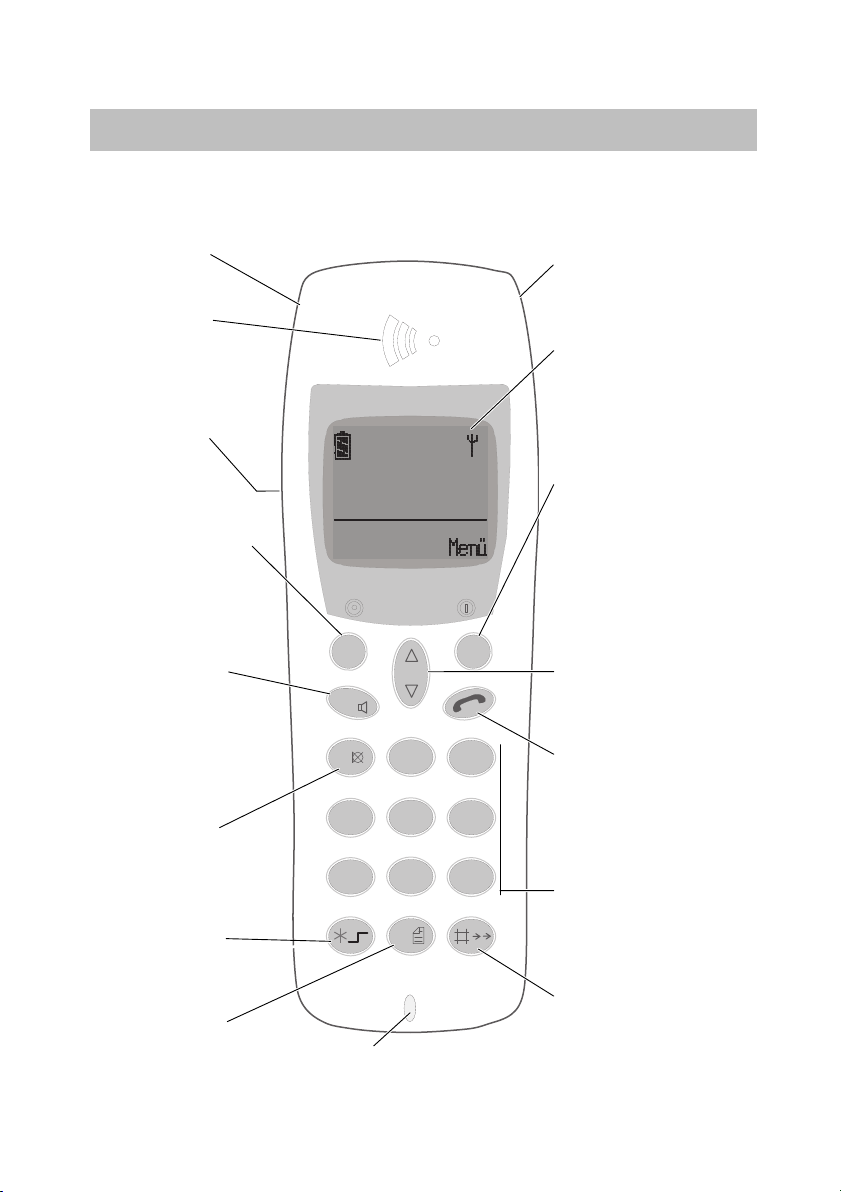
OverviewIntegral 5
Emergency call key
Handset
Handsfreeloudspeaker
on rear of casing
Left softkey
Functions depend
on status (shown
in display). Also
for switching off.
R button
Signal button
for functions in
a telephone system
2nd function:
handsfree operation
Button 1
2nd function:
Mute
Star button
2nd function: for
special functions
Button 0
2nd function: call list,
message list
0 5 3 4 1 2 8 5 7 0 1
N A M E
O K
R
1
4
P Q R S
7
A B C
2
G H I
J K L
5
T U V
8
0
Microphone
Headset socket
Display
indicates call
numbers and
settings
Right softkey
Functions depend
on status (shown
in display). Also for
switching on.
Selector
to confirm settings
or to open the status
menu;
arrow keys to scroll
in the menu
D E F
3
Handset button
corresponds to
M N O
6
W X Y Z
9
lifting and replacing
the handset
Digit keys
for digits and letters
Hash button
2nd function:
redialling
7
Page 8
Overview Integral 5
Function of the right softkey e.g. Menu
Function of the left softkey, e.g. Clrdown
Display
Text and symbols in the display facilitate operation. They guide you through
the menus and inform you about the status of your handset.
The functions of the right and left softkeys change according to the current
status. The functions are shown in the display directly above the softkeys.
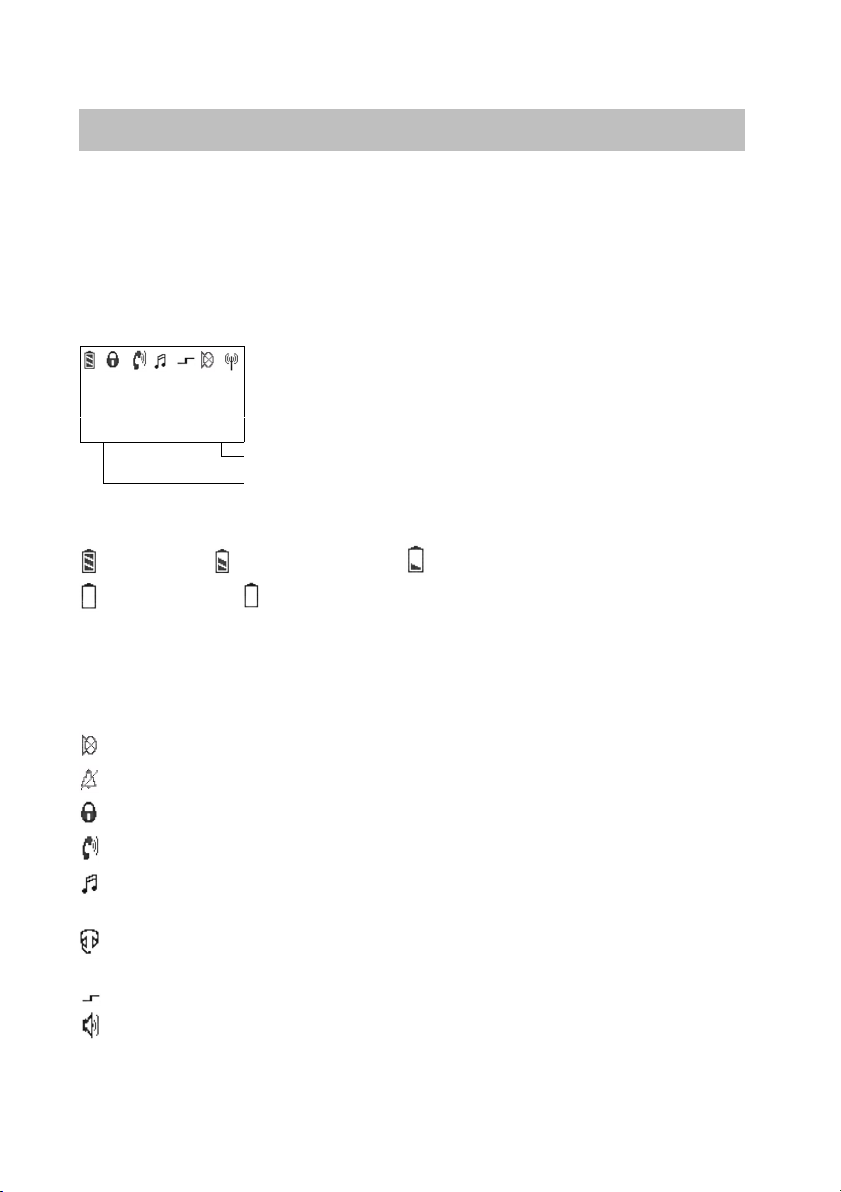
The lines in the display
Symbol line indicates the status of the telephone.
7442
Smith
Clrdown Menu
Meaning of symbols
Battery full, Battery nearly full, Battery almost empty,
Battery empty, (battery symbol flashing) Capacity for less than five
minutes.
Please note: After having inserted a battery pack, the handset does not
„know“ its charging status. So the battery signal shows two bars only
meaning battery is nearly charged. An appropriate battery signal will be
shown after the battery pack in the handset once has been fully charged.
Mute: The microphone is off. Your call partner cannot hear you.
No call signal: The call signal has been set to mute or vibrate.
Two text lines e.g. for name and call number
Lock: The handset is locked.
Handset: The handset has a telephone connection.
Multifrequency code: Each push of the button is transferred to the
connection subscriber (MFC post-dialling) as an (audible) DTMF tone
Headset: You are making a call using the headset. The housing micro-
phone and -loudspeaker are automatically switched off.
Special functions activated: Star button is pressed for a long period.
Loudspeaker: The loudspeaker for handsfree operation on the rear
side of the housing is switched on.
8
Page 9

OverviewIntegral 5
Display
Within range of system: Your handset is within range of a base sta-
tion. You may make a call.
Connection to system: Your handset has an active radio connection to
the base station.
continued
9
Page 10
Overview Integral 5
e subscriber’s ca
d/o
the subscriber s call number and/or name
e name
the name
e name
the name
ac
ed,
ayed
activated, the number being called is also displayed
number to which you have diverted your calls
Display
continued
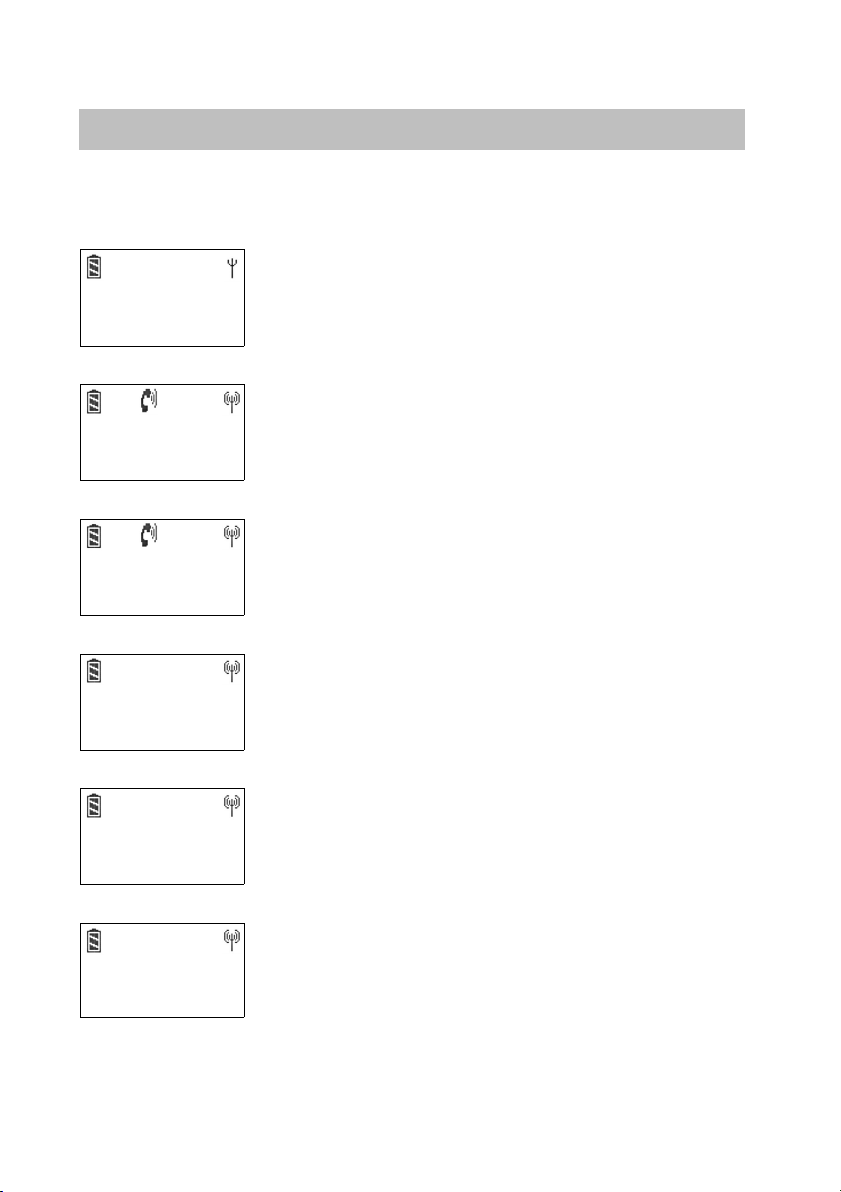
The display on your handset can show 16 characters on each line.
The layout of the display contents depends on the status of your handset.
In basic state
7442
Smith
Menu
The display shows your number and your name.
Name display
Conversation
2492
Clrdown Menu
If you are calling a subscriber, the display shows
th
ll number an
r name.
.
When making a call
0004434758739124
Clrdown Menu
The display shows the number and where available
th
.
.
If you receive a call (standard display)
Call
0004434758739124
Clrdown Menu
The display shows the number and, where available,
th
.
.
If you receive a call (extended display)
Call
39124 -> 750531
Clrdown Menu
If you receive a diverted call or if call display A–>B is
tivat
the number being called is also displ
Call diversion
7442 -> Wagner
Smith
Clrdown Menu
The display shows your number and the name or call
10
.
.
.
Page 11

OverviewIntegral 5
LIST: There are new entries in your call list
Display
7442
Smith LIST
Clrdown Menu
continued
New entry in call list / Message
MAIL: You have received messages
.
11
Page 12

Getting to know your handset
Integral 5
Commissioning
If your handset is not yet mounted
If you receive the handset incompletely assembled, you have to
• insert the MEMCard (→ page 13),
• install the battery (→ page 14) and
• if necessary remove the protective film from the display.
• Your service must log your handset on to your telephone system.
Your handset is then ready for operation.
• Now connect the charger (→ page 15).
If your handset is already completely mounted
If you receive your handy already fully assembled and it is logged on
to your telephone system, then you only need to connect the charger
(→ page 15).
12
Page 13
Integral 5
Getting to know your handset
Commissioning
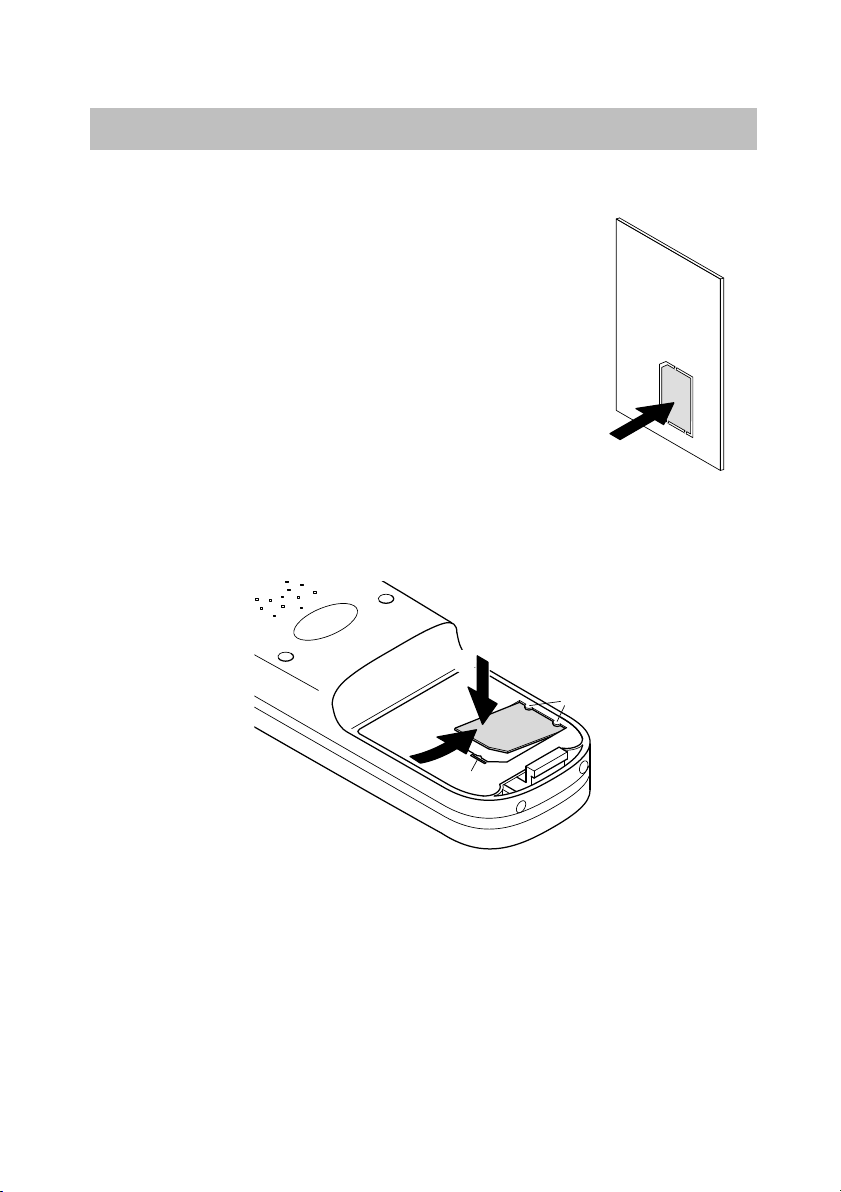
MEMCard
You can only use your handset to make a call when a
MEMCard is installed. It saves important data for your
handset, such as personal settings and your personal
telephone book. If you change your handset you can
continue to use your MEMCard to make calls
immediately.
Installing MEMCard
• First press the small MEMCard out of the larger
surround with your finger (illustration right).
• With the short edge at an angle under the holding crescents a,
push the MEMCard into the MEMCard compartment (1).
The golden contact surface of the MEMCard must face downwards!
• Press the MEMCard in until the small tag b locks (2).
continued
2
a
1
b
Removing the MEMCard
The MEMCard only has to be removed if you intend to give the handset
to someone else or need the MEMCard for a new handset.
• Take the battery out of the handset (→ page 14).
• Press the small tag b away and gently lift the MEMCard at the same
time.
• Now remove the MEMCard.
13
Page 14
Getting to know your handset
Integral 5
Commissioning
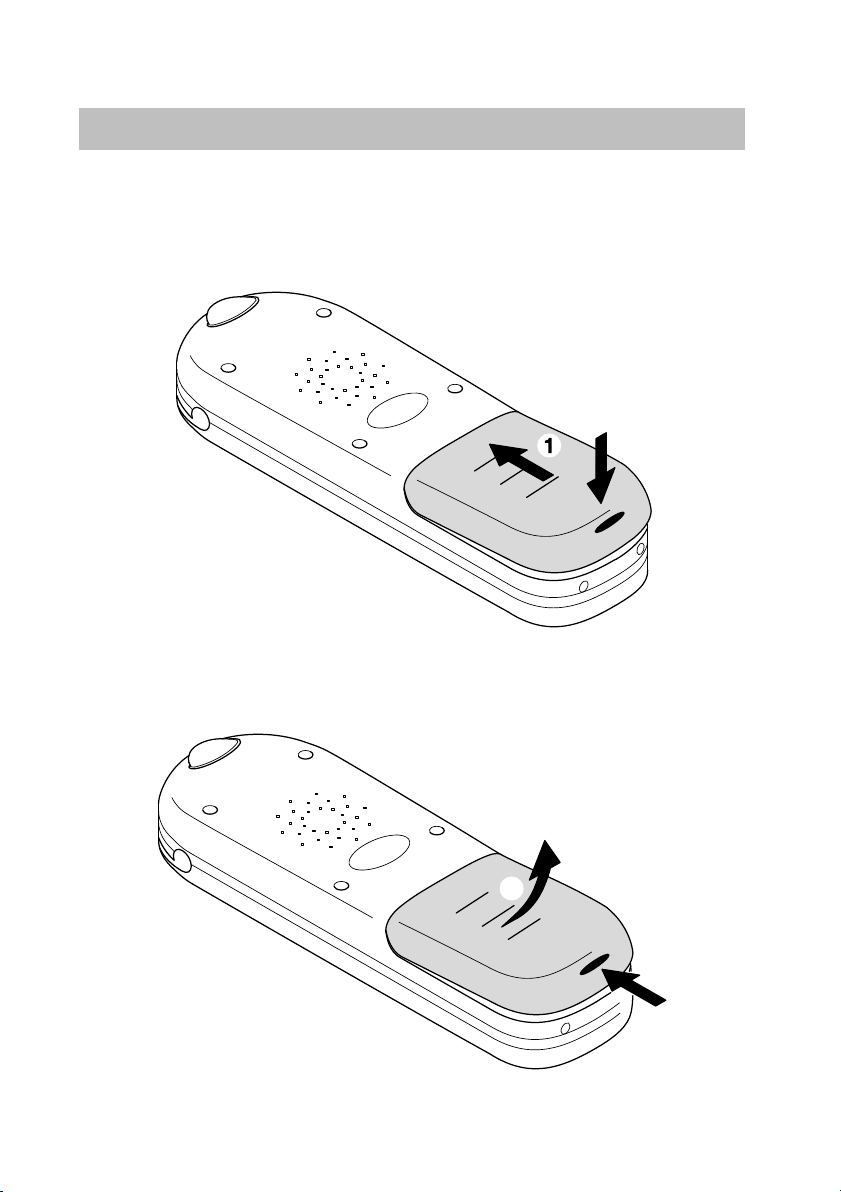
Inserting battery
• Push the battery into the housing (1).
• Press the battery down on the button side until it audibly locks (2).
continued
2
Removing battery
• Place handset on table with display facing downwards.
• Press the black button in (1) and lift the battery out at the same time (2).
14
2
1
Page 15
Integral 5
Getting to know your handset
Commissioning
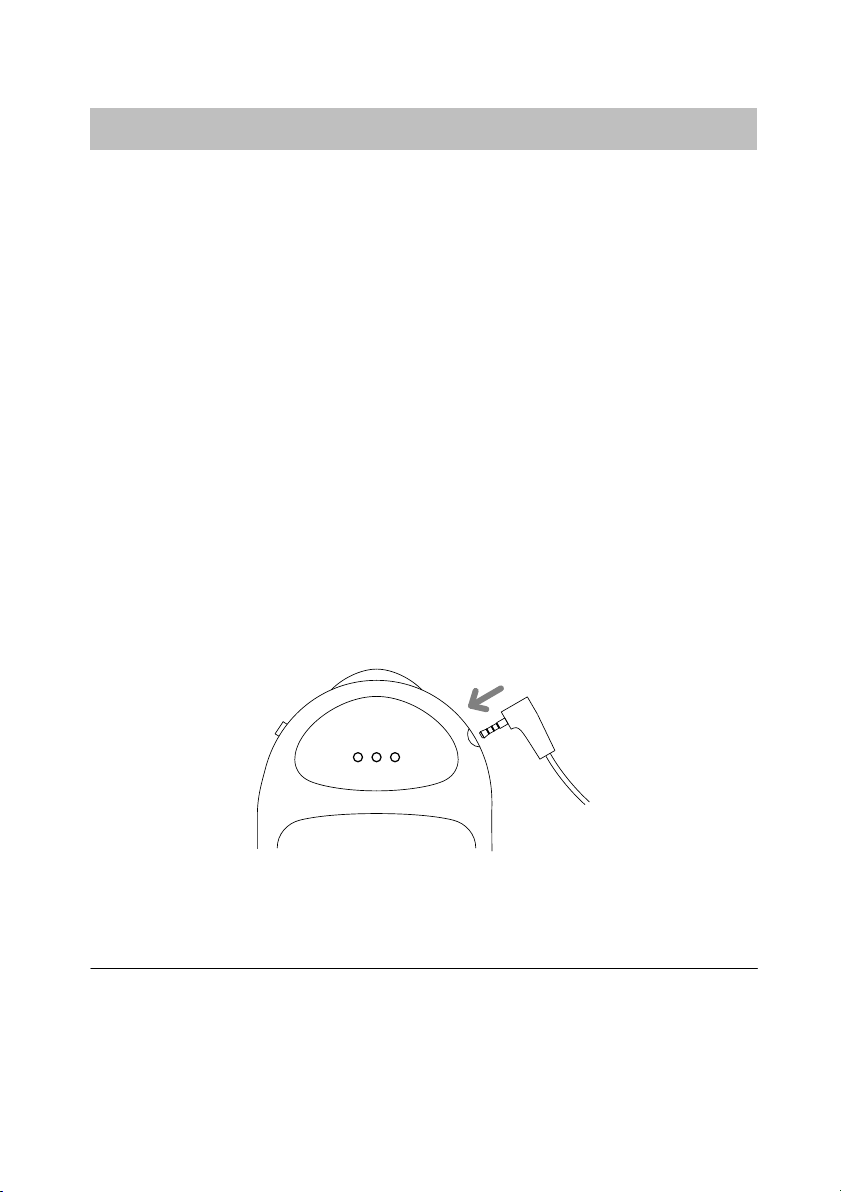
Setting up the charger
Place the charger on a smooth stable surface, such as on a table. Select
a place that is away from direct sunlight and from damp.
Attention: The plug-in power supply units for the charger and charger Plus
must not be interchanged.
• Insert the small jack on the connection cable into the back of the charger
• Insert the mains plug into a socket.
The charger is now ready for operation.
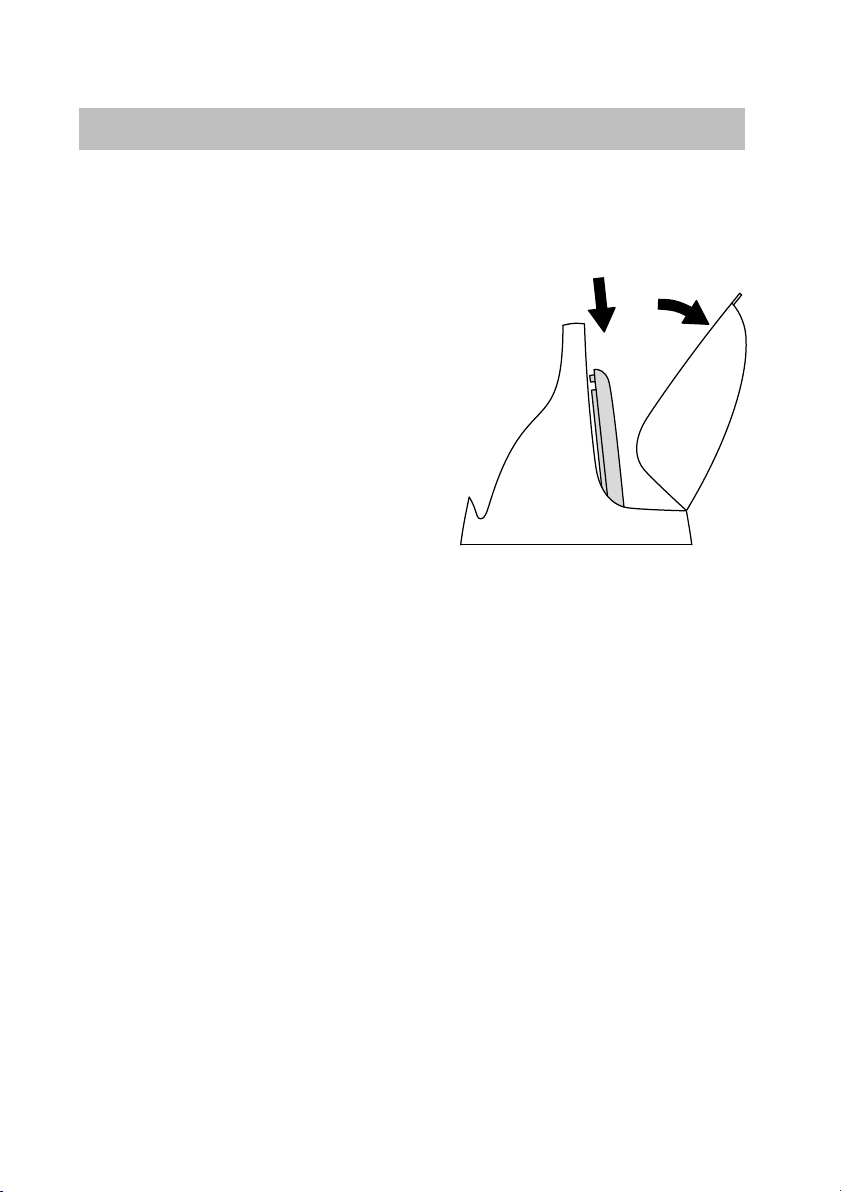
Charging the handset
Simply place the handset into the charger. You will hear an acknowledgement tone. Your handset will remain switched on or off. The battery symbol
in the symbol bar ’moves’ until the battery is completely full.
If the battery cannot be charged, because, for example, it is faulty, a warning tone sounds every 15 seconds.
While recharging the battery will become somewhat warm to the touch.
This is normal.
continued
.
Charger
Charger Plus
15
Page 16
Getting to know your handset
Integral 5
2
continued
1
Commissioning
Loading spare battery
If you have a comfort charger Plus (accessory), you can additionally use it
to load a spare battery.
• Open out the charger
• Place the spare battery the right way
round in the slot provided (2). The
LED in the lower part of the charger
changes from green to red, showing
that the spare battery is correctly
positioned and is charging.
• When the spare battery is fully
charged, the loading process stops.
Then the LED shows green again.
Information on using the battery
Y
ou can leave your handset in the charger cradle for extended periods.
The battery cannot be over-charged.
You can take the battery out of the handset if you do not intend to make
calls for am extended period, e.g when you go on holiday. This ensures
that the battery will only lose a negligible amount of energy before you next
use it.
Plus (1).
Do not leave the battery in full sunlight. Properly handled, it will have
a much longer service life.
Attention!
• The battery may explode if exposed to fire.
• To avoid injury and burns, ensure that the battery contacts are not short-
circuited and do not come into contact with conductive objects.
16
Page 17
Integral 5
Getting to know your handset
Commissioning
Headset (ear-talk-piece)
A headset is available for the FC1 handset. The headset enables you to
make calls “handsfree”. Your handset automatically recognises when a
headset is connected. The microphone and receiver in the handset are
then
switched off. To amplify the conversation you can switch on the loud-
speaker for handsfree operation.
When a call arrives, the handset rings or you are given a signal by the
headset (→ p. 78). All other functions are unaffected. To change the
handset volume, press the selector upward or downward for a longer
period (→ p. 80)
All other features function as normal. Especially for the handset volume
press the selector up or down for a longer period (→ p. 80).
Connecting headset
The socket is in the upper right part of the handset. Carefully pull the protective cap off the socket.
Insert the headset jack fully into the socket until it locks audibly.
continued
Do not use the headset, when placed in the charger. To make a call, take
the handset out of the charger.
Please refer to the relevant operation instructions for how to use the headset.
17
Page 18

Getting to know your handset
Integral 5
Commissioning
Caution! Prevent damage to your hearing!
If this headset is used with other devices, very loud acoustic signals/signal
events may result in hearing damage (acoustic shock). With other devices
there is no guaranteed acoustic protection against loud noises. Only use
this headset in conjunction with FC1!
If you use the headset for extended periods, you should set the volume to a
moderate level. Over time, high volume levels can lead to hearing damage.
continued
18
Page 19

Integral 5
Getting to know your handset
Basic rules of operation
The operation of your telephone includes several operating steps which are
often repeated. Please familiarize yourself with these operating steps.
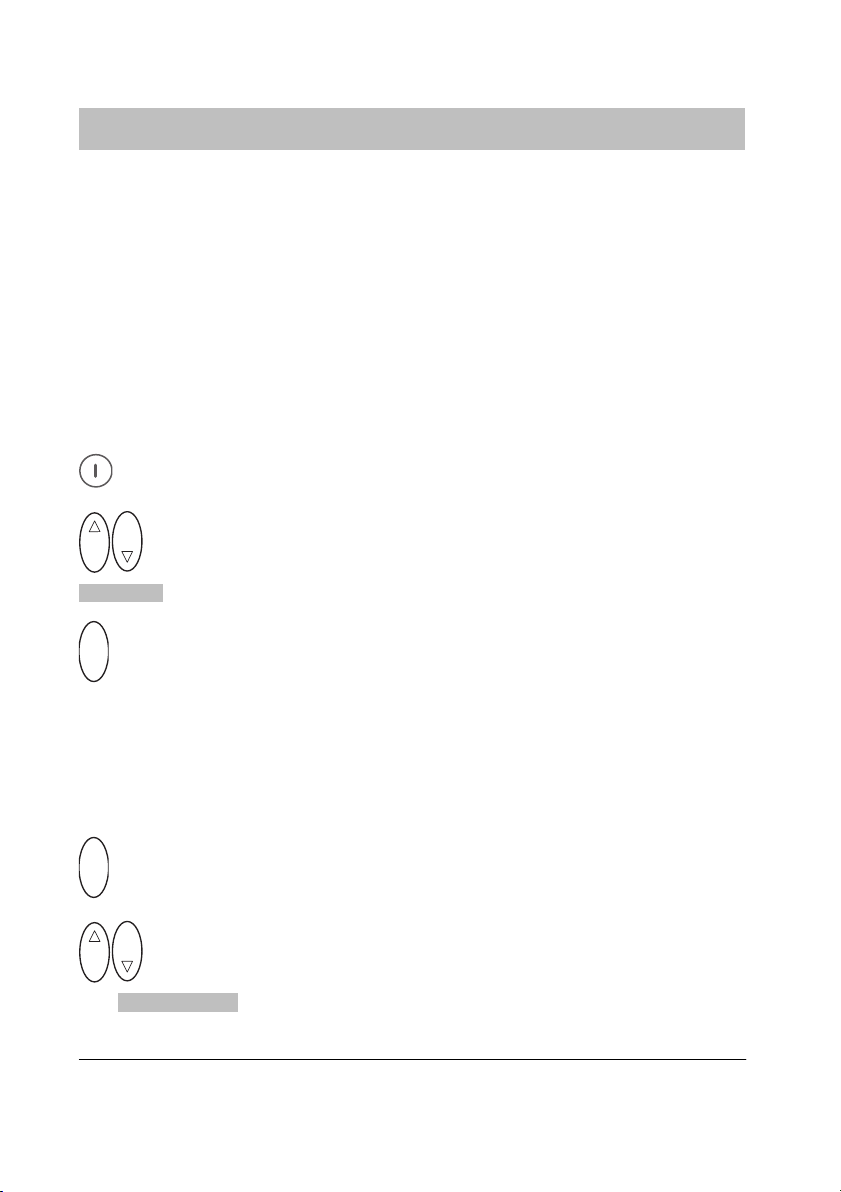
Switching on the telephone
The telephone is switched off. Press the right softkey for a long
period.
Switching off the telephone
The telephone is in basic status. Press the left softkey for a long pe-
riod.
Left and right softkey
The function of the softkeys changes according to the situation. The
respective function always appears in the display above the softkey,
e.g.
Menu or off .
The right softkey is used for switching on or calling up menus.
The left softkey is used for ending a menu option or canceling.
If you press the key for a long period when in any of the menus,
the handset will be returned to its basic status.
Selector
O K
By default, this confirms the setting. (Press the button slightly stronger
than ususal. This prevents to trigger an unintentional action.)
Pressing this key in the idle state opens the status display (→ page 20).
19
Page 20
Getting to know your handset
Integral 5
Basic rules of operation
continued
Doubly occupied keys
Some keys on your handset are occupied by two functions. The additional
orange labels denote these keys. You must hold the key pressed down
for longer if you want to trigger the second orange function. You will hear
a confirmation tone.
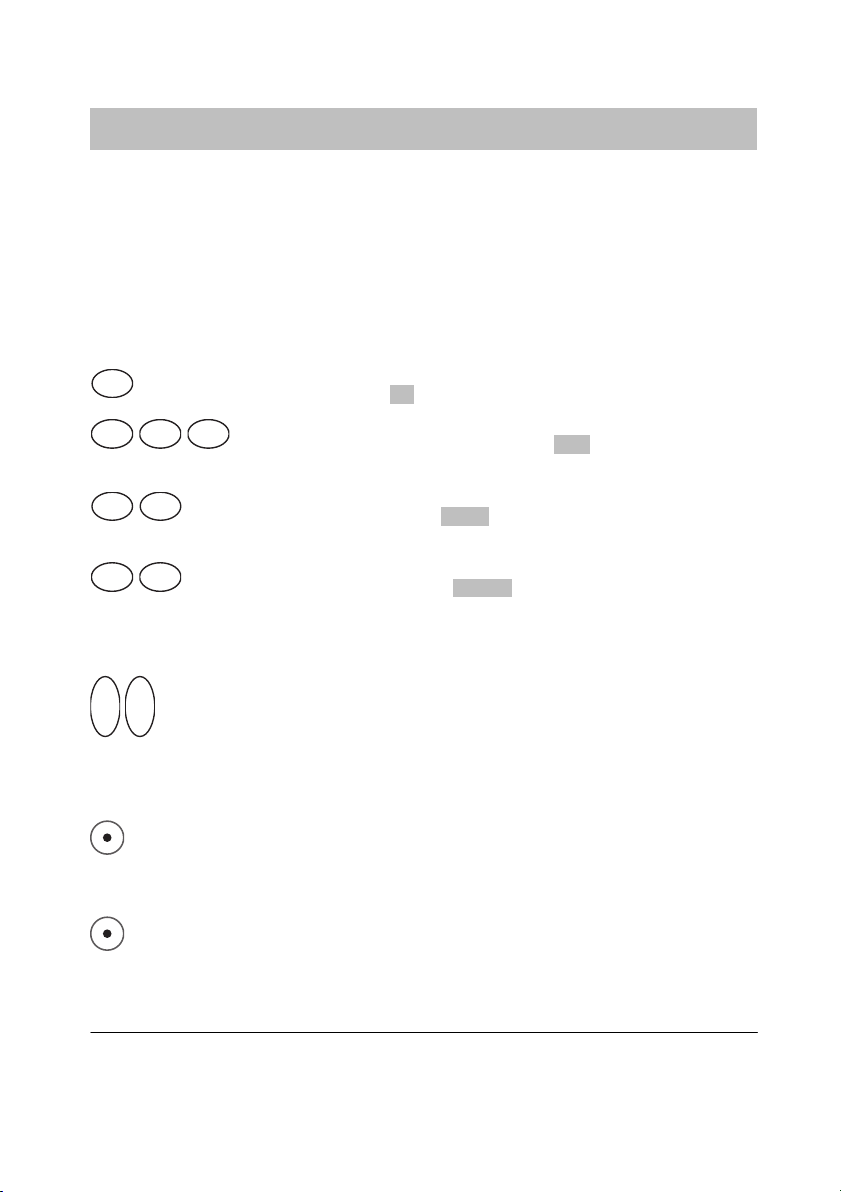
Selecting a menu
Many functions and settings of your telephone can be obtained via the display contents (menu). The menu is set out in such a way that most of the
menu options lead to submenus.
Call up the menu using the right softkey.
O K
O K
Press selector up or down to mark the menu option required, e.g.
System .
O K
Select menu option with the selector.
Calling up the status display
In the status display you will find important information about the status of
your telephone such as the call list, messages received, call diversions and
the time.
O K
Call up the status display.
O K
O K
Press selector up or down to scroll to the required status display,
e.g.
Call list .
To call up the menu, in basic status you can just press the selector down.
20
Page 21

Integral 5
Getting to know your handset
Basic rules of operation
continued
Settings in the status menu
The status display includes the “Settings” menu item. In this menu you will
find additional settings for your handset, e.g. the ring tones.
O K
Call up the status display using the selector.
O K
Scroll to the Settings menu item.
O K
Call up the settings.
O K
O K
Press selector up or down to select the menu option required, e. g.
Ext. call type .
O K
If necessary press several times to change the setting.
O K
O K
Press selector up or down. The setting is saved.
Menu-level back
The left softkey enables you to move to the next menu level up
or leave the menu.
Submenus
Submenus are operated in exactly the same way as the main menu.
21
Page 22

Getting to know your handset
Integral 5
Basic rules of operation
Cancel
Press the left softkey for a long period in order to reach basic status.
continued
22
Page 23
Integral 5
Getting to know your handset
Basic rules of operation
continued
Entering characters for telephone-directory entries
The digit keys may also be used to enter letters and characters, e.g. for
names in your personal telephone directory. The letters are printed on the
digit keys. Your telephone will automatically switch to the input of letters
and characters when this is required. The table of characters on page 115
indicates which characters you may enter.
Example: Entering the name “JOHN”:
J K L
5
Press the JKL button once. J appears in the display. Wait briefly.
M N O6M N O6M N O
6
Press the MNO button three times. JO appears in
the display. Wait briefly.
G H I4G H I
4
Press the GHI button twice. JOH appears in the display.
Wait briefly.
M N O6M N O
6
Press the MNO button twice. JOHN appears in the display.
Wait briefly.
Ending input
O K O K
Press the selector twice. The characters are accepted
Correcting characters
Press the left softkey.
Deleting the line
Press the left softkey for a long period.
To switch between upper- and lower case letters: Press the star key for
a long period
.
23
Page 24

Getting to know your handset
Integral 5
Basic rules of operation
Adding a character
O K
O K
Move the cursor to the right or to the left. The new character(s) that
you enter will be added in front of the cursor.
continued
24
Page 25
Integral 5
The functions
Telephoning as usual
Telephoning within your telephone system (internal): Dial the direct dial
number. Outside your telephone system (external): Dial the outside line
code (usually 0) and the call number.
Making a call (block dialling)
P Q R S
A B C
2
1
Lift the handset
Ending a call
Replace the handset.
Accepting a call
Your handset rings.
Lift the handset.
M N O
7
6
Enter the call number, e.g. 1276.
If you have activated Direct dial (→ p. 75), the digits you enter are dialled
immediately and can no longer be corrected.
25
Page 26
The functions
Integral 5
Telephoning as usual
Redialling
You can redial one of the five external call numbers you most recently dialled.
#
Press the hash key for a long period..
O K
Scroll to the required call number, e. g. 06975051234.
Lift the handset.
Redialling - Deleting an entry
The redial entry you want to delete is being displayed.
0
Press the 0 key.
Specific redialling
With specific redialling, only the call numbers you have previously selected
will be saved in the redial list.
You have made a connection. Do not hang up.
continued
#
Press the hash key for a long period. The number is sent to the redial
memory.
Replace the handset.
Specific redialling must be set up in the system. Normal redialling is then
switched off.
26
Page 27

Integral 5
The functions
Telephoning as usual
Telephoning via a specific line group
O K
Menu Dial assist
O K
O K
Menu Line group
O K
O K
Select group, e.g. Group 1 .
O K
Confirm.
A B C
2
1
0
D E F
3
Private telephoning
O K
Menu Dial assist
4
J K L
G H I
5
Dial the call number, e.g. 012345.
continued
O K
O K
O K
O K
O K
Confirm.
0
Menu Priv. line group
Select line group, e.g. Group 1
A B C
2
1
D E F
3
4
J K L
G H I
5
Dial the call number, e.g. 012345.
27
Page 28
The functions
Integral 5
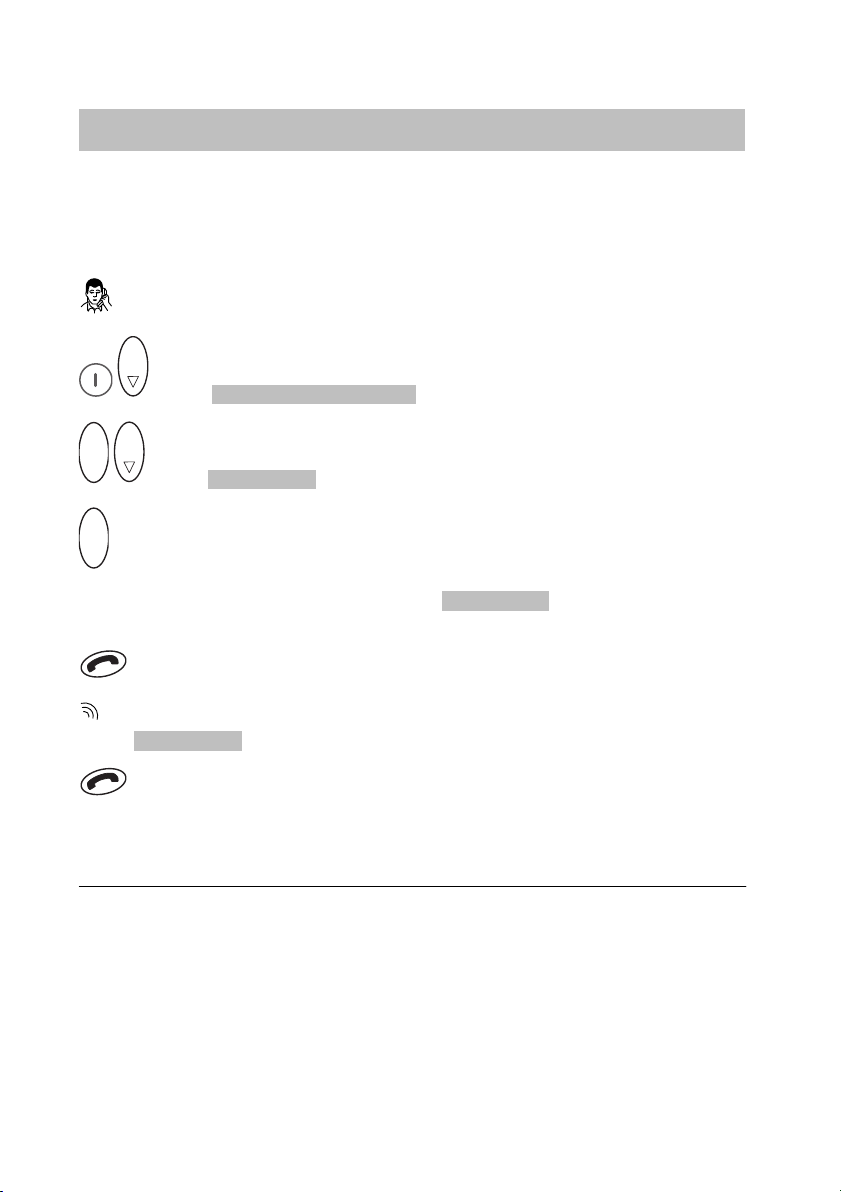
Callback
The subscriber you are calling is busy. When you activate callback, you
receive a signal when the busy subscriber is once again free.
Switching on callback
The subscriber you are calling is busy.
O K
Menu Dialling options
O K
O K
Menu Callback
O K
Confirm.
You will hear an acknowledgement tone.
Callback appears briefly
in the display.
Replace the handset.
When the subscriber you want to call becomes free, your telephone
Callback appears in the display.
rings.
Lift the handset The connection is made.
With internal calls you can also switch on callback if the person you are
calling does not answer.
Callback to external subscribers is only possible if supported by the network operator and the system connection type.
Call diversions are not taken into account with callback.
If you do not pick up after a certain time while the handset is ringing, the
callback is cleared. The waiting period is set in the system.
28
Page 29

Integral 5
The functions
Callback
Clearing callback
O K
Call up the status display.
O K
Scroll to the Callback act. menu item.
O K
Confirm. Delete appears in the display.
O K
Confirm.
Callback off appears briefly in the display.
continued
29
Page 30
The functions
Integral 5
Consultation call and call transfer
During an external call, you can switch the handset to mute and carry out
a query within the room or with an internal subscriber. Your call partner
waiting on the line cannot hear you doing this. You can also transfer your
caller internally or externally.
Consulting with an internal subscriber
You are speaking on the telephone.
R
Go to consultation mode with the R button. Your first call partner can-
not hear you.
P Q R S
7
6
J K L
M N O
5
G H I
4
Enter the subscriber’s internal call number,
e.g. 7654.
You are connected. Your first call partner is made to wait.
Refer–back to a list entry
You can select a refer–back subscriber from the call list, the redial list or the
phone book.
You are speaking on the telephone.
R
Go to consultation mode with the R button. Your first call partner can-
not hear you.
0
Call up the required list, e. g. the call list by pressing the 0 key for a
long period.
O K
O K
Scroll to the desired entry and confirm.
You are connected. Your first call partner is made to wait.
30
Page 31

Integral 5
The functions
Consultation call and call transfer
continued
Ending consultation and retrieving the initial call
R
End consultation with the R button.
You are reconnected with your first call partner.
Transferring a call partner
You are speaking on the telephone.
R
Go to consultation mode with the R button.
P Q R S
7
6
J K L
M N O
5
G H I
4
Dial the subscribers number, e.g. 7654.
Tell the subscriber you want to transfer a call.
Replace the handset.
The first call partner is now connected with the second call partner.
Your connection is not occupied.
External-external call transfer must be enabled by your system administrator.
You can pass on the caller directly, without waiting for her/him to pick up.
If the internal subscriber does not take the call, the call will come back
to you after a short period.
You can also transfer an external subscriber externally. However this only
works if the first external subscriber is the caller.
With an external-external call transfer two trunk lines are occupied!
31
Page 32

The functions
Conference
You can talk on the telephone to two people at the same time.
Each subscriber can talk to any other.
Initiating a conference
You are speaking on the telephone.
R
Initiate a consultation
Integral 5
P Q R S
7
6
J K L
M N O
5
G H I
4
Enter the desired call number, e.g. 7654.
You are connected. The first call partner is made to wait.
O K
Menu Conversation
O K
O K
Menu Conference
O K
Confirm. Both conference partners will be displayed, e. g.
7654-2431 .
You can now talk to both subscribers at the same time.
Ending a conference
End the call as usual. With an all-internal conference, the other two conference participants remain connected.
You can also set up a conference with external call partners.
32
Page 33

Integral 5
The functions
Second call during a conversation
If an external second caller attempts to contact you when you are using
the telephone, you will hear a signal. You can end the first conversation and
take the second call. You can ignore the second call.
This function must be enabled in your telephone system.
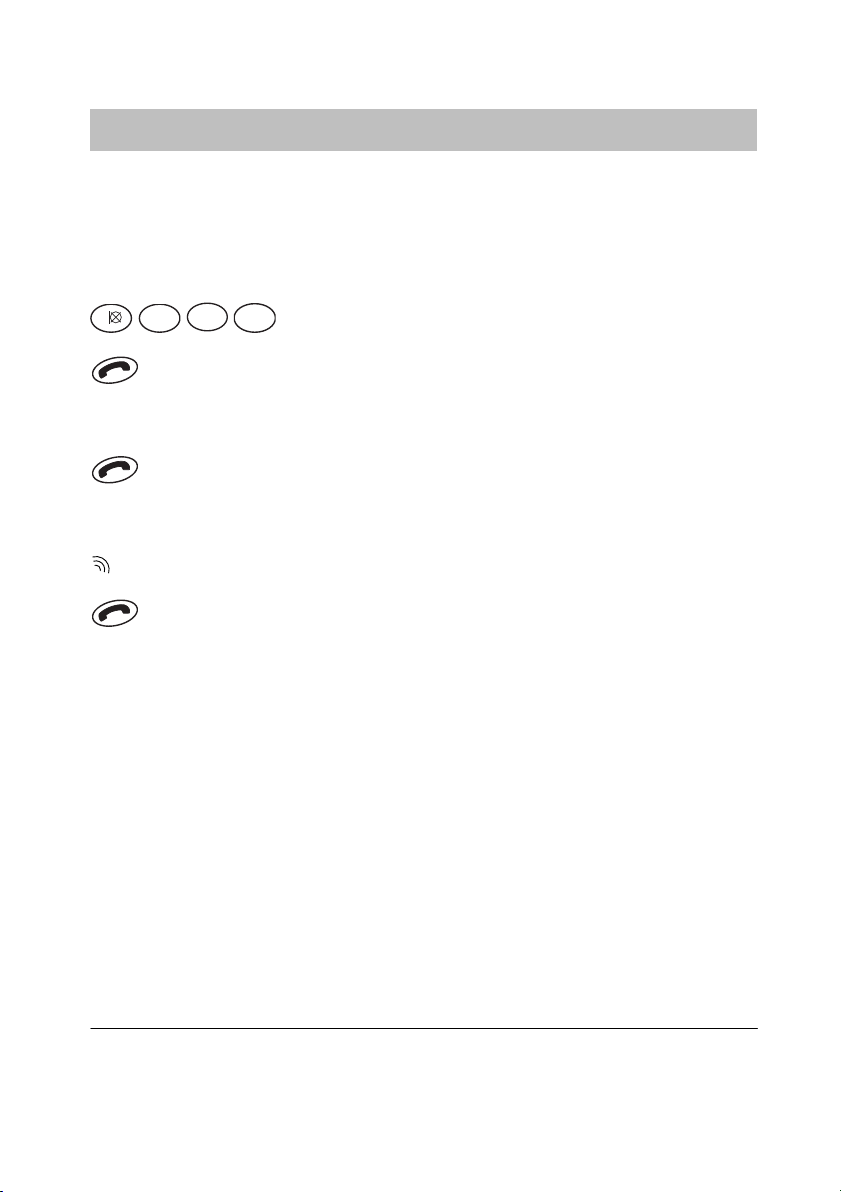
Taking the second call
You are speaking on the telephone. You hear a call tone and an info
message appears on the display with the subscriber’s name or call number,
e. g. “Bach”.
Replace the handset. The second call is still in effect.
Lift the handset You are connected to the second caller.
The second caller hears a free-line signal.
If the second call comes from a digital connection and you do not take
the call, the call goes to the call list.
33
Page 34

The functions
Integral 5
Abbreviated dialling
In your telephone system call numbers are centrally stored under set code
numbers. You can dial them by entering the appropriate code number. (If
you wish to set up additional call numbers, please contact your system
administrator.)
Lift the handset.
O K
Ü
W X Y Z
9
Press the star key (for a long period), then press OK.
0 0
Enter the three figure code number, e.g. 900.
You can extend the stored call number with the digit keys (post dialling).
34
Page 35

Integral 5
Local telephone directory
You can store up to 250 numbers locally on your MEMCard.
Searching for an entry using the arrow keys
O K
Menu Dial assist
O K
O K
Menu Local tel. dir.
O K
O K
Menu Search
O K
Confirm.
O K
Search for the entry, e.g. Claes
The functions
Lift the handset
35
Page 36

The functions
Integral 5
Local telephone directory
Searching for an entry by entering the first letter
O K
Menu Dial assist
O K
O K
Menu Local tel. dir.
O K
O K
Menu Search
O K
Confirm.
A B C2A B C2A B C
2
with C appears in the display, e.g.
O K
Search for the entry, e.g. Claes
Enter the first letter, e.g. C. The first entry beginning
Carl .
continued
Lift the handset.
36
Page 37

Integral 5
The functions
Local telephone directory
continued
Searching for an entry quickly
A B C2A B C2A B C
2
Enter the first letters (press the first button for a long
period), e.g. C. The first entry beginning with C appears in the display,
e.g.
Carl
O K
Search for the entry, e.g. Claes
O K
Confirm when found. The number is shown in the display,
e.g.
6087 . You can change the number.
Lift the handset.
37
Page 38

The functions
Integral 5
Local telephone directory
New entry
O K
Menu Dial assist
O K
O K
Menu Local tel. dir.
O K
O K
Menu New entry
O K
Confirm.
P Q R S
7
6
e.g. 7654. To do this refer to p. 23.
O K
Confirm.
J K L
M N O
5
G H I
4
Enter the number (max. 32 characters),
continued
A B C
2
... Enter the name (max. 16 characters). To do this refer to p. 23.
O K
Confirm. The display shows: Entry save?
O K
Confirm.
38
Page 39

Integral 5
The functions
Local telephone directory
Changing an entry
O K
Menu Dial assist
O K
O K
Menu Local tel. dir.
O K
O K
Menu Edit
O K
O K
Confirm. Search for the entry, e.g. Claes
O K
Confirm.
P Q R S
7
6
e.g. 7654 (→ p. 23).
J K L
M N O
5
G H I
4
Enter the number (max. 32 characters),
continued
O K
Confirm.
A B C
2
... Enter the name (max. 16 characters). To do this refer to p. 23.
O K
Confirm. The display shows: Entry change?
O K
Confirm.
39
Page 40

The functions
Integral 5
Local telephone directory
Deleting an individual entry
O K
Menu Dial assist
O K
O K
Menu Local tel. dir.
O K
O K
Menu Clear entry
O K
O K
Confirm. Search for the entry, e.g. Claes
O K
Confirm. The display shows: Entry clear?
O K
Confirm.
continued
40
Page 41

Integral 5
The functions
Local telephone directory
Deleting all entries
O K
Menu Dial assist
O K
O K
Menu Local tel. dir.
O K
O K
Menu Clear all
O K
Confirm.
P Q R S
7
6
O K
Confirm. Display: Really clear all entries?
J K L
M N O
5
G H I
4
Enter PIN number, e. g. 7654 (→ p. 90).
continued
O K
Confirm.
41
Page 42

The functions
Integral 5
Local telephone directory
Querying the free capacity
O K
Menu Dial assist
O K
O K
Menu Local tel. dir.
O K
O K
Menu Capacity
O K
Confirm. The display shows e.g.
Positions: 250 incl. free: 45
continued
42
Page 43

Integral 5
The functions
Central telephone directory
The names and call numbers of important call partners are stored within
your telephone system. You can dial these numbers at any time.
Searching for an entry quickly
Ü
Press the star key for a long period.
A B C2A B C2A B C
2
C appears in the display, e.g.
J K L5J K L5J K L
5
CL appears in the display, e.g.
Enter further letters if required.
O K
Scroll to the desired entry, e.g. Clee
Lift the handset.
Scrolling forwards
Enter the first letter, e.g. C. The first entry beginning with
Carl .
Enter the next letter, e.g. L. The first entry that starts with
Claes .
O K
By name: Press the selector downwards.
O K
Ü
By initial letters: Press the star button (for a long period),
then press the selector briefly downward.
The central telephone directory must be set up within your system.
43
Page 44

The functions
Integral 5
Central telephone directory
Scrolling backwards
O K
By name: Press the selector upwards.
O K
Ü
then press the selector briefly upward.
Dialling the displayed call number
By initial letters: Press the star button (for a long period),
Lift the handset.
continued
44
Page 45

Integral 5
The functions
Central telephone directory
Searching for an entry via the menu.
O K
Menu Dial assist
O K
O K
Menu Centr. tel. dir.
O K
Confirm
Ü
Press the star key for a long period.
A B C2A B C2A B C
2
appears in the display, e. g.
J K L5J K L5J K L
5
CL appears in the display, e.g.
Enter further letters if necessary.
Enter the first letter, e.g. C. The first entry beginning with C
Carl .
Enter the next letter, e.g. L. The first entry beginning with
Claes .
continued
O K
If necessary scroll to the entry required, e.g. Clee
Lift the handset.
Dialling the displayed call number in a consultation call
You can call up the telephone directory while making an external call.
You can select an entry and carry out a consultation call there.
O K
Ü
Press the star key (for a long period), then press the selector.
The selected subscriber will receive a consultation call. Your first call partner
is left waiting.
45
Page 46

The functions
Integral 5
Central telephone directory
Cancel
Off button.
continued
46
Page 47

Integral 5
The functions
Call list
External calls you do not answer will be entered in the call list along with
the time and date of the call. You can display this list at any time and call
back the subscribers registered in it. When you have new entries in the call
list LIST will appear in the display.
You can also include other entries in the call list, such as internal calls or
conversations with external callers ( → p. 76).
Viewing entries
0
Press button 0 for a long period.
The display shows the first caller in the list, e.g.
Scrolling
O K
To scroll press the selector downwards.
Dialling the displayed number
Lift the handset.
You can also access the call list from the status display. Next to the text
“Call list” the number of new entries you have not yet viewed is displayed in
parentheses.
The call list can store up to ten entries.
Subscribers without call number transfer or will call number suppression
switched on are not entered.
When you have called back a subscriber from the call list, the relevant
entry will be automatically deleted.
069194193 .
If you return a call to a number in the call list, the call recipient will always
be shown the number he dialled to reach you.
47
Page 48

The functions
Integral 5
Call list
Cancel
To cancel press the left softkey.
Deleting individual call numbers from the call list
The entry you want to delete is displayed.
0
To delete press the 0 button.
Symbols used in the call list
In addition to the time of the last call, the following symbols provide you
with more information about an entry.
! New entry you have not viewed yet.
i Identifies an internal call.
/
Conversation with an external caller.
2* The subscriber has called you twice.
continued
48
Page 49

Integral 5
The functions
Call list
continued
Deleting call list entries automatically
You can set that call list entries are deleted automatically after a defined
time.
O K
Call up the status display.
O K
Settings menu.
O K
O K
... delete after (off) menu.
O K
Press several times if necessary until the desired time is displayed.
The options available for automatic deletion of your call list entries are:
10 minutes, 1 hour, 1 day, 1 week and 1 month.
49
Page 50

The functions
Integral 5
Messages
You can receive messages on your telephone. MAIL will appear in the display after a message has been received. After reading you can delete the
message.
Viewing messages
O K
Call up the status display.
O K
Scroll until the first message is displayed, e.g.
2431: Meeting 11:30 .
O K
If appropriate, scroll to other messages.
Clearing a message
0
Press the 0 key.
MAIL is not shown by default if you also have new entries in the call list. In
this case only LIST appears in the display. However, you can give preference to the MAIL display (→ p. 87).
When you have received a message, you will hear the acknowledgment
tone before the dialling tone each time you lift the handset.
50
Page 51

Integral 5
The functions
Sending messages
You can send a text message to the users of your system. Text messages
can only be received by telephones equipped with a display.
O K
Menu Addit. services
O K
O K
Menu Message . Number: Text appears in the display.
1
Press the digit key for a standard text, e.g. “1”. The standard text se-
lected appears in the menu.
Ü
A B C2A B C2A B C
2
Enter additional digits/letters as needed.
Digits: Directly using the number keys
Letters: Press the star key for a long period and enter letters
Now continue with a), b) or c):
a) Send message to caller
R
Press the R button. The message is sent to the caller.
b) Send message to a user
O K
Ü
Press the star key for a long period, and press selector. The To
symbol appears in the display.
P Q R S
M N O
7
6
Enter the call number for the recipient of the message, e.g. 67.
The message will be sent immediately.
To be able to select from standard texts, these must first have been
entered into the system.
51
Page 52

The functions
Integral 5
Sending messages
c) Send message to all
#
Press the hash key for a long period. The To all symbol appears
in the display.
O K
Ü
Press the star key for a long period, and press selector.
The message is sent to all subscribers immediately.
Cancelling message to caller
O K
Call up the status display.
O K
Scroll to the option Message to caller .
0
Press the 0 key.
continued
52
Page 53

Integral 5
The functions
Suppression of call numberdisplay
If you do not wish to inform an external call partner of your call number, you
can prevent your call number being shown in your call partner’s display.
Suppressing display of own call number
O K
Menu Dialling options
O K
O K
Menu Rem. No. displ.
O K
Confirm.
Rem. No. displ. off appears briefly in the display.
When you make your next call, your call number will not be shown on your
call partner’s display.
Reactivating display of own call number
O K
Menu Dialling options
O K
O K
Menu Rem. No. displ.
O K
Confirm.
Rem. No. displ. on appears briefly in the display.
Call number suppression must be enabled at the exchange.
After a call, display of your call number is automatically switched on again.
53
Page 54

The functions
Integral 5
Follow me (Call diversion from)
You can have calls diverted to you from a connection in your telephone
system. The handset must be within range of the telephone system.
You can set up several consecutive call diversions to your handset.
Diverting calls
O K
Menu Addit. services
O K
O K
Menu Call diversion
O K
O K
Menu Call div. from
O K
Confirm.
1
Press the button 1.
P Q R S
A B C
7
2
Enter the number from which you wish to divert calls, e.g. 27.
All calls to the specified number will be diverted to you.
The call diversion appears in the status display.
54
Page 55

Integral 5
The functions
Follow me (Call diversion from)
continued
Diverting calls after a delay
O K
Menu Addit. services
O K
O K
Menu Call diversion
O K
O K
Menu Call div. from
O K
Confirm.
A B C
2
Press the button 2.
P Q R S
A B C
7
2
Enter the number from which you wish to divert calls, e.g. 27.
All calls to the specified number will be diverted to you after a delay.
55
Page 56

The functions
Integral 5
Follow me (Call diversion from)
continued
Diverting calls when busy
O K
Menu Addit. services
O K
O K
Menu Call diversion
O K
O K
Menu Call div. from
O K
Confirm.
D E F
3
Press the button 3.
P Q R S
A B C
7
2
Enter the number from which you wish to divert calls, e.g. 27.
All calls to the specified number will be diverted to you when that call number
is busy.
56
Page 57

Integral 5
The functions
Call diversion
You can divert all calls from your handset to another connection in your
telephone system. The handset must be within range of the telephone
system.
Immediate call diversion
O K
Menu Addit. services
O K
O K
Menu Call diversion
O K
O K
Menu Call div. to
O K
Confirm.
1
Press the button 1.
P Q R S
T U V
7
8
6
J K L
M N O
5
Enter the internal or external call diversion destination e.g. 8765. If it is an external number you will have to add an external
line code (usually “0”) in front of it.
Press the left softkey. The call diversion will appear in the display, e.g.
2431 -> Chopin .
57
Page 58

The functions
Integral 5
Call diversion
continued
Delayed call diversion
O K
Menu Addit. services
O K
O K
Menu Call diversion
O K
O K
Menu Call div. to
O K
Confirm.
A B C
2
Press the button 2.
P Q R S
T U V
7
8
6
J K L
M N O
5
Enter the internal or external call diversion destination e.g. 8765. If it is an external number you will have to add an external
line code (usually “0”) in front of it.
Press the left softkey. The call diversion will appear in the display, e.g.
2431 -> Chopin .
58
Page 59

Integral 5
The functions
Call diversion
continued
Call diversion when busy
O K
Menu Addit. services
O K
O K
Menu Call diversion
O K
O K
Menu Call div. to
O K
Confirm.
D E F
3
Press the button 3.
P Q R S
T U V
7
8
6
J K L
M N O
5
Enter the internal or external call diversion destination e.g. 8765. If it is an external number you will have to add an external
line code (usually “0”) in front of it.
Press the left softkey. The call diversion will appear in the display, e.g.
2431 -> Chopin .
59
Page 60

The functions
Integral 5
Call diversion
continued
Viewing a call diversion
You can view all call diversions that have been set up in the status display
(→ p. 20).
Cancelling a specific call diversion
O K
Call up the status display.
O K
Scroll to the desired call diversion, e.g. Divert to 2413 B .
0
Press the 0 key.
Cancelling all call diversions
O K
Menu Addit. services
O K
O K
O K
60
O K
Menu Call diversion
O K
Menu Clear
Confirm.
Page 61

Integral 5
The functions
Signalling calls on two telephones (twinning)
You can arrange to have incoming calls signalled on both your own phone
and another, external phone, e.g. your GSM mobile. This is called twinning.
O K
Menu Addit. services .
O K
O K
Menu Call diversion .
O K
O K
Menu Call div. to .
O K
Confirm.
G H I
4
Press the 4 key.
...
G H I
4
Enter the external number of the phone that you want to ring
0
out when a call is received, e.g. 0012341234.
Press the left softkey. The twinning number is displayed, e.g.
twinning 0012341234 .
61
Page 62

Telefoning as usual
Changing call divert/twinning remotely
You can call up your telecommunications system from anywhere and set up
or alter call divert or twinning for your handset or other telephones. This is
possible from any telephone with DTMF suffix dialling.
Call subscriber whose call diversion is to be changed
W X Y Z
P Q R S
M N O
9
6
0
7
J K L
5
TC-system from an external telephone, e.g. 0697505.
A B C
G H I
2
4
Enter the number of the remote control access, e.g. 24.
A dialling tone sounds as confirmation.
J K L
5
0
Call the number of your
M N O
6
J K L5J K L
5
0
Enter the internal call number of the subscriber
whose call diversion you wish to change.
A B C
D E F
2
1
3
G H I
4
Enter the 4- or 6-digit PIN-number of the subscriber,
e.g. 1234. A dialling tone sounds as confirmation.
Now continue with one of the following three variations (a - c):
”Changing call divert/twinning remotely” must be released by the service
department. The service department will also tell you the number to dial for
remote settings access.
The subscriber’s secret PIN-number must be different from the delivery
setting (→ p. 90).
For “Call diversion to”: you do not need to enter an external call number
if you are calling from the same external telephone number to which
you wish to divert your calls. In any case the call number transmission
for the telephone must be active.
62
Page 63

Telefoning as usual
Changing call divert/twinning remotely
a) Diverting calls to another telephone or mailbox
(call divert to, twinning)
P Q R S
7
Ü
1
0
to which calls are to be diverted, e.g. 00897543.
#
b) Divert calls from an internal subscriber
(Call diversion from, Follow me)
Ü
1
1
Press the star key, followed by 71.
Enter the dial code for the call diversion option, e.g. 1.
Dial codes for call routing variations:
1 = immediately – 2 = on no answer – 3 = on busy – 4 = twinning
W X Y Z
T U V
8
P Q R S
9
J K L
7
5
4
D E F
G H I
3
Enter the internal or external number
Press the hash key. You will hear an acknowledgement tone.
P Q R S
7
0
Press the star key, followed by 70.
Enter the code for the call diversion variation, e.g. 1.
Codes for call diversion variations:
1 = immediately – 2 = delayed – 3 = if busy
continued
A B C
2
D E F
3
Enter the 2-4 digit internal call number of the subscriber from
which the calls are to be diverted. You will hear an acknowledgement tone.
c) Deactivate call diversion/twinning
P Q R S
7
#
0
Press the hash key followed by 70 for
“Call diversion from”.
or
P Q R S
7
#
1
Press the hash key followed by 71 for
“Call diversion from”.
You will hear an acknowledgement tone. Call diversion is switched off.
63
Page 64

The functions
Integral 5
Call forwarding
You can forward an external call from your handset to another connection
that is programmed in the telephone system (call forwarding position).
This function must be set up by your system administrator.
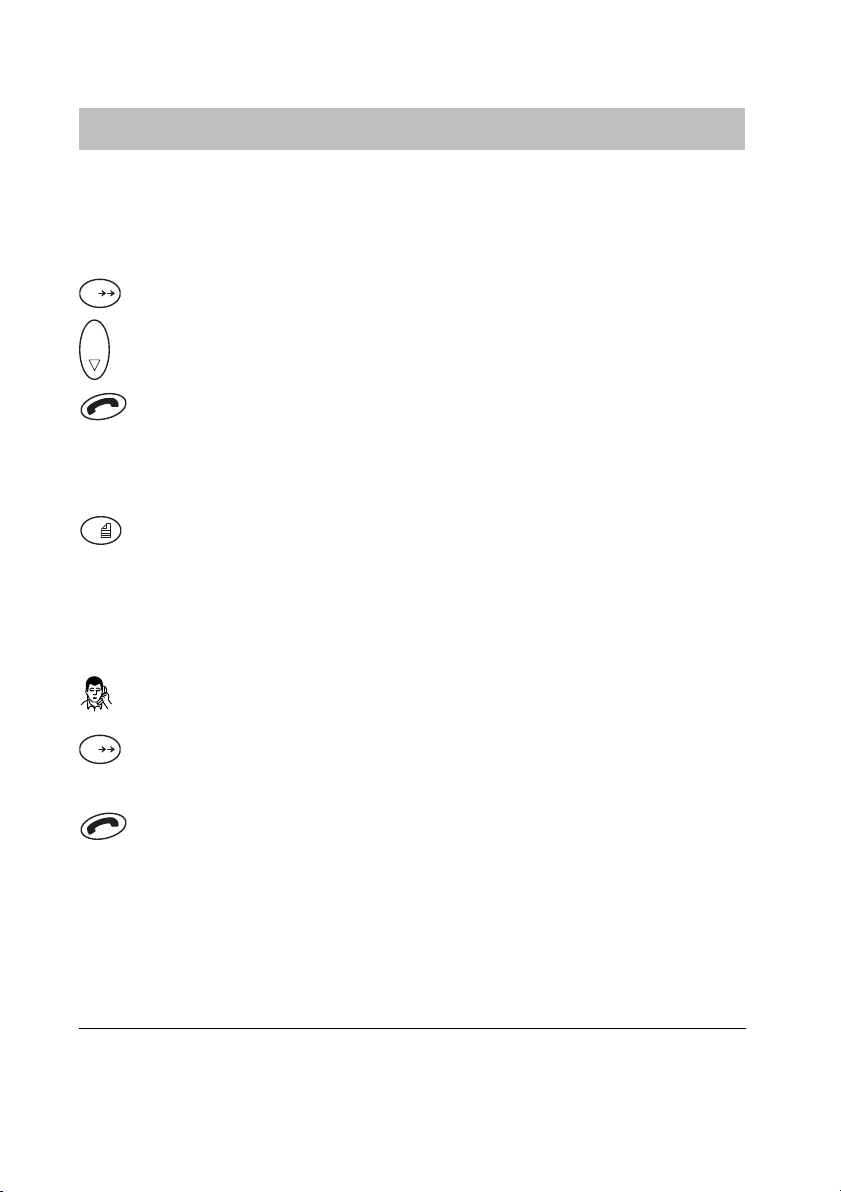
Forwarding a call
Your handset rings.
O K
Menu Addit. services
O K
O K
Menu Call diversion
O K
O K
Menu Call forwarding
O K
Confirm. Call forwarding appears briefly in the display.
64
Page 65

Integral 5
The functions
Announcement
You can make an announcement from your handset to a connection within
your telephone system. It is not possible to make an announcement to
another handset.
Making an announcement
Lift the handset.
P Q R S
1
O K
O K
O K
Confirm.
A B C
2
O K
Menu Dial assist
Menu Announcement
M N O
7
6
Dial the call number, e.g. 1276
Announcement appears in the display. Speak now.
Ending an announcement
Replace the handset.
If the number is busy you cannot make an announcement.
This function must be enabled within your telephone system. If necessary
please contact your system administrator.
65
Page 66

The functions
Integral 5
Pick-up
From your handset you can retrieve (pick-up) calls from other subscribers
to your telephone system.
Retrieving a call (pick-up)
Another telephone rings.
Lift the handset.
O K
Menu Pick up calls
O K
O K
Menu Pick up
O K
Confirm.
P Q R S
A B C
7
2
retrieve (pick up), e.g. 27.
Enter the call number of the subscriber whose call you wish to
You are connected.
If you have picked up an internal call, the number or name of the subscriber appears in the display.
If you have picked up an external call, the number or name of the line
appears in the display.
66
Page 67

Integral 5
The functions
Accepting calls from ringing lines
Accepting a ringing line
You hear an external call at another telephone.
Lift the handset.
O K
Menu Pick up calls
O K
O K
Menu Seize ring. line
O K
Confirm.
The name of the line or the number and/or name of the caller appears
in the display. You are connected.
67
Page 68

The functions
Integral 5
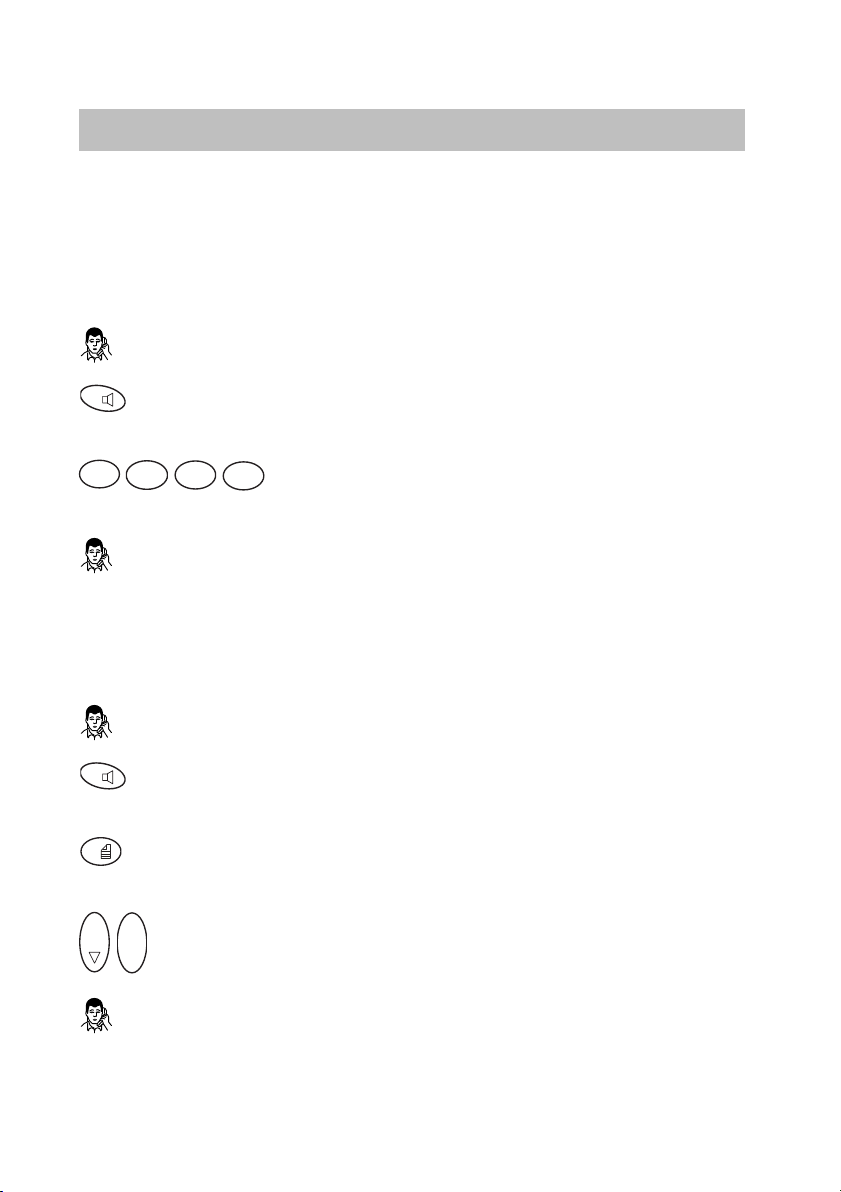
DTMF-postdialling
You can switch over to DTMF-postdialling whilst telephoning. Each press
of a button is then transmitted as a tone, allowing you to e.g. operate an
answering machine.
DTMF on
You are speaking on the telephone.
O K
Menu Conversation
O K
O K
Menu Tone-PD (DTMF)
O K
Confirm.
appears in the display. Continue to dial. Each digit is transmitted
as a tone.
Sending “A“ – “D“ as a DTMF signal
You are speaking on the telephone.
O K
Menu Convers. .
O K
O K
Menu, e.g. Tone dial (A) .
O K
Confirm. “A“ will be sent as a tone.
By default, DTMF postdialling is active and does not need to be switched
on.
68
Page 69

Integral 5
Call charge display
You can view the charges incurred by the last external call.
Viewing the charges
O K
Menu Addit. services
O K
O K
Menu Charges
O K
Confirm.
The charges incurred by the last call are shown in the display,
e.g.
Eur 1.68
Call charge display off
Press the left softkey.
The functions
69
Page 70

The functions
Integral 5
Muting the microphone
You may switch off the microphone on your handset whilst telephoning.
The handset remains switched on. Your call partner cannot hear you but
you can hear her/him.
Muting the microphone
You are speaking on the telephone.
1
Switch off microphone: press button 1 for a long period. appears in
the display.
Reactivating the microphone
The microphone is off.
1
Switch on microphone: press button 1 for a long period. You may
continue telephoning.
If you end a call with the microphone muted, the microphone will be automatically reactivated when commencing the next call.
appears in the display.
70
Page 71

Integral 5
The functions
Hear conversation via loudspeaker (handsfree operation)
You can switch on the fitted handsfree loudspeaker on your handset.
You can then hear your caller’s amplified voice and can speak freely
with her/him.
Switching on handsfree
You are speaking on the telephone.
R
Switch on handsfree loudspeaker: press button R for a long period.
appears in the display.
Switching off handsfree operation
The loudspeaker for handsfree operation is switched on.
display.
R
Switch off handsfree loudspeaker: press button R for a long period.
Handsfree operation with the handset in the charger
For this function, the “Handsfree” setting must be selected in the “Set telephone > Charger” menu (→ p. 85).
You are speaking on the telephone.
Place the handset in the charger. Handsfree operation is automatically
switched on.
The handsfree loudspeaker is switched off automatically once you hang up
the call.
The best amplified sound quality can be obtained by placing the handset
on the table keypad down.
appears in the display.
appears in the
71
Page 72

The functions
Setting the handset
Ring signal
O K
Menu Set telephone
O K
O K
Menu Ringer signal
O K
Confirm.
O K
Set ring tone as desired, e.g. Ring tone . You may choose
between ring tone, vibrating, both, short or mute ring tone.
O K
Confirm.
External and internal calls are now signalled in this way.
Integral 5
In the charger your handset will not vibrate. If you have selected vibration
as the ring signal, the ring tone will briefly sound when there is a call.
If you have selected vibrating or mute as your calling signal, a corresponding symbol will appear in the display (→ p. 8).
72
Page 73

Integral 5
The functions
Setting the handset
continued
Ring tone volume
O K
Call up the status display.
O K
Menu Settings
O K
O K
Menu Ringing tone
D E F
3
Select a digit for the volume (1–9), e.g. 3. You will hear the ring tone.
O K
Confirm.
All ring tones (message, external, internal) will be reproduced at this volume.
73
Page 74

The functions
Integral 5
Setting the handset
continued
Ring tone-acoustic pattern
You can set a different sound for each type of call (message, external, internal, VIP). The sound tells you what kind of call is waiting.
O K
Call up the status display.
O K
Menu Settings
O K
O K
Scroll to the desired call type, e.g. Ext. call type .
D E F
3
Select the melody with a digit (1-9), e.g. 3. You will hear the ring tone
so you can check it.
O K
Confirm.
You must define the numbers to be signalled with the VIP ringtone in the
telecommunications system (call filter list).
You can also access the ring tone menu via “Menu > Set telephone > Ring
tone volume / Ring tone melody“.
74
Page 75

Integral 5
The functions
Setting the handset
continued
Direct dialling
You can set that all digits you enter are dialled immediately (deactivate
block dialling).
O K
Call up the status display.
O K
Menu Settings .
O K
O K
Menu Direct dial (off) .
O K
Activate direct dialling.
75
Page 76

The functions
Integral 5
Setting the handset
continued
Internal call list
You can set that internal calls you have not answered are also entered in
the call list.
O K
Call up the status display.
O K
Menu Settings .
O K
O K
Menu Int. call list (off) .
O K
Activate the internal call list.
Call list √ (Talk list)
You can set that all your conversations with external subscribers are entered in the call list.
O K
Call up the status display.
O K
Menu Settings .
O K
O K
Menu Call list √ (off) .
O K
Activate the call list √.
76
Page 77

Integral 5
The functions
Setting the handset
continued
Call list entries in the case of call diversion
If you have set up a “Call diversion to“ you can set which telephone is to
receive entries in the call list:
(A) only your telephone
(B) only the call diversion destination
(A+B) your telephone and the call diversion destination
O K
Call up the status display.
O K
Menu Settings .
O K
O K
Menu Call list diversion (A) .
O K
If necessary, press several times until the desired setting is displayed,
e.g.
Call list diversion (A+B) .
77
Page 78

The functions
Integral 5
Setting the handset
Ring tone output
Select how a call should be signalled if a headset is connected.
O K
Menu Set telephone
O K
O K
Menu Ring tone output
O K
Confirm selection.
O K
Select the setting, e.g. Headset .
O K
Store the new setting. The setting is now effective.
continued
If no headset is connected, the loudspeaker in the handset rings.
The settings you have made in the “Calling signal” menu apply here.
The headset and the loudspeaker cannot ring at the same time.
78
Page 79

Integral 5
The functions
Setting the handset
Key-beep
O K
Menu Set telephone
O K
O K
Menu Key beep
O K
Confirm.
O K
Select setting, e.g. Tone .
O K
Confirm.
continued
79
Page 80

The functions
Integral 5
Setting the handset
Handset volume
O K
Menu Set telephone
O K
O K
Menu Handset volume
O K
Confirm.
D E F
3
Enter handset volume (from 1 to 6), e.g. 3.
O K
Confirm.
Temporarily adjust volume during conversation
continued
You are making a call as normal or with the loudspeaker switched on
for handsfree operation.
O K
O K
Press the selector up or down for a long period until you hear
a signal tone.
O K
O K
Press the selector up or down.
The set volume is retained for the current conversation. Thereafter the
preset volume applies for the handset or the handsfree-loudspeaker
.
The handset volume setting does not affect the volume for the handsfree
loudspeaker.
80
Page 81

Integral 5
The functions
Setting the handset
continued
Permanently setting volume during conversation
You are making a call as normal or with the loudspeaker switched on
for handsfree operation.
O K
O K
Press the selector up or down for a long period until you hear
a signal tone.
O K
O K
Press the selector up or down to adjust the volume.
O K
Confirm. The current handset or loudspeaker for handsfree operation
volume is stored permanently.
Lighting
O K
Menu Set telephone
O K
O K
Menu Lighting
O K
O K
Select type of lighting, e.g. off . You can choose between off and
automatic (lighting is switched on automatically when handset is used).
O K
Confirm.
81
Page 82

The functions
Integral 5
Setting the handset
continued
Reset
A reset returns some settings to the factory-default: handset PIN number
(0000), ringer signal (ring tone + vibrate), ring tone output (loudspeaker),
range warning (off), charger (handsfree), loudspeaker volume (3), key
beep (on), handset volume (3), lighting (on), alert tone (on). –
The PIN must be entered for this purpose.
O K
Menu Set telephone
O K
O K
Menu Reset
O K
Confirm.
A B C
D E F
2
3
4
O K
J K L
G H I
5
Enter PIN number, e.g. 2345.
Confirm. The display shows: Really reset?
O K
Confirm.
On delivery the PIN is 0000. For details of the PIN please refer to page 90.
82
Page 83

Integral 5
The functions
Setting the handset
continued
Switching warning signal on or off
If required, you can set a warning or signal tone to sound
– just before your handset runs out – of battery power as well as
– each time you place your handset back in the charger for loading.
O K
Menu Set telephone
O K
O K
Menu Alert tone
O K
O K
Choose desired setting, e.g. on
O K
Store with the selector.
83
Page 84

The functions
Integral 5
Setting the handset
continued
Switching the range warning signal on or off
You can set whether you wish to hear a warning or alert tone during a call
shortly before you leave the radio range of your base station with the handset.
O K
Menu Set telephone
O K
O K
Menu Range warning
O K
O K
Select the desired setting, e.g. on
O K
Confirm.
84
Page 85

Integral 5
The functions
Setting the handset
continued
Placing the handset into the charging station during a call
You can set how the headset reacts when you place it into the charging
station during a call. It can switch to handsfree or else break the connection.
O K
Menu Set telephone
O K
O K
Menu Charger
O K
O K
Select the desired setting, e.g. Handsfree
O K
Confirm.
85
Page 86

The functions
Integral 5
Setting the handset
continued
Extended call display
You can set your telephone to display not only the caller’s number or name
but the number which they dialled.
This tells you whether the caller wants to speak to service or the workshop,
for example.
O K
Call up the status display.
O K
Menu Settings .
O K
O K
Menu Call display A->B (off) .
O K
Activate the call display.
86
Page 87

Integral 5
The functions
Setting the handset
continued
Preference in the display of LIST or MAIL
If you have received new entries in the call list and new messages at the
same time: The idle display shows only one of these, either LIST or MAIL.
You can set that the information that is more important to you appears on
the display.
O K
Call up the status display.
O K
Menu Settings .
O K
O K
Menu Prio idle display (LIST) .
O K
Change preference to MAIL.
87
Page 88

The functions
Integral 5
Emergency call
When your handset is locked, the only function that call be used is the
emergency call. Over the right softkey in the display there appears: SOS.
The emergency call function is constantly accessible via the white emergency call button on the upper left of the handset – also of course when the
handset is not locked.
Setting up and changing the emergency call number
O K
Menu Set telephone
O K
O K
Menu Emergency No.
O K
Confirm.
A B C
D E F
2
3
4
O K
J K L
G H I
5
Enter PIN number, e.g. 2345.
Confirm.
M N O6M N O6M N O6M N O
6
Enter or change the emergency number
(→ p. 23), e.g. 6666.
O K
Confirm.
The SOS emergency call is not available if an emergency call number has
not been entered, during a conversation, while a call or message is being
received, or if the handset is out of range of the telephone system.
To delete an emergency call number, change it by entering a new number
(press the left softkey for a long period) and confirm with the OK button.
88
Page 89

Integral 5
The functions
Emergency call
Making an emergency call when the handset is locked
The handset is locked. In the display over the right softkey there is shown
SOS .
Press the right softkey. The emergency call number is shown in the
display, e.g.
O K
Confirm. The emergency call number is dialled.
Making an emergency call with the emergency call button
Press the emergency call button in the upper left for a long period.
The emergency call number is dialled.
6666 ?
continued
89
Page 90

The functions
Integral 5
Personal Identification Number (PIN)
Important settings and functions on your handset are safeguarded by
means of a four digit personal identification or PIN number. You can change
the PIN. The PIN also enables you to lock your handset.
Regular PIN
O K
Menu Lock
O K
O K
Menu Set PIN
O K
Confirm.
0 0 0 0
Enter the old regular PIN. (On delivery this is set
to 0000.) The digits do not appear in the display.
O K
Confirm.
A B C
D E F
2
3
4
J K L
G H I
5
Enter the new regular PIN, e.g. 2345. The digits
do not appear in the display.
O K
Confirm.
A B C
D E F
2
3
4
J K L
G H I
5
Repeat the new regular PIN. The digits do not
appear in the display.
O K
Confirm.
Memorize your PIN carefully! If you forget your PIN, an adjustment inside
the telephone is necessary. Contact your system administrator.
90
Page 91

Integral 5
Locking the handset
Locking
O K
Menu Lock
O K
O K
Menu Locking
O K
Confirm. appears in the display.
Unlocking
The functions
The handset is locked.
appears in the display.
Press any key, e.g. the left softkey.
Enter PIN appears in the display.
A B C
2
D E F
3
4
J K L
G H I
5
Enter PIN, e.g. 2345. The digits do not appear
in the display.
O K
Confirm.
When the handset is locked all functions are blocked. Only the emergency
call function will work (→ p. 88).
91
Page 92

The functions
Integral 5
Locking the handset
Keypad lock via the menu
O K
Menu Set telephone
O K
O K
Menu Keypad lock
O K
Confirm.
Keypad lock via the keys
R
Ü
Unlocking the keypad
The key board is locked.
Ü
by R.
Locking: Press the star key (for a long period), followed by R.
R
Unlocking: Press the star key (for a long period), followed
continued
When the handset is locked all functions are blocked. Only the emergency
call function will work (→ p. 88).
92
Page 93

Integral 5
The functions
Do not disturb
If you do not want to be disturbed you can deactivate the ringing tone temporarily.
O K
Menu Set telephone .
O K
O K
Menu Do not disturb .
O K
Confirm. The following text appears briefly in the display
Do not disturb on .
A caller will hear a busy tone or an announcement when you have activated “Do not disturb”.
You can make internal and external calls without any restrictions when you
have activated “Do not disturb”.
93
Page 94

The functions
Language
Setting local menu language
O K
Menu Set telephone
O K
O K
Menu Language
O K
O K
Select English language.
O K
Confirm.
Integral 5
You do not need to set the language of the system. This is already configured.
94
Page 95

Integral 5
The functions
Own allocation
If your system administrator has set up your handset as the night station for
a central office, calls will only be received on your handset when the night
service of the central office has been activated. If you want to be able to
receive these calls at any time, you have to activate an own allocation.
Activating own allocation
O K
Menu Addit. services
O K
O K
Menu Own allocation
O K
Confirm.
Viewing an own allocation
Ü
Press the star key followed by the left softkey.
Deactivating an own allocation
O K
Menu Addit. services
O K
O K
Menu Own allocation
O K
Confirm. Own allocation off appears briefly in the display.
95
Page 96

The functions
Integral 5
Own allocation and call diversion off
If you have activated an own allocation and a call diversion, you can deactivate both by entering a digit code.
Deactivating own allocation and call diversion after
W X Y Z9W X Y Z
9
Ü
Press the star key, followed by 99.
96
Page 97

Integral 5
The functions
Disconnecting from hunt groups
If your telephone is assigned to one or more hunt groups you can temporarily disconnect your telephone from these hunt groups.
O K
Menu Set telephone .
O K
O K
Menü DND hunt group .
O K
Confirm.
97
Page 98

The functions
Opening the door from the handset
O K
Menu Dialling options
O K
O K
Menu Door opener
O K
Confirm.
Integral 5
This function must be set up by your system administrator.
98
Page 99

Integral 5
The functions
Associated subscriber
Your system administrator can set up a telephone in your system as an associated subscriber, e.g. for an executive-secretary circuit. Some of the related functions are particularly convenient.
Calling the associated subscriber
O K
Menu Partner funct.
O K
O K
Menu Call
O K
Confirm.
Call diversion to associated subscriber
O K
Menu Partner funct.
O K
O K
Menu Call div. to
O K
Confirm.
The display shows e.g.
Cal div. to 24 -
99
Page 100

The functions
Integral 5
Associated subscriber
Call diversion from associated subscriber
O K
Menu Partner funct.
O K
O K
Menu Call div. from
O K
Confirm.
The display shows e.g.
Announcement to associated subscriber
O K
Menu Partner funct.
O K
O K
Menu Announcement
Call div. from 24 -
continued
O K
Confirm.
Lift the handset.
Announcement appears in the display. Speak now.
Ending announcement to associated subscriber
Replace the handset.
To cancel a call diversion please refer to page 60.
100
 Loading...