

Page 1
Original instructions
AVANTI SERVICE LIFT
User’s Manual
Model Service Lift OCTOPUS L95
Page 2
CE
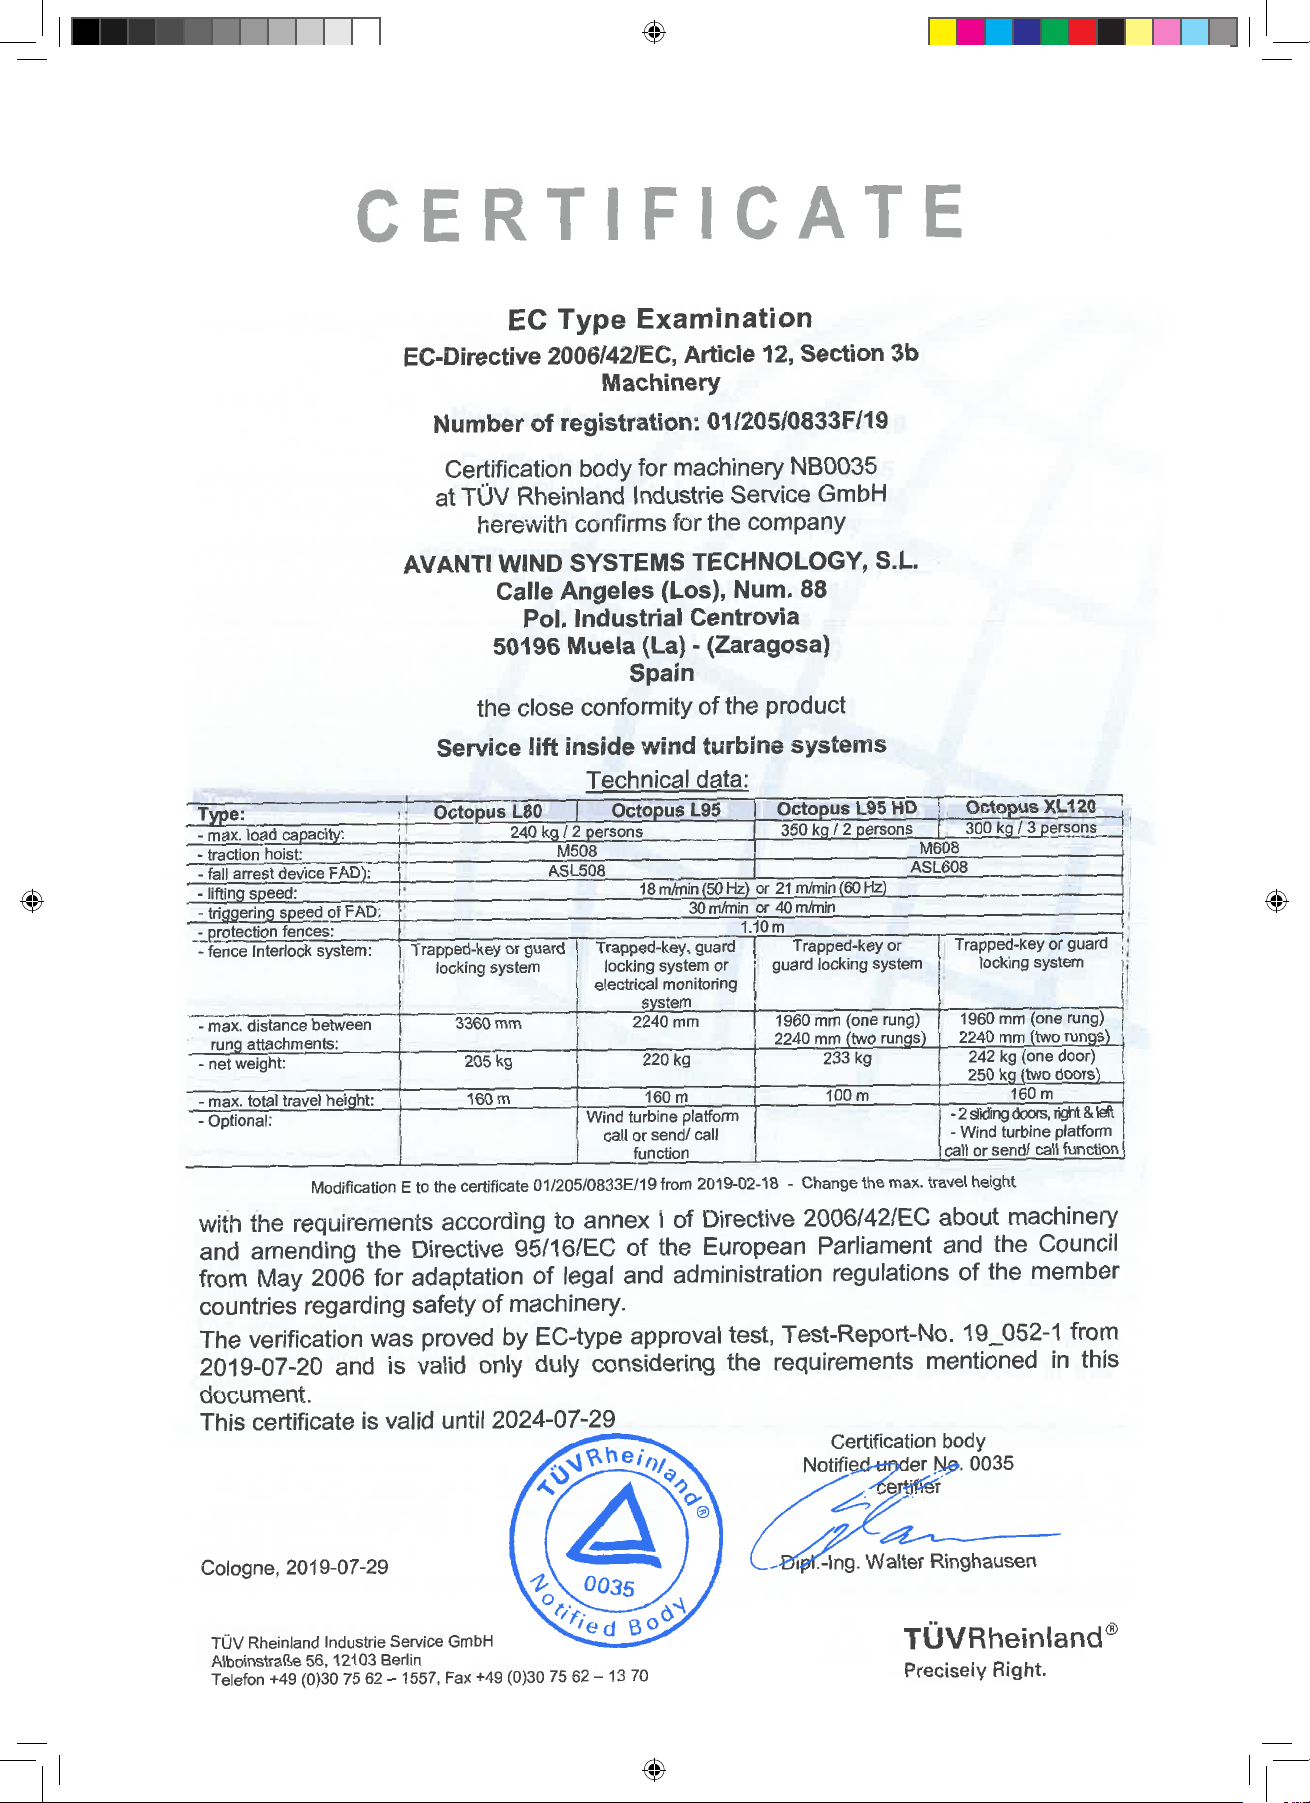
certificate for Octopus L95 :
Page 3
Date of publication:
3rd CE Edition: 07/2019
Revision 1: 30/07/2019
Manufacturer:
Avanti Wind Systems Technology, S.L.
Calle Ángeles (Los), Num. 88
Pol. Industrial Centrovía
50198 Muela (La) - (Zaragoza)- Spain
P: +34 976 149524
F: +34 976 149508
E: info@avanti-online.com
I: www.avanti-online.com
Manufactured Under Process Patent NO.8,499,896.
® Registered in Europe
Sales & Service:
avanti-online.com/contact
Page 4

AVANTI Service Lift for Wind Turbines
Contents
Page
1. Limited warranty ...............................................................5
2. Introduction ...................................................................6
2.1 Observations ................................................................6
2.2 Symbols ....................................................................6
2.3 Cautions ...................................................................7
2.4 Terms and definitions .........................................................7
3. Description ....................................................................8
3.1 Purpose ....................................................................8
3.2 Scope ......................................................................8
3.3 Exclusions ..................................................................8
3.4 Technical specifications .......................................................8
3.5 Dimensions..................................................................9
3.6 Components ...............................................................10
3.6.1 Overview .............................................................11
3.6.2 Traction hoist..........................................................11
3.6.3 Fall arrest device.......................................................11
3.6.4 Guiding system ........................................................11
3.6.5 Main control box.......................................................12
3.6.6 Control boxes .........................................................12
3.6.7 Platform fences........................................................13
3.6.8 Main service lift door ...................................................13
3.6.9 Ladder access door ....................................................13
3.6.10 Maintenance cover ....................................................14
3.6.11 Bottom hatches ......................................................14
3.6.12 Top hatches..........................................................14
3.6.13 Bottom obstruction device..............................................14
3.6.14 Top obstruction device.................................................15
3.6.15 Top normal limit switch.................................................15
3.6.16 Manual descent system ................................................15
3.6.17 Overload limiter.......................................................15
3.6.18 Internal light .........................................................16
3.6.19 Warning lights ........................................................16
3.6.20 Anchor points ........................................................16
3.6.21 Rescue pendant control ................................................16
3.6.22 Information signs and documents ........................................16
3.6.23 Travelling cable pulley .................................................17
3.6.24 Fasten kit............................................................17
4. Instructions for use.............................................................18
4.1 Daily inspection . . . . . . . . . . . . . . . . . . . . . . . . . . . . . . . . . . . . . . . . . . . . . . . . . . . . . . . . . . . ..18
4.2 Prohibited uses . . . . . . . . . . . . . . . . . . . . . . . . . . . . . . . . . . . . . . . . . . . . . . . . . . . . . . . . . . . . . 19
4.3 Entry and exit . . . . . . . . . . . . . . . . . . . . . . . . . . . . . . . . . . . . . . . . . . . .. . . . . . . . . . . . . . . . . . . 19
4.4 Stop/Emergency stop .. . . . . . . . . . . . . . . . . . . . . . . . . . . . . . . . . . . . . . . . . . . . . . . . . . . . . . . 19
4.5 Operation from inside the cabin . . . . . . . . . . . . . . . . . . . . . . . . . . . . . . . . . . . . . . . . . . . . . . . 19
4.6 Operation from outside the cabin . . . . . . . . . . . . . . . . . . . . . . . . . . . . . . . . . . . . . . . . . . . . . 19
4.7 Operation from platforms . . . . . . . . . . . . . . . . . . . . . . . . . . . . . . . . . . . . . . . . . . . . . . . . . . . . 19
4.8 Overload limiter . . . . . . . . . . . . . . . . . . . . . . . . . . . . . . . . . . . . . . . . . . . . . . . . . . . . . . . . . . . . 20
4.9 Manual descent . . . . . . . . . . . . . . . . . . . . . . . . . . . . . . . . . . . . . . . . . . . . . . . . . . . . . . . . . . . . 20
4.10 Fall arrest device . . . . . . . . . . . . . . . . . . . . . . . . . . . . . . . . . . . . . . . . . . . . . . . . . . . . . . . . . . 20
4.11 Troubleshooting . . . . . . . . . . . . . . . . . . . . . . . . . . . . . . . . . . . . . . . . . . . . . . . . . . . . . . . . . .. 21
4.12 Out of service . . . . . . . . . . . . . . . . . . . . . . . . . . . . . . . . . . . . . . . . . . . . . . . . . . . . . . . . . ... 23
Appendix A: Daily Inspection Log.....................................................
Appendix B: Stomp-test Instruction
..................................................
.24
.34
4
AT00012569 OCTOPUS user CE 2nd EN R3.indd 4
Page 5

User’s Manual
1. Limited Warranty
Avanti Wind Systems Technology, S.L. warrants
that commencing from the date of shipment to
the Customer and continuing for a period of the
longer of 365 days thereafter, or the period set
forth in the standard AVANTI warranty, the
Product1) described in this Manual will be free
from defects in material and workmanship
under normal use and service when installed
and operated in accordance with the provisions
of this Manual.
This warranty is made only to the original user
of the Product. The sole and exclusive remedy
and the entire liability of Avanti under this
limited warranty, shall be, at the option of
Avanti, a replacement of the Product (including
incidental and freight charges paid by the
Customer) with a similar new or reconditioned
Product of equivalent value, or a refund of the
purchase price if the Product is returned to
Avanti, freight and insurance prepaid. The
obligations of Avanti are expressly conditioned
upon return of the Product in strict accordance
with the return procedures of Avanti.
This warranty does not apply if the Product (i)
has been altered without the authorization of
Avanti or its authorized representative; (ii) has
not been installed, operated, repaired, or
maintained in accordance with this Manual or
other instructions from Avanti; (iii) has been
subjected to abuse, neglect, casualty, or
negligence; (iv) has been furnished by Avanti to
Customer without charge; or (v) has been sold
on an “AS-IS” basis.
Except as specifically set forth in this Limited
Warranty,
ALL EXPRESS OR IMPLIED CONDITIONS,
REPRESENTATIONS AND WARRANTIES,
INCLUDING, BUT NOT LIMITED TO, ANY
IMPLIED WARRANTY OR CONDITION OF
MERCHANTABILITY, FITNESS FOR A PARTICULAR PURPOSE, NON-INFRINGEMENT,
SATISFACTORY QUALITY, COURSE OF DEALING, LAW, USAGE OR TRADE PRACTICE ARE
HEREBY EXCLUDED TO THE MAXIMUM
EXTENT PERMITTED BY APPLICABLE LAW
AND ARE EXPRESSLY DISCLAIMED BY
AVANTI. IF, PURSUANT TO ANY APPLICABLE
LAW, TO THE EXTENT AN IMPLIED WARRANTY CANNOT BE EXCLUDED AS PROVIDED IN
THIS LIMITED WARRANTY, ANY IMPLIED
WARRANTY IS LIMITED IN TIME TO THE SAME
DURATION AS THE EXPRESS WARRANTY
PERIOD SET FORTH ABOVE. BECAUSE SOME
STATES DO NOT PERMIT LIMITATIONS ON
THE DURATION OF IMPLIED WARRANTIES,
THIS MAY NOT APPLY TO A GIVEN CUSTOMER. THIS LIMITED WARRANTY GIVES CUSTOMER SPECIFIC LEGAL RIGHTS, AND
CUSTOMER MAY HAVE OTHER LEGAL
RIGHTS UNDER APPLICABLE LAWS.
This disclaimer shall apply even if the express
warranty fails of its essential purpose.
In any cases of dispute the English original shall
be taken as authoritative.
* Avanti service lift (“Product”)
5
Page 6
AVANTI Service Lift for Wind Turbines
2. Introduction
!
!
2.1 Observations
Only trained people may use this lift.
This manual must be available to staff at all times during installation, maintenance and operation.
Additional copies are available from the manufacturer upon request.
This manual, including, but not limited to, measurements, procedures, components, descriptions, instructions, recommendations and requirements, is subject to change without prior notice. Please check Avanti
website/manuals for the latest revisions of the manuals.
Any additional cost related to or arising from any changes in the manuals does not entitle Customer to any
form of compensation or other legal remedies.
The pictures and sketches in this manual may not reflect the product aesthetics, colours,
arrangement precisely. This has no impact on the function or safety.
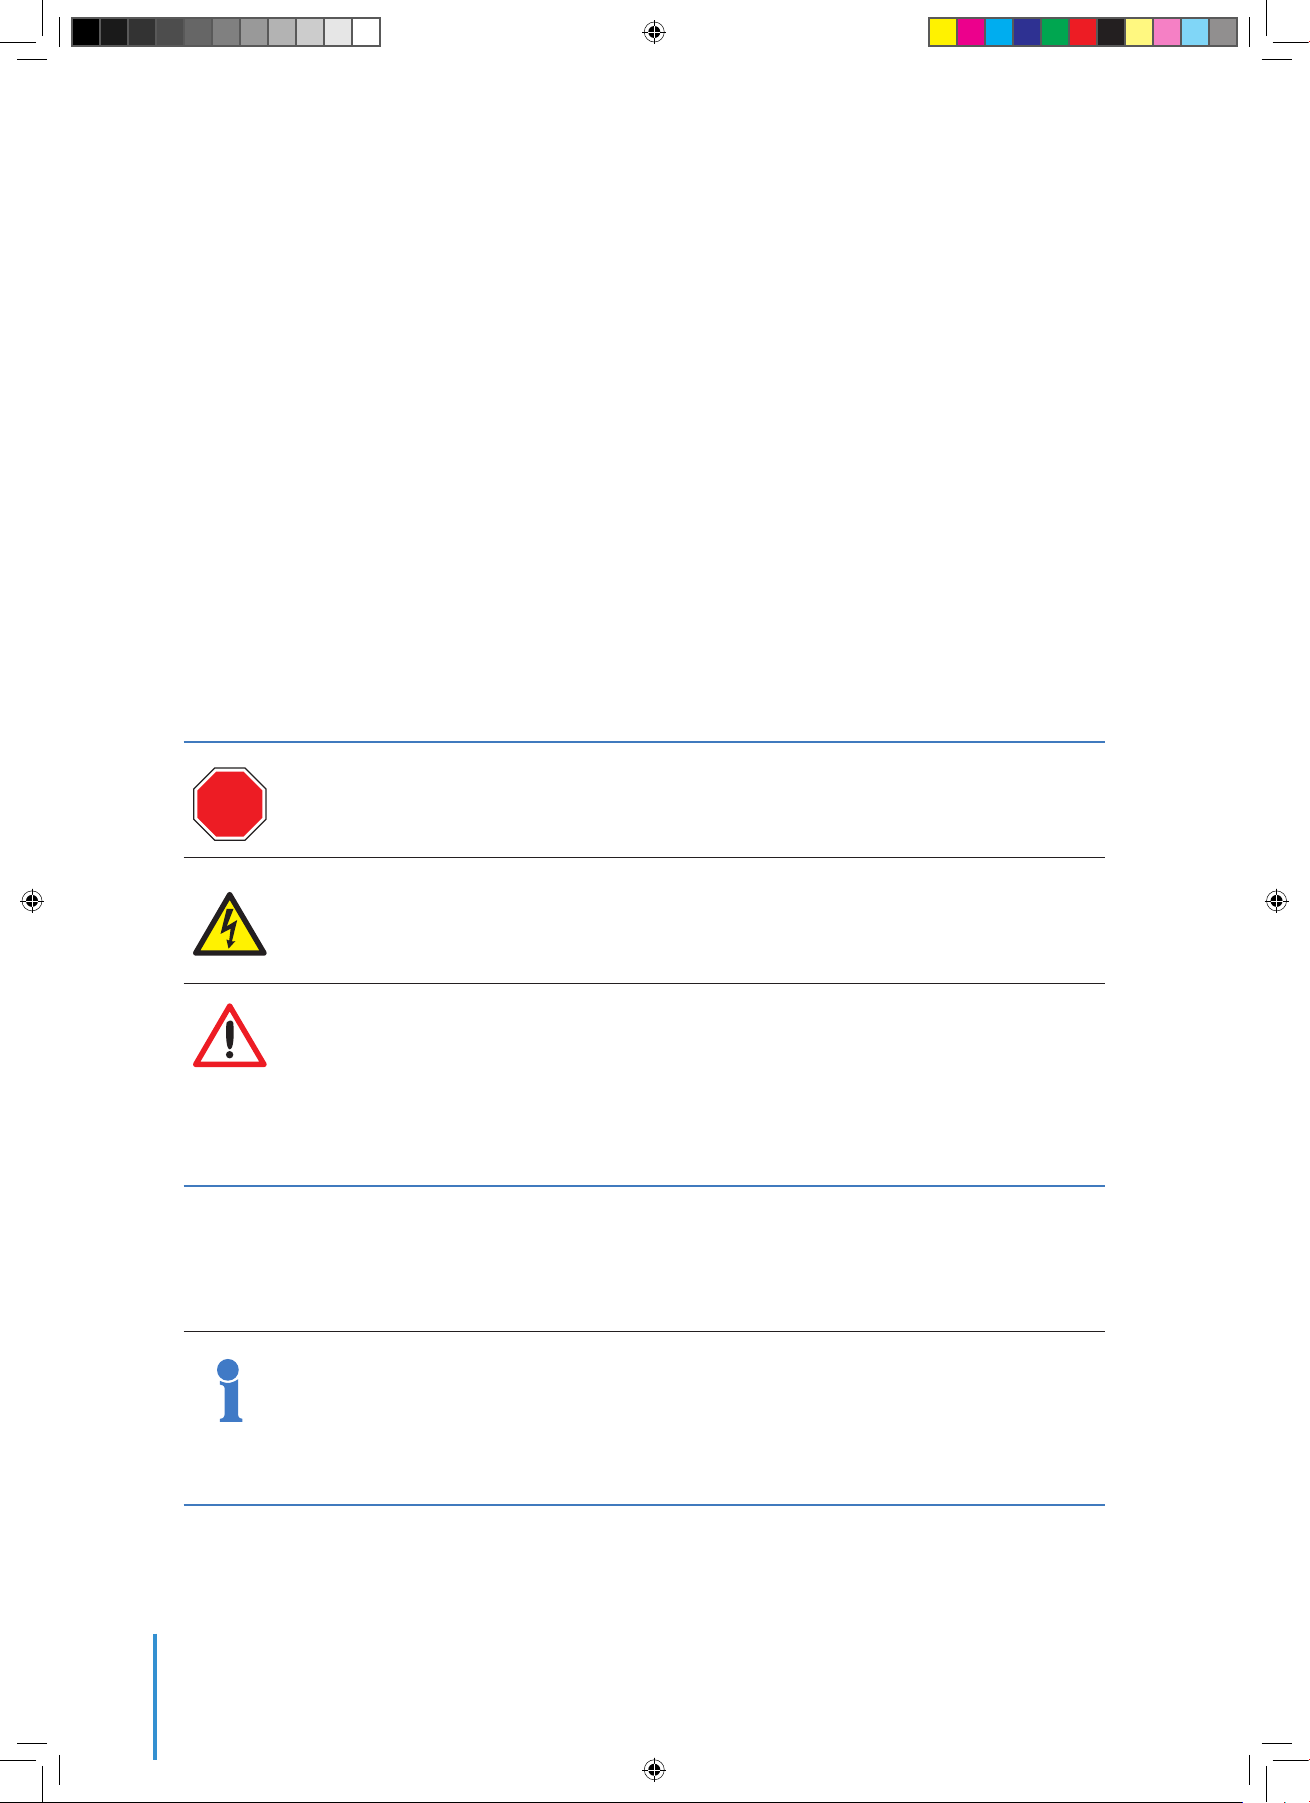
2.2 Symbols
Symbol Signal word Meaning Possible injury if not observed
Safety instructions
STOP
DANGER!
DANGER!
CAUTION!
Additional instructions
ATTENTION! Potentially dangerous
IMMEDIATE or
possibly imminent
danger:
IMMEDIATE or
possibly imminent
danger of hazardous
voltage:
Potentially hazardous
situation:
situation:
Death or severe injury!
Death or severe injury!
Light injury or material damage.
Damage to equipment or workplace
IMPORTANT! Useful tips for optimum
Order
6
None
working procedure
Reference to written
specification/documentation
Page 7

User’s Manual
2.3 Cautions
Use and daily inspection
be performed by person who has gone through the
relevant training associated with the Avanti service
lift use and daily inspection and is in possession of a
valid (non expired) certificate for the task.
Installation and maintenance of the service lift shall
only be performed by Certified technicians.
of the service lift shall only
Only original fault-free parts may be used.
Use of non-original parts will render the manufacturer’s warranty void and any type approval invalid.
No modification, extension or reconstruction of the
service lift is allowed without the manufacturer’s prior
written consent.
Personnel must be at least 18 years of age.
The staff must be familiar with the relevant accident
prevention instructions and must have received
proper training in these.
Personnel are obliged to read and understand this
User’s Manual.
Personnel shall wear PPE (safety helmet, full body
harness, shock absorber, lanyard and slider) at all
times.
A copy of the User’s Manual must be handed out
to the personnel and must always be available for
reference.
If more than one person is entrusted with one of
the above tasks, the employer shall appoint a
supervisor in charge of the operation.
Self-locking nuts must be used at all times. The
screw must extend from the nut by at least half
of the thread diameter. The nut may not be used
once it has become possible to loosen by hand!
If any damage or faults are found during operation,
or if circumstances arise which may jeopardize
safety: immediately interrupt the work in progress
and notify the supervisor or employer!
All tests/repairs of electrical installations may only
be performed by a certified technician.
All repairs to the traction, braking and supporting
systems may only be performed by a certified technician.
If any supporting parts are repaired or replaced,
the operational safety of the system must be tested
and verified by a certified technician.
No warranty is provided against damage resulting
from reconstruction or modification of equipment or
use of non-original parts which are not approved by
the manufacturer.
Service lift must be inspected by Certified technicians before first use.
Service lift must be inspected at least once a year
by Certified technicians. In case of high operating
frequency or severe conditions of use, more frequent
inspection is required.
Service lift is designed for a lifetime of 20 years with
an operating frequency of approximately 12.5 h/year
(250 h in total).
Service lift may not be used by persons who are
under the influence of alcohol or drugs which may
jeopardize working safety.
The service lift shall not be used in case of fire in the
tower.
Service lift shall ONLY be used when the turbine is
not generating power.
All wind farm site specific rules must be followed.
Service lift shall not be used during inclement
weather, including wind speeds over 18 m/s.
Avoid injury – follow all instructions!
Owner must verify the need for third party service lift inspections with the local
authority and comply with the standards
specified.
2.4 Terms and definitions
Terms Definitions
on who has received relevant training from Avanti or a qualified instructor associated with the
Certified technician
User
Manual descent
(also: descent without electrical
power supply)
Pers
intended work and who holds valid certification (current) for the task in question.
Person who has received relevant training associated with us
the corresponding daily inspections and who holds valid certification (current) for the task in
question.
Action performed to descend the cabin at a controlled speed without electrical power, by releasing
the traction system’s electromagnetic brake manually.
ing the Avanti service lift and perform
7
Page 8

AVANTI Service Lift for Wind Turbines
3. Description
3.1 Purpose
The service lift purpose is to transport persons
plus their tools and equipment to the most
convenient height for performing work in wind
turbine generators (WTG).
Its use is limited to certified technicians. The
access to the WTG and consequently to the
service lift is controlled and forbidden to public
access.
The service lift is used primarily to transport
technicians, their tools and spare parts from the
bottom platform (or lowest accessible point) to
the top platform (or highest accessible point).
It is also used to access intermediate platforms
where inspection and service of WTG connecting bolts and other equipment is made.
3.2 Scope
• The Octopus service lift system consists of
the following subsystems:
• Cabin.
• Traction and fall arrest systems.
• Guiding system.
• Control, safety and power systems
(including an interlock system on platform
fence doors).
• A rescue pendant control
1)
3.3 Exclusions
T
he service lift shall not be used outdoor or in
potentially explosive atmospheres.
The service lift is not designed to carry a person
on its top.
The wind turbine manufacturer is responsible of
integrating the service lift and ensuring
compliance with the essential health and safety
requirements as stated on the 2006/42/EC
Machinery Directive and the applicable
harmonized standards following the
manufacturer recommendations.
This will require supply of interface components,
including but not limited to:
• Ladder system.
• Brackets for ladder sections.
• Platform fences with doors.
• Power supply protection.
The wind turbine manufacturer shall also
provide any additional relevant warning,
instruction and / or training specific to the
integration of the service lift necessary for its
safe and correct installation.
Tower manufacturer’s risk
assessment shall include a service
lift integration study.
1)
In case of send or send/call configuration,
the rescue pendant control will not be
available.
Each of the subsystems listed above and their
components are described in detail throughout
the document.
The system fully complies with essential health
and safety requirements of European Machinery
directive.
There are two different configurations for
working temperature ranges; in particular, there
is a standard configuration and a low
temperature configuration where traction
system and main control box components are
chosen specifically.
3.4 Technical specifications
Service lift
Main door type
Main door interlock system
Service lift speed
Rated load
Max. nº persons
Max. travelling height (L95)
Operating temp (normal version)
Survival temperature (normal version)
Operating temp (Low temp version)
Max. noise level
Full sliding door
18 m / min ± 20 %
Guard locking
240kg
2 persons
160 m
-15ºC to +60ºC
-25ºC to +80ºC
-30ºC to +40ºC
80 dB (A)
8
Page 9

User’s Manual
3.5 Dimensions
1040
2680
2750
970
960
9
Page 10

AVANTI Service Lift for Wind Turbines
3.6 Components
3.6.1 Overview
1 Traction system
2 Fall arrest device
3 Cabin light
4 Anchor points
5 Maintenance cover
6 Cabin control box
7 Bottom obstruction device
8 Guide ladder
9 Guiding rollers
10
10 Main control box
11 Hour counter
12 Ladder access door
13 Full sliding door
14 External controls
15 Top obstruction device
16 Safety wire rope
17 Traction wire rope
18 Travelling cable pulley
Page 11

User’s Manual
Traction system Fall arrest device
3.6.2 Traction system
Service Lift Hoist
Version Traction system type Kg m/min kW A mm Kg
Octopus L95
Octopus L95
Octopus L95
Octopus L95
Octopus L95
M508 / 400V 50Hz
M508 / 690V 50Hz
M508 / 400V 60Hz
M508 / 480V 60Hz
M508 / 690V 60Hz
Lifting
capacity
500 18 1.5 4.1 8.4 50
500
500 21 1.8 4.9 8.4 50
500
500 21
Wire rope
speed
18 1.5
21
Power
Rated
current
2.3 8.4 50
1.8 4.1 8.4 50
1.8 2.8
Tra c t ion
wire rope Ø
8.4
3.6.3 Fall arrest device
Service Lift Fall arrest device Lifting capacity
Version Type Kg (lbs )
OctopusL95
OctopusL95
ASL 508
ASL 508
500 (1100)
500 (1100)
Triggering
speed
m/min (ft/min)
30 (100)
40 (130)
Safety
wire rope Ø
mm Kg (lbs)
8.4 7 (15.4 )
8.4 7 (15.4 )
3.6.4 Traction and safety wire ropes
Service Lift Version
Octopus L95
Wire rope type
M508 / ASL 508
Wire rope
diameter
8.4 mm, 5x19 HDG no 55 kN 2 t shackle
Surface
Treatment
Mark/
feature
Min. break
resistance
Unit weight
approx.
55
Unit weight
approx.
Attached with
11
Page 12

AVANTI Service Lift for Wind Turbines
3.6.5 Main control box
3.6.6 Control boxes
3.6.6.1 Cabin control box
Hour counter
External UP
button (for
send function)
External
emergency
stop button
External
DOWN button
(for send function)
Override
key of bottom
obstruction switch
Warning buzzer
Overload buzzer
3.6.6.2 Platform control boxes
Internal
emergency
stop button
Platform
level lamp
OK
lamp
Fall arrest device
triggered lamp
1)
Trapped key switch
(optional
for Octopus L95)
Internal UP
button (for
manual function)
Internal DOWN
button (for manual
function)
DOWN
button
Platform
level
lamp
12
UP button
Emergency
stop button
Ready
lamp
Main
switch
1 )
Optional for Octopus L95.
Page 13

User’s Manual
2
3
4
5
3.6.7 Platfo
They must conform to EN 14122, be 1,1 m high and
be equipped with doors. These must be monitored
with a trapped key system that permits fence door to
be opened only when service lift is present.
Trapped key is attached to cabin by means of a wire
rope, preventing loss of key.
Optionally, the platform fences can be equipped
with an electrical switch monitoring system, that
disables control of the elevator in case one platform
fence is open, which is composed by a manual
actuated mechanical lock connected to switch
cutting power to lift when it is opened, or with a
guardlocking system keeping the door locked while
the service lift is not at the platform. The door is
unlocked when the service lift is at the platform with
the lift detection switch activated. The ready light is
ON when the door is closed.
During emergency use, for example, power cut, need
of evacuation or rescue, the door guard locking
switch can be unlocked by acting the mechanical
Door Manual Release system from outside the fence,
or from inside the fence.
3.6.8 Main service lift door
Main access to the cabin is done through the full
sliding door installed on the front.
The full sliding door opening dimensions are 1950 x
500 mm. It features a guard locking system that:
rm fences
It is possible to manually release guard locking
system in order to open main door between
platforms for maintenance tasks or installation of
WTG parts.
External manual release
of guard locking of L95
3.6.9 Ladder access door
Ladder access door consists of two hinged sheets
that fold up when opened, thus optimizing space. In
case of evacuation, the ladder access door permits
direct access to ladder and ladder rail.
A safety switch interrupts control when door is open.
Internal manual release
of guard locking of L95
• Prevents service lift to travel if the door is open.
This opening condition is monitored by the guard
locking switch.
• Permits door to be opened only when service lift
is levelled with a platform. This levelling condition is
monitored by the platform level switch which is
triggered by the safe zone plates.
For the Octopus L95, as an option, the levelling
condition can be monitored by a magnetic sensor.
Safe zone plate
(on all platforms)
Platform level
switch
13
Page 14

AVANTI Service Lift for Wind Turbines
3.6.10 Maintenance cover
Maintenance cover allows safe and fast inspection of
traction and safety wire ropes from inside the cabin
while travelling.
3.6.11 Bottom hatches
Bottom hatches can be opened from both sides,
thus allowing egress and ingress from underneath.
Bottom cabin hatch opens inwards, and bottom
obstruction device hatch opens outwards.
Each of them has a safety switch that interrupts
control when hatch is opened.
Once top hatches and ladder access door are open,
clear area is at least 500 x 500 mm, and ladder
becomes totally accessible.
3.6.12 Top hatch
Top hatch can be opened from both sides, thus
allowing egress and ingress from above.
It has a safety switch that interrupts control when
hatch is opened.
Top obstruction device hatch opens outwards.
Once top hatches and ladder access door are open,
clear area is at least 500 x 500 mm, and ladder
becomes totally accessible.
Direct evacuation to ladder is possible at
any position along the WTG.
3.6.13 Bottom obstruction device
Bottom obstruction device interrupts descent if:
• It encounters an obstacle.
• It reaches the bottom platform.
Ascent will still be possible, for instance to remove
the obstacle. In order to put the service lift on the
ground, the contact plate functionality can be
bypassed with the override bottom obstruction
device switch located on the cabin control box. To
do so, turn the override bottom obstruction switch
key while pressing the down button.
Release the DOWN button as soon as the
rubber bumpers hit the floor. Otherwise
the service lift or the installation may get
damaged.
14
Page 15

User’s Manual
A mechanical bottom obstruction device switch
!
3
4
5
6
7
permits the bottom obstruction device to be still
operational during manual descent. Manual descent
will be stopped if an obstacle is encountered.
Guiding shaft &
supporting wire
Bottom obstruction
switches
Bottom
obstruction
device (plate)
Guiding shaft &
supporting wire
Mechanical bottom
obstruction breaker
3.6.14 Top obstruction device
Top obstruction device interrupts ascent if it
encounters an obstacle. Descent will still be possible,
for instance to remove the obstacle.
When the top obstruction device switches
are engaged, press the down button until it
disengages.
3.6.15 Top limit switch
Top limit switch interrupts ascent if it is triggered by
the top plate.
Emergency top limit switch is triggered in case the
top limit switch fails to engage. It cuts off power
supply, so only manual descent will be possible.
Top limit plate is mounted on the ladder.
Top limit plate
(only on top platform)
Emergency top limit
switch
Top limit switch
In Octopus L95 these switches can be located
on the top of the cabin, beside safety and
traction wire ropes. The top limit plate will be
attached to traction and safety wire ropes.
Guiding
shafts with
spring (x4)
Do not use the service lift until the top
obstruction device switch fault has been
rectified.
Top
obstruction
switches
Top
obstruction
device (plate)
3.6.16 Manual descent system
The service lift features a manual descent system
that can be used in case of emergency.
To activate it, push the manual descent actuator
fully upwards. The electromagnetic motor brake is
released.
The service lift descends with a controlled speed
limited by means of a centrifugal brake installed
between the motor shaft and the gear box.
3.6.17 Overload limiter
An overload limiter is built into the traction hoist. In
case of an overload, it will prevent the upward travel
and a buzzer will sound, until overload condition is
eliminated.
Attempting to run in an overloaded liiff is
STOP
prohibited!
Performing a manual descent in case of an
overloaded lift is prohibited!
15
Page 16

AVANTI Service Lift for Wind Turbines
3.6.18 Internal light
!
The service lift is equipped with a light inside the cabin.
When service lift is connected to power supply, this light
illuminates at all times.
The internal light is battery packed in order to illuminate
the inside of the cabin in case of a power failure. When
fully charged, it will last at least for 30 minutes.
3.6.19 Warning lights and buzzer
A set of warning lights is mounted on the top and on the
bottom of the service lift. The flashes warn that the
service lift is moving.
A warning buzzer warn that the service lift is moving.
The pressure sound of the buzzer is adjustable. To
reduce it, user must turn counter clockwise the buzzer.
To increase it, user must turn clockwise the buzzer.
3.6.21 Rescue pendant control
Rescue pendant control is only mandatory if rescue
route of service lift can be somehow blocked. A blocked
rescue route is an event where:
• A person is unconscious inside the service lift,
blocking the bottom hatch,
• the rescuer is below service lift, and
• the service lift is stopped halfway through a platform
hole, blocking rescue route since platform has no
extra hatch.
There shall be one rescue pendant control per
WTG; and it shall be stored in the WTG
bottom platform. A clearly visible sign shall
indicate its exact location.
1)
Warning buzzer
3.6.20 Anchor points
The service lift features two anchor points inside the
cabin.
Each anchor point may only be used by one
STOP
user simultaneously.
During operation users must hook themselves up to the
anchor points inside the cabin, in order to prevent falling
risks. In case of need of evacuation, the evacuation
procedure will be followed.
Note 1): In case of send or send/call configuration, the rescue pendant control will not be
available.
It features three buttons: UP, DOWN and emergency
stop button. When necessary, pendant control is
plugged to cabin bottom socket. It has a 4 m long cable
that permits service lift to be powered up/down that
same distance. When plugged, pendant control does
not override any safety switch. If any of them is triggered, no running will be possible; including the obstruction device switches. Therefore, there is no risk of
moving service lift hitting rescuer. Pendant control
overrides cabin control box, and service control box if
installed.
16
Page 17

User’s Manual
3.6.22 Information signs and documents
The manual and quick guide are accessible from inside
the cabin. The following documents, signs and labels
are supplied with the service lift and shall always be
available.
A rescue pendant control
1)
emergency sign shall be
present at the bottom platform, clearly indicating
storage location of rescue pendant control.
Location Document
Serial number plate
Manual documents inside blue bag
Cabin
Pull to open sticker (ladder door) (only in L95)
Main control box
Bottom platform
Quick guide document
Use of PPE label sign
Working load limit / Nº persons label
Manual descent label
Fall arrest deactivation label
Fall arrest activation label
Main door guardlocking labels
No standing on top prohibition label
Fasten kit sticker (only in L95)
For one person only sticker (anchor point)
Remove eye nuts stickers (only in L95)
Evacuation guide (only in L95)
Wiring diagram
Electrical hazard warning label
Rescue pendant control emergency sign
1)
Note 1): In case of send or send/call configuration,
the rescue pendant control will not be available.
3.6.23 Travelling cable pulley
Travelling cable is connected from power supply socket
over mid tower´s height platform to service lift socket
and it is provided with a cable relief on each end. A
travelling cable pulley is suspended on the cable and is
guided along the traction and safety wire ropes.
Travelling cable
Travelling cable pulley
Traction wire
rope
Safety wire rope
The travelling cable pulley straightens the cable at all
times.
3.6.24 Fasten kit
The service lift features an special tool, called Fasten kit,
for mechanically blocking the lift in order to perform
installation/maintenance tasks below the suspended
cabin. T his kit i s located o n th e cabin’s top.
It consists in a M14 screwed rod, that must be inserted
through a hole of the top rollers assembly and along a
rung of the guiding ladder, and finally blocked with a
M14 nut.
M14 nut
M14 screwed rod
Fasten kit
17
Page 18

AVANTI Service Lift for Wind Turbines
4. Instructions for use
!
4.1 Daily inspection
Daily inspection of the ser vice lift shall only be performed by a certified technician. If there is more than
one user, the employer shall appoint a supervisor in
charge of the daily inspection.
4.1.1 Ove r all
Visual Inspection:
a) Check that the cabin has no damages.
b) Check that the top and bottom obstruction devices
are free of damages.
c) Check that the traction and safety wire rope ropes
are correctly fed and guided.
d) Record the hour meter reading on the service lift log
(Appendix A).
4.1.2 Travel zone
a) Ensure that there are no obstacles within the service
lift’s operating area which may obstruct the travel of the
cabin or cause the cabin to hit the ground.
4.1.3 Control and safety devices
4.1.3.1 Cabin control from inside the cabin
a) Close the doors. Press the EMERGENCY STOP
button.
The lift should remain still when the UP/DOWN button
is pressed. To restart, pull the EMERGENCY STOP
button.
b) Test the EMERGENCY top limit switch:
During upward travel, press the switch manually, and
the service lift shall stop immediately. Neither upward
nor downward travel should now be possible.
c) Bottom obstruction device. Lower the lift;
It shall stop before the rubber feet of the cabin reach
the tower ground level.
d) Door switch:
Open the door – it shall not be possible to move the lift
upwards or downwards.
Place the cabin at a height no corresponding to
platform – it shall not be possible to open the door. The
door is only able to open by turning the emergency
release lever up.
e) Key switch ON/OFF (if installed):
Turn the key to OFF - it shall not be possible to move
the lift upwards or downwards.
If any faults occur during work,
STOP
- stop working,
- if required secure the workplace and
- rectify the fault!
Make sure that nobody is exposed to danger below
the service lift, for instance from falling parts.
g) Fall arrest device. Activate the fall arrest device by
pulling down the red locking handle. Press and hold the
DOWN button of the cabin control box. The service lift
should not descend. Try to perform manual descent.
The service lift should not descend. Press and hold
the UP button of the cabin control box. The service lift
should ascend. Unlock the fall arrest device by pulling
down the black unlocking handle.
There is a supplementary method to check the FAD
functionality, called ‘Stomp Test’. The procedure is
explained in the ‘Stomp-test Instruction’ Appendix.
4.1.3.2 Cabin control from outside of the cabin –
Automatic send
The automatic mode function is only available from the
control buttons outside of the cabin and shall be
checked as follows:
a) Press the UP button and hold until the warning
lights start flashing. The lift should travel upwards.
b) Press the EMERGENCY STOP button on the
control box. The lift stops.
c) Pull the EMERGENCY STOP button and press the
DOWN button and hold until the warning lights start
flashing. The service lift should travel downwards until
the bottom obstruction device engages.
4.1.3.3 Cabin control from platform control
boxes – Call or Send and call configuration
The external mode function is only available from the
platform control boxes.
a) Press and hold the UP button on the control box
– the service lift ascends with a delayed response.
b) Press the emergency stop button on the control
box - the service lift stops.
c) Pull the emergency stop button and press and hold
the DOWN button - the service lift descends.
f) Top obstruction device:
activate device by pressing it down. The service lift
shall not move up until device is released.
18
Page 19

User’s Manual
4.2 Prohibited uses
!
The consequences of not following below
STOP
When using the service lift it is prohibited to:
• Use the service lift beyond its intended purpose.
• Operate the service lift without following the safety
warnings and operating instructions.
• Overload the service lift
• Try to repair machine components. Only certified
technicians are allowed to perform service on the
machine.
• To use the ladder while service lift is being used.
• To use the ladder, unless service lift
is out of service, or in case of
evacuation or rescue.
• To manipulate switches and safeties.
• To place objects on service lift roof.
• To travel on service lift roof.
• To use the emergency manual release of the
guard locking of door lift or fence doors during
normal use.
• To disattach trapped key from wire rope.
• To have a second trapped key.
STOP prohibitions are extremely hazardous to
the physical integrity of the users.
4.6 Operation from outside the cabin
(automatic send configuration)
Transportation of people is forbidden if the operation
is controlled from outside the cabin
Operation by means of the user control box:
a) The key switch ON/OFF should be ON (if
available).
b) Close the door.
c) Press the UP or DOWN button respectively and
the cabin starts ascending/descending.
Transportation of people is forbidden if the
STOP
operation is controlled from outside the cabin
4.7 Operation from platforms (call or
send and call configuration)
Transportation of people is forbidden if the operation
is controlled from the platforms.
4.3 Entry and exit
To ensure safe entry and exit:
a) Lower the service lift onto the access platform
until the bottom obstruction device is activated and
the cabin stops, or: bring the lift to a height corresponding to the correct level for exiting from the
wind turbine’s platform.
b) Open the door and exit/enter the lift through the
door.
4.4 Stop/Emergency stop
a) Release the Up or Down button; the service lift
should stop.
If it does not:
b) Push the EMERGENCY STOP button, and all
controls should be disabled.
4.5 Operation from inside the cabin
a) Close the door.
b) The key switch ON/OFF should be ON (if available).
c) To go up or down, push and hold the Up or Down
button.
d) To place the service lift on the floor after the
bottom obstruction device has stopped the lift.
- Turn the override bottom obstruction device
switch clockwise and hold.
- Press the DOWN button until the service lift rests
on the floor, then release.
Operation by means of the platform control box:
a) Turn the trapped key switch to ON (if available).
b) Close the door of the cabin and of the
platform fence.
c) Press and hold the UP or DOWN button to
ascend or descend the cabin.
d) Then platform light (green) illuminates, cabin is
aligned with a platform and can be opened.
STOP
STOP
STOP
STOP
Transportation of people is forbidden if the
operation is controlled from the platforms.
Sections 4.6 and 4.7: when actuating the
external UP or DOWN buttons, response of
cabin is delayed while the warning lights are
flashing and the warning buzzer sounds, in
order to warn personnel in the surroundings
that cabin is going to move.
Before closing the lift door, ensure that your
equipment (i.e.lanyards) do not get trapped/
tangled with the closing door and/or with
surrounding elements.
To prevent the lanyards from tangling with
surrounding elements, keep them properly
attached to your body harness.
To prevent the lanyards from tangling with the
moving ser vice lift, do not get close to the
hoistway.
19
Page 20

AVANTI Service Lift for Wind Turbines
4.8 Overload limiter
!
!
a) In case of an overload, the lift’s upward travel
should be blocked (L95 versions), and a buzzer should
sound in the connection cabinet.
Attempting to run in an overloaded lift is prohibited!
STOP
Performing a manual descent in case of an
overloaded lift is prohibited!
b) Remove enough of the load to make the buzzer
stop and enable upward travel (L95 version).
On entering and starting the lift, the buzzer may
sound briefly. This is due to temporary load peaks
occurring as the lift takes off.
The overload limiter is designed not to activate the
buzzer or stop the lift because of peak loads caused by
the cabin swinging.
If the problem persists have an a certified
technician adjust the overload limiter (Refer to
“Regulation of overload limiter” Appendix in
Installation and Maintenance Manual).
4.10 Fall arrest device
To lock the fall arrest device in an emergency:
• Pull down the red handle.
If the fall arrest device engages, simply disengage it
from inside the cabin until the fall arrest device is
unlocked by:
• Pulling the black handle downwards.
• However, this is not possible if the safety wire rope
is under tension. If this is the case:
1. Remove the load on the safety wire rope by pushing
the UP button taking the lift upwards a few centimetres.
2. Manually open the fall arrest device until the fall
arrest device is unlocked by:
• Pulling the black handle downwards.
In case of no power and the fall arrest device is locked
with the safety wire rope under tension evacuate the lift
according to the “Evacuation guide”.
4.9 Manual descent
If a power failure or an operation fault etc. interrupts the
hoist, a manual descent is possible from inside the
cabin.
Brake release lever in L95
1. The lever is attached underneath the cabin top. Turn
it down.
2. Push the lever upwards the full way. The service lift
moves downwards. The built-in mechanical overspeed
limiter limits the pace of descent.
3. To stop, simply loosen the lever.
4. After manual descent, the system must be checked
by an expert
Pull to UNLOCK (Black) Pull to LOCK (Red)
During manual descent if the bottom obstruction
device hits an obstacle, the brake release lever is
mechanically disengaged so the further descent is
disabled. The system is automatically reset once the
obstacle is removed.
20
Page 21

User’s Manual
4.11 Troubleshooting
1. All tests and repairs to the electronic components should be performed by certified
technicians only! The wiring diagram is
placed in the power cabinet.
Breakdown Cause Solution
The service lift
will neither go up
nor down!
DANGER !
Unplug the power supply
before opening the power
cabinet.
A1 The fixed EMERGENCY STOP
A2 Wire rope loop on traction hoist.
A3 The fall arrest device is
a) Lift wire rope breakage
b) Hoist failure
A4 The service lift is stuck on an
A5 Power failure
a) Control not switched on or
deactivated.
b) Grid voltage interrupted.
c) Supply between grid connection
and control interrupted.
DANGER !
STOP
Attempting to use the lift will jeopardize work safety.
button has been activated.
Damaged or defective wire rope or
wire rope outlet causes problems.
holding the service lift on the
safety wire.
obstacle.
2. Repairs to the traction hoist, the fall arrest
device and to the system’s supporting components should be performed by certified
technicians only!
Deactivate the button in question by
pulling it until it pops out.
Stop work immediately!
Ask the supplier or manufacturer for help.
a) + b) Evacuate the service lift
according to the “Evacuation
guide”.
Carefully remove the obstacle.
Test the operational safety of affected
tower sections. Inform the supervisor.
a) Turn EMERGENCY STOP button to
the right until it is released.
b) Find the cause and wait for the power
to return.
c) Test and if necessary repair the supply
cable, fuses, and/or wiring from the
control box.
A6 Safety switch is triggered
a) EMERGENCY top limit switch was
pressed.
b) Door switch is not properly
closed or is defective.
c) Ladder access door switch is
activated.
d) A top or bottom hatch switch is
triggered.
A7 Protection switch on
overheating
a) A phase is missing
b) Motor is not cooling
c) Voltage too high/low
A8 Brake does not open
(no click on on/off )
a) Supply, braking coil or
rectifier defective.
b) Braking rotor closes.
a) Perform manual descent until the
emergency top limit switch is released.
b) Close the door and test the door
switch.
c) Close the door.
d) Close the hatch.
a) Test/repair fuses, supply and
connection.
b) Clean the hood.
c) Measure voltage and power
consumption on the loaded motor.
If voltage deviates from
specifications, use cable with
increased dimensions.
a) Have a certified technician, repair/
replace the supply, braking coil and
rectifier.
b) Return traction hoist for repair.
21
Page 22

AVANTI Service Lift for Wind Turbines
!
Breakdown Cause Solution
The service lift will
neither go up
nor down!
Service lift goes
down but not up
DANGER !
A9 The key switch (if
installed) ON/OFF has not
been activated.
A10 The main switch is in the
OFF position.
A11 Rescue pendant control is
plugged.
STOP
B1 The service lift is stuck on
B2 Overload - Buzzer sounds in
the connection cabinet.
B3 Top obstruction switch:
a) Top obstruction switch is
defective or not connected properly.
b) Top obstruction switch is
activated.
Irresponsible behaviour
jeopardizes system safety!
an obstacle.
Turn the key to ON.
Turn the main switch ON.
- Use rescue pendant control in case of rescue
event.
- Otherwise, unplug pendant control.
Carefully move the service lift downwards
and remove the obstacle.
Test the operational safety of affected
platform components.
Inform the supervisor.
Test and possibly reduce load until buzzer stops.
a) Test the top obstruction switch connection/function. Replace if necessary.
b) Move lift down until the top obstruction
switch is released.
Unplug the power supply
before opening the power
cabinet.
Motor hums
loudly or wire
ropes squeak,
but the lift can
go both up and
down.
B4 A phase is missing
B5 Fault in UP control circuit
in control box or traction system
C1 Wire ropes dirty
WARNING !
Further use of lift may
result in damage to the
wire rope traction.
Test fuses and power supply.
Test and possibly repair connections,
wiring and relays.
If possible, immediately replace
the traction system and return it for
test/repair at AVANTI.
22
Page 23

User’s Manual
Breakdown Cause Solution
Service lift will
go up but not
down!
DANGER !
Unplug the power supply
before opening the power
cabinet.
Irresponsible behaviour
STOP
jeopardizes system safety!
D1 The service lift has
encountered or is stuck on an
obstacle.
D2 The fall arrest device is
holding the service lift on the wire
rope.
a) Excessive hoist speed
b) Too low release speed on
fall arrrest device.
A defective fall arrest device
STOP
D3 Fault in down controller circuit
on traction system
D4 Bottom obstruction switch:
a) Bottom obstruction switch is
defective or not connected properly.
b) Bottom obstruction switch is
activated.
will threaten the safety of the
service lift!
Replace immediately!
Carefully take the service lift up and
remove the obstacle.
Test the operational safety of affected
platform components.
Inform the supervisor.
a) + b) Take the service lift upwards to
relieve the safety wire rope.
unlock the fall arrest device by
turning the unlocking lever, and
test its function.
Functional test when the
lift is back on the ground:
Replace the hoist and fall
arrest device and return
them for testing.
Insert brake lever into the traction
system and lower lift manually.
Test, and if necessary have connections, wiring, and relays repaired.
a) Test the bottom obstruction
switch connection/function. Replace
if necessary.
b) Move lift up until the bottom
obstruction switch is released.
Button lamp
not lit although
operation is
normal.
Hoist goes down
when up button is
pressed and up
when down button
is pressed.
Loud noise and / or
smoke coming
from hoist motor
E A lamp is defective
F Two phases changed in the
supply.
G Brake closed or partially closed
WARNING !
Damage of hoist brake leading to brake
function lost.
If these steps do not identify the cause and rectify the fault:
Consult a certified technician or contact the manufacturer.
4.12 Out of service
1. Securing the service lift:
Bring the service lift all the way down, until the
bottom obstruction device stops the cabin.
Have an electrician replace it.
Have an electrician switch the 2 phases
in the plug.
Stop work immediately!
Call supervisor for advice and potential
repair of hoist.
2. Turn off the main switch to prevent
inadvertent operation of the lift:
Turn the main switch to the OFF position.
Power supply is now interrupted. Mark the lift
“OUT OF SERVICE”. Contact the service
technician for repair.
23
Page 24

AVANTI Service Lift for Wind Turbines
ppendix B: Stomp-test Instruction
A
Supplementary way to inspect the ASL during Daily Inspection before Operation
Purpose 2. Test Step
This instruction is a supplementary part of the Daily Lift
Checking to be used by authorized users and Certified
technicians. The information describes a recommended
and supplementary way of how to check the over speed
triggering and arresting function in the Avanti Safety Fall
Arrest Device model ASL. Second, the test also
documents that the Safety Brake maintains its grip on
the Safety Wire after engagement. This extra testing we
name the “Stomp-test”.
This stomp-test-method is supplementary to the given
daily obligation in your manual explaining “to descend
the lift, manually engage the FAD (Fall Arrest Device),
verification by short no-powerdescent, unloading the
FAD again by ascending and observing centrifugal weigh
unit through the window during lift use”. With the
“Stomp-test” we test the ability of the FAD to trigger in
case of over speed and arrest the load.
Tools: None
Measurement Equipment: None
Validity
It is applicable for testing the installed Safety Fall Arrest
Device (ASL) on-site. The test must only be performed by
trained users/Certified technicians and always with
respect of all the relevant safety regulations.
Cautions
Be aware that the instruction only explains the steps of
how to execute the “Stomp test” in the lift installation; it
doesn’t guide any safety precautions and the necessary
use of safety equipment.
With the cabin in “parked” position app. 3 m/10 ft. above
the bottom landing floor, the user starts descending by
electrical power using the push down button. When the
cabin starts descending the user executes a hard stomp
with one foot in the cabin floor – The hard stomp is
executed by lifting one foot, so the lower leg is positioned
with a knee angle of 90 degrees – Then immediately after
the foot is stomped in the cabin floor -
-The user must make sure to have a solid footing during
the foot stomp!
The foot stomp should engage the ASL and arrest the
electrical descent of the cabin, the red light (if existing in
the control box) should turn “on” and the cabin load
should be hanging on the FAD/Safety Wire.
If the ASL doesn’t arrest at the first trial, then
re-establish the cabin in the position described in the
preparation part mentioned above and execute the
“Step” once again stomping a little harder.
3. Test Result
If the ASL activates properly after the stomp, the ASL will
now hold the cabin on the Safety Wire.
In order to ensure important maintaining grip by the
Safety Brake, the user then activates the manual descent
function and result shall be a Safety Fall Arrest Device
ASL holding the cabin fixed on the Safety Wire
(manual descending is not possible).
- If the activated ASL fixes the cabin on the Safety Wire
while manual descent is activated, the Safety Fall Arrest
Device (ASL) is in good and operational condition.
Therefore, Avanti strongly recommends you to read and
understand what the physical work steps in the “Stomptest” are, and then execute your own Risk and Hazard
Assessment according to the valid safety working
procedures in your own organisation before starting the
test.
1. Test Preparation
The cabin (with 1 person inside) is ascended with a
service lift user inside, and the cabin bottom is
positioned (“parked”) in a height of app. 3 m/10 ft. above
the bottom landing floor platform.
34
In order to release the activated ASL push the ascent
button up a little before releasing the ASL by the
unlocking handle.
- If the ASL can´t activate after first or second
“Stomp-test”, or can´t fix the cabin in activated position
- User must immediately bring the cabin down and
park it at the bottom landing platform floor.
- Lock Out the installation from use and contact Avanti
for further approach!
- Document the execution of the above described
procedure in the Daily Inspection Log Appendix.
Any doubts regarding above instruction, please do not
hesitate to contact Avanti’s local representative for help.
- www.avanti-online.com
Page 25

User’s Manual
35
Page 26

avanti-online.com/contact
Revision 1: 30/07/2019
E: info@avanti-online.com
AT00012569 – Octopus L95 User´s manual, EN
I: www.avanti-online.com
3rd CE Edition: 07/2019
 Loading...