


Avanity WINDSORVS60WAB, WINDSORVS48WTB, BRENTWOODVS61NWC, BRENTWOODVS49NWB Installation Manual
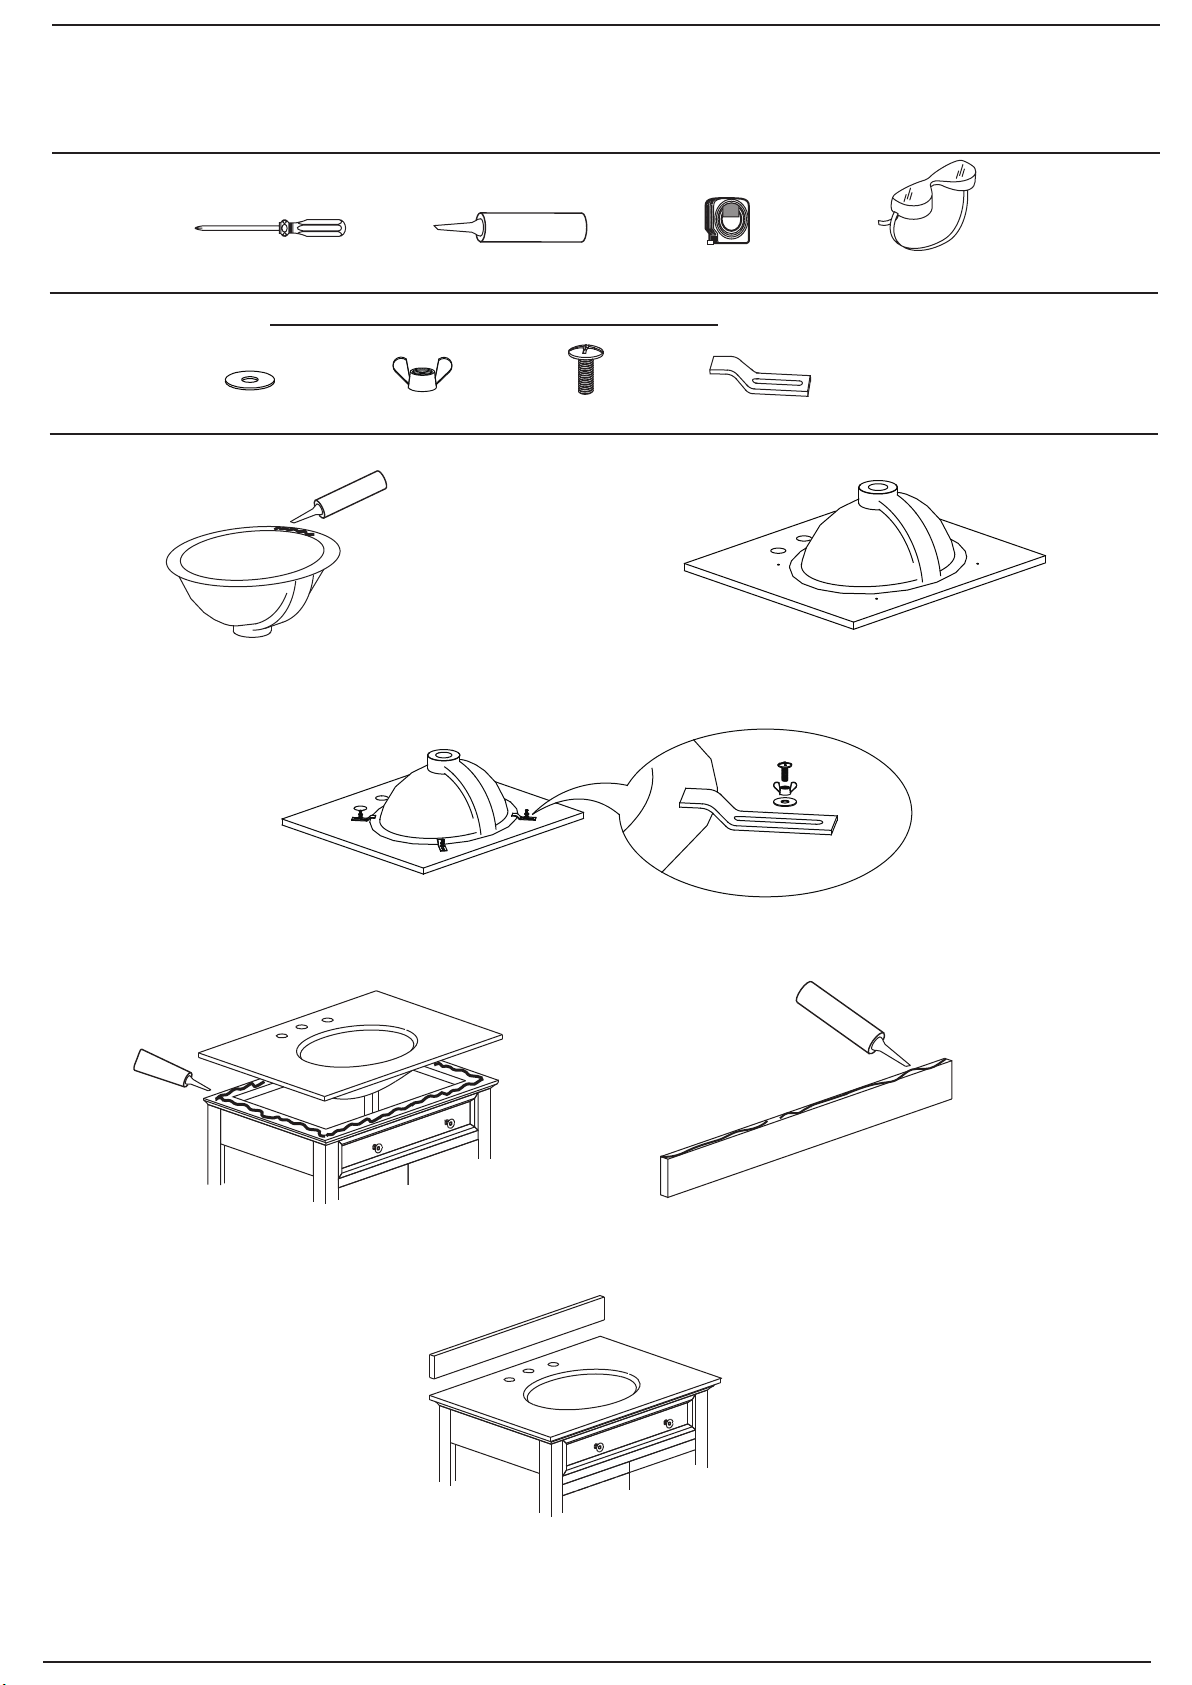
SUGGESTED TOOLS AND MATERIALS
Philips Screwdriver Sealant Tape Measure Safety Glasses
PARTS / HARDWARE (INCLUDED ONLY WITH AVANITY STONE TOPS)
INSTALLATION INSTRUCTION
STONE VANITY TOP
All Sizes
10'
500001
SINK INSTALLATION
1
Apply a continuous bead of quality sealant
to the top surface (rim) of the sink.
4x
120003
4x
120004
111212
4x
4x
2
Turn the stone top upside down and place it on a clean,
scratch resistant surface. Center the sink over the cutout.
3
Secure the sink to the top using the mounting kit / hardware provided with the stone top, HAND TIGHTEN ONLY.
4
6
5
Apply bead of quality sealant evenly
along the top of the vanity.
Finally, place the bottom side of back splash with sealant onto the countertop and check
alignment of backsplash. Adjust the leg levelers as needed
Apply silicone sealant evenly along
the bottom of backsplash and wall.
**NOTE: Sink style, shape, cutout on top, vanity may vary from the picture above. Instructional purposes only. **