

Page 1
DVB-S2 Messgerät
smartmeter ES1
User Manual
Version: 11.06.2019 – Englisch
Page 2

Technical Details
2 smartmeter S30
Page 3

Technical Details
Preface
Dear Customer,
Thank you for purchasing the digital DVB-S/C/T meter smartmeter ES1.
This user manual contains all the information required
to connect,
to operate,
to clean, and
to dispose of the device.
Please read the user manual carefully before you start using the meter.
Avanit GmbH
Am Sternbach 1
91477 Markt Bibart
Germany
Service Hotline: +49 (0) 7724 94 78 555
Telefax: +49 (0) 7724 94 78 333
E-Mail: [email protected]
Internet: www.smart-electronic.de
© Avanit GmbH 2019
All rights, technical changes, errors as well as printing mistakes reserved. Any reproducing or copying of
the contents requires prior written permission from smart.
smartmeter S30 3
Page 4

Technical Details
Table of Contents
1. Safety precautions
2. Main features
3. Front panel and functions
4. Operations and Management
5. Main menu operation description
5.1 Find
5.2 Spectrum
5.3 List
5.4 Edit satellite
5.5 Edit transponder .
5.6 Setup System
6. Update application system
7. Charge indicator
8. Technique specifications
9. Attachments
Brief introduction:
This type of digital satellite finder is a simple and convenient instrument to install
and adjust satellite dish. As digital satellite finder, it is necessary to input corresponding satellite parameters, such as LO frequency of LNB, Down Frequency, symbol
rate, etc.
It can be used as an indicator to adjust satellite dish, feedhorn position and polarizing angle so that help the best dish installation.
4 smartmeter S30
Page 5

Technical Details
1. Safety precautions
• Please read this user’s guide carefully, especially for the first time users.
• Do not touch the LCD display by hand.
• Do not place heavy items on the device.
• Keep this unit away from the heat, direct sunlight, strong mechanical vib-
ration, or dusty places. ·Clean the surface with a dry and soft cloth. Do not
pour any liquid to void serious injury.
• Keep the unit in a ventilated place.
• Please contact your supplier if any failure occurs.
• Operate properly per this user’s guide, otherwise any damage of the unit is
at the user’s risk.
• Specifications are subject to change and improvement without notice.
Please inquire of manufacturer if there’s any need after the usage.
Notice:
1. The battery is only applicable to the charger which supplied or appointed by the
manufacturer of this machine.
2. The charging time should be minimum 5 hours for the first time , and it should not
be charged over 12 hours after the first time.
3. The battery should be stored within a temperature range of 0 ℃ to 40 ℃ .
4. When stored for a long period , charger the battery at least once per month so as
to prevent over discharge .
5. Products placed for a long time to charge once every three months.
6. The battery is expendable.
smartmeter S30 5
Page 6
Technical Details
2. Main features
1 - Support DVB-S, DVB-S2
2 - Support Spectrum Function
3 - Support 0/22KHz., DISEqC1.0 , UASLS
4 - Support Unicable LNB
5 - Build in highlight LED light
6 - Show the Signal Quality on Nixie Tube
7 - Build in buzzer
8 - Support to check the power cable automatically
9 - Support to reset to defaults
10 - LCD Screen shows signal strength quality, Power, MER, TP Type, FEC, BER,
etc.
11 - The unit of Signal power support dBm, dBμv.
12 - USB 2.0 for software update, backup satellite parameters
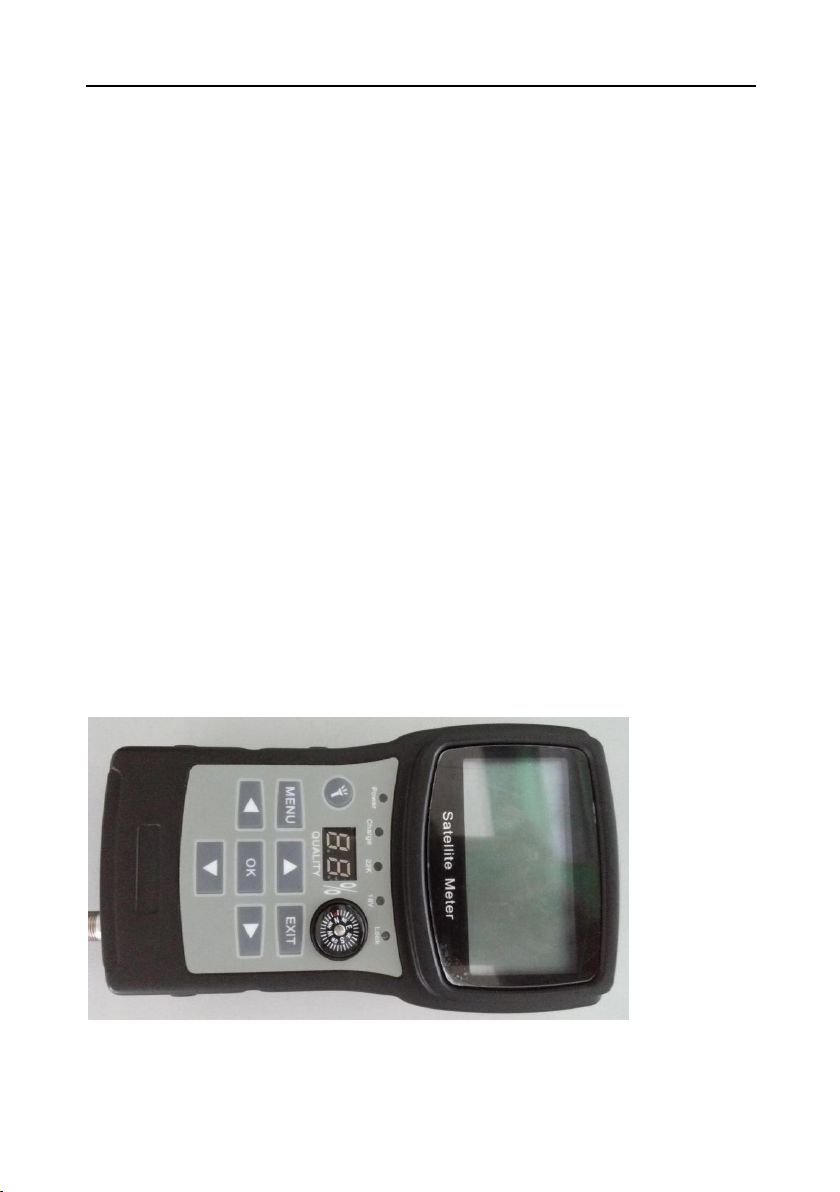
3. Front panel introduction and function description
6 smartmeter S30
Page 7
Technical Details
MENU
EXIT
OK
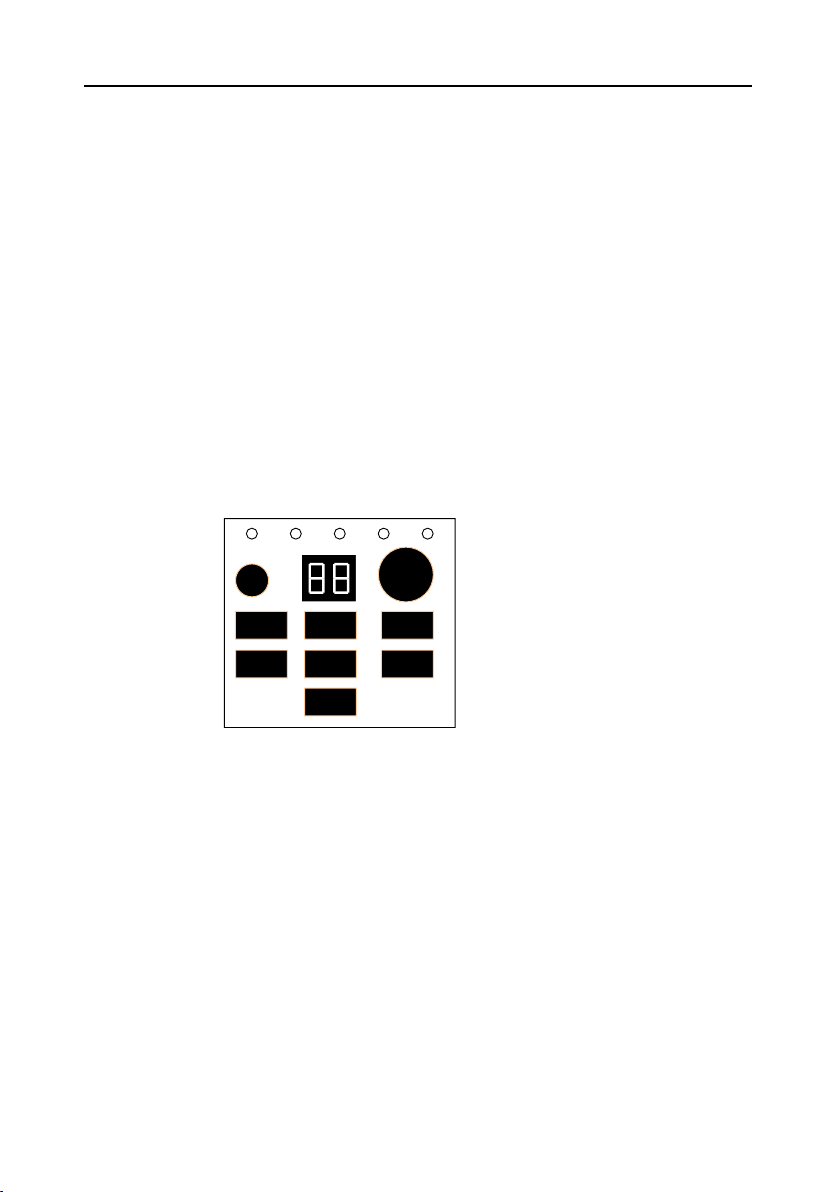
1 Signal Input
2 DC input
3 USB port
4 Compass
5 Indicator
6 LCD
7 Nixie tube
8 LED switch
9 Buttons
10 Power Switch
4. Operations and Management
Power: It lights on when the power on
Change: It lights on when change the battery
22K: Indicate the 22K signal
18V: Indicate the 18V output for LNB
Lock: It lights on when the signal is locked
LED switch: Switch the highlight LED
Compass: Indicate the direction
MENU: Direct go to main menu
EXIT: Press this button to step back, or cancel current parameter modifying.
OK: Use this button to enter a submenu or save a new setting after adjustment; press it to
enter parameter setting.
Move cursor up/down/left/right, Page up/down, change the parameter settings.
smartmeter S30 7
Page 8
Technical Details
Satellite Name: Chinasat6B
Local Freq: 05150
Transponder Freq: 03840
Symbol Rate: 27500
Polarity: H
22K: OFF
DiSEqC1.0: LNB2
USALS: OFF
Buzzer: OFF
S: 57 % Q: 45 %
MAIN MENU
Setup
Sat
TP
Find
List
Spectrum
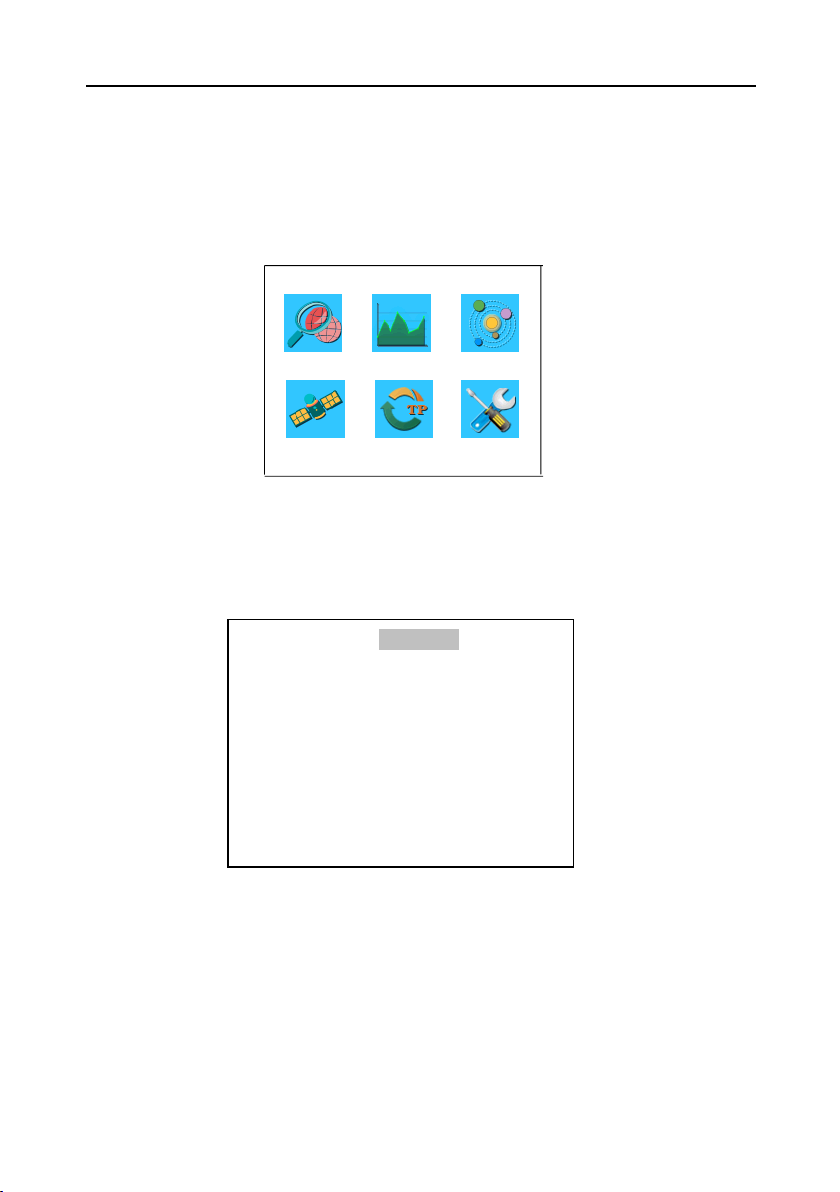
5. Main menu operation description
When power on, the screen will display some information about software, then enter
to the main menu.
5.1 Find
In this menu, it is display the signal strength and quality according to the parameters
that user selected or edited, help user to adjust the dish.
The buzzer can be turned on or off by “Buzzer” item.
Move cursor to “S: Q:”and press [OK], it will display signal strength and quality
progress bar as below.
8 smartmeter S30
Page 9

Technical Details
Satellite Name: Chinasat6B
Local Freq: 05150
Transponder Freq: 03840
Symbol Rate: 27500
Polarity: H
22K: OFF
DiSEqC1.0: LNB2
USALS: OFF
Buzzer: OFF
S: 57 % Q: 45 %
Satellite Name: Chinasat6B
Local Freq: 05150
Transponder Freq: 03840
Symbol Rate: 27500
Polarity: H
22K: OFF
DiSEqC1.0: LNB2
USALS: OFF
Buzzer: OFF
S: 57 % Q: 45 %
Set USALS parameter “ON”, press [OK] on this parameter to enter USALS function
as below:
Longitude: Satellite longitude.
Direction: Satellite direction
Move: To drive the motor to rotate dish antenna,press < / > to select east or west,
press [OK] once will rotate one step, press and hold will rotate continuously.
Goto: Rotate to the target automatically, press [OK] to execute
XX: Rotate dish antenna to corresponding satellite automatically
ZERO: Rotate to “0” scale
Set Limit:Set rotation limit, select “LEFT”, “RIGHT” or “CLEAR” and press [OK] to
execute.
E.g. rotate motor to an east direction angle, then select “EAST” and press [OK], this
angle location will be EAST rotation limit, motor will not be able to rotate over this
east limit. Select “CLEAR” to cancel limit.
smartmeter S30 9
Page 10
Technical Details
Chinasat6B
01 03840 (H) 27500
S: - 57%
Q: 45%
TYPE: DVB-S
FEC: 3/4
BER: 0.00E-00
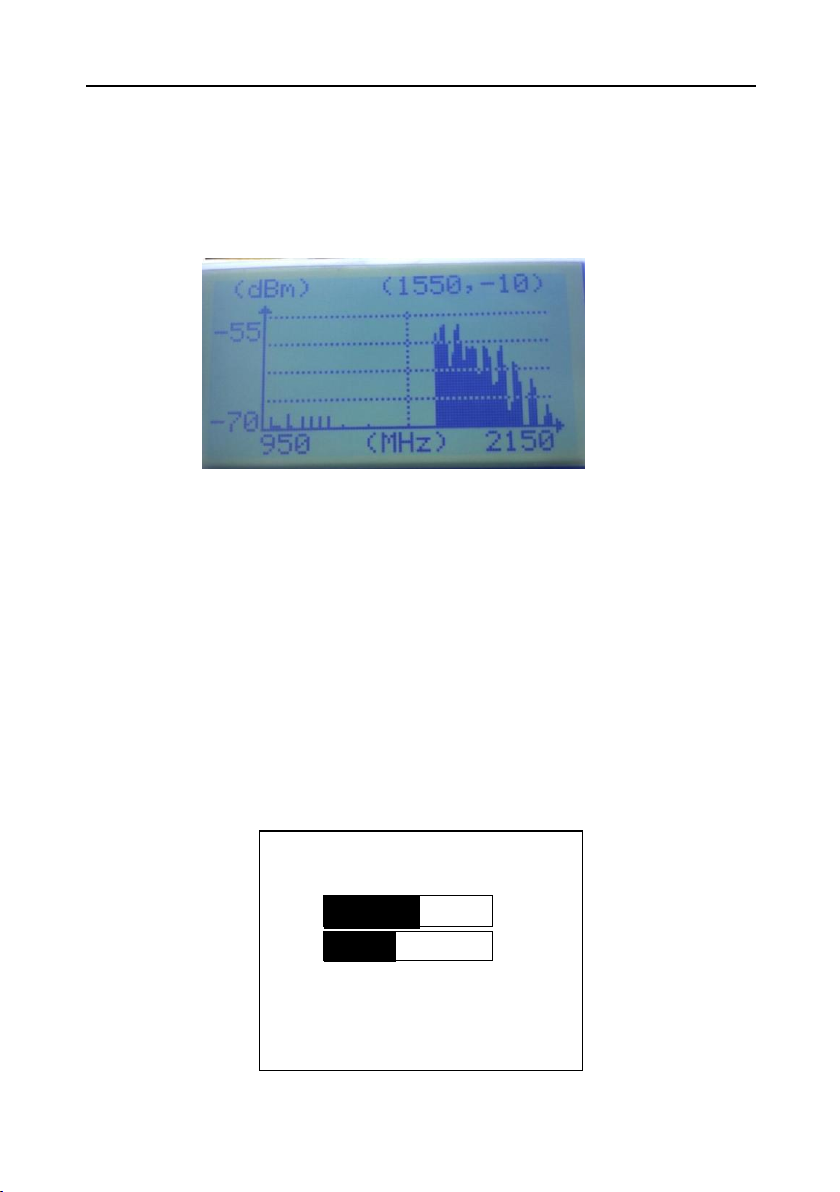
5.2 Spectrum
In this menu, the strength of input signal will display in graphic mode.
Press < / > to move cursor, press Up / Down to change the range of signal strength
display, current frequency and signal strength is shown on top, press [OK] to pause.
5.3 List
5.3.1 Manual Check
Select the desired satellite and corresponding transponder, it will show the signal
detail information, include strength, quality, type, FEC and BER.
10 smartmeter S30
Page 11
Technical Details
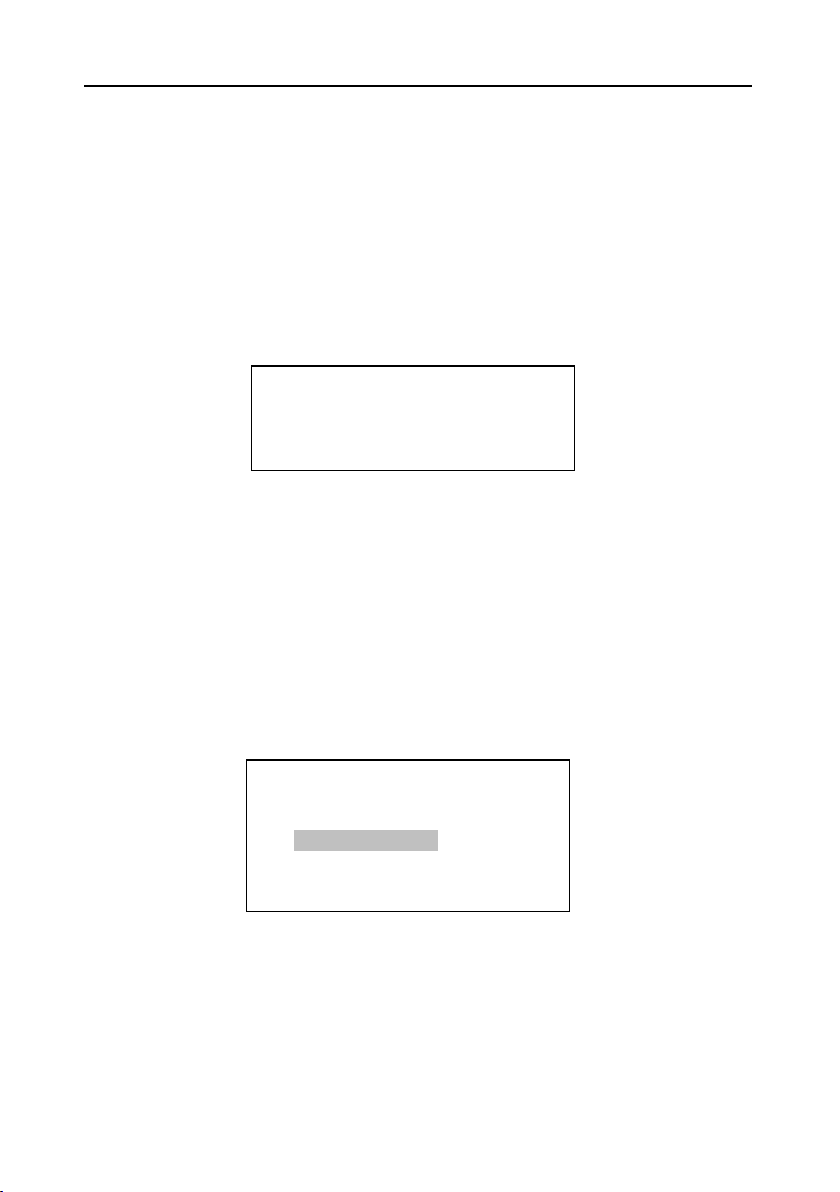
In auto-check
01 Thaicom5
Edit Satellite
Add Satellite
Modify Satellite
Delete Satellite
·Press Up / Down to change satellite
·Press < / > to change transponder
5.3.2 Auto Check
This function is used for finding which satellite that selected has been connected to
the line quickly and easily. It will stop switch satellite and light “Lock” LED when the
signal has been locked.
Press [OK] to search next satellite
5.4 Sat
In this menu user can add, modify or delete the satellites, including satellite name,
LO frequency, 22KHz、DiSEqC1.0、USALS and satellite longitude according to self
requirements.
smartmeter S30 11
Page 12

Technical Details
Edit Transponder
Add Transponder
Modify Transponder
Delete Transponder
2014-9-2 13:50:29
Sf700
01 01 00CHina 6B 05150 0 0 0 115.5 0
001 001 01 03951 09520 1
001 002 01 03880 27500 0
01 02 Koreasat 5 11300 1 0 0 113.0 0
001 003 02 12647 28000 1
01 03 0000NSS 11 Univ 0 0 0 108.2 0
5.5 TP
In this menu user can add, modify or delete the transponders, including transponder
frequency, symbol rate and polarity.
5.6 Setup
This menu contains some auxiliary functions and user data management
5.6.1 Back up Data
You can back up satellite data to U disk by this menu.
5.6.2 Update Data
You can update satellite data from U disk by this menu.
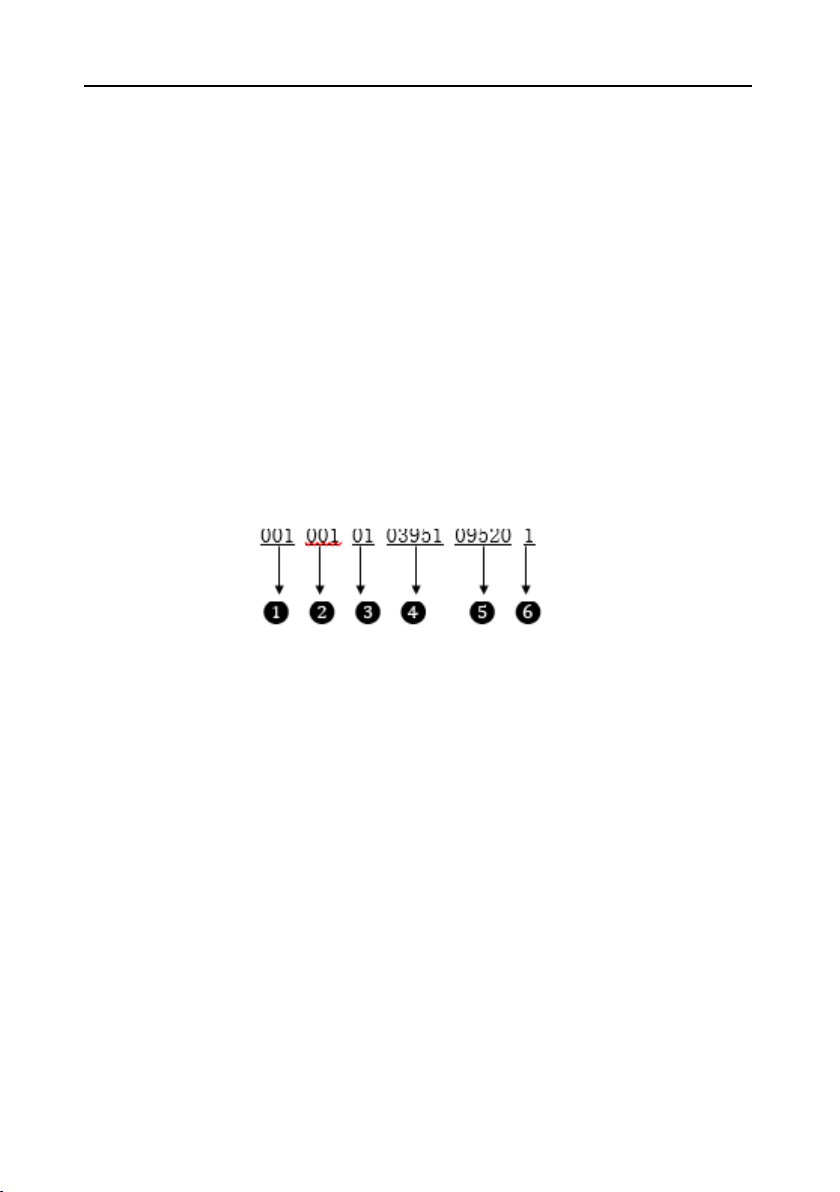
Note: Only the “txt” format file which named “sf700” can be identified, and must
write as below. (There is a blank line at last)
12 smartmeter S30
Page 13
Technical Details
① “01” means this line information is about satellite.
② The serial number of the satellite, it must be continuous, can not from “01” to
“03”.
③ Satellite name. The length is ten. If the name of the satellite is sat01, the third
must be “00000sat01”.
④ The LO Freq of the satellite.
⑤ Represent 22KHz signal status. “0” means OFF, “1” means ON.
⑥ Represent DiSEqC1.0 status. “0” means OFF, “1” means LNB1, “2” means
LNB2, “3” means LNB3, “4” means LNB4.
⑦ Represent USALS status, “0”means USALS OFF, “1”means USALS ON.
⑧ Satellite Longitude.
⑨ Satellite location. “0” means east, “1” means west.
❶ “001” means this line information is about TP.
❷ The serial number of the TP, it must be continuous, can not from “01” to “03”.
❸ The number means this TP is belong to which satellite have the same number..
❹ Transponder frequency
❺ Symbol Rate.
❻ Polarity. “0” means H, “1” means V.
5.6.3 Reset to Factory
User can reset the satellite data to default in this menu.
smartmeter S30 13
Page 14

Technical Details
Parameter Setting
Sat Longitude: 111.0 E
Local Longitude: 113.0 E
Local Latitude: 22.2 S
Angle Calculated
Elevation: 63.8
Azimuth: 354.7
Polarization: 4.8
5.6.4 Calculation Angle
The function can calculate antenna elevation, azimuth and LNB polarization angle
according to satellite longitude, local location longitude and latitude parameter settings, it is useful for receiving installation.
The letter “E”, “W”, “N” and “S” means east longitude, west longitude, north hemisphere and south hemisphere respectively. Move cursor to the letter, and press <
/ > to select.
The angle data can be calculated and displayed automatically when parameter is
being set. Elevation angle is counted from horizon upward, azimuth angle is from
north clockwise.
5.6.5 Set Compensation
5.6.6 Select Power’s Unit
Select the unit of signal level.
5.6.6 Change the color
Select the background color, text color and cursor color.
14 smartmeter S30
Page 15

Technical Details
Select File
01 SF700-1.BIN
6. Update application system
The product can update application system from USB port, if you want to update
application system, insert U disk, press MENU and connect power supply until the
screen display as below.
Press “OK” to update .When the system is complete updating, the system will
restart.
7. Charge indicator
Green led on: Fully charged
Red led on: In charging
Red led flash: No battery or battery error
smartmeter S30 15
Page 16

Technical Details
Input signal
Frequency range
950~2150MHz
Signal Level
-65 ~ -25dBm
Impedance
75Ω
Signal processing
Symbol rate
1Msps~60Msps
Demodulation
DVB-S: QPSK
DVB-S2:
8PSK,16APSK,32APSK
22KHz Tone
Supported
DiSEqC1.0
Supported
USALS
Supported
Power supply
Switching Power input
AC110~240V 50Hz/60Hz
Switching Power output
12V DC 2000mA
8. Technical specifications
9. Attachments:
Power supply: x 1
Instruction Manual: x 1
F type connector: x 2
16 smartmeter S30
Page 17

Technical Details
Technical Details
System Resources
DDRAM 1GByte DDR
FLASH 8MByte
Connectors
Data Connector USB
Audio Video Output Digital HDMI
Audio Video Output Analog Hosiden
Power Supply
Power 15 V
Li-Ion Battery 3000 mAh
Voltage Power Supply/Charger 175 - 250 V ~, 50/60 Hz
Size and Weight
Length x Wide x Heigth 11.2 cm x 17.7 cm x 4.8 cm
Weigth 0.5 kg
Temperature
Working Temperature 0° C to +40° C
Storage Temperatur -40° C to +65° C
smartmeter S30 17
Page 18

Declaration of Conformity
Declaration of Conformity
The company Avanit GmbH, Am Sternbach 1, 91477 Markt Bibart hereby declares conformity
with the following guidelines and standards for this product:
Guideline for electromagnetic compatibility 99/5/EC and 2014/30/EU
EN61326-1:2013
EN61326-2-2:2013
EN301489-1:2011-09
EN301489-17:2012-09
EN300328 V1.9.1:2015-02
Guideline for low voltage 2014/35/EU
EN61010-1:2010
EN62479:2010
18 smartmeter S30
Page 19

Declaration of Conformity
smartmeter S30 19
Page 20

 Loading...