

Page 1
564 SS Stainless Steel Fireback Installation
A
SKU # 96100180
Packing List
• Rear Fireback
• (2) Side Firebacks
• Floor Fireback
Installation
WARNING Turn off gas to the appliance and make sure it has fully cooled prior to conducting service.
NOTE: The firebacks are shipped in vinyl to prevent marring the surface of the stainless steel. Remove
the vinyl prior to installation. Wear clean gloves when installing the firebacks to prevent
fingerprints on the surface (or use a rag or paper towel to handle the firebacks).
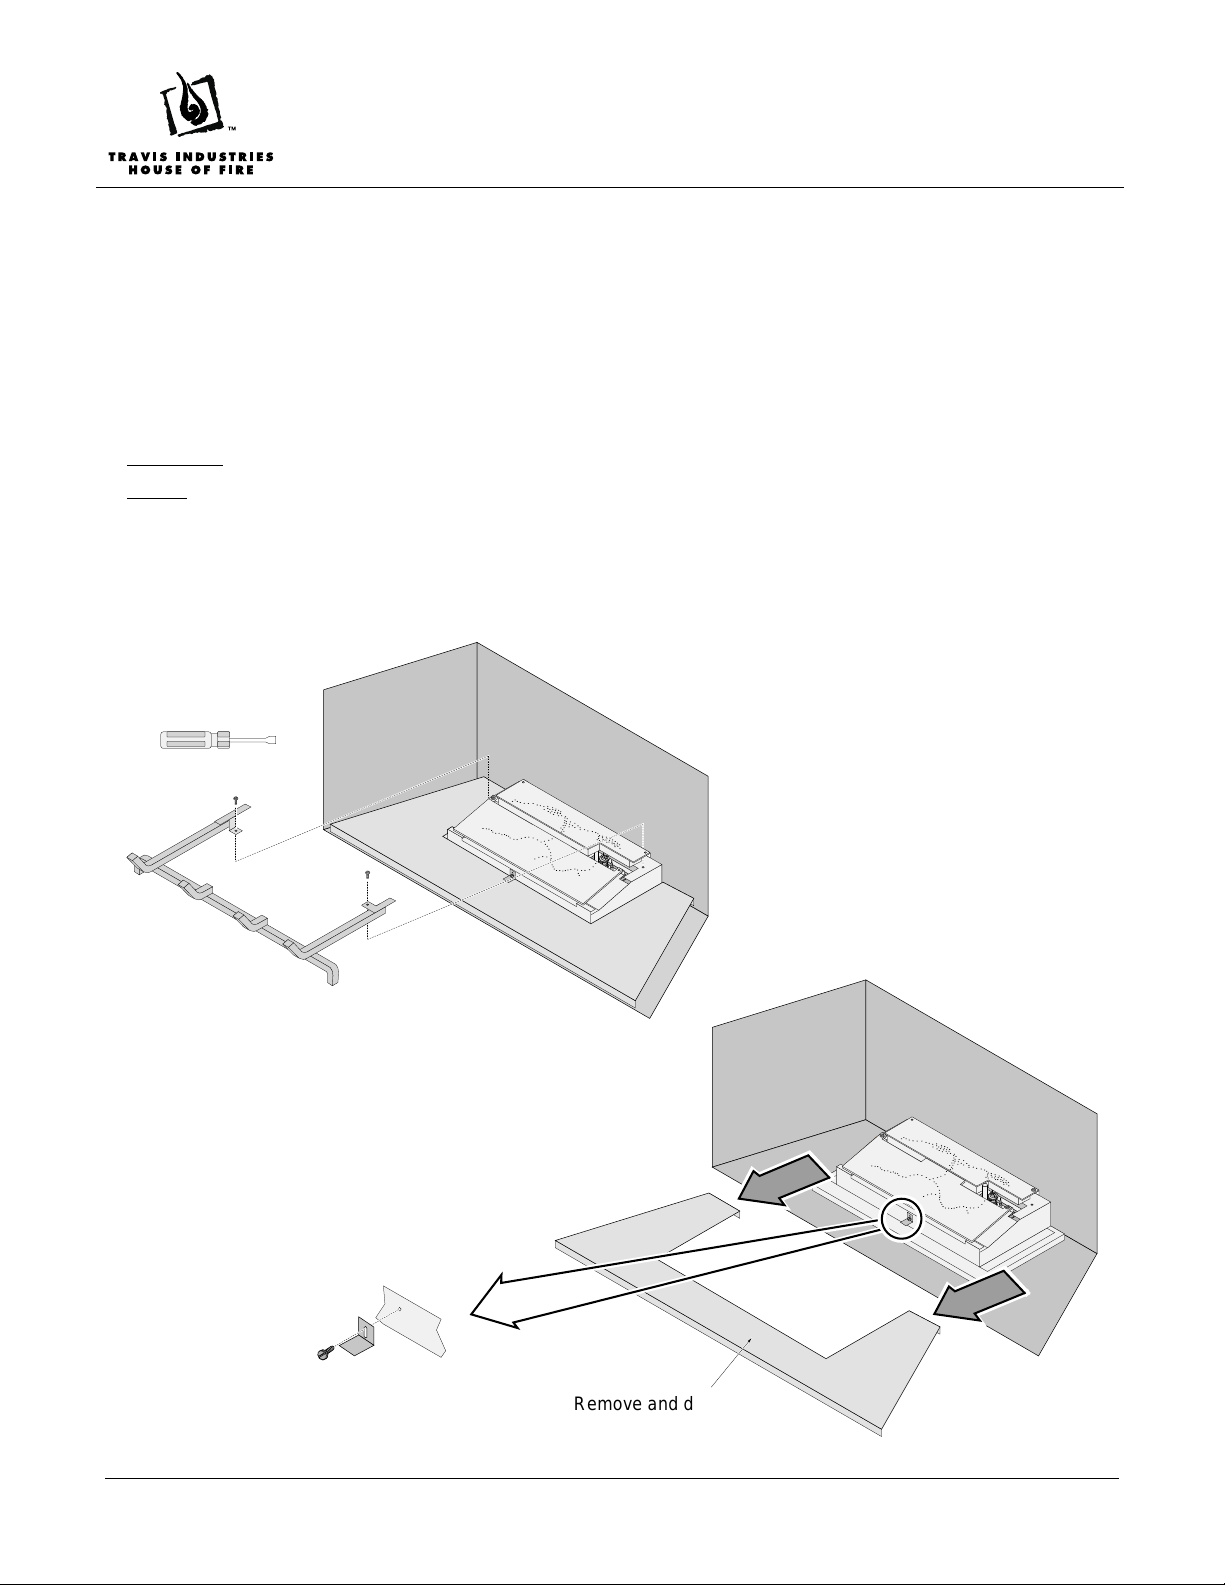
1 Remove the glass frame and logs (see the installation manual for details).
2 Remove the grate (replace after fireback installation). Remove and discard the hearth plate.
1/4" Nutdriver
Remove the grate
(replace after fireback installation).
Remove the screw and bracket.
Remove and discard
the hearth plate
Page 1 of 2 7/25/07 Travis Industries, Inc.
Page 2
564 SS Stainless Steel Fireback Installation
A
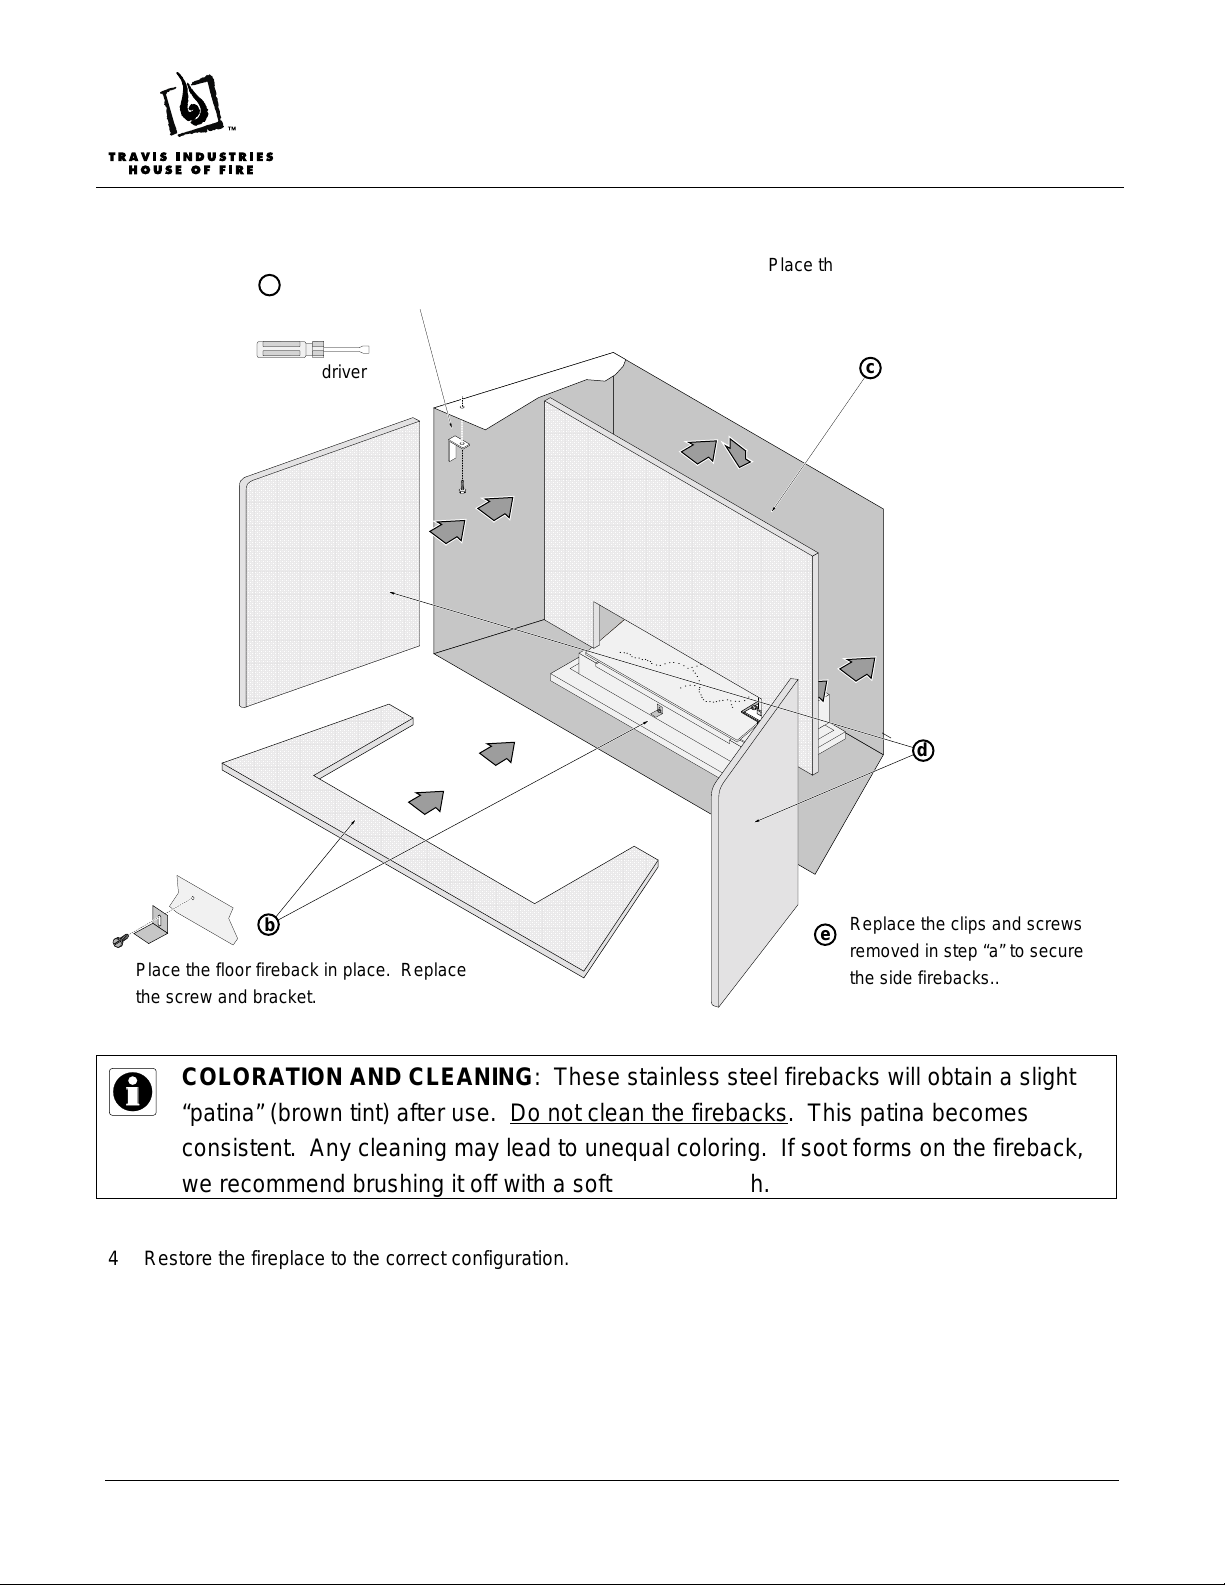
3 Install the firebacks following the directions below
SKU # 96100180
Remove the clip and screw located on the
a
firebox ceiling near the front (both sides).
1/4" Nutdriver
Place the rear fireback in place. The side
fireback holds the rear fireback in place hold the rear fireback while installing the
side fireback.
c
Place the side
d
firebacks in place.
b
Place the floor fireback in place. Replace
the screw and bracket.
Replace the clips and screws
e
removed in step “a” to secure
the side firebacks..
COLORATION AND CLEANING: These stainless steel firebacks will obtain a slight
“patina” (brown tint) after use. Do not clean the firebacks. This patina becomes
consistent. Any cleaning may lead to unequal coloring. If soot forms on the fireback,
we recommend brushing it off with a soft cloth or brush.
4 Restore the fireplace to the correct configuration.
Page 2 of 2 7/25/07 Travis Industries, Inc.
 Loading...