

Page 1
Lower Panel DVS / DVL Insert EF II
96100340
CHECK CONDITION OF SHIPMENT
Upon receipt of this kit, check the condition of the packaging. Damage to the package should be noted on
the carrier's freight receipt. Any damage claims as a result of shipping must be handled through the shipper.
Travis Industries will provide assistance in resolving shipping claims or replacing items not included in the
package. Please report any missing items immediately.
COMPATIBILITY
• DVS Insert EF II with EF II Surround Panels • DVL Insert EF II with EF II Surround Panels
DVS – 4” by 6” 96100300 DVL – 4” by 6” 96100320
DVS – 8” by 10” 96100301 DVL – 8” by 10” 96100321
DVS – 10” by 13” 96100302 DVL – 10” by 13” 96100322
ITEMS NEEDED FOR ASSEMBLY
• 11/32" Wrench • Hack Saw (for cutting the trim)
• Nibbler, Electric Shears, or other device for cutting 20 gauge sheet metal
PACKING LIST
• Lower Panel • (2) Stud Plates • (4) 8-32 Keps Nuts • Side Trim (2 pieces)
INSTALLATION INSTRUCTIONS
! Turn the gas off prior
to installing.
1 With the insert in
place and hooked
up, install the side
and top surround
panels (do not install
the trim, rheostat, or
on/off switch).
2 Cut the the lower
panel following the
directions to the
right.
Panel Width:
Cut the following off each side:
• DVS Insert 4 x 6 Panels 5-1/2"
• DVS Insert 8x10 & Arch Panels 3-7/8"
• DVS Insert 10 x 13 Panels 1-7/8"
• DVL Insert 4 x 6 Panels 4-1/16"
• DVL Insert 8 x 10 & Arch Panels 2"
• DVL Insert 10 x 13 Panels - none -
Panel Height:
Cut the lower panel to the desired height.
See "Panel Width" above.
© Travis Industries 17601429 Page 1 of 2 060320
Page 2

Lower Panel DVS / DVL Insert EF II
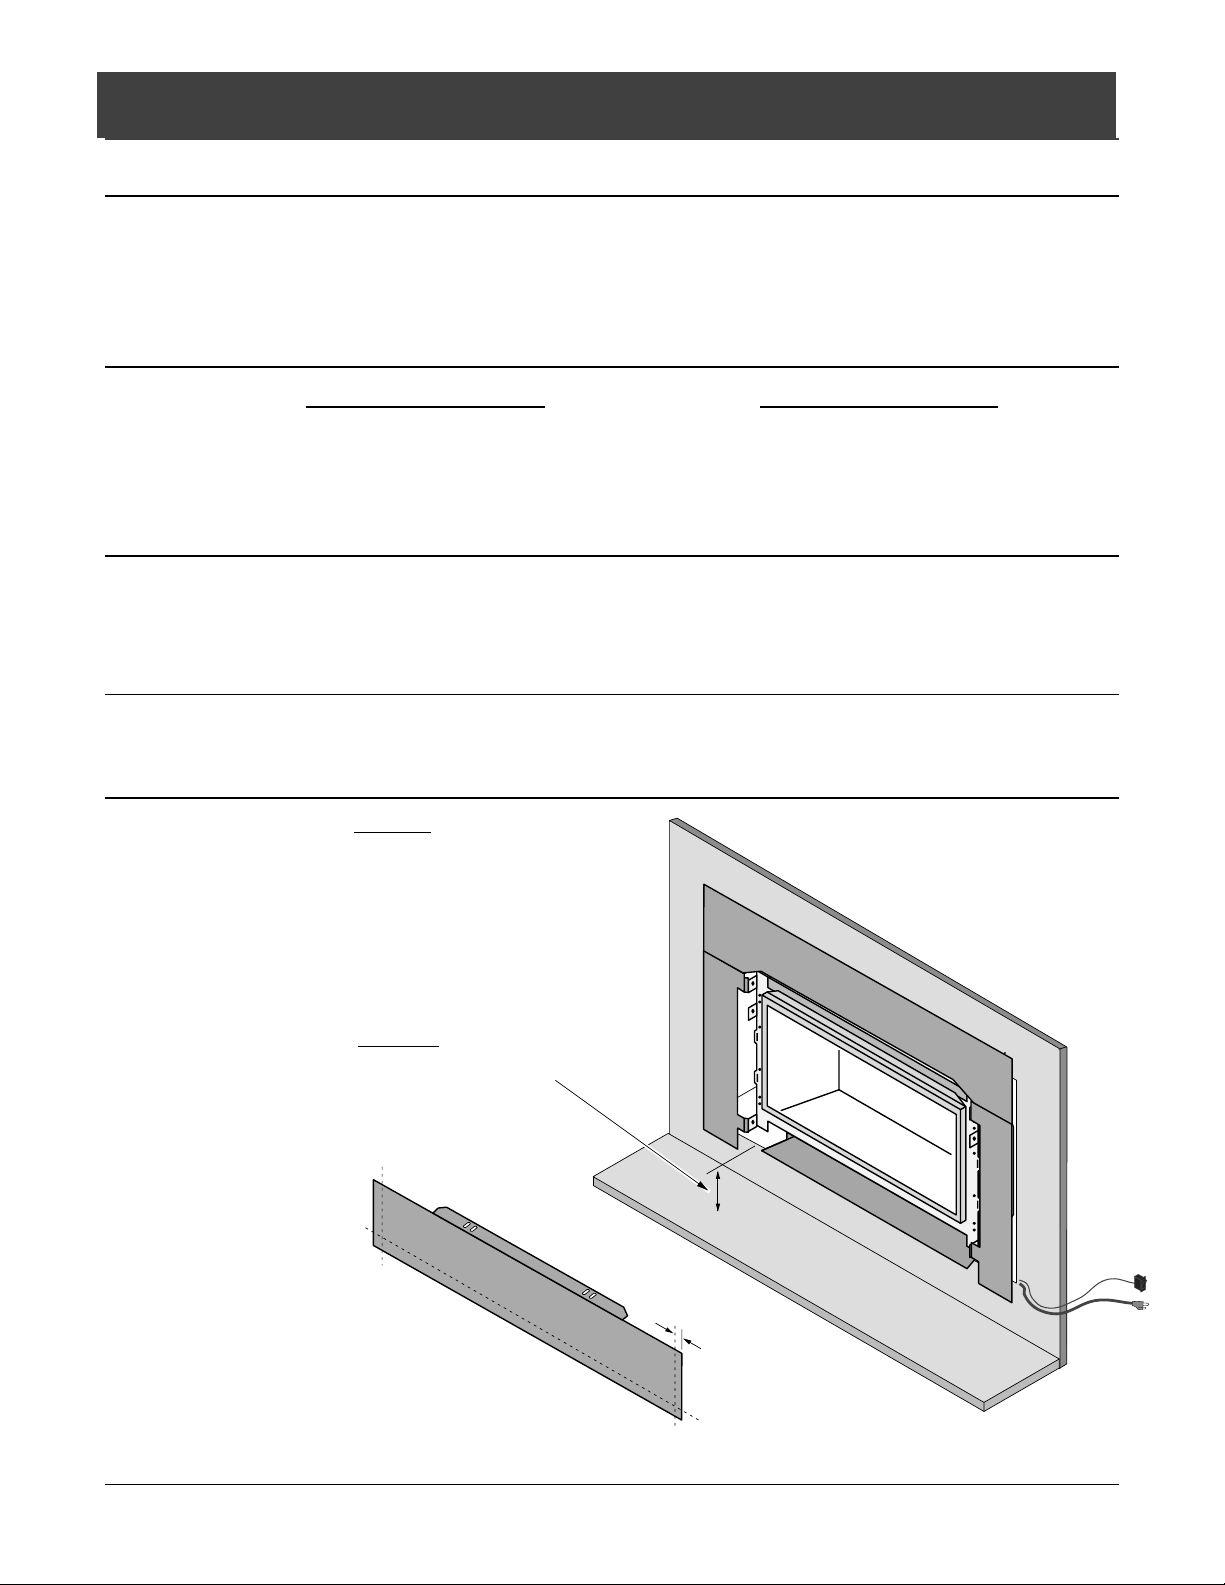
3 Install the lower
panel (see the
illustration to the
right). Make sure
the panel is
aligned with the
side panels before
tightening the nuts.
4 Cut and install the
trim following the
directions below.
5 Install on/off switch
and rheostat (see
the owner's
manual for
details).
Attach the lower surround
panel to the insert with the
included nuts and stud
plates.
Stud
Plate
HINT: You may wish to tape the
stud plates to the lower panel to
hold them in place.
96100340
These slots allow for the
lower panel to be aligned
with the side panels.
a
Discard the two side pieces of
trim included with the surround
panels (use the side trim
included with the lower panel).
b
Use a hack saw to cut the side
trim to match the panel size
(measured to the inside edge).
Attach the side trim (included with the lower panel) to the top trim
c
(included with the surround panels) following the directions below.
Tighten the set screws
from the back side with a
small standard screwdriver
Top Trim
Construct the panel trim.
Insert one leg of each "L"
bracket into the top and side
trim piece. Align the trim and
secure with the two set
screws. Slide the trim over
the panels. Use the spring
clips to hold the trim in place.
Spring Clips
(included with the surround panels)
"L" Bracket
Right Side
Trim
© Travis Industries 17601429 Page 2 of 2 060320
 Loading...