

Page 1
High-Temperature Wood Insert Wiring Kit
97200337
Overview
The high-temperature wood insert wiring kit allows an installer to conceal the power cord from the blower
behind the surround panel for the Travis products listed below. The wire harness is routed through the
convection channel from the right side and attached to the blower.
Compatibility
• Lopi Revere (SKU 99800303 – cast ashlip)
• Lopi Freedom (SKU 99800153 – cast ashlip)
• 1750 Insert (SN 1112-003324 or greater)
• 1250 Insert (SN 1111-001903 or greater)
• Flush Wood Inserts (Small, Medium, Large)
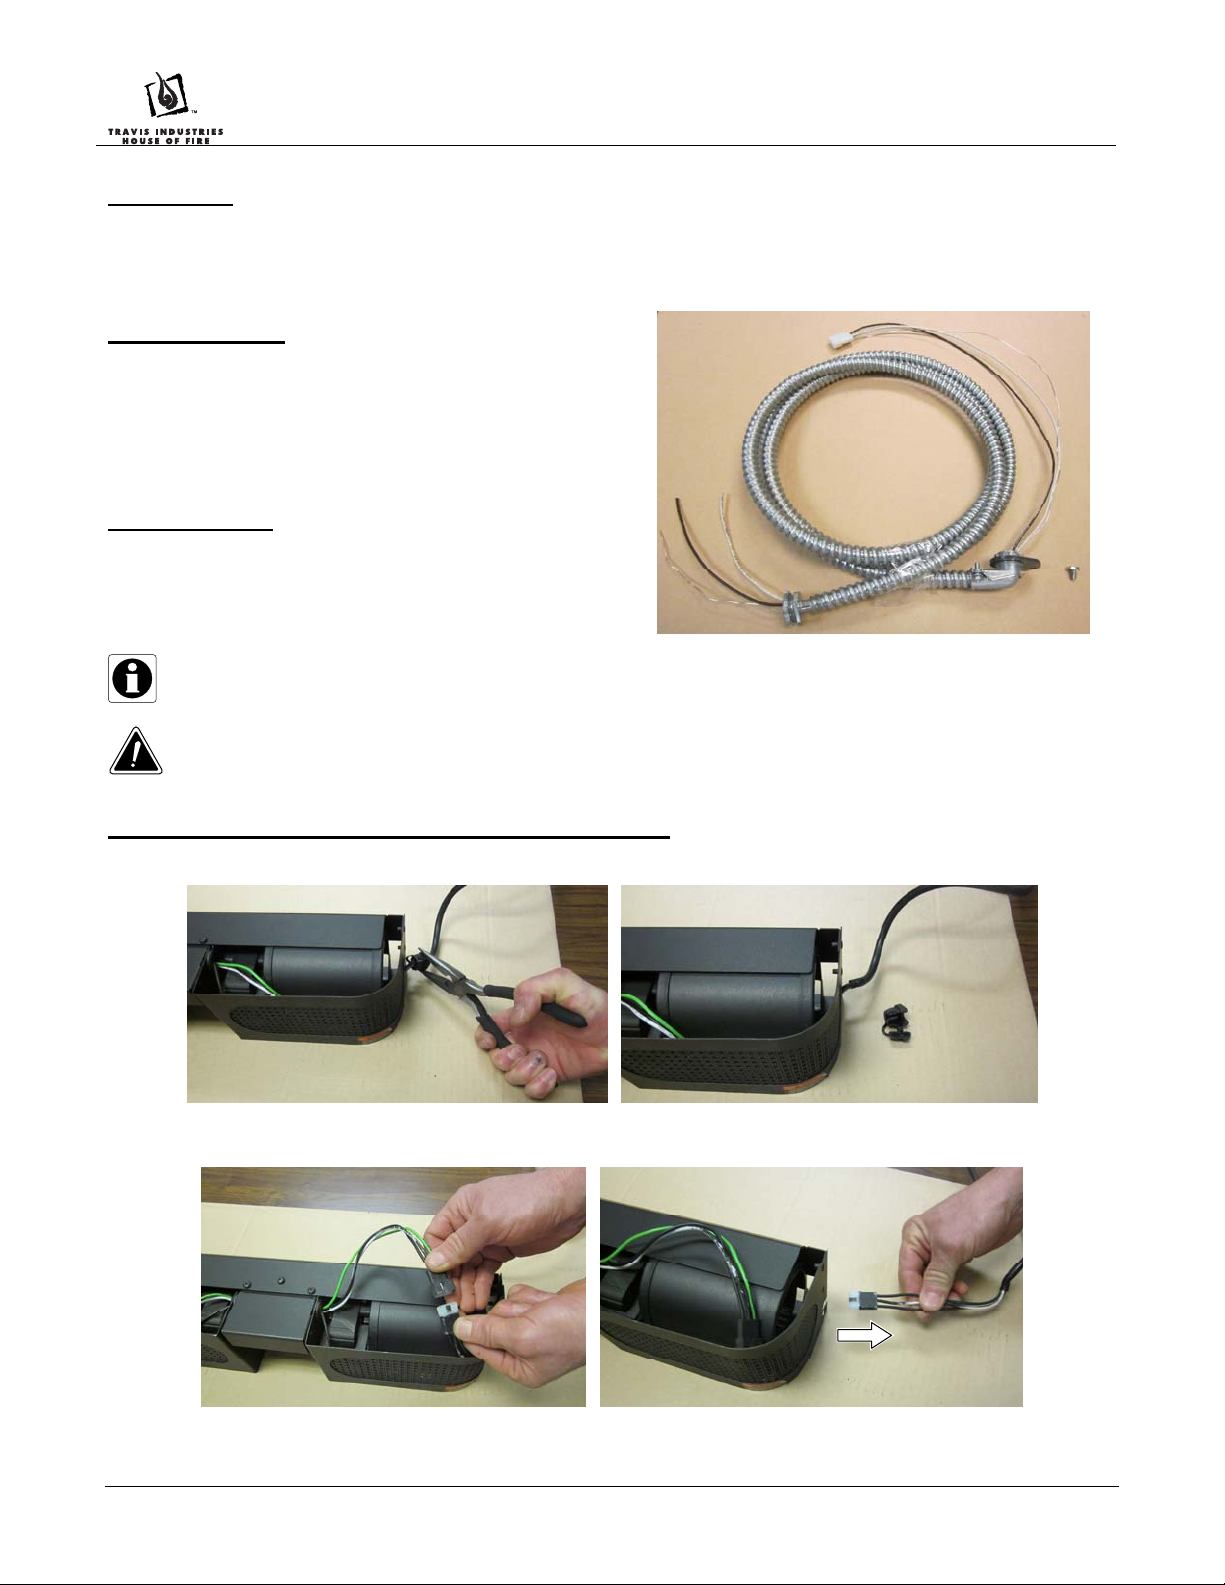
Packing List
• Wire Harness (10’ Length) with Mounting Plate
• 10-24 x ½” Thread-Cutting Screw
• Button Plug
This kit must be installed in accordance with local electrical codes. Consult your local building
official for any requirements that must be met in your area.
Make sure the electrical lead leading to the insert has been disabled prior to installing this kit.
Installation – Revere, Freedom, 1750, 1250
1 Use pliers to disconnect the strain relief from the front blower. Discard the strain relief.
2 Disconnect the power cord from the blower. Route the power cord out of the blower housing and discard.
Page 1 of 6 1/31/14 - 17601776 © Travis Industries, Inc.
Page 2

High-Temperature Wood Insert Wiring Kit
97200337
3 Route the conduit on the wiring harness through the fireplace to a junction box outside of the fireplace.
Attach the "This fireplace has been altered..."
plate to the fireplace (included with the insert).
You may wish to place it in a location where it
will be covered by the surround panels.
Conduit may be run through a suitable hole
or ash trap (you may wish to seal this area
to prevent cold air infiltration).
Do not run the conduit
under the insert.
Junction Box
(mounted outside the fireplace)
4 The fireplace insert should be placed on the fireplace hearth in position to access the right side of the insert.
5 Use a screwdriver to remove the button plug on the side of the insert. Discard the button plug.
6 Route the molex plug on the wiring harness through the hole on the right side of the insert. Then reach in
from the front of the insert and pull the molex plug forward.
Page 2 of 6 1/31/14 - 17601776 © Travis Industries, Inc.
Page 3

High-Temperature Wood Insert Wiring Kit
7 Attach the mounting plate on the wiring harness to the insert with the included screw (5/16” Nutdriver).
8 Route the molex plug through the back of the blower housing and connect to the power input. You may wish
to paint the molex and wiring black to conceal. Make sure all excess wiring is tucked into the area in front of
the blower.
97200337
9 The blower may be attached to the insert at this time. Make sure no wiring contacts the squirrel cage
the side of the blower. Connect power to the blower after the insert is in place.
10 Place the button plug into the exposed whole on the right side of the blower.
on
Page 3 of 6 1/31/14 - 17601776 © Travis Industries, Inc.
Page 4

High-Temperature Wood Insert Wiring Kit
97200337
Installation – Flush Wood Inserts (Small, Medium, Large)
NOTE: The wiring kit may be routed to the left or right side of the insert. An additional knockout is provided on
the right side to allow the wiring kit to be routed through the side wall.
1 Disconnect the molex connector from the power cord as shown below.
Disconnect the molex connector
leading from the power cord.
Rheostat Wires
Power Cord
2 Remove the power cord as shown below. Tighten the strain relief on the two wires leading to the rheostat.
Remove the
power cord.
Unscrew the clamp
on the strain relief.
Tighten the clamp to secure the
wires leading to the rheostat.
Page 4 of 6 1/31/14 - 17601776 © Travis Industries, Inc.
Page 5

High-Temperature Wood Insert Wiring Kit
3 Secure the conduit to the side of the insert as shown below.
97200337
The strain relief is attached to the left side of
the fireplace insert. Insert the locknut over
the molex connector and screw it onto the
conduit connector.
Left Side of
Fireplace Insert.
4 Attach the molex connector from the conduit to the connector on the insert.
Attach the molex connector on the conduit to
the molex connector on the insert.
Page 5 of 6 1/31/14 - 17601776 © Travis Industries, Inc.
Page 6

High-Temperature Wood Insert Wiring Kit
5 With the appliance in place, run the conduit through the fireplace to the junction box. The conduit can be
routed to the left or right side.
NOTE: Leave extra slack in the conduit to allow for servicing of the appliance. When placing the insert, route the
conduit away from the insert to prevent it from contacting or being pinched by the insert.
97200337
Attach the "This fireplace has been altered..." plate
to the fireplace (included with the insert). You may
wish to place it in a location where it will be covered
by the surround panels.
Fireplace Penetration
(conduit may be run through
the fireplace ash trap)
Junction Box
(mounted outside the fireplace)
Do not run the conduit
under the insert.
Page 6 of 6 1/31/14 - 17601776 © Travis Industries, Inc.
 Loading...