

Page 1
Fyre-Stones Set “B” (31 DVI / DVS GSR)
Installation Instructions
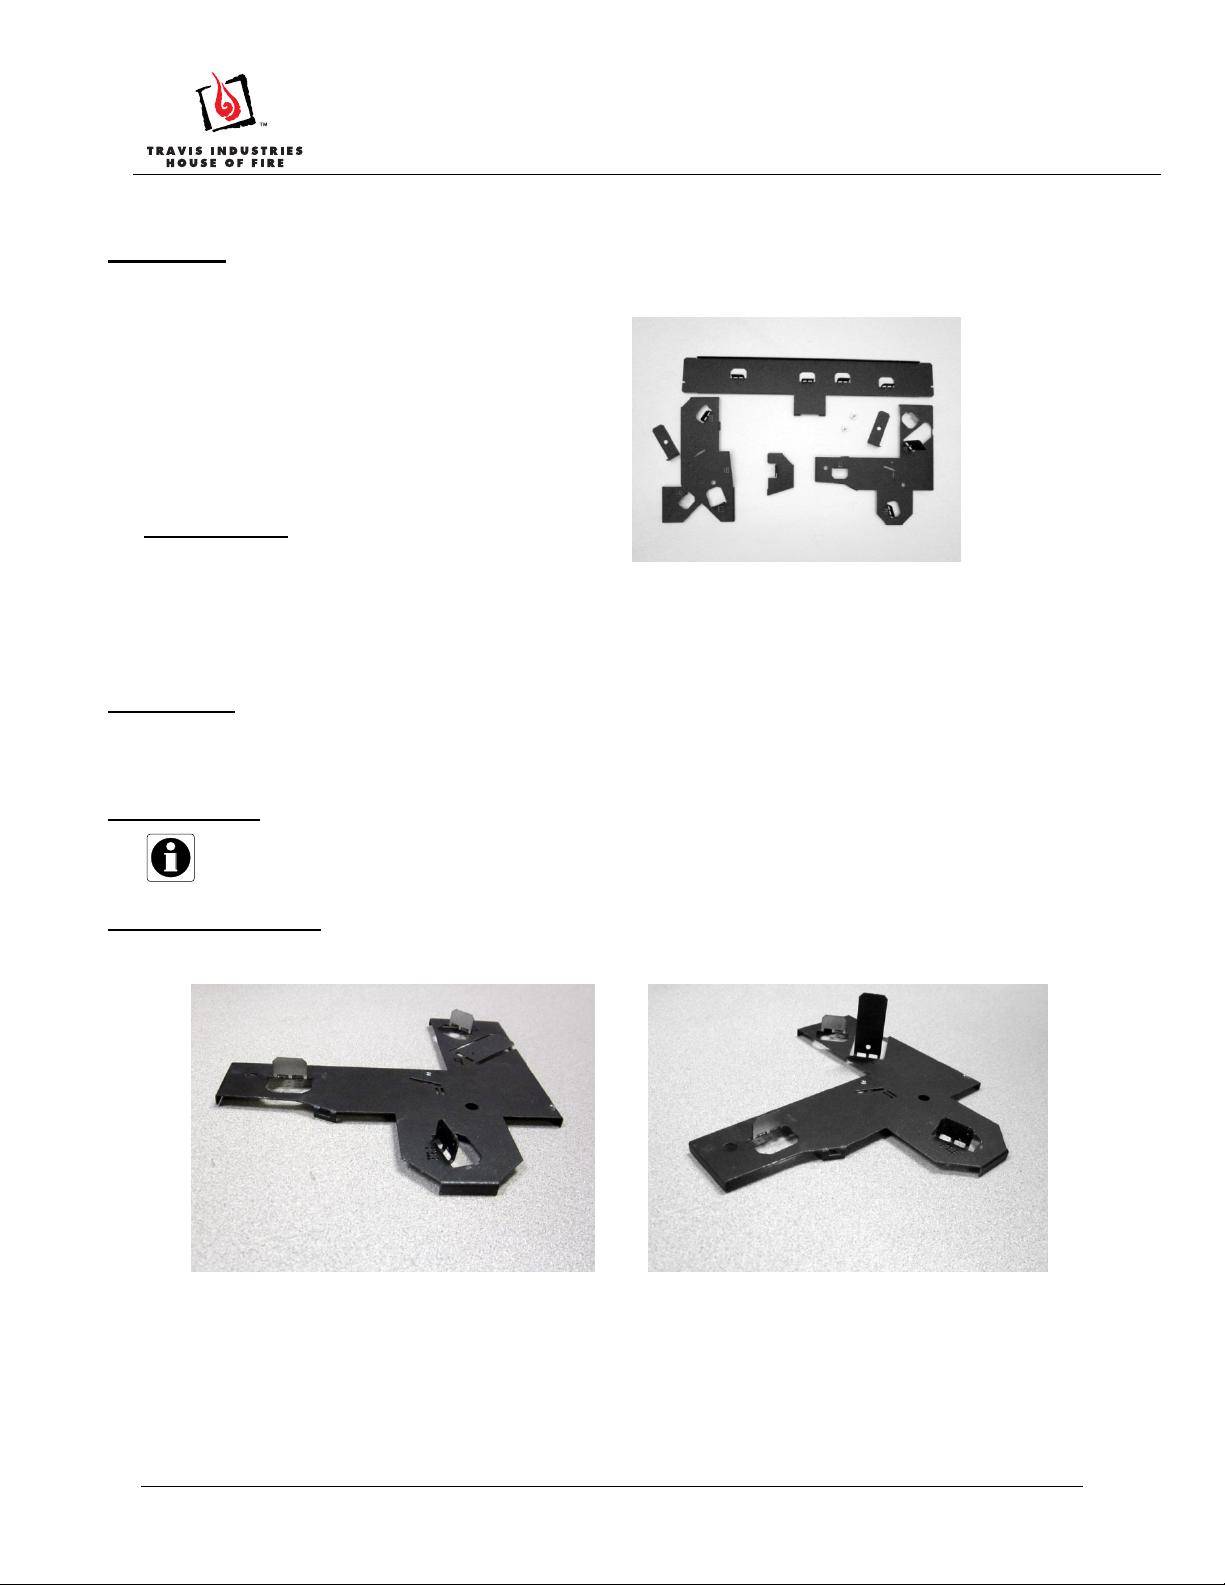
Packing List
Set of 16 Fyre-Stones (includes 2
each of stones numbered 2, 8,
and 11)
Rear Stone Grid
Left Stone Grid
Pilot Stone Grid
Right Stone Grid
(2) Elevated Grids
Left
(2) 8-32 x 3/8” Screws
Items Required
A portion of a Crushed Glass Kit
(each kit includes four 2.5 lb. bags):
o Platinum (94500580)
o Bronze (94500581)
o Cobalt (94500582)
Compatibility
Rear
Pilot
(sku 94700762)
Right
31 DVI
DVS GSR with Dancing-Fyre Burner
Installation Tips
Install the stones after the firebacks are in place.
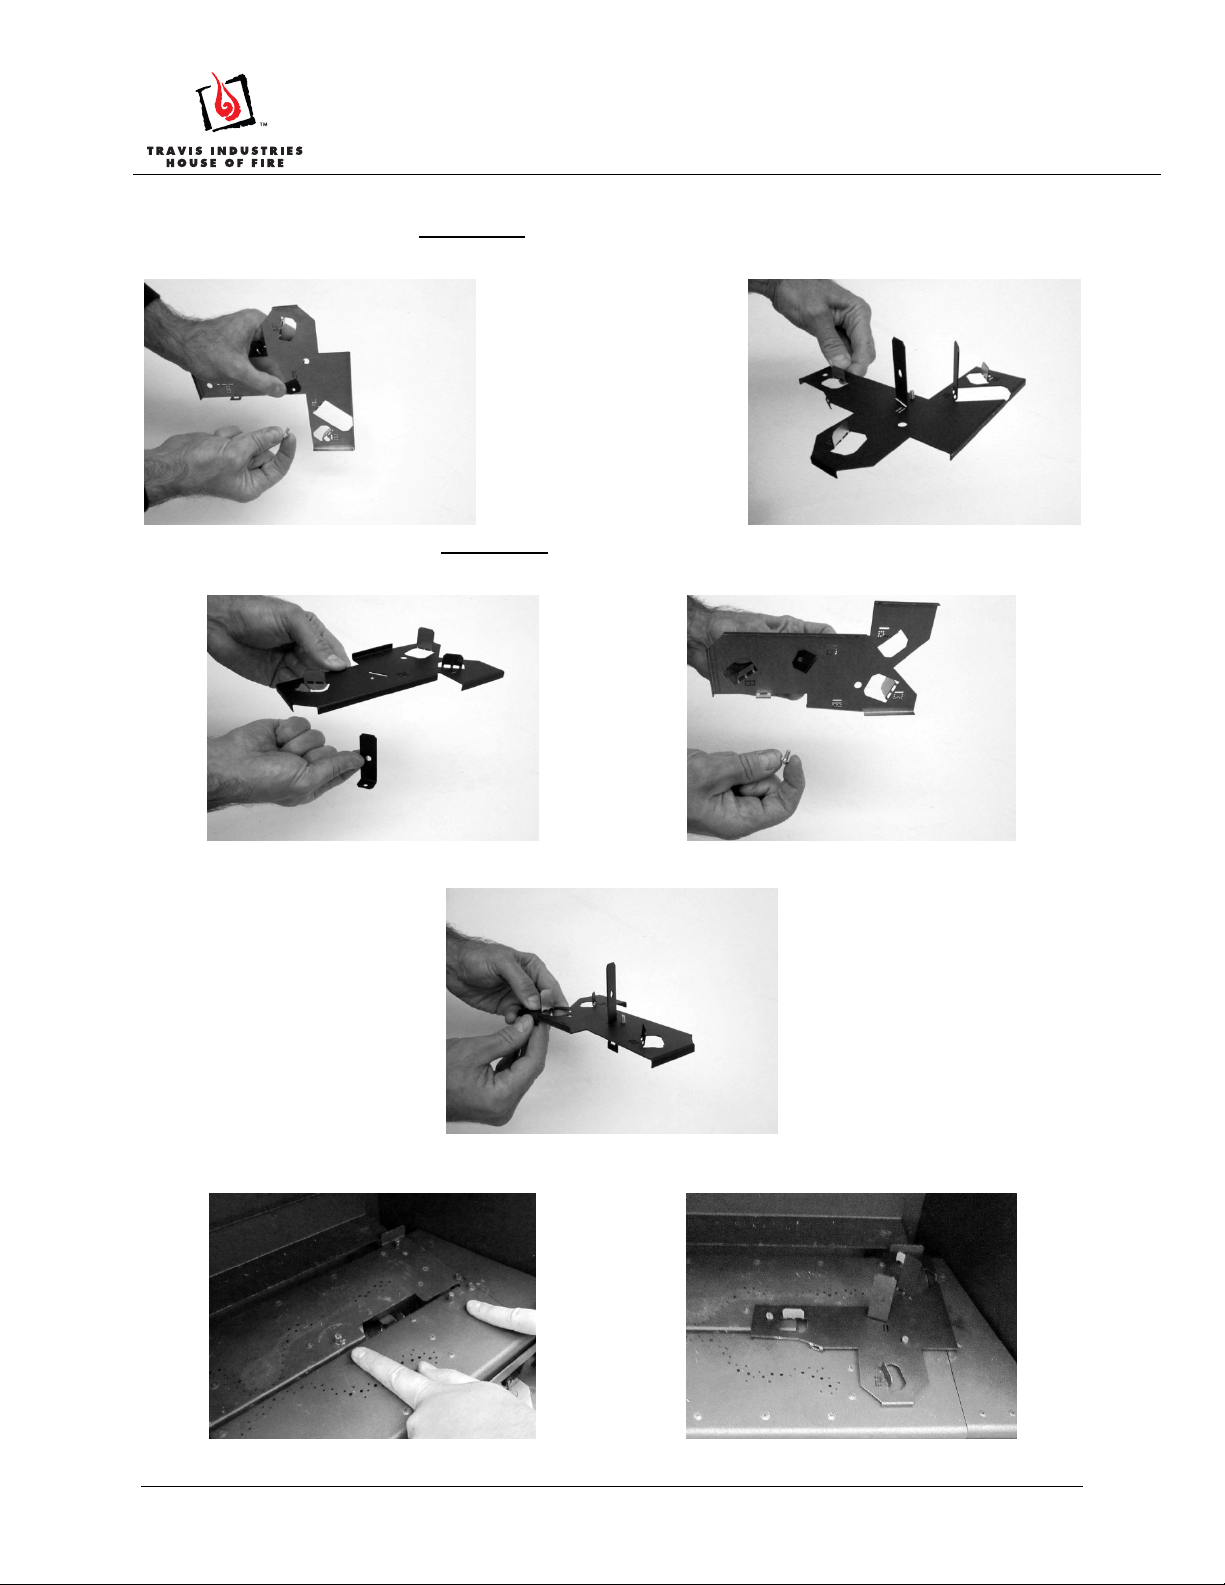
Stone Grid Installation
Bend the tab on the right stone grid as shown below.
Page 1 of 6 17601708 — 12/13/12 © Travis Industries, Inc.
Page 2
Fyre-Stones Set “B” (31 DVI / DVS GSR)
Insert one of the elevated tabs from below through the slot on the right stone grid as shown below.
Secure the tab by inserting one of the included screws from below.
Insert the remaining elevated tab from below through the slot on the left stone grid as shown below.
Secure the tab by inserting one of the included screws from below.
Installation Instructions
The right stone grid
should now
look like the photo at
right.
(sku 94700762)
The left stone grid should now look like the photo below.
Place the right stone grid on the burner as shown below.
Page 2 of 6 17601708 — 12/13/12 © Travis Industries, Inc.
Page 3

Fyre-Stones Set “B” (31 DVI / DVS GSR)
Place the left stone grid on the burner as shown below.
Place the rear stone grid on the burner as shown below.
Installation Instructions
(sku 94700762)
Place the pilot stone tab on the pilot bracket as shown below.
Page 3 of 6 17601708 — 12/13/12 © Travis Industries, Inc.
Page 4

Fyre-Stones Set “B” (31 DVI / DVS GSR)
Placing the Stones
Each stone has a slot and a number etched into it. The stones are placed onto the stone grid,
matching the number on the stone to the number on the grid. The numbers on the grid are
random, not in sequential order. EXAMPLE: Stone marked “5” is inserted over the tab marked “5”
on the stone grid.
NOTE: Numbers on the stones should always face the rear of the firebox.
NOTE: There are (2) each of stones numbered 2, 8, and 11.
Starting at the back of the burner with stone #2, place the stones around the stone grid, paying close
attention to the notch/tab alignment and making sure the numbers face the rear of the firebox. The stone
placement sequence is shown below.
Installation Instructions
(sku 94700762)
Page 4 of 6 17601708 — 12/13/12 © Travis Industries, Inc.
Page 5

Fyre-Stones Set “B” (31 DVI / DVS GSR)
NOTE: Stone number 16 has no slot. It is placed near the front of the burner, as shown below.
NOTE: Stone number 11 is placed between the burner ports at the front edge of the burner.
8 2 3
12
19
13
Installation Instructions
5
4
18
11
8
11
2
(sku 94700762)
15
9
16
Page 5 of 6 17601708 — 12/13/12 © Travis Industries, Inc.
Page 6

Fyre-Stones Set “B” (31 DVI / DVS GSR)
Installation Instructions
(sku 94700762)
Crushed Glass Installation
Glass Quantity
This media set requires 1 lb. of ¼” American Fireglass Crushed Glass
Measuring Glass
Use 1 Rounded Cup (240ml rounded)
NOTE: A level measuring cup (240ml) = 0.95 lbs.,
so each cup should be slightly rounded.
It is better to use too little glass than too much. Excessive glass, especially when using
propane (LP), will lead to sooti ng. Plac e the g lass as thinly as possible over the burner ports
for optimum burner performance.
Carefully pour the glass around the floor of the firebox, as shown below. Now we are working with your
inner artist. Here you must pay attention to create the best possible look. For hard to reach areas, you
can use a teaspoon to ensure all the black surfaces are covered.
The pilot area must be kept clear of glass to provide quick burner ignition.
The glass needs to be 1 layer thick on LP and no more than 2 layers on NG.
The completed installation should look like the photos below.
Page 6 of 6 17601708 — 12/13/12 © Travis Industries, Inc.
 Loading...