

Page 1
31 DVI Insert Log Set
Installation Instructions (sku 94400991)
Packing List
• Rear Log
• Left Log
• Right Log
• Left Twig
• Right Twig
• Center Twig
• Rockwool
• Embers
Installation
WARNING:
• The logs are fragile, especially after being exposed to heat.
• Make sure the gas control valve is “OFF” and the heater is cool prior to conducting service.
• Failure to position the parts in accordance with these diagrams or failure to use only parts specifically
approved with this appliance may result in property damage or personal injury.
• The burner must be correctly positioned before installing the logs. Make sure the burner is fully seated
and the pilot is properly aligned. See owner’s manual for details on burner removal.
HINT
: If using propane (LP), convert the appliance before installing the log set.
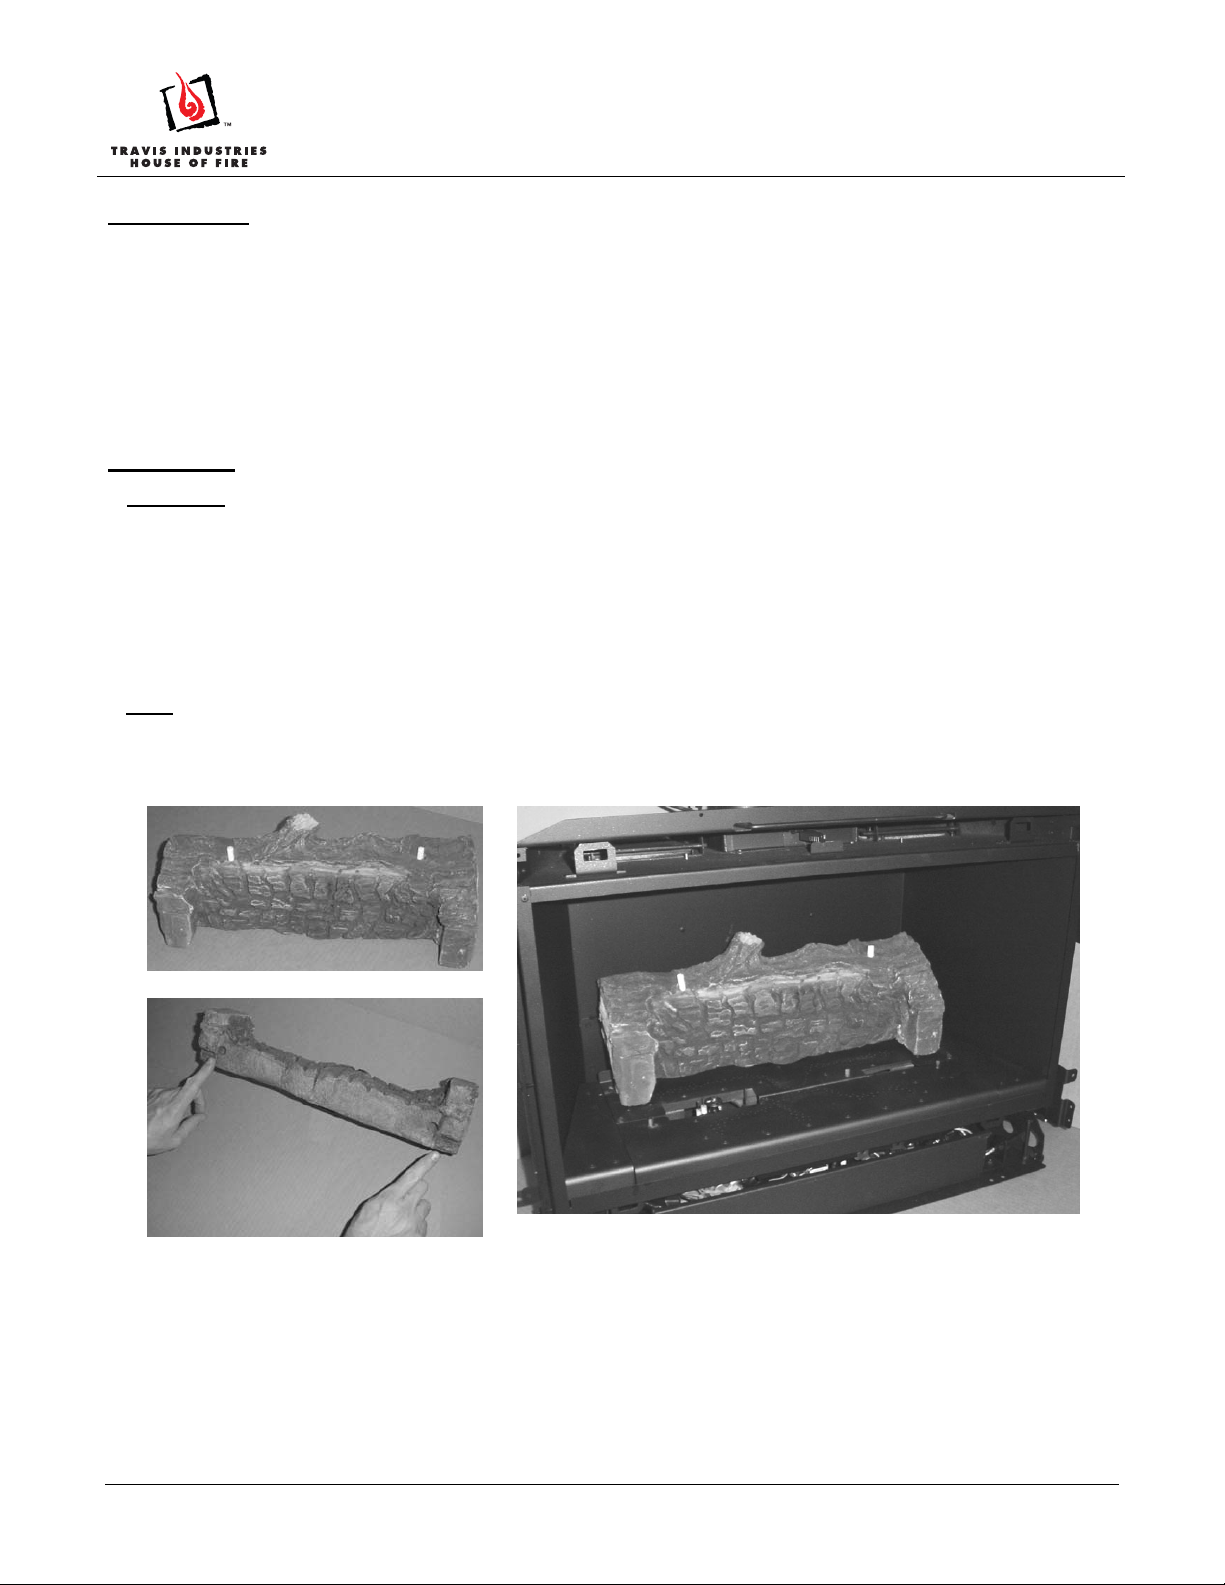
Rear Log Placement
The rear log has two cut-outs on the back edges along the bottom. Place the log on the
burner so these cut-outs fit over the two pins on the burner as shown above.
Page 1 of 4 17601609 - 4/5/10 © Travis Industries, Inc.
Page 2
31 DVI Insert Log Set
Installation Instructions (sku 94400991)
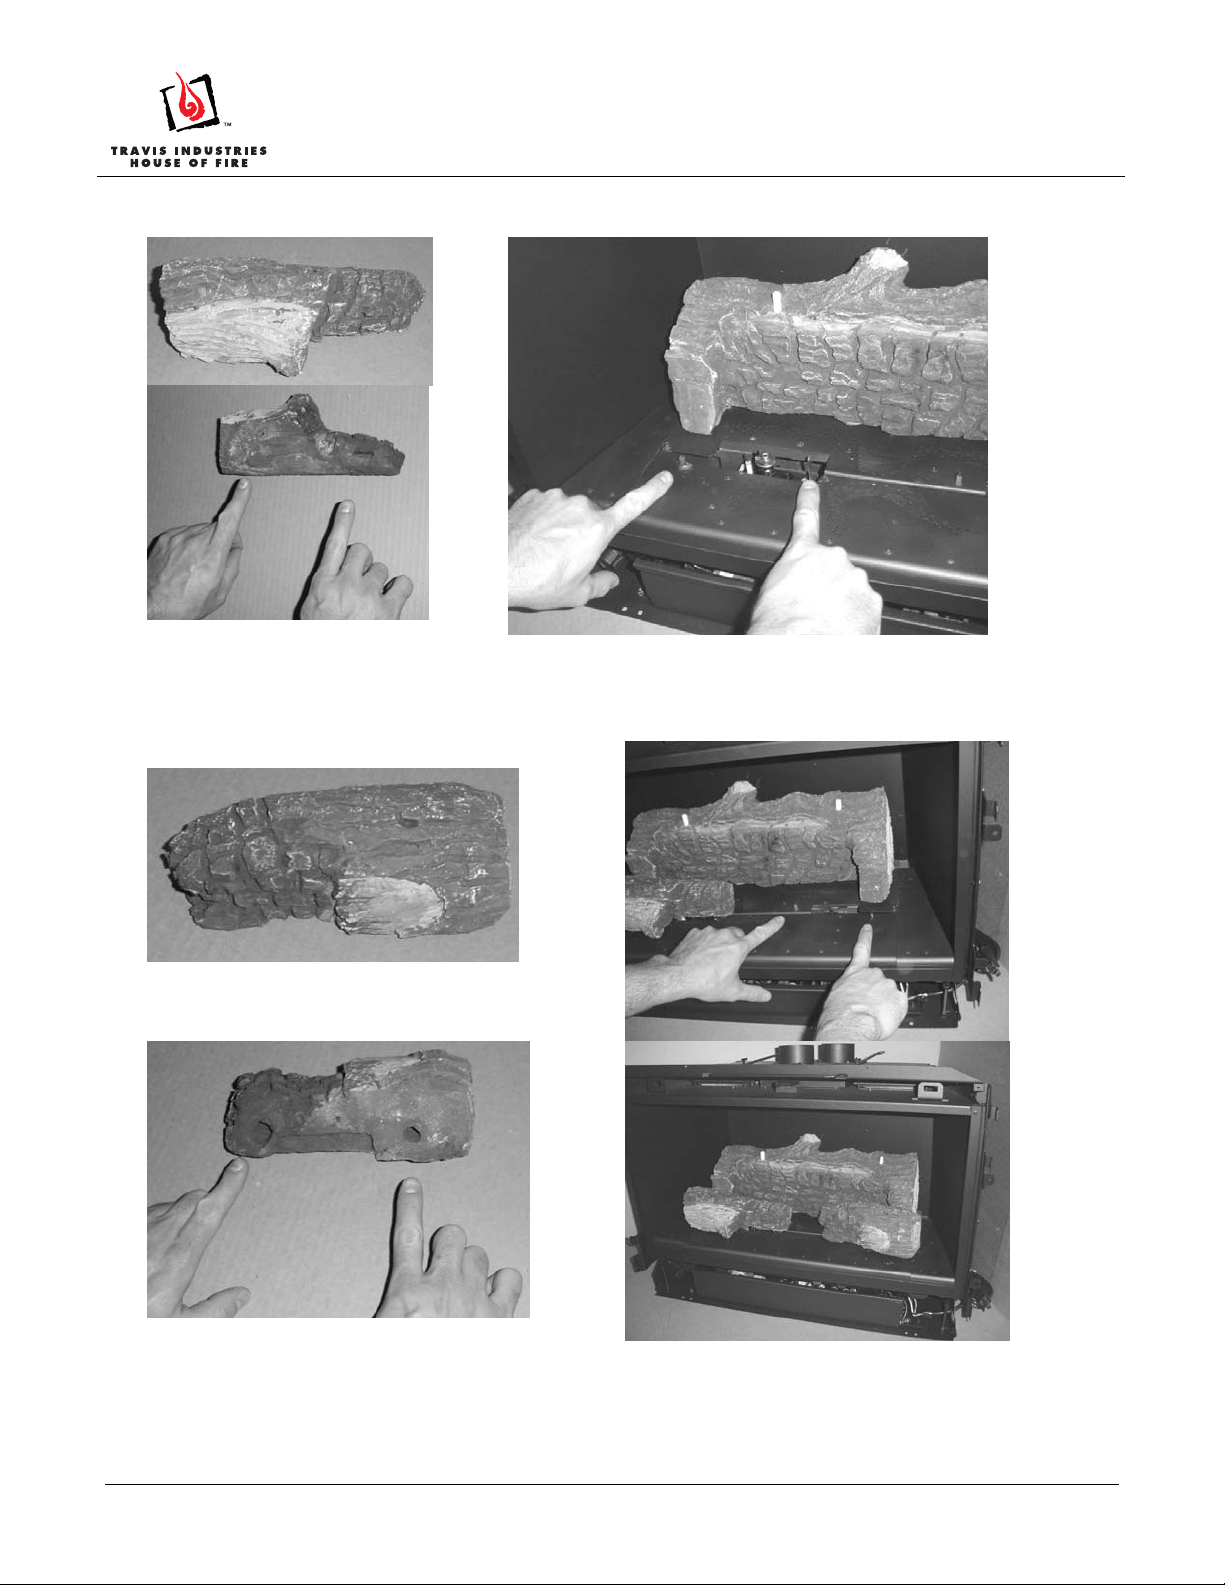
Left Log Placement
The left log has two holes in the bottom that fit over the pin on the burner and metal bracket
attached to the pilot assembly.
RIght Log Placement
The right log has two holes in the bottom that fit over the two pins on the burner. Place the
log as shown above.
Page 2 of 4 17601609 - 4/5/10 © Travis Industries, Inc.
Page 3
31 DVI Insert Log Set
Installation Instructions (sku 94400991)
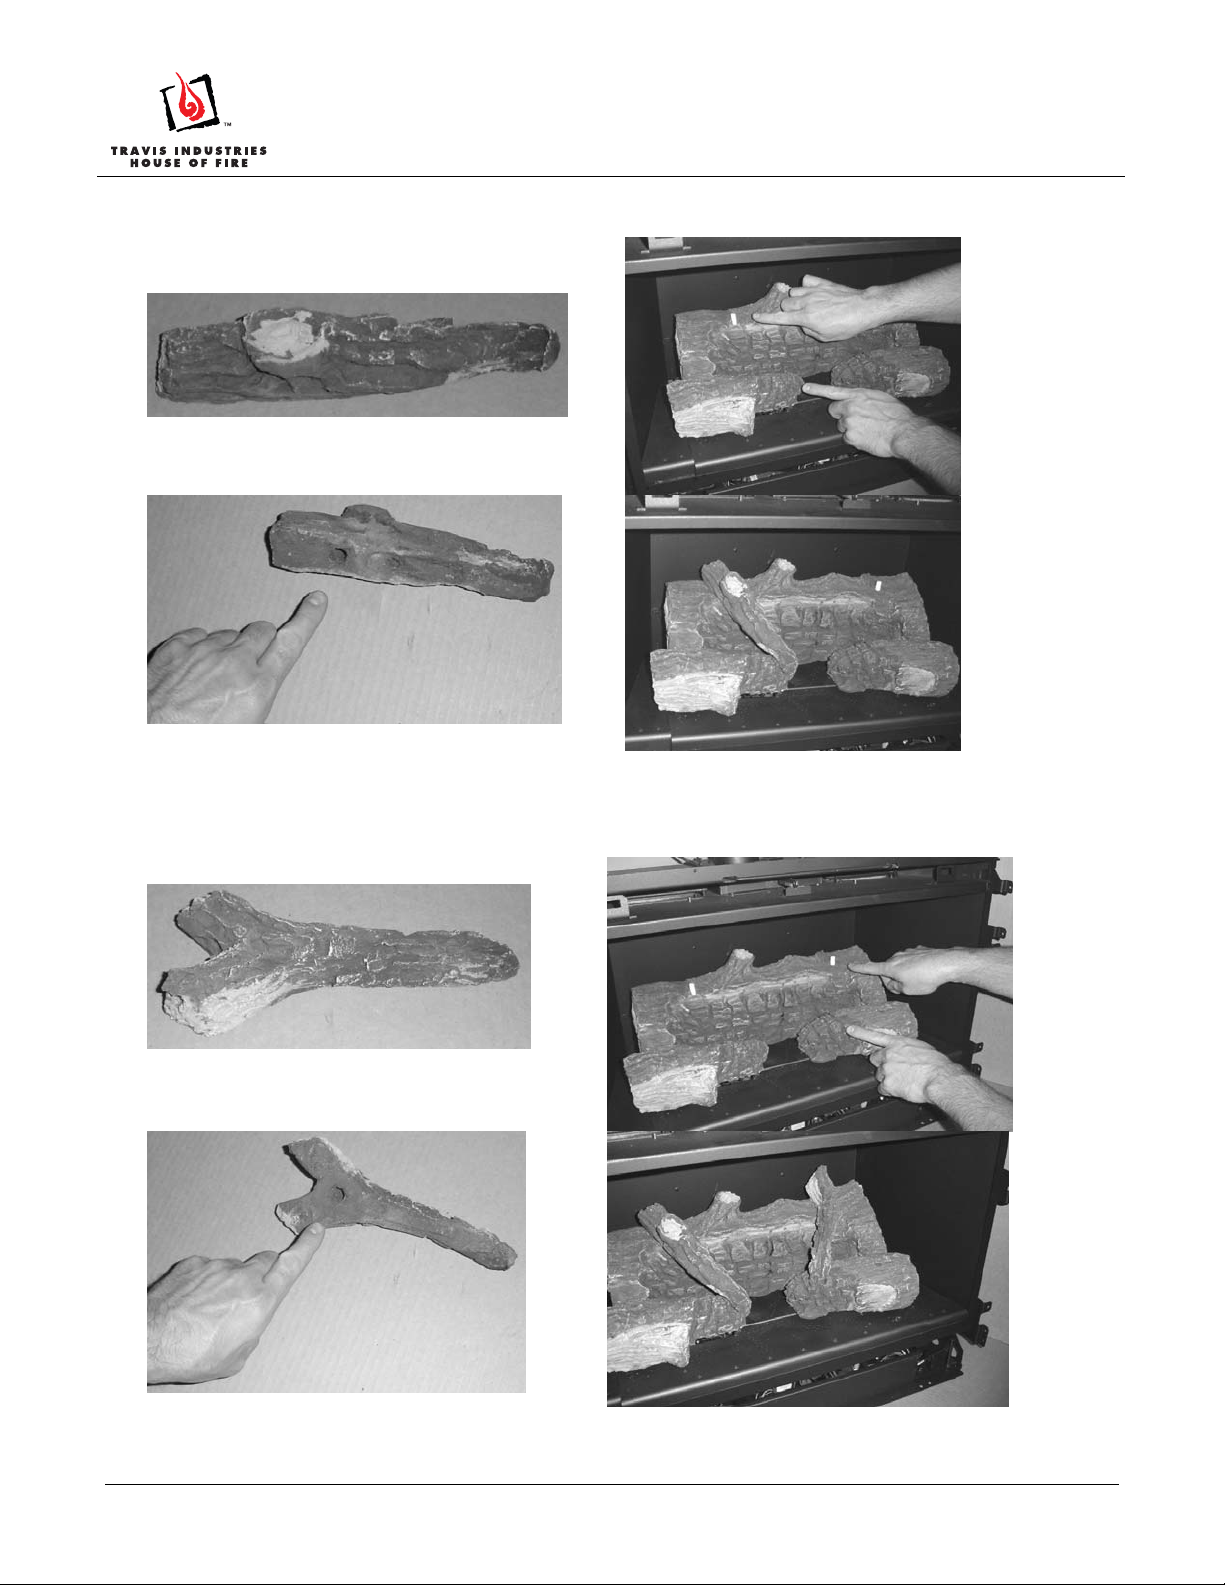
Left Twig Placement
The left twig has a single hole on the bottom that fits over the pin on the rear log. Place the
twig as shown above, noting how the twig points towards the center.
Right Twig Placement
The right twig has a single hole on the bottom that fits over the pin on the rear log. Place
the twig as shown above, noting how the twig points towards the center.
Page 3 of 4 17601609 - 4/5/10 © Travis Industries, Inc.
Page 4
31 DVI Insert Log Set
Installation Instructions (sku 94400991)
Center Twig Placement
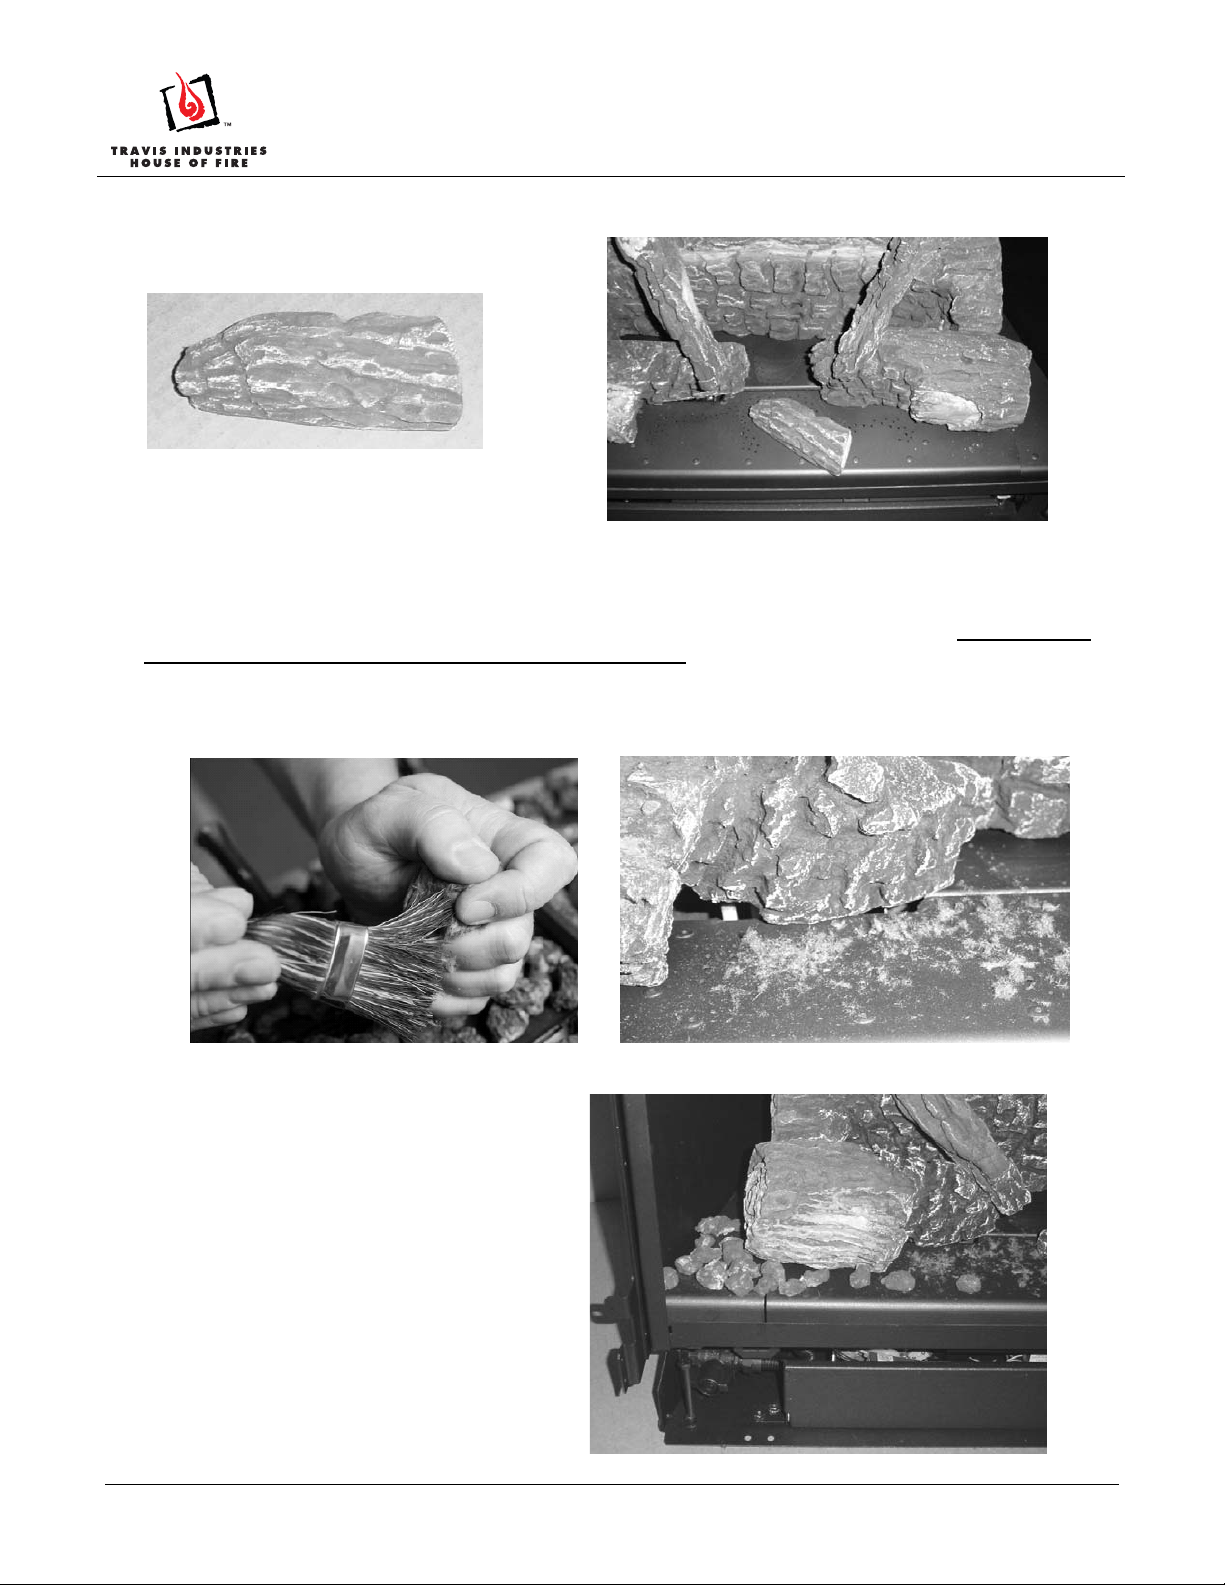
The center twig is placed directly on the burner as shown above. Make sure it so it does not cover any burner
holes
Rockwool Installation
The included rock wool is placed on top of the burner to enhance the glow from the burner. The rock wool
works best when it is applied in a very thin, porous layer. The best method for applying the rock wool is
to brush it on to the burner. Compress a clump of rockwool between your thumb and forefinger. Use a stiff
brush to apply a thin layer of rockwool fibers onto the burner. Do not use the entire bag of rockwool. Use
only a small amount and save the remainder. Over-use of rockwool will diminish the glow and may cause
sooting or other adverse conditions.
Ember Placement
Place a layer of embers along the edges of
the burner, rivets, and along any edges to
enhance the aesthetics of the firebox. Do
not place embers over any burner holes.
See the photo to the right.
Page 4 of 4 17601609 - 4/5/10 © Travis Industries, Inc.
 Loading...