

Page 1
Driftwood Log Set “A” (31 DVI, DVS GSR, 564 HO)
Packing List
Log Set (Rear Log, Left Log, Right Log,
Left Twig, Right Twig, Ember Chunk)
Compatibility
31 DVI
DVS GSR NB with Dancing-Fyre Burner
564 HO with Diamond-Fyre Burner
Installation Instructions
Items Required
A portion of a Crushed Glass Kit (each kit
includes four 2.5 lb. bags):
o Platinum (94500580)
o Bronze (94500581)
o Cobalt (94500582)
(sku 94500571)
Installation Warnings
The logs are fragile, especially after being exposed to heat.
Make sure the gas control valve is OFF and the heater is cool prior to conducting service.
Failure to position the parts in accordance with these diagrams or failure to use only parts specifically
approved with this appliance may result in property damage or personal injury.
The burner must be correctly positioned before installing the log set. Make sure the burner is fully seated
and the pilot is properly aligned. See owner’s manual for details on burner removal.
HINT: If using propane (LP), convert the appliance before installing the log set.
If using firebacks, make sure they are installed before installing the log set.
Log Set Installation
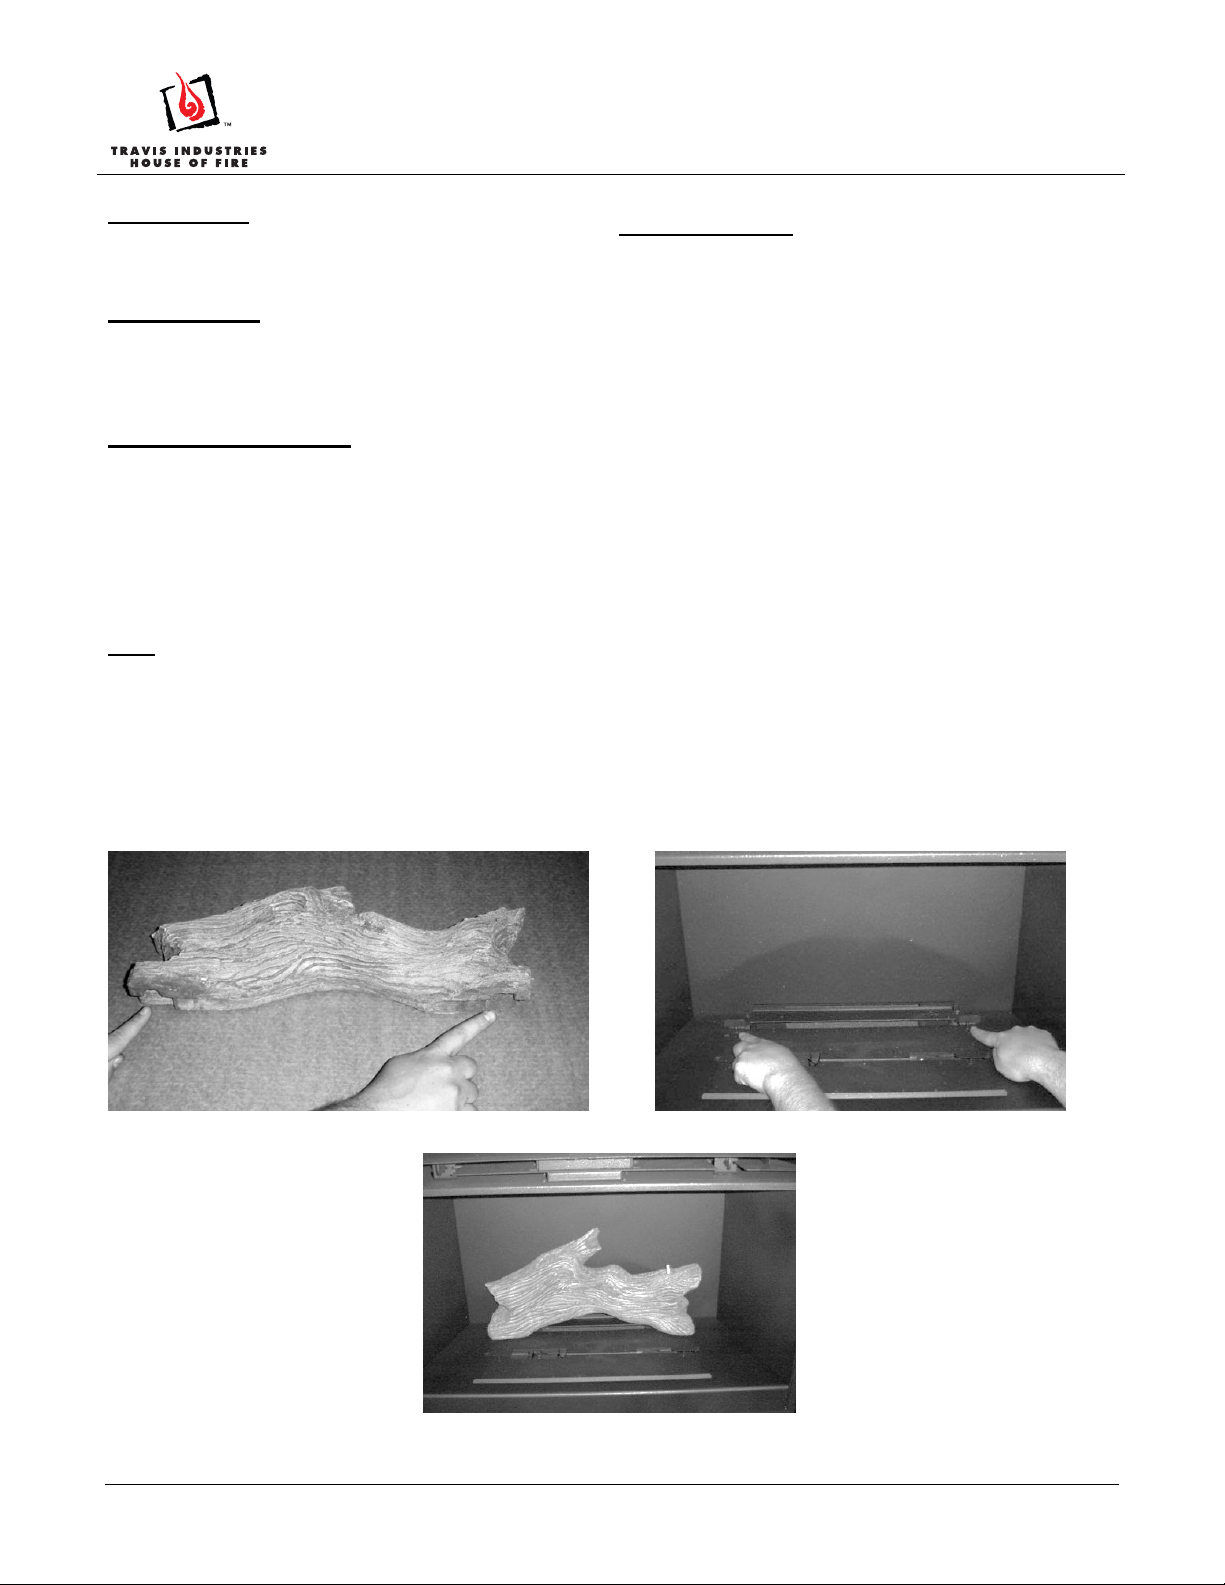
1. Place the rear log so the two holes on the bottom of the log fit over the pins on the burner. The log rests
against the back wall or fireback.
Figure 1: Rear Log
Figure 3: Rear Log in Place
Figure 2: Rear Log Placement
Page 1 of 5 17601710 — 6/28/12 © Travis Industries, Inc.
Page 2
Driftwood Log Set “A” (31 DVI, DVS GSR, 564 HO)
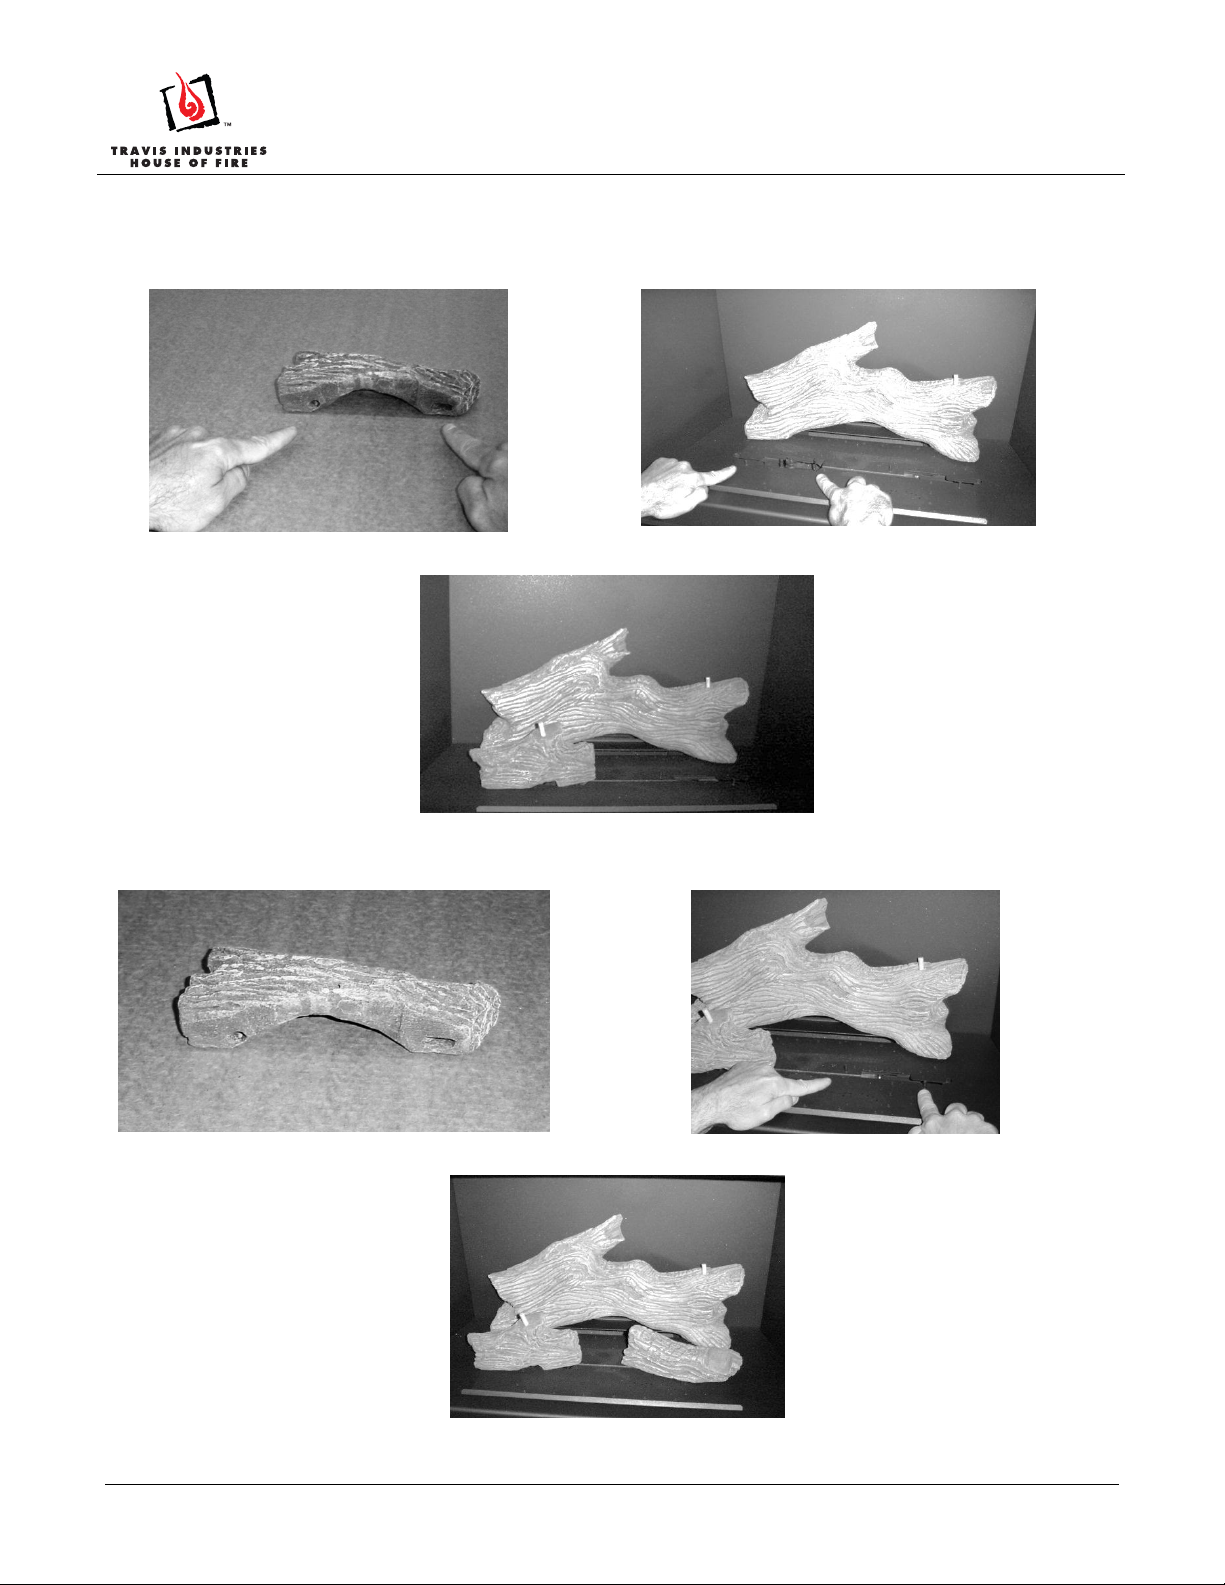
2. Place the left log as shown below. Note how the two pins on the burner insert into the holes on the log. Make
sure the log is pushed all the way back.
Installation Instructions
Figure 4: Left Log
Figure 5: Left Log Placement
(sku 94500571)
Figure 6: Left Log in Place
3. The right log as shown below. Note how the two pins on the burner insert into the holes on the log.
Figure 7: Right Log
Figure 8: Right Log Placement
Figure 9: Right Log in Place
Page 2 of 5 17601710 — 6/28/12 © Travis Industries, Inc.
Page 3
Driftwood Log Set “A” (31 DVI, DVS GSR, 564 HO)
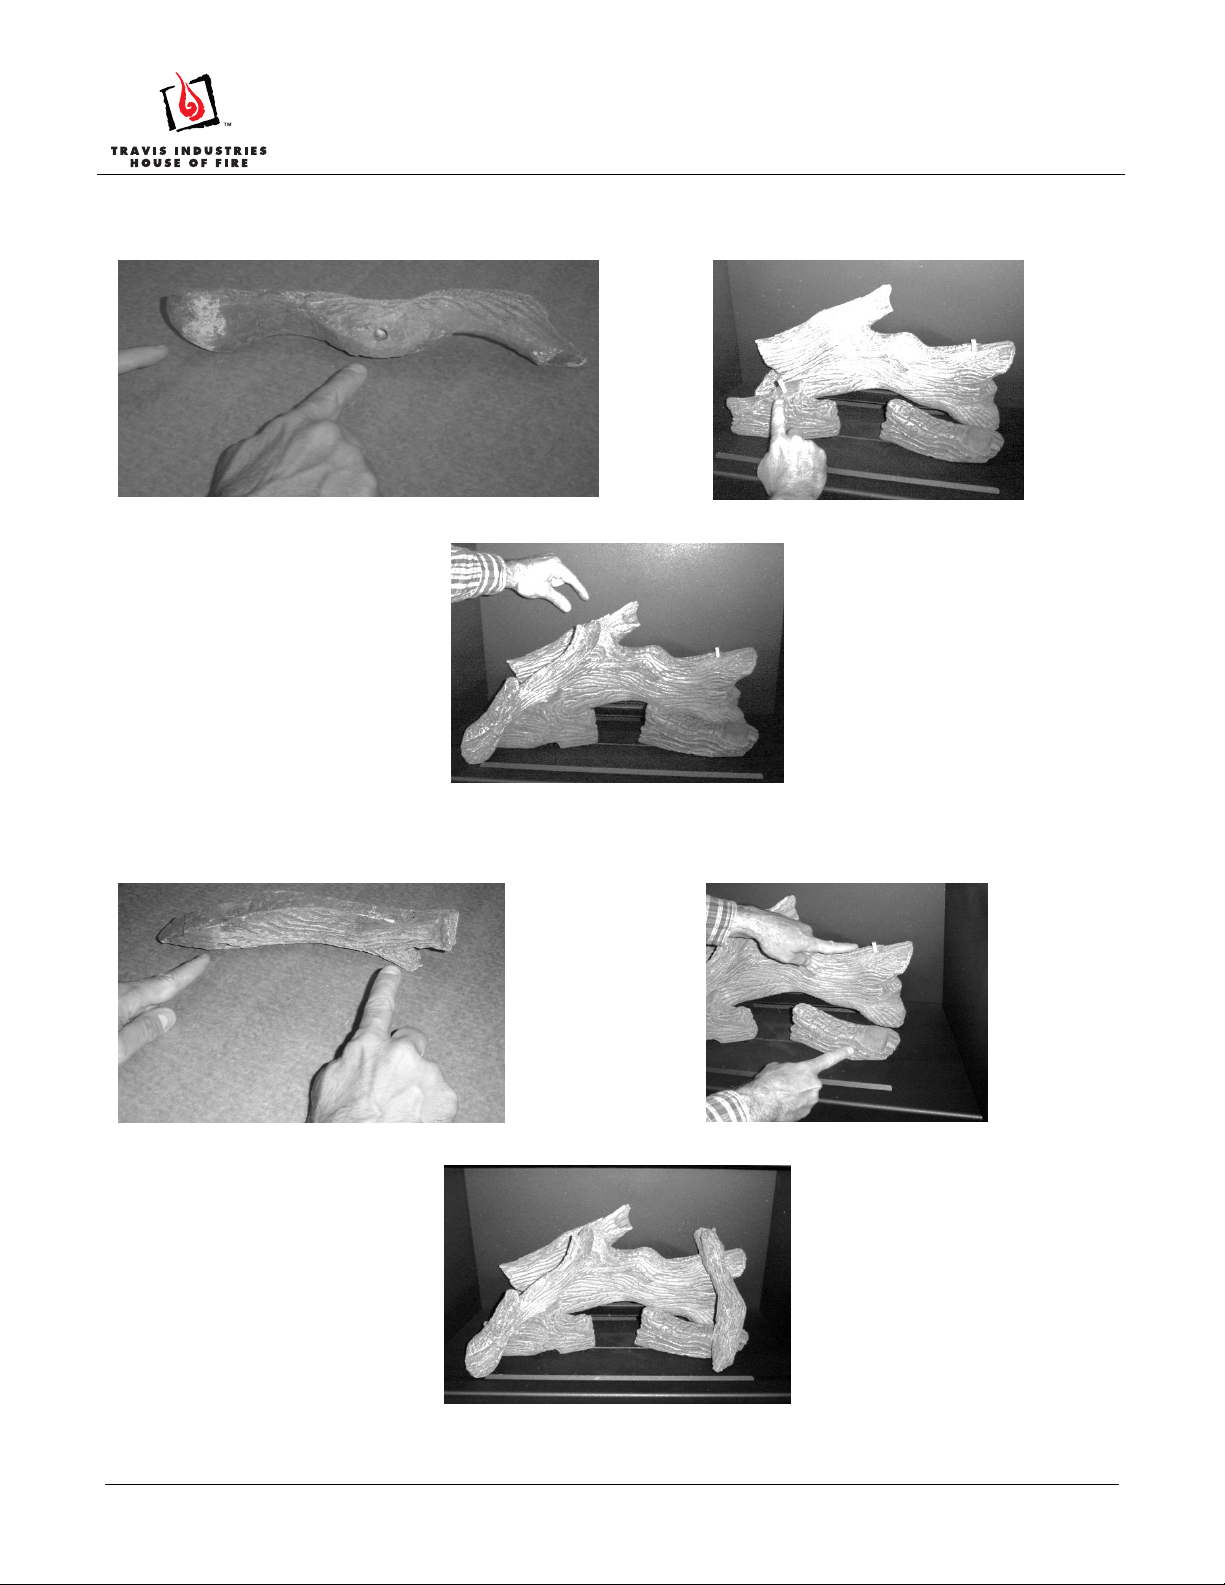
4. Place the left twig as shown below. Note how the hole on the twig inserts over the pin on the left log and rests
on the ember tray. When installed, the twig should have a space of about 1 inch from the rear log.
Installation Instructions
(sku 94500571)
Figure 10: Left Twig
Figure 11: Left Twig Placement
Figure 12: Left Twig in Place
5. Place the right twig as shown below. Note how the hole on the twig inserts over the pin on the rear log and
rests on the flat portion of the right log.
Figure 13: Right Twig
Figure 14: Right Twig Placement
Figure 15: Right Twig in Place
Page 3 of 5 17601710 — 6/28/12 © Travis Industries, Inc.
Page 4
Driftwood Log Set “A” (31 DVI, DVS GSR, 564 HO)
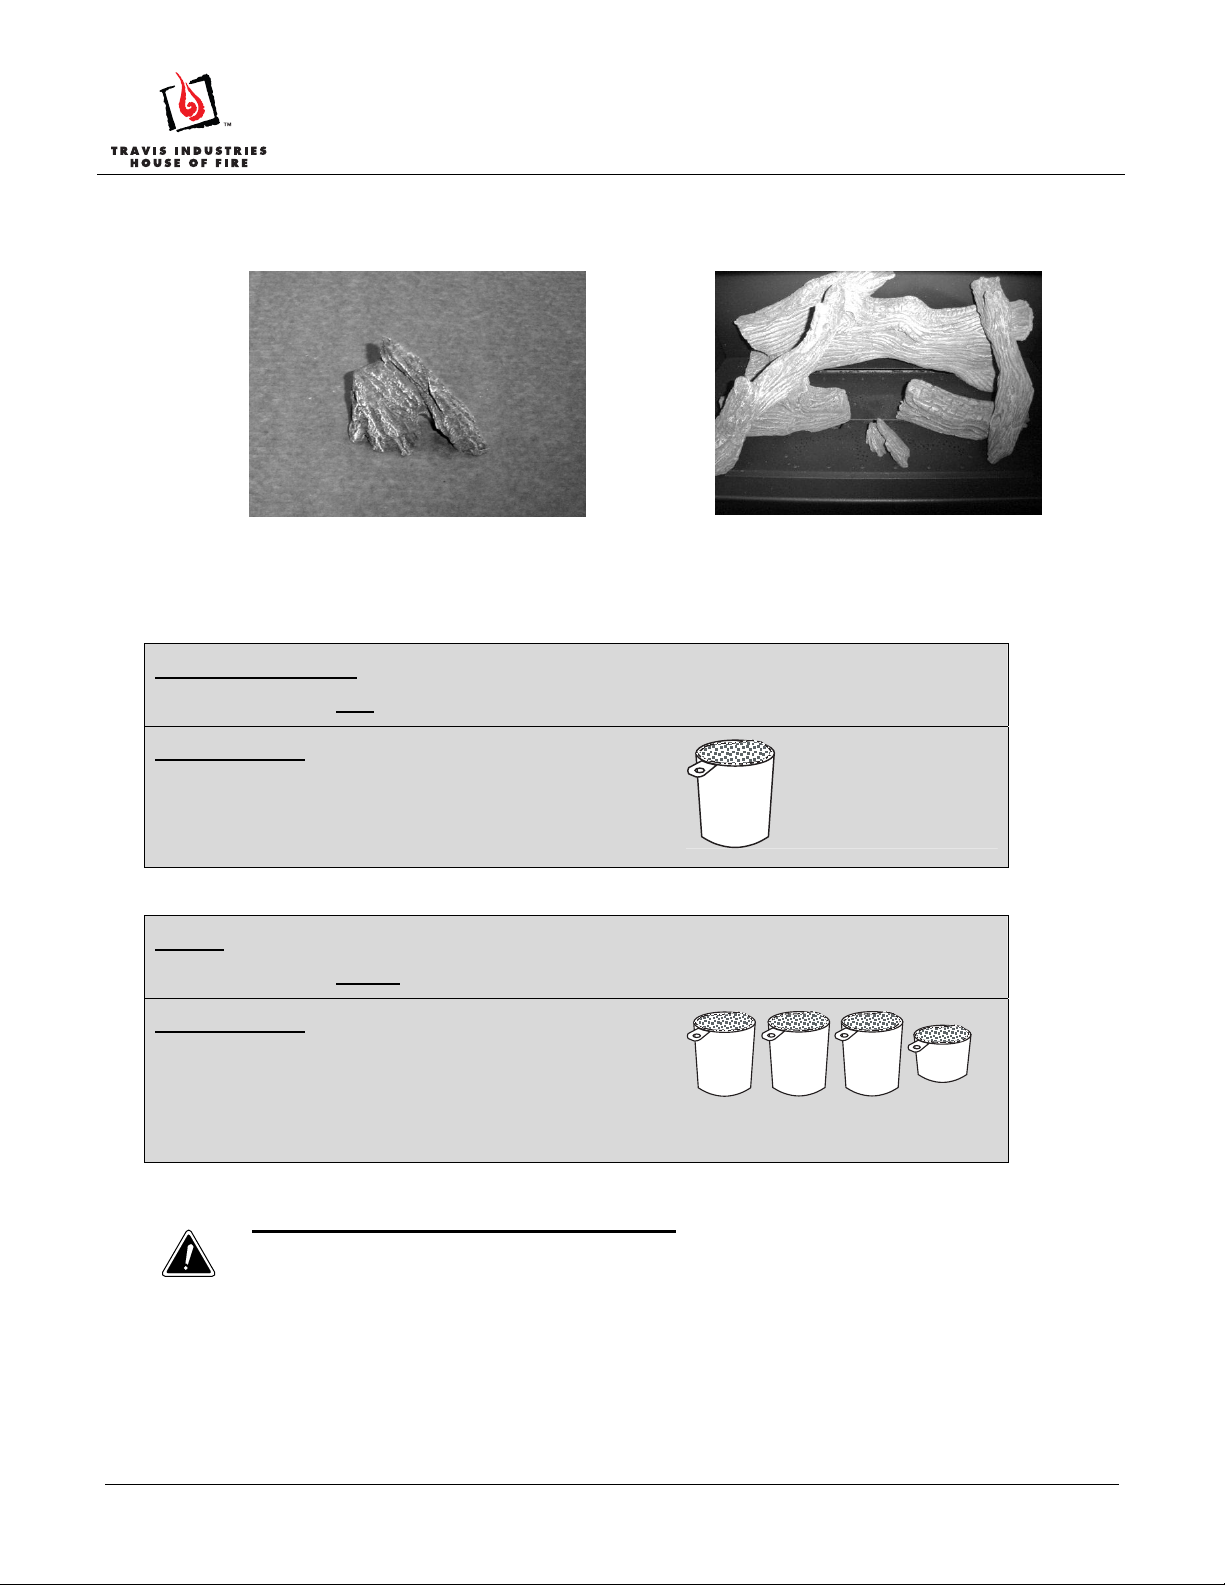
6. Place the ember chunk on the burner as shown below. Make sure the ember chunk does not cover any of the
burner holes.
NOTE: The Ember Chunk should stand vertically in the firebox.
Figure 16: Ember Chunk
Installation Instructions
(sku 94500571)
Figure 17: Ember Chunk in Place
Crushed Glass Installation
31 DVI / DVS GSR NB
This model requires 1 lb. of ¼” American Fireglass Crushed Glass
Measuring Glass
Use 1 Rounded Cup (240ml rounded)
NOTE: A level measuring cup (240ml) = 0.95 lbs.,
so each cup should be slightly rounded.
564 HO
This model requires 3.5 lbs. of ¼” American Fireglass Crushed Glass
Measuring Glass
Use 3-1/2 Rounded Cups (240ml rounded)
(one 2.5 lb. bag plus 1 Cup)
NOTE: A level measuring cup (240ml) = 0.95 lbs.,
so each cup should be slightly rounded.
It is better to use too little glass than too much. Excessive glass, especially when using propane
(LP), will lead to sooting. Place the glass as thinly as possible over the burner ports for optimum
burner performance.
Page 4 of 5 17601710 — 6/28/12 © Travis Industries, Inc.
Page 5
Driftwood Log Set “A” (31 DVI, DVS GSR, 564 HO)
Installation Instructions
(sku 94500571)
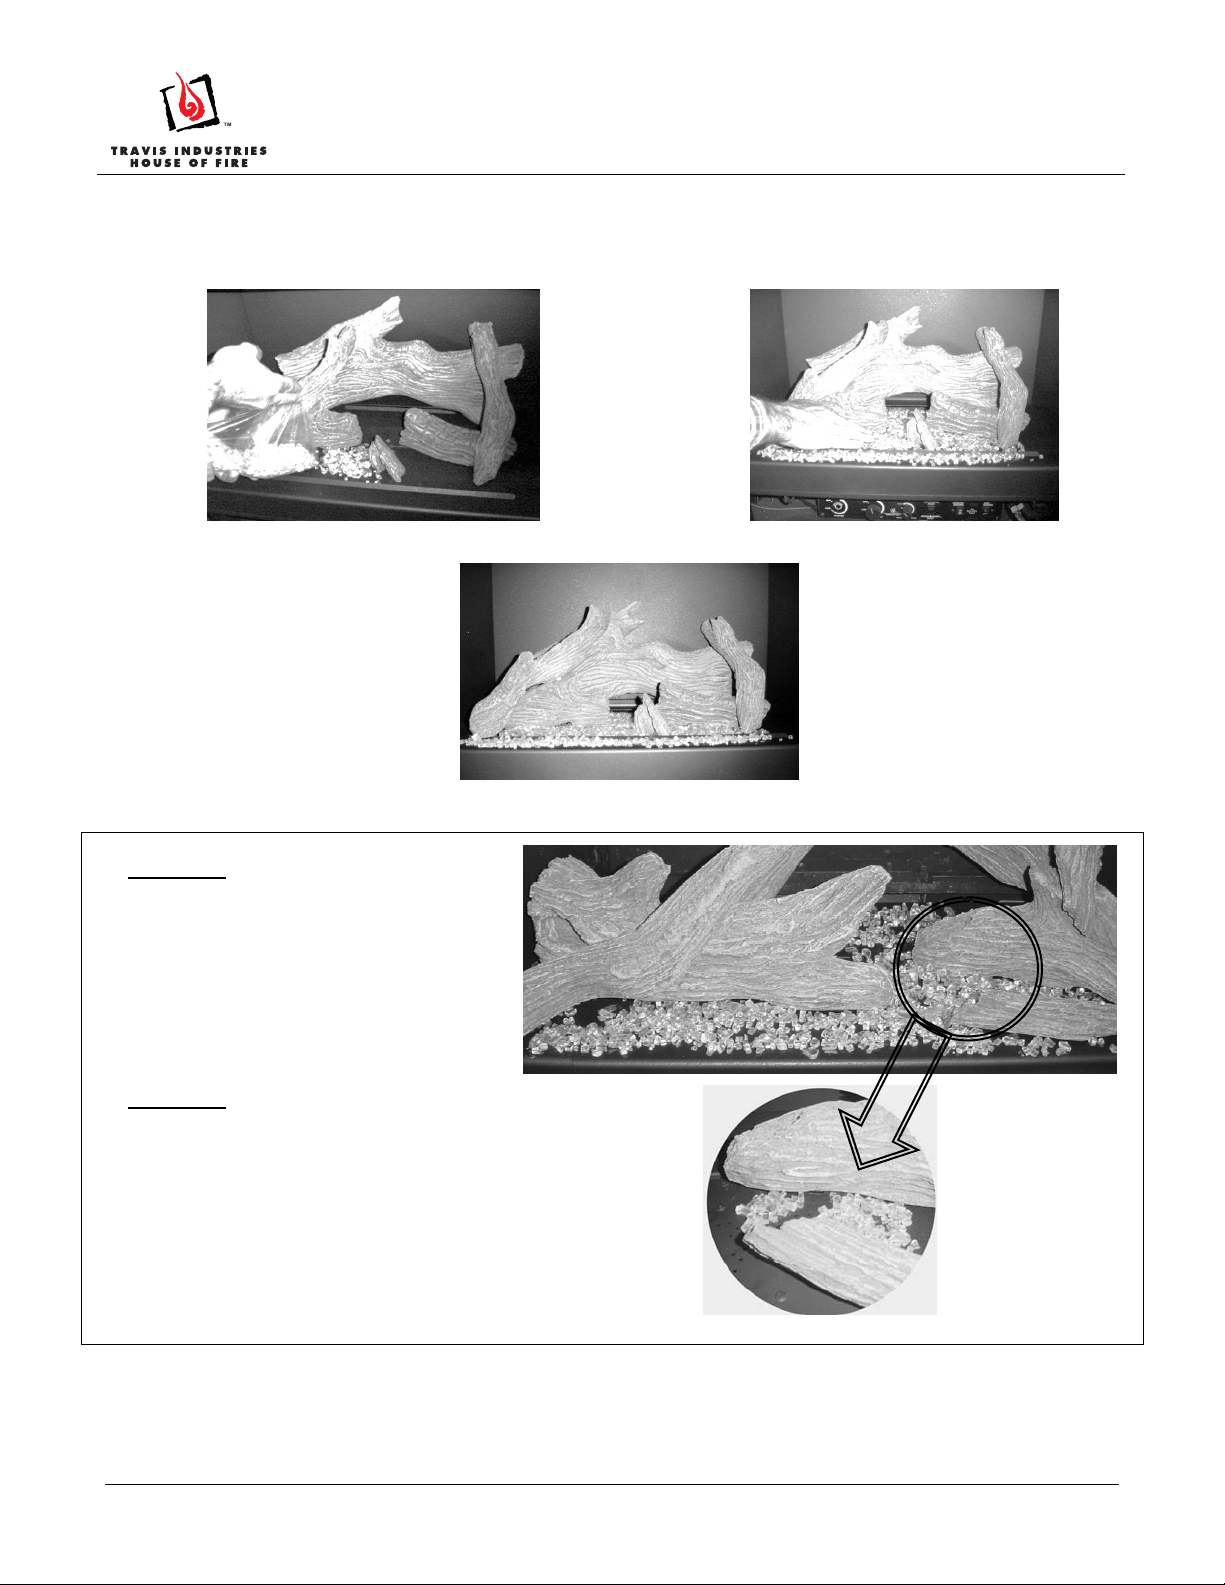
Carefully pour the glass around the floor of the firebox as shown below. Now we are working with your inner artist.
Here you must pay attention to create the best possibl e look. For hard to reach a reas, you can use a teaspoon to
ensure all black surfaces are covered.
Figure 18: Pouring Crushed Glass
Figure 19: Spreading Crushed Glass
Figure 20: Completed Log Installation
WARNING: Make sure the glass is a
maximum 1 layer thick (NG can be up
to 2 layers). If the glass is too thick it will
impair burner performance and create
soot.
WARNING: Make sure the pilot is not
covered with glass. Clear away glass, if
necessary, to ensure the pilot flame
lights the burner quickly.
Figure 21: Glass Thickness
Page 5 of 5 17601710 — 6/28/12 © Travis Industries, Inc.
 Loading...