

Page 1

HEDS-8949 & HEDS-8969
Alignment Kit for AEAT-9000 Encoders
User Manual
1. Introduction
Overview
This user manual describes the Avago HEDS-8949 and
HEDS-8969 alignment kit. The kit features real-time IC
monitoring the IC output during user alignment. The
alignment kit consists of the IC interface hardware and
Windows software. The IC interface hardware is a microcontroller system that connects the HEDS-8949 /
HEDS-8969 encoder to the PC through a USB cable. This
user manual includes hardware setup, software setup and
software operating illustrations.
Features
• Bus-powered USB device
• Real-time monitoring of LocTest and TiltOut output
• Real-time monitoring A/B Incremental signal pairs or
Sine/Cosine signal pairs.
• Real-time monitoring of SSI data.
• Data capturing rate at 4000 samples per second
Ordering Information
HEDS-8949 for AEAT-9000-1GSH0
HEDS-8969 for AEAT-9000-1GSH1 and AEAT-9035
Page 2

2. Hardware Components
Unpacking the Unit
Figure 1 illustrates the typical packing of the HEDS-8949/
HEDS-8969 alignment kit.
The package includes:-
1. USB cable
2. Alignment module (HEDS-8949/8969)
3. Encoder cable (HEDS-8949/8969)
(24/30 pin for HEDS-8949, AEAT-9000-1GSH0)
or
(24/16 pin for HEDS-8969, AEAT-9000-1GSH1/AEAT-9035)
4. Installation CD
Figure 1. Inside the alignment kit box
Figures 2 and 3 show the various components provided in the alignment kits.
The USB cable (1) connects to the USB port of the alignment kit (2).
2
1
3
Figure 2. Alignment kit components for HEDS-8949 Figure 3. Alignment kit components for HEDS-8969
4
3
1
2
4
2
Page 3
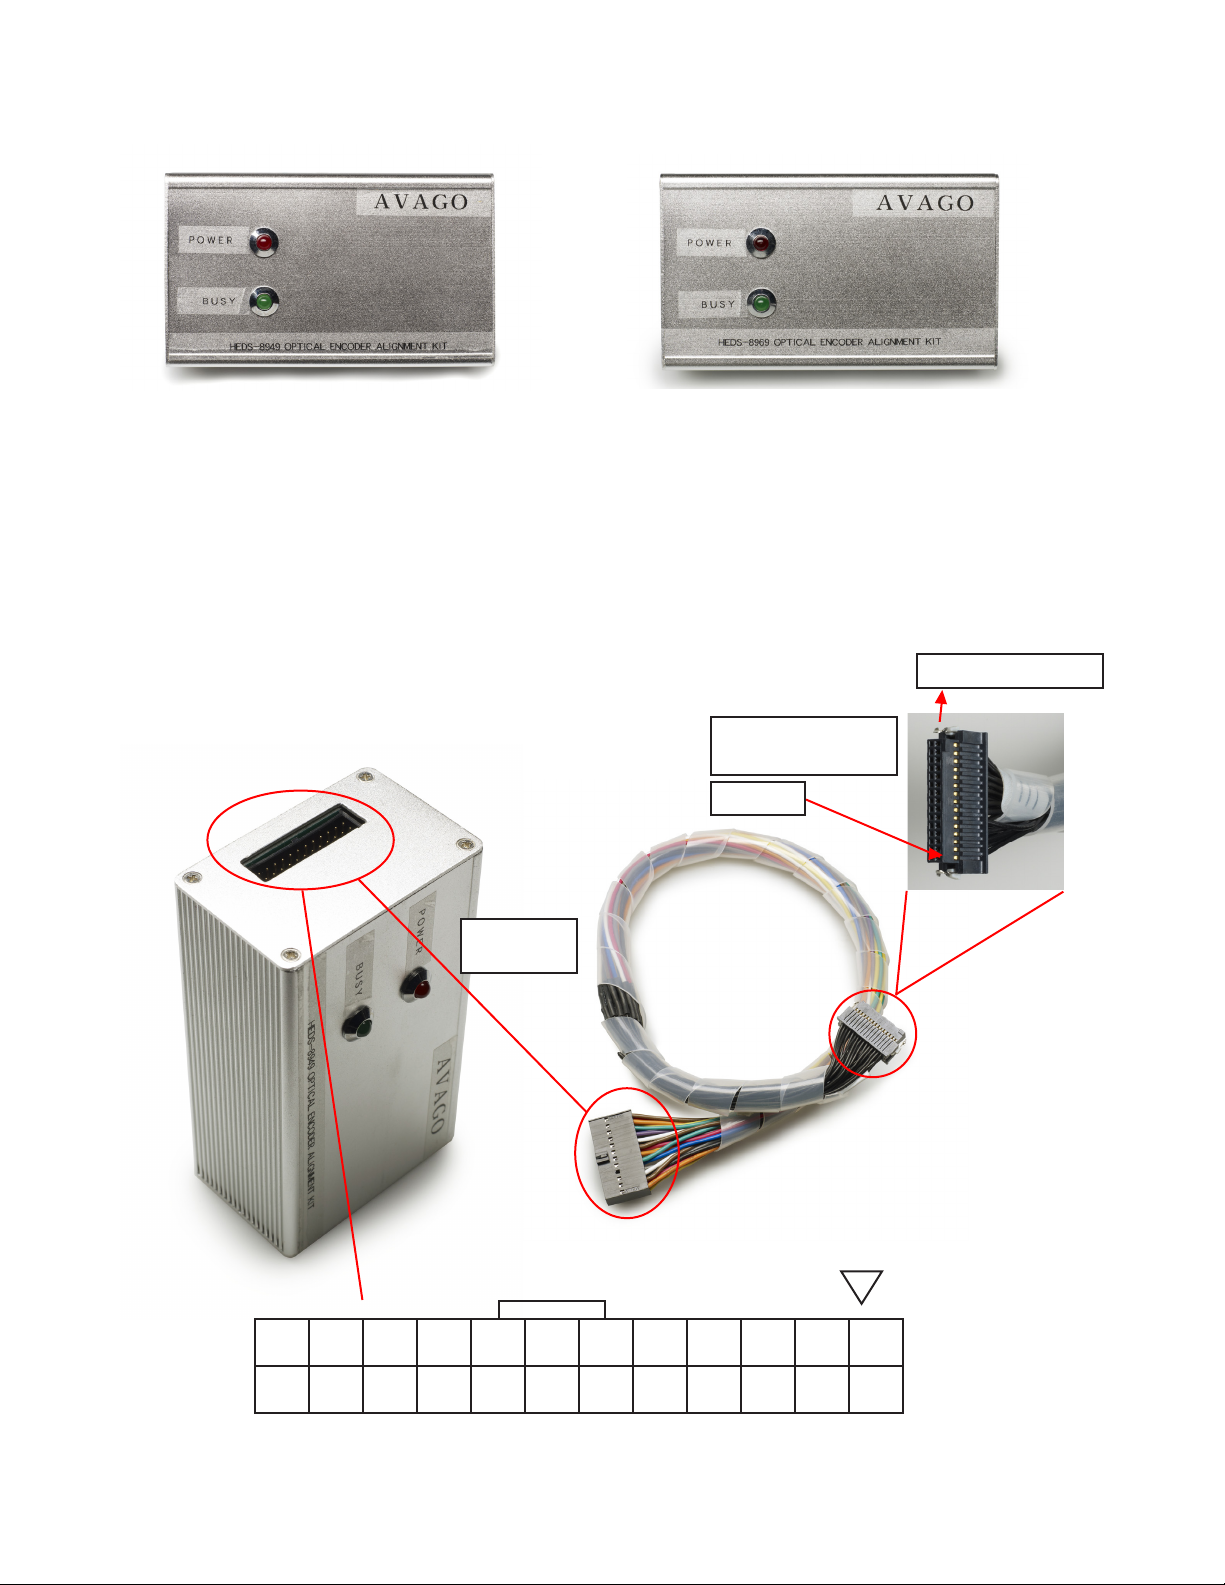
Figures 4 and 5 show the HEDS-8949/ HEDS-8969 alignment modules.
Figure 5. Alignment module top cover for HEDS-8969Figure 4. Alignment module top cover for HEDS-8949
Connect the alignment kit to your PC using the provided USB cable. When the alignment module is powered-up the red
LED will illuminate. The green LED will blink when there is communication between the PC and encoder.
The kit’s current consumption is less than 200 mA. The kit includes a 100 mA current limiting circuit for the encoder.
If the current consumption for the alignment kit exceeds 100 mA, the programmer will cut o the supply to the encoder.
On the left side of the programmer is the programming connector, which is a 24-pin (2 x 12) rectangular header.
This connector is used to connect a cable harness to the encoder. Figure 6 shows the encoder cable and connectors.
The programming connector pin names and function are described in Table 1 (shown on next page).
Use for AEAT-9000-1GSH0
Matching
Connector
Encoder Connector
(To Target System)
Pin 1
23 21 19 17 15 13 11 9 7 5 3 1
24 22 20 18 16 14 12 10 8 6 4 2
Figure 6. Encoder cable and connectors: 24-way cable for connecting the encoder IC of the target system
3
Page 4
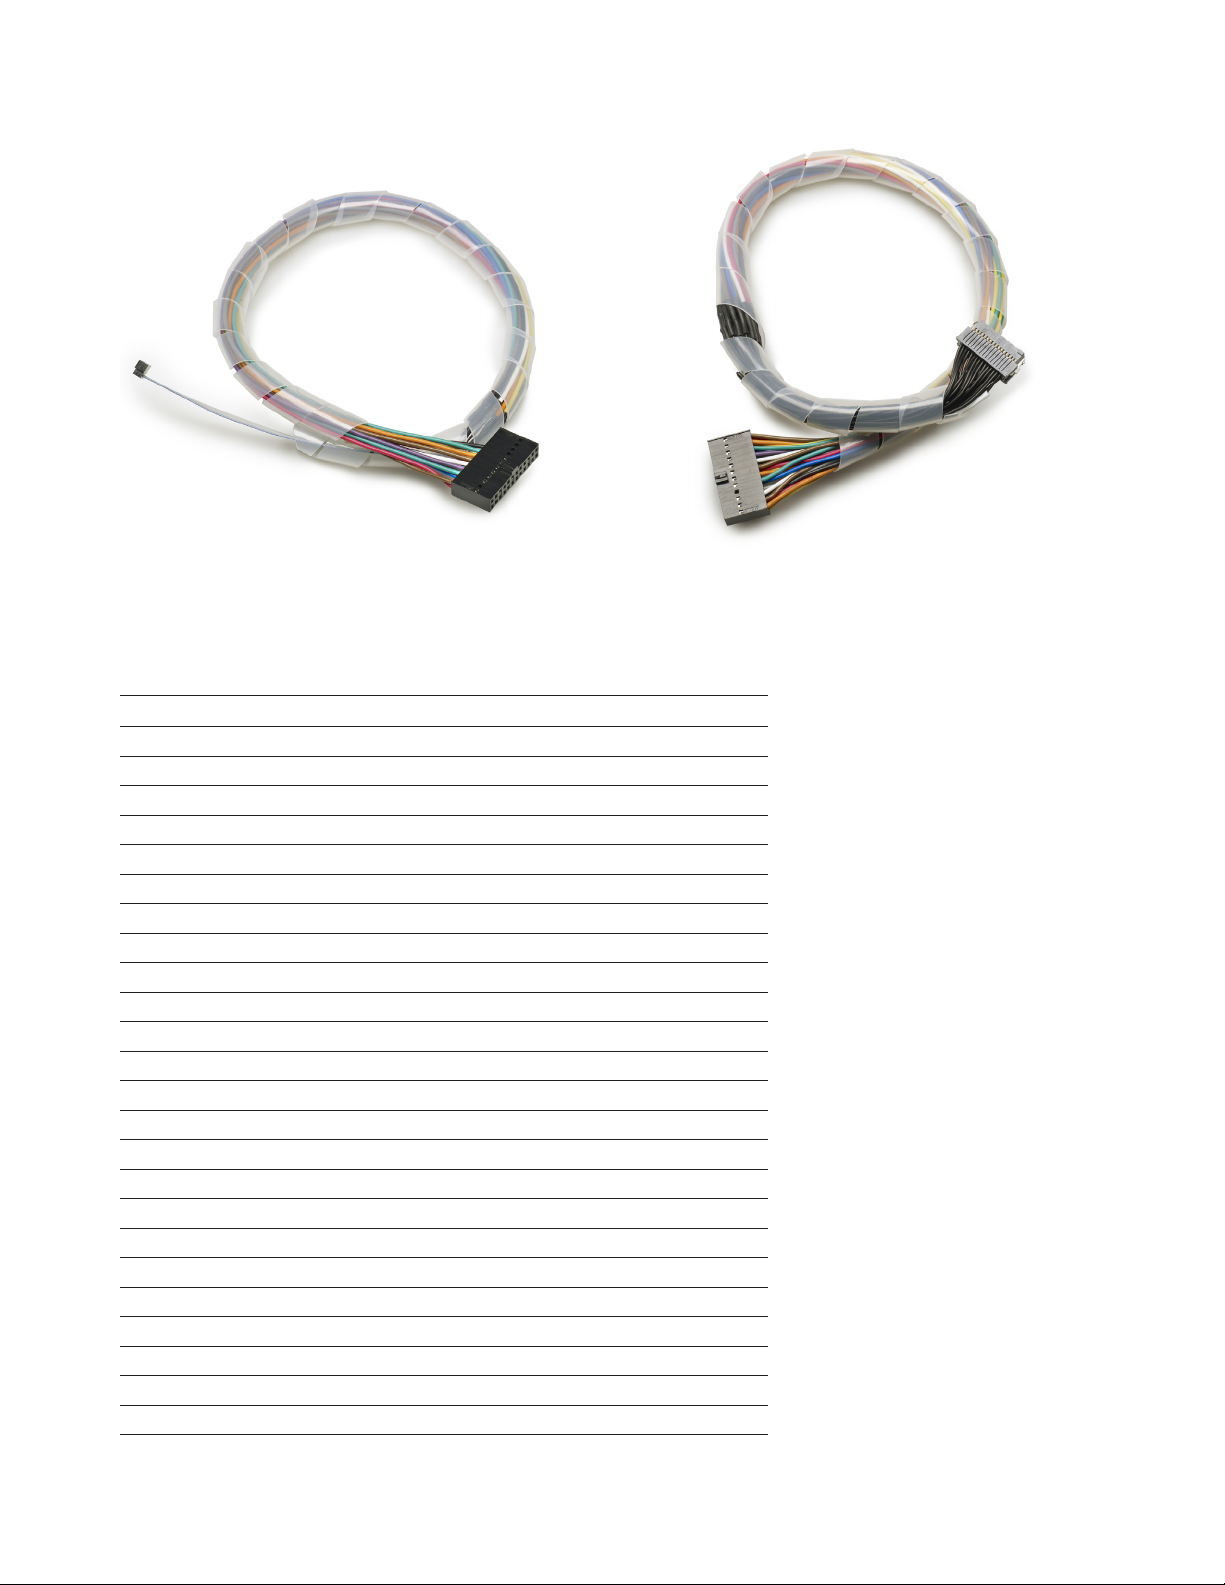
The encoder cables are shown below in gures 7a and 7b.
Figure 7a. Encoder cable, HEDS-8969 (for AEAT-9000-1GSH1/AEAT-9035) Figure 7b. Encoder cable, HEDS-8949 (for AEAT-9000-1GSH0)
Table 1. Programming connector pin descriptions
PIN Name Function
PIN 1 INCA Incremental A Input
PIN 2 INCB Incremental B Input
PIN 3
PIN 4
PIN 5 SCL+ SSI Shift Register Clock
PIN 6 SPI_SI SPI Data Input
PIN 7 SPI_CLK SPI Clock
PIN 8 NSL+ SSI Enable
PIN 9 LERR Error pin
PIN 10 GND IC Ground
PIN 11 Zero_RST Zero Reset Input
PIN 12 DOUT SSI Data Output
PIN 13 Vdd IC supply
PIN 14 LocTest Alignment Locate Signal
PIN 15 MSBINV Inverted Counting Input
PIN 16
PIN 17
PIN 18 TiltOut Tilt Alignment Output
PIN 19 DIN+ SSI Data Input
PIN 20 SPI_SO SPI Data Output
PIN 21 Cosine+ Cosine+ Input
PIN 22 Sine+ Sine+ Input
PIN 23 Cosine- Cosine- Input3
PIN 24 Sine- Sine- Input4
4
Page 5
3. Software Installation
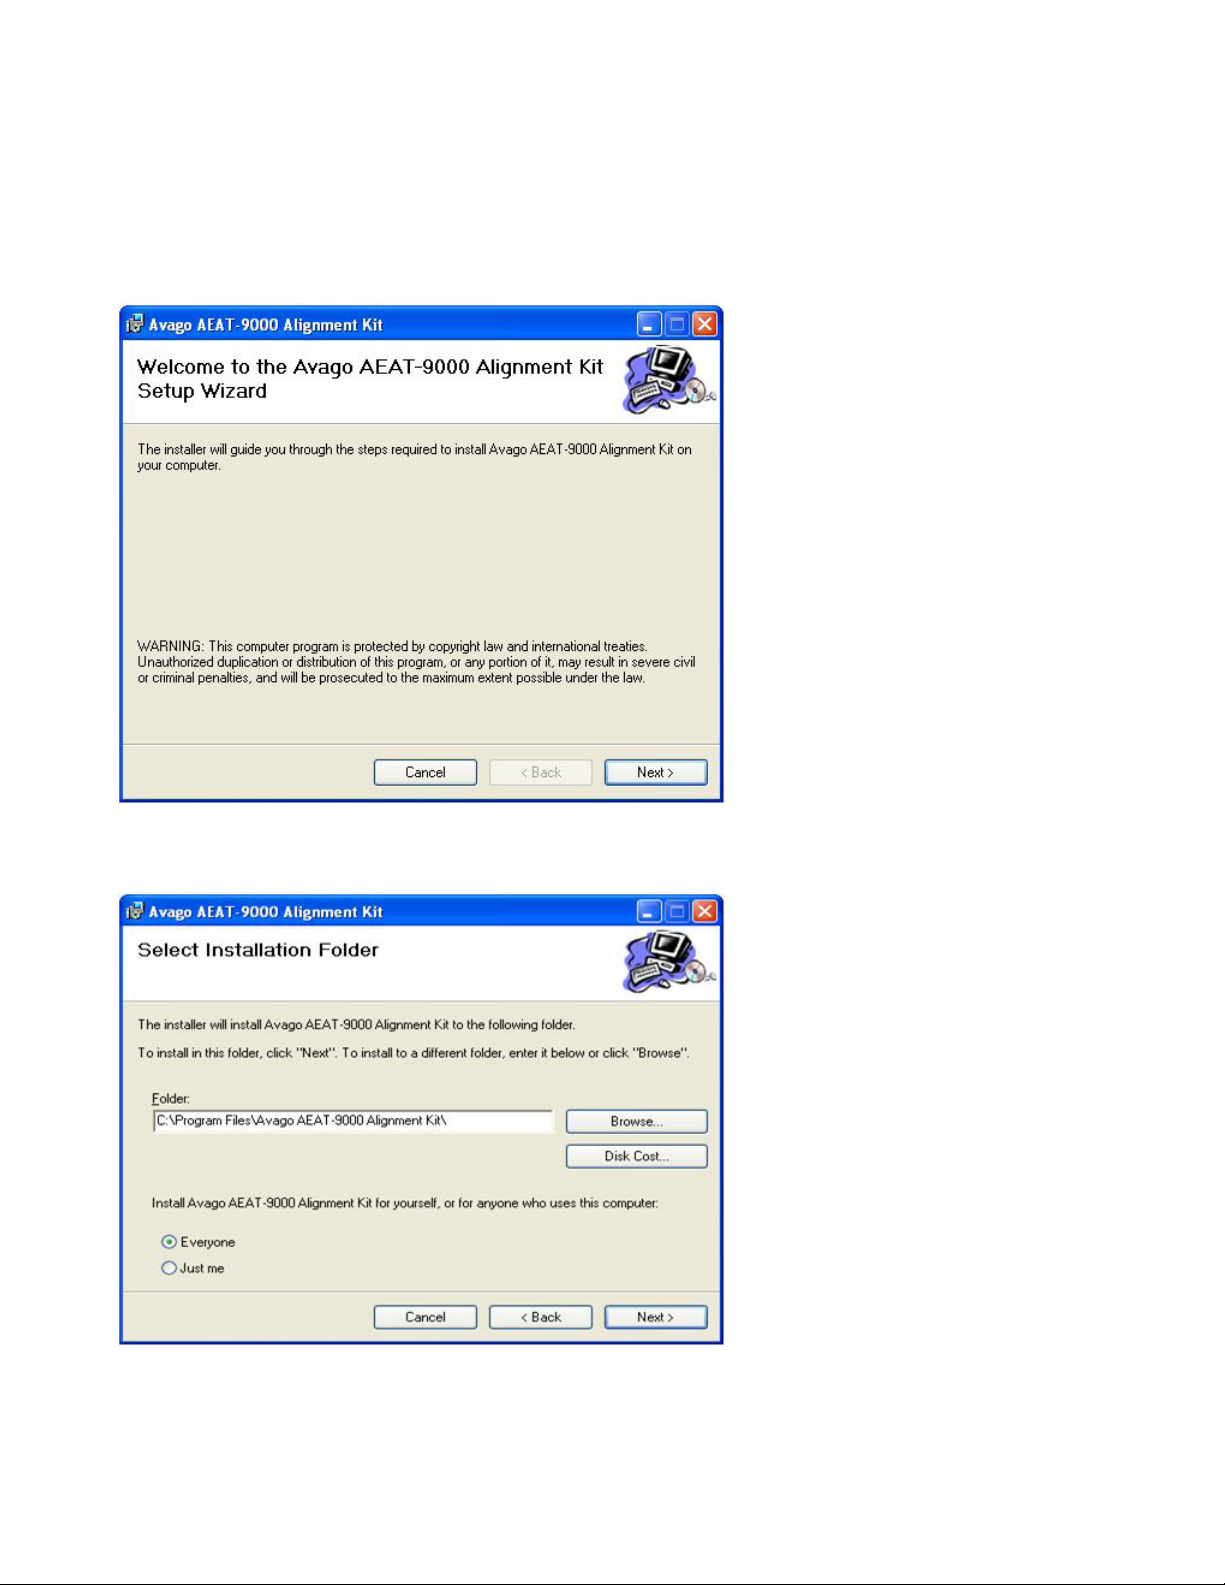
The user manual and the programmer application software are on the installation CD. To install the application software, browse the installation CD using Explorer and double-click the 'Avago AEAT-9000 Alignment
Kit' icon. The installation will run automatically. Figures 8, 9 and 10 illustrate the software installation process.
Figure 5: Software installation start up screen. Click Next to start installation.
Figure 8. Software installation start up screen. Click Next to start installation.
Figure 9. Installation folder selection screen. Specify the installation folder to change the default path. Click Next to continue.
5
Page 6

The installation process will continue after the step shown in Figure 10, and nally, an “Installation Complete” screen will
be shown.
Figure 10. Click Next to conrm and start the installation.
Locate the software by selecting Start > All Program > Avago AEAT-9000 Alignment Kit > AEAT-9000 Alignment Kit to
run the software.
To uninstall the software, open the Windows’ Control Panel, run the ”Add or Remove Program”, and locate ”Avago
AEAT-9000 Alignment Kit”. Click “Change/Remove” and follow the screen instructions to remove the software.
6
Page 7

4. Software Application
4.1 Device Monitoring
To run the application software, click Start > All Program > Avago AEAT-9000 Alignment Kit > AEAT-9000 Alignment Kit.
After selecting the software, the screen in Figure 11 will appear.
The software has two tabs: Device Monitoring and Alignment. Device Monitoring provides real-time display of encoder
data, and Alignment provides the interface for aligning the code disc.
Figure 11 shows the main screen of the software. When the ”Connect” button is clicked, the software will locate and
connect to the alignment kit. Once connected, real-time SSI angular data will be streamed to the software and displayed
as raw 17-bit SSI data as well as the converted mechanical degree position. This is illustrated in Figure 12.
Selection of Device Monitoring and
Alignment Mode
Figure 11. Optical encoder alignment main screen
Press this button to
link the software to
the Alignment Kit.
7
Page 8

Selection of signal pairs for signal plotting
Virtual Oscilloscope
Figure 12. Device monitoring tab
The Zero Reset button allows the user to zero oset the encoder’s position data. When clicked, the alignment kit will be
commanded to send a short HIGH pulse of 10 ms to the Zero_RST pin of the encoder.
Check the ‘MSB Invert’ check box if inverted counting is required. When ‘MSB Invert’ is checked, the alignment kit will
output a HIGH level on the “MSBINV” pin and vice versa.
The software contains a virtual oscilloscope for plotting real-time data. For display, the user can select between two
signal pairs: incremental A/B signal pairs and Sine/Cosine signal pairs. Signals are sampled at a 4000 Hz rate and transferred to the software via the USB bus. The software calculates the frequency of the signal, and derives the encoder disc
rotation speed in RPM (Rotation per Minute).
The timebase, volts per division and oset are set by the controls at the bottom of the screen shown in Figure 12. Four
trigger modes are supported: None, Single, Normal and Stopped. The trigger source is xed to the A signal for A/B incremental signal pairs and the sine signal for Sine/Cosine signal pairs.
8
Page 9

4.2 Alignment Mode
The alignment mode provides an interface for monitoring the LocTest and TiltOut signals for aligning the code disc.
Figure 13 shows the alignment mode screen.
The alignment mode measures and analyzes the LocTest and TiltOut signals and provides necessary alignment data to
the user. The description of each alignment parameter is given in Table 2.
Figure 13. Alignment mode
9
Page 10

Table 2. Alignment data
V
Vp-p MAX (LOCTEST) The maximum peak-to-peak voltage for the LOCTEST signal. The amplitude of the signal
will depend on the total stack-up TIR of the code wheel.
2.80
2.70
2.60
2.50
2.40
2.30
2.20
2.10
2.00
1.90
0 45 90 135 180 225 270 315 360
Duty % AVG Duty % is calculated on the TiltOut signal with the following formula:
0° 180° 360°
V ( )
SLO
Nominal
Vp-p
t
T
Duty % = x 100%
t
T
The average value of Duty % is then calculated based on the number of valid TILTOUT
pulses captured.
ON Pulse Width The ON pulse width of the TiltOut signal, t.
Pulse Ratio The ratio of periods between pulses generated at TiltOut.
0° 180° 360°
V ( )
SLO
T1 T2
Pulse Ratio =
T1
T2
Results Provides a PASS / FAIL indicator based on the specication limit provided by the user.
10
Page 11

Software will analyze the alignment data and provide a PASS/FAIL indicator based on a set of specication limits provided
by the user. To enter the specication limit setting menu, select Tools > Specication as shown in Figure 14. A specication settings dialog will then pop-up as shown in Figure 15. The purpose of each parameter is described in Table 3.
Table 3. Specication settings
Vp-p High Limit
Vp-p Low Limit
Duty % AVG Upper Limit
Duty % AVG Lower Limit
Pulse Ratio High
Pulse Ratio Low
The maximum / minimum allowable peak-to-peak voltage for the LocTest signal.
The maximum / minimum allowable PWM Duty % for the TiltOut signal.
Please refer to Table 2 for the PWM Duty % calculation.
The maximum / minimum allowable pulse ratio for the TiltOut signal.
The purpose of these parameters is to ensure the periods of the TiltOut pulses are consistent.
Software will output a PASS indicator if all the specication limits in Table 2 are met. Please refer to the product datasheet
for details on aligning the code disc.
Select Tools > Specication to go into
specication dialog
Figure 14. Menu for the alignment specication
Enable / Disable
Specication Checking
Figure 15. Specication dialog
11
Page 12

5 Firmware Update
This section describes the step-by-step procedures for updating the rmware of the HEDS-8949/8969 alignment box.
5.1 System Requirement
The following items are required for updating the rmware of the alignment box
• PC running Microsoft Windows XP operating system or later, and a free USB port
• iBootloader Downloader PC software executable
• Avago HEDS-8949/8969 rmware Hex le (*.hex)
5.2 Procedure
Start the iBootloader Downloader software executable. The startup screen is shown in Figure 16.
Connect the HEDS-8949/8969 alignment box to the PC using the USB port. When rst connected, Windows will install
the driver automatically. The downloader software will detect the alignment box and prompt if the connected device is
connected in bootloader mode or application mode. Figure 16 shows the screen shot of downloader software when the
alignment box is in application mode.
Figure 16. Startup screen of the iBootloader downloader
12
Page 13

Figure 17. Alignment box detected running in application mode
To update the rmware, the user must switch the alignment box into bootloader mode by clicking the “Boot Mode”
button shown in Figure 17. Once completed, the software will prompt a “Device attached” message and more button
options are enabled, as shown in Figure 18.
Figure 18. Alignment box detected and running in bootloader mode
13
Page 14
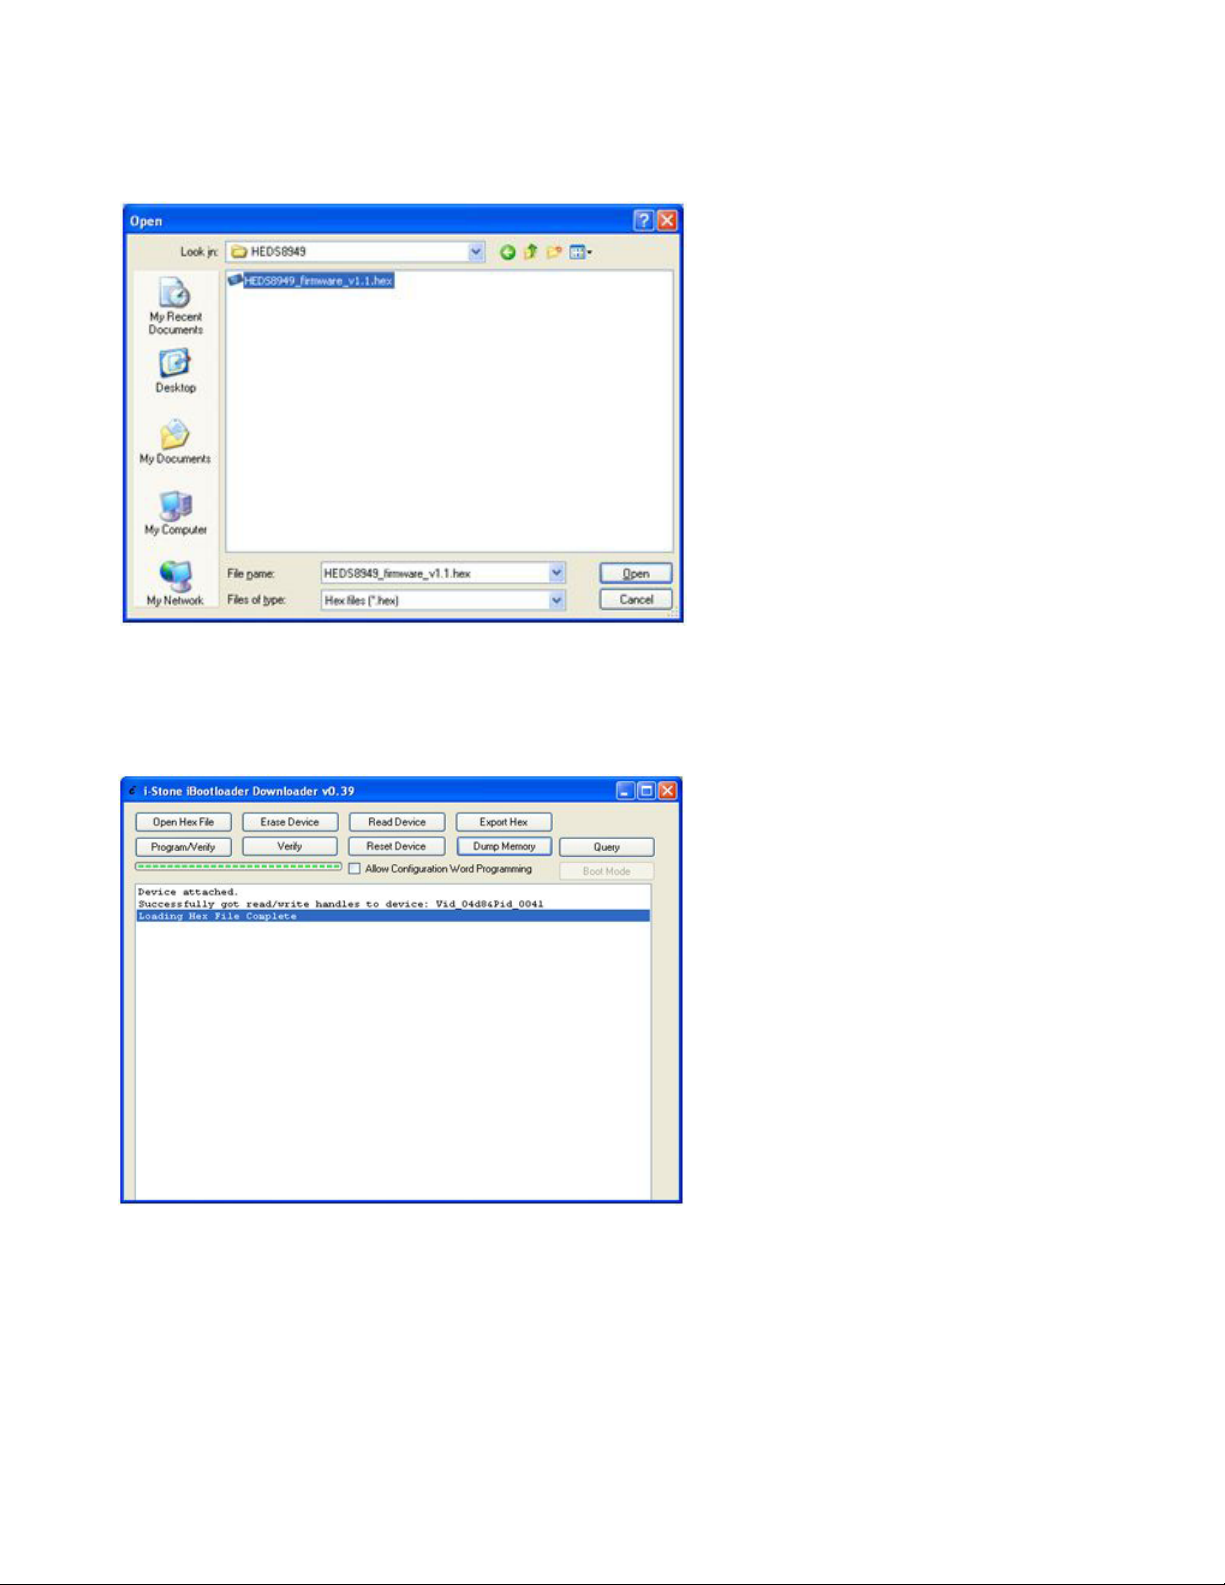
Click the “Open Hex File” button and an open le dialog will be prompted. Locate and select the rmware Hex le as
shown in Figure 19.
Figure 19. Selecting the rmware Hex le
Proceed with the rmware update by clicking the “Program/Verify” button as shown in Figure 20.
Figure 20. Program verify process and upon completion of Hex le.
14
Page 15

The rmware update will start and the progress status of the update will be shown in a message prompt. The rmware
update process consists of an erase, program and verify cycle. Once completed, the downloader software will prompt
an erase/program/verify completed successfully message as shown in Figure 21.
Figure 21. Erase/Program/Verify process
Finally, reset the alignment box by pressing the "Reset Device" button as shown in Figure 22. The alignment module will
be running the updated rmware.
Figure 22. Reset Device process.
For product information and a complete list of distributors, please go to our web site: www.avagotech.com
Avago, Avago Technologies, and the A logo are trademarks of Avago Technologies in the United States and other countries.
Data subject to change. Copyright © 2005-2013 Avago Technologies. All rights reserved.
AV02-3143EN - September 24, 2013
 Loading...