

Page 1
1
NVR-1108 P / NVR-5116P-V3
H.264 Network Video Recorder
Quick Start Guide
Installation
Configuration
Warranty Information
Page 2
AVACOM NVR Series Quick Start Guide
1
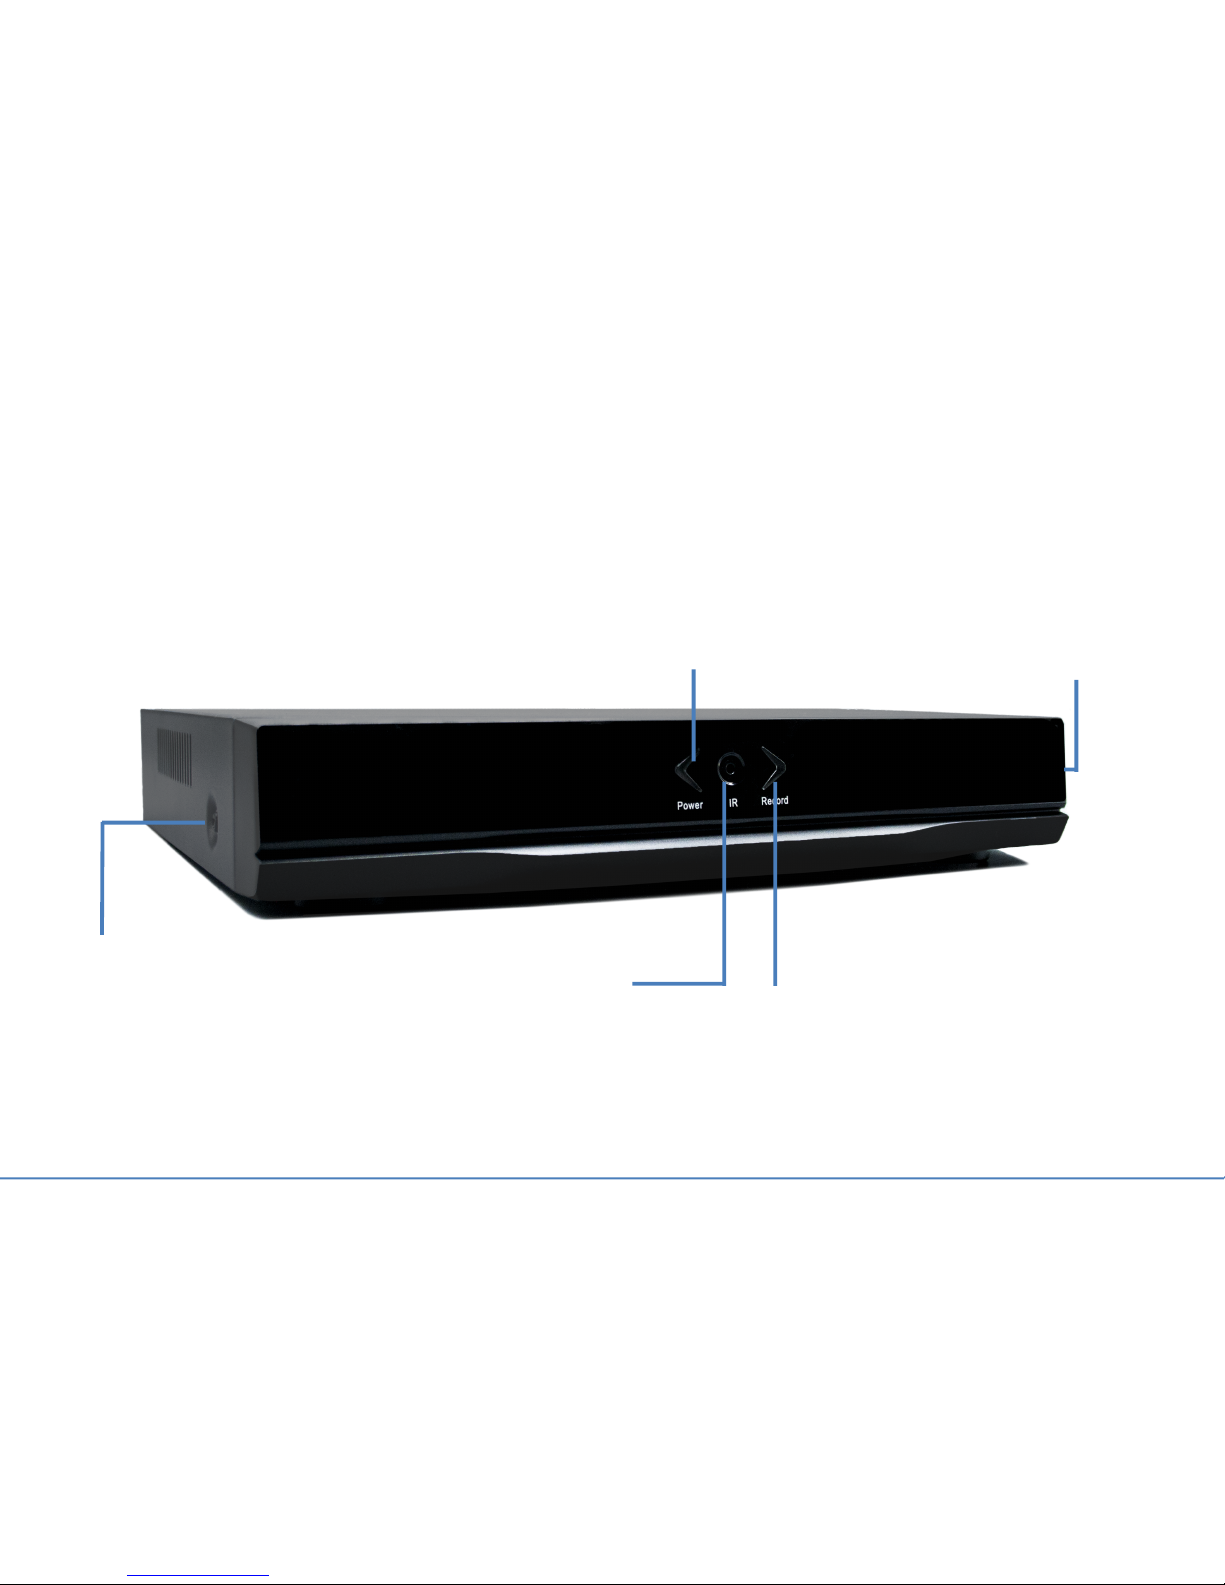
Device Layout
Front Panel
Chassis
Screw
Record
Indicator
Power
Indicator
Chassis
Screw
IR Sensor
Page 3
2
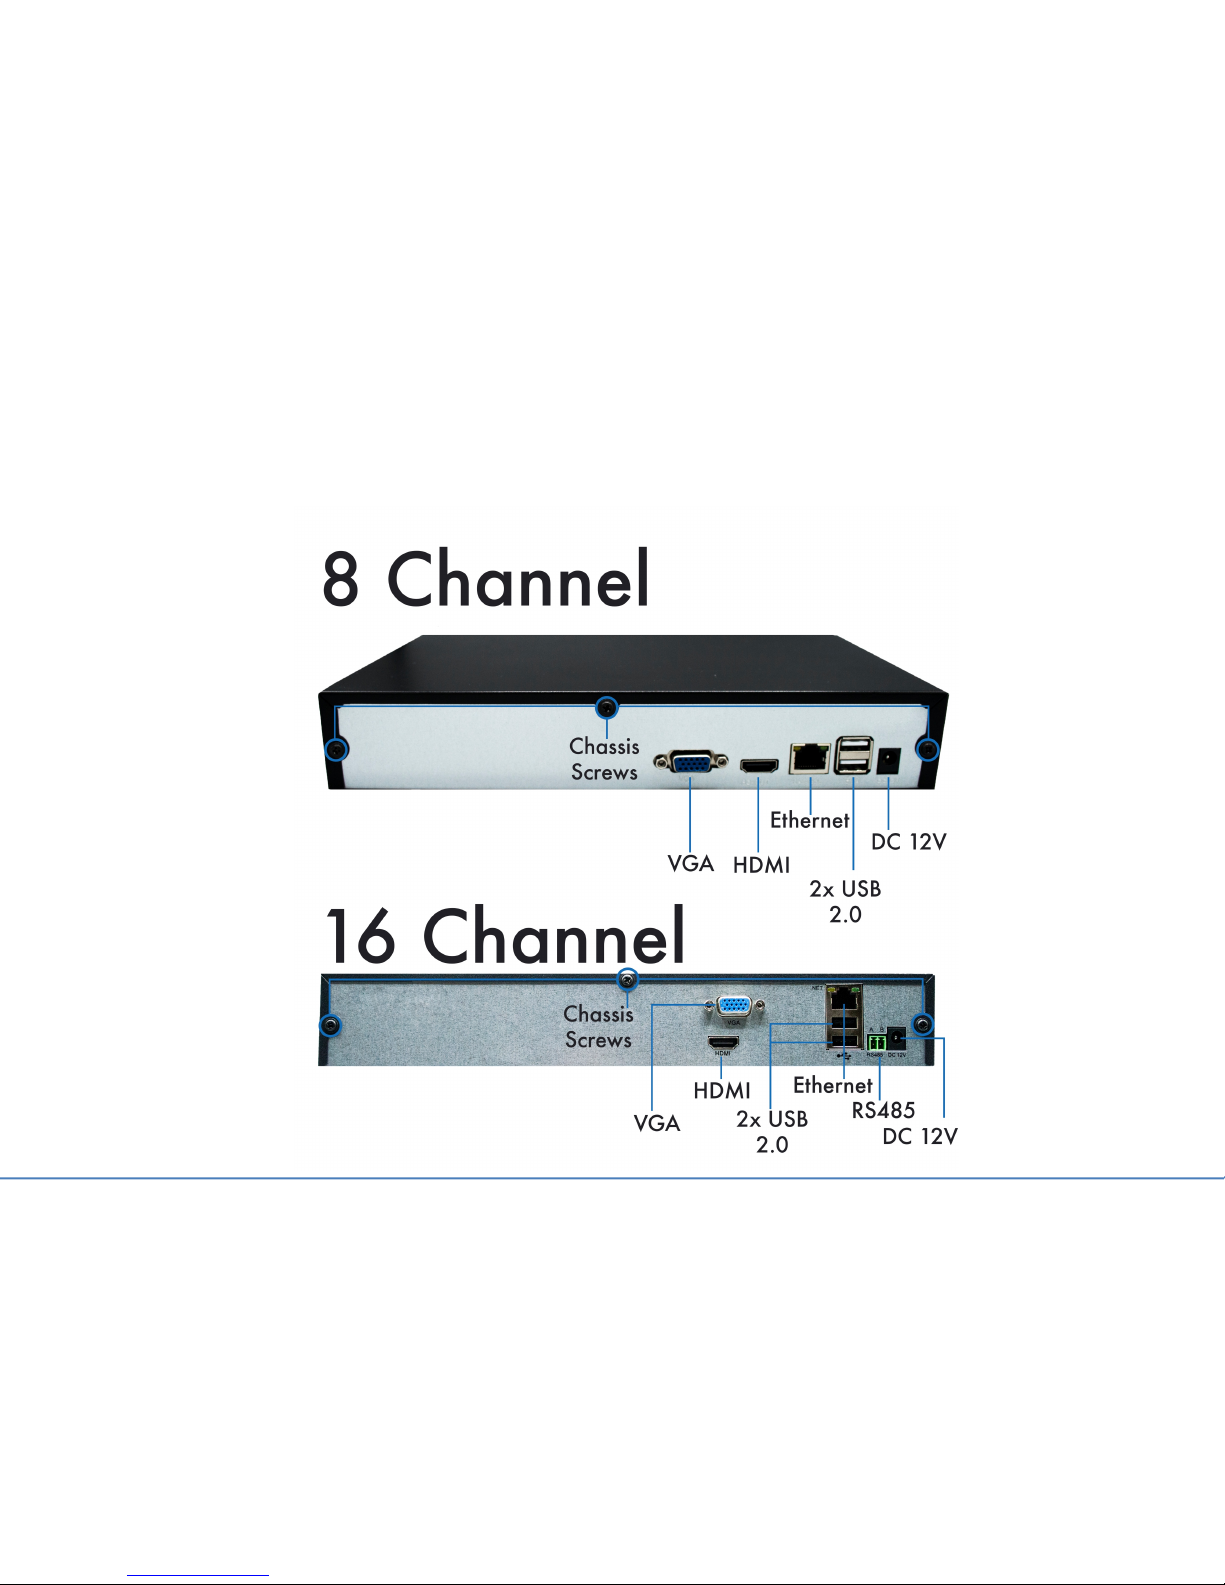
Rear Panel
Device Layout (cont.)
AVACOM NVR Series Quick Start Guide
Page 4

3
What’s in the Box:
NVR
Mouse
HDMI Cable
12 VDC Power
Supply
HDD Mounting
Screws (4)
Quick Start
Guide
AVACOM NVR Series Quick Start Guide
What you will need:
1. VGA or HDMI monitor
2. Router with at least one
available Ethernet port
3. Phillips head screwdriver
(If your NVR goes without HDD)
Page 5

4
Hardware Installation
AVACOM NVR Series Quick Start Guide
How$to$add$HDD$to$your$NVR
Page 6

5
When the NVR is turned ON, the Configuration Wizard will appear
1. Configuration Wizard:
'Welcome' screen - Click on Next.
2. System Login: Use default Username and
Password to access the configuration menu.
(Username: admin, Password: <blank>)
AVACOM NVR Series Quick Start Guide
1.$Connect$the$power$adapter$to$the$back$of$the$NVR.
2.$Connect$the$included$mouse$into$the$USB$port$in$the$back$of$the$NVR.
3.$Connect$either$an$HDMI$cable$or$a$VGA$cable$from$the$NVR$to$your$display.
4.$Ensure$the$Red$Power$Light$is$lit$on$the$front$of$the$NVR.
How$to$connect$your$NVR$to$your$network.
NOTE:&Before&powering&on&the&NVR,&ensure&that&you&have&HDD&installed&
if&you&intend&on&recording&camera&footage.
Settings
Page 7

6
3. Time - Language Configuration:
Check to see that Time and Time Zone
are correct
4. Install NVR Mobile app: Scan QR code for
Android or iPhone use or Install AvacomPlus app
to monitor cameras via the Web.
AvacomPlus app
AVACOM NVR Series Quick Start Guide
Settings$(cont.)
5. IP Channel Config Wizard: Add, Delete,
EnableDisable and modify Devices attached to
the Network that will be monitored by the NVR.
1. Click ‘Search’ to find the cameras
on your network
2. Click ‘Add’ to add the cameras
to the device list (lower box)
3. Highlight camera in the device list and change
the username/password if necessary
4. Click ‘Apply’ when all cameras have been
added
6. Configuration Wizard
'Thank You' screen:
Click on OK.
Page 8

Warranty Information
1 Year Limited Hardware Warranty
AVACOM guarantees to the customer that this unit will conform to its published specifications and will
be free from defects in material and workmanship at the time of delivery and for a period of two
years thereafter. Without limiting the foregoing, this warranty does not cover any defect resulting from
(a) any unit sold by an entity other than AVACOM, (b) any design or specification supplied by an
entity other than AVACOM, (c) non-observance of technical operating parameters (e.g. exceeding
limiting values) or (d) misuse, abuse, using in abnormal conditions or alterations of any kind. Please
call AVACOM Support Line to obtain a Return Material Authorization (RMA). Customer needs to
provide a copy of Shipping Slip and Product Serial Number. Ship the unit with a valid RMA to below
address for repair. Customer needs to bear one way shipping cost.
1 Month Replacement, Refund
For buying from amazon.com or eBay.com, please reference to Amazon or eBay policies. For buying
from www.avacomtech.com, please reference to our website www.avacomtech.com.
10 Year Telephone and Remote Desktop Technical support
Contact Information
AVACOMTECH INC
135 Civic Center Dr, Ste 101
National City, CA 91950
Tel: 619.336.0392, Fax: 619.336.0492
Email: support@avacomtech.com
Thank you for choosing AVACOM www.avacomtech.com
 Loading...