

AUVIO FM Transmitter/Charger for iPod or iPhone, 1200769 User Manual
TM
THE PERFORMANCE YOU NEED
TM
FM Transmitter/Charger
for iPod® or iPhone
Please read this user’s guide before using your new transmitter.
User’s Guide 1200769
®
2/2
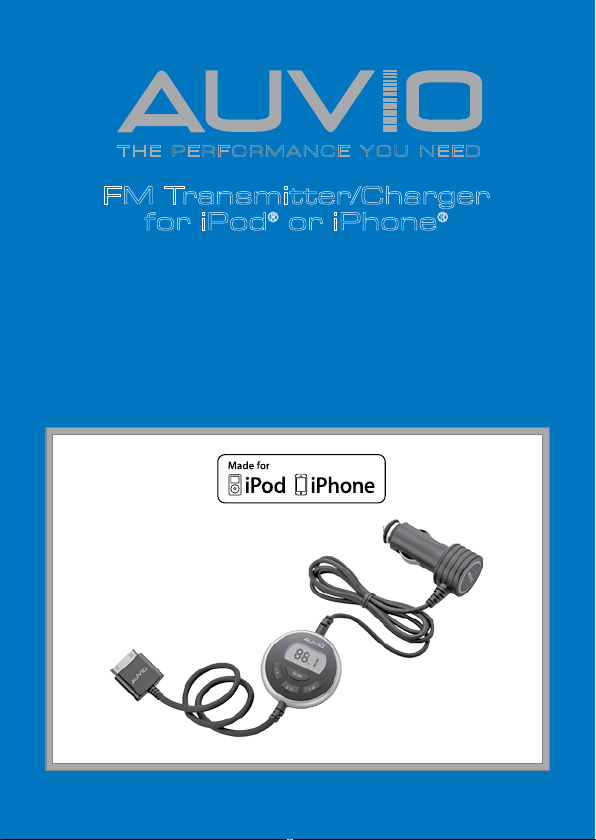
Package contents
FM Transmitter
Quick Start
User’s Guide
Features
Plays your iPod or iPhone music through your car speakers.
Charges your iPod or iPhone while you listen to music.
Auto-scan automatically searches for the clearest frequency.
IMPORTANT SAFETY INFORMATION
Connect and operate this product BEFORE operating your vehicle.
Pay attention to the road. Attempting to drive and operate your
transmitter at the same time can cause a serious traffic accident!
Please drive responsibly.
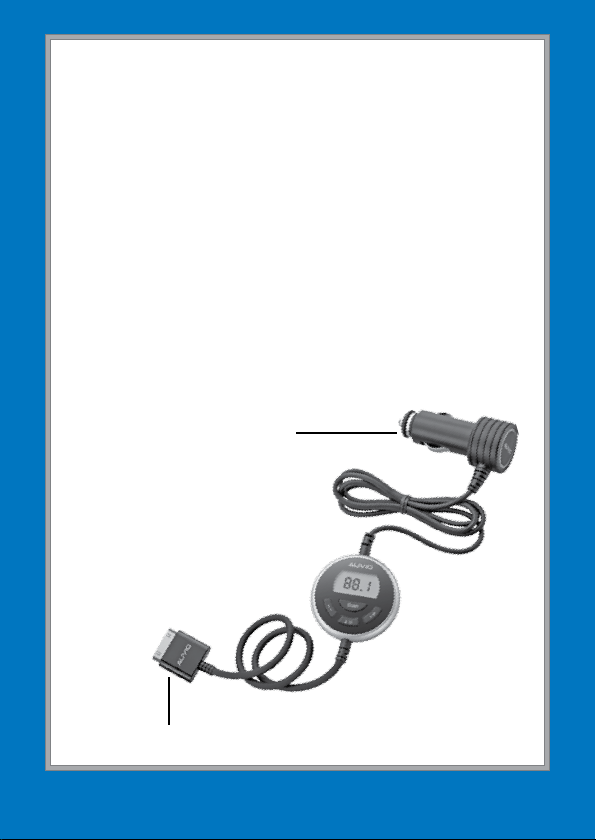
Connect to your car’s power outlet.
Press any button to turn the
backlight on for ten seconds.
Connect to your iPod/iPhone.
2
2

1 Connect the Transmitter
1. Insert the transmitter’s power adapter into your car’s power
outlet. The backlight turns on and the transmitter displays --- .
2. Connect the 30-pin connector to your iPod/iPhone with
AUVIO facing up. Your iPod/iPhone will start charging and
the last transmitting frequency will be displayed on the
transmitter.
2 Tune Your Transmitter
w Caution: Do not tune or scan while driving.
Auto-scanning for a Frequency
Hold down Scan until the display changes. Your FM transmitter
starts searching for unused or weak frequencies. The scan stops
at the first clear frequency.
Auto scan may not find clear frequencies in highly congested areas.
For more precise tuning, follow the procedure for manually tuning.
Manually Tuning a Frequency
1. Hold down 2 M until
display.
2. Press 1or 3 to find the desired frequency.
3. Wait until the display stops flashing.
M1, M2
Saving Displayed Frequencies
1. Hold down 2 M until
2. Hold down 1, 2 M, or 3 for two seconds to save the
displayed frequency to M1, M2, or M3 respectively.
M1, M2
Selecting a Saved Frequency
Press 1, 2 M or 3 to select a saved frequency. The display
shows M1, M2, or M3 and its corresponding frequency.
, and M3 all flash on the
, and M3 all flash on the display.
3
3
 Loading...