

Page 1
AUTOTECH
Installation Instructions
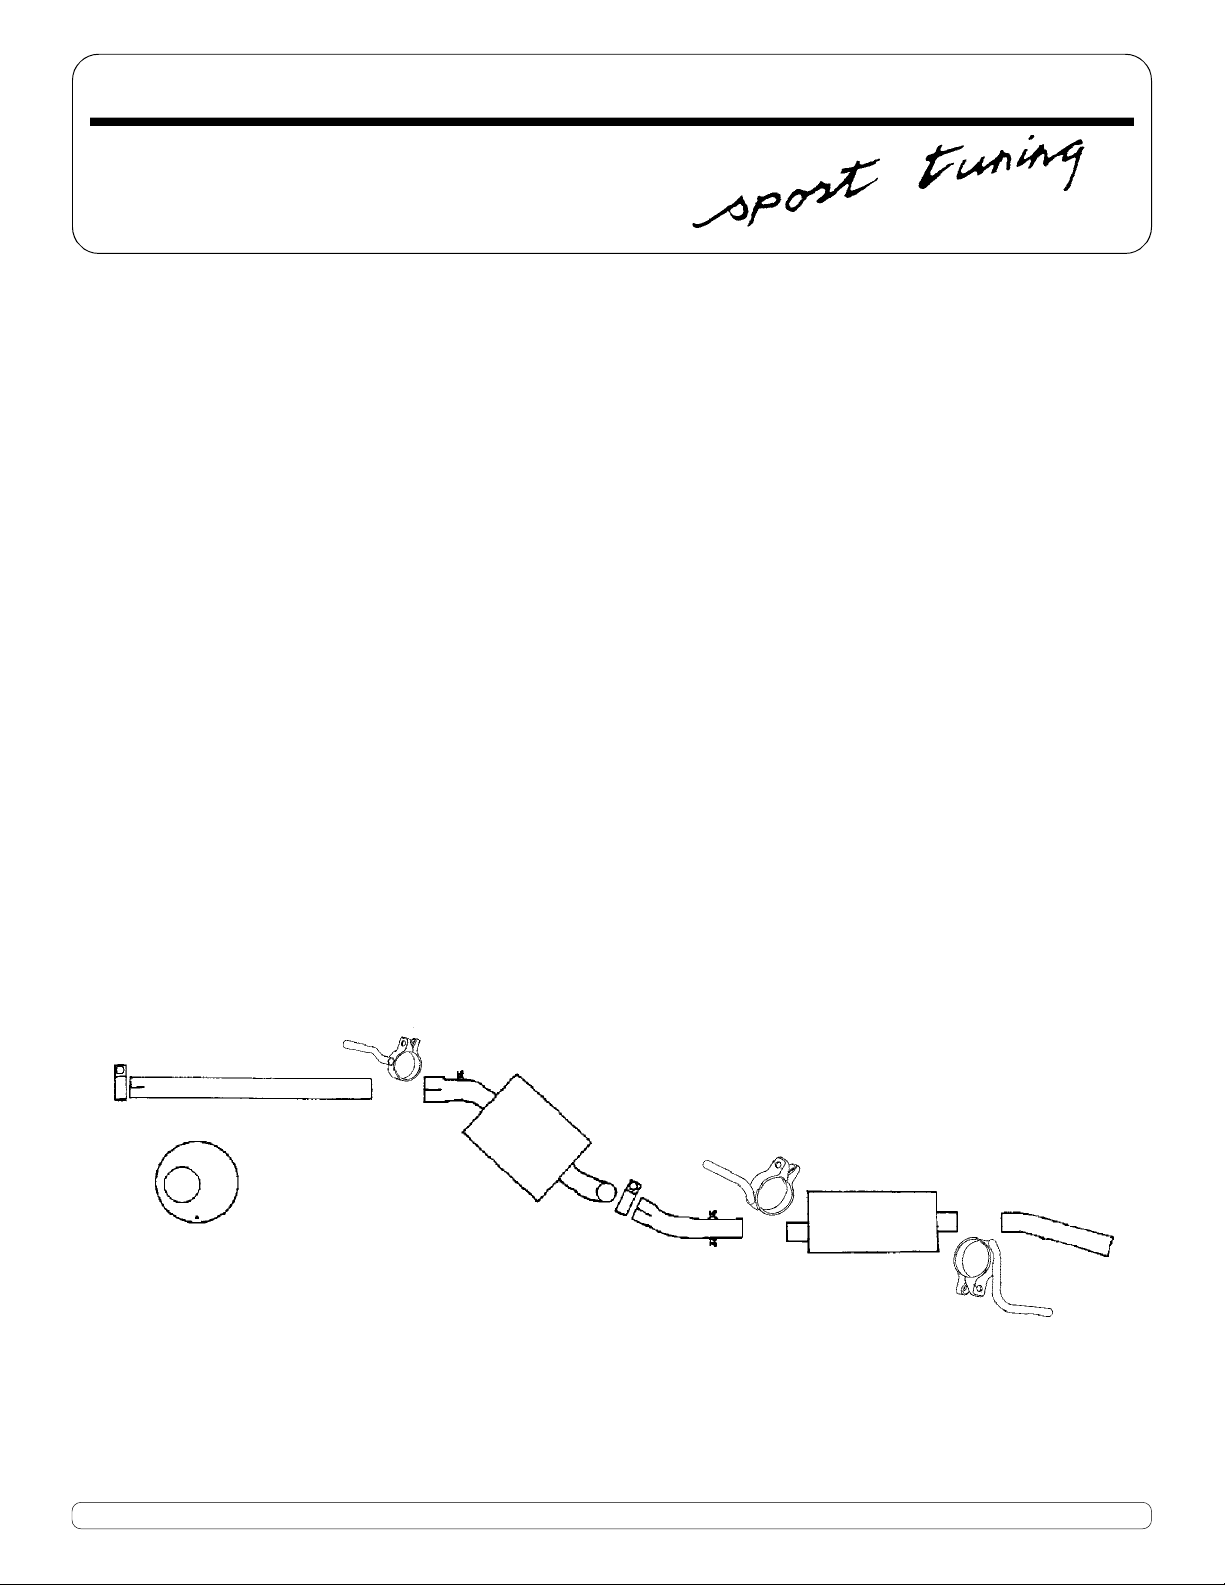
Part Number: 10.297.220K; 10.297.222K
Description: SPORTTUNED ALUMINIZED EXHAUST SYSTEM, A3 4-cylinder 1993-98
Notes: This AUTOTECH exhaust for Golf and Jetta 3 vehicles is patterned after the 1996
and later factory design, using a single over-tube hanger just ahead of the
midmuffler. 1993-95 cars with a dual hanger design are converted to the later,
single hanger style using the hanger (1H0.253.144C) supplied with the Autotech
exhaust.
Procedure:
Note: Always use gloves and eye protection when working with exhaust system components.
1. Loosen, but do not remove the left rear wheel lug bolts. Jack up the left side of the car and
secure it with jackstands. Remove the left rear wheel.
2. Apply some penetrating oil to the clamp bolts and to the joints themselves and let sit for
10-30 minutes in order to loosen up some of the rust that may have accunulated. This will
make disassembly of your old exhaust system much easier. Loosen the clamp bolts and slide
clamps off the joints.
3. Before installing the AUTOTECH system, first lay out all the components on the ground to
familiarlize yourself with their installed orientation.
4. Remove the old exhaust system, starting from the rear of the car and working your way
forward.
5. Loosely install your new system. Start with the front pipe that slips onto the catalytic
convertor, and work your way back. Be sure to install all the components loosely, so that you
can rotate or adjust any pieces if necessary, for proper fit and alignment.
6. Of the 5 clamps supplied, 3 have the tubular hangers welded on. Note positions below:
Drain Hole should be at
6 O'clock Position on
back of rear muffler.
144A
144B
144C
Phone 949.240.4000 Fax 949.240.045032240-E Paseo Adelanto, San Juan Capistrano, CA 92675
Page 2
front >
b
a
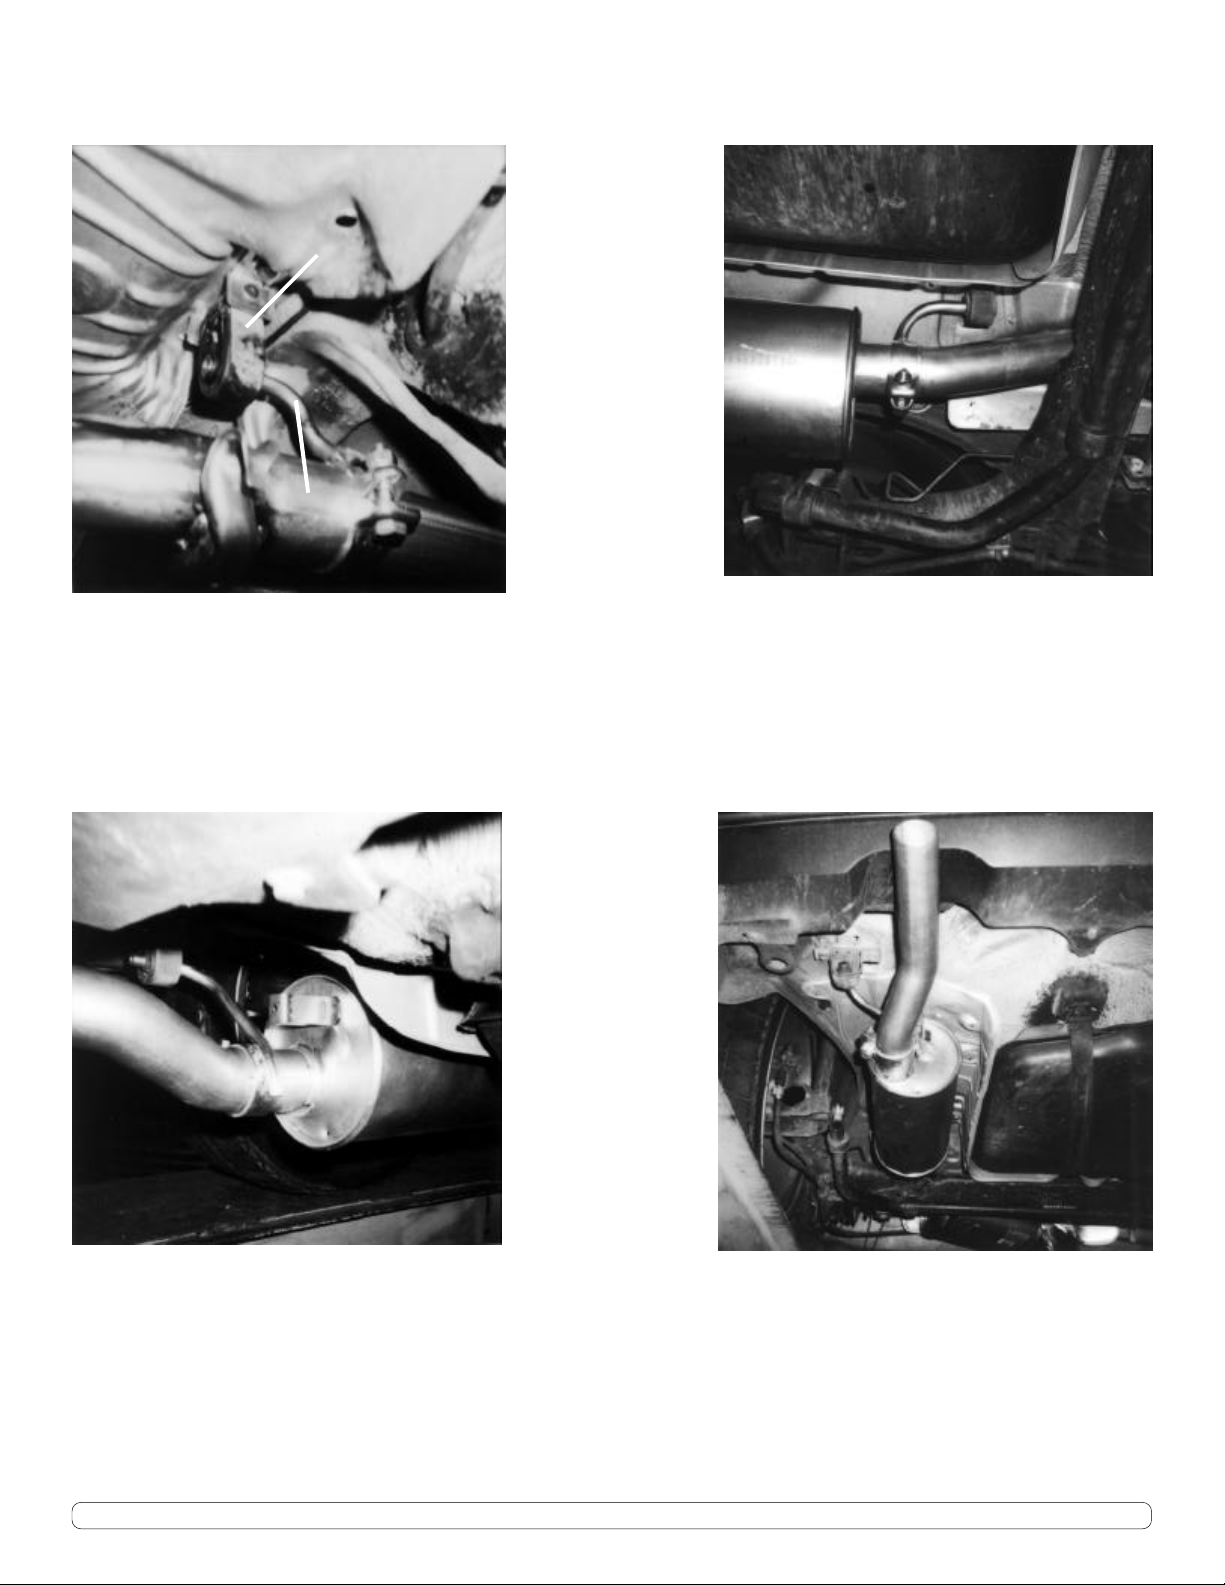
Fig 1. Right side view of midpipe hanger
(a) and clamp installed. The supplied
rubber hanger (b) bolts to the car in
place of the dual hanger assembly
found on 1993-95 vehicles. Hook in foreground is not used on the A3.
Fig 2. Right side view of clamp/hanger
installed at front of rear muffler.
Fig 3. Right side view of clamp/hanger
installed at back of rear muffler.
Fig 4. Rear view of rear muffler and
tailpipe assembly on a Golf 3. Note
the position of the drain hole on
the back plate of the muffler. This
shows the rotation of the rear muffler for best fitment.
Phone 949.240.4000 Fax 949.240.045032240-E Paseo Adelanto, San Juan Capistrano, CA 92675
 Loading...