

Page 1
APCETHD
Specs 1
Basic Description 1
Installation 2
Photocell sensitivity 2
Button Functions 3-4
Error LEDs 5
Factory Settings 6
Overview 7
How to customize settings 8-10
Q & A 11
Warning 12
Warranty 15
Page 2

Page 1 APCETHD
Specs
Input voltage 120 Volts AC
Maximum amperage 14.5 amps @ 120 VAC
Remote COMBO probe cable length 15 ft
Temperature control range 41º to 113º F
Temperature accuracy +/- 2ºF
Temperature dead-band (hysteresis) adjustable
Humidity control range 5% to 95% rH
Humidity accuracy +/- 3% rH
Humidity dead-band (hysteresis) adjustable
CO2 ON timer setting range 1 second to 12 hours
CO2 OFF timer setting range 1 second to 96 hours
Weight 5 lbs
Waterproofing Grade IP20
Dimensions 9” x 7” x 4”
Basic description
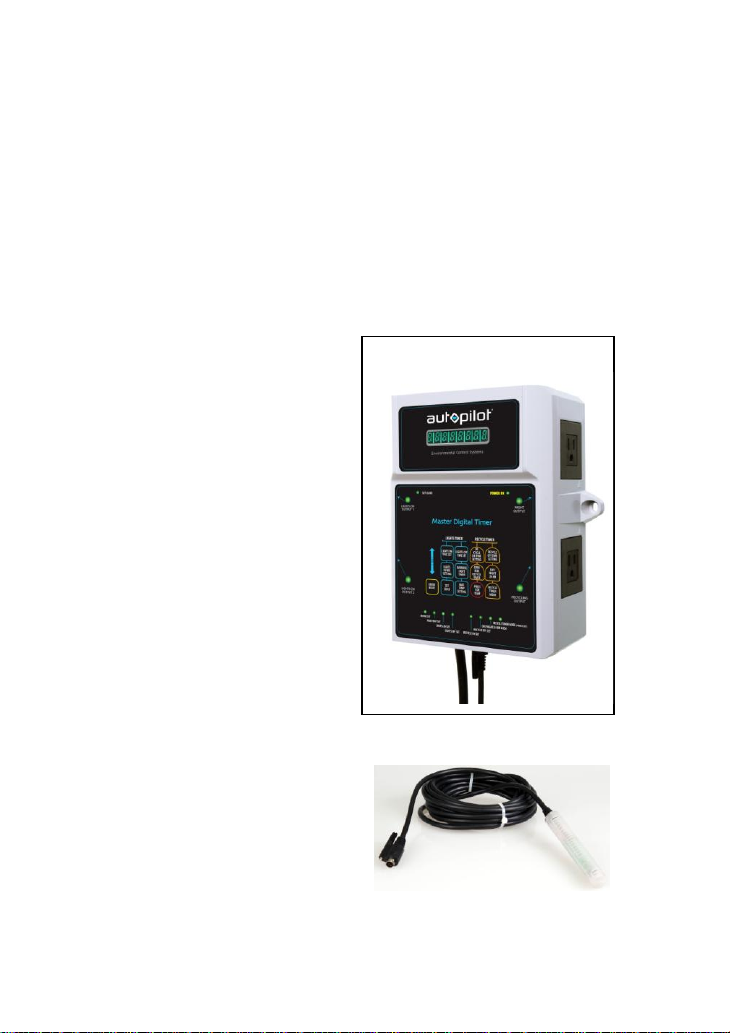
The APCETHD is designed to control humidity, temperature
and CO2. The controller has four (4) receptacles and a remote
combination probe with highly accurate temperature, humidity
and light sensors. The remote combination sensor is designed
to quickly react to changes in the growing area and to resist EMI
/ EFI from electronic ballasts. The remote sensor can be placed
up to 15 feet from the controller.
Note: An optional 15 ft extension cable can be purchased to
allow the user to place the remote sensor up to 30ft from
the controller.
Page 3

Page 2 APCETHD
Installation
Secure the unit to a wall.
Determine the best location for the remote probe. Place the probe
in an area with good air movement preferably at plant height.
Avoid placing the probe in direct sunlight or under direct HID
Lighting.
NOTE: Do not place the sensor probe where it will
come in to contact with water. The unit is not
waterproof!
The remote probe has a quick disconnect to easily remove or
connect the probe. Secure the quick disconnect to the unit by
securing the QD screw to the unit.
Plug the power cable into a standard NEMA 5-15 wall outlet. A
120 volt power supply is required.
Ensure that all of the devices being connected to the controller
have the proper voltage and will not exceed the maximum
amperage rating of this unit.
Note: Now is the time to customize your settings prior
to connecting any equipment.
Photocell Sensitivity
The sensitivity of the photocell may be adjusted.
Press both
The current photocell setting will be displayed. Press Up to
increase the number displayed and the sensitivity. (requires less
light to activate photocell) Press
and the sensitivity (requires more light to activate photocell).
Press Enter / Reset to accept the change.
Enter/Reset
and Up buttons and hold for 3 seconds.
to decrease the number
Down
Page 4

Page 3 APCETHD
Button Functions
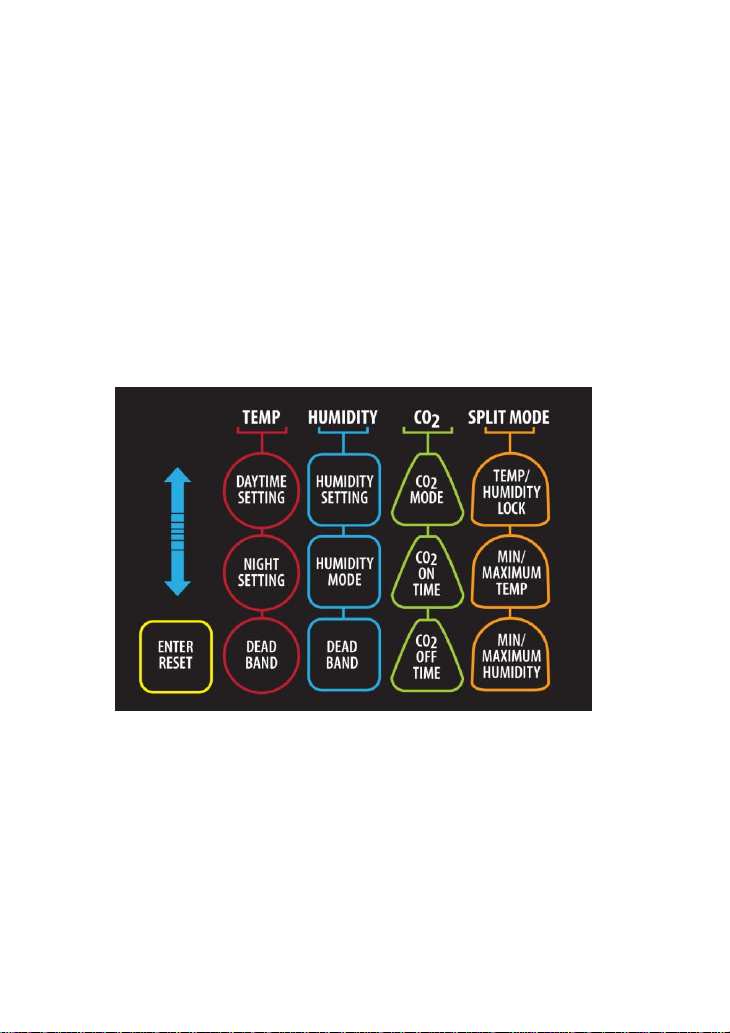
The fifteen (15) buttons located on the front face control all the
functions. Pressing each button will display a function and/or
current setting(s) in the green LED window. Some buttons
perform more than one function.
Several small green LED lights or status indicators located on
the front panel will light up to show selected function when certain
buttons are pressed.
- Press button to increase setting
Up
- Press button to decrease setting
Down
Enter/Reset
setting and to reset the Min/Max range.
- Press button, hold for 3 seconds to enter new
Temperature buttons
Daytime setting
Night setting
Dead Band - Press button to set the temperature dead-band
setting.
- Press button to set day temperature setting.
- Press button to set night temperature setting.
Humidity buttons
Humidity setting
Settings.
Humidity Mode
Incr) or de-humidification (rH decr) mode.
Dead Band
- Press button to set the humidity dead -band setting.
- Press button to set Day and Night humidity
- Press button to select the humidification (rH
Page 5

Page 4 APCETHD
CO2 buttons
CO2 Mode
dAYlocK
turned on (exhaust fans are running) Selecting
allow the CO2 and Cooling outputs to be on at the same time.
Use this mode if you are using air conditioning to cool.
CO2 ON time
CO2 output will be turned ON for. CO2 will be released or
produced during this time.
CO2 OFF time
CO2 output will be turned OFF for. The CO2 device will remain
turned OFF during this time.
will disable the CO2 output when the Cooling output is
- Press button to change the CO2 Mode. Selecting
dAYFrEE
- Press this button to set the amount of time the
- Press this button to set the amount of time the
will
Note: The CO2 timers can also be used as a standard
DAYTIME recycling timer if it is not used as a CO2
timer. (Select dAYFrEE mode)
Split Mode buttons
Temp/Humidity Lock
and temperature functions. The user has the option to run both at
the same time or independently.
- Press button to lock or split the humidity
Min/Maximum Temp
and low recorded levels for Temperature. Press and hold the
Enter/Reset button while the recorded value is displayed to reset
the Min/Max values.
Min/Maximum Humid
and low recorded levels for Humidity. Press and hold the
Enter/Reset button while the recorded value is displayed to reset
the Min/Max values.
- Press this button to recall the stored high
- Press this button to recall the stored high
*To change the temperature reading from F to C, press
and hold the UP and DOWN buttons for 2-3 seconds.
Page 6
Page 5 APCETHD
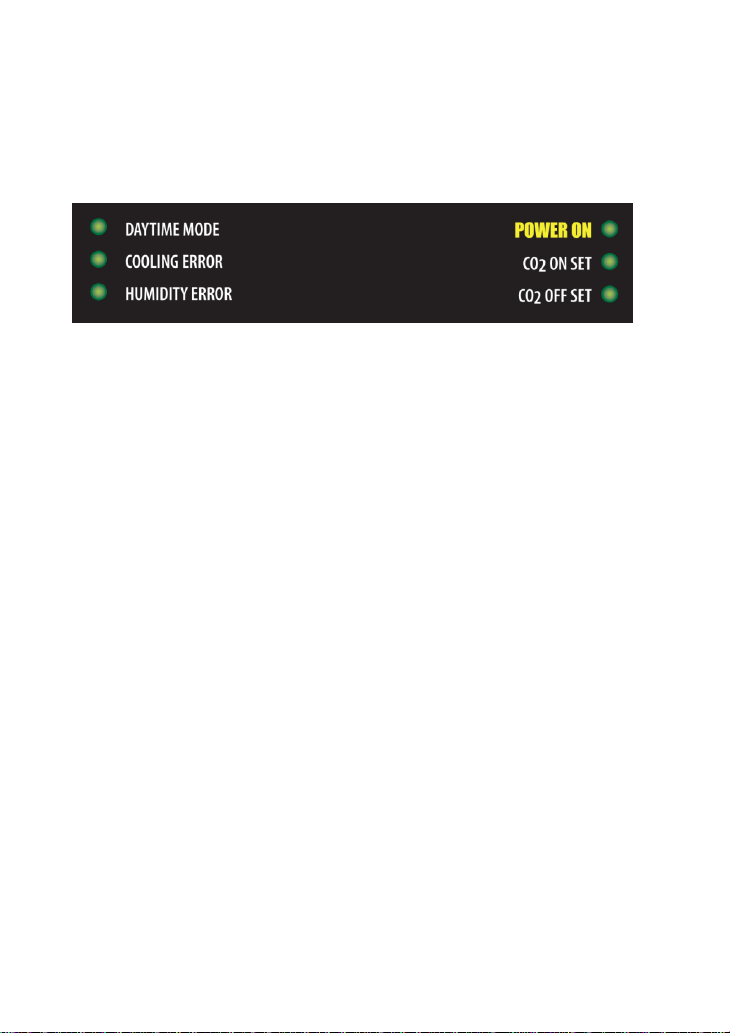
Error LEDs
The APCETHD is smart enough to monitor the temperature and
humidity levels and to alert the user to a problem with any of the
devices connected to the APCETHD. Here is how it works.
As the unit functions normally, the environmental conditions
(temp & humidity) will be slowly but steadily changing. These
small changes are detected by the controller.
If the controller does not detect a slight change in one (or more)
environmental conditions within a 1-hour period, the unit will deactivate the affected output and the appropriate green Error LED
will be flashing to indicate which device may have a problem.
This safety feature is extremely important and useful to
eliminate “runaway” conditions which could result in crop damage
or other more serious problems.
If any of the Error LEDs are blinking, the user should refer to the
example below to help identify the actual cause of the error.
* EXAMPLE: The Cooling error LED is flashing, it means that
the device connected to the Cooling output either did not
turn on OR that there is a problem with the temperature
sensor. Check the cooling device for proper operation and
verify the remote sensor is reading properly.
Note: To reset an error, press the Enter / reset button.
Page 7

Page 6 APCETHD
Factory Settings
The APCETHD comes pre-programmed with factory settings.
These settings may be adjusted by the user. For best results,
verify changes after adjusting any settings. The controller can be
easily reset to factory settings. (see below)
Temp day settings 80°F
Temp night setting 70°F
Temp dead-band 3°F
Humid settings 50 % rH
Humid mode Rh decr
Humid dead-band 5 % rH
CO2 Mode DayFree
CO2 ON timer 1 minute
CO2 OFF timer 30 minutes
Temp & humid lock Split
Reset Factory Settings
down buttons for 3 seconds. The display will read
Enter/reset button again to restore the factory default settings.
When the factory reset is complete the unit will say
- Press and hold the Enter / Reset and
. Press the
f.Set
doNE.
Note: To change the temperature reading from F to C,
press and hold the UP and DOWN buttons for 2-3
seconds.
Page 8
Page 7 APCETHD
The individual push-buttons on the APCETHD makes
changing settings EASY.
* Press a button, the display shows the current setting.
* To change the settings, use the UP and DOWN buttons.
* Then press ENTER to accept the new setting.
Overview
Page 9

Page 8 APCETHD
How to customize settings...
- Press button to increase setting
Up
- Press button to decrease setting
Down
Enter/Reset
to adjust the setting. The timer will always start in the “ON” cycle.
Temperature Display
button for 3 seconds to change display. C for Celsius and F for
Fahrenheit
Daytime Setting
DAYTIME SETTING,
settings press the Up and Down buttons. Press Enter to accept
new setting.
Night Setting
SETTING button,
press the Up and Down buttons. Press Enter to accept new
setting.
Temp dead-band
deadband. To set the dead band, press TEMP DEAD BAND.
d.b_ _ _F
DOWN buttons. Press Enter to accept new setting.
Humidity setting
humidity setting.
- Press button, hold for 3 seconds to restart timer or
- Press and hold both the Up and Down
- To set the Day temperature press the TEMP
dAY__F
- To set the Night temperature press TEMP NIGHT
Nit__F
– Press this button to change the Temp
will be displayed. To change setting press the UP and
- There is a day humidity setting and a night
will be displayed. To change settings
will be displayed. To change
1) To set the daytime humidity, press the HUMIDITY SETTING
button.
change daytime humidity setting. Press Enter to accept new
setting.
2) To set the nighttime humidity, press the HUMIDITY SETTING
button a second time
Down button to change the nighttime humidity setting. Press enter
to accept new setting.
day_rH
will be displayed. Press the Up or Down button to
will be displayed. Press the Up or
nit_rH
Page 10

Page 9 APCETHD
Humidity Mode –
dehumidify. Press Humid mode, the display will read the current
setting, either Humidify (
the Up and Down buttons to change the setting. Press Enter to
accept new setting.
Humid dead-band
the current setting. Press the Up or Down buttons to change the
setting. Press Enter to accept new setting.
CO2 ON time
down button to change hours setting, (Left 2 digits) then press
Enter to change to the minutes (center 2 digits), use up or down
to change, then press Enter to advance to the seconds setting
(Right 2 digits). Pressing Enter a final time accepts the new
settings.
CO2 OFF time - Repeat the procedure above to change the CO2
OFF timer settings.
Use this button to select humidify or
rH Incr
- Pressing Humidity DEAD BAND will display
- To change the timer settings, press the up or
) or dehumidify (
rH dEcr
). Press
Temp/humidity lock
split (
button to display the setting. Press the Up and Down buttons to
change the setting. Press Enter to accept new setting.
) humidity and temperature. Press Temp/humidity lock
SPLit
- use this function to interlock (
COnnEct
) or
1) Select connect (
cooling and removing humidity. The fan will turn on when the
sensor detects a rise above the setting in either the humidity or
temperature.
2) Select split (
cooling device and a dehumidifier to remove humidity. Each
device is controlled independently. The cooling device will turn on
when the temperature rises above the setting and the
dehumidifier will turn on when the humidity rises above the
setting.
COnnEct
) if using a ventilating fan or AC unit as a
SPLit
) if using ventilating fans only for
Page 11

Page 10 APCETHD
3) Select split (
and a humidifier to add humidity. Each device is controlled
independently. The cooling device will turn on when the
temperature rises above the setting and the humidifier will turn on
when the humidity lowers below the setting.
Min/Maximum Temp
and maximum temperature recorded values. Each time the button
is pressed, the next setting will be displayed.
Min/Maximum Humidity
minimum and maximum humidity recorded values. Each time the
button is pressed, the next setting will be displayed.
To reset the Min/Max values
displayed, press the Enter / Reset button and hold for 3 seconds.
) if using a fan or AC unit as a cooling device
SPLit
- Press to “recall” or display the minimum
- Press to “recall” or display the
– When the recorded value is
Page 12

Page 11 APCETHD
Q & A
What if my temperature is reading high?
probe is not in direct lighting from HID lights or sunlight.
Do I need to calibrate my humidity sensor?
temperature sensor, the humidity sensor is digital and does not
require calibration.
Why is the display reading Err SEn?
connected and/or communicating with the controller. Check the
quick-connect cable and that the remote probe is getting power.
*Contact the factory for more info.
What if one of the small green Error LEDs are on?
more environmental conditions are not acting correctly. Refer to
the Error LEDs sections to diagnose the problem.
What if the CO2 timer is not keeping correct time?
may need to be replaced. The lithium battery has an average life
of 5 years. Battery is a lithium CR1220 3 volt.
What if there is no power? Reset the power switch (circuit
breaker). If this continues reduce the number of devices
connected or use a power multiplier / expander to control devices
with larger amperage.
Make sure the remote
No. like the
The remote probe is not
One or
The battery
Page 13
Page 12 APCETHD
8 ft
minimum
IMPORTANT MESSAGE
1. Save these instructions. These safety and operating instructions
must be kept in a safe place for future reference.
2. Heed all warnings. All warnings on this product and in the instructions
must be observed closely.
3. Follow all instructions. All operating instructions must be followed..
4. If the instructions as provided by the manufacturer are not followed
damage to the product may result.
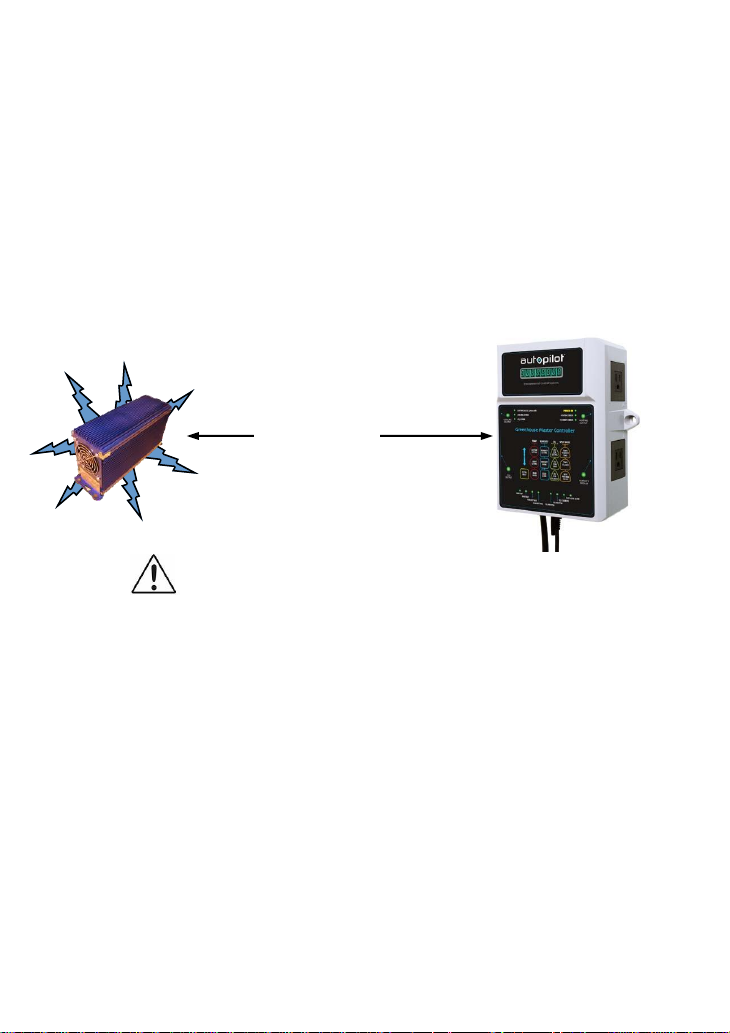
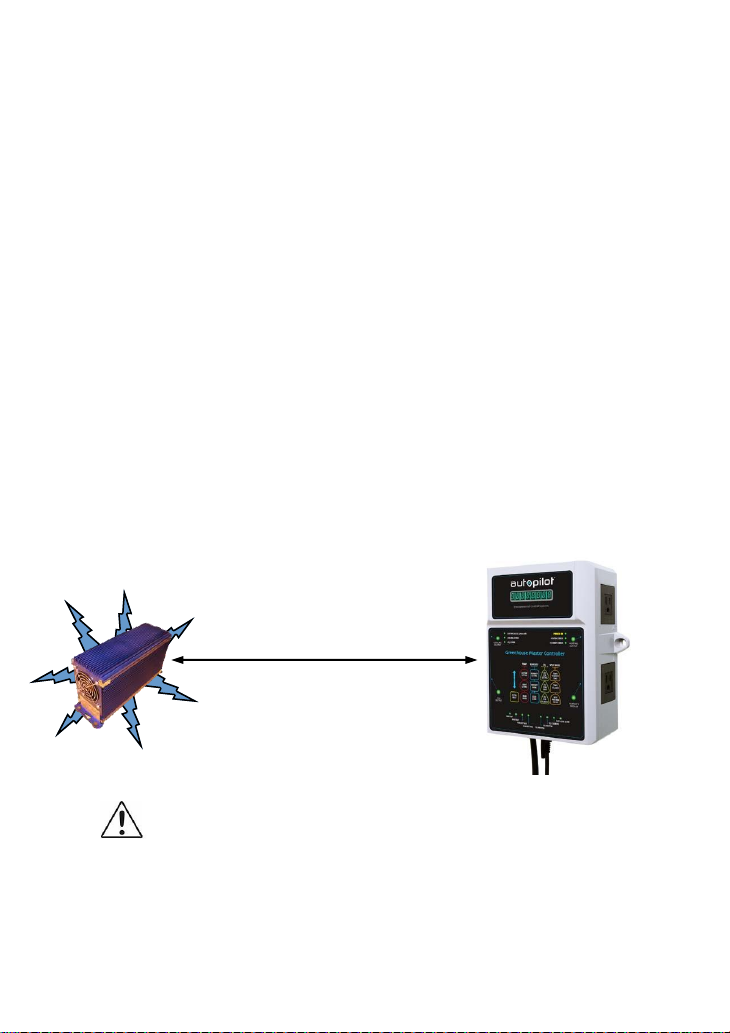
5. Install your controller at least 8 ft away from any devices that produce
large amounts of electronic noise, such as electronic ballasts or ozone
generators.
6. The symbol on the enclosure represents that the receptacle
beside it may have an output voltage, which can be dangerous. The
output voltages are the same as the input voltage voltage. This
receptacle can only be inserted with standard Nema 1-15P and Nema 515P plugs. Don’t insert any other plug in it.
7. Do not use this Controller near water. For example, near a bathtub,
washbowl, kitchen sink, or laundry tub, in a wet basement, or near a
swimming pool, and the like. The controller shall not be exposed to
dripping or splashing and that no objects filled with liquids, such as
vases, shall be place on this product. The product is not water-proof, or
shock-proof.
8. Any factory serviceable pare parts of the product only can be checked
or replaced by the manufacturer or authorize agencies. An unauthorized
person is NEVER allowed to open the enclosure.
9. If the power cable insulation is broken, please stop using the product!
Immediately unplug the unit and contact the retailer you purchased it
from.
Page 14
Page 13 APCETHD
8 ft
minimum
10. The product is equipped with a circuit breaker for short circuit or over
current situations. The circuit breaker will automatically shut down the
product at once. All outlets of the product all have the safety ground.
11. Do not install the enclosure near any heat source.
12. Do not block any ventilation openings.
13. This product is a Safety ClassⅠController. The main plug should
be inserted in a power socket outlet only if provided with a protective
earth contact. Any interruption of the protective conductor inside or
outside of the product is likely to make the product dangerous and is
prohibited.
MESSAGE IMPORTANT
1. Conservez ces instructions. Ces consignes de sécurité et d'exploitation
doivent être conservées dans un endroit sûr pour référence future.
2. Respectez tous les avertissements. Tous les avertissements sur ce produit
et dans les instructions doivent être observés de près.
3. Suivez toutes les instructions. Toutes les instructions doivent être suivies.
4. Si les instructions fournies par le fabricant ne sont pas suivies
d'endommager le produit peut entraîner.
5. Installez votre contrôleur au moins 8 pieds loin de tous les appareils qui
produisent de grandes quantités de bruits électroniques, tels que les ballasts
électroniques ou des générateurs d'ozone.
6. Le symbole sur le boîtier représente que le récipient à côté il
peut avoir une tension de sortie, qui peut être dangereux. Les tensions
de sortie sont les mêmes que la tension de tension d'entrée. Cette prise
ne peut être inséré à la norme NEMA 1-15P et NEMA 5-15P bouchons.
Ne pas insérer d'autres plug en elle.
7. Ne pas utiliser ce contrôleur près de l'eau. Par exemple, près d'une
Page 15

Page 14 APCETHD
baignoire, baignoire lavabo, évier de cuisine ou la lessive, dans une cave
humide, ou près d'une piscine, etc. Le contrôleur ne doit pas être exposé
à des éclaboussures et aucun objet rempli de liquides, tels que des
vases, doit être place sur ce produit. Le produit n'est pas étanche à l'eau,
ou antichoc.
8. Toutes les pièces d'usine Paré réparable du produit ne peut être
vérifiée ou remplacée par le fabricant ou autoriser les agences. Une
personne non autorisée n'est jamais permis d'ouvrir le boîtier.
9. Si l'isolation du câble d'alimentation est cassée, s'il vous plaît arrêtez
d'utiliser le produit! Débranchez immédiatement l'appareil et contactez le
revendeur vous l'avez acheté.
10. Le produit est équipé d'un disjoncteur pour un court-circuit ou sur des
situations actuelles. Le disjoncteur se fermera automatiquement le
produit à la fois. Toutes les sorties du produit ont tous la terre de
sécurité.
11. Ne pas installer l'enceinte à proximité de toute source de chaleur.
12. Ne pas bloquer les ouvertures de ventilation.
13. Ce produit est une classe de sécurité Ⅰ contrôleur. La fiche
principale doit être insérée dans une prise électrique que s'ils sont
fournis avec un contact de terre de protection. Toute interruption du
conducteur de protection à l'intérieur ou à l'extérieur du produit est
susceptible de rendre le produit dangereux et est interdit.
Page 16

Page 15 APCETHD
Warranty and Liability
1.Limited Warranty
Hydrofarm, Inc doing business as Hydrofarm, Inc (collectively
HYDROFARM) warrants that for a period of three years from the date of
purchase, this product will be free from defects in material and
workmanship. HYDROFARM, at its option, will repair or replace this
product or any component of the product found to be defective during the
warranty period. Replacement will be made with a new or
remanufactured product or component. If the product is no longer
available, replacement may be made with a similar product of equal or
greater value. This is your exclusive warranty. DO NOT attempt to repair
or adjust any electrical or mechanical malfunctions on this product. Doing
so will void this warranty and may cause serious injury/death/damage.
This warranty is valid for the original retail purchaser from the date of the
initial retail purchase and it not transferable. Keep the original sales
receipt. Proof of purchase is required to obtain warranty performance.
HYDROFARM dealers, distributors, service centers and retail outlets
selling HYDROFARM products do not have any right to alter, modify or in
any way change the terms and conditions of this warranty.
This warranty does not cover normal wear of parts or damage resulting
from the following: negligent use or misuse of the product, use on
improper voltage or current, use contrary to the operating instructions,
use contrary to any and all applicable local, state, provincial or federal
laws, disassembly, repair or alteration by anyone other than
HYDROFARM or an HYDROFARM authorized service center. Future,
the warranty does not cover: Acts of God, such as fire, flood, hurricanes,
tornadoes, nor Acts of War or Acts of Terrorism.
Page 17

Page 16 APCETHD
What are the limits on HYDROFARM’s liability?
HYDROFARM shall not be liable for any incidental or consequential
damages cause by the breach of any express, implied or statutory
warranty or condition.
Except to the extent prohibited by applicable law, any implied warranty or
condition of merchantability or fitness for a particular purpose is limited in
duration to the duration of the above warranty.
HYDROFARM disclaims all other warranties, conditions or
representations, express, implied, statutory or otherwise.
HYDROFARM shall not be liable for any damages of any kind resulting
from the purchase, use or misuse of, or inability to use the product
including incidental, special, consequential or similar damages or losses
of profits, or for any breach of contract, fundamental or otherwise, or for
any claim brought against the purchaser by any other party.
Some provinces, states or jurisdictions do not allow exclusion or
limitations on how long an implied warranty lasts, so the above limitations
or exclusion may not apply to you.
This warranty gives you specific legal rights, and you may also have
other rights that vary from province to province, state to state or
jurisdiction on jurisdiction.
This warranty is offered by HYDROFARM,INC., If you have any other
problem or claim in connection with this product, please write our
Consumer Service Headquarters, HYDROFARM,INC.
Copyright 2012 Hydrofarm,Inc All rights reserved.
Distributed by Hydrofarm,Inc.
Page 18

Made in China
This product conforms to USA and Canada
standards as listed below.
 Loading...