

Page 1
Pro!Import!AE 5.0
User Guide
last updated October 16, 2011
About Pro Import AE
Pro Import AE is Automatic Duck's oldest plug-in, first released in the spring of 2001.
This plug-in imports into After Effects AAF and OMF files from your Avid, XML files from
Final Cut Pro as well as Motion project files.
Using Pro!Import!AE
To use Pro Import AE you must first export from Final Cut Pro an XML file, an AAF or
OMF 2.0 file from your Avid editing system, or if you're translating a Motion project you
can just save the .motn project file.
Once you have the file that Pro Import AE can read importing it is as simple as choosing
the file in Pro Import AE's import dialog, setting any options then let it rip.
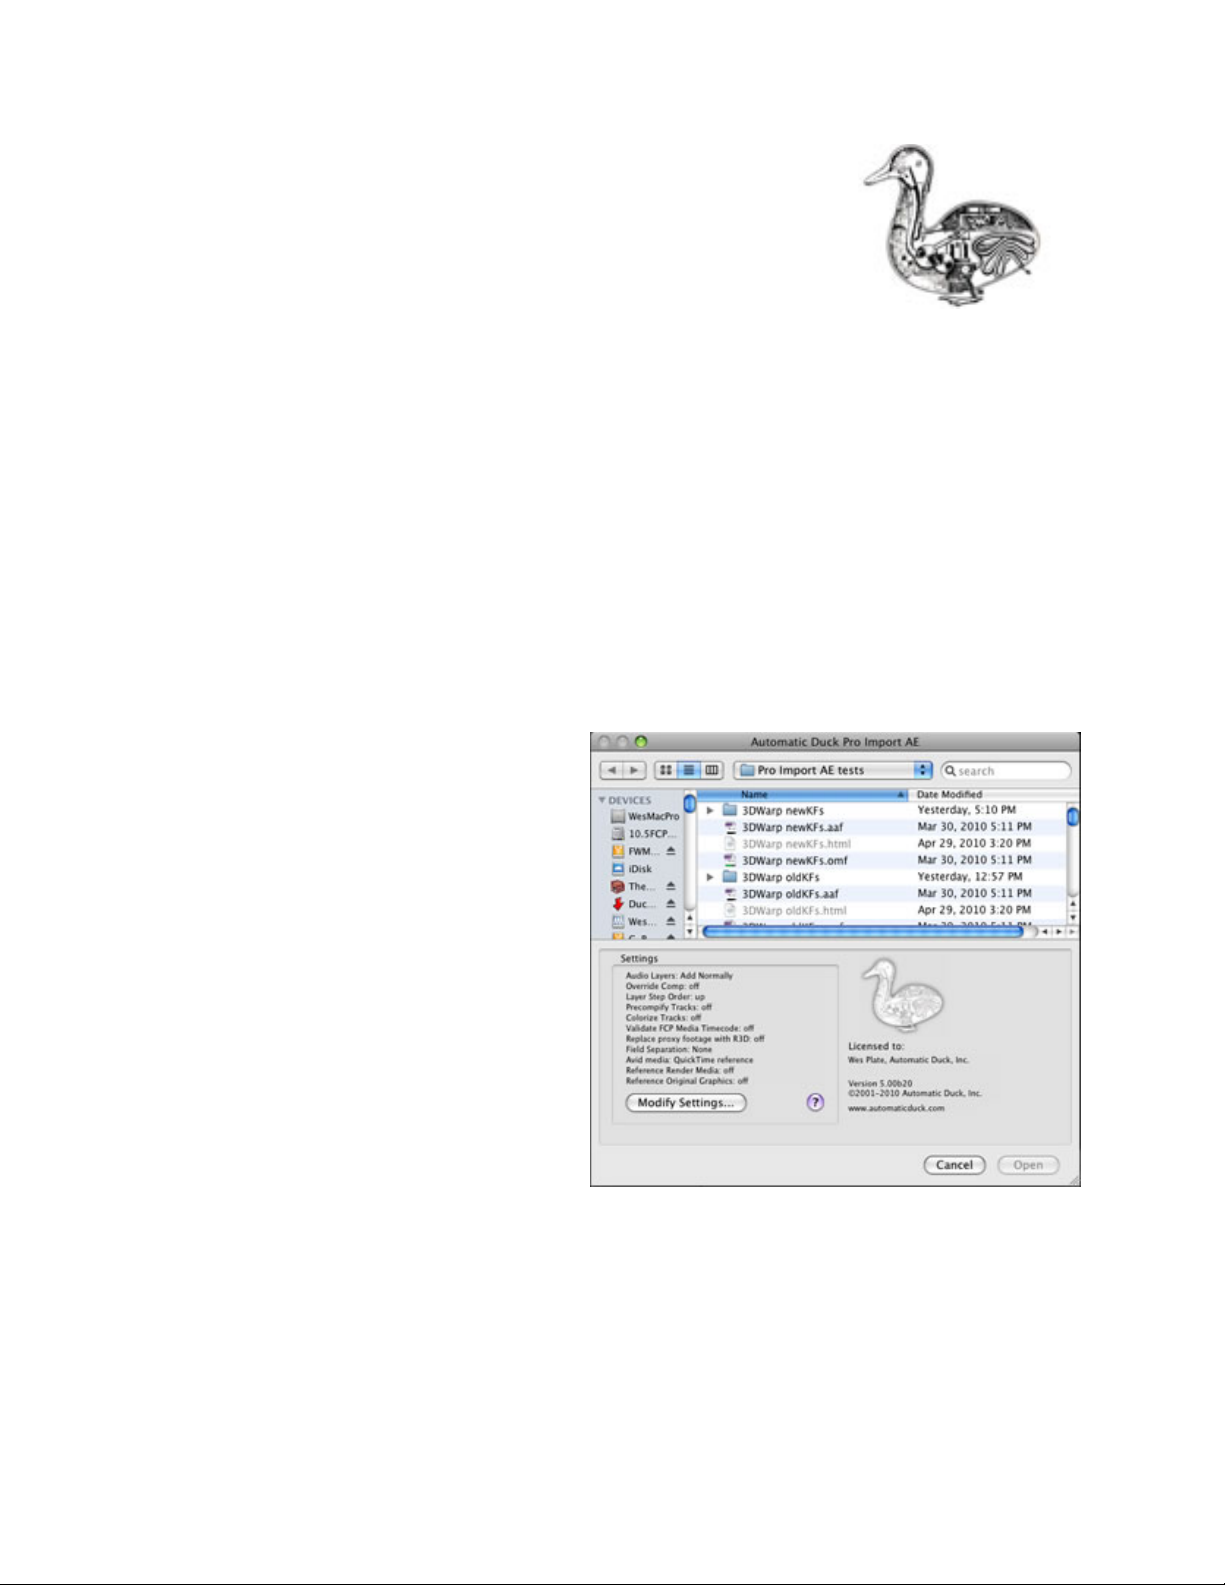
How to Import
To access Pro!Import!AE, select it
from the File->Import submenu, or
right-click/control-click in your project
pane and select it from the Import
menu.
The upper part of the Pro Import AE
dialog is the file chooser where you
select the file(s) you wish to import.
Below the file chooser is a summary of
Pro Import AE's settings. Click the Edit
Settings button to change these
options.
page 1 of 22
Page 2

Settings
The settings dialog is organized into two tabs, the Footage and Media tab for options
dealing specifically with the imported media files and the Comp and Layers tab that has
settings for how the composition is created and layers added.
Footage and Media
In After Effects parlance the media that gets imported into After Effects to potentially be
used in a composition is referred to as footage. In this section of Pro Import AE's
settings you tell the plug-in how you would like it to deal with these footage items.
Field Separation
Sometimes you need to instruct After Effects to separately calculate each field of your
interlaced footage, doing so is called Field Separation
Explaining when you need to do this, or
why you need to do this, is outside the
scope of this document. After Effects'
help has always been a good resource,
indeed the writer of this user guide
remembers that even though he had studied broadcasting in college it was the After
Effects 3.1 user guide that gave him his first good explanation of interlaced video.
Set file type for typeless media
There are two ways for a file to identify to
the operating system what kind of file it
is, either by having a file extension in the
name (everyone knows what a file whose
name ends in .doc is) or on the Mac by
using a four-character file type that is
stored inside the file. If the file type is not
set, and the file does not have an extension your Mac won't know which application to
use to open the file, and in the Finder you'll often see files like this indentified by a plain
document icon or a Unix icon.
After Effects CS3 and CS4 can be a little forgiving of files without an extension and file
type and still allow them to be imported. After Effects CS5, however, will not import
these files.
Pro Import AE offers to set the file type of an extensionless typeless QuickTime media
to "MooV", preventing your import from failing.
This option is only necessary to be used if you are using After Effects CS5.
page 2 of 22
Page 3
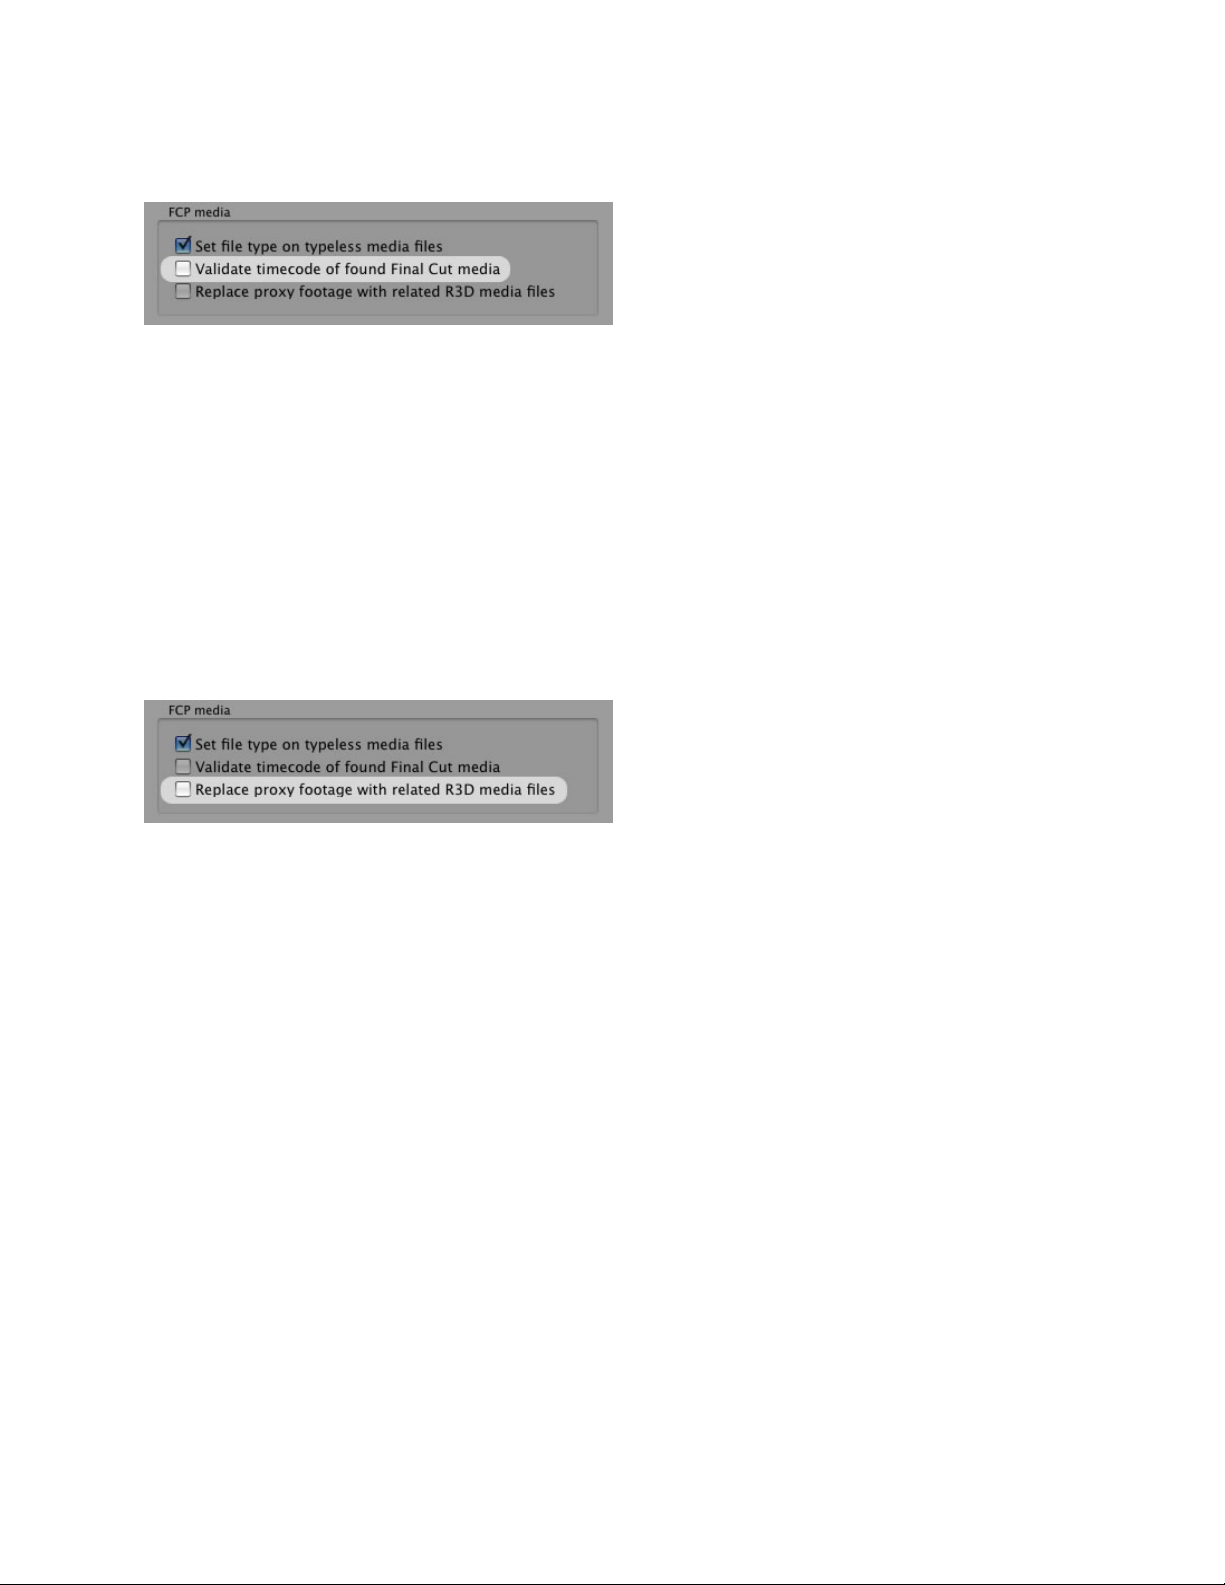
Validate timecode of found Final Cut media
Sometimes customers run into a situation
where they have multiple copies of a
media file available on their system, each
with different durations perhaps due to
running stuff through FCP's Media
Manager. In a case like this when Pro
Import AE searches for media to import
into After Effects it is possible to connect up with the wrong media file, producing
undesirable results.
When you enable this option Pro Import AE will open the candidate media files it finds
and verify the start timecode of the file matches what the FCP XML file says it should
be.
This does slow down the import somewhat, but if you are in a situation where it is
necessary to enable this feature you won't mind.
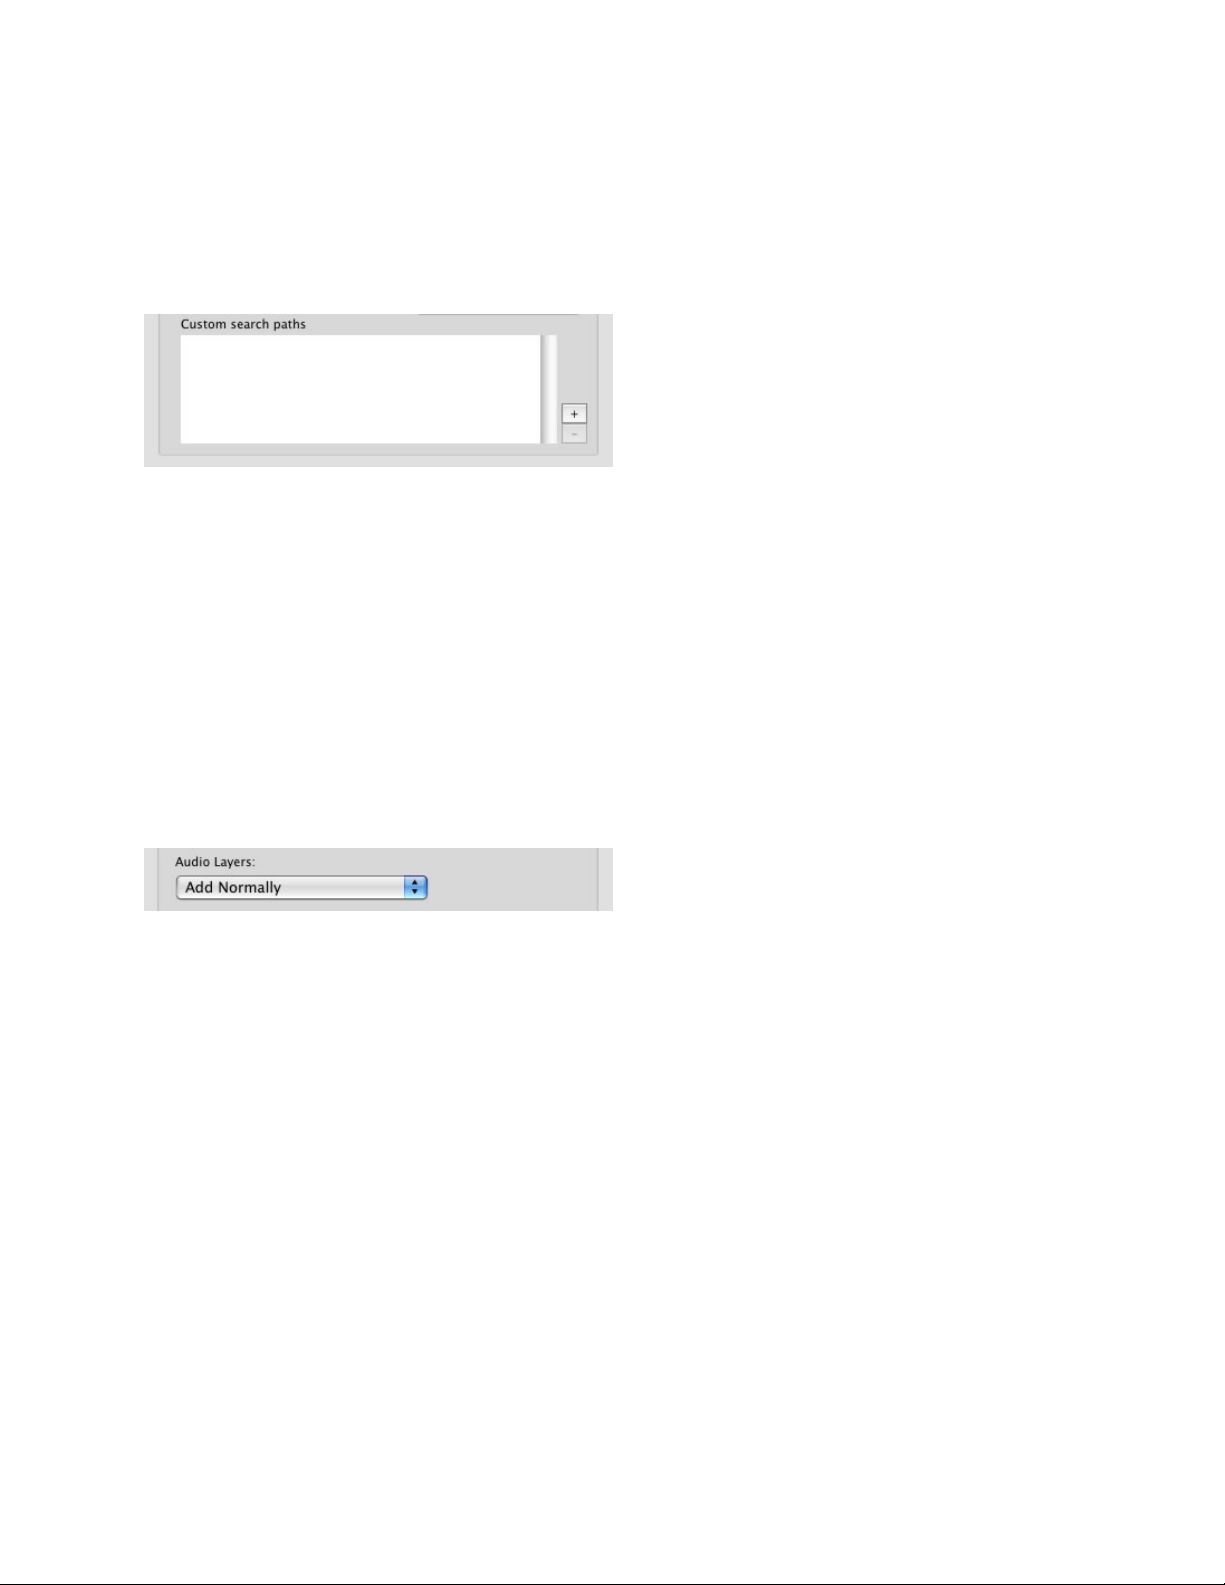
Replace proxy footage with related R3D media files
Often you're editing in Final Cut Pro not
with original R3D files, but instead with
lower resolution proxy QuickTime media
created by using Log & Transfer. When
Final Cut Pro creates this proxy media it
also saves into the Final Cut project
information about the R3D file from which
the proxy was generated. Pro Import AE offers you the option to import these R3D files
into After Effects instead of the smaller proxy media.
This option probably only works if you have used FCP's Log and Transfer tool to create
your proxy media files. If you create proxies using an outside application Final Cut Pro
has no knowledge of the original R3D media files and so this information can't make it
into the XML file for Pro Import AE to do something about.
Since your R3D files are probably larger than your proxy material you will also want to
use the Override composition setting option.
This option requires you be using at least After Effects CS4 version 9.0.2 with the RED
plug-in installed, or After Effects CS5.
page 3 of 22
Page 4

Avid Media options
After Effects cannot by itself play all Avid media files, indeed when Automatic Duck
started After Effects couldn't read any Avid media files. Pro Import AE's way around this
has always been to "fool" After Effects into playing Avid's OMF and MXF media files via
QuickTime reference movies. This generally works well, but there are situations where
other options would be more desirable.
Connect After Effects directly to Avid media files
When you choose this option Pro Import AE will assume that After Effects will be able to
directly read your Avid's OMF or MXF media files, either all by itself or via a QuickTime
component such as those from MXF4Mac and Calibrated Software. Pro Import AE does
not check to make sure After Effects will be able to use the media files diretly, it
assumes that if you enabled this choice you know what you're doing.
Create QuickTime reference movies to Avid media files
This is the method Pro Import AE has used to get Avid media into After Effects since the
very beginning in 2001. It works very nicely but the complex relationship between After
Effects, the reference movies and the Avid media files can cause problems when you
resurrect and old project or when you need to move a project to another system.
However practically no additional storage space is required when you use reference
movies, because these pointer files are tiny.
Flatten reference movies to Avid media
Enable this option and Pro Import AE will create self-contained media files for After
Effects. These files are not reference movies, they have no dependence on the Avid
media files. This obviously requires more storage space, but this option is better for
transporting or archiving projects.
Add layers for rendered Avid media
Pro Import AE cannot translate most
effects from an Avid into After Effects,
Avid in their wisdom has always kept the
parameters of their effects encoded so
third parties couldn't read them.
Automatic Duck has decoded some effect
parameters such as position, scale and
opacity from effects like PIP and
page 4 of 22
Page 5

Superimpose, but if you have a third party AVX effect applied it will not be translated.
If you have a sweet effect that you created in the Avid and want to bring that into After
Effects you can enable this option and as long as you have rendered the effect before
you export from the Avid, Pro Import AE will create a separate layer pointing to the Avid
rendered media file.
The original layer is also added to the comp so you have yourself a choice to use the
Avid rendered layer, the original layer, or perhaps a combination of the two. It is up to
you. The rendered layer's visibility switch is set to off, simply turn it on if you wish to
include it.
Search for original imported graphics files
When you import a file into an Avid
editing system, it creates new OMF or
MXF media to edit with. Depending on
the setup, the resulting Avid media could
be highly compressed and perhaps
downscaled so when you bring this
sequence into After Effects you might
prefer instead to use the original graphics
files you originally imported into the Avid.
When you have this option enabled Pro Import AE looks in your AAF file for information
your Avid stored about the media file (like a .mov) that you imported into your Avid. This
original file is then searched for, not the MXF media file your Avid created as a result of
your file import.
Do not search these volumes
Pro Import AE spends a lot of time
searching for media files. This is because
the file path stored in the Final Cut XML
file is no longer valid or in the case of an
Avid OMF or AAF there may only be hints
about where to find the media. There may be certain places on your computer, however,
that you don't want Pro Import AE to look in for media.
To keep Pro Import AE from searching certain volumes enable the checkbox then select
the volume name from the popup menu.
Independent of this setting you can also cause individual folders to be ignored by
surrounding the folder name in parentheses. For example the folder "(hidden media)"
and its subfolders would never be searched.
page 5 of 22
Page 6
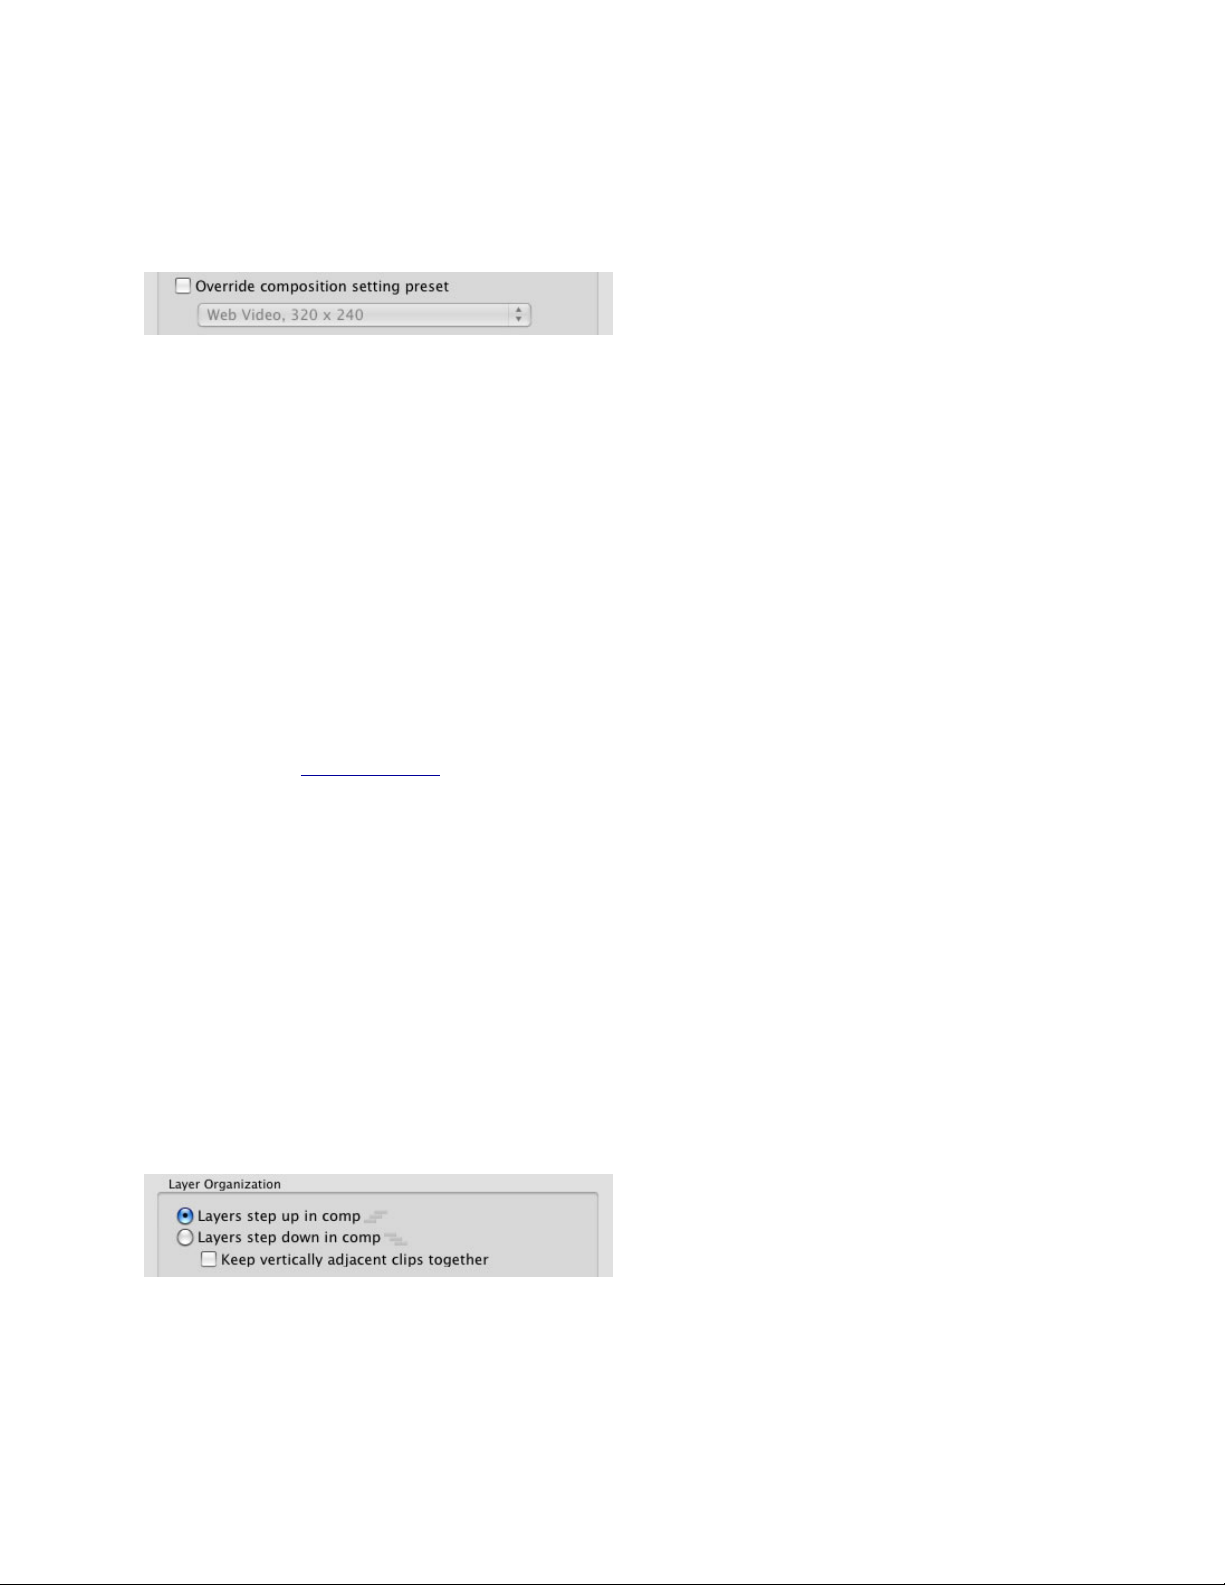
Custom search paths
Just like you might want to instruct Pro Import AE to never search certain places you
might also want to give the plug-in some priority locations where the plug-in should
search for media files. Pro!Import!AE will search these locations you add to this list
before any other.
This is especially useful on Windows where the plug-in is not able to search the entire
system for media files.
Comp and Layers
Audio Layers
Final Cut Pro and Avid editing systems express the clips on each track individually,
therefore what you think of as one clip containing video and two audio channels actually
presents itself as three in the XML, AAF and OMF files. This means that single clip will
make three layers in After Effects. You might like that, you might not, but we offer you
controls to make you happy either way.
Ignore
This is self-explanatory, right? Audio clips are ignored with this selection.
Add Normally
When this is selected each audio clip on each track is created as a separate layer in
After Effects.
Place in Subcomp
This option helps reduce the number of layers in your comp and moves all of the audio
layers into a nested composition.
Enable on Video Layers
Only applicable to FCP XML imports, this option does not create any audio layers in
your After Effects Composition, instead layers that use footage containing audio will
have their audio enabled as well as their picture.
page 6 of 22
Page 7
Override composition setting preset
Sometimes you want your After Effects comp to be setup differently than your editing
timeline was set, you can use this setting to override how the new comp is created.
The composition created by Pro Import AE will match the size and frame rate defined by
the selected preset.
Customizing the preset list
Unfortunately Pro Import AE is not able to read comp presets from After Effectsʼ
preferences, so we have built our own XML settings file you can edit if you would like to
modify the contents of this menu.
On Mac OS X, you can find an alias to the file “ADCompPresets.xml” located inside the
plug-in package. Locate your After Effects plug-ins folder and in there you should be a
file called AutoDuck Pro Import AE.plugin. In the Finder, right-click (or hold Control
down while click-ing on the package) and a contextual menu will appear. Choose
“Show Package Contents” and a new Finder window appears. Open the Contents
folder and “ADCompPresets.xml” will be in there. Open this file in your favorite text
editor. We like TextWrangler, it is free!
On Windows, you can find the “AECompPresets.xml” file located inside the “Supporting
Files” folder which should be located at the same location as “AutoDuck Pro Import
AE.aex” inside an “Automatic Duck” folder in your After Effects plug-ins folder. Open this
file in a text editor like Notepad.
You will see the presets shown in the XML file plus instructions for how to format
additions you make to the file. Just add new lines in the format shown, save the file and
relaunch After Effects and you should see your custom setting appear in the list.
Layer step options
Some users work in AE with their clips “stepping up” the timeline, while others prefer to
“step down”. Which is better? Who knows, but Pro Import AE gives you a choice.
When Layers step up in comp is selected, layers from earlier in the comp appear lower
in the layer order and later clips appear higher. The clips look like stairs going upwards.
page 7 of 22
Page 8

As you would expect, when Layers step down in comp is selected, layers from earlier in
the comp appear higher in the layer order and later clips appear lower. The clips look
like stairs going downwards.
So there you go, more choices for you.
Keep vertically adjacent clips together
Historically Pro Import AE has added clips to the timeline as they were processed as the
plug-in processed clips, first left to right on V1, then left to right on V2, etc. This meant
that for a long sequence, a clip on V2 that appeared right on top of a clip on V1 would
be vertically separated from the V1 clip in After Effects.
The Keep vertically adjacent clips together option reorganizes the timeline so that a clip
from V2 will be immediately above its V1 neighbor.
There are rules for how the plug-in decides to do this. The “vertically adjacent” clips
must start at the same frame and must have the same duration.
This option only considers video clips, audio clips are not reordered in the timeline.
page 8 of 22
Page 9

Precompify layers based on track
While certainly the power of Pro Import
AE is that it builds an AE comp with each
video clip as a separate layer. But
sometimes you want the option to treat
everything from a single video track together as one element in After Effects.
It can be helpful to know at a glance that layers came from different tracks.
When Precompify clips based on track is enabled, all the clips from a track in the AAF/
OMF/XML file are placed into a nested composition.
You can still open the nested comp to edit or apply effects to the individual clips, but in
the main comp you will be able to treat the entire track as one element.
Colorize layers using labels
When you bring your edited sequence
into After Effects it can at first be a little
disorienting to see your clips from your
NLEʼs timeline spread out widely over
AEʼs timeline. Not only are clips from the
same video track exploded into many
individual layers, clips from different
tracks can end up far from each other. Any organization you had in your NLE can be lost
instantly. To help visually organize clips from different tracks, there are a couple of
options for alternating the label colors of layers.
Alternate label colors based on track
This way all the clips from V1 would be one color, then all the clips from V2 would be a
different color, and so on, drawing your eyeʼs attention to the differences in the timeline.
It can be helpful to know at a glance that layers came from different tracks.
page 9 of 22
Page 10

Label audio and video tracks separately
Supported Effect Translation from Avid
Avid Effect
After Effects Translation
Video Dissolve
Opacity keyframes created
Dip To Color
Color solid created with Opacity animated from 0 to 100 to
0
Superimpose
Opacity value set to match
Picture-in-Picture (2D)†
Scale, Position, Level, Crop and Softness translated
Xpress 3D PIP
Scale, Position, Level, Crop and Softness translated
3D Warp†
Scale, Rotation, Position, Level, Crop and Softness
translated
Resize
Scale and Position translated
Flip
Scale set to 100, -100
Flop
Scale set to -100, 100
Flip-Flop
Scale set to -100, -100
Matte Key††
Luma Key track matte enabled
Submaster
Layers nested into Precomp
Motion Effects
Layer Stretch set to match speed
Strobe
Posterize Time filter applied
Time Warp
Time Remap keyframes set
Freeze Frame
Time Remap Keyframe set
X-Spin transition
Animating Scale keyframes created
Y-Spin transition
Animating Scale keyframes created
Z-Spin transition
Animating Scale and Rotation keyframes created
Audio Level and Automation
Gain
Audio level keyframes created
Audio Dissolve
Audio level keyframes created
This option will color all of the video layers one label color and all the audio layers the
other.
What is translated
Pro Import AE is able to translate a lot of metadata from your Avid, Final Cut Pro or
Motion project into After Effects. Not everything translates, of course, but a lot does.
Translation from Avid editing systems
The following table outlines how Pro Import AE deals with the supported effects when
importing from Avid editing systems.
†Original keyframe model as well as the newer Advanced keyframe model.
†† See Avid Matte Keys section for more information
page 10 of 22
Page 11

Effects and parameters that are not supported are not translated, and are therefore lost.
Effect and Parameter Support from FCP
FCP Effect/Parameter
After Effects Translation
Opacity (Motion Tab)
Opacity
Scale (Motion Tab)
Scale
Rotation (Motion Tab)
Rotation
Center (Motion Tab)
Position
Distort (Motion Tab)†
Corner Pin
Crop
Rectangular Mask created
Speed
Stretch
Time Remapping
Time Remap Keyframes set
Freeze Frame††
Time Remap Keyframe set
Strobe
Posterize Time filter applied
Distortion > Flop set to
Horizontal
Transform Effect applied, Scale set to -100, 100
Distortion > Flop set to
Vertical
Transform Effect applied, Scale set to 100, -100
Distortion > Flop set to Both
Transform Effect applied, Scale set to -100, -100
Dissolve
Opacity Keyframes
Dip To Color Dissolve
Color solid created with Opacity animated from 0 to 100 to 0
Matte - Color (Key frames
not supported)
Solid Layer
Composite Mode
Transfer/Blending Mode
Basic 3D
Rotations set Rotations in AE, Center and Scale set Position
and Scale in Transform effect
Audio Level and Audio
keyframes
Audio level keyframes created
Audio Dissolve
Audio level keyframes created
Effect and Parameter Support from Motion
Motion Effect/Parameter
After Effects Translation
Opacity
Opacity
Scale
Scale
Rotation
Rotation
Position
Position
Four Corner
Corner Pin
Please keep this in mind as you prepare to migrate from your Avid editing system to
After Effects.
The following table shows what is translated from Final Cut Pro to After Effects.
† Support for distort does not include “Aspect Ratio.”
†† Freeze frames cannot be applied to Nested Sequences.
The following table shows what is translated from Motion to After Effects.
page 11 of 22
Page 12

Crop
Rectangular Mask created
Media Playback Rate
Playback Rate in Interpret Footage
Perspective > Flop (Horizontal)
Transform Effect applied, Scale set to -100, 100
Perspective > Flop (Vertical)
Transform Effect applied, Scale set to 100, -100
Perspective > Flop (Both)
Transform Effect applied, Scale set to -100, -100
Blend Mode
Transfer/Blending Mode
Audio Level and Audio keyframes
Audio level keyframes created
Third Party Effects
Pro Import AE is able to apply many third party filters in After Effects with the same
settings used in Final Cut Pro.
If an effect is not translated by Pro Import AE the plug-in will put a marker on the layer
with the name of the untranslated effect. The plug-ins that Automatic Duck has tested
and translated are listed on our web site.
When Effects are Unsupported
Effects and parameters that are not supported are not translated, and are therefore lost.
Please keep this in mind as you prepare to migrate from Avid, Final Cut Pro or Motion to
After Effects. If your timeline contains elements that Pro Import AE knows that it cannot
translate for you, a warning message will appear.
page 12 of 22
Page 13

This warning notifies you that some “effects” are not supported. In the context of this
dialog, the term effects refers not only to effect filters, but to any parameter or feature
that modifies your clip. In most cases it appears because of unsupported features or
filters, not any kind of dramatic failure.
Clip Markers
When Pro Import AE sees an effect it doesnʼt know how to translate, it places a marker
on the layer with the effect or parameter name in the marker.
Particle Emitters, Replicators, Text from Motion
A particle emitter and text from Motion (left) and how it appears in After Effects (right)
It is not possible for us to convert the Motion particles into particle systems in After
Effects, we simply canʼt take the parameters found in Motion and apply those
parameters to any particle plug-in in AE.
Instead we take a different approach. If a Motion project file is renamed with a “.mov”
extension, After Effects can use QuickTime to render the Motion project file as though it
was a QuickTime movie. Therefore, Pro Import AE creates mini Motion project files for
particles, replicators, text and other Motion-generated content. The project only contains
the one element so that its layer in After Effcts is discreet and only renders the one
element. This allows you to move the element in the AE comp.
page 13 of 22
Page 14

Motion must be installed on the Mac youʼre using After Effects on, without Motion
installed QuickTime cannot open the mini Motion project files created by Pro Import AE.
Time Remapping
Time Remapping information from Final Cut Pro and Time Warps from Avid editing
systems can be translated into After Effects using Pro Import AE.
The keyframe values in the FCP time remap keyframes or the Avid time warp keyframes
are translated to the keyframe values of Time Remapping in After Effects. Avid editing
systems have some pre-built time warp effects that donʼt rely as much on keyframes as
they do on the easing of the timewarp motion curve. Pro Import AE doesnʼt deal with
these, we only can read the values of the individual time warp keyframes.
An illustration of FCP time remapping going into After Effects. As mentioned in the next
section, easing of keyframes is not translated, just keyframe values.
Keyframe Interpolation
Keyframes created in After Effects are default linear keyframes; easing is not supported.
Bezier curves in motion paths are also not supported.
Nested Sequences
A powerful feature of Final Cut Pro is its ability to nest sequences inside sequences. After
Effects shares this functionality, you can nest comps within comps. Pro Import AE
page 14 of 22
Page 15

supports nesting, so your nested sequences from FCP will become nested compositions
in After Effects.
Be aware that audio from nested compositions may not appear in After Effects as you
expect.
In Avid editing systems, nesting isnʼt possible like it is in Final Cut Pro. However some
level of nesting is available, where layers can be nested inside of effects such as
Picture in Picture. The Submaster effect is another way nesting is possible in an Avid.
When nests are present in an Avid AAF or OMF file, Pro Import AE will create nested
sequences in After Effects.
Nesting from Motion
Motionʼs architecture is a bit different than After Effectsʼ, in that every clip is always
housed inside of a layer.
Clips are the actual bits that reference content, and the layers are containers that hold
the clips. Clips cannot live at the “root level” of a Motion project, only layers can. This is
different than After Effects. In After Effects, layers are the same as clips and these layer
objects are allowed to exist in the root of the composition. There is no extra level of
separation between the layer and the clip.
This is important to understand as you work between Motion and After Effects, as
Pro!Import!AE will try to do what makes the most sense when it comes to dealing with
Motionʼs “extra level”.
In many cases, like in the figure below, it doesnʼt make sense in After Effects to have
the separate levels of layer and clip.
page 15 of 22
Page 16

This structure of a layer named “Layer” containing a clip called “Rocket Launch” could
easily be recreated in After Effects. You can imagine a comp called “Layer” and that
comp contains a layer named “Rocket Launch”. But this setup is a bit inconvenient in
After Effects, nested comps in After Effects-- while powerful-- can get in the way. So in
this example the Motion clip loses its layer-wrapping and becomes an After Effects
layer.
In cases where nesting needs to happen, it does. Imagine two clips in a Motion layer,
then the layer is rotated.
Visually this causes the two clips within the layer to rotate, so in After Effects we need to
have both layers rotate. The best way to convert this example is to create a nested
composition in After Effects and apply the rotation to the layer that represents the
nested comp.
Now youʼll see how Motion layer names will want to be changed if theyʼre going to be
created nested comps. “Layer” and “Layer 1” and so on just isnʼt useful, so be mindful of
that in Motion when youʼre setting up your project.
The nested comps from Motion are the result of a lot of complex calculating by Pro
Import AE. Nests in Motion donʼt actually have any size, they are simply the sum of all
page 16 of 22
Page 17

the clips (and perhaps even other layers) contained within and the “bounding box” that
represents the nest in the Motion canvas is drawn on the fly. Nested comps in After
Effects do have a size, however, and Pro Import AE needs to calculate what that is.
Pro Import AE considers Position and Scale when it calculates what the size of the
nested comp needs to be.
In the following example, three clips of a ski jumper are nested into a layer and the layer
is scaled so the three clips appear on screen together. This creates a nest in After
Effects for the three jumpers.
You can see above that the nested composition is created at such a size so that you
see all three jumper layers.
Other parameters in Motion can affect the size the size of the bounding box, but that
wonʼt affect the size of the nested comp in After Effects. Rotation is a good example.
page 17 of 22
Page 18

As the middle jumper is rotated, the virtual nest in Motion widens, but Pro Import AE
doesnʼt consider rotation when it calculates the size of the nested comp, so in After
Effects the corners of the jumper get cut off. You can easily fix this by changing the
comp settings for the nested composition.
Source Clip Markers / Locators
Markers from source clips in FCP sequences are translated into layer markers in After
Effects. Both the name and the description fields from the FCP markers are translated.
While Final Cut Pro markers have Name and Description fields, After Effects layer
markers only have one field for a name/comment. To help keep the Name and
Description fields separated, Pro Import AE inserts “[“ and “]” characters around the text
that was in the FCP marker name field.
You are limited to a total of 61 characters that can be inserted into an AE layer marker
name. Your name and description fields in your FCP source marker will be truncated if
necessary.
Sequence markers are added to a layer at the top of the comp.
page 18 of 22
Page 19

Locators from Avid editing systems are also translated into After Effects markers.
Motion offers markers that can be applied to either clips in the timeline or project. Both
kinds translate into After Effects, the markers on Motion clips appear on their translated
After Effects layers. Motion project markers appear on a switched off layer at the top of
the comp.
Markers are a great way to make comments about clips that need special attention in
After Effects.
page 19 of 22
Page 20

Text and Titles
Pro Import AE is able to read the text from titles created in Avid (Media Composer 10
and later) and Final Cut editing systems then create text layers in After Effects. Text
from Motion is translated into a mini Motion project so that the visual results in After
Effects match what you saw in Motion.
Pro Import AE will attempt to set the font, alignment, color and size of the text in After
Effects CS4 and CS5.
Third party Text Generators like Borisʼ Title 3D are not supported by Pro Import AE.
Composite Modes
Pro Import AE is capable of translating the composite or transfer mode applied to clips
in FCP or Motion.
Final Cut Pro “composite modes” become After Effects “blending modes”. Motion “Blend
Modes” also translate.
Pro Import AE is able to read the composite mode setting, and will set the layer in After
Effects to the matching mode. Subtract mode is not supported since there is no
“Subtract” mode in After Effects.
page 20 of 22
Page 21

Avid Matte Key
When you bring in Matte Key effects from your Avid system, they will result in Luma
Track Mattes. This is good, but what isnʼt good is that your Avid media is in the 601
color space, so your blacks will be RGB 16 and your whites RGB 235.
The composite on the left has a bit of the spaceship motor stage bleeding through the
next shot (note to the left of the “A” where the arrow is pointing), while the right side is
correct.
You will want to adjust the matte layer so that it is in the RGB color space and its blacks
are RGB 0 and the whites are RGB 255.
To do this, select your black and white matte layer, then apply the Levels filter from
Effect>Color Correction>Levels.
page 21 of 22
Page 22

Set the effect so that the Input Black is 16 and the Input White is 235. You can leave the
other settings, you want the Output Black to be 0 and the Output White to be 255.
The matte layer will now properly key the video elements involved in the matte key.
Square pixel elements in non-square pixel sequences
Final Cut Pro and After Effects deal differently with the problem of a square-pixel
element in a non-square-pixel sequence/comp (and vice-versa). As a result, you will see
a visual difference between the Final Cut Pro canvas and the After Effects composition
window. You will also receive a warning of an unsupported effect, this is because Final
Cut Pro uses the Aspect Ratio control in the Distort section of the motion tab to deal
with pixel aspect ratio differences, and Aspect Ratio is not a supported effect.
Color Matte Generators
Only Color Matte is supported of the shape/pattern/color generators available in Final
Cut Pro. When a Color Matte is used in a Final Cut Pro sequence, Pro Import AE
translates it into an After Effects solid layer. The color of the color matte generator is
carried through and the solid layer matches the color!
Legal Info
Automatic Duck and Pro Import are trademarks of Automatic Duck, Incorporated. Avid
and OMF are registered trademarks of Avid Technology, Incorporated. QuickTime and
Final Cut Pro are registered trademarks of Apple Computer, Incorporated. Other
trademarks are the property of their respective holders. MXF support utilizes the freemxf
library by Matt Beard, et.al.; see http://www.freemxf.org for more information.
© Copyright 2011 Automatic Duck, Inc. All Rights Reserved.
page 22 of 22
 Loading...