

Page 1
Quick Start Guide
Page 2
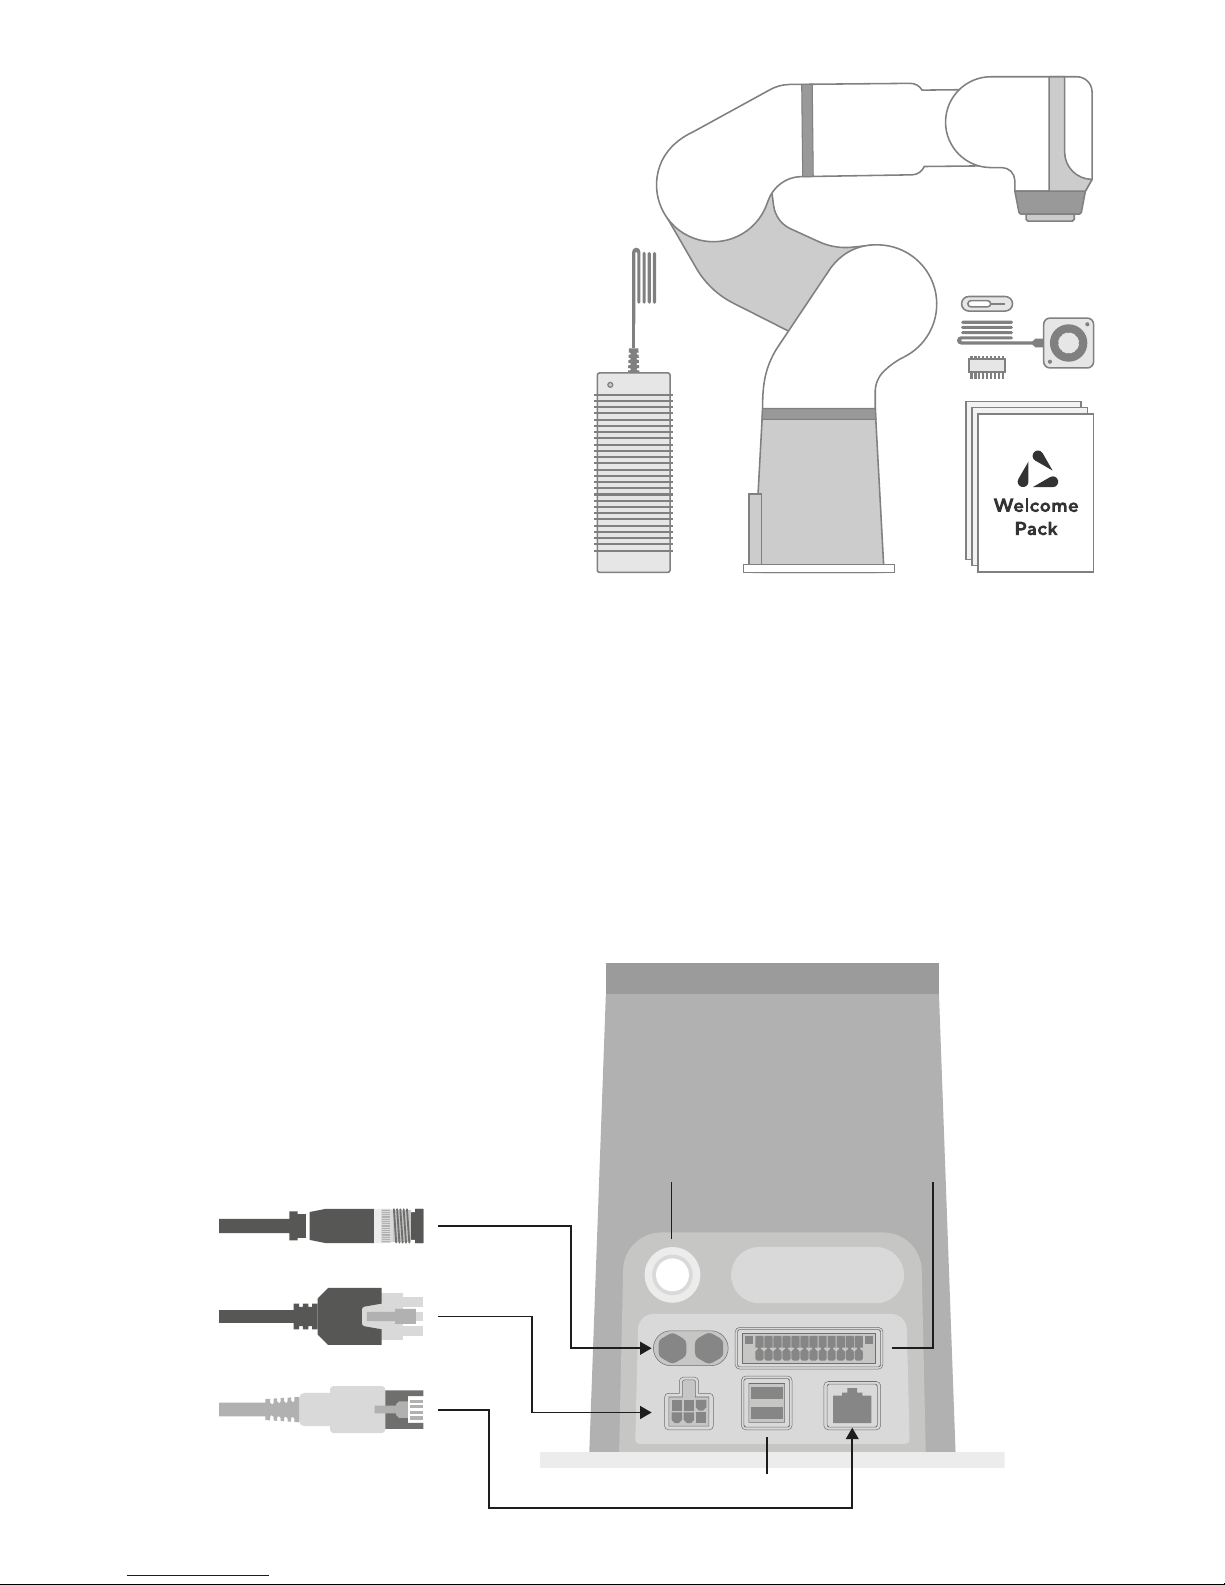
On/Off Button
Emergency Stop
Power Supply
Ethernet
USB Port
I/O Connector
Inside the box
Powering On
1
1
2
2
3
3
4
4
5
5
6
6
Robot Arm
Start by plugging the Power Supply and Emergency Stop following the diagram
below. Press the On/Off button, then connect to your network with wifi or Ethernet.
Note: The Ethernet Cable is not included.
Power Supply
Emergency Stop
Manuals
Emergency Break Release
Safety & Reference Manuals
Welcome Pack
Quick Start Guide
I/O Connector
Page 3
Get Connected
Choreograph
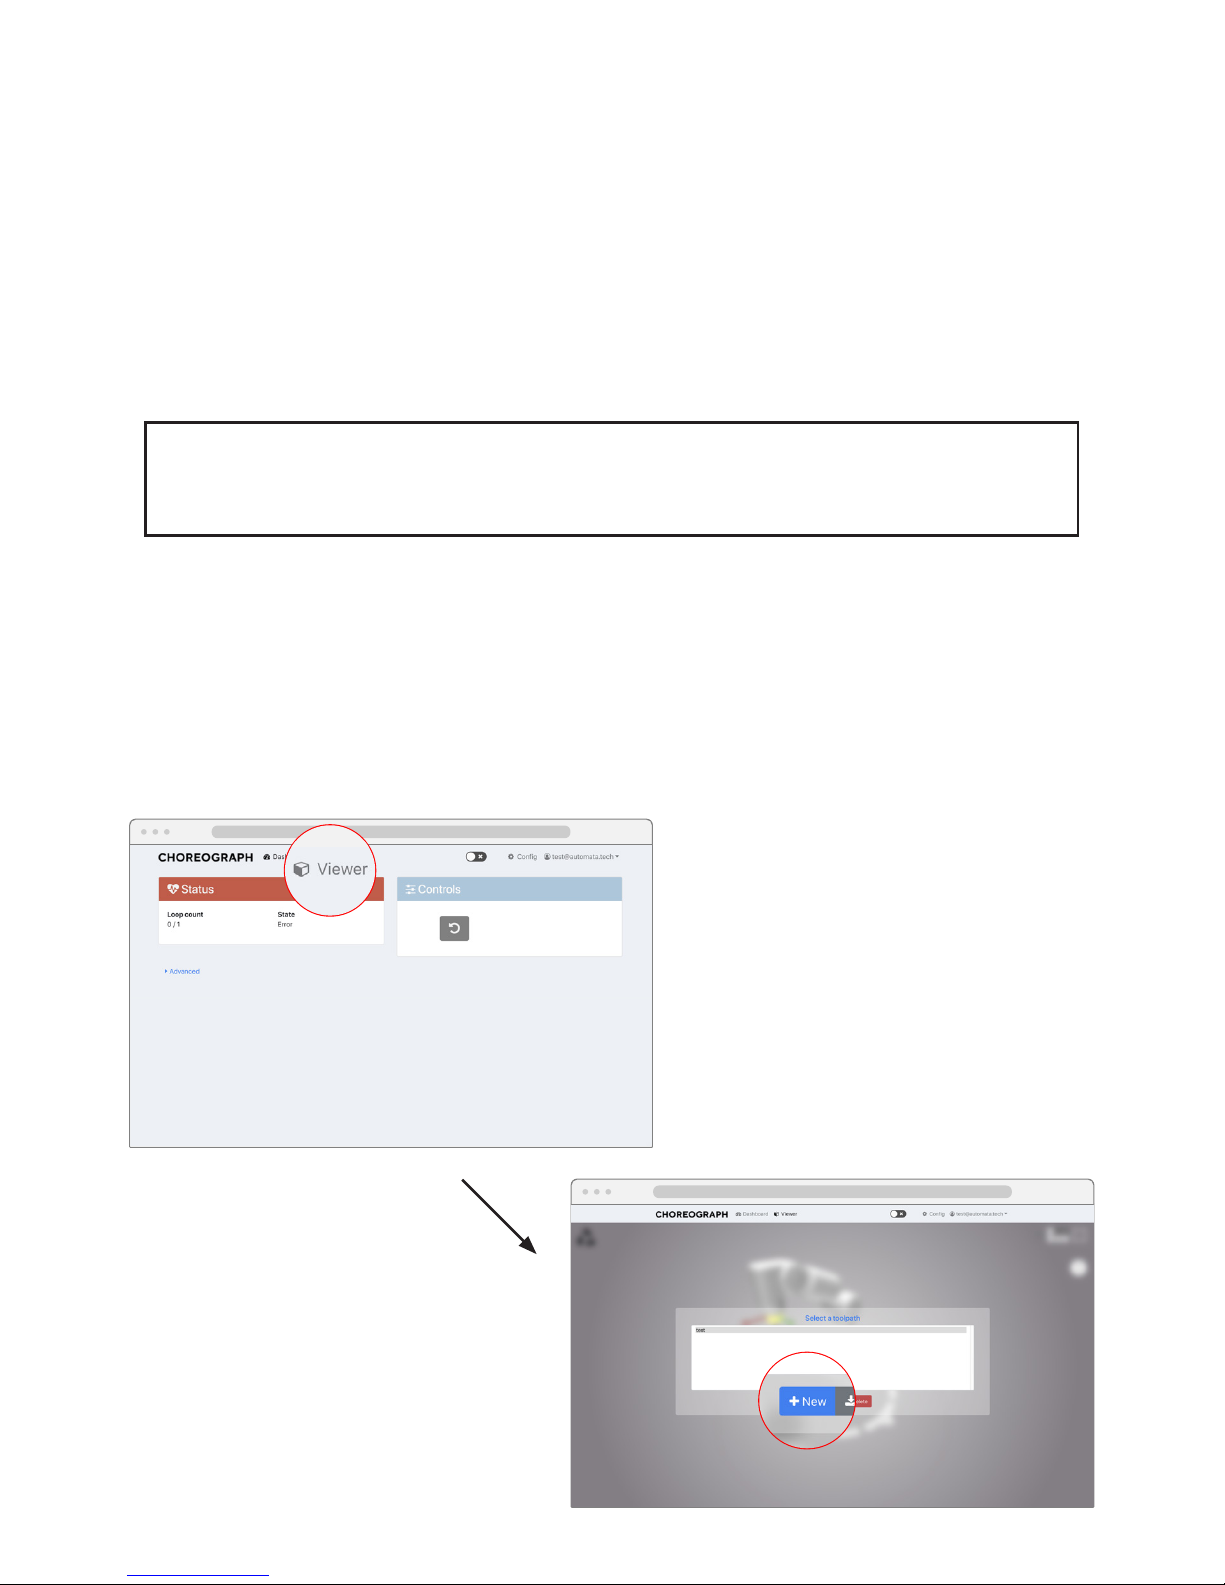
To start programming Eva, navigate to the viewer in Choreograph, and click new to
start a new toolpath.
Open your browser and navigate to the URL eva.automata or 172.16.172.1. and set
up your new account.
Note: For more information go to the page 5 on the Reference Manual.
Here you have your personal Eva Access Wifi Password:
Page 4
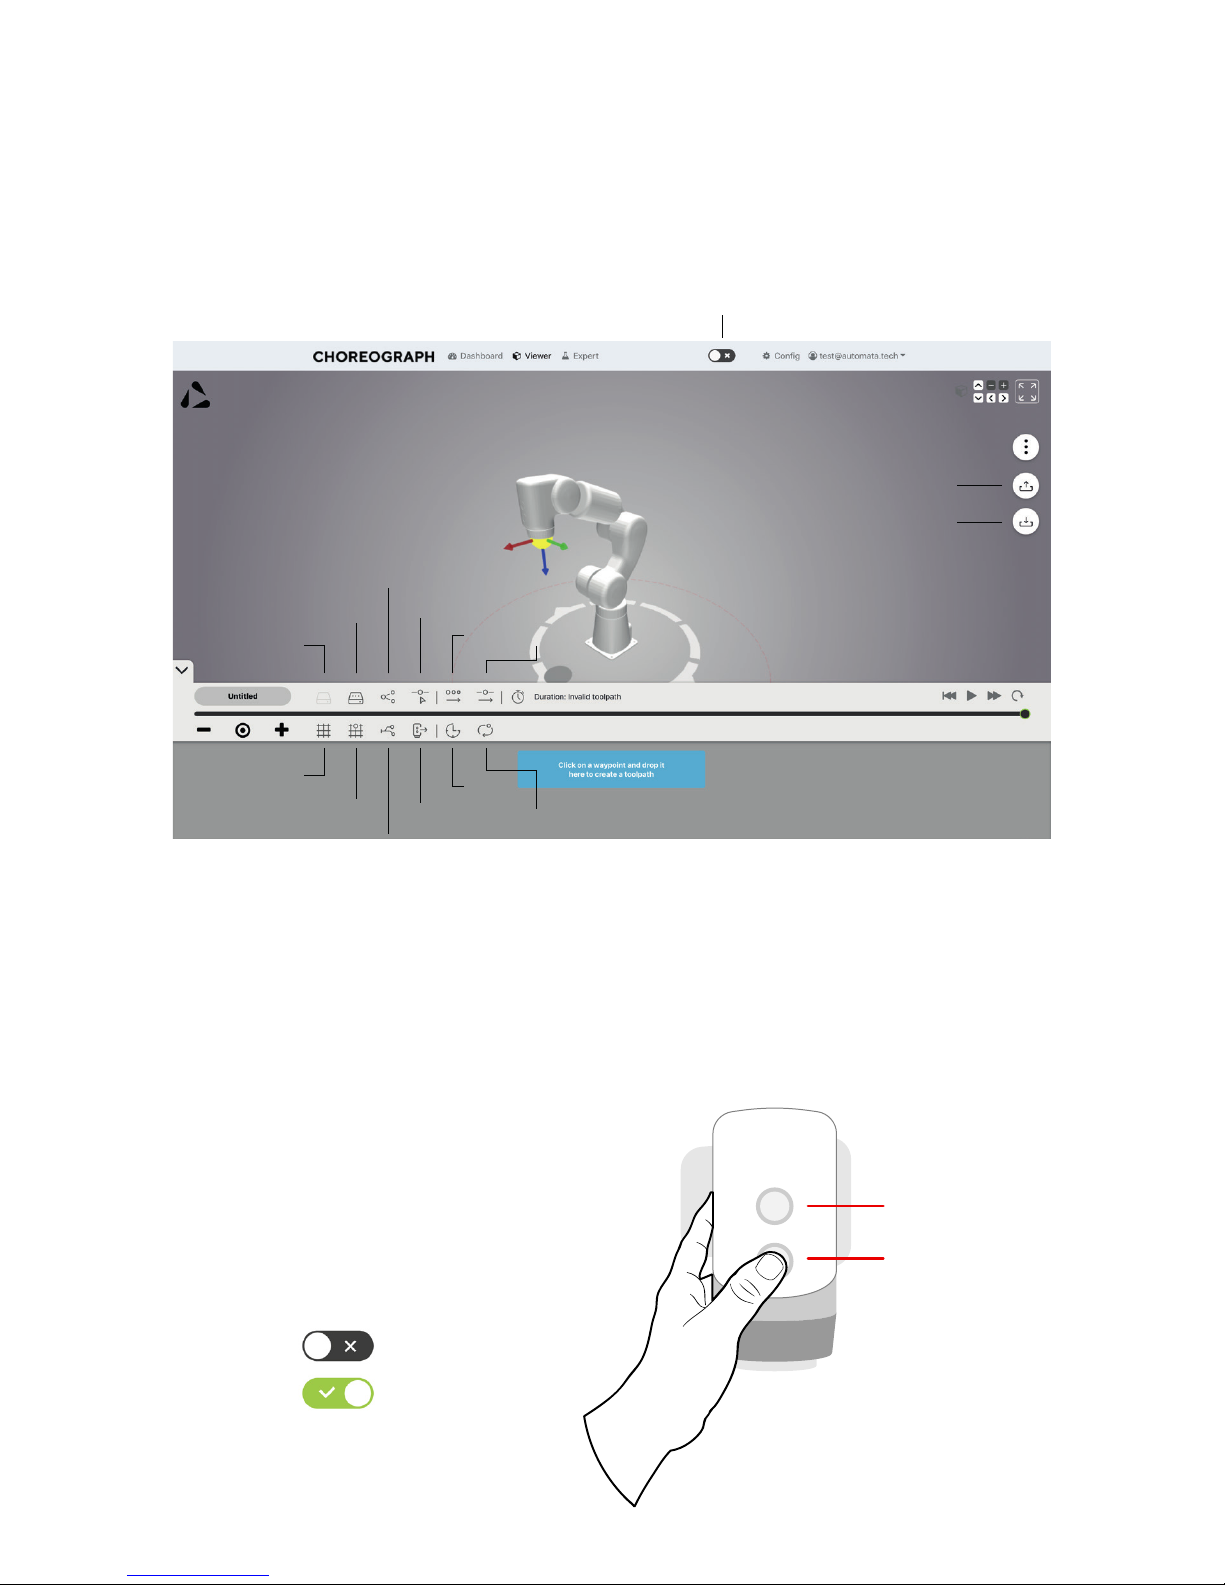
Save
Grid
Grid waypoint
Branch
Set Output
Wait
Restart
Save as
Share
Select toolpath
Order by
Orde
Order by Timeline
Export toolpath
Online/Offline
Import toolpath
Waypoint button
Backdriving button
Move Eva manually
Learn more
To move the robot manually, press and hold the Backdriving button on the robot
head, this will give you the freedom to manipulate Eva.
Note: Make sure to take the lock; click the
grey x at the top of the screen to slide it into
a green tick.
This gives your device ownership of the robot, and only in this state will Choreograph
save waypoints.
The icons immediately above the timeline are action points. They can be dragged
to the timeline just like waypoints, but specify special behaviour rather than points
in space.
Page 5
Create a Waypoint
Toolpath
To create a new waypoint move Eva
to the position you want and press
the Waypoint Button on the robot
head.
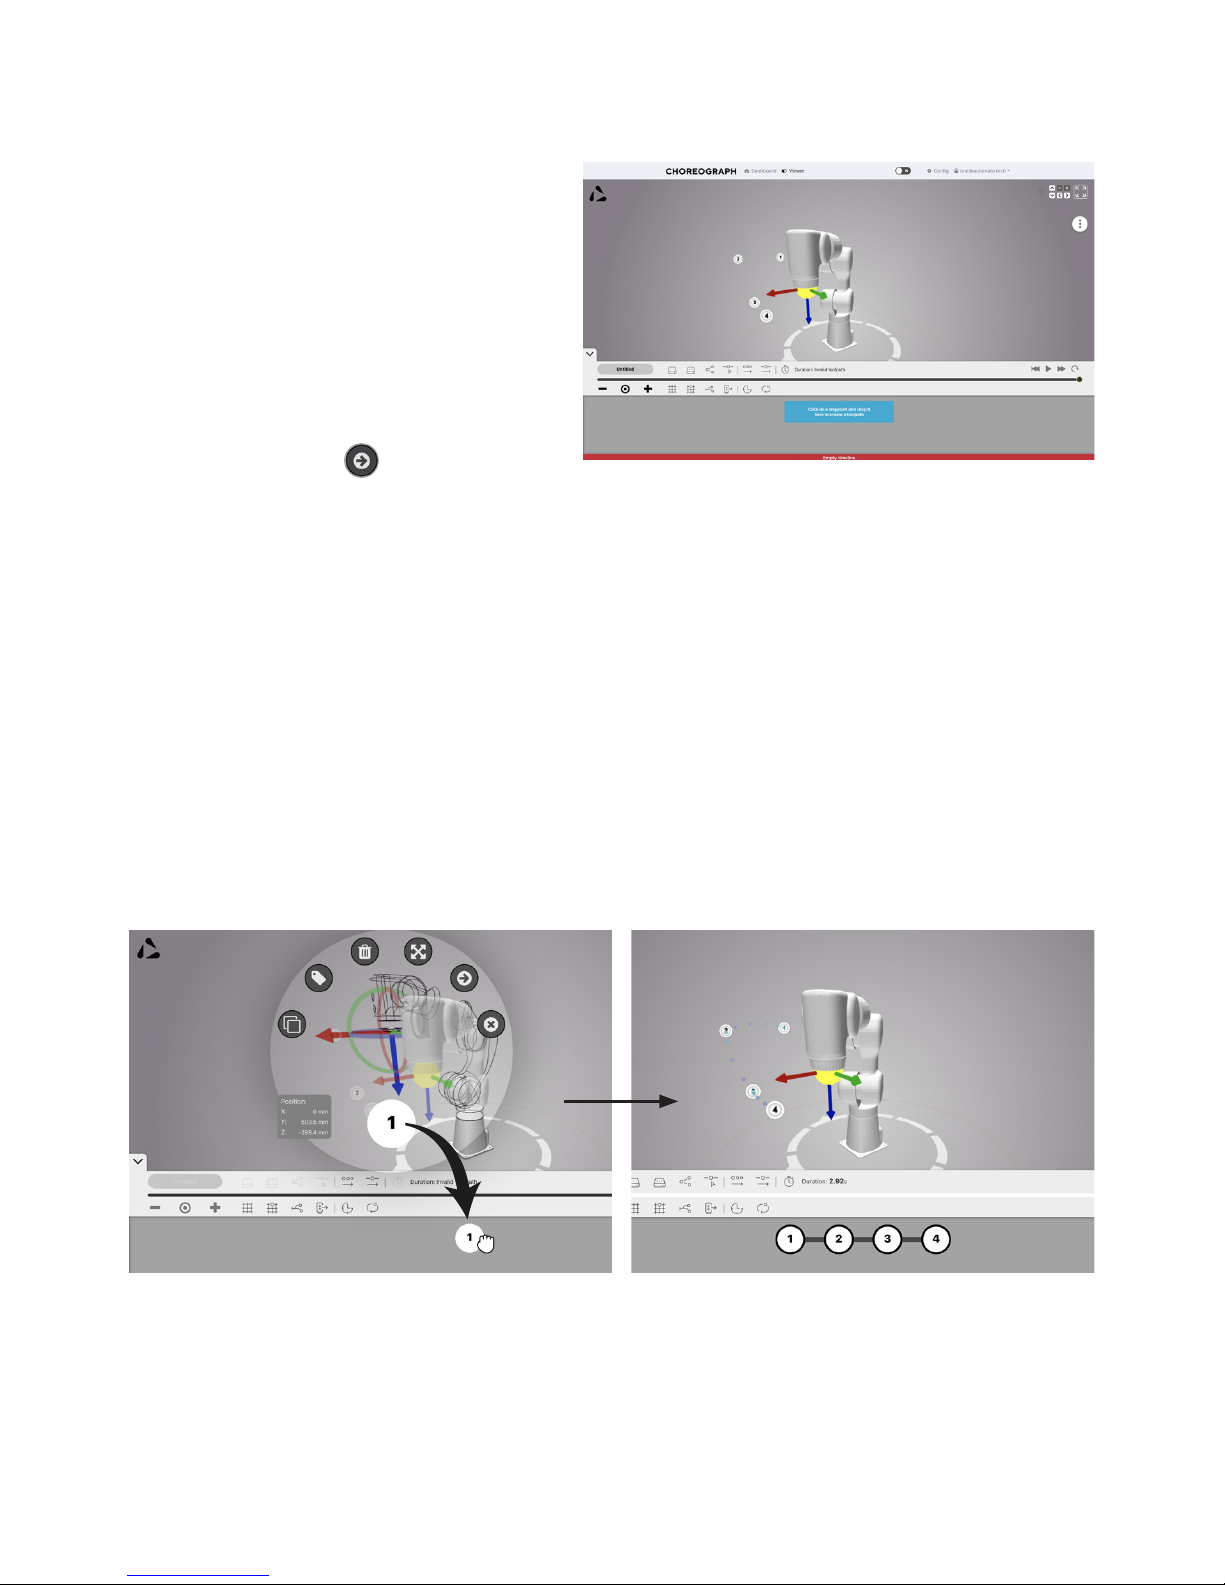
When you think you have a series
of waypoints in the right place, click
on the first waypoint and a menu
will appear. You can use the ‘go-to
waypoint’ button to check
accuracy.
Open the timeline, select each of your waypoints one by one, drag their 2D icons
onto the timeline in the desired order, and you have created your first toolpath.
Whenever you make changes, make sure to save your toolpath
Note: There is another way you can create a waypoint using Choreograph, visit page 9 in the Reference
Manual.
Page 6

Note that a waypoint can ‘exist’ several times along the timeline, but only once in
the 3D workspace. Modifying the properties of a waypoint on the timeline (eg:
waypoint type, speed) doesn’t affect the waypoint as a whole. On the other hand,
changing the position of a waypoint in space will change every instance of that
waypoint along the timeline.
For more specific or complex information please check the Reference Manual
provided.
Visit www.automata.tech to reference a comprehensive online user’s manual or contact
[email protected] for additional information and assistance.
Once you’re ready to try out your toolpath, use the controls on the left-hand side
of the viewer. Note: Remember to be online.
Important: Before running Eva for the first time you need to follow the next steps.
Remember to save and follow this steps every time you make a change.
Note:
Uploading
Press upload (this gives the robot information about the toolpath)1
Press home (this sends the robot to the first position)2
Press play. Try playing just one loop the first time.3
Page 7

Page 8

Automata Technologies Limited
Unit 4, Holford Yard
Bevin Way
London WC1X 9HD
 Loading...