

Page 1
Nutritest
User Guide
Simple to use
Long battery life, automatically enters power saving mode
Portable and compact design
Simultaneously display EC(CF), pH and temperature readings
128 x 64 pixel LCD screen with adjustable contrast
Calibration of EC, pH and temperature readings
Can be used in constant monitoring (automatic) or “sample on demand” (manual) mode
Data logging of previous 10 readings when in manual mode
Alarm buzzer when in automatic mode
User selectable units for nutrient (EC/CF/TDS) and temperature (°C/°F)
Settings and calibration retained when battery is removed
Page 2
Nutritest Manual
© 2013 Autogrow Systems Ltd
1
Description
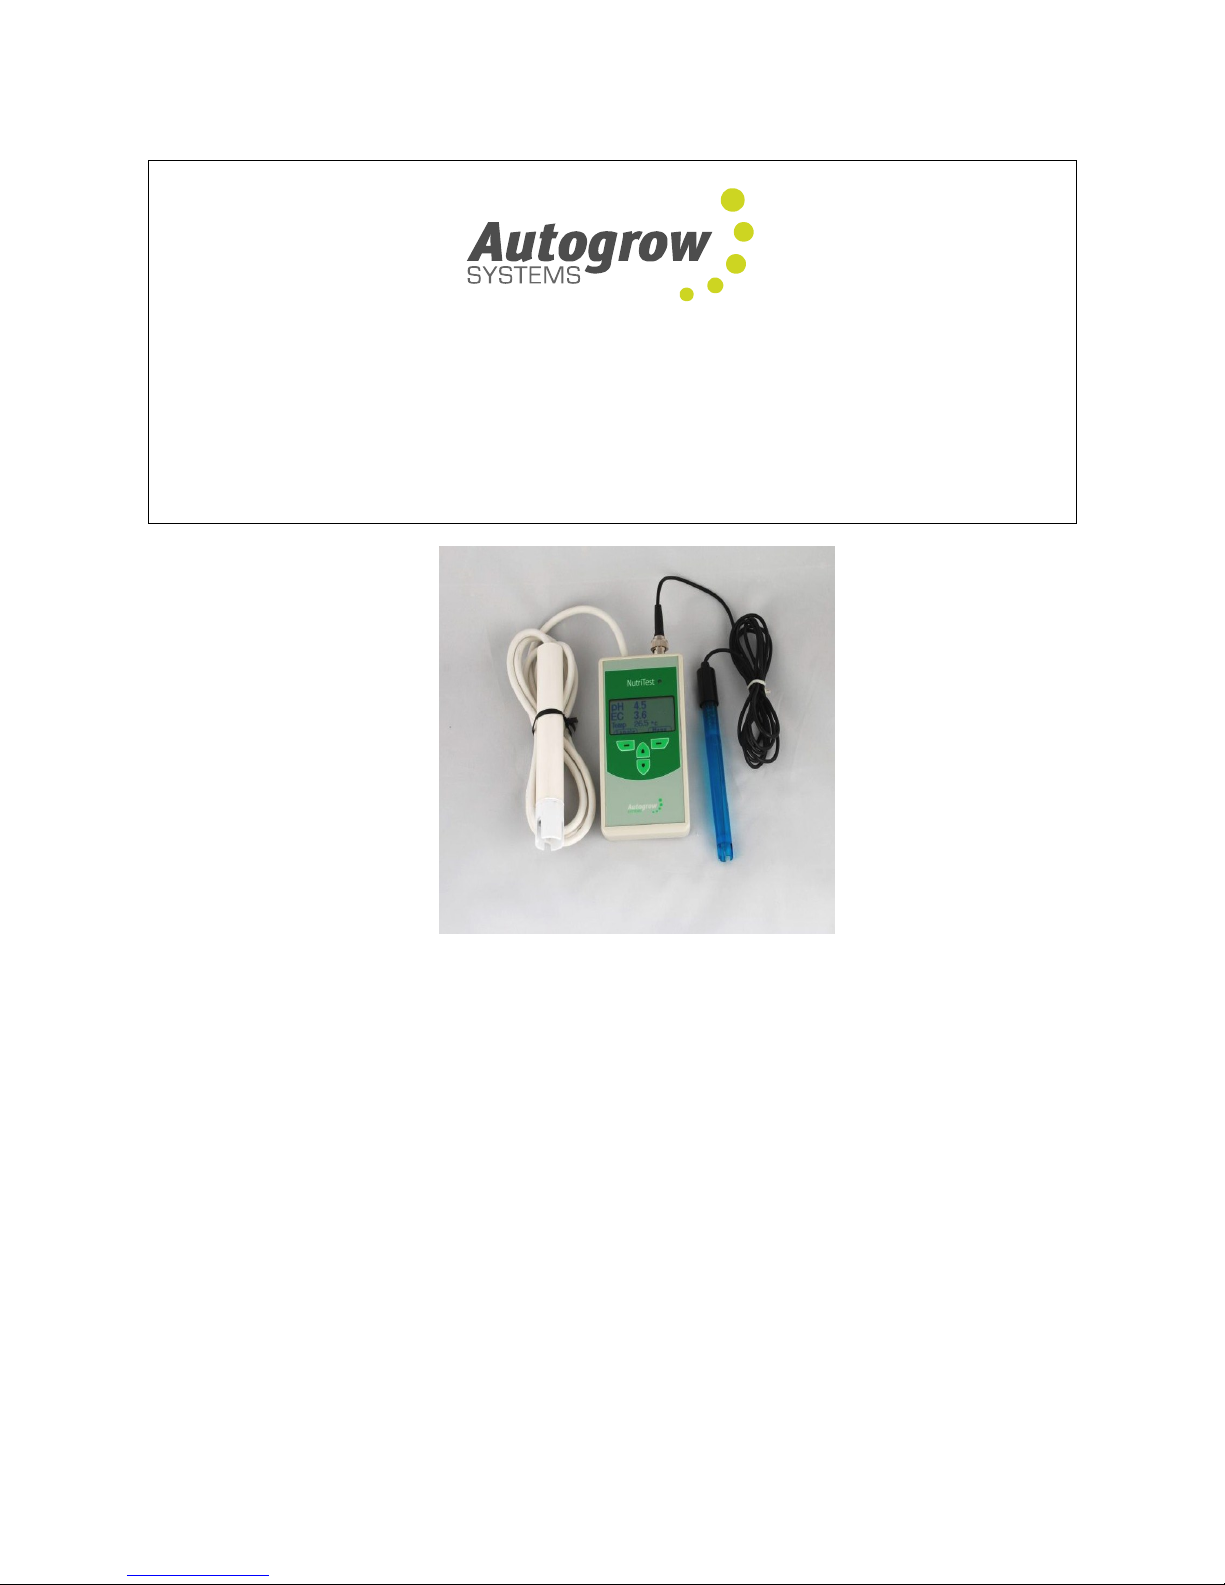
The Autogrow Nutritest is a combined nutrient, pH and temperature portable meter. It has been designed to be
easy to use and consume minimal energy. It can be used easily in the field, requiring no external power. It
operates either as a monitor, periodically taking readings, or as a “sample on demand” meter, taking readings
when required. All readings are displayed simultaneously on screen, minimizing the need to scroll through
different readings. The Nutritest comes with a permanently attached EC probe and a removable pH probe
which can be replaced as required.
Applications
Hydroponics
Nurseries
Runoff monitoring
NFT
Operation
Powering up the Nutritest
If nothing is shown on screen and a battery is installed simply press any of the 4 buttons and this will wake up
the device.
Powering Down the Nutritest
The Nutritest can be put into power saving mode manually when the main screen is displayed by pressing the
down button and holding it for 3 seconds. The display will then be powered down and the device will consume
a minimal amount of energy.
Auto Power Down
The Nutritest will enter a power saving mode when no button has been pressed for 5 minutes, except for when
it is in automatic sampling mode. The screen will be turned of and the device will be inactive. To power up the
device press any key. During power saving mode all settings and the data log will be saved.
Sampling Modes
Manual
In this mode the Nutritest samples when the left button is pressed. Sampling takes about half a second and
during this time the buttons are not active. To show sampling is in progress the readings are highlighted. To
exit this mode and make adjustments press the right button to navigate to the main menu screen. The
sampling mode can be changed to automatic or manual as described on page 5 in the “Settings” section.
Automatic
In this mode the Nutritest can be used to display a constant readout. A sample is taken every 10 seconds.
During sampling the readings are highlighted and the buttons are inactive. In this mode the alarm settings
apply as described on page 4 in the “Alarms” chapter.
Page 3
Nutritest Manual
© 2013 Autogrow Systems Ltd
2
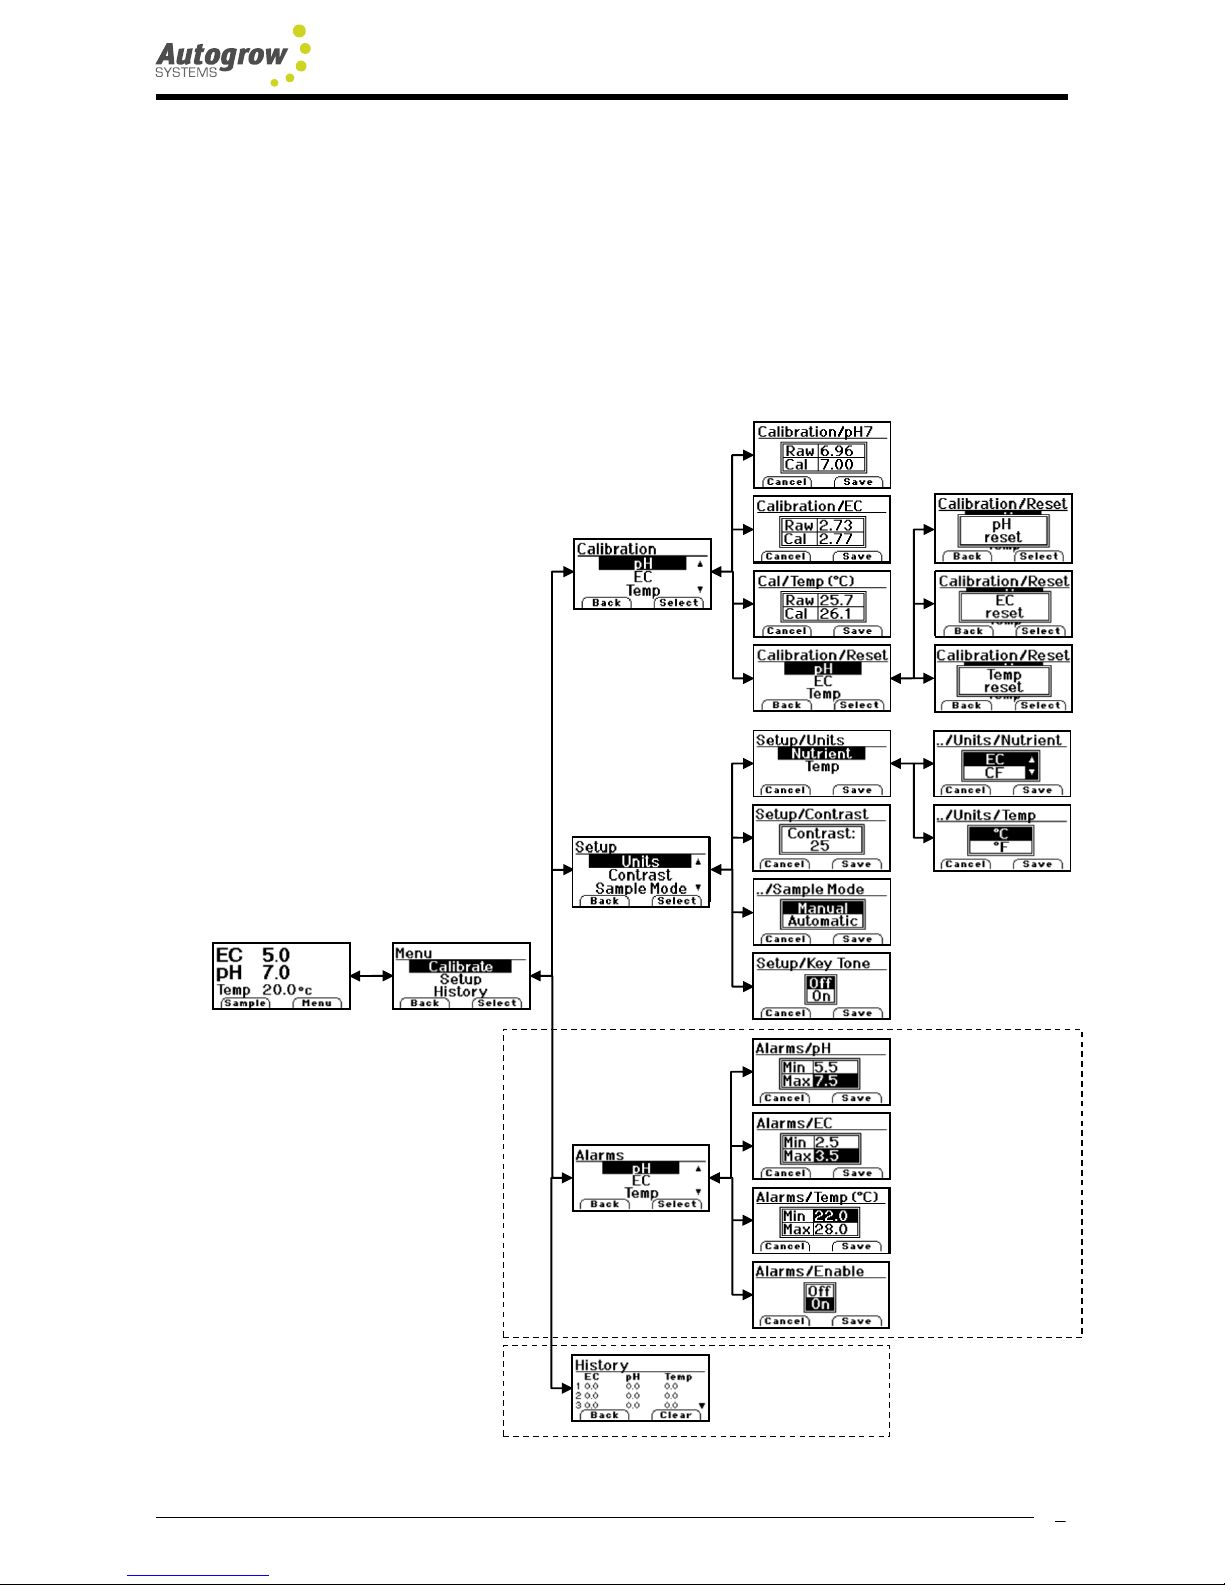
How to Navigate through the Menus
The main menu screen can be accessed from the main display screen. From this screen all other settings and
calibration can be accessed as shown in the diagram below. To scroll through the menu options use the up
and down buttons. To select a menu option use right button and to exit a menu screen use the left button.
When calibrating or adjusting a numerical value hold the up or down buttons down to increase or decrease the
value. This will change the value every ¼ of a second that the button is held down. When adjusting a setting
press the up or down button once then release. The setting will change on each button press. To save a
calibration, value or setting adjustment, press the right button. To cancel, press the left button. Either of these
will return to the menu used to access the adjustment.
Main menu
Calibration
Calibration
Temperature
Calibration
Reset
Calibration
Setup
Units
Contrast
Sample
mode
Key tone
on/off
Alarms
(Auto only)
pH Alarms
EC Alarms
Temperature
Alarms
Alarm on/off
History
Reset EC
Calibration
Reset Temp
Calibration
Reset pH
Calibration
Set EC Units
Set Temp
Units
Main Display
Only accessible in
automatic mode
Only accessible in
Manual mode
Page 4

Nutritest Manual
© 2013 Autogrow Systems Ltd
3
Calibration
EC, pH and temperature can all be calibrated. 2 values are shown on screen during calibration:
Raw – this shows the un-calibrated reading and indicates how accurate the probe is.
Cal – this shows the calibrated reading which is used for the main display.
To calibrate the Nutritest:
1. Navigate to the appropriate calibration screen.
2. Hold down the up button to increase the calibrated reading or down button to decrease.
3. Once the device has been satisfactorily calibrated press the right key to save and exit. Alternatively
pressing the left key will discard calibration and exit.
To restore the calibration setting to factory default:
4. Navigate to the reset calibration screen and select the reading to reset (pH/EC/Temp).
5. Press the right button and release to reset the reading so that it is un-calibrated. A message will briefly be
displayed confirming that calibration has been reset.
6. To exit the reset calibration screen press the left key.
EC Calibration
The EC calibration should be checked weekly. To do this, place the probe in the 2.77 (CF 27.7) standard
solution and allow to stand for 5 minutes. The reading should be 2.8mS/cm +/- 0.1 mS/cm. If not, navigate to
the EC and follow the steps above until the calibrated reading shows 2.77. Next rinse the probe in fresh water
and shake off excess water.
Temperature Calibration
The temperature sensor is located in the EC probe so to calibrate temperature place the EC probe in a body of
water with a known temperature. The probe should be left in the solution long enough for the probe
temperature to match the solution temperature.
pH Calibration
The pH calibration should also be checked weekly. Calibrating the pH is a more complicated process and
requires a few more steps. It involves 2 stages of calibration: calibrating using a pH7.0 solution and then a
pH4.0 solution. To calibrate the pH:
1. Place the probe in a pH 7.0 buffer solution. Allow about 5 minutes for the pH reading to stabilize then
navigate to the pH calibration screen.
Note: An error message will be displayed and calibration will be disabled until a reading between 6.0 and 8.0.
is sampled. At this point the calibration can be cancelled by pressing the left button.
2. Once the reading has stabilized and is in the above range calibrate the device until the calibrated reading
shows 7.00.
3. Remove the probe and rinse it in fresh water and shake of the excess water.
Page 5

Nutritest Manual
© 2013 Autogrow Systems Ltd
4
4. Place the probe in a pH 4.0 buffer solution. Allow about 5 minutes for the pH reading to stabilize then
press the right button to commence to the pH4 calibration stage. At this stage the reading must be
between pH3.0 and 5.0, otherwise calibration will be disabled (see note above).
5. Once the reading has stabilized and is in the above range calibrate the device until the calibrated reading
shows 4.00.
6. When the device is satisfactorily calibrated, press the right key to save the calibration adjustment and go
back to the calibration menu screen. Alternatively pressing the left button discards the 2 stages of
calibration and returns to the calibration menu screen.
Alarms
The alarm is only active in automatic mode and the alarm settings can only be accessed when the Nutritest
has been put into automatic mode (see page 5 in the “Settings” section for more details).
If the alarm is enabled then a buzzer beeps if any reading is outside the specified safe range. An exclamation
mark will also be shown next to the reading on the main screen. An alarm bell icon on the main screen shows
that the alarm is enabled
To edit the specified safe range for a reading:
1. Make sure that the device is in automatic mode and navigate to the Alarms menu screen.
2. Select the appropriate reading type and press the right button to enter the alarm editing screen.
3. A grid will now appear with “Min” and “Max” fields in the left column and the corresponding values in the
right. Press the up/down buttons to select the min or max value and then press the right key to edit the
value.
4. The value field will now be highlighted and can be adjusted. Note that the range is limited to 0 and an
upper limit (10.0 mS/cm for EC, 14.0 for pH and 60.0 ºC for temperature).
To enable the alarm:
5. Navigate to the Alarms menu screen and scroll down to the enable option at the bottom.
6. Select this option with the right button and a box will pop up showing “On” and “Off” fields.
7. If it is not highlighted select “On” and press the right key to save and return to the Alarms menu screen.
Reading is out of range
Alarm is enabled
Select min or max
Edit min or max value
Page 6

Nutritest Manual
© 2013 Autogrow Systems Ltd
5
Settings
The setup menu accessed from the main menu can be used to change the reading units for EC and
temperature, adjust the screen contrast, change the sample mode or enable/disable the key tone.
Changing the Units
To change the units for nutrient or temperature readings navigate to the Setup menu and select “Units” from
the menu options. Selecting Nutrient or Temperature will then cause a pop up box to appear containing the
units to select from.
Note: When the units are changed not only is the main display showing the readings effected but also every
screen that displays a value related to nutrient or temperature readings. This includes the calibration screens,
the alarm screens and the History screen.
Adjusting the Contrast
To adjust the contrast, navigate to the Setup menu and select “Contrast” from the menu options. The contrast
ranges from 0 – 53. It is recommended that the contrast is not set higher than it needs to be to extend the
battery life.
Changing the Sample Mode
To change the sample mode, navigate to the Setup menu and select “Sample Mode” from the menu options.
Now select manual or automatic mode. See page 1 in the “Sampling Modes” section for a description of the
modes.
Enabling/Disabling the Key Tone
For silent operation the key tone can be disabled. To do this, navigate to the Setup menu and select “Key
Tone”.
Data Logging and Viewing
When the Nutritest is in manual mode the last 10 EC, pH and temperature samples are logged into a list. This
can be helpful when a number of different tanks have been sampled in the field and these are to be written
down later.
The History screen shows 3 readings at a time and can be accessed from the main menu. This screen is only
accessible when the device is in manual mode. On the left of the screen there is an index number showing the
order of the readings, 1 being the newest and 10 being the oldest.
When entering the History screen readings 1 to 3 will be displayed. To view the other readings use the down
button to scroll through them. The Nutritest will discard the oldest reading after 10 readings has been stored.
To clear the history log press the right button. Note that when automatic mode is entered the history log is
automatically cleared.
Latest readings
Oldest readings
Page 7

Nutritest Manual
© 2013 Autogrow Systems Ltd
6
Maintenance
Cleaning the EC probe
The face of the EC probe must be kept in pristine condition. Never touch with the fingers which may carry oily
deposits from perspiration. The probe face may be cleaned removing the shroud and by brushing with a soft
toothbrush or clean kitchen Scotchbrite (fine nylon scourer) with a little liquid scouring liquid such as Jif or Soft
Scrub. Rinse thoroughly with clean water.
Cleaning the pH probe
The glass bulb at the end of the pH electrode should be shiny and clear. If not then it may be cleaned by
brushing with a soft toothbrush or special cleaning tool with a little liquid scourer such as Jif or Soft Scrub. Do
this very carefully as the glass bulb is extremely delicate. Rinse thoroughly with clean water. The tip of the
probe should be kept wet when not in use to maximize its life expectancy. Keep the tip in the container that it
came with filled with fresh water.
Replacing the Battery
The battery should be checked every few months for signs of corrosion. Should the battery need replacing
remove the 2 screws on the back of the case. Remove the battery cover and carefully pull the battery out of
the case.
Specifications
Power
1 x 9 volt battery (standard alkaline)
Estimated battery life
(1)
2 years
Dimensions (mm)
130 x 67 x 25
Display
128 x 64 pixel LCD
Operating temperature
0 - 55 ºC
Nutrient
pH
Temperature
Units
EC/CF/TDS500/TDS640
NA
ºC / ºF
Measurement and alarm range
0 - 10 mS/cm
0 – 14
0 - 60 ºC
Measurement accuracy
0.1 mS/cm
0.1
1 ºC
Calibration resolution
0.01 mS/cm
0.01
0.1 ºC
Note 1: Based on an average of 30 minutes daily use in manual mode taking 50 samples
Page 8

Nutritest Manual
© 2013 Autogrow Systems Ltd
7
Problem Solving Guide
Problem
Possible Cause
Solution
Nothing displayed on screen
Device in power saver mode
Press any button
Battery is low
See page 6 for how to replace the battery
Error message displayed
while calibrating pH
Incorrect buffer solution used
See page 3 for how to calibrate pH
Incorrect reading due to pH
probe wearing out
Replace pH probe
Inaccurate EC reading
EC probe has dirt/oxidation
layer
See page 6 for how to clean the EC probe
EC needs calibrating
See page 3 for how to calibrate EC
Inaccurate pH reading
pH probe is wearing out
Replace pH probe
pH needs calibrating
See page 3 for how to calibrate pH
pH has not yet stabilized
Wait at least 5 minutes from inserting the
probe in the solution
Inaccurate temperature
reading
EC probe temperature has not
yet stabilized
Wait for probe temperature to match
tank/liquid temperature
Cannot access the Alarms
settings
Device is in manual mode
See page 5 for details on how to put the
device in automatic mode
Cannot access the History
screen
Device is in automatic mode
See page 5 for details on how to put the
device in manual mode
Screen is hard to read
Contrast too low
See page 5 for details on how to adjust the
contrast
Alarm is not functioning
Alarm is not enabled
See page 4 for details on how to enable the
alarm
Warranty
The warranty on the controller is limited to 24 months – return to factory. Before returning the unit for service
please call Autogrow Systems Ltd for a return authorization. The warranty period for EC sensors is 24 months,
pH sensor is 6 months.
This warranty specifically excludes any parts that have been broken or damaged by water, chemical attack or
excessive temperature. At no time must the case temperature be allowed to exceed 55 deg C (130 deg F).
This warranty expressly excludes liability for consequential damages or for charges for labour or other
expense in making repairs or adjustments, or loss of time or inconvenience.
 Loading...