

Page 1

Installation and Licensing Guide
07.14.2009
Page 2

©
2009 Autodesk, Inc. All rights reserved. Except as otherwise permitted by Autodesk, Inc., this publication, or parts thereof, may not be
reproduced in any form, by any method, for any purpose.
Certain materials included in this publication are reprinted with the permission of the copyright holder.
The following are registered trademarks or trademarks of Autodesk, Inc., in the USA and other countries: 3DEC (design/logo), 3December,
3December.com, 3ds Max, ADI, Alias, Alias (swirl design/logo), AliasStudio, Alias|Wavefront (design/logo), ATC, AUGI, AutoCAD, AutoCAD
Learning Assistance, AutoCAD LT, AutoCAD Simulator, AutoCAD SQL Extension, AutoCAD SQL Interface, Autodesk, Autodesk Envision, Autodesk
Insight, Autodesk Intent, Autodesk Inventor, Autodesk Map, Autodesk MapGuide, Autodesk Streamline, AutoLISP, AutoSnap, AutoSketch,
AutoTrack, Backdraft, Built with ObjectARX (logo), Burn, Buzzsaw, CAiCE, Can You Imagine, Character Studio, Cinestream, Civil 3D, Cleaner,
Cleaner Central, ClearScale, Colour Warper, Combustion, Communication Specification, Constructware, Content Explorer, Create>what's>Next>
(design/logo), Dancing Baby (image), DesignCenter, Design Doctor, Designer's Toolkit, DesignKids, DesignProf, DesignServer, DesignStudio,
Design|Studio (design/logo), Design Web Format, Discreet, DWF, DWG, DWG (logo), DWG Extreme, DWG TrueConvert, DWG TrueView, DXF,
Ecotect, Exposure, Extending the Design Team, Face Robot, FBX, Filmbox, Fire, Flame, Flint, FMDesktop, Freewheel, Frost, GDX Driver, Gmax,
Green Building Studio, Heads-up Design, Heidi, HumanIK, IDEA Server, i-drop, ImageModeler, iMOUT, Incinerator, Inferno, Inventor, Inventor
LT, Kaydara, Kaydara (design/logo), Kynapse, Kynogon, LandXplorer, LocationLogic, Lustre, Matchmover, Maya, Mechanical Desktop, Moonbox,
MotionBuilder, Movimento, Mudbox, NavisWorks, ObjectARX, ObjectDBX, Open Reality, Opticore, Opticore Opus, PolarSnap, PortfolioWall,
Powered with Autodesk Technology, Productstream, ProjectPoint, ProMaterials, RasterDWG, Reactor, RealDWG, Real-time Roto, REALVIZ,
Recognize, Render Queue, Retimer,Reveal, Revit, Showcase, ShowMotion, SketchBook, Smoke, Softimage, Softimage|XSI (design/logo),
SteeringWheels, Stitcher, Stone, StudioTools, Topobase, Toxik, TrustedDWG, ViewCube, Visual, Visual Construction, Visual Drainage, Visual
Landscape, Visual Survey, Visual Toolbox, Visual LISP, Voice Reality, Volo, Vtour, Wire, Wiretap, WiretapCentral, XSI, and XSI (design/logo).
The following are registered trademarks or trademarks of Autodesk Canada Co. in the USA and/or Canada and other countries: Backburner,
Multi-Master Editing, River, and Sparks.
The following are registered trademarks or trademarks of Moldflow Corp. in the USA and/or other countries: Moldflow MPA, MPA (design/logo),
Moldflow Plastics Advisers, MPI, MPI (design/logo), Moldflow Plastics Insight, MPX, MPX (design/logo), Moldflow Plastics Xpert. All other brand
names, product names or trademarks belong to their respective holders.
Disclaimer
THIS PUBLICATION AND THE INFORMATION CONTAINED HEREIN IS MADE AVAILABLE BY AUTODESK, INC. "AS IS." AUTODESK, INC. DISCLAIMS
ALL WARRANTIES, EITHER EXPRESS OR IMPLIED, INCLUDING BUT NOT LIMITED TO ANY IMPLIED WARRANTIES OF MERCHANTABILITY OR
FITNESS FOR A PARTICULAR PURPOSE REGARDING THESE MATERIALS.
Copyright Notices
Page 3

Contents
Mudbox Installation Guide . . . . . . . . . . . . . . . . . . . . . 1
Chapter 1 Quick Start to Mudbox Installation . . . . . . . . . . . . . . . . 3
Introduction . . . . . . . . . . . . . . . . . . . . . . . . . . . . . . . . 3
Prepare to Install Mudbox . . . . . . . . . . . . . . . . . . . . . . . . . 4
Install Mudbox on Windows . . . . . . . . . . . . . . . . . . . . . . . . 4
Install Mudbox on Mac OS X . . . . . . . . . . . . . . . . . . . . . . . . 5
Chapter 2 Step-by-Step Guide to Mudbox Installation . . . . . . . . . . . . 7
Introduction . . . . . . . . . . . . . . . . . . . . . . . . . . . . . . . . 7
Prepare to Install Mudbox (Step-by-Step) . . . . . . . . . . . . . . . . . 8
Install Mudbox . . . . . . . . . . . . . . . . . . . . . . . . . . . . . . . 9
Install Mudbox on Windows (Step-by-Step) . . . . . . . . . . . . . 9
Install Mudbox on Mac OS X (Step-by-Step) . . . . . . . . . . . . 13
Uninstall Mudbox . . . . . . . . . . . . . . . . . . . . . . . . . . . . . 16
Learn About Mudbox . . . . . . . . . . . . . . . . . . . . . . . . . . . 17
Chapter 3 Mudbox Licensing . . . . . . . . . . . . . . . . . . . . . . . . . 19
Network Licensing for Mudbox . . . . . . . . . . . . . . . . . . . . . . 19
Stand-Alone Licensing Guide . . . . . . . . . . . . . . . . . . . 21
iii
Page 4

Chapter 4 Quick Start to Autodesk Stand-Alone Licensing . . . . . . . . . 23
Introduction . . . . . . . . . . . . . . . . . . . . . . . . . . . . . . . . 23
Multi-seat Stand-Alone License . . . . . . . . . . . . . . . . . . . . . . 24
Manage Your Stand-Alone License . . . . . . . . . . . . . . . . . . . . 24
Check Product Information . . . . . . . . . . . . . . . . . . . . . 24
View Product Information . . . . . . . . . . . . . . . . . . . . . 25
Save License Information as a Text file . . . . . . . . . . . . . . . 25
Update Your Serial Number . . . . . . . . . . . . . . . . . . . . . 25
Register and Activate an Autodesk Product . . . . . . . . . . . . . 26
Move Your Stand-Alone License from One Computer to
Another . . . . . . . . . . . . . . . . . . . . . . . . . . . . . . 30
Chapter 5 License Transfer Utility . . . . . . . . . . . . . . . . . . . . . . 31
Introduction . . . . . . . . . . . . . . . . . . . . . . . . . . . . . . . . 31
Notes on Transferring a Mudbox License . . . . . . . . . . . . . . . . . 32
Transfer a License . . . . . . . . . . . . . . . . . . . . . . . . . . . . . 32
Install the Autodesk Product . . . . . . . . . . . . . . . . . . . . 32
Export a License . . . . . . . . . . . . . . . . . . . . . . . . . . . 33
Import a License . . . . . . . . . . . . . . . . . . . . . . . . . . . 34
Chapter 6 Troubleshoot a License Error . . . . . . . . . . . . . . . . . . . 37
License Errors . . . . . . . . . . . . . . . . . . . . . . . . . . . . . . . 37
Errors Caused by Hardware Changes . . . . . . . . . . . . . . . . 37
Errors Caused by Reinstalling an Operating System . . . . . . . . 38
Errors Caused by Changing the System Date and Time . . . . . . 38
Network Licensing Guide . . . . . . . . . . . . . . . . . . . . . 39
Chapter 7 Quick Start to Autodesk Network Licensing . . . . . . . . . . . 41
Set Up a Mudbox License Server . . . . . . . . . . . . . . . . . . . . . 41
Install the Network License Manager . . . . . . . . . . . . . . . . . . . 42
Install the Network License Manager (Windows) . . . . . . . . . . 42
Install the Network License Manager (Mac OS X) . . . . . . . . . 43
Install the Network License Manager (Linux) . . . . . . . . . . . 45
Obtain a Network License . . . . . . . . . . . . . . . . . . . . . . . . . 45
Configure a License Server . . . . . . . . . . . . . . . . . . . . . . . . 47
Notes on Configuring a Mudbox License Server . . . . . . . . . . 47
Configure a License Server (Windows) . . . . . . . . . . . . . . . 47
Configure a License Server (Mac OS X) . . . . . . . . . . . . . . . 49
Configure a License Server (Linux) . . . . . . . . . . . . . . . . . 50
Chapter 8 Plan Your Network Licensing . . . . . . . . . . . . . . . . . . . 53
iv | Contents
Page 5

Plan Your License Server Configuration . . . . . . . . . . . . . . . . . 53
Single License Server Model . . . . . . . . . . . . . . . . . . . . . 53
Distributed License Server Model . . . . . . . . . . . . . . . . . . 54
Redundant License Server Model . . . . . . . . . . . . . . . . . . 54
Learn About Your License . . . . . . . . . . . . . . . . . . . . . . . . . 55
License Operation and Availability . . . . . . . . . . . . . . . . . 55
License Files . . . . . . . . . . . . . . . . . . . . . . . . . . . . . 56
License File Examples . . . . . . . . . . . . . . . . . . . . . . . . 59
Package License File Examples . . . . . . . . . . . . . . . . . . . 62
License Types and Behaviors . . . . . . . . . . . . . . . . . . . . 66
Heartbeat Signal . . . . . . . . . . . . . . . . . . . . . . . . . . . 66
Chapter 9 Autodesk Network Licensing Tools . . . . . . . . . . . . . . . . 67
Network License Manager . . . . . . . . . . . . . . . . . . . . . . . . . 67
System Requirements for the Network License Manager . . . . . . 67
FLEXnet Configuration Tools . . . . . . . . . . . . . . . . . . . . . . . 68
Utilities for License Server Management . . . . . . . . . . . . . . 69
Utilities for License Server Management (Mac OS X and
Linux) . . . . . . . . . . . . . . . . . . . . . . . . . . . . . . . 69
The Options File . . . . . . . . . . . . . . . . . . . . . . . . . . . 70
SAMreport-Lite License Reporting Tool . . . . . . . . . . . . . . . . . . 70
Chapter 10 Network Licensing Tasks . . . . . . . . . . . . . . . . . . . . . 73
Update FLEXnet from a Previous Version . . . . . . . . . . . . . . . . . 73
Obtain the Server Host Name and Host ID Manually . . . . . . . . . . 77
Stop and Restart the License Server . . . . . . . . . . . . . . . . . . . . 79
Set Up and Use an Options File . . . . . . . . . . . . . . . . . . . . . . 80
Create a Report Log . . . . . . . . . . . . . . . . . . . . . . . . . 82
Configure License Borrowing . . . . . . . . . . . . . . . . . . . . 82
Set Up License Timeout . . . . . . . . . . . . . . . . . . . . . . . 83
Uninstall the Network License Manager . . . . . . . . . . . . . . . . . 84
Uninstall the Network License Manager (Windows) . . . . . . . . 85
Uninstall the Network License Manager (Mac OS X) . . . . . . . . 85
Uninstall the Network License Manager (Linux) . . . . . . . . . . 86
Glossary . . . . . . . . . . . . . . . . . . . . . . . . . . . . . . 87
License Borrowing . . . . . . . . . . . . . . . . . . . . . . . . . 91
Chapter 11 License Borrowing . . . . . . . . . . . . . . . . . . . . . . . . . 93
Overview . . . . . . . . . . . . . . . . . . . . . . . . . . . . . . . . . 93
Borrow a License . . . . . . . . . . . . . . . . . . . . . . . . . . . . . 93
Return a License . . . . . . . . . . . . . . . . . . . . . . . . . . . . . . 95
Contents | v
Page 6

Chapter 12 BORROWLICENSE Command . . . . . . . . . . . . . . . . . . . 97
Borrow a License Window . . . . . . . . . . . . . . . . . . . . . . . . . 97
Chapter 13 RETURNLICENSE Command . . . . . . . . . . . . . . . . . . . . 99
Index . . . . . . . . . . . . . . . . . . . . . . . . . . . . . . . 101
vi | Contents
Page 7

Mudbox Installation Guide
1
Page 8

2
Page 9

Quick Start to Mudbox Installation
This guide provides a brief overview for installing Autodesk® Mudbox® 2010 on all supported
platforms. Use this guide if you are already familiar with installing Mudbox.
If you require more detailed information on installing Mudbox, refer to the Step-by-Step
Guide to Mudbox Installation on page 7.
1
Introduction
The basic workflow to install Mudbox on a single computer is as follows:
1 Complete the tasks described in Prepare to Install Mudbox on page 4.
2 Install Mudbox on your preferred platform:
■ Windows on page 4
■ Mac OS X on page 5
NOTE If you are using a network license to run Mudbox, contact your network
administrator to find your license server name before you begin the install. The
license server name is required by the install wizard to configure your network
license.
3 If you are using a stand-alone license to run Mudbox, see Register and
Activate an Autodesk Product on page 26 for information on obtaining
your license.
3
Page 10

Prepare to Install Mudbox
Before you install Mudbox, ensure you’ve done the following:
■ Verify the system requirements required to run Mudbox.
For a listing of the most current qualified hardware and operating systems,
see http://www.autodesk.com/mudbox-system-requirements and
http://www.autodesk.com/mudbox-hardware.
■ Locate your serial number and product key.
The serial number and product key appear on the back or your DVD
package or is included with the information you received when you
downloaded Mudbox from the Autodesk Store.
■ Determine which license type you require (stand-alone or network).
A stand-alone license is for a single computer. It lets you run Mudbox only
on the computer where the license is installed.
A network license is shared by a specific number of computers on a network.
The Mudbox software is installed on many computers (clients), each with
a license file that accesses the network license server. Network licenses
require client and server setup.
■ Close other programs.
See Prepare to Install Mudbox (Step-by-Step) on page 8 for more detailed
information.
Install Mudbox on Windows
To install Mudbox, follow the instructions in the Autodesk Product
Configuration wizard. This section provides a brief overview of the install
steps.
If you require more detailed information on each window of the installer, see
Install Mudbox on Windows (Step-by-Step) on page 9.
To install Mudbox on Windows
1 Do one of the following to launch the Mudbox installer:
■ Insert the Mudbox DVD into your computer’s DVD drive. The Install
Mudbox window appears. If this window does not appear
automatically, double-click the autorun.exe file on the DVD. In the
4 | Chapter 1 Quick Start to Mudbox Installation
Page 11

Install Mudbox window, click the Install Mudbox button for the
version of the product you want to install (32 bit or 64 bit).
■ If you are installing from a download package you obtained from the
Autodesk Store, double-click the Mudbox executable that you
downloaded. Click Next in the Autodesk Product Configuration
window that appears to extract the Mudbox files to the default
directory.
2 Follow the instructions in the Autodesk Product Configuration wizard
to proceed with the install.
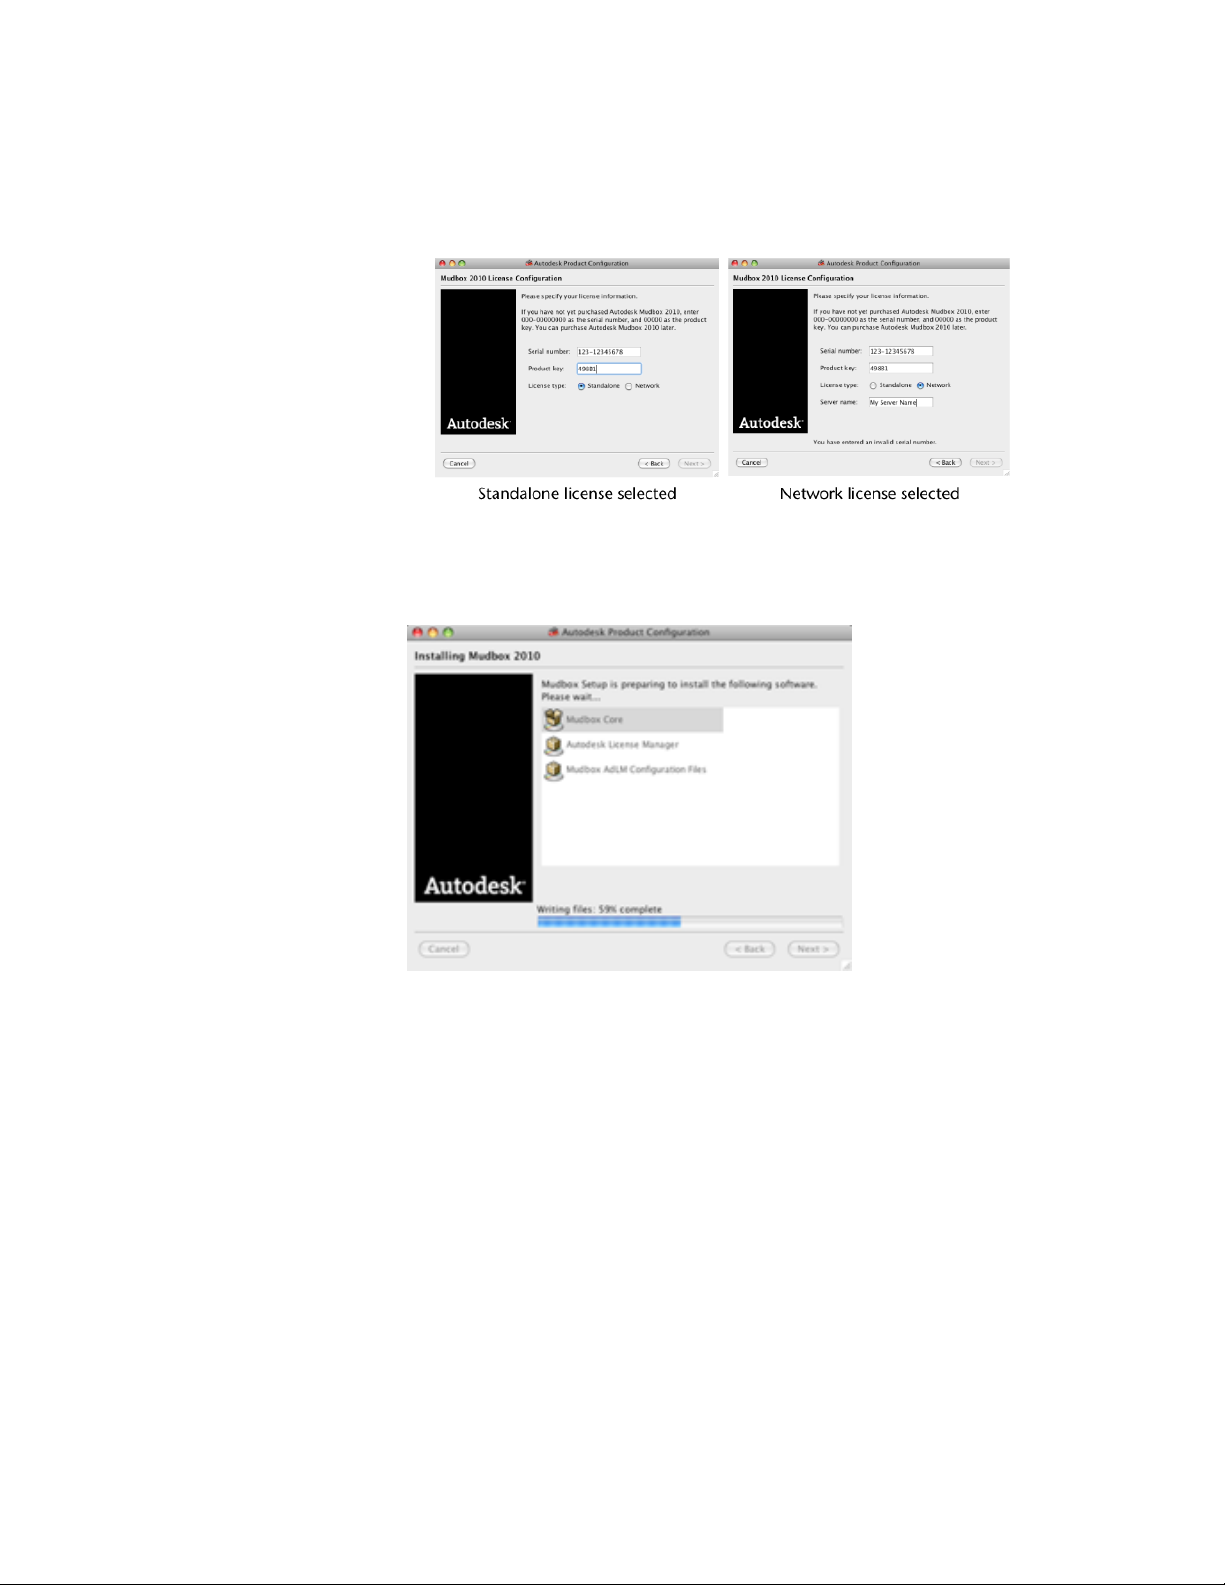
3 In the Mudbox 2010 License Configuration window, do the following:
■ Enter your 11-digit serial number.
■ Enter your product key.
■ Select your License type: Standalone or Network.
If you select Standalone license type, you can obtain your stand-alone
license later by following the steps in Register and Activate an
Autodesk Product on page 26.
If you select the Network license type, enter your license server name
in the Server name field that appears. Contact your network
administrator to find the name of your license server.
4 Click Done when the Installing Mudbox 2010 confirmation window
appears.
Install Mudbox on Mac OS X
To install Mudbox, follow the instructions in the Autodesk Product
Configuration wizard. This section provides a brief overview of the install
steps.
If you require more detailed information on each window of the installer, see
Install Mudbox on Mac OS X (Step-by-Step) on page 13.
To install Mudbox on Mac OS X
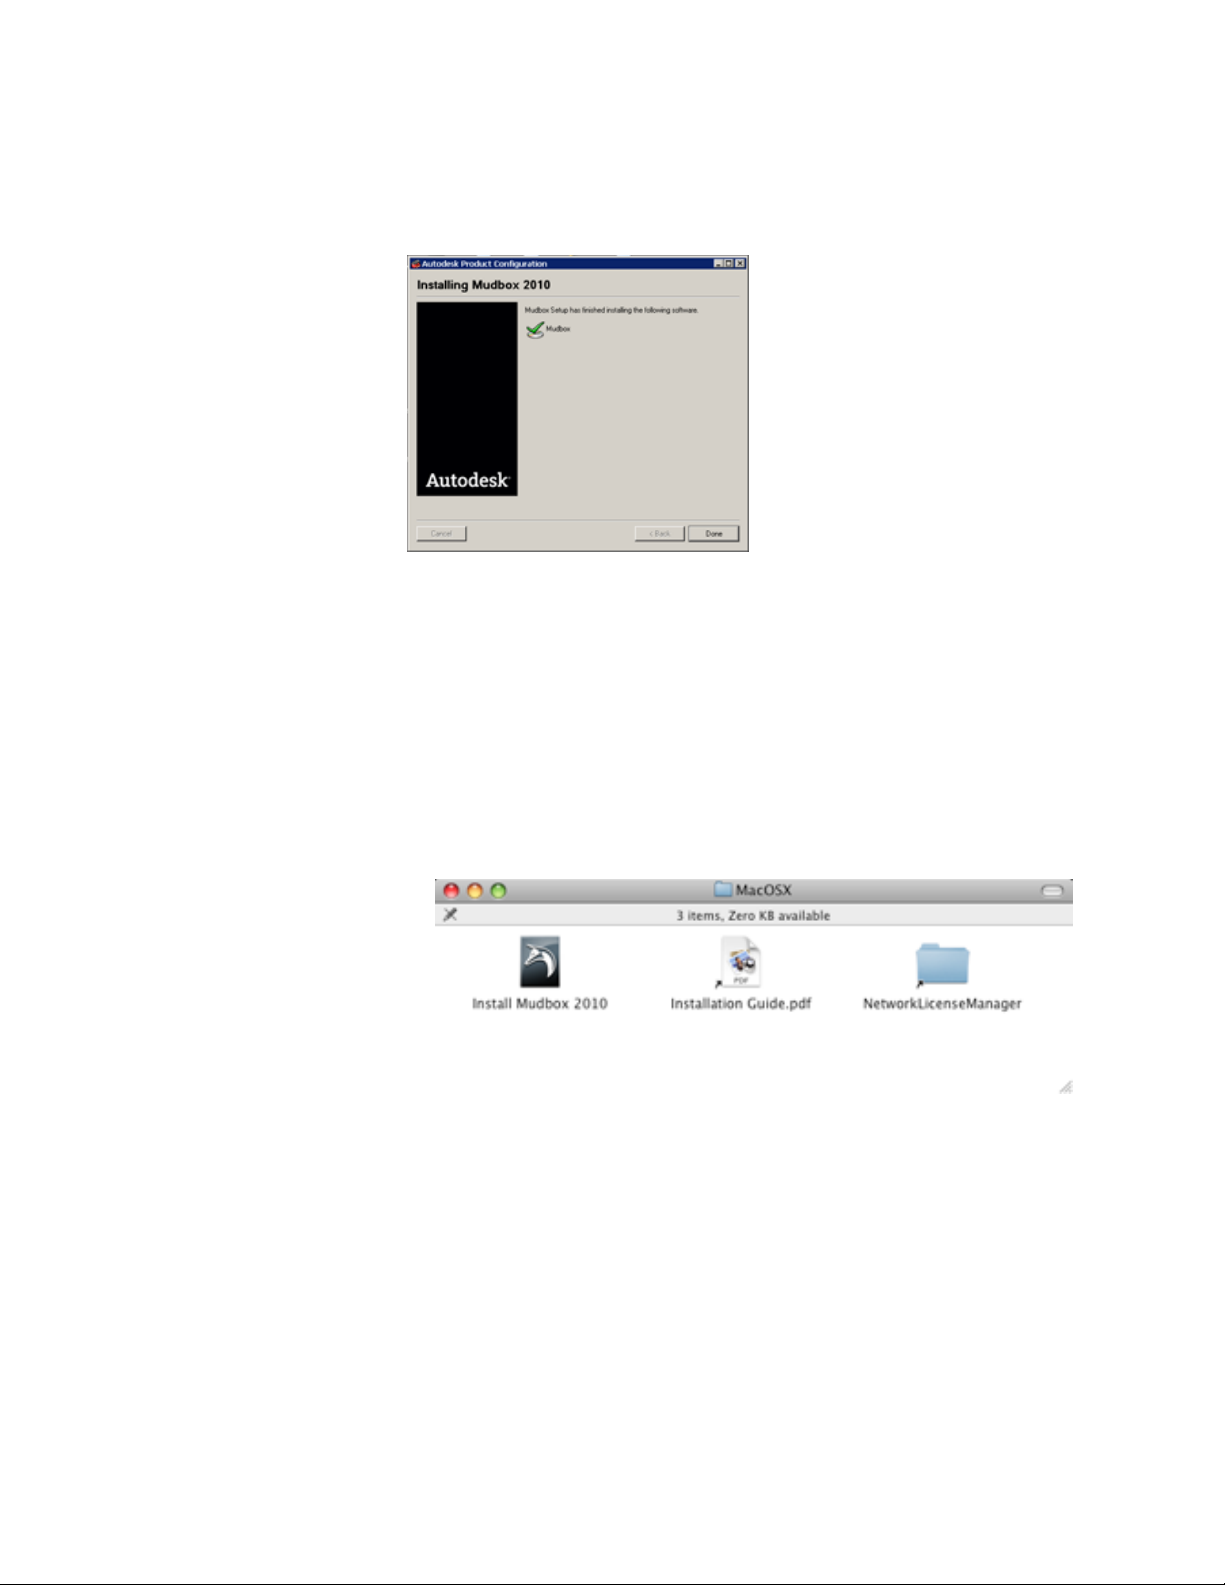
1 Do one of the following to open the Mudbox installer:
■ If you are installing from a DVD, insert the DVD into your drive, then
double-click the Install Mudbox 2010 program.
Install Mudbox on Mac OS X | 5
Page 12

■ If you are installing from a download package you obtained from the
Autodesk Store, double-click the Mudbox .dmg file, then double-click
the Install Mudbox 2010 program in the window that appears.
2 Follow the instructions in the Autodesk Product Configuration wizard
to proceed with the install.
3 In the Mudbox 2010 License Configuration window, do the following:
■ Enter your 11-digit serial number.
■ Enter your product key.
■ Select your License type: Standalone or Network.
If you select Standalone license type, obtain your stand-alone license
later by following the steps in Register and Activate an Autodesk
Product on page 26.
If you select the Network license type, enter your license server name
in the Server name field that appears. Contact your network
administrator to find the name of your license server.
4 Continue following the installer instructions, and click Done in the final
window.
By default, Mudbox is installed in the following directory:
/Applications/Autodesk/Mudbox2010.
6 | Chapter 1 Quick Start to Mudbox Installation
Page 13

Step-by-Step Guide to Mudbox Installation
Introduction
This guide provides detailed, step-by-step instructions on installing Autoesk
Mudbox 2010 on all supported platforms. If you are already familiar with
installing Mudbox and do not require detailed instructions, you can refer to
the Quick Start to Mudbox Installation on page 3.
The steps to install Mudbox are similar whether you are installing Mudbox on
a single computer with a stand-alone license, or on many client computers that
will access a network license from a server machine. The basic workflow to
install Mudbox is as follows:
1 Complete the tasks described in Prepare to Install Mudbox (Step-by-Step)
on page 8.
2 Install Mudbox on your preferred platform:
■ Windows on page 9
2
■ Mac OS X on page 13
NOTE If you will use a network license to run Mudbox, contact your network
administrator to find your license server name before you start the install. You
can enter your license server name in the install wizard to configure your
network license.
3 If you are using a stand-alone license to run Mudbox, see Register and
Activate an Autodesk Product on page 26 for information on obtaining
your stand-alone license.
7
Page 14

Prepare to Install Mudbox (Step-by-Step)
The following sections provide a summary of tasks to complete before you
install Mudbox.
Verify system requirements
Before you install Mudbox, make sure that your computer meets the system
requirements. To review the requirements, see
www.autodesk.com/mudbox-system-requirementsand
www.autodesk.com/mudbox-hardware
Locate your serial number and product key
To license Mudbox you need a serial number and product key. You can find
your serial number and product key on the outside of the product packaging
or in the Autodesk Upgrade and Licensing Information email you received if you
downloaded your product from the Autodesk Store.
Mudbox serial numbers have 11 characters. For example: 123-45678901.
Mudbox product keys have 5 characters. For example: 657B1.
NOTE For Windows and Mac OS X, if you do not have a serial number, you can
enter 000-00000000 as a temporary serial number and 00000 for the product key
to start a 30-day trial license.
Understand your license type (stand-alone or network)
During installation, you need to select which type of license you will use to
run Mudbox: stand-alone or network.
A stand-alone license (sometimes referred to as a node-locked license) is a
license for a single computer. It lets you run Autodesk Mudbox only on the
computer where the license is installed.
If you plan to use a stand-alone license to run Mudbox, you enter your serial
number during the install, then register and activate the license the first time
you run Mudbox. (See Register and Activate an Autodesk Product on page 26.)
A network license (sometimes referred to as a floating license) is a license that
can be shared by various computers on a network. Mudbox is installed on
many computers (sometimes referred to as clients), each with a license file
that accesses the network license server.
If you plan to use a network license, you need to enter the name of your license
server during the install. Obtain the license server name from your network
administrator before you start the installation wizard.
8 | Chapter 2 Step-by-Step Guide to Mudbox Installation
Page 15

If you are setting up a Mudbox license server, refer to the Network Licensing
Guide on page 39 for information on setting up a Mudbox license server.
Close other programs
To avoid any licensing conflicts when installing Mudbox, it is important that
you close all other programs and disable virus detection software before
launching the installer.
Install Mudbox
Install Mudbox on Windows (Step-by-Step)
This section provides detailed information on each window of the Mudbox
installer. If you are already familiar with installing Mudbox on Windows, see
also Install Mudbox on Windows on page 4 in the Quick Start guide .
To install Mudbox on Windows
1 Do one of the following to open the Mudbox installer:
■ Insert the Mudbox DVD into your computer’s DVD-ROM drive. The
Install Mudbox window appears. If it does not appear automatically,
double-click the autorun.exe file on the DVD-ROM. In the Install
Mudbox window, click the version of the product you want to install
(32 bit or 64 bit).
■ If you are installing from a download package, double-click the
Mudbox executable that you downloaded. In the Autodesk Product
Configuration window that appears, click Next to unzip the extracted
files to the default directory (C:\Autodesk\Mudbox2010), or click Browse
to navigate and select a different directory.
Install Mudbox | 9
Page 16
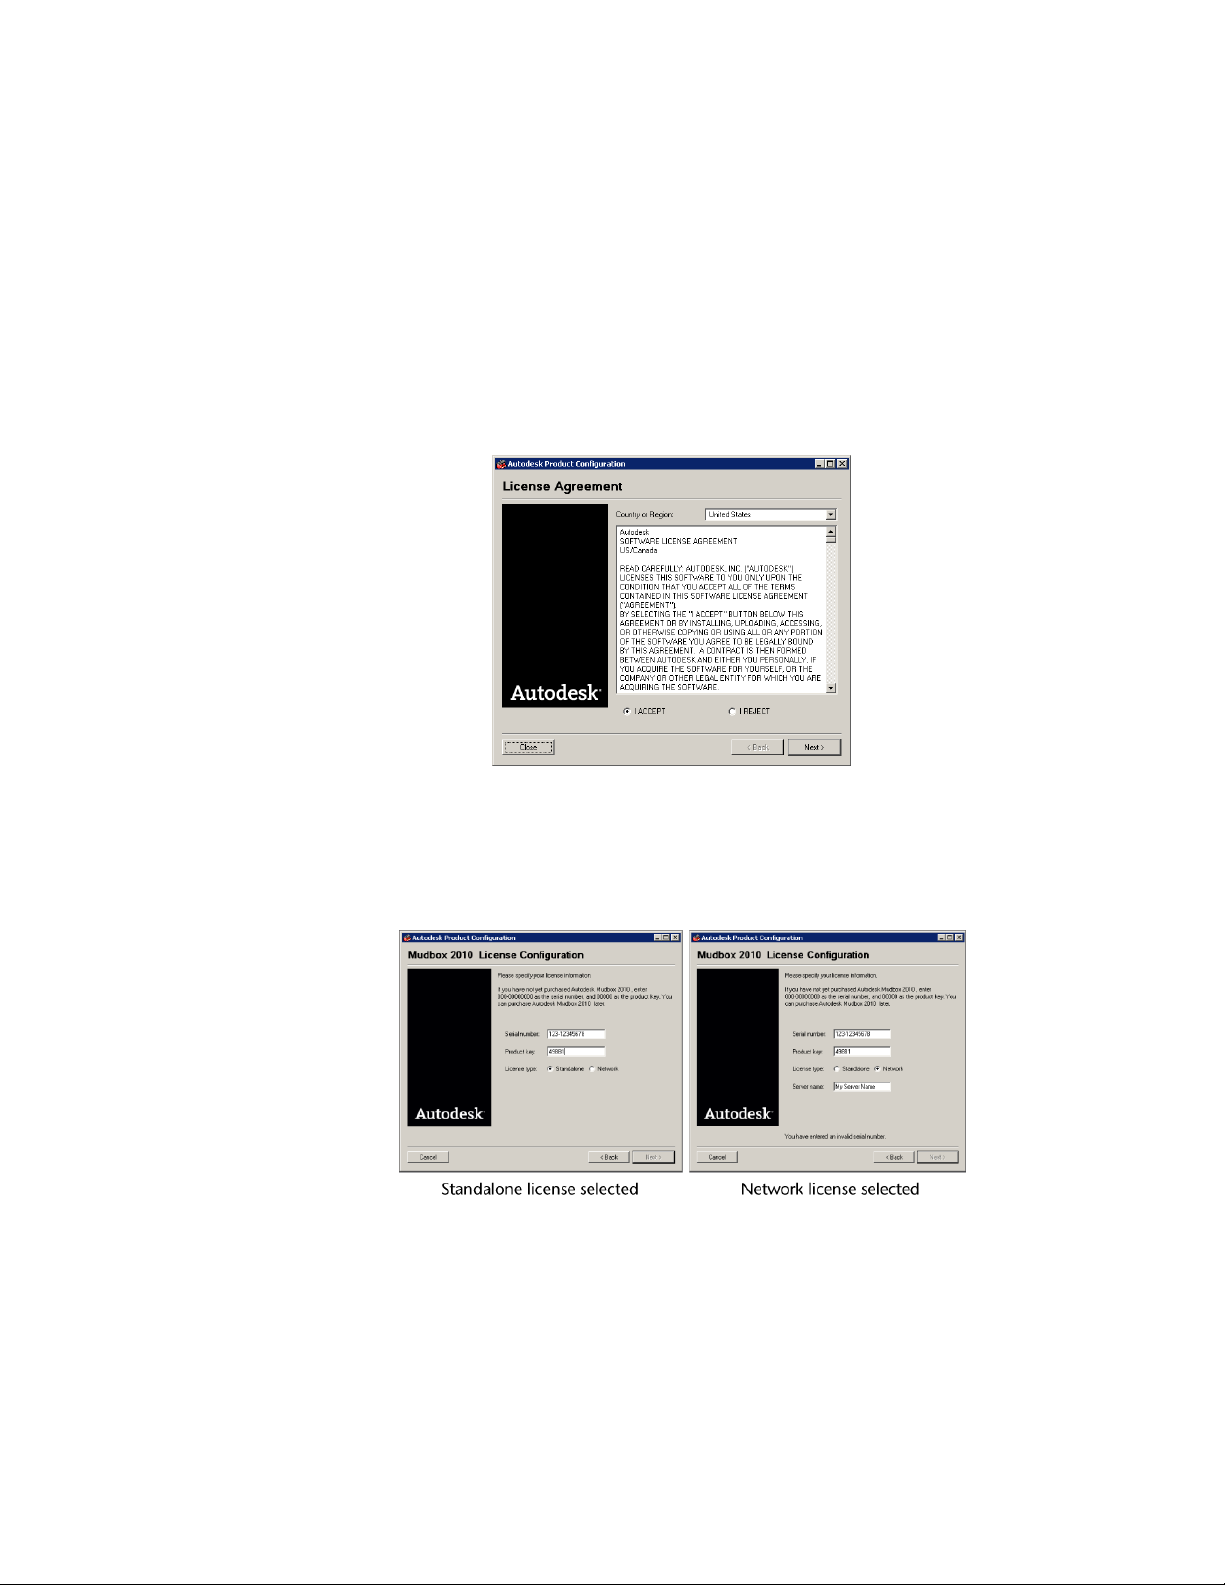
2 In the License Agreement window, do the following:
■ Select your Country or Region from the drop-down list.
■ Select I ACCEPT to accept the terms and conditions.
■ Click Next.
If you do not accept the terms and want to stop the installation, select I
REJECT and click Close.
3 In the Mudbox 2010 License Configuration window, do the following:
■ Enter your 11-digit serial number.
■ Enter your product key.
■ Select your License type: Standalone or Network.
10 | Chapter 2 Step-by-Step Guide to Mudbox Installation
Page 17
If you select Standalone license type, you can obtain your stand-alone
license later by following the steps in Register and Activate an
Autodesk Product on page 26.
If you select the Network license type, enter your license server name
in the Server name field that appears. Contact your network
administrator to find the name of your license server.
(If you are setting up a license server, see the Network Licensing Guide
on page 39.)
■ Click Next.
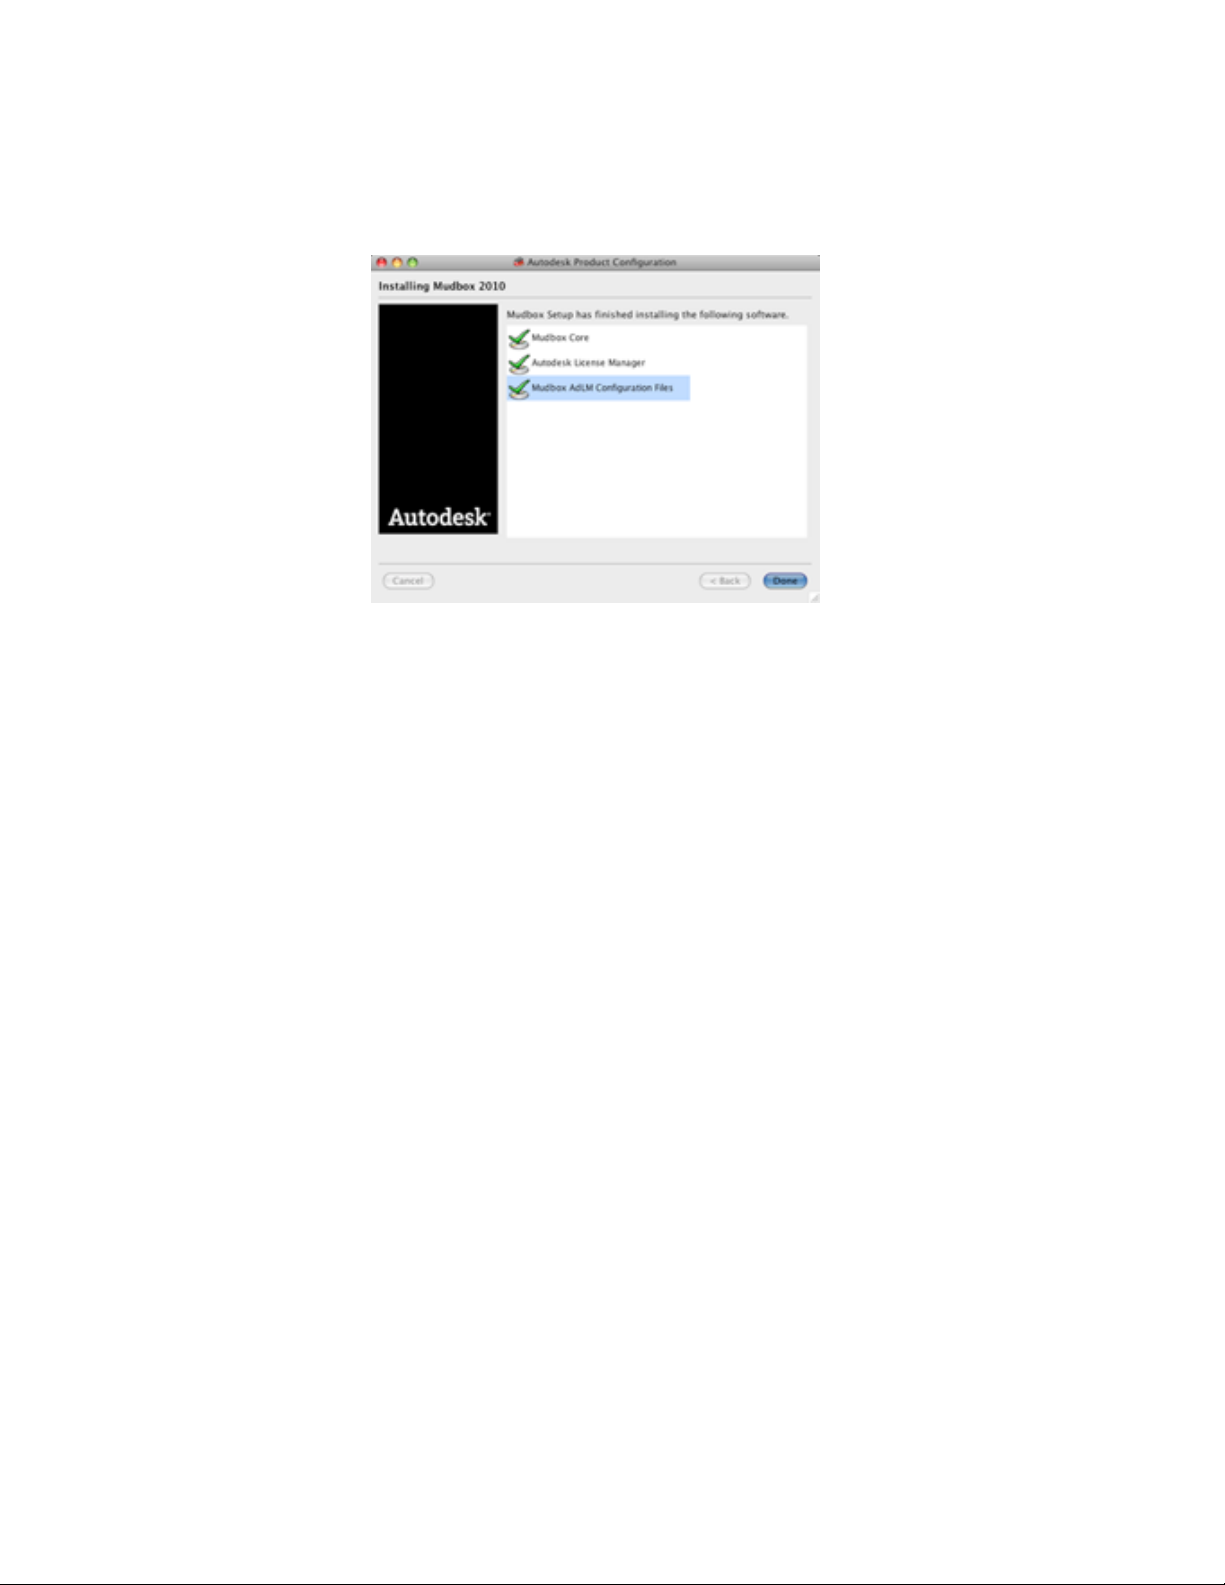
An Installing Mudbox 2010 window displays with a progress indicator
bar.
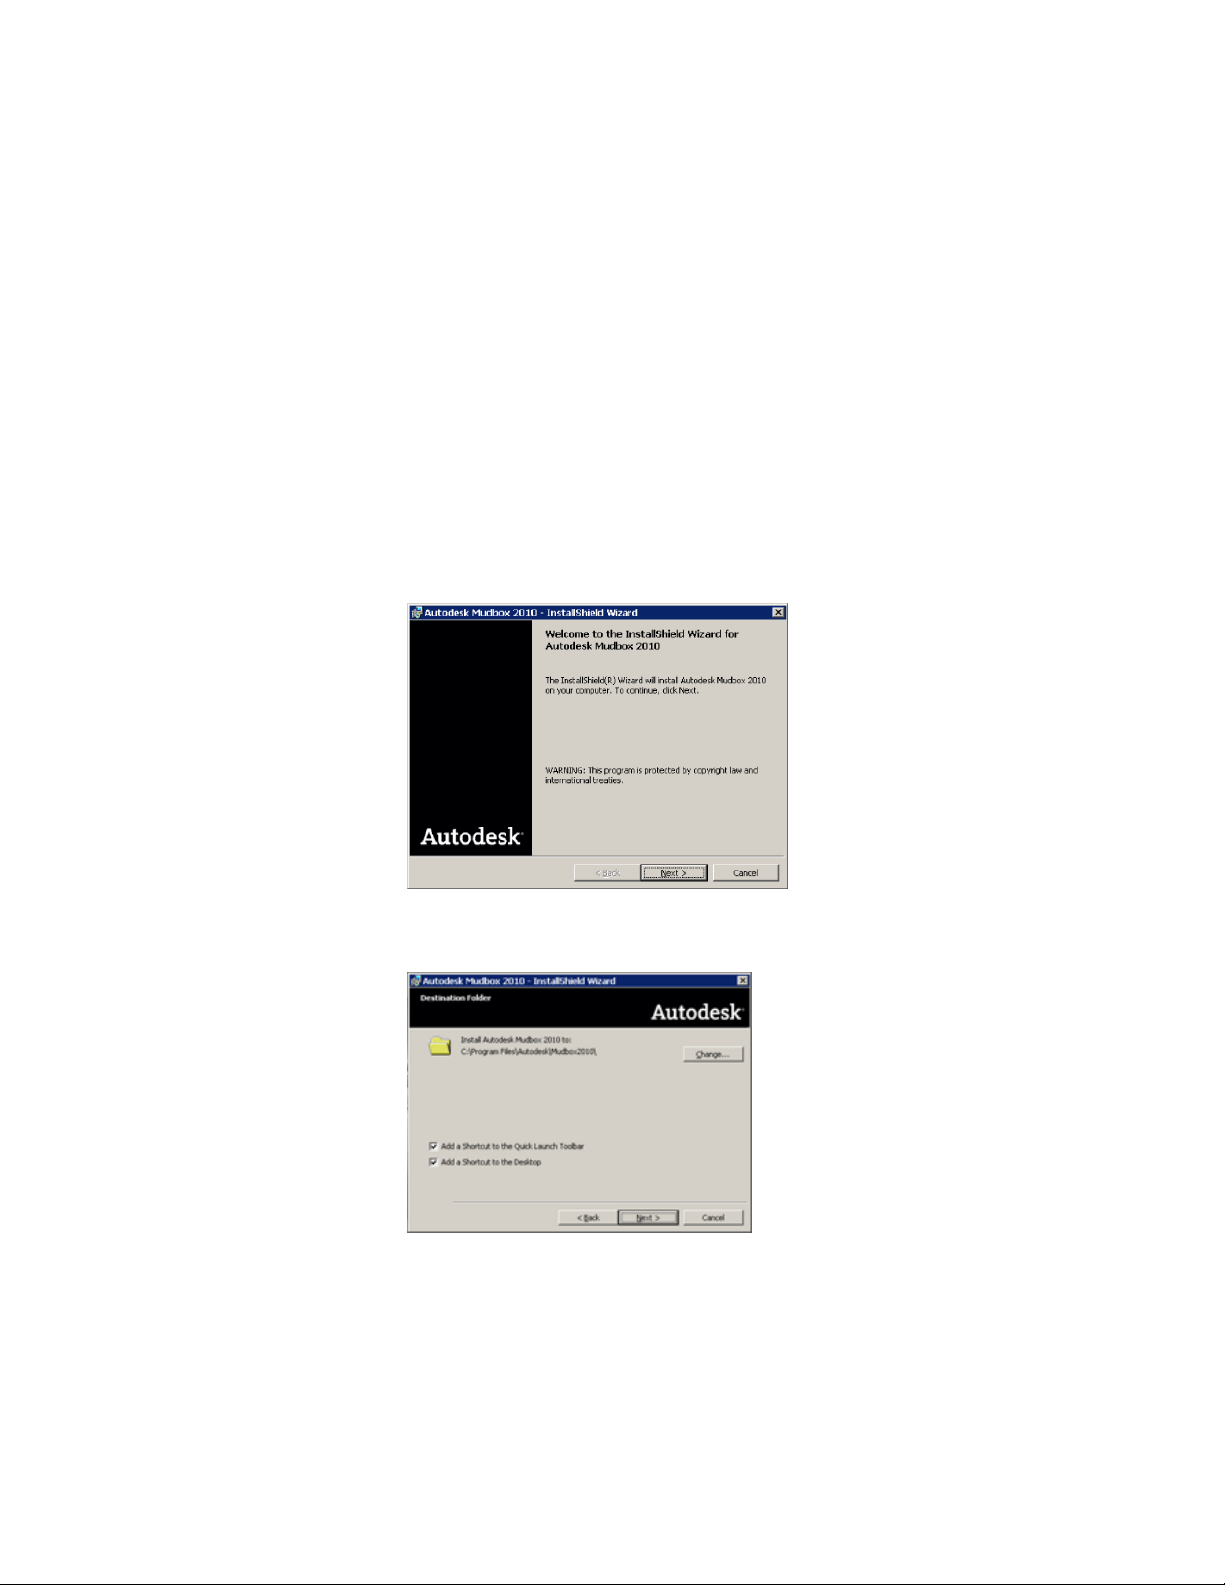
4 In the Welcome window, click Next.
5 In the Destination Folder window, confirm that the file directory is as
required, then click Next.
Install Mudbox on Windows (Step-by-Step) | 11
Page 18
NOTE Click Change if you want to modify the default installation directory
for Mudbox. By default, Mudbox is installed in the following directory:
C:\Program Files\Autodesk\Mudbox2010.
6 By default, the installer adds Mudbox shortcuts to your Quick Launch
Toolbar and Desktop.
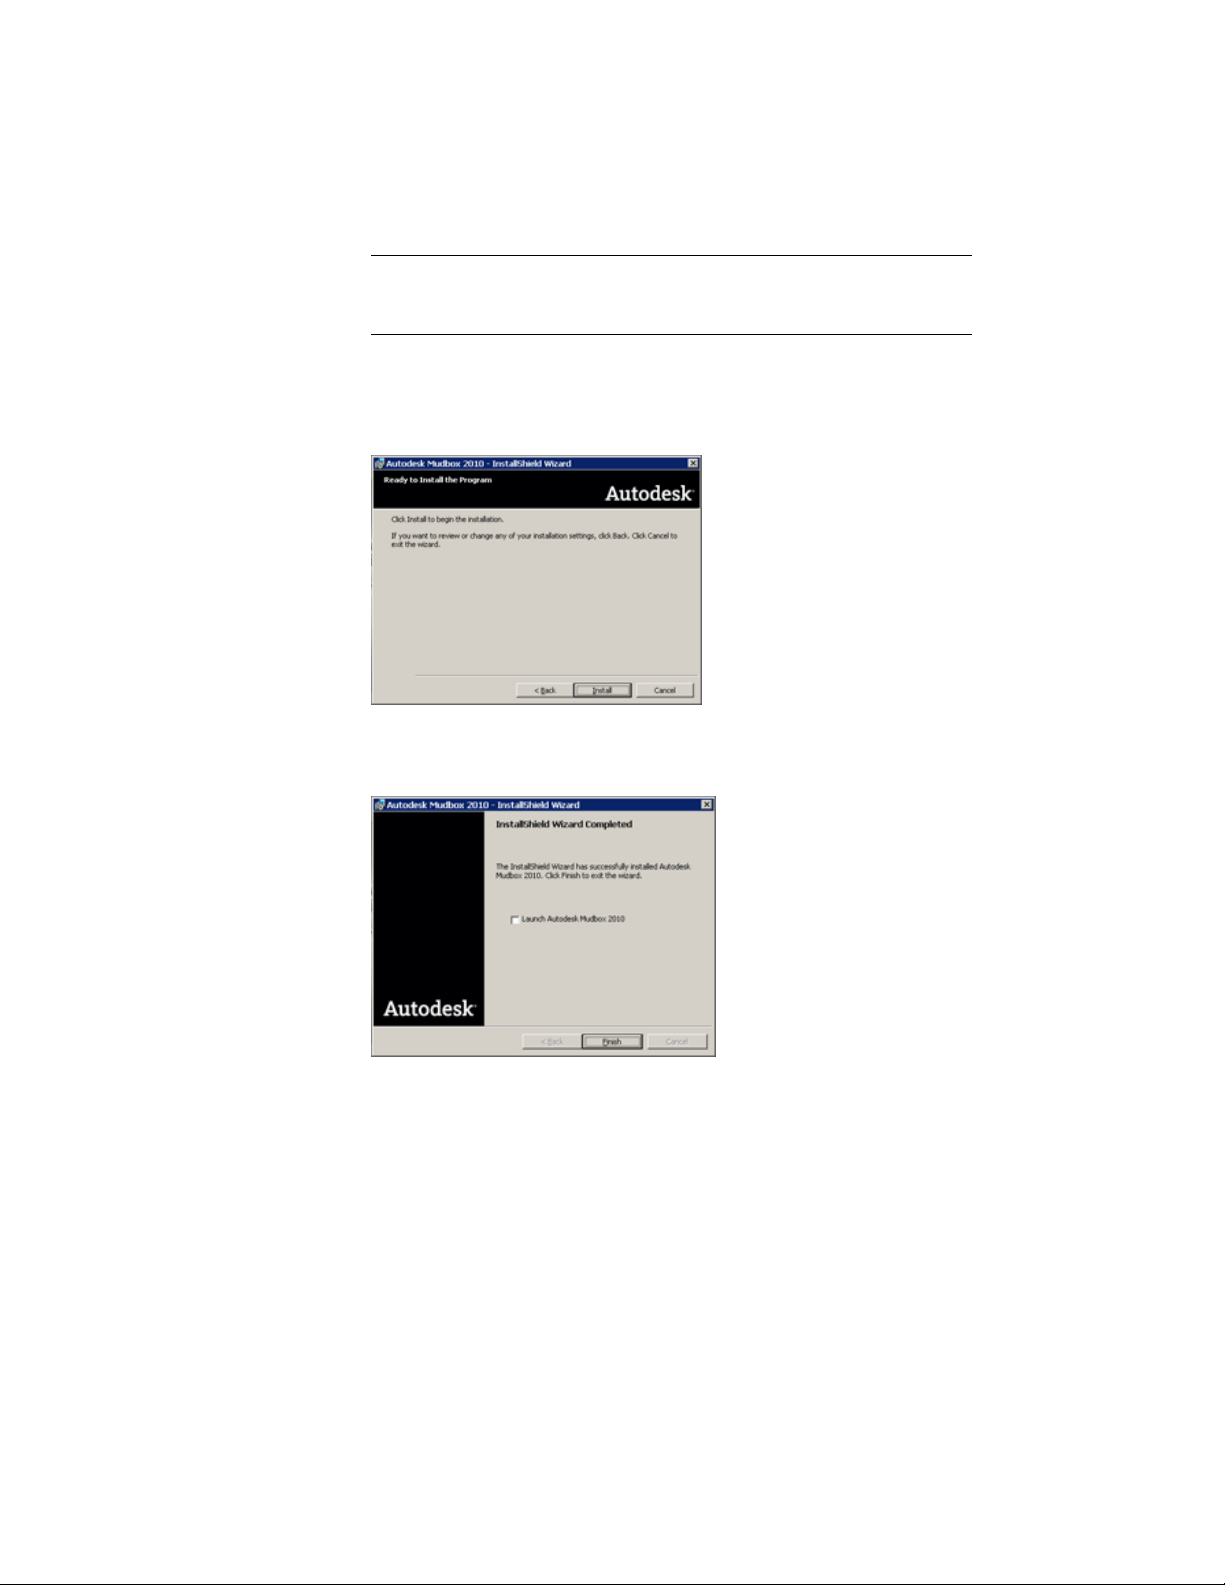
7 In the Ready to Install the Program window, click Install.
A Mudbox 2010 window appears and displays a progress indicator.
8 When the Wizard Completed window appears, click Finish.
9 In the Installing Mudbox 2010 window, verify that the Mudbox
application displays with a green check mark, then click Done.
12 | Chapter 2 Step-by-Step Guide to Mudbox Installation
Page 19
Install Mudbox on Mac OS X (Step-by-Step)
This section provides detailed information on each window of the install
wizard. If you are already familiar with installing Mudbox, you can see also
Install Mudbox on Mac OS X on page 5 in the Quick Start guide.
To install Mudbox on Mac OS X
1 Do one of the following to launch the installer:
■ If you are installing from a DVD, insert the DVD into your drive, then
double-click the Install Mudbox 2010 program.
■ If you are installing from a download package, double-click the
Mudbox .dmg. In the Mudbox Finder window that opens, double-click
the Install Mudbox 2010 program.
The Autodesk Product Configuration wizard starts.
Install Mudbox on Mac OS X (Step-by-Step) | 13
Page 20

2 In the License Agreement window, do the following:
■ Select your Country or Region from the drop-down list.
■ Select I ACCEPT to accept the terms and conditions.
■ Click Next.
If you do not accept the terms and want to stop the installation, select I
REJECT and click Close.
3 In the Mudbox 2010 License Configuration window, do the following:
■ Enter your 11-digit serial number.
■ Select your product key.
■ Select your License type: Standalone or Network.
If you select Standalone license type, obtain your stand-alone license
later by following the steps in Register and Activate an Autodesk
Product on page 26.
If you select the Network license type, enter your license server name
in the Server name field that appears. Contact your network
administrator to find your license server name.
(If you are setting up a license server, see the Network Licensing Guide
on page 39.)
14 | Chapter 2 Step-by-Step Guide to Mudbox Installation
Page 21
■ Click Next.
An Installing Mudbox 2010 window displays with a progress indicator
bar.
4 In the Installing Mudbox 2010 window, verify that all the components
you want display with a green check mark, then click Done.
By default, Mudbox is installed in the following directory:
/Applications/Autodesk/Mudbox2010.
Install Mudbox on Mac OS X (Step-by-Step) | 15
Page 22
Uninstall Mudbox
The following sections describe how to uninstall Mudbox 2010.
Uninstall Mudbox (Windows)
There are two ways to uninstall Mudbox for Windows.
To uninstall Mudbox for Windows using the Uninstall utility
1 From the Start menu, select Programs > Autodesk > Autodesk Mudbox
2010 > Uninstall Mudbox.
2 Follow the instructions in the window that appears.
To uninstall Mudbox using Add or Remove Programs
1 From the Start menu, select Settings > Control Panels > Add/Remove
Programs.
2 In the list of programs that appears, select Mudbox 2010 and click
Remove.
3 Follow the instructions in the window that appears.
16 | Chapter 2 Step-by-Step Guide to Mudbox Installation
Page 23

Uninstall Mudbox (Mac OS X)
To uninstall Mudbox for Mac OS X
1 Navigate to the Mudbox directory (by default,
Applications/Autodesk/Mudbox2010/).
2 Double-click the Uninstall Mudbox 2010 utility.
The Autodesk Uninstaller starts.
3 Select the packages you want to uninstall and click Uninstall.
Learn About Mudbox
For information about new features, see the What's New section of the Mudbox
Help (accessible from the Help menu.)
Learn About Mudbox | 17
Page 24

18
Page 25

Mudbox Licensing
3
The Quick Start licensing guides in this book ( Stand-Alone Licensing on page 23 and Network
Licensing on page 41) are intended to describe the licensing procedures for all Autodesk
products. This chapter provides supplemental Mudbox-specific information.
Network Licensing for Mudbox
Network License Activation for Mudbox
Several Autodesk products use the Autodesk Network License Activation Utility
to obtain network licenses. Note that although some topics in this guide refer
to the Network License Activation Utility, this tool is not supported for Mudbox.
For information on obtaining a network license for Mudbox, see Obtain a
Network License on page 45.
19
Page 26

20
Page 27

Stand-Alone Licensing Guide
21
Page 28

22
Page 29

Quick Start to Autodesk Stand-Alone Licensing
This guide provides information and instructions for managing an Autodesk® stand-alone
license on a single-user workstation.
If you are running a network version of your Autodesk product, see your administrator for
information about managing a network license.
4
Introduction
A stand-alone license allows you to run an Autodesk product on a single
workstation. To obtain a license, you register your product.
You can use your Autodesk product in trial mode for a given number of days
from the first time you launch the product. The number of days that a trial
mode is active differs between Autodesk products. You can register your license
at any time before the trial period expires. After the trial period expires, you
cannot run your Autodesk product until you register the product.
When you register your product, you receive an activation code. If you register
online, your activation code is automatically retrieved from Autodesk and the
product starts. If you register offline, you request an activation code from
Autodesk. Upon receipt, you manually enter the activation code in the Product
Activation wizard. The Product Activation wizard is displayed every time you
launch a product that has not been registered.
NOTE If you are installing and using an Autodesk product on both operating systems
of a dual-boot operating system, you must obtain a separate activation code for
each operating system.
23
Page 30

For more information about registering and activating your product, see your
product's Installation Guide, which is available from the Documentation link
on the Installation wizard or in the product's Help system.
The license file stays on your workstation when you uninstall your product.
If you reinstall your Autodesk product on the same workstation, the license
information is still valid. You do not have to reactivate the product.
Multi-seat Stand-Alone License
A multi-seat stand-alone license allows you to install, register, and activate an
Autodesk product on several workstations using a single serial number.
Manage Your Stand-Alone License
This section provides information about advanced stand-alone licensing tasks
such as license types and behaviors, viewing product information, saving your
license file as a text file, updating your serial number, registering and activating
your product, and moving a license.
Check Product Information
You can view detailed information about your Autodesk product and your
product license (such as the license usage type and the license behavior), and
then save this information as a text file.
License usage types
Commercial A license for a product that was purchased commercially.
Not for Resale A license for a product that is not sold commercially.
Educational (EDU)/Institution A license designed specifically for educational
institutions.
Student Portfolio A license for students who are using an Autodesk product
as part of their curriculum.
License behaviors
Trial A license that allows individuals to try the product in trial mode for a
specified number of days. The trial period starts the first time you launch your
product. When the trial period expires, the product must be registered and
activated to continue use.
24 | Chapter 4 Quick Start to Autodesk Stand-Alone Licensing
Page 31

Permanent Allows permanent use of an Autodesk product.
Term Extendable Allows access to an Autodesk product for a limited time.
The term can be extended at any time.
Term Non-Extendable Allows access to an Autodesk product for a limited
time. The term cannot be extended.
View Product Information
To view product information
1 Launch Mudbox.
2 Select Help > About Mudbox > Product License Information from the
main menu bar.
3 In the Product License Information window that appears, view details
about your product and the product license.
4 In the Product License Information window, click Close.
Save License Information as a Text file
To save your product license information as a text file
1 Launch Mudbox.
2 Select Help > About Mudbox > Product License Information from the
main menu bar.
The Product License Information window appears.
3 In the Product License Information window, click Save As.
4 In the Save As window, name the file, choose a location where you want
to save it, then click Save.
5 In the Product License Information window, click Close.
Update Your Serial Number
If you installed your product with the trial serial number (000-00000000), you
can update that trial serial number with a valid serial number. Your valid serial
View Product Information | 25
Page 32

number is located on the outside of the product packaging or in the Autodesk
Upgrade and Licensing Information e-mail you received if you downloaded your
product.
When you register and activate your product, you are asked for the product
serial number, which gets automatically entered upon completion of the
activation process.
If you have a multi-product bundle of software that uses a single serial number,
only the first product you register and activate displays the updated serial
number. For other products to display the serial number, you must update it
from the Help menu.
NOTE For the updated serial number to display, you must be logged into the
system with Administrator rights.
To update your serial number
1 Launch Mudbox.
2 Select Help > About Mudbox > Product License Information from the
main menu bar.
3 In the Product License Information window that appears, click Update.
4 In the Update the Serial Number window, enter your product serial
number.
The serial number is located on the outside of the product packaging or
in the Autodesk Upgrade and Licensing Information e-mail you received if
you downloaded your product.
NOTE If you have lost your serial number, contact the Autodesk Business
Center (ABC) at 800-538-6401 for assistance.
5 Click OK.
You can now see the updated serial number.
Register and Activate an Autodesk Product
Before you can activate the license for your Autodesk product, you must go
through the registration process. Once registered, the activation process is
greatly simplified. You can register and activate your Autodesk product either
when you start the program or while you are running the product.
26 | Chapter 4 Quick Start to Autodesk Stand-Alone Licensing
Page 33

There are two ways to register and activate your product: Online and Offline.
Online Registration and Activation
Online registration and activation requires that you have Internet access. This
process allows you to create one or more password protected user accounts
that can be accessed when activating any Autodesk product.
To create a user account and activate a product
1 Launch the product you want to register and activate.
2 In the Product Activation dialog box, select Activate the Product and
click Next.
3 If you installed the product with the trial serial number 000-00000000,
the Product Information page displays. Enter a valid serial number and
product key.
The serial number and product key are located on the outside of the
product packaging or in the Autodesk Upgrade and Licensing Information
email you received if you downloaded your product.
4 On the Register Today page, select Get an Activation Code and click Next.
5 From the Log In page, click the Create a User ID Now link.
6 Begin filling out your personalization data and password on the Create
User ID page and click Next.
7 Complete your personalization data on the Account Information page
and click Next.
8 On the Choose Account page, make sure that your user account is selected
and click Next.
9 You are notified of registration and activation status on the Registration
- Activation Confirmation page. Click Finish.
To activate a product using an existing user account
1 Launch the product you want to register and activate.
2 In the Product Activation dialog box, select Activate the Product and
click Next.
3 On the Register Today page, select Get an Activation Code and click Next.
Register and Activate an Autodesk Product | 27
Page 34

4 Enter your User ID and Password and then click Log In.
5 On the Choose Account page, make sure that your user account is selected
and click Next.
6 You are notified of registration and activation status on the Registration
- Activation Confirmation page. Click Finish.
Offline Registration and Activation
If online registration and activation is not possible, you can register and
activate your product offline. Your registration data can be submitted by
e-mail, fax, or phone (Americas only). Within two business days, your
activation code is sent back to you by e-mail or fax.
Offline registration and activation is necessary under the following conditions:
■ An online request has timed out
■ A processing error occurred such as an invalid serial number
To register your product offline
1 If you are unable to register online, the Register Today’s Connect to the
Internet page indicates the reason why online registration and activation
failed. Click the Use Another Method link.
2 On the Product Registration page, specify the following:
■ Whether the product is registered to a company or an individual.
■ The country or region where the product will be used.
■ Whether the product is an upgrade. If it is, you also need the previous
product’s serial number.
Click Next.
3 Enter your personalization data on the Customer Information page and
choose how you would like to receive your activation code - e-mail, fax,
or postal mail. Click Next.
4 Review your personalization data on the Confirm Information page and
choose the method you will use to submit your request. Your request can
be sent by e-mail, fax, or phone.
If you choose Send My Request by Email, an e-mail message will display
for you to complete. If you choose to forward your request by fax or
28 | Chapter 4 Quick Start to Autodesk Stand-Alone Licensing
Page 35

phone, the Contact Autodesk page will display with pertinent
contactinformation.
You will be sent your activation code by the method you specified on
the Customer Information page.
5 If you want to print a copy of your registration information, select the
Open Activation Request Form. When you are finished, click Close.
To activate an Autodesk product during launch
1 When you start the program, select Activate the Product in the [Autodesk
Product] Product Activation wizard, and click Next.
2 On the Activation page of Register Today, select Enter an Activation Code.
3 Select the method you would like to use for entering the activation code
you received from Autodesk.
■ Select Paste the Activation Code if you received your activation code
by e-mail or fax. Copy the code from the e-mail and paste it into the
activation code field.
■ Select Type the Activation Code if you received your activation code
by postal mail or printed fax. Carefully enter the code, in groups of
four characters, into the numbered fields.
NOTE The code is not case sensitive and you may not need to use all 14
fields.
4 After entering the activation code, click Next.
5 On the Registration - Activation Confirmation page, click Finish.
To activate an Autodesk product from the Help menu
1 Select Help > About Mudbox > Product License Information.
2 In the Product License Information window that appears, click Activate.
3 In the Autodesk Mudbox Product Activation wizard, select Activate the
Product, then click Next.
4 On the Register Today page, follow the on-screen instructions.
Register and Activate an Autodesk Product | 29
Page 36

Move Your Stand-Alone License from One Computer to Another
Your stand-alone license allows you to run an Autodesk product on a single
computer. However, you can still install your Autodesk product on more than
one computer. Without purchasing a separate license for the second
installation, you can use the License Transfer utility to transfer a license from
one workstation to another.
For example, you sometimes find yourself working from both your office
desktop and an office laptop. Both computers have your Autodesk product
installed. Because most of your work is done on your office desktop, you
activated the license on that computer. If the trial period has expired on the
office laptop, you can use the License Transfer utility to transfer your license
from the office desktop to the office laptop. See Transfer a License on page
32 for more information.
30 | Chapter 4 Quick Start to Autodesk Stand-Alone Licensing
Page 37

License Transfer Utility
5
With the License Transfer utility, you can use an Autodesk® product on more than one
computer without purchasing a separate license for each computer. The License Transfer
utility transfers a product license online from one computer to another, and ensures that the
product works only on the computer that contains the license.
Introduction
Using the License Transfer utility, you can transfer an Autodesk product license
between computers. You may want to transfer a license to a computer
temporarily (if you want to use an Autodesk product on your laptop, for example)
or permanently (if the computer where you originally activated your Autodesk
product is being replaced). You can leave the license on the secondary computer
indefinitely, or you can move the license between computers as needed.
License transfers rely on the product’s serial number. Before an Autodesk product
can be exported, it must be activated with the serial number and product key.
During license import, a previously activated and exported license is imported
to a product or product suite installed with the same serial number. The
activation is transferred to the import computer, completing the license transfer.
NOTE When you upgrade your Autodesk product (non-subscription), you can no
longer perform online license transfers of the previous license.
NOTE Although the License Transfer utility allows you to transfer your product
license between computers, your license agreement may not allow the installation
of an Autodesk product on more than one computer. Read your license agreement
to find out whether your product license permits the use of the License Transfer
utility.
31
Page 38

Notes on Transferring a Mudbox License
The following sections on importing and exporting licenses are intended to
describe the process for all Autodesk products. This section provides additional
details on locating the License Transfer Utility for Mudbox on Mac OS X and
Linux.
To open the License Transfer Utility (Mac OS X)
1 Navigate to the following directory:
Applications\Autodesk\Mudbox2010\Licensing\
2 Double-click the License Transfer Utility.
Transfer a License
To transfer a license you must have an Internet connection, have an Autodesk
product installed on both computers, and perform an online export and import
of the license.
Install the Autodesk Product
Before you can use the License Transfer utility to transfer licenses, you must
have an Autodesk product installed on all computers involved in the transfer.
The License Transfer utility is a custom stand-alone installation option. During
installation, a shortcut is created from the Start (Windows) menu. A License
Transfer utility shortcut is installed once per product, per workstation.
To install the Autodesk product
1 Install and activate the Autodesk product on a computer.
See your product's installation instructions for complete details.
2 Install the Autodesk product on any other computer that will be using
the License Transfer utility. You do not have to register or activate the
product on this computer.
See your product's installation instructions for complete details.
32 | Chapter 5 License Transfer Utility
Page 39

Export a License
A license is exported when the License Transfer utility moves a product license
from a computer to the online Autodesk server.
The license can be exported as public or private. Exporting a license as public
means that you are not reserving the license and anyone using the same serial
number and their own user ID and password can import that license. Exporting
a license as private means that you are reserving that license for yourself and
the license can only be imported with the same serial number, your user ID,
and your password.
NOTE An Internet connection is required to export a license.
To export a license
1 On the computer where you want to export the license, do one of the
following:
■ (Windows XP) Click Start ➤ Programs ➤ Autodesk ➤ [Autodesk
■ (Windows Vista) Click Start ➤ All Programs ➤ Autodesk ➤
■ (Mac OS X or Linux) Double-click the License Transfer Utility shortcut.
The Export the License dialog box displays the Autodesk product name
and serial number.
Product] ➤ License Transfer Utility.
[Autodesk Product] ➤ License Transfer Utility.
2 In the Export the License dialog box, click Sign In.
3 On the Log In page, enter your Autodesk user ID and password and click
Log In.
4 On the License Export page, confirm the export information.
5 If you want to make the license available as a public import, click Make
the license available as a public import.
6 Click Export.
7 On the License Export Confirmation page, click Finish.
Export a License | 33
Page 40

Import a License
A license is imported when the License Transfer utility moves a previously
exported product license from the online Autodesk server to a computer.
When you have exported a product license from a computer, you complete
the license transfer process by importing that license onto a computer. A
license is imported when the License Transfer utility creates an active license
on a computer, allowing your Autodesk product to run on this computer.
When you use the License Transfer utility to import a license to a computer,
you are not activating the product on the computer; you are simply transferring
your activation to this machine.
NOTE An Internet connection is required to import a license.
To import a license
1 On the computer where you want to import the license, do one of the
following:
■ (Windows XP) Click Start ➤ Programs ➤ Autodesk ➤ [Autodesk
Product] ➤ License Transfer Utility.
■ (Windows Vista) Click Start ➤ All Programs ➤ Autodesk ➤
[Autodesk Product] ➤ License Transfer Utility.
■ (Mac OS X or Linux) Double-click the License Transfer Utility shortcut.
The Import the License dialog box displays the Autodesk product name
and serial number.
2 In the Import the License dialog box, click Sign In.
3 On the Log In page, enter your Autodesk user ID and password and click
Log In.
4 On the License Import Confirmation page, click Finish.
The license is now imported to the computer and you can run your
Autodesk product on this computer. If you want to transfer the license
to another computer, repeat the export and import procedures.
34 | Chapter 5 License Transfer Utility
Page 41

To import a license to replace a trial license
1 On the computer where you want to import the license, do one of the
following:
■ (Windows XP) Click Start ➤ Programs ➤ Autodesk ➤ [Autodesk
Product] ➤ License Transfer Utility.
■ (Windows Vista) Click Start ➤ All Programs ➤ Autodesk ➤
[Autodesk Product] ➤ License Transfer Utility.
■ (Mac OS X or Linux) Double-click the License Transfer Utility shortcut.
The Update the Serial Number and Product Key dialog box displays the
Autodesk product name and serial number.
2 In the Update the Serial Number and Product Key dialog box, enter the
serial number and product key to update your Autodesk product. Click
Update.
The Import the License dialog box displays the Autodesk product name
and updated serial number.
3 In the Import the License dialog box, click Sign In.
4 On the Log In page, enter your Autodesk user ID and password and click
Log In.
5 On the License Import Confirmation page, click Finish.
The license is now imported to the computer and you can run your
Autodesk product on this computer. If you want to transfer the license
to another computer, repeat the export and import procedures.
Import a License | 35
Page 42

36
Page 43

Troubleshoot a License Error
When you activate your Autodesk product, only the computer that you used to activate the
product is licensed to run the product. If you make certain changes to your computer, your
stand-alone license might fail. You will receive a license error and you will not be able to use
your product. This section discusses ways in which you can troubleshoot a license error.
6
License Errors
Some license errors require you to reactivate your product. If you need to
reactivate your product, the Product Activation wizard is displayed when you
try to run the product. To reactivate your product, follow the instructions in
the Product Activation wizard.
The following topics offer more details regarding specific errors.
Errors Caused by Hardware Changes
If you replace or reconfigure hardware on the computer where your Autodesk
product license resides, the stand-alone license might fail. You will not be able
to use your product.
To prevent damage to your product license, use the License Transfer utility to
export your license file. After you make the hardware change, you can import
the license file back. For instructions about using the License Transfer utility,
see Transfer a License on page 32.
NOTE If you get a license error when you change your hardware, you may have to
reactivate your license. See Register and Activate an Autodesk Product.
37
Page 44

Errors Caused by Reinstalling an Operating System
If you reinstall your operating system on the computer where your Autodesk
license resides, the license might fail. You will not be able to use your product.
To resolve a license error in this case, you must reactivate your product. See
Register and Activate an Autodesk Product.
To prevent a license error when you reinstall an operating system
NOTE If using Norton Ghost™ or another image utility, do not include the Master
Boot Record.
1 Locate the following folder and make a backup copy:
C:/Documents And Settings/All Users/Application Data/FLEXnet
2 Reinstall the operating system and reinstall the Autodesk product.
3 Paste the license folder to the same location from which you originally
copied the folder in step 1.
You can now run your Autodesk product.
Errors Caused by Changing the System Date and Time
Your product license allows for time changes to the system clock within two
days of the current time. If you set your system clock back more than two
days, the next time you start your product, you will receive a message that
gives you the option of correcting the system clock. If you do not correct the
system clock, you receive a license error.
To prevent a license error due to a change in system date and time
■ Make sure that your computer's system date and time are accurate when
you install and activate your Autodesk product.
38 | Chapter 6 Troubleshoot a License Error
Page 45

Network Licensing Guide
39
Page 46

40
Page 47

Quick Start to Autodesk Network Licensing
Setting up network licenses for an Autodesk®product requires careful planning and execution.
This section gives you quick, step-by-step instructions about how to set up a network licensed
environment, and assumes that you are familiar with the terminology and processes required
to set up an Autodesk product to run on a network. If you are not familiar with network
licensing, please read the entire Network Licensing Guide for further details before you attempt
to set up a network license server.
7
Set Up a Mudbox License Server
To configure your machines to serve and receive Mudbox licenses across a
network, you must set up the license server machine, then set up each client
computer that obtains a license from the server.
The basic workflow for setting up a license server is as follows:
1 Install the Network License Manager.
2 Obtain your network license.
3 Configure your license server using the appropriate platform-specific steps:
■ Configure a License Server (Windows) on page 47
■ Configure a License Server (Mac OS X) on page 49
■ Configure a License Server (Linux) on page 50
4 Configure each client machine to use a network license by entering your
license server machine name in the install wizard as you install Mudbox
on the client.
41
Page 48
For information on installing Mudbox on each client computer, refer to
either the Quick Start to Mudbox Installation on page 3 guide, or the
Step-by-Step Guide to Mudbox Installation on page 7. Both of these
guides provide information on installing Mudbox on all supported
platforms.
NOTE You do not need to install Mudbox on the license server machine. You only
need to install the Network License Manager.
Your license server can serve licenses to workstations on all supported platforms
(Windows, Linux, Mac OS X). This requires that the computers can access
each other via TCP/IP.
NOTE Servers can serve a license to themselves.
Install the Network License Manager
Install the Network License Manager (Windows)
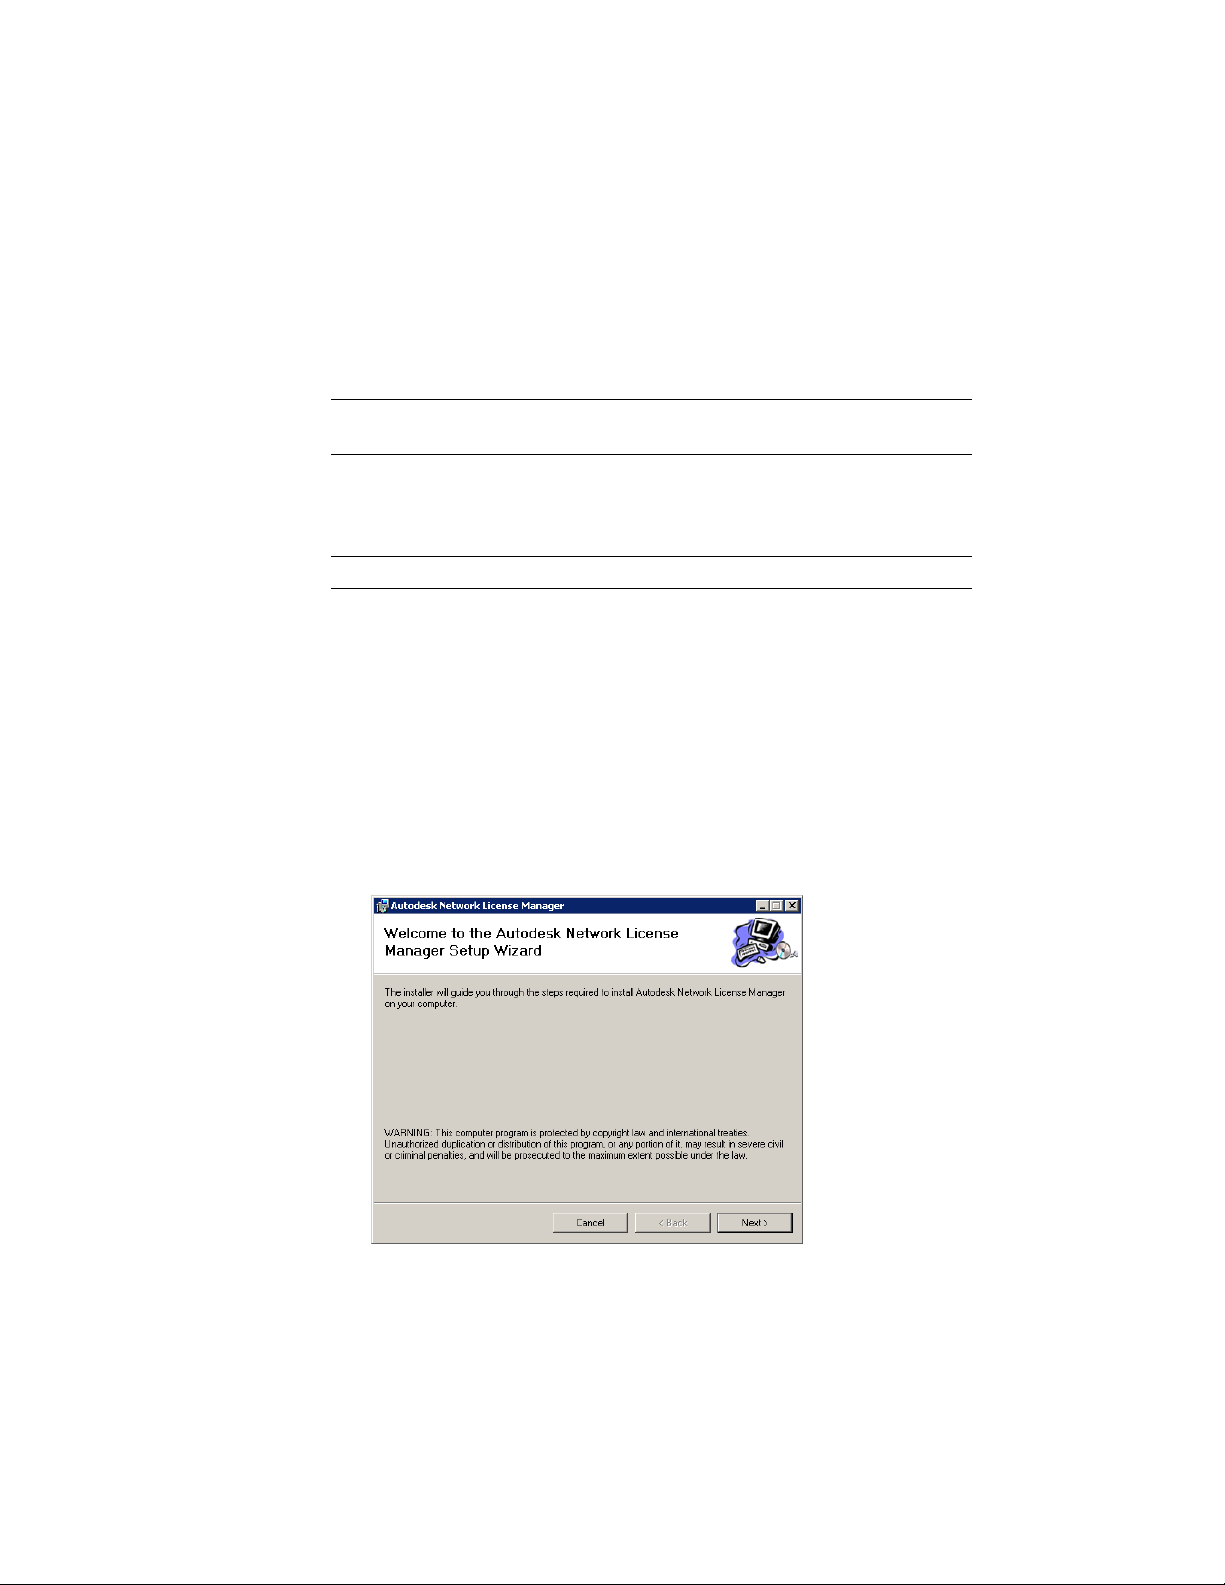
To install the Network License Manager
1 Double-click the NLM installer on your DVD or in the package you
downloaded.
The Autodesk Network License Manager Setup wizard starts.
42 | Chapter 7 Quick Start to Autodesk Network Licensing
Page 49

2 Click Next to start the install.
3 In the Select Installation Folder window, accept the default installation
path (C:\Program Files\Autodesk Network License Manager\) or click
Browse to specify a different path. If you enter a path that does not exist,
a new folder is created using the name and location you provide. Click
Next.
NOTE Do not install the Network License Manager on a remote drive. When
you install the Network License Manager files, you must provide a path to a
local drive. You must specify the drive letter; the universal naming convention
(UNC) is not permitted.
4 On the Confirm Installation page, click Next.
The wizard installs the Network License Manager, providing you with all
of the network licensing tools you need to set up your license server.
5 On the Installation Complete page, click Close.
Install the Network License Manager (Mac OS X)
To install the Network License Manager
1 Navigate to the NetworkLicenseManager folder on your Mudbox DVD,
or in the package you downloaded.
2 Do one of the following:
■ (DVD) Double-click the Network License Manager package icon.
■ (Download) Double-click the Network License Manager .dmg, then
double-click the Network License Manager package icon.
The Install Autodesk NLM wizard appears.
Install the Network License Manager (Mac OS X) | 43
Page 50

3 Click Continue to begin the installation, then follow the instructions in
the installer to install the Network License Manager tools.
4 Click Done when you see the Install Succeeded message.
By default, the Network License Manager tools are installed in the following
directory: /usr/local/flexnetserver. In addition, scripts to help set up your
44 | Chapter 7 Quick Start to Autodesk Network Licensing
Page 51

license server are installed in the following directory:
/Library/StartUpItems/adsknlm.
Install the Network License Manager (Linux)
To install the Network License Manager
1 Open a shell as a super user.
2 Navigate to the NetworkLicenseManager directory on your Mudbox DVD,
or extract the Network License Manager package from the compressed
file that you downloaded.
3 To install the Network License Manager, enter the following command:
rpm -ivh adlmflexnetserver-#.rpm
where # is the package number.
Obtain a Network License
To obtain your network license, note that you will need the following pieces
of information:
■ Your Autodesk account login information (if you already have an account).
■ Your serial number.
■ Your (license server) host ID and host name.
If you need more information on finding your host ID and host name, see
Obtain the Server Host Name and Host ID Manually on page 77.
To obtain your network license
1 Go to http://www.autodesk.com/register.
2 On the Log In page, do one of the following:
■ If you already have an Autodesk account, enter your User ID and
password, then click Log In.
■ If you need to set up an Autodesk account, click the Create User ID
Now link.
Fill out your information on the Create User ID page and click Next.
Install the Network License Manager (Linux) | 45
Page 52

3 On the Choose Account page, make sure your user account is selected
and click Next.
The Product Registration & Activation wizard starts.
If you are already familiar with Autodesk Product Registration &
Activation, you can simply follow the instructions on each page of the
wizard. The remaining steps in this section provide additional details on
each page.
4 On the first page of the Product Registration & Activation wizard:
■ Select your operating system.
■ Enter your serial number.
■ Click Next.
5 On the Product Information page, do the following:
■ Select Single server as the Network server type.
■ Enter your server host name and your server host ID. (See Obtain the
Server Host Name and Host ID Manually on page 77 for more
information.)
■ Click Next.
6 On the License Received page, do one or more of the following:
■ Click Save License File to save the license file to your computer. You
can save the file with any name as long as you use the .lic file
extension.
■ Click Print if you want to print a copy of the license information.
A copy of this license information is also e-mailed to the address you
specify in your Autodesk account.
Remember the name and location of your .lic license file as you will
need it later when setting up your license server.
46 | Chapter 7 Quick Start to Autodesk Network Licensing
Page 53

Configure a License Server
Notes on Configuring a Mudbox License Server
This guide is intended to describe the licensing procedures for all Autodesk
products. Some of the following topics refer to using the Network License
Activation utility to obtain your network license. Note that this utility is not
used to obtain network licenses for Mudbox. Instead, you use the Autodesk
Register Once Web page to obtain your network license for Mudbox. (See
Obtain a Network License on page 45.)
Configure a License Server (Windows)
You configure a license server so that you can manage the Mudbox licenses
you received using the Autodesk Register Once Web page. You configure the
license server using the LMTOOLS utility.
Before configuring your license server, ensure that:
■ You have installed the Network License Manager, which gives you the
following files: lmgrd, adskflex, and lmutil. (See Install the Network License
Manager (Windows) on page 42.)
■ You have received the network license file from Autodesk that contains
the product licenses; for example, productlicense.lic. (See Obtain a Network
License on page 45.)
To configure your license server
NOTE Log in with Administrator rights when working with the LMTOOLS utility.
1 Click Start > Programs > Autodesk > Network License Manager > LMTOOLS
Utility.
2 In the LMTOOLS program, on the Service/License File tab, make sure the
Configure Using Services option is active.
3 Click the Config Services tab.
4 In the Service Name list, select the service name you want to use to
manage licenses.
Configure a License Server | 47
Page 54

By default, the service name is Flexlm Service 1. If FLEXnet® is managing
other software on your computer in addition to Autodesk, you can change
the service name to avoid confusion. For example, you can rename Flexlm
Service 1 to Autodesk Server1.
NOTE If you have more than one software vendor using FLEXnet® for license
management, the Service Name list contains more than one option. Make
sure that only one Autodesk service is listed.
5 In the Path to Lmgrd.exe File field, enter the path to the network license
tools daemon (lmgrd.exe), or click Browse to locate the file.
By default, this daemon is installed in the C:\Program Files\Autodesk
Network License Manager folder.
NOTE If you install the Windows 32 server tools on a Windows 64 machine,
the path is C:\Program Files (x86)\Autodesk Network License
manager\lmgrd.exe.
6 In the Path to the License File box, enter the path to your license file, or
click Browse to locate the file.
This is the path to the license file you obtained from the Autodesk Register
Once Web page, or the location where you placed the license file if you
obtained it offline.
7 (Optional) In the Path to the Debug Log File box, enter a path to where
you want to create a debug log, or click Browse to locate an existing log
file.
The log file must have a .log file extension. For new log files, you must
enter the .log extension manually.
8 To run lmgrd.exe as a service, select Use Services.
9 To start lmgrd.exe automatically when the system starts, select Start Server
at Power Up.
10 Click Save Service to save the new configuration under the service name
you selected in step 4. Click Yes when prompted if you would like to save
the settings to the service.
11 Click the Start/Stop/Reread tab and do one of the following:
■ If a service has not yet been defined for Autodesk, click Start Server
to start the license server.
48 | Chapter 7 Quick Start to Autodesk Network Licensing
Page 55

■ If a service for Autodesk is already defined and running, click ReRead
License File to refresh with any changes made to the license file or
Options file.
The license server starts running and is ready to respond to client requests.
12 (Optional) To confirm that the server is running, click the Server Status
tab and click Perform Status Enquiry.
If the license server is up, the window displays the following:
<servername>:license server UP(MASTER)
where <servername> is the license server computer name. The text area
also lists the products and the number of logins you have.
13 Close the LMTOOLS utility.
Configure a License Server (Mac OS X)
You configure a license server so that you can manage the Mudbox licenses
you received using the Autodesk Register Once Web page. You configure the
license server using the LMTOOLS utility.
Before configuring your license server, ensure that:
■ You have installed the Network License Manager, which contains the
following files: lmgrd, adskflex, and lmutil. For Mac OS X, this installer
also includes important scripts that help you set up your license server.
(See Install the Network License Manager (Mac OS X) on page 43.)
■ You have received the network license file from Autodesk that contains
the product licenses; for example, productlicense.lic. (See Obtain a
Network License on page 45.)
To configure automatic start-up of your license server
1 Locate your network license file and rename it adsk_server.lic.
2 Copy adsk_server.lic to the following directory: /var/FlexLM/
NOTE Create this directory if it does not already exist.
3 Reboot your computer.
4 Use the Console to verify that lmgrd and adskflex start up successfully.
Configure a License Server (Mac OS X) | 49
Page 56

Configure a License Server (Linux)
You configure a license server so that you can manage the Mudbox licenses
you received using the Autodesk Register Once Web page. You configure the
license server using the LMTOOLS utility.
Before configuring your license server, ensure that:
■ You have installed the Network License Manager, which includes the
following files: lmgrd, adskflex, and lmutil. (See Install the Network
License Manager (Linux) on page 45.)
■ You have received the network license file from Autodesk that contains
the product licenses; for example, productlicense.lic. (See Obtain a Network
License on page 45.)
To configure your Linux license server
1 Extract the FLEXnet IPv4 server files into the following directory:
/home/<user id>/flexlm11.5.
NOTE Replace <user id> with your user id, not a root user id.
2 Copy the .lic file into the flexlm11.5 directory created in step 1.
3 Open a terminal window in root mode.
4 Go to the directory /etc/.
5 Locate the rc.local file.
6 Edit the rc.local file and start lmgrd by entering the following
commands in the terminal window:
NOTE Replace licensefile.lic with your license file name.
/bin/su <user id> -c ‘echo starting lmgrd>\
/home/<user id>/flexlm11.5/boot.log’
/usr/bin/nohup /bin/su <user id> -c ‘umask 022;\
/home/<user id>/flexlm11.5/lmgrd -c\
/home/<user id>/flexlm11.5/licensefile.lic >> \
/home/<user id>/flexlm11.5/boot.log ‘
/bin/su <user id> -c ‘echo sleep 5 >> \
/home/<user id>/flexlm11.5/boot.log ‘
50 | Chapter 7 Quick Start to Autodesk Network Licensing
Page 57

/bin/sleep 5
/bin/su <user id> -c ‘echo lmdiag >>\
/home/<user id>/flexlm11.5/boot.log ‘
/bin/su <user id> -c ‘/home/<user id>/flexlm11.5/lmutil lmdiag
-n -c\
/home/<user id>/flexlm11.5/licensefile.lic >> \
/home/<user id>/flexlm11.5/boot.log ‘
/bin/su <user id> -c ‘echo exiting >>\
/home/<user id>/flexlm11.5/boot.log ‘
7 Save the rc.local file.
8 Reboot your machine and verify that the lmgrd and adskflex have started
by doing one of the following:
■ During the reboot, look for the message that the license server has
started.
■ Check the boot.log file created in /home/<user id>/flexlm11.5/ to
see if lmgrd and adskflex have started.
See Manually start your license server (Linux) for additional information.
Configure a License Server (Linux) | 51
Page 58

52
Page 59

Plan Your Network Licensing
This section contains information that you need to know before you set up a network license
server. The section includes information about supported license server models, license
operation and availability, network license file definitions and parameters, license file examples,
license types and behaviors, and the license server heartbeat signal.
8
Plan Your License Server Configuration
You must decide which license server model to use for managing your Autodesk
product licenses on a server. Autodesk supports the following network license
server models:
■ Single license server model
■ Distributed license server model
■ Redundant license server model
Single License Server Model
In the single license server model, the Network License Manager is installed on
a single server, so license management and activity is restricted to this server.
A single license file represents the total number of licenses available on the
server.
Advantages of the Single License Server Model
■ Because all license management takes place on a single server, you have just
one point of administration and one point of failure.
53
Page 60

■ Of the three license server models, this configuration requires the least
amount of maintenance.
Disadvantage of the Single License Server Model
■ If the single license server fails, the Autodesk product cannot run until the
server is back online.
Distributed License Server Model
In the distributed license server model, licenses are distributed across more
than one server. A unique license file is required for each server. To create a
distributed license server, you must run the Network License Manager on each
server that is part of the distributed server pool.
Advantages of the Distributed License Server Model
■ Servers can be distributed across a wide area network (WAN); they do not
need to exist on the same subnet.
■ If one server in the distributed server pool fails, the licenses on the
remaining servers are still available.
■ If you need to replace a server in the distributed server pool, you do not
need to rebuild the entire pool.
■ Server replacement is easier than in a redundant server pool, where you
must reactivate the entire pool.
Disadvantage of the Distributed License Server Model
■ If a server in the distributed server pool fails, the licenses on that server
are unavailable.
Redundant License Server Model
In the redundant license server model, you use three servers to authenticate
a single license file. One server acts as the master, while the other two provide
backup if the master server fails. With this configuration, licenses continue
to be monitored and issued as long as at least two servers are still functional.
The license file on all three servers is the same. You must install the Network
License Manager on each server.
54 | Chapter 8 Plan Your Network Licensing
Page 61

In the redundant license server model, all servers must reside on the same
subnet and have consistent network communications. (Slow, erratic, or dial-up
connections are not supported.)
Advantage of the Redundant License Server Model
■ If one of the three servers fails, all licenses that are managed in the server
pool are still available.
Disadvantages of the Redundant License Server Model
■ If more than one server fails, no licenses are available.
■ All three servers must reside on the same subnet and have reliable network
communications. The redundant server pool does not provide network
fault tolerance.
■ If one of the three servers is replaced, the complete redundant server pool
must be rebuilt.
■ If your Autodesk product supports license borrowing and licenses are
borrowed from a redundant license server pool, you must restart the license
server after you stop the Network License Manager.
Learn About Your License
In this section, you learn about license operation and availability, the license
file, license types and behaviors, and the heartbeat signal.
License Operation and Availability
When you start an Autodesk product, the product determines the server from
which it should try to obtain a license. The product then requests a license
through the TCP/IP network protocol to the license server.
If the number of available licenses has not been exceeded on the license server,
the Network License Manager assigns a license to the workstation. A product
session then starts on the workstation, and the number of available licenses
on the license server is reduced by one.
Likewise, when you exit a product, the Network License Manager frees a license
for another user. If you run multiple sessions of an Autodesk product on an
individual workstation, only one license is used. When the last session is
closed, the license is freed.
Learn About Your License | 55
Page 62

The following three processes manage the distribution and availability of
licenses:
■ License manager daemon (lmgrd.exe). Handles the original contact with
■ Autodesk vendor daemon (adskflex.exe). Tracks the licenses that are checked
NOTE If the adskflex.exe vendor daemon terminates for any reason, all users lose
their licenses until lmgrd.exe restarts the vendor daemon or the problem causing
the termination is resolved.
■ License file. A text file that has vendor-specific license information.
License Files
the application, and then passes the connection to the vendor daemon.
The lmgrd.exe daemon is used to communicate with the vendor daemon
only; lmgrd.exe does not authenticate or dispense licenses, but rather passes
user requests to the vendor daemon. By using this approach, a single
lmgrd.exe daemon can be used by multiple software vendors to provide
license authentication. The lmgrd.exe daemon starts and restarts the vendor
daemons as needed.
out and the workstations that are using them. Each software vendor has
a unique vendor daemon to manage vendor-specific licensing. As its name
implies, the adskflex.exe vendor daemon is specific to Autodesk products.
The network license file you receive from Autodesk contains licensing
information required for a network installation. You obtain license file data
when you register your Autodesk product. For information on receiving your
license file, see Obtain a Network License on page 45.
The license file contains information about network server nodes and vendor
daemons. It also contains an encrypted digital signature that is created when
Autodesk generates the file.
The license file is located in a network location that you specify when you
save the license file from the RegisterOnce Web page, or using the license
information that Autodesk e-mails to you. The location must be accessible to
every user who runs the product from a network installation.
56 | Chapter 8 Plan Your Network Licensing
Page 63

The following table defines each license file parameter.
Definitions of license file parameters
ExampleDefinitionParameterLine
Host NameSERVER
Host ID
[None]USE_SERVER
Vendor DaemonVENDOR
Port Number
COMPONENTS
Network License Manager resides
the Network License Manager resides
vendor daemon
assigned for use only by Autodesk
products running the Autodesk
vendor daemon
List of feature codes supported in the
package
LABSERVERHost name of the server where the
03D054C0149BEthernet address of the server where
adskflex.exeName of the server-side Autodesk
port=2080Network port number reserved and
SERIES_1Name of feature code groupNamePACKAGE
1.000Internal version number referenceVersion
COMPONENTS=
"526000REVIT_9_OF\
51200ACD_2007_OF\
513001INVBUN_11_OF"
SUPERSEDE
SIGN
OPTIONS=SUITEOPTIONS
SUPERSEDEReplacement for any existing Increment line of the same feature code
from any license files on the same license server that have a date earlier
than the defined Issue Date
SIGN=0 SIGN2=0Encrypted signature used to authenticate the attributes of the license file
51200ACD_2007_0FProduct supported by the license fileFeature CodeINCREMENT
License Files | 57
Page 64

Definitions of license file parameters
ExampleDefinitionParameterLine
Expiration Date
Number of Licenses
VENDOR_STRING
BORROW
DUP_GROUP
permanentAmount of time the licenses are
available
25Number of licenses supported by the
license file
COMMERCIALLicense usage type and license behavior of the product that is supported
by the license file
BORROW=4320Definition of the license borrowing
period for the licenses defined under
the same increment line.
In this example, the maximum period that licenses can be borrowed is
4320 hours (180 days), unless otherwise noted (for example, BORROW=2880 means that licenses can
be borrowed for a maximum of
2880 hours, or 120 days).
License borrowing is disabled when
this parameter is absent in the license file.
DUP_GROUP=UHDefinition of multiple license requests when the same user and same
host share the same license
ISSUED
ated by Autodesk
Serial Number
product
SIGN
ticate the attributes of the license file
58 | Chapter 8 Plan Your Network Licensing
15-jul-2006Date that the license file was gener-
123-12345678Serial number of the Autodesk
SIGN=6E88EFA8D44CEncrypted signature used to authen-
Page 65

License File Examples
License file examples are provided in this document to help you understand
how the license files work for your particular network setup. Autodesk provides
a standard license file for individual products and a license file with additional
parameters for products that are sold both individually and as part of a product
set.
■ Standard License File. If you purchase one or more individual products
that are not offered as part of a suite of products, you receive a standard
license file.
■ Standard License File with Additional Parameters. If you purchase Autodesk
products that are included in a product set and are also sold as an individual
product, you receive a standard license file with additional parameters
included in the license file. The additional parameters define the sequence
for license usage so that the individual product license is used before the
license for the product set.
Autodesk license file examples include a license file not specific to a product,
completed license files for single, distributed, and redundant server models,
a combined product version license file, and an example of additional
parameters added to a standard license file.
Example of a License File Not Specific to a Product
Here is an example of the contents of a license file and the parameters
associated with each line:
SERVER ServerName HostID
USE_SERVER
VENDOR adskflex port=portnumber
INCREMENT feature_code Adskflex Version ExpDate NumberofLicenses
\
VENDOR_STRING=UsageType:Behavior BORROW=4320 SUPERSEDE \
DUP_GROUP=DupGrp ISSUED=IssueDate SN=SerialNumber SIGN= \
License File Examples | 59
Page 66

Example of a License File for a Single or Distributed Server
Here is an example of a completed license file for a single or distributed license
server model:
SERVER XXHP0528 0019bbd68993
USE_SERVER
VENDOR adskflex port=2080
INCREMENT 57600ACD_2009_0F adskflex 1.000 permanent 5 \
VENDOR_STRING=commercial:permanent BORROW=4320 SUPERSEDE \
DUP_GROUP=UH ISSUED=09-Jan-2008 SN=123-12345678 SIGN="1393 \
E368 816E D417 C1CD 7DBD 7B90 1354 D6F0 48FE EBB8 9C84 C3AF \
7D79 BEE1 0181 0655 76FF 996C B707 14B5 D4DE A3FE 0B2D 2D36 \
057C A579 7866 26BF 44E2" SIGN2="1280 943B 53A7 9B93 E00B D967
\
D821 BD37 BE6D B78A F074 B223 88AA 242C DD0A 1292 D56F 4108 \
62CD FA35 E365 0736 A011 7833 8B35 7BFF DAD8 34A8 452F 2EB4"
Example of a License File for a Redundant Server
Here is an example of a completed license file for a redundant license server
model:
SERVER CCN12378042 001cc4874b03 27005
SERVER XXHP0528 0019bbd68993 27005
SERVER CCN12378043 001cc4874b10 27005
USE_SERVER
VENDOR adskflex port=2080
INCREMENT 57600ACD_2009_0F adskflex 1.000 permanent 5 \
VENDOR_STRING=commercial:permanent BORROW=4320 SUPERSEDE \
DUP_GROUP=UH ISSUED=10-Jan-2008 SN=123-12345678 SIGN="11C4 \
CA79 07FC 7AD0 409A 6E04 6E98 D76C 197C 0416 076C B211 1CDD \
D0AB 698B 16BF 7A0E D4F8 1CFE 2985 644F 64CD CECE 0DDB 5951 \
3262 7C31 13A8 F08F 55B2" SIGN2="19A6 FDA3 2ED5 5301 8675 7B81
\
1B0E 451B 19F1 1A99 C8E9 CBA6 8CB3 6AC3 8B38 1519 13F2 2373 \
82AE 55E5 1A25 4952 4458 F3A2 6F28 D25D 1DC0 E066 209B 0953"
NOTE The redundant server model requires the addition of a port number (the
default is 27005) for each server.
60 | Chapter 8 Plan Your Network Licensing
Page 67

Example of a License File for Combined Autodesk Product Versions
You can combine a license file for different releases of the same Autodesk
product or for different Autodesk products, and run all products from one
license server. For example, you can combine a license file for AutoCAD 2009
with license files for Maya® 2009 and AutoCAD Map.
Here is an example of the contents of a combined license file for AutoCAD 2008
and AutoCAD 2009:
SERVER XXHP0528 0019bbd68993
USE_SERVER
VENDOR adskflex port=2080
INCREMENT 57600ACD_2009_0F adskflex 1.000 permanent 5 \
VENDOR_STRING=commercial:permanent BORROW=4320 SUPERSEDE \
DUP_GROUP=UH ISSUED=09-Jan-2008 SN=123-12345678 SIGN="1393 \
E368 816E D417 C1CD 7DBD 7B90 1354 D6F0 48FE EBB8 9C84 C3AF \
7D79 BEE1 0181 0655 76FF 996C B707 14B5 D4DE A3FE 0B2D 2D36 \
057C A579 7866 26BF 44E2" SIGN2="1280 943B 53A7 9B93 E00B D967
\
D821 BD37 BE6D B78A F074 B223 88AA 242C DD0A 1292 D56F 4108 \
62CD FA35 E365 0736 A011 7833 8B35 7BFF DAD8 34A8 452F 2EB4"
INCREMENT 54600ACD_2008_0F adskflex 1.000 permanent 3 \
VENDOR_STRING=commercial:permanent BORROW=4320 SUPERSEDE \
DUP_GROUP=UH ISSUED=09-Jan-2008 SN=123-12345678 SIGN="1E6E \
4B61 5712 4766 92A0 6782 9EF4 3F47 56A1 1F38 6DE8 C0C7 90AC \
7289 152E 0EA2 CC0D 3F10 577A 0489 CEB6 10D5 FBCC B552 0C9D \
5966 91A6 59F0 2788 FACE" SIGN2="1DDF 3B9D 3392 71D5 AB08 7E05
\
8497 111E 092F 0E54 8DC2 2BED 17C2 2CC1 981B 0EC2 BC15 8F00 \
C79A ABFD 2136 BABA 2EDF E941 EA53 32C6 597F F805 5A8A 599A"
Example of Additional Parameters in a License File
For Autodesk products that are included in a product set and are also sold as
an individual product, licenses are allocated based on a sequence of priorities
defined in the license file. For those products, information similar to the
following example appears in a license file:
License File Examples | 61
Page 68

SERVER Server1 1a34567c90d2
USE_SERVER
VENDOR adskflex port=2080
INCREMENT 54600ACD_2008_0F adskflex 1.000 permanent 5 \
VENDOR_STRING=commercial:permanent BORROW=4320 SUPERSEDE \
DUP_GROUP=UH ISSUED=09-Jan-2007 SN=123-12345678 SIGN="0247 \
45D6 87C4 27A5 7F9E F24A ED3D 61E4 6B3B CC5C AD77 B865 9EA8 \
3D62 0792 0F67 19E7 57E7 FAFA A48B D582 335A EC16 1FE5 B70D \
76AB 6488 61CC DE5E F5B7" SIGN2="09FD 0850 7CF1 F447 9F05 9FA3
\
2A0A 38D6 83FC 1746 F3F5 5A72 6250 E002 DE0B 0E6E F88C AC95 \
136F 87F2 A945 E4C4 A97F 44B5 74EE 83F3 3F3E 1579 B981 8994"
Package License File Examples
Autodesk offers a package license file option, which allows you use of a set of
products that are packaged and sold together. The package license file contains
a set number of licenses for four different versions of your software. Running
an instance of any one of the versions uses one license in the package. Packaged
license files support prior versioning for subscription users. Package license
files operate under the following guidelines:
■ Package license files come with the current version of the software and
three previous versions of the same product.
■ License files may be combined with license files for different products. For
more information about combining license files, see Example of a License
File for Combined Autodesk Product Versions on page 61.
■ Package license files cannot be combined with non-package license files
for product versions contained in the package. For example, you cannot
combine a Autodesk Product 2009 package license file with a regular license
file for Autodesk Product 2008, 2007, or 2006.
■ Both the PACKAGE and INCREMENT sections of the license are required
for licensing to work properly. When you combine license files, be sure to
include both of these sections.
■ License borrowing, option files, and licensing cascading work the same
for package licenses as they do for regular license files.
■ A new license file will supersede an older license file.
62 | Chapter 8 Plan Your Network Licensing
Page 69

The following sections provide package license file examples for single,
distributed, and redundant license servers, and combined Autodesk product
versions.
Example of a Package License File for a Single or Distributed Server
Here is an example of a completed license file for a single or distributed license
server model:
SERVER Server1 1a34567c90d2
USE_SERVER
VENDOR adskflex port=2080
PACKAGE SERIES_1 adskflex 1.000 COMPONENTS="54700REVIT_2009_0F \
54600ACD_2009_0F 51300INVBUN_11_0F" OPTIONS=SUITE SUPERSEDE \
ISSUED=09-Jan-2008 SIGN="1707 9EAC CBCB 2405 692E 4A89 \
AA26 30CC 2AC2 D6B3 A61B AB5E 492E 3EBD 0B48 4E75 193A DA82" \
FC45 C009 E360 944A 14BA E99C 9B24 5A1B 4A44 083A BE5F 3827 \
SIGN2="004A FC90 AB47 3F6B 59BC 0E6D 6681 6971 A76A BA52 98E2
\
5671 26B3 0E78 791B 109F 0591 7DC3 F09F 4D8D 4FB7 E341 4A03 \
CD68 1D77 27F8 8555 9CF7 DEDD 9380"
INCREMENT SERIES_1 adskflex 1.000 permanent 100 \
VENDOR_STRING=commercial:permanent BORROW=4320 DUP_GROUP=UH \
SUITE_DUP_GROUP=UHV SN=123-12345678 SIGN="1707 9EAC CBCB \
692E 4A89 FC45 C009 E360 944A 14BA E99C 9B24 5A1B 4A44 BE5F \
3827 AA26 30CC 2AC2 D6B3 A61B AB5E 492E 3EBD 0B48 DA82" \
SIGN2="004A FC90 AB47 3F6B 59BC 0E6D 6681 6971 A76A BA52 \
5671 26B3 0E78 791B 109F 0591 7DC3 F09F 4D8D 4FB7 E341 4A03 \
CD68 1D77 27F8 8555 9CF7 DEDD 9380"
Example of a Package License File for a Redundant Server
Here is an example of a completed license file for a redundant license server
model:
Package License File Examples | 63
Page 70

SERVER 1a34567c90d2 27005
SERVER 2a34567c90d2 27005
SERVER 3a34567c90d2 27005
USE_SERVER
VENDOR adskflex port=2080
PACKAGE 64300ACD_F adskflex 1.000 COMPONENTS="57600ACD_2009_0F \
54600ACD_2008_0F 51200ACD_2007_0F 48800ACD_2006_0F" \
OPTIONS=SUITE SUPERSEDE ISSUED=27-May-2008 SIGN="1092 05D8 \
A206 276B 2C84 EFAD ACA5 C54B 68A4 653E C61F 31DE C8CE B532 \
CFBB 0006 5388 347B FDD6 A3F4 B361 7FD4 CDE4 4AAC 0D11 B0EF \
4B44 BFD6 3426 97DD" SIGN2="0670 B01A D060 0069 FF25 F1CD D06B
\
314E E7C9 3552 5FFA 4AC7 28A7 C897 F56A 19BB FB1C 754E 6704 \
DEEA AC4E F859 2E9B 64B6 0DD0 9CCE 9556 269F EAC0 2326"
INCREMENT 64300ACD_F adskflex 1.000 permanent 50 \
VENDOR_STRING=commercial:permanent BORROW=4320 SUPERSEDE \
DUP_GROUP=UH SUITE_DUP_GROUP=UHV ISSUED=27-May-2008 \
SN=399-99999999 SIGN="1B5B 8D70 4CAD 32E5 9CA2 82E0 5C47 291C
\
35AB 9B9C 5B3E 5067 F61B 4139 1B32 0716 1FD3 5105 A991 B78E \
9D1E 63AB BC23 0D1E B70C 2A05 E1C1 F605 ABB1 2EA8" SIGN2="01D6
\
31F5 2951 4500 E5C8 058F 7490 9789 9EF4 CBED DA27 5F06 6780 \
9033 2018 0C3B E1E0 3580 E60E C2BB B4AB 8D6A 4245 3059 8CA6 \
2EFE DFAE 027F 2ABE 3F2B"
Example of a Package License File for Combined Autodesk Product Versions
Here is an example of a completed license file for combined Autodesk product
versions:
64 | Chapter 8 Plan Your Network Licensing
Page 71

SERVER servername 123456789111
USE_SERVER
VENDOR adskflex port=2080
PACKAGE 64300ACD_F adskflex 1.000 COMPONENTS="57600ACD_2009_0F \
54600ACD_2008_0F 51200ACD_2007_0F 48800ACD_2006_0F" \
OPTIONS=SUITE SUPERSEDE ISSUED=25-Jun-2008 SIGN="03EF DE18 \
8046 0124 4EA4 6953 F82D 3169 7C24 D0DE E58E 8168 FFA3 D891 \
B43B 08D8 7E7F C6ED CBCC FE2A BB0A 4566 C2AE F1C1 D373 8348 \
E6E3 884A E398 1C78" SIGN2="07AC D696 8844 D19F AB00 8B75 53A3
\
2F76 91DF AED0 3231 1506 0E6B ADC6 C3B8 1797 93B5 9756 8C0F \
8811 56E6 B2BA 0523 FE2E 82B7 1628 076F 173B F37C 7240"
INCREMENT 64300ACD_F adskflex 1.000 permanent 2 \
VENDOR_STRING=commercial:permanent BORROW=4320 SUPERSEDE \
DUP_GROUP=UH SUITE_DUP_GROUP=UHV ISSUED=25-Jun-2008 \
SN=399-99999999 SIGN="1CCB E88D B819 8604 06FA 9AEE 42F1 CBEA
\
37B9 3CFA A0A8 697F 9CB1 8354 6256 05ED 69D4 D2FF D512 6A2E \
D5DD B722 EF5B 3172 BA95 4625 F8D3 DD24 BB39 6A58" SIGN2="0DFF
\
FA6F C378 20E0 2622 BE52 B434 F99F 2681 2B93 64F2 CE0C 7F4A \
7024 B3D1 051A 6920 72BD DE35 8920 E6A1 C8D6 AF23 7BE7 CC91 \
6916 70B1 9E80 AB07 1644"
PACKAGE 64800INVPRO_F adskflex 1.000 \
COMPONENTS="59600INVPRO_2009_0F \
55300INVPRO_2008_0F 51400INVPRO_11_0F 49000INVPRO_10_0F" \
OPTIONS=SUITE SUPERSEDE ISSUED=25-Jun-2008 SIGN="1306 5990 \
F8A1 56FB 1D8A 9DA7 D6AE 8E9E F6EC 2862 367A 36E2 C5FB E6E1 \
4AAA 0128 8C2D 95FD 09B2 ABA1 6F98 A0A3 70DE 3220 6835 7E51 \
3849 9D81 8BDC 9DC1" SIGN2="0021 AA08 F2E7 8AEB 5345 341A 7E42
\
3001 B8C5 DFC2 6EB8 87C5 C04A AE43 A10F 1DA1 EF8A F0FA 10F5 \
AC81 1E22 789F A18D 650F 6BBB 563A BDA5 DD1C 82EC 27F6"
INCREMENT 64800INVPRO_F adskflex 1.000 permanent 2 \
VENDOR_STRING=commercial:permanent BORROW=4320 SUPERSEDE \
DUP_GROUP=UH SUITE_DUP_GROUP=UHV ISSUED=25-Jun-2008 \
SN=399-99999966 SIGN="0BE4 51F4 570C DC48 5E66 F952 629E EDF0
\
019C 6FF7 0509 1FF0 D4FB 3B16 1981 073F 31EC A241 8CB3 8782 \
E655 00C6 E097 D5EF B0D8 67D3 199D 699D 2E09 B16F" SIGN2="1254
\
3E37 0CE4 F42D B7CD 858C 92FC A963 5274 770F 9354 FE29 E117 \
205D C632 0C4E AEC0 7501 9D9E FFEB D84D F154 16A1 E120 339A \
Package License File Examples | 65
Page 72

FDBF 3F07 4477 B8B3 5DA4"
License Types and Behaviors
Autodesk supports dynamic product usage and license behaviors. This means
that you can purchase a specific type of behavior with a specific license and
change that license at a later date without having to uninstall and reinstall
the Autodesk product.
License types include the following:
■ Commercial. A license for a product that was purchased commercially.
■ Not for Resale. A license for a product that is not sold commercially. Not
for Resale products are for evaluation or demonstration purposes only and
may not be used for commercial or production use.
■ Educational (EDU)/Institution. A license designed specifically for
educational institutions.
■ Student Portfolio. A license for students who are using an Autodesk product
as part of their curriculum.
License behaviors are as follows:
■ Permanent. Enables permanent use of an Autodesk product.
■ Term Extendable. Enables access to an Autodesk product for a limited time.
The term can be extended at any time.
■ Term Non-Extendable. Enables an Autodesk product for a limited time.
The term cannot be extended.
Heartbeat Signal
When an Autodesk product is running, it communicates with the license
server at regular intervals using a communication method known as the
“heartbeat” signal. If the heartbeat signal is lost, the server tries to reconnect.
If the server cannot reconnect, the user receives a license error.
If the product stops working because it has lost a connection to the server,
you must shut down the product, and then restart it. If the problem causing
the original loss of the heartbeat signal is resolved and there are available
licenses on the server, the program can be restarted.
66 | Chapter 8 Plan Your Network Licensing
Page 73

Autodesk Network Licensing Tools
Autodesk network licensing tools for Mudbox include the Network License Manager, the
FLEXnet configuration tools, and SAMreport-Lite.
Network License Manager
The Network License Manager is used to configure and manage license servers.
It includes the lmgrd, adskflex, and lmutil tools that you need to set up your license
server. See the following topics for more information:
■ Install the Network License Manager
■ Configure a License Server on page 47
System Requirements for the Network License Manager
9
Make sure that your network license server meets the minimum recommended
requirements. See the following table for hardware and software requirements.
67
Page 74

NOTE Not all products support all operating systems. See your product’s Network
Administrator’s Guide for supported operating systems.
Hardware and software requirements for the network license server
NotesRequirementHardware/software
Operating system
Computer/processor
Network interface card
Windows Vista® 32-bit SP1
Windows Vista 64-bit SP1
Windows® XP 32-bit SP3
Windows XP 64-bit SP2
Windows 2003 R2 Server Edition
Windows 2003 Server Edition
Windows 2000 Server Edition*
Linux® 32-bit Red Hat® Enterprise Linux
4.0 and 5.0 WS (U4)
Linux 64-bit Red Hat® Enterprise Linux
5.0 WS (U4)
Apple® Mac® OS X Leopard 10.5.3 and
later
Pentium® III or higher
450 Mhz (minimum)
Intel Mac
Compatible with existing Ethernet network infrastructure
TCP/IPCommunication protocol
The Network License Manager
supports Ethernet network configurations only.
*If you use a Windows 2000
Server, you must manually install
the Network License Manager
located in your product’s install
folder: CDROM1\x86\sup-
port\NLM\en-US\NLM.msi.
The Network License Manager
supports multiple network interface cards, but at least one must
be an Ethernet card.
The Network License Manager
uses TCP packet types.
FLEXnet Configuration Tools
The License Server Tools use FLEXnet license management technology from
Acresso Software. FLEXnet provides administrative tools that help to simplify
management of network licenses. You can use FLEXnet tools to monitor
network license status, reset licenses lost to a system failure, troubleshoot
license servers, and update existing license files on the fly.
68 | Chapter 9 Autodesk Network Licensing Tools
Page 75

For specific information about using FLEXnet configuration tools, you can
find the LicenseAdministration.pdf document in the following directory:
■ (Windows) C:\Program Files\Autodesk Network License
Manager\Docs\FlexUser\LicenseAdministration.pdf
■ (Mac OS X) /usr/local/flexnetserver/LicenseAdministration.pdf
■ (Linux) /opt/flexnetserver/LicenseAdministration.pdf
Utilities for License Server Management
FLEXnet provides two utilities for managing the license server. These tools
are located in the C:\Program Files\Autodesk Network License Manager folder.
lmtools.exe Provides a Microsoft® Windows graphical user interface for
managing the license server.
lmutil.exe Provides a set of command line options for managing the license
server.
You can use lmtools.exe or lmutil.exe to perform the following server
management tasks:
■ Start, stop, and restart the server.
■ Configure, update, and reread the license file.
■ Diagnose system or license problems.
■ View server status, including active license status.
Utilities for License Server Management (Mac OS X and Linux)
On Mac OS X and Linux, you can find the FLEXnet utilities in the following
directory:
■ (Mac OS X) /usr/local/flexnetserver/
■ (Linux) /opt/flexnetserver
Utilities for License Server Management | 69
Page 76

The Options File
Another component of FLEXnet is the Options file. You create this file to set
specific configuration options. For information about creating and using an
options file, see Set Up and Use an Options File on page 80.
Use the Options file to set parameters for the following server-related features:
Report log file A compressed, encrypted file is created that generates accurate
usage reports on license activity for use by SAMreport-Lite. For more
information about SAMreport-Lite, see the SAMreport-Lite User's Guide, which
you can access on the Documentation tab of the menu browser.
License borrowing If your Autodesk product supports the license borrowing
feature, you can allow users to borrow an Autodesk product license from a
network license server so that they can use the product without being
connected to the license server. A license can be borrowed for a limited time.
License timeout With license timeout, you can set a timeout period on your
license server for one Autodesk product at a time. When set, license timeout
returns a license to the license server when a connection with the workstation
is lost, or if a license is checked out but the Autodesk product is idle on a
workstation for longer than the timeout period you define.
License timeoutall With license timeoutall, you can set a timeout period on
your license server that applies to all Autodesk products installed on your
computer. When set, license timeout returns a license to the license server
when a connection with the workstation is lost, or if a license is checked out
but the Autodesk product is idle on a workstation for longer than the timeout
period you define.
For more information about configuration options, see Set Up and Use an
Options File on page 80.
For specific information about using FLEXnet configuration tools, see the
FLEXnet documentation by navigating to C:\Program Files\Autodesk Network
License Manager\Docs\FlexUser\LicenseAdministration.pdf.
SAMreport-Lite License Reporting Tool
While not part of the network installation, a version of SAMreport called
SAMreport-Lite is available to help you track network license usage. With
SAMreport-Lite technology from Acresso Software, you can monitor client
usage for Autodesk network licensed products.
70 | Chapter 9 Autodesk Network Licensing Tools
Page 77

SAMreport-Lite generates usage reports in various output formats including
HTML, text, and Report Interchange Format. For more information about the
SAMreport-Lite features and for instructions on installing SAMreport-Lite, see
the SAMreport-Lite User's Guide.
NOTE You can install SAMreport-Lite and access the SAMreport-Lite User's Guide
from the Autodesk product menu browser.
For additional information about SAMreport-Lite, and for updates and fixes
for this feature, visit the Autodesk website at:
www.autodesk.com/samreportlite
SAMreport-Lite License Reporting Tool | 71
Page 78

72
Page 79

Network Licensing Tasks
10
This chapter includes information on updating FLEXnet, and on installing and configuring
the Autodesk Network License Manager on a network.
Update FLEXnet from a Previous Version
This release of Autodesk products and later require FLEXnet version 11.5 or
later. If you are currently using a version of FLEXnet that is earlier than 11.5,
you need to upgrade to version 11.5 or later.
NOTE If the server where you plan to install the Autodesk Network License Manager
has FLEXnet installed for another product, make sure that the version of lmgrd.exe
is the most current version.
To determine what version of FLEXnet is installed, you need to verify the version
of the following files:
Windows
■ lmgrd.exe
■ lmtools.exe
■ lmutil.exe
■ adskflex.exe
Mac OS X or Linux
■ lmgrd
■ lmutil
73
Page 80

■ adskflex
To verify the version of lmutil.exe, lmtools.exe, or adskflex.exe (Windows)
You should be logged in with Administrator rights when working with the
LMTOOLS utility.
1 Do one of the following:
■ (Windows XP) Click Start ➤ Programs ➤ Autodesk ➤ Network
License Manager ➤ LMTOOLS.
■ (Windows Vista) Double-click the LMTOOLS icon on the desktop.
2 In lmtools.exe, click the Utility tab.
3 On the Utility tab, enter the location of the file, or click the Browse button
to locate the file and click Open. The file location should look something
like this:
C:\Program Files\Autodesk Network License Manager\lmutil.exe
4 On the Utility tab, click Find Version.
The version number of the file you selected is displayed. If necessary, use
the following procedure to update your version of FLEXnet.
To verify the version of lmutil, lmgrd, or adskflex (Mac OS X or Linux)
You should be logged in with the same user ID you used when installing the
FLEXnet files, for example, /Users/<userid>/adsknlm (Mac OS X) or
/home/<userid>/adsknlm (Linux).
Enter the following commands in the terminal window/prompt:
<prompt>./lmutil -v
<prompt>./lmgrd -v
<prompt>./adskflex -v
The output of each command will look similar to this example:
Copyright©1989-2007 Macrovision Europe Ltd. And/or Macrovision
Corporation. All Rights reserved.
lmutil v11.5.0.0 build 56285 i86_mac10
To update FLEXnet (Windows)
You should be logged in with Administrator rights when working with the
LMTOOLS utility.
74 | Chapter 10 Network Licensing Tasks
Page 81

1 Back up your license files.
2 Do one of the following:
■ (Windows XP) Click Start ➤ Programs ➤ Autodesk ➤ Network
License Manager ➤ LMTOOLS.
■ (Windows Vista) Double-click the LMTOOLS icon on the desktop.
3 In the LMTOOLS program, click the Start/Stop/Reread tab.
4 On the Start/Stop/Reread tab, click Stop Server.
5 Close lmtools.exe.
6 Note the location where the Network License Manager is installed and
then uninstall the Network License Manager. For details about uninstalling
the Network License Manager, see Uninstall the Network License Manager.
7 Install the Network License Manager. For details about installing the
Network License Manager to the same location as the previous version,
see Install the Autodesk Network License Manager.
8 Do one of the following:
■ (Windows XP) Click Start ➤ Programs ➤ Autodesk ➤ Network
License Manager ➤ LMTOOLS.
■ (Windows Vista) Double-click the LMTOOLS icon on the desktop.
9 In the LMTOOLS program, click the Start/Stop/Reread tab.
10 On the Start/Stop/Reread tab, click Start Server.
11 Close lmtools.exe.
To update FLEXnet (Mac OS X)
You should be logged in with the same user ID you used when installing the
FLEXnet files, for example, /Users/<userid>/adsknlm. The logged in user ID
should be in the sudoers list to execute some of the following commands.
1 Back up your license files.
2 Stop the Autodesk Network License Manager service by entering the
following in Terminal:
sudo /sbin/SystemStarter stop adsknlm
Update FLEXnet from a Previous Version | 75
Page 82

3 Note the location where the Network License Manager is installed and
then uninstall the Network License Manager by entering the standard
Mac OS X commands, for example, rm.
4 Install the Network License Manager. Copy the new version of the
FLEXnet network license manager files (lmgrd, adskflex, and lmutil) to
the location recommended when you configured your license server, for
example, /Users/<user id>/adsknlm.
5 Start the Autodesk Network License Manager service by entering the
following in Terminal:
sudo /sbin/SystemStarter start adsknlm
NOTE Version 11.5 of the FLEXnet license manager that ships with Autodesk
products is backwards compatible and will administer licenses for the Autodesk
2008-, 2007-, 2006-, 2005-, 2004-, and 2002-based products.
To update FLEXnet (Linux)
You should be logged in with the same user ID you used when installing the
FLEXnet files, for example, /home/<userid>/adsknlm. The logged in user ID
should be in the sudoers list to execute some of the following commands.
1 Back up your license files.
2 Stop the Autodesk Network License Manager service by entering the
following in Terminal:
./lmutil lmdown -q -force
3 Note the location where the Network License Manager is installed and
then uninstall the Network License Manager by entering the standard
Linux commands, for example, rm.
4 Install the Network License Manager. Copy the new version of the
FLEXnet network license manager files (lmgrd, adskflex, and lmutil) to
the location recommended when you configured your license server, for
example, /home/<user id>/adsknlm.
5 Start the Autodesk Network License Manager service by entering the
following in Terminal:
./lmgrd -c acad.lic -l debug.log
NOTE Replace acad.lic and debug.log with your license file name and log
file name.
76 | Chapter 10 Network Licensing Tasks
Page 83

NOTE Version 11.5 of the FLEXnet license manager that ships with Autodesk
products is backwards compatible and will administer licenses for the Autodesk
2008-, 2007-, 2006-, 2005-, 2004-, and 2002-based products.
Obtain the Server Host Name and Host ID Manually
If you are unable to use the Network License Activation utility to obtain your
server host name and host ID, you can obtain this information manually.
Autodesk uses the server host name, host ID, and product serial number to
generate a license file.
To obtain the information manually, you can use the Windows command
prompt or you can run the lmtools.exe utility. If you use lmtools.exe, do not
run it on a remote workstation.
To obtain the host name and ID using the Windows command prompt
1 Do one of the following:
■ (Windows XP) Click Start ➤ Programs ➤ Accessories ➤ Command
Prompt.
■ (Windows Vista) Click Start ➤ All Programs ➤ Accessories ➤
Command Prompt.
2 At the Windows command prompt, enter the following command, and
then press ENTER:
ipconfig /all
3 Locate the Host Name line, and write down the host name.
4 Locate the Physical Address line. Write down the physical address without
the dashes. This is your twelve-character host ID.
NOTE If your server has more than one network adapter, select the one that
corresponds to a physical network adapter. To determine which adapters are
physical: in the Windows command prompt, enter ipconfig /all, and then
view the Description field above each physical address. If there is more than
one physical network adapter, it does not matter which one you use. Devices
such as VPN adapters, PPP adapters, and modems are not valid.
5 Close the Windows command prompt.
Obtain the Server Host Name and Host ID Manually | 77
Page 84

To obtain the host name and ID using lmtools.exe
You should be logged in with Administrator rights when working with the
LMTOOLS utility.
1 Do one of the following:
■ (Windows XP) Click Start ➤ Programs ➤ Autodesk ➤ Network
License Manager ➤ LMTOOLS.
■ (Windows Vista) Double-click the LMTOOLS icon on the desktop.
2 In the LMTOOLS program, click the Systems Settings tab.
3 On the Systems Settings tab, locate the Computer/Hostname box. Copy
the host name and paste the information into a text editor.
4 Locate the Ethernet Address box. The Ethernet address is the host ID. It
consists of twelve characters. Write down the information. If your Ethernet
address is more than twelve characters, write down the first twelve
characters only.
NOTE If your server has more than one Ethernet adapter, select one that
corresponds to a physical network adapter.
5 Close lmtools.exe.
To obtain the host name and ID using the Mac OS X or Linux terminal window
1 Launch a Terminal window.
2 Go to the directory where lmutil is installed.
3 Retrieve the host name by entering the following in Terminal:
<prompt>./lmutil lmhostid -hostname
The host name is displayed.
4 Retrieve the host ID by entering the following in Terminal:
<prompt>./lmutil lmhostid
The twelve-character host ID is displayed.
5 Close the Terminal Window.
78 | Chapter 10 Network Licensing Tasks
Page 85

Stop and Restart the License Server
Before you can perform any system maintenance on your license server, you
must stop the license server. When you have completed maintenance, you
can restart the license server.
To stop the license server (Windows)
You should be logged in with Administrator rights when working with the
LMTOOLS utility.
1 Do one of the following:
■ (Windows XP) Click Start ➤ Programs ➤ Autodesk ➤ Network
License Manager ➤ LMTOOLS.
■ (Windows Vista) Double-click the LMTOOLS icon on the desktop.
2 In the LMTOOLS program, on the Service/License File tab, select the
Configure Using Services option.
3 Select the service name for the license server you want to start manually.
4 Click the Start/Stop/Reread tab.
5 On the Start/Stop/Reread tab, click Stop Server.
6 Close lmtools.exe.
To restart the license server (Windows)
You should be logged in with Administrator rights when working with the
LMTOOLS utility.
1 Do one of the following:
■ (Windows XP) Click Start ➤ Programs ➤ Autodesk ➤ Network
License Manager ➤ LMTOOLS.
■ (Windows Vista) Double-click the LMTOOLS icon on the desktop.
2 In the LMTOOLS program, on the Service/License File tab, select the
Configure Using Services option.
3 Select the service name for the license server you want to start manually.
4 Click the Start/Stop/Reread tab.
5 On the Start/Stop/Reread tab, click Start Server to restart the license server.
Stop and Restart the License Server | 79
Page 86

To stop the license server (Mac OS X)
Enter the following in Terminal:
sudo /sbin/SystemStarter stop adsknlm
To restart the license server (Mac OS X)
Enter the following in Terminal:
sudo /sbin/SystemStarter restart adsknlm
To stop the license server (Linux)
Enter the following in Terminal:
./lmutil lmdown -q -force
To restart the license server (Linux)
Enter the following in Terminal:
./lmgrd -c acad.lic -l debug.log
NOTE Replace acad.lic with your license file name and debug.log with your log
file name.
Set Up and Use an Options File
With an Options file, you set configuration options for managing licenses on
each license server that you set up. An Options file sets parameters that the
license file reads and the lmgrd program executes.
If you want to have the same license behavior on some or all of your license
servers, you must save the same Options file to each of those license servers.
If you want to specify different license behavior on different license servers,
you must create an Options file for each license behavior. You must save each
Options file to the server where you want specific license behavior.
NOTE For Options file changes to take effect on a license server, you must save
the Options file, and then use lmtools.exe to reread the license file.
With an Options file, you can do the following:
■ Create a Report Log on page 82
■ Configure License Borrowing on page 82
80 | Chapter 10 Network Licensing Tasks
Page 87

■ Set Up License Timeout on page 83
Here is an example of the contents of an Options file:
REPORTLOG=c:\test\report.rl
BORROW_LOWWATER Autodesk_f1 3
TIMEOUT Autodesk_f1 7200
You can also set up advanced license parameters, such as reserving a license,
restricting license usage, or defining groups of users. To learn more about
setting advanced Options file parameters, see the FLEXnet documentation in
the C:\Program Files\Autodesk Network License Manager\docs\FlexUser folder.
To create an Options file
You should be logged in with Administrator rights when working with the
LMTOOLS utility.
1 Open a text editor, enter the parameters you want, and then save the
document as a file named adskflex.opt to the same location where you
saved the license file.
NOTE Make sure you save the file with the extension .opt. The default
extension .txt is not recognized by the Network License Manager.
2 Do one of the following:
■ (Windows XP) Click Start ➤ Programs ➤ Autodesk ➤ Network
License Manager ➤ LMTOOLS.
■ (Windows Vista) Double-click the LMTOOLS icon on the desktop.
■ (Mac OS X) Launch a Terminal window, navigate to the Autodesk
Network License Manager folder, and enter the following:
./lmutil lmreread -c @hostname-all
Close the Terminal window.
3 (Windows) In the program, on the Start/Stop/Reread tab, click ReRead
License File.
4 (Windows) Close lmtools.exe.
Set Up and Use an Options File | 81
Page 88

Create a Report Log
In the Options file, you can create a report log file that is used with
SAMreport-Lite.
To create a report log
1 In a text editor, open the Options file, adskflex.opt.
2 In the Options file, enter the following syntax on its own line (with
REPORTLOG entered in uppercase, as shown):
REPORTLOG [+]report_log_path
For example (Windows), the syntax REPORTLOG +"c:\My
Documents\report.rl" means that a report log named report.rl is located
in the folder c:\My Documents.
For example (Mac OS X or Linux), the syntax REPORTLOG +"/Users/<user
id>/NLM/report.rl" means that a report log named report.rl is located in
the folder /Users/<user id>/NLM.
NOTE Path names that contain spaces must be enclosed in quotation marks.
In the REPORTLOG syntax, “[+]” means that entries to the log file you
create are appended rather than replaced each time the Network License
Manager is restarted. (It is recommended that you use this option so that
you retain a history of log entries.)
Configure License Borrowing
If your Autodesk product supports the license borrowing feature, you can use
the Options file to configure license borrowing options. For example, you can
define the maximum number of licenses that cannot be borrowed from your
network at any one time. In addition, you can define which users can borrow
an Autodesk product license. Licenses are borrowed per user, not per machine.
NOTE If your Autodesk product supports license borrowing, and licenses are
borrowed from a redundant license server pool, you must restart the license server
after you stop the Network License Manager.
At the end of a borrow period, the borrowed license is automatically disabled
on the user's computer and becomes available again on the license server.
Users can also return a license before a borrow period has ended.
82 | Chapter 10 Network Licensing Tasks
Page 89

To set license borrowing parameters
1 In the Options file, enter the following syntax on its own line (with
BORROW_LOWWATER entered in uppercase, as shown):
BORROW_LOWWATER feature_code n
In the BORROW syntax, “feature_code” is the name of the product in
the license file, and “n” is the number of licenses that cannot be borrowed.
For example, the syntax BORROW_LOWWATER Autodesk_f1 3 means
that for the product Autodesk_f1, three licenses cannot be borrowed from
the license server.
2 Enter the following syntax on the next line (with MAX_BORROW_HOURS
entered in uppercase, as shown):
MAX_BORROW_HOURS feature_code n
In this syntax, “n” is the number of hours that a license can be borrowed.
For example, the syntax MAX_BORROW_HOURS Autodesk_f1 360 means
that for product Autodesk_f1, licenses can be borrowed for 360 hours, or
15 days.
NOTE Licenses are borrowed in increments of 24 hours only. Any number
that is more than a 24-hour increment is not used. For example, the number
365 would be rounded down to 360 hours, or 15 days.
For more information about setting up the license borrowing feature, see the
FLEXnet documentation in the C:\Program Files\Autodesk Network License
Manager\Docs\FlexUser folder.
NOTE Users can borrow a license in an Autodesk product by clicking the Tools
menu ➤ License Borrowing, or by entering borrowlicense on the Autodesk product
command line. Help for this feature is available in the Borrow a License for [Autodesk
Product] window and in C:\Program Files\[Autodesk Product]\Help\adsk_brw.chm.
Set Up License Timeout
License timeout is set in the Options file to determine how long a product
session can be idle before the license is reclaimed by the license server. When
you set this flag in the Options file, a user's license is reclaimed by the license
server if the product is idle on a workstation for more than the timeout period
you define.
Set Up License Timeout | 83
Page 90

If a user's license is lost because of the idle timeout, the product attempts to
claim a new license once the user uses the product again. If no license is
available, the user can save work before the product shuts down.
You can set individual license timeouts for each Autodesk product on your
computer by using the TIMEOUT parameter or you can set one license timeout
for all Autodesk products on your computer by using the TIMEOUTALL
parameter.
To set license timeout parameters
■ For individual Autodesk products: In the Options file, enter the following
syntax on its own line (with TIMEOUT entered in uppercase, as shown):
TIMEOUT feature_code n
In the TIMEOUT syntax, “feature_code” is the name of the product (referred
to in the INCREMENT line in the license file), and “n” is the number of
seconds before an inactive license is reclaimed by the license server.
For example, the syntax TIMEOUT Autodesk_f1 7200 means that for the
product Autodesk_f1, the license timeout period is set for 7200 seconds,
or two hours.
■ For all Autodesk products: In the Options file, enter the following syntax
on its own line (with TIMEOUTALL entered in uppercase, as shown):
TIMEOUTALL n
In the TIMEOUTALL syntax, “n” is the number of seconds before an
inactive license is reclaimed by the license server.
For example, the syntax TIMEOUTALL Autodesk 7200 means that for all
Autodesk products, the license timeout period is set for 7200 seconds, or
two hours.
For more information about using the license timeout feature, see the FLEXnet
documentation in the C:\Program Files\Autodesk Network License
Manager\Docs\FlexUser folder.
Uninstall the Network License Manager
You can uninstall the Network License Manager from the license server. When
you uninstall the Network License Manager, licenses are no longer available
to your users.
84 | Chapter 10 Network Licensing Tasks
Page 91

Uninstall the Network License Manager (Windows)
To uninstall the Network License Manager
1 Do the following to stop the license server:
■ Select Start > Programs > Autodesk > Network License Manager >
LMTOOLS Utility.
■ In the LMTOOLS window, switch to the Stop/Start/Reread tab and
click Stop Server.
■ Close the LMTOOLS utility.
2 Open the Control Panel and double-click Add or Remove Programs.
3 Select Autodesk Network License Manager in the list of programs that
appears, then click Remove.
NOTE You must manually delete files that you created for use with the Network
License Manager (such as log files, license files, and the Options file). They are not
automatically deleted when you uninstall the Network License Manager.
Uninstall the Network License Manager (Mac OS X)
To uninstall the Network License Manager
1 Delete the following directories:
■ /usr/local/flexnetserver/
■ /Library/StartUpItems/adsknlm
This removes the main license server tools as well as the configuration
scripts that help you set up your license server.
2 Reboot your machine.
NOTE You must manually delete any other files that you created for use with the
Network License Manager (such as log files, license files, and the Options file).
Uninstall the Network License Manager (Windows) | 85
Page 92

Uninstall the Network License Manager (Linux)
To uninstall the Network License Manager
1 Open a shell as a super user.
2 Execute the following command to verify the package number of the
Network License Manager that you installed:
rpm -qa |grep adlm
3 Execute the following command to uninstall the Network License Manager
package:
rpm -e adlmflexnetserver-#.rpm
where # is the package number.
NOTE You must manually delete files that you created for use with the Network
License Manager (such as log files, license files, and the Options file).
86 | Chapter 10 Network Licensing Tasks
Page 93

Glossary
adskflex.exe The Autodesk vendor daemon used with the FLEXnet license
technology. This daemon keeps track of the Autodesk licenses that are checked
out and the workstations that are using the licenses.
ADSKFLEX_LICENSE_FILE In a distributed license server configuration, the
environment variable used to point a workstation to the distributed license
servers.
borrowed license A license that allows you to use an Autodesk product for
a limited period of time without having to buy a separate license or have
network access to the license server.
daemon A program that runs continuously in the background of a computer.
The daemon handles requests from the computer and then forwards the
requests to other programs or processes. The Network License Manager uses
two daemons: the vendor daemon (adskflex.exe) and the license manager
daemon (lmgrd.exe).
debug log file A file used with FLEXnet to log connection activity (such as
license failure or starting and stopping) between the Network License Manager
and the workstation.
deployment The files and folders created on a server and used by workstations
to install Autodesk programs.
distributed server A license server configuration option in which several
servers are used to manage license distribution. Each distributed license server
has a unique license file and a fixed number of licenses. If one distributed
license server fails, the other servers are still able to distribute their licenses.
Ethernet address See host ID.
feature code A license file parameter that represents the product that is
supported by that license file.
FLEXnet The Acresso Software license management technology implemented
in the Autodesk family of products.
Glossary | 87
Page 94

heartbeat signal The communication signal between the Network License
Manager and the workstation to verify that the workstation is accessible and
has an active Autodesk product session running.
host ID The unique hardware address of a network adapter. Also known as
Ethernet address or physical address.
host name The TCP/IP name associated with a computer. FLEXnet technology
uses the host name as a parameter; the host name must be distinguished from
the NetBIOS (server) name.
idle A state of inactivity in your product that prompts a network license server
to reclaim a license. Inactivity is due to no mouse or keyboard activity and
no commands, LISP expressions, menu macros, or scripts in progress for the
period of time that is defined in the Options file. See also license timeout.
JRE (Java Runtime Environment) A program that is required to run Java
programs. This program must be installed with SAMreport-Lite.
license file A file used with FLEXnet that controls the number of available
seats. This file must be in ASCII plain text format.
license server A server that contains the Network License Manager.
license timeout A feature that allows you to set up a timeout period on your
license server to automatically return an idle license to the server so that it is
available for use again.
licpath.lic In both single and redundant server configurations, the file used to
point the workstation to the FLEXnet license server. Licpath.lic is located in
the root installation folder.
88 | Glossary
lmgrd.exe The license manager daemon. This daemon handles the original
contact with the program, and then passes the connection to the vendor
daemon, adskflex.exe.
lmtools.exe A graphical user interface utility used to administer the FLEXnet
license technology. (Lmutil.exe is the command line version of this utility.)
lmutil.exe A command line utility used to administer the FLEXnet license
technology. (Lmtools.exe is the graphical user interface version of this utility.)
master daemon See lmgrd.exe.
Network License Activation utility A utility that allows network
administrators to license and authorize network versions of an Autodesk
product over the Internet.
Page 95

network license installation A type of installation that requires you to install
and run the Network License Manager from a network server. You must install
and configure the Network License Manager before clients can run the
Autodesk product.
Network License Manager The technology used by Autodesk for network
license management.
Options file The file used by FLEXnet to control license manager parameters,
such as reserving licenses and creating report logs used with SAMreport-Lite.
physical address See host ID.
redundant server A license server configuration option in which three servers
are used to administer licenses. The redundant servers share a license file and
a pool of licenses. The redundant server pool remains functional as long as
two of the three servers are running and communicating with each other.
report log file A file used with FLEXnet and SAMreport-Lite. This log file
provides information about network license usage. The Options file creates
the report log.
SAMreport-Lite A version of Acresso Softwares's SAMreport tool.
SAMreport-Lite is included on the Autodesk product discs.
vendor daemon See adskflex.exe.
workstation A desktop computer used by an individual user on a network.
Glossary | 89
Page 96

90
Page 97

License Borrowing
91
Page 98

92
Page 99

License Borrowing
11
If you are running a network-licensed version of the program, you can borrow a license from
a license server to use the program for a specified time when your computer is not connected
to the network.
NOTE If you have a stand-alone version of the program, you cannot borrow a license.
To check your license type, click Help menu ➤ About ➤ Product Information. In the
Product Information dialog box, view your product license type.
Overview
If you are using a network-licensed version of your Autodesk product and your
network administrator supports the license borrowing feature, you can borrow
a product license from your network license server to use the program when
your computer is not connected to the network. Your license is automatically
returned to the license server at the end of the day on the return date you set
when you borrowed the license. You can also return a license early.
NOTE There is a limit to the number of licenses available for borrowing. If you try
to borrow a license and are notified that no licenses are available, all network licenses
may already be borrowed by other users. If you are unable to borrow a license, see
your network administrator for help.
Borrow a License
You can run the program when your computer is not connected to the network
until your license-borrowing period ends. If you don't remember the date that
a license expires, you can check the date by placing your cursor over the
93
Page 100

Borrowing icon in the program's status tray or by clicking Help ➤ About and
using the Product Information dialog box.
When the license-borrowing period expires, the borrowed license is
automatically returned to the license server. Once your computer is
reconnected to the network, you can run the program from the network or
borrow a license again.
Interaction with Other License-Borrowing Tools
Using the license borrowing feature in the program is the recommended way
to borrow a license; however, some third-party borrowing tools may also be
available to you. These tools are not supported or compatible with the license
borrowing feature in the program. Other third-party or legacy
license-borrowing tools that may be available to you are the Autodesk License
Borrowing utility (shipped with Autodesk products) and the borrowing feature
in lmtools.exe, a component of the Autodesk Network License Manager.
If another license-borrowing tool is active when you attempt to use the license
borrowing feature, you should proceed as follows to borrow a license for the
program:
■ If you run the Autodesk License Borrowing utility that shipped with your
Autodesk product and then turn on the borrowing flag for the Adskflex
option or the All option, a license can be borrowed when you start the
program. However, you cannot return a license until you exit and then
restart the program.
■ If borrowing is set in lmtools.exe for all products, you can either (a) use the
other tool to borrow licenses for the program or (b) stop the borrowing
process in lmtools.exe and then use the license borrowing feature in the
program.
■ If borrowing is set in lmtools.exe for non-Autodesk products only, you must
stop the borrowing process in lmtools.exe. You can then use the license
borrowing feature to borrow licenses for your Autodesk product. If you do
not stop the borrowing process in lmtools.exe, the license borrowing feature
will not function.
To borrow a license using the Tools menu
NOTE AutoCAD-based products only.
1 Click Tools menu ➤ License Borrowing ➤ Borrow License.
94 | Chapter 11 License Borrowing
 Loading...