

Autodesk 15606-011408-9330 - MAPGUIDE R6.3 SITE LIC-UPG R6, 15606-011408-9300 - MAPGUIDE R6.3 UPG, MapGuide 6 Developer's Manual
Page 1
Autodesk MapGuide® Release 6
Developer’s Guide
15306-010000-5060 October 2001
Page 2

Copyright © 2001 Autodesk, Inc.
All Rights Reserved
AUTODESK, INC. MAKES NO WARRANTY, EITHER EXPRESSED OR IMPLIED, INCLUDING BUT NOT LIMITED TO ANY
IMPLIED WARRANTIES OF MERCHANTABILITY OR FITNESS FOR A PARTICULAR PURPOSE, REGARDING THESE MATERIALS
AND MAKES SUCH MATERIALS AVAILABLE SOLELY ON AN “AS-IS” BASIS.
IN NO EVENT SHALL AUTODESK, INC. BE LIABLE TO ANYONE FOR SPECIAL, COLLATERAL, INCIDENTAL, OR
CONSEQUENTIAL DAMAGES IN CONNECTION WITH OR ARISING OUT OF PURCHASE OR USE OF THESE MATERIALS. THE
SOLE AND EXCLUSIVE LIABILITY TO AUTODESK, INC., REGARDLESS OF THE FORM OF ACTION, SHALL NOT EXCEED THE
PURCHASE PRICE OF THE MATERIALS DESCRIBED HEREIN.
Autodesk, Inc. reserves the right to revise and improve its products as it sees fit. This publication describes the state of this product
at the time of its publication, and may not reflect the product at all times in the future.
Autodesk Trademarks
The following are registered trademarks of Autodesk, Inc., in the USA and/or other countries: 3D Plan, 3D Props, 3D Studio, 3D
Studio MAX, 3D Studio VIZ, 3DSurfer, ActiveShapes, ActiveShapes (logo), Actrix, ADE, ADI, Advanced Modeling Extension, AEC
Authority (logo), AEC-X, AME, Animator Pro, Animator Studio, ATC, AUGI, AutoCAD, AutoCAD Data Extension, AutoCAD
Development System, AutoCAD LT, AutoCAD Map, Autodesk, Autodesk Animator, Autodesk (logo), Autodesk MapGuide,
Autodesk University, Autodesk View, Autodesk WalkThrough, Autodesk World, AutoLISP, AutoShade, AutoSketch, AutoSurf,
AutoVision, Biped, bringing information down to earth, CAD Overlay, Character Studio, Design Companion, Design Your World,
Design Your World (logo), Drafix, Education by Design, Generic, Generic 3D Drafting, Generic CADD, Generic Software,
Geodyssey, Heidi, HOOPS, Hyperwire, Inside Track, Kinetix, MaterialSpec, Mechanical Desktop, Multimedia Explorer, NAAUG,
ObjectARX, Office Series, Opus, PeopleTracker, Physique, Planix, Powered with Autodesk Technology, Powered with Autodesk
Technology (logo), RadioRay, Rastation, Softdesk, Softdesk (logo), Solution 3000, Texture Universe, The AEC Authority, The Auto
Architect, TinkerTech, VISION*, WHIP!, WHIP! (logo), Woodbourne, WorkCenter, and World-Creating Toolkit.
The following are trademarks of Autodesk, Inc., in the USA and/or other countries: 3D on the PC, 3ds max, ACAD, Advanced User
Interface, AME Link, Animation Partner, Animation Player, Animation Pro Player, A Studio in Every Computer, ATLAST, AutoArchitect, AutoCAD Architectural Desktop, AutoCAD Architectural Desktop Learning Assistance, AutoCAD Learning Assistance,
AutoCAD LT Learning Assistance, AutoCAD Simulator, AutoCAD SQL Extension, AutoCAD SQL Interface, Autodesk Animator
Clips, Autodesk Animator Theatre, Autodesk Device Interface, Autodesk Inventor, Autodesk PhotoEDIT, Autodesk Software
Developer's Kit, Autodesk Streamline, Autodesk View DwgX, AutoFlix, AutoSnap, AutoTrack, Built with ObjectARX (logo),
ClearScale, Colour Warper, Combustion, Concept Studio, Content Explorer, cornerStone Toolkit, Dancing Baby (image), Design
2000 (logo), DesignCenter, Design Doctor, Designer's Toolkit, DesignProf, DesignServer, DWG Linking, DXF, Extending the
Design Team, FLI, FLIC, GDX Driver, Generic 3D, gmax, Heads-up Design, Home Series, i-drop, Kinetix (logo), ObjectDBX,
onscreen onair online, Ooga-Chaka, Photo Landscape, Photoscape, Plasma, Plugs and Sockets, PolarSnap, Pro Landscape,
Reactor, Real-Time Roto, Render Queue, SchoolBox, Simply Smarter Diagramming, SketchTools, Sparks, Suddenly Everything
Clicks, Supportdesk, The Dancing Baby, Transform Ideas Into Reality, Visual LISP, Visual Syllabus, VIZable, Volo, and Where Design
Connects.
Third Party Trademarks
Apple and Macintosh are trademarks of Apple Computer, Inc., registered in the U.S. and other countries.
ColdFusion is a registered trademark of Macromedia, Inc. All rights reserved.
Java and all Java-based trademarks and logos are trademarks or registered trademarks of Sun Microsystems, Inc. in the United
States and other countries.
Netscape and Netscape Navigator are registered trademarks of Netscape Communications Corporation in the United States and
other countries.
Microsoft and ActiveX are registered trademarks of Microsoft Corporation in the United States and/or other countries.
All other brand names, product names or trademarks belong to their respective holders.
Third Party Software Program Credits
Copyright © 2001 Microsoft Corporation. All rights reserved.
Portions of this product are distributed under license from D.C. Micro Development, © Copyright D.C. Micro Development. All
rights reserved.
InstallShield ™ Copyright © 2001 InstallShield Software Corporation. All rights reserved.
GOVERNMENT USE
Use, duplication, or disclosure by the U. S. Government is subject to restrictions as set forth in FAR 12.212 (Commercial Computer
Software-Restricted Rights) and DFAR 227.7202 (Rights in Technical Data and Computer Software), as applicable.
12345678910
Page 3

Contents
Chapter 1 Introduction . . . . . . . . . . . . . . . . . 7
What’s New in Release 6 . . . . . . . . . . . . . . . . 8
Autodesk DWG Data Source Support . . . . . . . . . . 8
Enhanced Support for Map Redraw Operations . . . . . . . 8
Symbol Bitmap Support . . . . . . . . . . . . . . . 8
Map Mode Retrieval Support . . . . . . . . . . . . . 9
Java Edition Platform Support Changes . . . . . . . . . . 9
Before You Begin . . . . . . . . . . . . . . . . . . . 9
Familiarity with Autodesk MapGuide . . . . . . . . . . 9
Programming and Scripting Languages . . . . . . . . . 10
Your Audience. . . . . . . . . . . . . . . . . 10
User Help . . . . . . . . . . . . . . . . . . 11
About the Autodesk MapGuide Viewer API . . . . . . . . . 11
Autodesk MapGuide Viewer API Help . . . . . . . . . 13
Autodesk MapGuide Web Site . . . . . . . . . . . . 13
What Is an Autodesk MapGuide Viewer API Application . . . . . 13
Viewing Maps . . . . . . . . . . . . . . . . . 14
Querying and Updating Data . . . . . . . . . . . . 14
Creating an Autodesk MapGuide Viewer API Application . . . . . 15
Chapter 2 Displaying Maps . . . . . . . . . . . . . . . . 17
Overview . . . . . . . . . . . . . . . . . . . . 18
Map Display for ActiveX Control and Plug-In. . . . . . . . . 20
Linking to a Map . . . . . . . . . . . . . . . . 20
Embedding a Map . . . . . . . . . . . . . . . 22
Map Display for the Java Edition . . . . . . . . . . . . . 24
Map Display for Autodesk MapGuide LiteView . . . . . . . . 26
Installing Viewers on Client Machines . . . . . . . . . . . 27
Chapter 3 Accessing Maps . . . . . . . . . . . . . . . . 31
Overview . . . . . . . . . . . . . . . . . . . . 32
Map Access for ActiveX Control and Plug-In . . . . . . . . . 32
Required Software for Autodesk MapGuide Viewer Plug-In. . . 34
iii
Page 4

Map Access for the Java Edition . . . . . . . . . . . . . 35
Map Access from HTML . . . . . . . . . . . . . . 35
Map Access Using Java . . . . . . . . . . . . . . 38
Required Software for the Java Edition . . . . . . . . . 39
Java Edition Differences. . . . . . . . . . . . . . 39
Communicating with the Plug-In from a Java Applet . . . . . . 40
Accessing Secure Data . . . . . . . . . . . . . . . . 43
Handling Busy State and Map Refresh . . . . . . . . . . . 43
About the Busy State . . . . . . . . . . . . . . . 43
Controlling Map Refresh Operations. . . . . . . . . . 45
Handling Errors . . . . . . . . . . . . . . . . . . 47
Getting Error Codes . . . . . . . . . . . . . . . 47
Checking for Incorrect Argument Types . . . . . . . . 48
Debugging an Application . . . . . . . . . . . . . . . 48
Chapter 4 Working with Map Layers, Map Features, and Printing . . . 49
Overview . . . . . . . . . . . . . . . . . . . . 50
Working with Map Layers . . . . . . . . . . . . . . . 50
Counting Map Layers . . . . . . . . . . . . . . 50
Listing Map Layers . . . . . . . . . . . . . . . 51
Adding a Map Layer . . . . . . . . . . . . . . . 53
Linking Map Layers . . . . . . . . . . . . . . . 53
Toggling Map Layer Visibility On and Off . . . . . . . . 55
Working with Map Features . . . . . . . . . . . . . . 56
Getting Keys of Selected Map Features . . . . . . . . . 56
Getting Coordinates of a Selected Map Feature . . . . . . 58
Invoking Select Radius Mode . . . . . . . . . . . . 61
Zooming In on Selected Features . . . . . . . . . . . 61
Counting Map Features . . . . . . . . . . . . . . 62
Working with Printing . . . . . . . . . . . . . . . . 64
Setting the Print Priority . . . . . . . . . . . . . 65
Enabling the Print Events . . . . . . . . . . . . . 66
Positioning Page Elements with Page Coordinate System Units . 67
Adding Custom Page Elements . . . . . . . . . . . 68
Chapter 5 Handling Events . . . . . . . . . . . . . . . . 69
Overview . . . . . . . . . . . . . . . . . . . . 70
Working with Event Handlers. . . . . . . . . . . . . . 70
Browser Differences . . . . . . . . . . . . . . . 71
Setting Up Event Handlers . . . . . . . . . . . . . . . 72
Plug-In and Java Edition Event Handlers . . . . . . . . 72
ActiveX Control Event Handlers . . . . . . . . . . . 75
Plug-In and ActiveX Control Event Handlers . . . . . . . 75
iv | Contents
Page 5

Writing Event Handlers . . . . . . . . . . . . . . . . 78
Page Setup Event Handler Example. . . . . . . . . . . 79
Print Event Handler Example . . . . . . . . . . . . 81
Plug-In Event Handler Example . . . . . . . . . . . . 83
Chapter 6 Using Reports to Query and Update Data Sources . . . . . 85
Overview . . . . . . . . . . . . . . . . . . . . . 86
How Reports Are Generated . . . . . . . . . . . . . 86
Specifying the Report Script . . . . . . . . . . . . . 86
The Request . . . . . . . . . . . . . . . . . . 87
Launching the Report . . . . . . . . . . . . . . . 87
Introducing ColdFusion and ASP . . . . . . . . . . . . . 88
Creating Report Scripts with ColdFusion . . . . . . . . . . . 89
Listing File Contents with ColdFusion. . . . . . . . . . 89
Querying and Displaying Data via the Map with ColdFusion . . 92
Modifying a Database via the Map with ColdFusion . . . . 102
Creating Report Scripts with ASP . . . . . . . . . . . . 109
Summary of ASP Objects, Components, and Events . . . . 110
Listing File Contents with ASP . . . . . . . . . . . 111
Querying and Displaying Data via the Map with ASP . . . . 115
Modifying a Database via the Map with ASP . . . . . . . 125
Chapter 7 Applications . . . . . . . . . . . . . . . . . 135
Overview . . . . . . . . . . . . . . . . . . . . 136
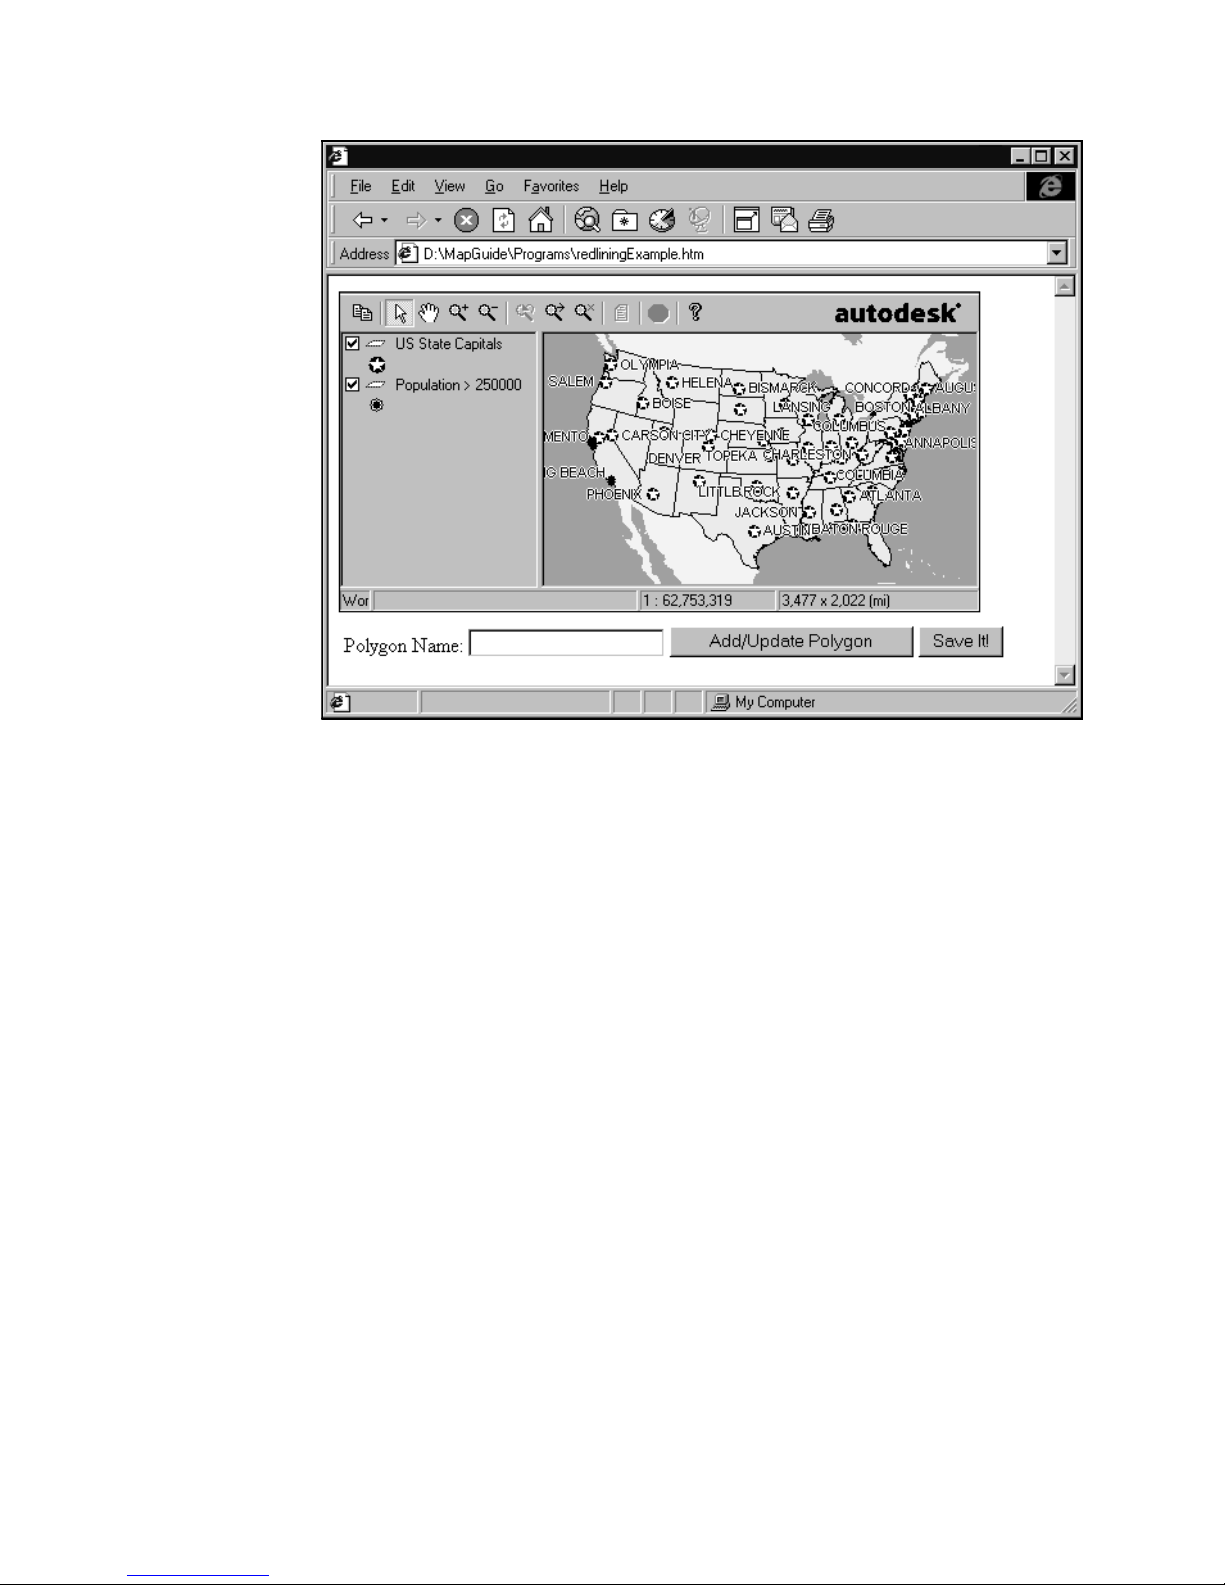
Custom Redlining Application . . . . . . . . . . . . . 136
Redlining Example Code . . . . . . . . . . . . . 137
Municipal Application . . . . . . . . . . . . . . . 140
Municipal Application Example Code . . . . . . . . . 141
Facility Management Application . . . . . . . . . . . . 156
Facilities Management Application Example Code . . . . . 157
DWG Filtering Application . . . . . . . . . . . . . . 164
Understanding Layers in Autodesk MapGuide . . . . . . 165
Changing Map Layer Data Source Properties . . . . . . . 165
DWG Filtering Application Example Code . . . . . . . 166
SDF Component Toolkit Applications . . . . . . . . . . . 171
Updating SDF Files—an ASP Example . . . . . . . . . 171
Converting to an SDF File—a Visual Basic Example . . . . 181
Getting SDF File Information—a Visual Basic Example . . . 188
Copying an SDF File—a Visual Basic Example . . . . . . 196
Index . . . . . . . . . . . . . . . . . . . . . . . . 203
Contents | v
Page 6

vi
Page 7

Introduction
1
The Autodesk MapGuide® product suite provides you
with all the tools you need to create, publish, and display
maps and associated attribute data over the Web. The
Autodesk MapGuide Developer’s Guide is a complete guide
to Autodesk MapGuide customization and development
features. This chapter introduces Autodesk MapGuide
application development, and describes how to use
Autodesk MapGuide
applications.
®
Viewer API to develop such
■ What’s new in Release 6
■ Before you begin
■ About the Autodesk
MapGuide Viewer API
■ What is an Autodesk
MapGuide Viewer API
application
■ Creating an Autodesk
MapGuide Viewer API
application
7
Page 8

What’s New in Release 6
This release of the Autodesk MapGuide Viewer API includes one new object
and several new and changed methods and properties to support new and
enhanced features. For detailed information about the new object, and the
methods and properties that were added or changed, choose Help ➤
Contents ➤ What’s New in the Autodesk MapGuide Viewer API Help.
Autodesk DWG Data Source Support
Several changes and additions have been made to Autodesk MapGuide and
the Autodesk MapGuide Viewer API to support Autodesk drawing (DWG)
data sources. The most significant addition is a new MGDwgDataSources
object with several methods and properties to get and set DWG values of
Autodesk MapGuide map layers. Also, a new MGMapLayerSetup method
(getDwgDataSources) and a property (MGDwgDataSources) were added.
Two MGMapLayerSetup methods (getDataFile and setDataFile)
methods and one property (DataFile) were also changed to support DWG
data sources. See “DWG Filtering Application” on page 164 for an example
of working with DWG data sources.
Enhanced Support for Map Redraw Operations
Two new MGMap methods (getIntermediateUpdatesEnabled and
setIntermediateUpdatesEnabled) and a new property
(IntermediateUpdatesEnabled) were added to allow more control over
how frequently, and under what conditions, the Autodesk MapGuide Viewer
redraws a map. Maps are now updated every 1.5 seconds by default. This
allows the end user to view changes to the map as it is being drawn instead
of waiting until the entire map is rendered. See “Handling Busy State and
Map Refresh” on page 43 for information about controlling map refresh
operations.
Symbol Bitmap Support
Changes were made to two MGSymbolAttr methods (setRotation and
setSymbol) and two properties (Rotation and Symbol) to support bitmaps
in symbols.
8 | Chapter 1 Introduction
Page 9

Map Mode Retrieval Support
One new MGMap method (getMode) and one new property (Mode) were
added to allow retrieval of a map’s mode, such as zoom, pan, and so on.
Java Edition Platform Support Changes
Autodesk MapGuide Viewer, Java™ Edition does not run if you are using
Microsoft
2.2. You need to upgrade to MRJ 2.2.4 or later.
For a complete list of supported platforms, including browsers and operating
systems, refer to “Autodesk MapGuide Viewer Requirements” in Chapter 1,
“Introduction,” in the Autodesk MapGuide User’s Guide.
®
Internet Explorer® 5.x with Macintosh® Runtime for Java (MRJ)
Before You Begin
Before you can begin developing with Autodesk MapGuide, you need to
know how to use Autodesk MapGuide and the programming and scripting
languages you use to create Autodesk MapGuide web applications. Equally
important, you need to know who your users are and what they need, as well
as how to deliver help about your applications.
Familiarity with Autodesk MapGuide
You need to be very familiar with Autodesk MapGuide. In particular, you
should read the first few chapters of the Autodesk MapGuide User’s Guide to
make sure you understand the product, especially emphasizing the following
sections:
■ Chapter 2, “Understanding Autodesk MapGuide.” Read this chapter care-
fully, with particular attention to the sections on how the components
work together, application development components, and what application development is.
■ Chapter 3, “Designing Your System.” Pay particular attention to the sec-
tions on security, architecture and performance, and choosing a
Viewer/browser environment.
The more you understand about the Autodesk MapGuide components and
how they work together, the easier it will be for you to comprehend the
examples in this book and come up with unique solutions on your own.
Before You Begin | 9
Page 10

Programming and Scripting Languages
You’ll need to be familiar with one or more of the following programming
languages or toolkits to develop Autodesk MapGuide web applications.
MapGuide applications can include a variety of capabilities including
customized interface (toolbar, etc.), report generation, processing of
redlining markup, server-side processing of SDF files, Dynamic Map
Authoring, and more.
■ Use Java, JavaScript, JScript, Visual Basic, or VBScript with the Autodesk
MapGuide Viewer API to develop applications that programmatically
access and control Autodesk MapGuide Viewer. This document covers
what you need to know to develop such applications.
■ Use Macromedia
another third-party application to create custom reports. For information
about creating reports, see Chapter 6, “Using Reports to Query and Update
Data Sources.”
®
ColdFusion®, Microsoft® Active Server Pa ges (ASP), or
■ Use the SDF Component Toolkit to create server-side scripts that dynam-
ically update SDF files posted on an Autodesk MapGuide
®
Server. For more
information about using this toolkit, see “SDF Component Toolkit Applications” on page 171 and refer to the SDF Component Toolkit Help.
■ Use the Autodesk MapGuide Viewer API to process redlining data and
update your data sources. For more information about working with
redlining data, see “Custom Redlining Application” on page 136.
■ Use the Dynamic Authoring Toolkit to build XML-based applications for
dynamic map solutions. For more information about this toolkit, refer to
the Dynamic Authoring Toolkit Developer’s Guide.
Your Audience
As with all development, the most important aspect of designing your application is asking yourself, “What do my users need?” Talk to the people who
will be using your application and find out how they will be using it. What
tasks will they want to perform? Will they need redlining? Are they computer
savvy, or will you need to guide them through basic usage of your application? Do they have much domain knowledge? It’s critical that you find out
what tasks your users will need to perform, as well as their knowledge of
those tasks.
10 | Chapter 1 Introduction
Page 11

User Help
If you want to provide information about your application that users can
readily access, you can develop your own set of Help pages. You can then set
up the map to point to your customized Help system instead of the default
Autodesk MapGuide Viewer Help when users click the Help button or access
Help from the popup menu. For more information, refer to the Autodesk
MapGuide Help.
About the Autodesk MapGuide Viewer API
The Autodesk MapGuide Viewer API allows you to customize the way in
which someone using Autodesk MapGuide Viewer interacts with a map. You
can also create a stand-alone version of the Autodesk MapGuide Viewer that
displays maps without the use of a Web browser.
Autodesk MapGuide Viewer comes in three different types: Autodesk
MapGuide Viewer ActiveX Control, Autodesk MapGuide Viewer Plug-In, and
Autodesk MapGuide Viewer, Java Edition. These Viewer types are sometimes
referred to as Viewer versions within the Help and the documentation. Be
careful to not confuse this usage with Autodesk MapGuide release versions.
Each Autodesk MapGuide Viewer type exposes a programming interface that
you can use to programmatically access and manipulate its functionality.
For example, you could create an application that displays a map in one
frame and a form in another. In the form, you might have controls such as
buttons and list boxes that use API methods to alter or redraw the map. Or,
you might put the map and controls on a single page, as shown in the
following illustration. This application consists of a map, a form listing map
features, and a number of custom image buttons on the HTML page. Users
can select a city from the list box, and then click a button to zoom to that
city.
About the Autodesk MapGuide Viewer API | 11
Page 12

Sample application with custom buttons
You could also code your application to update the form, display status information, or change the appearance of buttons as users select or double-click
specific features on the map. This two-way interaction between the map and
controls on the Web page allows you to create very powerful applications.
In this context, an Autodesk MapGuide Viewer application is a Web page
containing one or more maps, each of which is displayed in a separate
instance of the Autodesk MapGuide Viewer. The Web page can also have
frames, buttons, controls, graphics, and so on for querying and controlling
the map and its data. In most cases, you will write your application code
within one or more HTML pages using one of the supported languages (refer
to “Choosing a Viewer/Browser Environment” in the Autodesk MapGuide
User’s Guide).
12 | Chapter 1 Introduction
Page 13

Autodesk MapGuide Viewer API Help
For complete information about the Autodesk MapGuide Viewer API, refer to
Autodesk MapGuide Viewer API Help, available from the Autodesk MapGuide
CD and the Autodesk MapGuide documentation page at the following web
site: www.autodesk.com/mapguidedocs. The Autodesk MapGuide Viewer API
Help provides descriptions of all of the Autodesk MapGuide Viewer API
objects, methods, properties, and events, and it includes sample applications
that you can use to get a quick start.
Autodesk MapGuide Web Site
You can find additional information about Autodesk MapGuide development on the Autodesk MapGuide Web site at www.autodesk.com/mapguide.
The site provides many examples of applications developed with Autodesk
MapGuide, both demo applications and real customer sites. You will also
find links to resources, such as Autodesk MapGuide Viewer API Help, API examples, general product documentation, and discussion groups.
What Is an Autodesk MapGuide Viewer API
Application
An Autodesk MapGuide Viewer API application can be as simple as an HTML
page that displays an embedded map window file (MWF), or it can be as
complex as a CGI application, coded in C++, that modifies data files on the
server and refreshes the browsers of everyone viewing the map. Usually it is
something between the two, such as a map embedded in a Web page with
buttons and other controls on it that interact with the map.
The following sections describe several of the tasks your Autodesk MapGuide
application can perform.
What Is an Autodesk MapGuide Viewer API Application | 13
Page 14

Viewing Maps
The m ost co m m on developm en t goal is t o allow Auto desk Map G uide Vie w er
users to view and interact with maps. You can do this by embedding a map
in an HTML page, in which case the Autodesk MapGuide Viewer runs within
the user’s Web browser to display the map, or you can run the Autodesk
MapGuide Viewer from within a stand-alone application that you create.
With either approach, you will use the Autodesk MapGuide Viewer API to
interact with the map. For example, you might create a button that refreshes
a map or add text boxes that allow the user to add data to the map.
Querying and Updating Data
Beyond viewing maps, users want to retrieve data to answer questions. This
includes selecting map features and running reports on them, such as
selecting power poles and seeing when they were last serviced. You set up
these reports using Macromedia ColdFusion, Microsoft Active Server Pages
(ASP), or another server-side scripting language. Additionally, you can use
these scripts to enable the user to update the data. For example, you could
display the date of last service in a text field, where the technician in the field
could update it. Your script would then take the technician’s date and update
the source database, so that all other technicians viewing that power pole on
the map would see the new date of last service. For more information about
reports, see Chapter 6, “Using Reports to Query and Update Data Sources.”
You can also enable users to mark up the maps to edit the spatial data, such
as correcting the location of a fire hydrant by drawing its correct location on
the map. This process is called redlining. Autodesk MapGuide provides APIs
that allow you to add redlining functionality to your map. You can then
create a server-side script that retrieves the redlining data, processes it, and
updates the source data. For more information about redlining, see “Custom
Redlining Application” on page 136. If your source data is in SDF files, you
can use the SDF Component Toolkit to update the SDFs directly when
redlining. For more information about working with SDF files, see “SDF
Component Toolkit Applications” on page 171.
14 | Chapter 1 Introduction
Page 15

Creating an Autodesk MapGuide Viewer API
Application
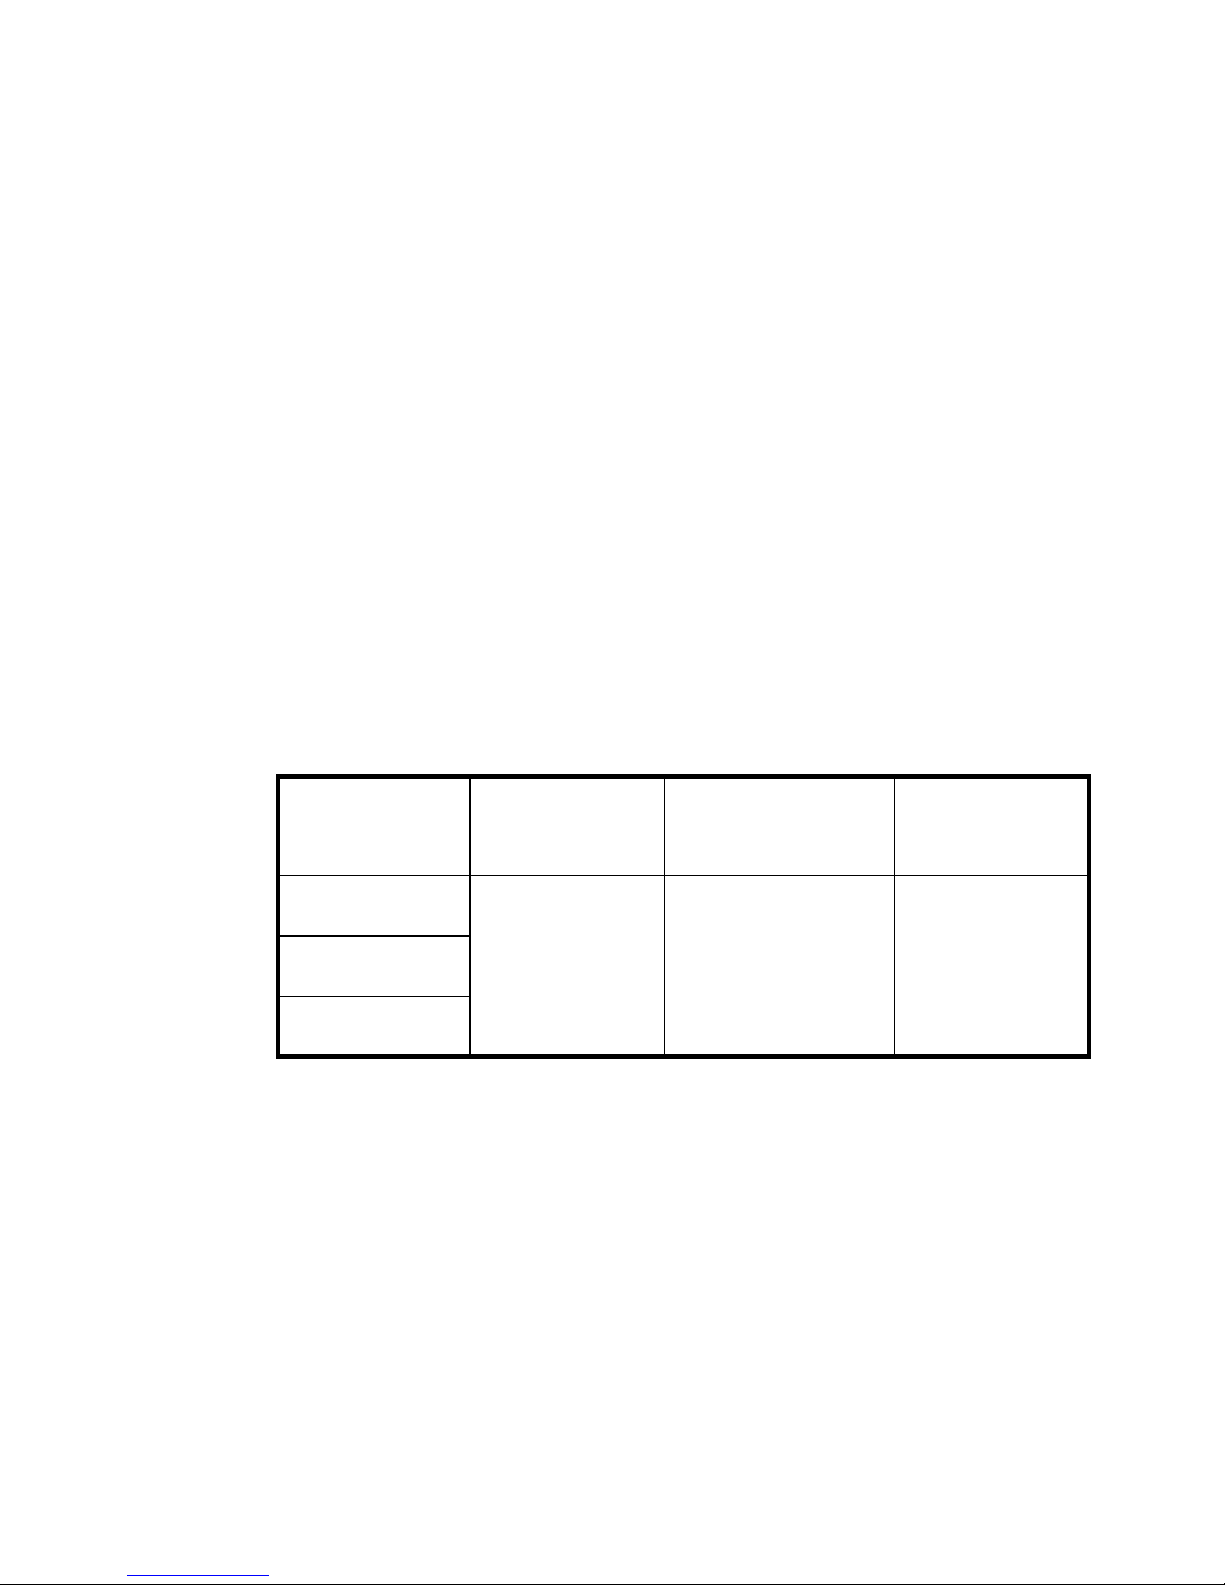
The following table summarizes tasks involved when creating an Autodesk
MapGuide Viewer API application. For examples of real-world applications,
also see Chapter 7, “Applications.”
Application Type Task For more information...
Simple
Applications
Advanced
Applications
Display maps by either
linking to or embedding
them in an HTML page
Programmatically access
and manipulate maps,
map layers, and map
features
Respond to Autodesk
MapGuide Viewer events
Query and update data
sources using reports
See Chapter 2, “Displaying
Maps”
See Chapter 3, “Accessing
Maps” and Chapter 4, “Work-
ing with Map Layers, Map Features, and Printing”
See Chapter 5, “Handling
Events”
See Chapter 6, “Using Reports
to Query and Update Data
Sources”
Creating an Autodesk MapGuide Viewer API Application | 15
Page 16

16
Page 17

Displaying Maps
2
This chapter describes how to link to or embed a map in
a Web page for display in Autodesk MapGuide
ActiveX Control, Autodesk MapGuide Viewer Plug-In, or
Autodesk MapGuide Viewer, Java Edition. Once your
application can display a map, you can access the map
programmatically, as described in Chapter 3, “Accessing
Maps.”
®
Viewer
■ Overview
■ Map display for ActiveX
Control and Plug-In
■ Map display for the Java
Edition
■ Map display for Autodesk
MapGuide LiteView
■ Installing Viewers on client
machines
17
Page 18

Overview
The process of displaying a map involves linking to or embedding a specific
map in a Web page. The Autodesk MapGuide Viewer installed on each user
machine runs automatically to display the map. This means that your users
can view the same map with one of three Autodesk MapGuide Viewers
(Autodesk MapGuide Viewer ActiveX Control, Autodesk MapGuide Viewer
Plug-In, or Autodesk MapGuide Viewer, Java Edition), depending on which
ones you support. If your users are unable to download or install an Autodesk
MapGuide Viewer, or if they do not need query or more advanced functionality provided by Autodesk MapGuide Viewers, they can use Autodesk
MapGuide
tion, see “Map Display for Autodesk MapGuide LiteView” on page 26.
The Autodesk MapGuide Viewers you choose to support depend on the
browser operating environment of your users. The programming or scripting
languages you use to develop your applications depend on the Autodesk
MapGuide Viewers you support. For a detailed discussion of these options,
refer to “Choosing a Viewer/Browser Environment” in the Autodesk
MapGuide User’s Guide.
The following table summarizes the combinations supported by Autodesk
MapGuide.
®
LiteView instead. For more information about this viewing solu-
18 | Chapter 2 Displaying Maps
Page 19
Browser/Viewer Configurations
Operating
System
Windows
Browser Client-Side
Viewer
Internet Explorer Autodesk
MapGuide Viewer
ActiveX Control
Autodesk
MapGuide Viewer,
Java Edition
Netscape
Navigator
None
(stand-alone
application)
Autodesk
MapGuide Viewer
Plug-In
Autodesk
MapGuide Viewer,
Java Edition
Autodesk
MapGuide Viewer
ActiveX Control
Programming
or Scripting
Language
HTML, VBScript,
JScript, JavaScript
HTML, JScript,
JavaScript, Java
HTML, JavaScript
HTML, JavaScript,
Java
Visual Basic
Mac OS
Solaris
Internet Explorer Autodesk
MapGuide Viewer,
Java Edition
Netscape
Navigator
Autodesk
MapGuide Viewer,
Java Edition
HTML, Java
HTML, JavaScript,
Java
Overview | 19
Page 20
Map Display for ActiveX Control and Plug-In
To display your map with Autodesk MapGuide Viewer ActiveX Control
and/or Autodesk MapGuide Viewer Plug-In, you can either:
■ Link to the map, or
■ Embed the map (the map runs inside a Web browser)
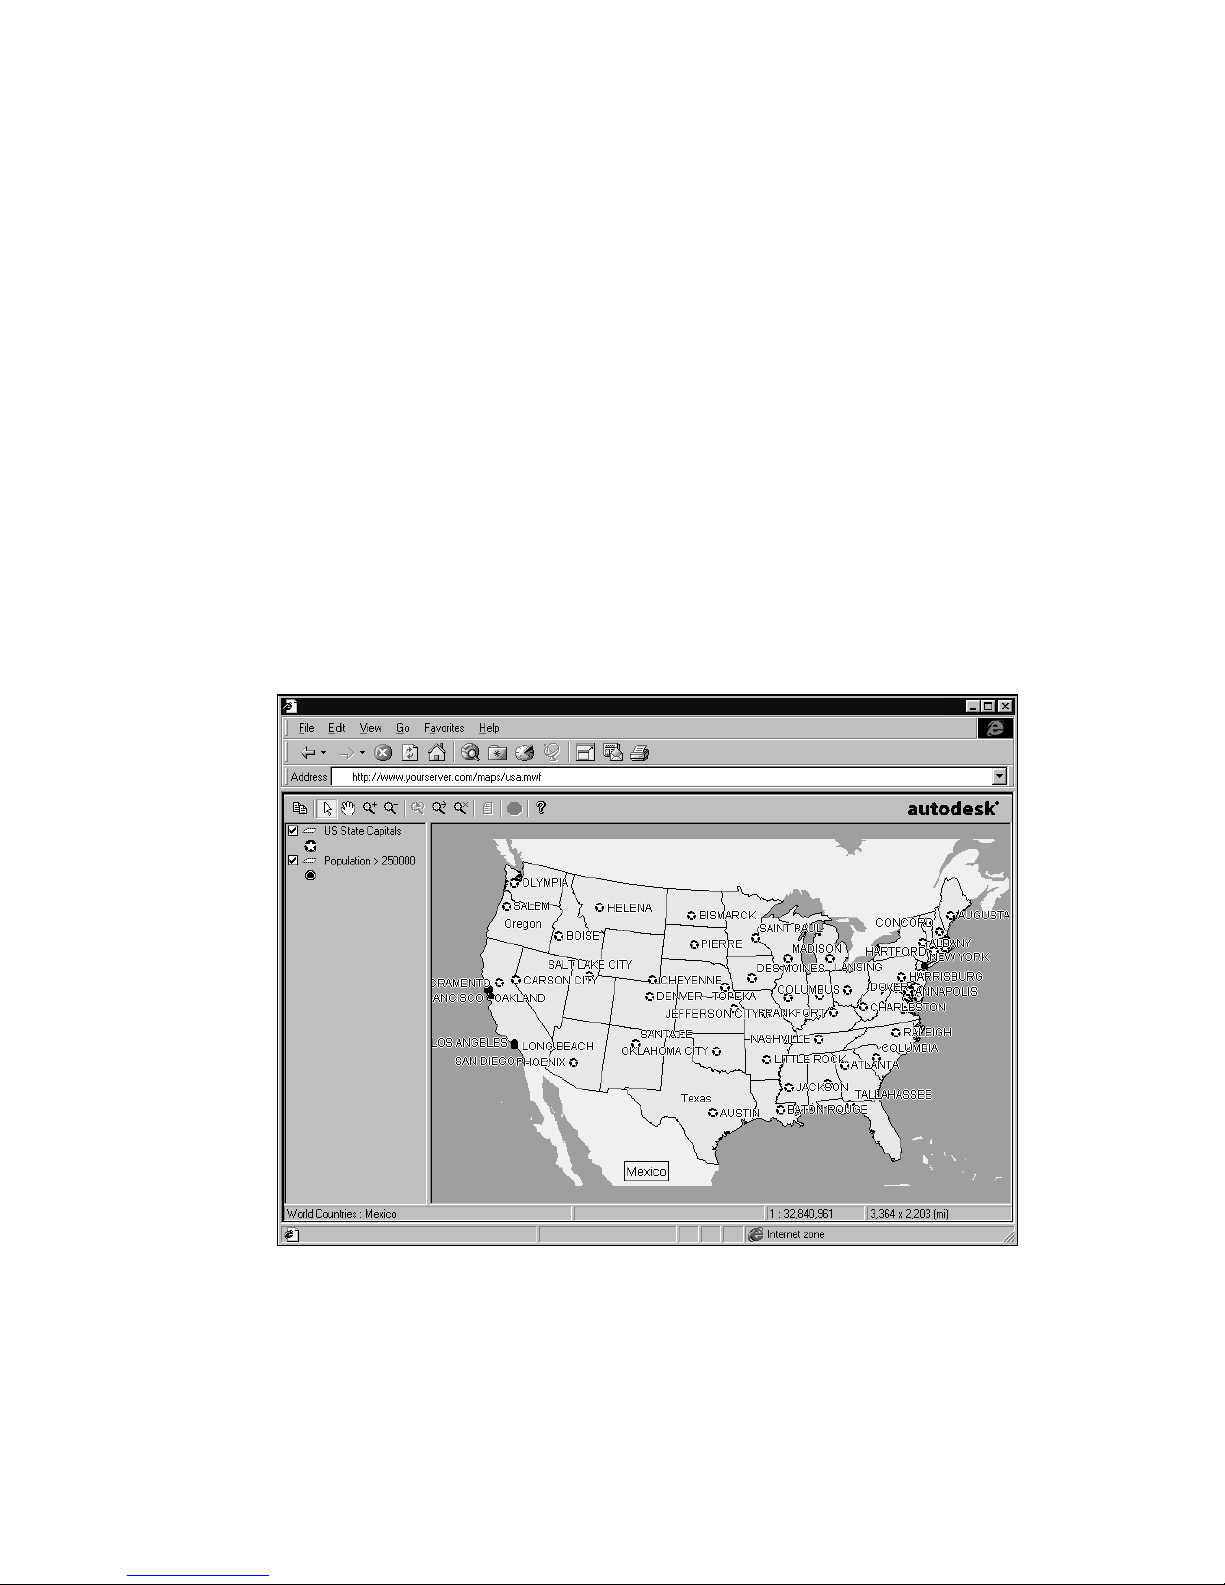
Linking to a Map
You can display a map by creating a link to the map from an HTML page.
The, when the user clicks the link, the map displays full screen. Note that the
browser displays the map by itself, not as part of an HTML page.
Create the link just like any other link in HTML, using the <A> tag with the
HREF parameter. Set the HREF value to the URL of your Autodesk MapGuide
Server, along with the maps directory alias and the MWF file for the map:
<A HREF="http://www.yourserver.com/maps/usa.mwf">United States
Map</A>
Linked map
20 | Chapter 2 Displaying Maps
Page 21

Displaying a Linked Map in a Different Window or Frame
To display the linked map in a different window or frame, use the TARGET
parameter. If necessary, open the second window or frame so that the original document can continue to be displayed. For example:
<A HREF="http://www.mapguide.com/maps/usa.mwf"
TARGET="MAPAREA">United States Map</A>
This displays the usa.mwf map in a Web browser window called MAPAREA.
The TARGET parameter can also specify the name of a frame.
Displaying a Specific Area of the Map
In an Autodesk MapGuide Viewer, you can adjust the view of the map
window so that it displays only the area you want.
To display a specific area of a map
1 Right-click over the map to display the popup menu, and then use the
Zoom commands or Pan to display the area of the map you want.
2 Right-click again, and then choose Copy ➤ As URL to copy the map’s URL
to the clipboard.
3 In your HTML document, choose Edit ➤ Paste to paste the URL into the
HREF parameter of the anchor tag. For example:
<A HREF="http://www.mapguide.com/maps/usa.mwf?Lat=37.81
&Lon=-122.37&Width=20.0&Units=Mi&ext=.mwf">United States Map</A>
This displays the San Francisco area. For a list of the parameters that control
the way the map is displayed when linked to or embedded in an HTML page,
choose Help ➤ Contents ➤ Advanced Topics ➤ URL Parameters in the
Autodesk MapGuide Viewer Help.
Map Display for ActiveX Control and Plug-In | 21
Page 22

Embedding a Map
A second way to display a map is to embed it in an HTML page. Embedding
a map displays it with the rest of the information on that page.
To embed the map, use the EMBED (for Netscape Navigator) or OBJECT (for
Microsoft Internet Explorer) tag in the page.
To ensure that both Netscape Navigator and Internet Explorer can access the
map, use both tags. For example:
<OBJECT ID="map" WIDTH=300 HEIGHT=200 CLASSID="CLSID:62789780-B74411D0-986B-00609731A21D">
<PARAM NAME="URL" VALUE="http://www.mapguide.com/maps/usa.mwf">
<EMBED SRC="http://www.mapguide.com/maps/usa.mwf" NAME="map"
WIDTH=300 HEIGHT=200>
</OBJECT>
For a list of the parameters that control the way the map is displayed when
it is linked to or embedded in an HTML page, choose Help ➤ Contents ➤
Advanced Topics ➤ URL Parameters in the Autodesk MapGuide Viewer Help. Be
sure that the values you use are the same for both the OBJECT and EMBED
parameters.
The following screen shows the embedded map.
22 | Chapter 2 Displaying Maps
Page 23
Embedded map
Embedding a Map in a Frame-Based Page
To display a map within a frame-based page, use the <FRAME> tag to reference an HTML document that embeds the map. When you display a map
within a frame, the size of the map can grow and shrink as the window is
resized. To see an example of a map within a simple frame-based HTML page,
choose Help ➤ Contents ➤ Examples Basic ➤ Simple Frameset example in
the Autodesk MapGuide Viewer API Help.
The following is an example of an HTML page for frame set layout:
<HTML>
<HEAD>
<TITLE>Frame Layout</TITLE>
</HEAD>
<FRAMESET ROWS="70%,*">
<FRAME SRC="map.htm" NAME="myFrame" SCROLLING=no
MARGINHEIGHT=0 MARGINWIDTH=0>
<FRAME SRC="list.htm" NAME="ListFrame">
</FRAMESET>
</HTML>
Map Display for ActiveX Control and Plug-In | 23
Page 24

Here is an example HTML page for map.htm referenced by the frame set:
<HTML>
<HEAD>
<TITLE>Map.htm</TITLE>
</HEAD>
<BODY>
<OBJECT ID="map" WIDTH=100% HEIGHT=100%
CLASSID="CLSID:62789780-B744-11D0-986B-00609731A21D"
CODEBASE="ftp://adeskftp.autodesk.com/webpub/mapguide/ver6/
mgaxctrl.cab#Version=6,0,x,x">
<PARAM NAME="URL" VALUE="http://www.mapguide.com/maps/usa.mwf">
<PARAM NAME="ToolBar" VALUE="OFF">
<EMBED SRC="http://www.mapguide.com/maps/usa.mwf?ToolBar=OFF"
NAME="map" WIDTH=100% HEIGHT=100% BORDER=0>
</OBJECT>
</BODY>
</HTML>
Note that in your applications, you should change the release (#Version)
number from 6,0,x,x to the actual release number of Autodesk MapGuide
you are using. You can find the release number using the Help ➤ Help About
menu command in the user interface or the MGMap.aboutDlg method.
Map Display for the Java Edition
Using Autodesk MapGuide Viewer, Java Edition, you cannot display a map
by linking to it; you must embed it. The following are ways to embed a map:
■ Embed Autodesk MapGuide Viewer, Java Edition in the HTML page where
the map is embedded (runs inside a Web browser).
■ Wrap a Java applet around Autodesk MapGuide Viewer, Java Edition (can
run inside or outside of a Web browser). For information about applet
wrappers, see “Map Access Using Java” on page 38.
If you are using Autodesk MapGuide Viewer, Java Edition, you cannot link to
a map. Instead, you must embed the map in the HTML page. To do this, use
the <APPLET> tag and be sure to enter it directly into the HTML. Do not use
document.write statements. For example, you should use:
<APPLET NAME="map" WIDTH=300...
and so on, and not use:
document.write('<APPLET');
document.write(' NAME=map');
...
Note Do not specify the height and width parameters in percentages, because
percentages are unsupported in Internet Explorer on the Macintosh.
24 | Chapter 2 Displaying Maps
Page 25

To display your map with Autodesk MapGuide Viewer, Java Edition
1 Start with the standard HTML <APPLET> tag.
2 Set the
CODE parameter to the path to the MGMapApplet.class file in the
com.autodesk.mgjava package. This package is where the API for Autodesk
MapGuide Viewer, Java Edition resides. You can find this package in the
mgjava.jar archive file, which contains all Autodesk MapGuide Viewer,
Java Edition class files for Windows, Macintosh, or Solaris systems. There
is also an mgjava.cab file for Windows only. To download these files,
choose Help ➤ Contents ➤ Plug-In/Java Edition Downloads in the
Autodesk MapGuide Viewer API Help. The MGMapApplet obj e ct provided b y
the MGMapApplet.class file implements the MGMap object interface for
Autodesk MapGuide Viewer, Java Edition. Setting the CODE parameter to
MGApplet instantiates Autodesk MapGuide Viewer, Java Edition.
3 Set the VALUE parameter to the URL of your Autodesk MapGuide Server
and the path to the MWF file for the map. For example:
<HTML>
<HEAD>
<TITLE> Autodesk MapGuide Viewer, Java Edition Example</TITLE>
</HEAD>
<BODY>
<CENTER>
<H2>Simple Invocation of Installed Autodesk MapGuide
Applet</H2>
<APPLET WIDTH=300 HEIGHT=200 ALIGN="baseline"
CODE="com/autodesk/mgjava/MGMapApplet.class">
<PARAM NAME="mwfURL"
VALUE="http://www.mapguide.com/maps/usa.mwf">
</APPLET>
</CENTER>
</BODY>
</HTML>
Map Display for the Java Edition | 25
Page 26
Map Display for Autodesk MapGuide
LiteView
Autodesk MapGuide LiteView is a platform-independent, server-side viewing
solution that delivers maps in the form of static raster images to client Web
browsers from your Web page. It is not a type of Autodesk MapGuide Viewer.
Autodesk MapGuide LiteView is useful when users need only to display the
map and do not need the more advanced queries and other functionality of
Autodesk MapGuide Viewer. Also, since LiteView is a server-side solution,
users do not have to download and install one of the Autodesk MapGuide
Viewer types to view your maps.
To display a map using Autodesk MapGuide LiteView, you send a URL
request that returns the map displayed as a raster image file in the browser.
Note that you do not use the Autodesk MapGuide Viewer API with Autodesk
MapGuide LiteView. For complete information on implementing Autodesk
MapGuide LiteView, refer to the Autodesk MapGuide LiteView Developer’s
Guide. The following table summarizes the supported configurations for
Autodesk MapGuide LiteView:
Autodesk MapGuide LiteView Configurations
Operating
System
Windows
Mac OS
Solaris
Browser Server-Side
Any browser that
supports PNG file
format
Viewing Solution
Autodesk MapGuide
LiteView
Programming
or Scripting
Language
ColdFusion (CF),
Active Server Pages
(ASP), Java Server
Pages (JSP) or Perl
26 | Chapter 2 Displaying Maps
Page 27

Installing Viewers on Client Machines
If users accessing your Web site don’t have an Autodesk MapGuide Viewer
installed on their system, they need to download one in order to view the
map you have displayed in the Web page. You can include code in your
HTML file that automatically detects whether or not the user has Autodesk
MapGuide Viewer, and then either downloads it automatically or prompts
the user to download it themselves.
To install the Autodesk MapGuide Viewer ActiveX Control
1 To install the latest version of Autodesk MapGuide Viewer ActiveX Con-
trol for Internet Explorer users, include the CODEBASE parameter to access
the ActiveX Control cabinet file, mgaxctrl.cab, in the HTML page that specifies your map. This parameter detects whether the latest version of the
Autodesk MapGuide Viewer ActiveX Control is installed. If the user does
not have the ActiveX Control or has an older version, the latest version
will be installed automatically.
In the following example, the CODEBASE parameter references the
mgaxctrl.cab file located on the Autodesk MapGuide FTP site. Alternatively, you can copy this file to your Web server and reference the file
there. You can find a copy of this file in the \ActiveXCab folder on the
Autodesk MapGuide CD:
<OBJECT ID="map" WIDTH=300 HEIGHT=200
CLASSID="CLSID:62789780-B744-11D0-986B-00609731A21D"
CODEBASE="ftp://adeskftp.autodesk.com/webpub/mapguide/ver6/
mgaxctrl.cab#Version=6,0,x,x">
<PARAM NAME="URL"
VALUE="http://www.mapguide.com/maps/usa.mwf">
<EMBED SRC="http://www.mapguide.com/maps/usa.mwf"
NAME="map" WIDTH=300 HEIGHT=200
PLUGINSPAGE="<www.autodesk.com/mapguideviewerdownload>">
</OBJECT>
Note that in your applications, you should change the release (#Version)
number from 6,0,x,x to the actual release number of Autodesk
MapGuide you are using. You can find the release number using the Help
➤ Help About menu command in the user interface or the
MGMap.aboutDlg method.
Installing Viewers on Client Machines | 27
Page 28

To install the Autodesk MapGuide Viewer Plug-In
1 To install the latest version of Autodesk MapGuide Viewer Plug-In for
Netscape Navigator users, write additional code to prompt the user to
download Autodesk MapGuide Viewer Plug-In, as follows:
To download Autodesk MapGuide Viewer Plug-In
// Call this function on a page onLoad event or frameset onLoad event
function init()
{
// For Netscape browsers, check for
// Autodesk MapGuide Viewer Plug-In
if (navigator.appName == "Netscape")
{
for(j=0;j<navigator.plugins.length;j++)
{
if (navigator.plugins[j].name == "Autodesk MapGuide")
return;
}
// If the Autodesk MapGuide Viewer Plug-In is
// not detected, display the message...
displayDownloadMsg();
return;
}
// If the Autodesk MapGuide Viewer Plug-In is installed,
// check the version by returning the API version
var version = getMap().getApiVersion();
// If the API/Plug-In version is previous to 6.0,
//display the message
if (version < "6.0")
{
displayDownloadMsg();
return;
}
}
function displayDownloadMsg()
{
// Display dialog box.
msg = "You do not have the latest version of " +
"Autodesk MapGuide Viewer. Do you want to " +
"download it now? Click OK to download or Cancel" +
"to proceed with your current Autodesk MapGuide Viewer."
// If user clicks OK, load download page from Autodesk Web site
if (confirm(msg))
top.window.location =
"www.autodesk.com/mapguideviewerdownload";
}
28 | Chapter 2 Displaying Maps
Page 29

To install the Autodesk MapGuide Viewer, Java Edition
1 To check a client machine for Autodesk MapGuide Viewer, Java Edition,
include the following applet in the HTML page that displays your map:
<APPLET
WIDTH="200"
HEIGHT="50"
CODE="CheckInstall.class"
<PARAM NAME="ClassToCheck"
VALUE="com.autodesk.mgjava.MGMapApplet">
<PARAM NAME="Installer"
VALUE="http://www.autodesk.com/mapguideviewerdownload">
</APPLET>
If Autodesk MapGuide Viewer, Java Edition is not found, the user is given
the option to download it from the Autodesk MapGuide download page.
For this code to work, the CheckInstall.class file must reside in the same
directory as the Web page that contains this code. Alternatively, you can
add a CODEBASE parameter that points to the folder where this file exists.
For a working example, choose Help ➤ Examples Advanced ➤ Java Edition
Examples ➤ Example3 in the Autodesk MapGuide Viewer API Help. For a
default Windows installation, you can find a copy of the
CheckInstall.class file in the following location:
C:\Program Files\Autodesk\MapGuideDocumentation6
\ViewerAPIHelp\ViewerAPI\JavaEdition\examples\classes
Installing Viewers on Client Machines | 29
Page 30

30
Page 31

Accessing Maps
3
This chapter describes how to programmatically access
maps you have embedded in a Web page. Once your
application can access a map, you can begin to expand
your application to work with map layers, map features,
and printing as described in Chapter 4, “Working with
Map Layers, Map Features, and Printing.”
■ Overview
■ Map Access for ActiveX
Control and Plug-In
■ Map Access for the Java
Edition
■ Communicating with the
Plug-In from a Java applet
■ Accessing secure data
■ Handling busy state and
map refresh
■ Handling errors
■ Debugging an application
31
Page 32

Overview
Netscape® Navigator® and Microsoft® Internet Explorer® expose map objects
at different levels in their object hierarchies. Therefore, how you access a map
is determined by the browsers you are supporting, not by the version of
Autodesk MapGuide
write a simple function that checks the user’s browser type and returns an
instance of the MGMap object using the technique required by that browser.
Note that we refer to JavaScript code modules as functions, reserving the term
method for the Autodesk MapGuide Viewer API. Once you’ve obtained the
map object, your application code uses that instance when it calls methods
in the Autodesk MapGuide Viewer API. In most cases, the code for either
browser will be identical.
®
Viewer you use. As described in this chapter, you can
Map Access for ActiveX Control and Plug-In
This section describes how to access maps from both Netscape Navigator and
Internet Explorer. The techniques described here use JavaScript as the
scripting language. Because Internet Explorer automatically recompiles
JavaScript code into its native JScript, you can write JavaScript code that
works with either browser.
Suppose you embedded your map and named it map. In Netscape Navigator,
the map object called map is exposed by the document object and can be
accessed from JavaScript in one of the following ways:
document.map // one way...
document.embeds["map"] // another way...
In Internet Explorer, the map object called map is exposed by the window
object and can be accessed from JavaScript in one of the following ways:
window.map // one way...
map // another way...
The easiest way get around these differences is to write a getMap function
that checks the browser type and returns the appropriate map object; that
function can then be called as needed by the rest of the code in your
application.
32 | Chapter 3 Accessing Maps
Page 33

If your embedded map had the name map, the code to access the map on a
simple, frameless HTML page would look like this:
<SCRIPT LANGUAGE="JavaScript">
function getMap()
{
if (navigator.appName() == "Netscape")
return document.map;
else
return window.map;
}
</SCRIPT>
If your application had multiple HTML frames, the code to access the same
map in a frame called Left would look like this:
<SCRIPT LANGUAGE="JavaScript">
function getMap()
{
if (navigator.appName == "Netscape")
return parent.Left.document.map;
else
return parent.Left.map;
}
</SCRIPT>
Note We chose the name getMap for our function, but the name can be any-
thing you want, as long as it follows JavaScript naming conventions. Be careful to
not to confuse the getMap function with MGMapLayer.getMap, a predefined
Autodesk MapGuide Viewer API method.
After this function is defined, any other JavaScript method can simply call
getMap to retrieve the map object. For example, you can create a variable to
represent the map, and then use getMap to set the value of that variable:
var map = getMap();
You can then apply methods to that variable to work with the map. For
example, the following function displays an Autodesk MapGuide report
called Parcel Data:
function runReport()
{
var jb_map = getMap(); // assign map to variable
jb_map.viewReport('Parcel Data'); // call method from variable
}
Or you could bypass the variable assignment and use getMap directly:
function runReport()
{
getMap().viewReport('Parcels'); // use getMap() return value
}
Map Access for ActiveX Control and Plug-In | 33
Page 34

Because getMap has an MGMap object as its return value, you can use the func-
tion in place of MGMap, accessing that object’s methods or properties as
needed.
Warning Because Netscape Communicator 4.x contains the Same Origin security policy, the map object cannot be accessed by the Autodesk MapGuide Viewer
API code in a d ifferent f rame. This occurs only when the code is w ritten in Java or
JavaScript and is on a different domain from the one where the map window file
(MWF) resides.
To enable codebase principals
1 Make sure Netscape Communicator is not running.
2 In your prefs.js file, located in the Netscape/user directory, add the line:
user_pref("signed.Java editions.codebase_principal_support",
true);
3 In your JavaScript code, before making any Autodesk MapGuide Viewer
API calls or references, add the line:
netscape.security.PrivilegeManager.enablePrivilege("UniversalBr
owserRead");
4 When executing the JavaScript code, Netscape Communicator will ask
whether to Grant or Deny access to the script. If you select Grant, the
script will run normally. Otherwise, the script is prevented from
executing.
Because codebase principals offer a minimal level of security, they can be
useful during development of your code, but you should use object signing
and digital signatures before delivery. For detailed information on Netscape
Communicator’s security models, codebase principals, and object signing,
refer to the Netscape developer documentation.
Required Software for Autodesk MapGuide
Viewer Plug-In
To work with Autodesk MapGuide Viewer Plug-In, you may need to download certain Java files provided with Autodesk MapGuide. Specifically, if your
application will handle events, you will need to download the Java observer
applet file MapGuideObserver6.class. For information about event handling
with Autodesk MapGuide Viewer Plug-In, see Chapter 5, “Handling Events.”
To download this observer applet file, choose Help ➤ Contents ➤ PlugIn/Java Edition Downloads in the Autodesk MapGuide Viewer API Help.
34 | Chapter 3 Accessing Maps
Page 35

Map Access for the Java Edition
You can access maps using Autodesk MapGuide Viewer, Java Edition in two
ways:
■ From an HTML page by embedding Autodesk MapGuide Viewer, Java Edi-
tion in the HTML page where the map is embedded. This approach is
described in “Map Display for the Java Edition” on page 24. In this case,
Autodesk MapGuide Viewer, Java Edition runs inside a Web browser.
■ Using Java by wrapping a Java applet around Autodesk MapGuide Viewer,
Java Edition as described in “Map Access Using Java” on page 38. Using
this approach, Autodesk MapGuide Viewer, Java Edition can run inside or
outside a Web browser.
Map Access from HTML
In an HTML page, you can simply embed Autodesk MapGuide Viewer, Java
Edition using the <Applet> tag. This approach provides the following
benefits:
■ You can post a map that most browsers and operating systems can access.
■ This is the simplest way to support Autodesk MapGuide Viewer, Java Edi-
tion. All you have to do is use the standard HTML <Applet> tag and set
MGMapApplet as the code value.
Although this approach supports the greatest number of browser/platform
combinations, just displaying the map might not provide enough functionality for you. In this case, you might want to use JavaScript or JScript.
Using JavaScript or JScript
The JavaScript or JScript techniques for accessing maps described in “Map
Access for ActiveX Control and Plug-In” on page 32 also work for Autodesk
MapGuide Viewer, Java Edition since the object hierarchy is determined by
the browser, not by the version of the Autodesk MapGuide Viewer.
Map Access for the Java Edition | 35
Page 36

Using JavaScript or JScript within an HTML page, you can create controls on the
HTML page, such as list boxes and buttons, that interact with the map. However,
JavaScript and JScript do not behave uniformly across all browser/operating
system combinations. Internet Explorer has the following limitations:
■ Internet Explorer 4.0 for Mac OS does not support JavaScript. It supports
JScript, but JScript cannot control a Java applet.
■ Because Internet Explorer exposes applets as COM objects instead of Java
objects, API methods that pass observer objects will not work. For example, the digitizePoint method requires an instance of the
MGDigitizePointObserver object. Therefore, Internet Explorer would
not be able to access digitizePoint or any other methods that pass
observer objects as arguments, including the following MGMap methods. If
you need to use any of these methods, implement Autodesk MapGuide
Viewer, Java Edition from Java instead of JavaScript or JScript:
■ addMapLayer and addMapLayers
■ all of the digitize methods
■ viewDistance and viewDistanceEx
The following table lists the levels of support that JavaScript or JScript
provide across different configurations.
36 | Chapter 3 Accessing Maps
Page 37

JavaScript/JScript Support for Different Configurations
Operating System Viewer Version JavaScript or JScript Support
Windows Autodesk
MapGuide Viewer
Plug-In on
Netscape
Navigator
Autodesk
MapGuide Viewer
ActiveX Control on
Internet Explorer
Autodesk
MapGuide Viewer,
Java Edition on
Netscape
Navigator
Autodesk
MapGuide Viewer,
Java Edition on
Internet Explorer
Solaris Autodesk
MapGuide Viewer,
Java Edition on
Netscape
Full support.
Only methods that do not pass
observer objects as arguments.
Full support.
Mac OS Autodesk
MapGuide Viewer,
Java Edition on
Internet Explorer
Internet Explorer 4.0 does not support JavaScript and JScript cannot
control Java applets.
Therefore, if you need to support the largest number of browsers and operating systems, you should embed the Autodesk MapGuide Viewer, Java
Edition in an HTML page and not use either JavaScript or JScript to interact
with the map. If you need more interactivity with the map, you will need to
use Java instead, as described below. This is particularly important if you
need to support Macintosh users, as they will need to use the Autodesk
MapGuide Viewer, Java Edition with Internet Explorer, which doesn’t have
full JScript support.
Map Access for the Java Edition | 37
Page 38

Map Access Using Java
You can access maps using Java and the Autodesk MapGuide Viewer, Java
Edition in several different ways, including using a wrapper Java applet, a
peer Java applet, or a wrapper Java application.
Wrapper Java Applet
You can write a wrapper Java applet that uses the pre-installed Autodesk
MapGuide Viewer, Java Edition and contains all the Autodesk MapGuide
Viewer API methods. This approach enables the Autodesk MapGuide Viewer
API to work on all operating systems and browsers. To run Autodesk
MapGuide Viewer from a wrapper applet, code your wrapper to instantiate
MGMapComponent. Then, in HTML, set the CODE value of the <APPLET> tag
to the name of the wrapper applet. For a Java wrapper applet example,
choose Help ➤ Contents ➤ Examples Advanced ➤ Java Edition Examples ➤
Example6 in the Autodesk MapGuide Viewer API Help.
Peer Java Applet
You can write a peer Java applet that runs Autodesk MapGuide Viewer, Java
Edition. This approach is slightly simpler than driving Autodesk MapGuide
Viewer, Java Edition from a wrapper applet, because, with a peer java applet,
Autodesk MapGuide Viewer, Java Edition is automatically provided with
browser services such as showDocument. Another benefit is that Autodesk
MapGuide Viewer, Java Edition and the peer applet can exist in separate
frames in the HTML document. To run Autodesk MapGuide Viewer from a
peer applet, your HTML page needs to include the <APPLET> tag twice: to set
the CODE value to MGMapApplet, and to set it to the name of the peer applet.
Wrapper Java Application
You can write a Java wrapper application that runs Autodesk MapGuide
Viewer, Java Edition outside a browser. This approach is analogous to using
Visual Basic to run Autodesk MapGuide Viewer ActiveX Control outside a
browser. You can still have Internet access from a Java application outside a
browser, but browser-specific functionality will not be available. To run
Autodesk MapGuide Viewer from a wrapper application, the application must
embed the MGMapComponent object and then implement the MGMapContext
object interface so that MGMapComponent can use the methods defined in
MGMapContext that are normally provided by the browser.
38 | Chapter 3 Accessing Maps
Page 39

Required Software for the Java Edition
To work with Autodesk MapGuide Viewer, Java Edition, you may need to
download certain Java files provided with Autodesk MapGuide. Specifically,
you will need to access the Autodesk MapGuide Viewer, Java Edition API,
which resides in the com.autodesk.mgjava package. You can find this package
in the mgjava.jar archive file, which contains all Autodesk MapGuide Viewer,
Java Edition class files for Windows, Macintosh, or Solaris systems. There is
also an mgjava.cab file for Windows only. To download these files, choose
Help ➤ Contents ➤ Plug-In/Java Edition Downloads in the Autodesk
MapGuide Viewer API Help.
If you are developing a Java application with Autodesk MapGuide Viewer,
Java Edition, you will also need the Java Development Kit version 1.1.x. If
you do not have this version, you can get it by downloading it from the
following Web site: java.sun.com. If you are developing a Java application
with Autodesk MapGuide Viewer, Java Edition using a development environment such as WebGain
the mgjava.jar file in your classpath.
If your application will handle events, you will need to download the Java
observer applet file MapGuideObserver6J.class. For more information about
event handling with Autodesk MapGuide Viewer, Java Edition, see Chapter
5, “Handling Events.” To download the Autodesk MapGuide observer, files,
choose Help ➤ Contents ➤ Plug-In/Java Edition Downloads in the Autodesk
MapGuide Viewer API Help.
®
VisualCafe™ or Borland® JBuilder, be sure to include
Java Edition Differences
The following sections describe some functional and browser differences
between Autodesk MapGuide Viewer, Java Edition and Autodesk MapGuide
Viewer ActiveX Control and Autodesk MapGuide Viewer Plug-In.
Functional Differences with Java Edition
Bookmarks and map preferences are stored in a different location for
Autodesk MapGuide Viewer, Java Edition than they are for Autodesk
MapGuide Viewer ActiveX Control and Autodesk MapGuide Viewer Plug-In.
They are not stored in the system registry. Instead, they are stored in the
user’s local file system, relative to the user’s home directory at
$home/.autodesk/mapguide/6.0 where $home is the value of the Java system
property user.home.
Map Access for the Java Edition | 39
Page 40

Different browsers and development environments have different assumptions about where the home directory is located, for example:
■ Internet Explorer
C:\windows_dir\Java\autodesk\mapguide\6.0
■ Netscape
C:\Programs\Netscape\users\username\.autodesk\mapguide\6.0
■ Solaris
/home/username/.autodesk/mapguide/6.0
Browser Differences with Java Edition
■ If a user with Internet Explorer requests data beyond a firewall, Autodesk
MapGuide Viewer, Java Edition fails unless the browser has already been
through proxy authorization. A simple workaround for this is to set the
browser’s home page to a site outside the firewall.
■ If a map was authored so that double-clicking a feature runs a JavaScript
command instead of opening an HTML page, the command might fail,
depending on the browser. For example, if the URL for a map feature is set
to:
javascript:alert("This is a private residence.")
users will receive an error message when they double-click that map feature in Internet Explorer. This is because different browsers support different protocols in the Java network library (the previous example illustrates
that Internet Explorer does not support the
Java network library).
JavaScript protocol in the
Communicating with the Plug-In from a Java
Applet
Netscape’s LiveConnect technology makes it possible to write a Java applet
that communicates with the Autodesk MapGuide Viewer Plug-In API. If you
choose to develop your application this way, you will need to know how to:
■ Access Autodesk MapGuide Viewer Plug-In from a Java applet
■ Call JavaScript functions from an Applet
The following sections cover these topics. You may also need to handle
events for Autodesk MapGuide Viewer Plug-In from your applet. For more
information about how to do this, see Chapter 5, “Handling Events.”
40 | Chapter 3 Accessing Maps
Page 41

Accessing the Plug-In from a Java Applet
You can access Autodesk MapGuide Viewer Plug-In from your Java applet.
To access Autodesk MapGuide Viewer Plug-In
1 Copy the npmapv32.zip file installed in your Netscape Plugins folder to a
folder in your Java development environment, so that your Java compiler
can import Autodesk MapGuide classes to your Java applet.
2 Write a setMap function in your applet that takes a parameter referencing
the map and then storing the reference for future use. For example:
Private MGMap myUSAMap;
Public void setMap (MGMap map1)
{
myUSAMap = map1;
}
3 Add your applet to the HTML page. You must include the MAYSCRIPT
attribute in the APPLET tag to give the applet permission to interact with
JavaScript. For example:
<APPLET code="plugInApplet" NAME="obs" WIDTH=400 HEIGHT=300
MAYSCRIPT>
.
.
.
</APPLET>
4 If you have not already done so, embed Autodesk MapGuide Viewer Plug-
In in the HTML page as shown in the following example (for more information, see “Embedding a Map,” on page 22). Use the following code:
<EMBED
SRC="http://www.mapguide.com/maps/usa.mwf?STATUSBAR=OFF"
NAME="map" WIDTH=300 HEIGHT=200 BORDER=0>
5 Enter the following code into your HTML page:
<SCRIPT LANGUAGE="JavaScript">
function Init()
{
var map = document.map;
var obs = document.obs;
obs.setMap(map);
}
</SCRIPT>
<BODY onLoad="Init();"
.
.
.
</BODY>
Communicating with the Plug-In from a Java Applet | 41
Page 42

This code calls the Init function, which is placed within the onLoad
event, which is inserted into the BODY tag. This prevents errors by loading
the map before any code tries to access it. Init passes the embedded map
object into the setMap function in the applet. Now you can make any API
call to the example file, myUSAMap, in your applet. For instance:
Public void getViewerInfo()
{
myUSAMap.aboutDlg();
}
The API is available from Autodesk MapGuide classes in the npmapv32.zip
file you copied in Step 1.
Calling JavaScript Functions from a Java Applet
You can call JavaScript functions in your HTML page from a Java applet.
To access JavaScript from a Java Applet
1 Import the netscape.javascript package into your Java applet code. You can
usually find this package in the \Program\Java\Classes\java40.jar file in
the Netscape browser root directory. You can download this filw from
http://developer.netscape.com/software/jdk/download.html. This pack-
age provides access to the JSObject class containing the getWindow
method, which enables you to call JavaScript methods from your applet.
2 The syntax for calling a JavaScript function from your applet is:
JSObject.getWindow(applet instance).call("function name",
parameters)
If you want to forward the onDigitizedCircle event to a JavaScript
function called onDigitizedCircleHandler, you must first put all of
the parameters into a java.lang.Object array before you can call
onDigitizedCircleHandler. Since the fourth parameter of the
onDigitizedCircle event is not derived from the java.lang.Object
class, you need to wrap it as a java.lang.Double object:
public void onDigitizedCircle(MGMap map, String units, MGPoint
center, double radius)
{
Object[] params = new Object[4];
params[0] = map;
params[1] = units;
params[2] = center;
params[3] = new Double(radius);
JSObject.getWindow(this).call("onDigitizedCircleHandler",
params);
}
42 | Chapter 3 Accessing Maps
Page 43

Accessing Secure Data
Map authors can control whether developers can use the getVertices and
getLayerSetup methods to access coordinate values and/or map layer
setup data. Map authors control the security of this data from the Map Layer
Properties dialog box in Autodesk MapGuide Author. If map authors allow
access to the API, they can also stipulate that the application must send in a
specific passkey first. If you are building an application for a map that
requires a passkey to access the coordinate values and/or the layer setup data,
you will need to get the passkey from the map author and pass it in with the
unLock method to enable the getVertices and getLayerSetup methods.
Remember that users can view any embedded scripts in HTML, so in some
cases you may not want to hard code your passkey in your Web page. To keep
the passkey secure, we recommend that you implement one of the following
techniques:
■ Create an application that includes one frame that displays the map only.
Be sure that the map fills up the entire frame. In this case, users will not
be able to view the source code of the frame that displays the map. You
can then hard code the passkey in the source code of that frame.
■ Write a Java applet that makes a request for the passkey to your Autodesk
MapGuide Server and then returns the passkey to the script in the Web
page. Call this applet in your embedded script after making sure that the
user has met your security criteria.
■ Write your entire Autodesk MapGuide Viewer application in a Java applet.
Handling Busy State and Map Refresh
This section describes the map busy state and the techniques for coordinating when and how to refresh a displayed map. When Autodesk MapGuide
Viewer refreshes the map display, it can cause errors in your application
unless you take the correct steps to prevent them. You need to familiarize
yourself with the way that the Autodesk MapGuide Viewer API is designed so
you can understand how to code your application correctly.
About the Busy State
Autodesk MapGuide Viewer enters a busy state whenever it refreshes the
display, and the busy state does not end until the data has been received from
the server and the display is updated or refreshed.
Accessing Secure Data | 43
Page 44

There are some important points to remember about the busy state:
■ In general, most write methods and properties are affected by the busy
state and return a -1 (busy) error code when called during a busy state.
Most read methods and properties are not affected by the busy state. However, there are exceptions to both of these rules. The best way to learn
which methods and properties do not work during the busy state is to
view the method/property descriptions in the Autodesk MapGuide Viewer
API Help.
■ When your Autodesk MapGuide Viewer application calls an API method
that causes a busy state, Autodesk MapGuide Viewer can return control to
the application and then go to the next method while still in the busy state.
To avoid errors, you need to make sure that Autodesk MapGuide Viewer is
not in a busy state when your application calls one of the methods that are
affected by the busy state.
Your application is most likely to fail when it is about to call two or more API
methods—the first an API method that automatically invokes a refresh, and
subsequent ones methods that don’t work during the busy state. For example:
function selectAndZoomToPointObject(mgObj)
{
var map = getMap();
var sel = map.getSelection();
sel.clear();
sel.addObject(mgObj);
map.zoomSelected(); // Busy state begins in zoomSelected()
map.setWidth(5, "KM"); // Error occurs because setWidth() fails
// if called during the busy state
}
To avoid errors, you need to make sure that Autodesk MapGuide Viewer is
not in a busy state when your application calls one of these methods. To do
this you can:
■ Control map refresh using the autoRefresh flag
■ Detect when a map refresh is about to happen
■ Detect a change in the busy state
Each of these approaches is described in the following sections.
44 | Chapter 3 Accessing Maps
Page 45

Controlling Map Refresh Operations
You can ensure that Autodesk MapGuide Viewer will not enter a busy state
by controlling when display refreshes occur. The first step is to remember
that display refreshes always occur in the following instances:
■ When the autoRefresh flag is set to True with MGMap.setAutoRefresh,
and the application calls an API method that requires an automatic refresh
such as MGMap.zoomSelected. Methods requiring an automatic refresh
are noted in the Autodesk MapGuide Viewer API Help.
■ Your application calls zoomGotoDlg, zoomGotoLocation, setUrl, or
refresh. These methods always invoke a display refresh, even if the
autoRefresh flag is set to false. The only exception is if you call one of
these methods from onViewChanging or onMapLoaded event handling
code. Under these circumstances, the methods will fail and will set error
code to -14 (refresh disabled) because the onViewChanging and
onMapLoaded events always disable the autoRefresh flag.
Using the autoRefresh Flag
To develop an application that executes smoothly, you need to prevent busy
states while the application calls methods in the API that do not work during
the busy state. To do this, you need to disable the autoRefresh flag.
To disable the autoRefresh Flag
1 Set the autoRefresh flag to False immediately before calling the first
method.
2 Reset the autoRefresh flag to True.
3 Call the refresh method immediately after your application calls the
other methods that do not work during the busy state. Simply setting the
autoRefresh flag back to True with MGMap.setAutoRefresh does not
refresh the map. For example:
function selectAndZoomToPointObject(mgObj)
{
var map = getMap();
var sel = map.getSelection();
map.setAutoRefresh(false); // Prevent busy state from happening
// when zoomSelected is called
sel.clear();
sel.addObject(mgObj);
map.zoomSelected();
map.setWidth(5, "KM");
map.setAutoRefresh(true); // Reset the autoRefresh flag
map.refresh(); // Update the display
}
Handling Busy State and Map Refresh | 45
Page 46

AutoRefresh Flag Caveats
While autoRefresh is disabled, methods that would normally cause
refreshes to occur do not, and the following types of operations may not
work as expected:
■ Enumerating map features on dynamic layers after a pan or a zoom—
If your application tries to return the number of features on a dynamic
layer prior to a refresh, it will return the number that existed before the
pan or zoom occurred.
■ Querying on or modifying selected features—If your application per-
forms queries or modifications on features on dynamic layers prior to a
refresh, the features may not actually exist anymore, or additional features
that were added to the selection may be missing.
■ Operations that require user interaction—Methods such as
digitizePoint and digitizeRectangle require users to click or drag
the mouse for their input parameters. However, users may be positioning
the cursor over a version of the map that is different from the one on
which the methods will be performing calculations.
■ Printing maps on dynamic layers and buffering features on dynamic
layers—Features that have not been downloaded onto the displayed map
may not appear in the printout or the buffer.
Detecting Map Refreshes
Autodesk MapGuide Viewer fires the onViewChanging and onViewChanged
events both when a map display refresh is about to happen and when one
just happened. You can write event-handling code in your application to
respond to these events (see Chapter 5, “Handling Events”). However, before
the Autodesk MapGuide Viewer fires these events, it disables the
autoRefresh flag. When writing your event-handling code for
onViewChanging, be sure to avoid methods that don’t work when the
autoRefresh flag is disabled, as described in the previous section.
Detecting a Change in the Busy State
Autodesk MapGuide Viewer fires the onBusyStateChanged event when the
busy state changes. You can write event-handling code for this event to enable
and disable specific user interface elements, such as buttons, in your application.
46 | Chapter 3 Accessing Maps
Page 47

Controlling Intermediate Update Map Redraw
Operations
You can use the MGMap.getIntermediateUpdatesEnabled and
MGMap.setIntermediateUpdatesEnabled methods to control how
frequently Autodesk MapGuide Viewer redraws a map. By default, maps are
updated every 1.5 seconds, enabling the end user to progressively view a map
as it is being rendered, rather than waiting until the entire map is complete.
Changes to the intermediate update setting takes effect on the next redraw
or refresh operation. The following JavaScript functions disable and reenable intermediate updates:
function disableIntermediateUpdates()
{
var map = getMap();
var status = map.getIntermediateUpdatesEnabled();
if (status == true) map.setIntermediateUpdatesEnabled(false);
}
function enableIntermediateUpdates()
{
var map = getMap();
var status = map.getIntermediateUpdatesEnabled();
if (status == false) map.setIntermediateUpdatesEnabled(true);
}
Handling Errors
Every application should track and handle errors. The Autodesk MapGuide
Viewer API has error tracking methods and properties you can use to debug
your applications.
Getting Error Codes
Every time an API method is run or a property is accessed, Autodesk
MapGuide updates the MGError object. This object contains error informa-
tion for the most recently executed method or property.
Handling Errors | 47
Page 48

To get the most recently called method error code
1 Call the MGMap.getLastError method to get the MGError object.
2 Next call the MGError.getCode method to get the error code. For
example:
function checkErrorCode()
{
var map = getMap();
var code = map.getLastError().getCode();
alert("ERROR: " + code);
}
Checking for Incorrect Argument Types
If you call an API method with incorrect argument types, by default,
Autodesk MapGuide Viewer has the method do nothing and flags the error
in MGError. You can see which argument was incorrect by calling the
MGError.getArg method.
To check for an incorrect argument type for the most recently called method
1 Call the MGMap.getLastError method to get the MGError object.
2 Next call the MGError.getArg method to get the number of the incorrect
argument. For example:
function checkArgType()
{
var map = getMap();
var arg = map.getLastError().getArg();
alert("ERROR: " + arg);
}
To see the argument types for any API method, locate that method’s Help
topic in the Autodesk MapGuide Viewer API Help.
Debugging an Application
In addition to checking MGError, you can call the
MGMap.enableApiExceptions and MGMap.disableApiExceptions
methods to throw or not throw exceptions. When exceptions are enabled
and the MGError code is set to a non-zero value, Autodesk MapGuide throws
an exception. Depending on your development environment, the exception
will halt your code and s end an error message containing the line number of
the error to the screen.
48 | Chapter 3 Accessing Maps
Page 49

Working with Map Layers,
Map Features, and Printing
4
This chapter shows you how to write code for common
tasks your application can perform with the Autodesk
MapGuide
manipulate a map, you may want it to control other
Autodesk MapGuide Viewer events, as described in
Chapter 5, “Handling Events.”
®
Viewer API. Once your application can
■ Overview
■ Workin g with map layer s
■ Workin g with map features
■ Working with printing
49
Page 50

Overview
Throughout this chapter you will find simple JavaScript code samples that
show you how to perform basic Autodesk MapGuide Viewer tasks in your
application. You will learn how to work with map layers, features, and how
to customize map printouts.
Note that we refer to JavaScript code modules as functions, reserving the term
method for the Autodesk MapGuide Viewer API. Also note that although
spatial data on the map consists of map features, the methods and properties
in the Autodesk MapGuide Viewer API that work with map features use the
term object instead of feature. This difference in terminology exists because
map features were called map objects in previous releases of Autodesk
MapGuide. Be careful not confuse the term object in these API names with the
object-oriented programming concept of objects. For example, the
addObject method adds a map feature to the selection. Likewise, the
MGMapObject object represents map features.
Working with Map Layers
This section describes common tasks your application can perform with
Autodesk MapGuide map layers.
Counting Map Layers
The countLayers function counts the layers in a map and displays the
count in a dialog box:
function countLayers()
{
var map = getMap();
var layers = map.getMapLayersEx();
var cnt = layers.size();
alert("This map has " + cnt + " layer(s).");
}
The function starts by calling the getMap function and assigning its return
value to a variable called map:
var map = getMap();
Remember that getMap is a custom function that detects the user’s browser
type and returns an MGMap object using the syntax required by that browser
(see page “Map Access for ActiveX Control and Plug-In” on page 32).
50 | Chapter 4 Working with Map Layers, Map Features, and Printing
Page 51

Next, the countLayers function calls the getMapLayersEx method, an
Autodesk MapGuide Viewer API method that returns an MGCollection
object containing all the layers defined in the map. The layer collection is
assigned to the layers variable:
var layers = map.getMapLayersEx();
Then it calls the MGCollection:size method, which returns a count of the
layers in the collection; that number is assigned to the cnt variable:
var cnt = layers.size();
Finally, countLayers displays the count, using the JavaScript alert func-
tion:
alert("This map has " + cnt + " layer(s).");
Displaying the layer count
Listing Map Layers
The listLayers function counts the layers in a map and displays their
names:
function listLayers()
{
var map = getMap();
var layers = map.getMapLayersEx();
var cnt = layers.size();
var msg;
var i;
for (i = 0; i < cnt; i++)
{
var layer = layers.item(i);
msg = msg + layer.getName() + "\n";
}
alert(msg);
}
The function starts by getting an instance of the map, a layer collection, and
a layer count, using the same code as the previous example:
var map = getMap(); // get an MGMap object
var layers = map.getMapLayersEx(); // create layer collection
var cnt = layers.size(); // get layer count
Wor king w it h Map Laye rs | 51
Page 52

Next, the listLayers function uses a for loop to cycle through the layer
collection, placing all the layer names in the single msg variable:
var msg; // empty variable to hold layer names
var i; // counter variable; used by loop
for (i = 0; i < cnt; i++) // iterate layer
{
var layer = layers.item(i);
msg += layer.getName() + "\n";
}
count times
// get next layer
// add layer name to msg
The cnt variable tells the for loop t o iterate once for ea c h m ap layer. At e a ch
iteration, the loop counter variable (i) is incremented and the following
statements are processed:
var layer = layers.item(i);
msg += layer.getName() + "\n";
// get next layer
// add layer name to msg
The first statement uses the item method to select a layer from the collection
and assign it to a variable called layer.
The second statement operates on the layer variable, first using the
getName method to obtain the name of the layer represented by that variable, and then assigning that name to the msg variable. In addition to the
layer name, msg is also assigned its previous contents and the JavaScript
newline character, \n. This has the effect of adding each layer name to msg
as a separate text line.
Finally, listLayers uses the JavaScript alert function to display the
contents of the variable msg in an alert box:
alert(msg);
alert box displaying layer names
52 | Chapter 4 Working with Map Layers, Map Features, and Printing
Page 53

Adding a Map Layer
The doAddLayer function adds a named layer to a map:
function doAddLayer()
{
if (navigator.appName == "Netscape")
document.map.addMapLayer("hydro.mlf", document.obs);
else
window.map.addMapLayer("hydro.mlf");
}
The function starts by checking the browser type. If the browser is Netscape,
doAddLayer calls the addMapLayer method, supplying it with the name of
an existing map layer file (MLF) and the name of the event observer:
document.map.addMapLayer("hydro.mlf", document.obs);
If the browser is Internet Explorer, doAddLayer calls the addMapLayer
method, supplying only the layer name as an argument:
window.map.addMapLayer("hydro.mlf");
Because addMapLayer takes different arguments depending on the browser
type, we did not bother to return the map object with getMap. Instead, we
supplied the map object using the syntax required by each browser.
Note If you support the Netscape browser, you must provide the name of the
event observer as a second argument to addMapLayer.
Linking Map Layers
Using Autodesk MapGuide Author, you can set map layer attribute properties
for specific display ranges. (Refer to “Setting Style Properties for Layers” in
the Autodesk MapGuide User’s Guide.) For example, you might set a layer to be
invisible when a user zooms out. Using the Autodesk MapGuide Viewer API,
you can extend this functionality by linking layers to one or more designated
control layers. Then if an action, such as zooming out, causes a control layer
to become invisible, the API can make the linked layers invisible as well.
In the following example, the onViewChanging function checks the visibility of three control layers named States, Counties, and ZIP Codes. If
one or more of the control layers is visible, onViewChanging makes all other
map layers visible; if none of the control layers is visible, onViewChanging
suppresses visibility of all other map layers.
Wor king w it h Map Laye rs | 53
Page 54

The function is named onViewChanging because it’s triggered by the
Autodesk MapGuide Viewer API event of the same name. Whenever an event
is triggered, Autodesk MapGuide Viewer checks for a function whose name
matches the event name. If the function is found, Autodesk MapGuide
Viewer invokes it, passing arguments that vary by event.
onViewChanging takes an MGMap object as an argument passed by the
onViewChanging event. Because the event provides an instance of the map
object, we don’t need to obtain it with getMap. For example,the following
function links map layers:
function onViewChanging(thisMap) // ’thisMap’ is MGMap object provided by event
{
var states = thisMap.getMapLayer ("States");
var countries = thisMap.getMapLayer("Counties");
var zipCodes = thisMap.getMapLayer("ZIP Codes");
var vis =
( states.getVisibility() ||
counties.getVisibility() ||
zipCodes.getVisibility() );
var layers = thisMap.getMapLayersEx();
for(vari=0;i<layers.size(); i++)
{
var layer = layers.item(i);
if (!layer.equals(states)
&& !layer.equals(counties) && !layer.equals(zipCodes))
{
layer.setVisibility(vis);
}
}
}
The function starts by using the getMapLayer method to return each of the
control layers as objects. Those objects are assigned to three variables named
states, counties, and zipCodes.
Next, onViewChanging uses the getVisibility method to determine if
any of the control layers are visible. If at least one control layer is visible (that
is, if states is visible or counties is visible or zipCodes is visible),
getVisibility returns the boolean value True, thus setting the vis vari-
able to True. Otherwise, it sets vis to the False value.
Then onViewChanging uses the getMapLayersEx method to create a layer
collection and assign it to the layers variable.
Finally, the function uses a for loop to cycle through each map layer. Each
time the loop encounters a layer that is not one of the control layers, that
layer is made visible or invisible, depending on the value of the vis variable.
54 | Chapter 4 Working with Map Layers, Map Features, and Printing
Page 55

Toggling Map Layer Visibility On and Off
The layerToggle function toggles the visibility of a map layer that is specified when the function is invoked:
function layerToggle(l_name)
{
var map = getMap();
var layer = map.getMapLayer(l_name);
if (layer == null)
alert("layer not found.");
else
{
layer.setVisibility(!layer.getVisibility());
map.refresh();
}
}
This function takes a layer name as an argument and might be called as
follows:
<FORM>
<INPUT TYPE="button" VALUE="Toggle Hydro"
ONCLICK="layerToggle('Hydro')">
</FORM>
The layerToggle function starts by getting an instance of the map object.
Then it passes the function argument, l_name, to the getMapLayer method.
The getMapLayer function returns the specified layer, or it returns null if
the layer is not found. The getMapLayer return value is then assigned to the
layer variable:
var map = getMap();
var layer = map.getMapLayer(l_name);
Next, the function checks the value of the layer variable. If it is null, an
alert displays; otherwise the setVisibility method is used to toggle the
layer’s visibility to the opposite of its current state:
if (layer == null)
alert("layer not found.");
else
{
layer.setVisibility(!layer.getVisibility());
map.refresh(); // after changing visibility, refresh map
}
Note the use of the not operator (!) with the getVisibility method. This
has the effect of checking the layer’s visibility and returning the opposite of
what it finds.
Wor king w it h Map Laye rs | 55
Page 56

Working w ith Map Features
This section describes common tasks your application can perform with
Autodesk MapGuide map features.
Getting Keys of Selected Map Features
In this example, the doGetKey function displays a dialog box showing the
keys of selected map features (keys are unique values that are used to identify
individual map features). If no features are selected, an alert displays
prompting the user to make a selection:
function doGetKey()
{
var map = getMap();
if (map.getSelection().getNumObjects() == 0)
{
alert ("Please make a selection first.");
return;
}
var sel = map.getSelection();
var objs = sel.getMapObjectsEx(null);
var cntObjects = objs.size();
var msg = "Keys of selected features are:\n";
var i;
for (i = 0; i < cntObjects; i++)
{
var obj = objs.item(i);
var key = obj.getKey();
msg = msg + obj.getMapLayer().getName()+""+key+"\n";
}
alert(msg);
}
The function starts by getting an instance of the MGMap object:
var map = getMap();
Then it uses two API methods to see if any map features are selected. Note
that the methods are concatenated; the first method, getSelection, operates on the map and returns a selection object, which is then passed to the
second method, getNumObjects, for processing. If no map features are
selected, an alert displays and the function terminates; otherwise, the selec-
tion is assigned to the sel variable:
if (map.getSelection().getNumObjects() == 0)
{
alert ("Please make a selection first.");
return;
}
var sel = map.getSelection();
56 | Chapter 4 Working with Map Layers, Map Features, and Printing
Page 57

Next, the doGetKey function calls the getMapObjectsEx method and
passes its return value (a collection of the selected map features) to a variable
called objs. Note that if you use getMapObjectsEx with a map layer, it
returns an MGCollection o bje ct mad e up o f map fe atu re s of a map la yer, but
by using the method with the selection object, and by passing it null as a
parameter, it returns the map features in the current selection only:
var objs = sel.getMapObjectsEx(null);
Then the function calls the MGCollection.size method, which returns a
count of the objects in the collection; that number is assigned to the
cntObjects variable:
var cntObjects = objs.size();
After that, doGetKey uses a for loop to cycle through the feature collection,
placing all of the feature names in a single msg variable:
// variable to hold feature names
var msg = "Keys of selected features are:\n";
var i; // loop counter variable
for (i = 0; i < cntObjects; i++) // iterate from 0 to cntObjects
{
var obj = objs.item(i);
var key = obj.getKey();
msg = msg + obj.getMapLayer().getName()+""+key+"\n";
}
The cntObjects variable tells the for loop to iterate once for each object.
At each iteration, the loop counter variable (i) is incremented and the
following statements are processed:
var obj = objs.item(i);
var key = obj.getKey();
msg = msg + obj.getMapLayer().getName()+""+key+"\n";
The first statement uses the item method to select an object from the collection and assign it to a variable called obj.
The second statement operates on the obj variable, first using the getKey
method to obtain the key of the feature represented by that variable, and
then assigning that name to the msg variable. The last line puts it all together
by concatenating the previous contents of msg, a layer name obtained by the
getName method, a space character, the contents of key, and a JavaScript
newline. After all selected features have been added to msg, the contents of
the variable are displayed in a JavaScript alert box:
alert(msg);
Working with Map Features | 57
Page 58

The following screen shows keys of the selected features displayed in the
alert box.
alert box displaying keys of selected features
Getting Coordinates of a Selected Map Feature
The doGetCoordinates function displays a dialog box showing the coordinates of a selected map feature:
doGet Coordinates Function
function doGetCoordinates()
{
var map = getMap();
var sel = map.getSelection();
var layer = map.getMapLayer("Parcels");
if (layer == null)
{
alert("No Parcels layer found in this map.");
return;
}
if ( (sel.getNumObjects() > 1) || (sel.getNumObjects() == 0) ||
(sel.getMapObjectsEx(layer).size() == 0) )
{
alert("Select only one parcel, please.");
return;
}
var obj = sel.getMapObjectsEx(layer).item(0);
var vertices = map.createObject("MGCollection");
58 | Chapter 4 Working with Map Layers, Map Features, and Printing
Page 59

doGet Coordinates Function
var cntVertices = map.createObject("MGCollection");
var res = obj.getVertices(vertices, cntVertices);
if (res == 0)
{
alert("No access to coordinate information.");
return;
}
msg = "Parcel:" + obj.getKey() + "\n";
msg = msg + "Coordinates in MCS unit\n";
for(vari=0;i<cntVertices.item(0); i++)
{
var pnt = vertices.item(i);
msg = msg + pnt.getX() + "," + pnt.getY() + "\n";
}
alert(msg);
}
The doGetCoordinates function starts by using getMap to get an instance
of the map; then it gets the current selection and assigns it to the sel variable:
var map = getMap();
var sel = map.getSelection();
Then doGetCoordinates uses the getMapLayer method to select the
Parcels layer and assign it to a variable named layer; if the Parcels layer
doesn’t exist in the map, an alert displays and the function terminates:
var layer = map.getMapLayer("Parcels");
if (layer == null)
{
alert("No Parcels layer found in this map.");
return;
}
Next, doGetCoordinates uses the getNumObjects and
getMapObjectsEx methods to verify that one, and only one, feature is
selected, and that the current layer is not empty. If the criteria are not met,
an alert displays and the function terminates:
if ( (sel.getNumObjects() > 1) ||
(sel.getNumObjects() == 0) ||
(sel.getMapObjectsEx(layer).size() == 0) )
{
alert("Select only one parcel, please.");
return;
}
Working with Map Features | 59
Page 60

Otherwise, the function creates some more variables. The obj variable
contains the first (and only) object in the current selection. The vertices
and cntVertices variables hold empty MGCollection objects:
var obj = sel.getMapObjectsEx(layer).item(0);
var vertices = map.createObject("MGCollection");
var cntVertices = map.createObject("MGCollection");
Then doGetCoordinates uses the getVertices method to get the coordinates and number of vertices of obj, our selected parcel feature. The values
getVertices obtains are passed to the empty vertices and cntVertices
collections.
If getVertices is successful, it returns an integer telling the number of
vertices it found; otherwise, it returns zero. The getVertices return value
is passed to a variable called res. If getVertices returns zero, an alert
displays and the function terminates:
var res = obj.getVertices(vertices, cntVertices);
if (res == 0)
{
alert("No access to coordinate information.");
return;
}
Next, doGetCoordinates uses a for loop to cycle through the vertices
collection, placing all of the coordinate listings in a single msg variable:
msg = "Parcel:" + obj.getKey() + "\n";
msg = msg + "Coordinates in MCS unit\n";
for(vari=0;i<cntVertices.item(0); i++)
{
var pnt = vertices.item(i);
msg = msg + pnt.getX() + "," + pnt.getY() + "\n";
}
The cntVertices variable tells the for loop to iterate once for each vertex
in the object. At each iteration, the loop counter variable (i) is incremented
and the following statements are processed:
var pnt = vertices.item(i);
msg = msg + pnt.getX() + "," + pnt.getY() + "\n";
The first statement uses the item method to select a vertex from the collection and assign it to a variable called pnt.
The second statement operates on the pnt variable, using the getX and getY
methods to get the vertex coordinates and assign them to msg. As with the
previous examples, a new line is added to msg each time the for loop iterates. After all coordinates have been added to msg, the contents of the variable are displayed in a JavaScript alert box:
alert(msg);
60 | Chapter 4 Working with Map Layers, Map Features, and Printing
Page 61

Invoking Select Radius Mode
The doSelectRadius function gets an instance of the map and uses that
instance to call the selectRadiusMode method:
function doSelectRadius()
{
var map = getMap();
map.selectRadiusMode();
}
Radius Mode allows the user to digitize a circle and select all map features
that fall within that circle.
Zooming In on Selected Features
The zoomSelect function zooms in to a selected feature:
function zoomSelect()
{
var map = getMap();
var selected = map.getSelection().getMapObjectsEx(null);
if (selected.size()>0)
map.zoomSelected();
else
alert("Nothing selected.");
}
First, the function gets an instance of the MGMap object. Then, it uses two
concatenated API methods to retrieve selected features and pass them to the
variable selected. The first method, getSelection, returns a selection
object, which is used by the second method, getMapObjectsEx. If you use
getMapObjectsEx with a map layer, it returns an MGCollection object
containing all features on the layer, but by using getMapObjectsEx with
the selection object and passing it null, it returns the features in the current
selection only:
var map = getMap();
var selected = map.getSelection().getMapObjectsEx(null);
Next, zoomSelect uses the size method to see how many features are
selected. If one or more features are selected, the zoomSelected method is
invoked, causing Autodesk MapGuide Viewer to zoom to those features, as
shown in the illustrations following the example. Otherwise, an alert
displays:
if (selected.size() > 0)
map.zoomSelected();
else
alert("Nothing selected.");
Working with Map Features | 61
Page 62

Before calling zoomSelected() After calling zoomSelected()
Counting Map Features
The showFeatureCount function counts the features on each map layer and
adds that count to the legend:
var legendSet; // Global variable, declared outside of function
function showFeatureCount()
{
if (legendSet)
return;
var map = getMap();
if (map.isBusy() == false)
// can also be written as 'if (!map.isBusy())'
{
var layers = map.getMapLayersEx();
var cnt = layers.size();
var i;
var msg;
for (i = 0; i<cnt; i++)
{
var layer = layers.item(i);
var objectCount = layer.getMapObjectsEx().size();
var label = layer.getLegendLabel();
label = label + " " + objectCount + " features";
layer.setLegendLabel(label);
}
}
legendSet = true;
}
62 | Chapter 4 Working with Map Layers, Map Features, and Printing
Page 63

The showFeatureCount function starts by checking the status of the global
variable, legendSet. If legendSet is set to True, showFeatureCount
terminates:
if (legendSet)
return;
This keeps showFeatureCount from printing multiple messages to the
legend if the user clicks the button more than once.
Next, showFeatureCount creates an instance of the map and checks to see
if the map is in a busy state (see “Handling Busy State and Map Refresh” on
page 43 for more information about the busy state):
var map = getMap();
if (map.isBusy() == false)
If the map is not busy, the function continues.
First, it uses the getMapLayersEx method to obtain a layer collection and
assign it to a variable called layers. Then it uses the size method to get the
number of layers and assign that number to the cnt variable:
var layers = map.getMapLayersEx();
var cnt = layers.size();
Then it creates a loop that counts the features in each layer and uses the
getLegendLabel and setLegendLabel methods, as shown in the illustrations following the example, to report the map feature counts in the map
legend:
var i;
var msg;
for (i = 0; i<cnt; i++)
{
var layer = layers.item(i);
var objectCount = layer.getMapObjectsEx().size();
var label = layer.getLegendLabel();
label = label+""+objectCount + " features";
layer.setLegendLabel(label);
}
Finally showFeatureCount sets the global legendSet variable to True.
This keeps the function from running again until the page containing the
map is refreshed.
legendSet = true;
Working with Map Features | 63
Page 64

The following screens compare the results before and after calling
showFeatureCount.
Note map features counts
Legend before calling showFeatureCount Legend after calling showFeatureCount
Working with Printing
Autodesk MapGuide lets map authors and Autodesk MapGuide Viewer users
control how the printed map appears on a page. For example, a map author
might create a custom symbol that displays only in the printout. Also, when
printing from Autodesk MapGuide Viewer, a user might choose to change
the map title or suppress page elements such as the legend, scale bar, or
North arrow. The API supports these user-interface features and also provides
additional functionality, allowing you to write code to change the title font,
add a custom symbol, or control the size and position of any page element
on the printout.
As a developer, you can specify that two events be fired each time a map is
sent to the printer. The first event, onBeginLayout, is fired after a user clicks
OK in the Print dialog box but before Autodesk MapGuide Viewer lays out
the page elements that will be sent to the printer. The second event,
onEndLayout, is called after Autodesk MapGuide Viewer lays out the page
elements but before the elements are sent to the printer. By writing event
handler functions for these events, you can intercept the page before it gets
to the printer and customize it to your liking.
64 | Chapter 4 Working with Map Layers, Map Features, and Printing
Page 65

Setting the Print Priority
As shown above, you can write an onEndLayout event handler that uses
MGPrintLayout, MGPageElement, and MGExtentEx to control the place-
ment of printed page elements. It is possible, and sometimes desirable, to
place page elements on top of each other. For example, you might want to
place the North arrow on top of an empty spot of ocean in your map. Of
course, this doesn’t do your user much good if the ocean prints on top of the
North arrow and hides it.
To solve this problem, each page element is assigned a default print priority.
A print priority is a positive floating-point number between 0.0 and 100.0
that describes the relative printing order of a page element. The element with
the lowest number is printed first. The element with the highest number is
printed last. You can read and change an element’s priority with the
getPrintPriority and setPrintPriority methods, but the default
values are as follows:
Element Default Print Priority
map 10.0
legend 20.0
title 30.0
URL 40.0
date/time 50.0
scale bar 60.0
North arrow 70.0
custom elements 80.0
Working with Printing | 65
Page 66

The following example shows an onEndLayout event handler, written in
JavaScript, that forces the title to be printed after the North arrow:
function onEndLayout(layout, info)
{
// retrieve arrow and map elements
var el_arrow = layout.getPageElement("mg_northarrow");
var el_map = layout.getPageElement("mg_map");
// force arrow to have higher print priority than map
el_arrow.setPrintPriority(el_map.getPrintPriority() + 1);
}
Enabling the Print Events
By default, the onBeginLayout and onEndLayout events are not fired; you
enable and disable them using the enablePrintingEvents and
disablePrintingEvents methods. For Autodesk MapGuide Viewer PlugIn and Autodesk MapGuide Viewer, Java Edition, you will also need to use
the setPrintingObserver method to specify the event observer. Here is
one way to write a JavaScript function that enables print events:
function enable_print_events()
{
var map = getMap();
map.enablePrintingEvents();
if (navigator.appName == "Netscape")
map.setPrintingObserver(obs);
}
66 | Chapter 4 Working with Map Layers, Map Features, and Printing
Page 67

Positioning Page Elements with Page Coordinate
System Units
Page element extents specified through the API are expressed in Page Coordinate System (PCS) units. The origin (0,0) of this system is located at the
upper-left corner of the paper. Its exact location depends on the current left
and top margins. Unlike the coordinate system that is used on a map, the Y
values increase in the downward direction and the X values increase to the
right. Like the device unit type, the default PCS unit type is a pixel.
Working with Printing | 67
Page 68

Adding Custom Page Elements
You can add custom page elements to the printout. Currently, the API can
only access symbols in the API symbol list. The API symbol list is a MWF or
EMF file containing a small set of predefined symbols. However, additional
symbols can be added to the list using Autodesk MapGuide
the topics “Adding Symbols for Use with the Viewer API” and “API Symbol
Manager dialog box” in the Autodesk MapGuide Help for more information.
The following example shows an onEndLayout event handler, written in
JavaScript, that adds a custom logo to the top left corner of the printout. Note
that the logo is rotated 90
°. This example assumes that the myLogo symbol
has been added to the API symbol list by the map author:
function onEndLayout(layout, info)
{
// add 'myLogo' symbol to layout and return as 'sym'
var sym = layout.addSymbol("myLogo");
// function ends if symbol doesn't load properly
if (sym == null) return;
// display symbol the top-left corner of page
MGExtentEx ext = sym.getExtent();
ext.set(0, 0, 600, 600);
sym.setExtent(ext);
®
Author. Refer to
// rotate symbol
var attr = sym.getSymbolAttr();
if (attr != null) {
attr.setRotation(-90.0);
}
}
68 | Chapter 4 Working with Map Layers, Map Features, and Printing
Page 69

Handling Events
5
This chapter describes how to design your Autodesk
MapGuide
MapGuide
trol over how your application responds to actions by
users as they view maps. Once your application can han-
dle Autodesk MapGuide Viewer events, you may want to
add data query and update capabilities, as described in
Chapter 6, “Using Reports to Query and Update Data
Sources.”
®
Viewer application to handle Autodesk
®
events. Handling events gives you more con-
■ Overview
■ Working with event
handlers
■ Setting up event handlers
■ Writing event handlers
69
Page 70

Overview
Just as the Web browser has events that are triggered in response to actions
within the browser, Autodesk MapGuide has its own events that are triggered
by actions within Autodesk MapGuide Viewer. For example, if the user
selects a feature on the map, the onSelectionChanged event is triggered.
There are also events for when the mouse double-clicks, the map view
changes, and more. Events are useful because you can write code that is
executed only when certain events occur. For example, if the user clicks a
point on the map, you might want to call a function that updates text boxes
with the coordinates for that point (see “SDF Component Toolkit Applications” on page 171 for an example of this). This type of function, which
works only in response to an event, is called an event handler.
For Microsoft
event handlers for your application. VBScript, a lightweight Visual Basic-like
scripting language. For Netscape
observers. Event observers act as the link between the event and your event
handling code; they are triggered when an event occurs and then call the
event handler in response.
®
Internet Explorer®, you write VBScript code to set up the
®
Navigator®, you need to set up event
Working with Event Handlers
Netscape Navigator and Internet Explorer handle events differently, so if you
want to support both browsers, you need to write code for both. Code examples that work for both are described in“Setting Up Event Handlers” on
page 72 and “Writing Event Handlers” on page 78. To see a full working
event handling example, choose Help ➤ Contents ➤ Examples Advanced ➤
Event Handling example in the Autodesk MapGuide Viewer API Help.
70 | Chapter 5 Handling Events
Page 71

Browser Differences
The following table summarizes the basic differences between how Netscape
Navigator and Internet Explorer handle events:
Netscape Navigator Internet Explorer
For Netscape Navigator, Autodesk
MapGuide provides an observer applet
that you embed in your application
using the <APPLET> tag.
For Autodesk MapGuide Viewer Plug-In,
this applet is called:
MapGuideObserver6.class
For Autodesk MapGuide Viewer, Java
Edition, it is called:
MapGuideObserver6J.class
You can use the same instance of the
observer applet for all events.
To call an Autodesk MapGuide method
that triggers an event, you pass the
Autodesk MapGuide observer as a
parameter.
For Internet Explorer, you write a few lines
of VBScript code that tell Internet
Explorer the name of the event handler.
You must create a separate event handler
for each type of event you want to handle.
Internet Explorer knows how to find the
event handler without being passed its
name because it assumes the event handler name will match the event it is
handling.
Event Observer Set Methods
There are some MGMap methods whose sole function is to allow you to set an
observer for a specific event. For example, when the map view changes (for
example, in response to a user panning or zooming), you can set the observer
for the onViewChanged by creating a function called onLoad (a browser
event) and inserting the MGMap.setViewChangedObserver method to set
the observer for the onViewChanged event. You can do this for each of the
events you want to handle. Note that specifying an observer is not required
for all events—just for the events you want to handle.
Working with Event Handlers | 71
Page 72

Setting Up Event Handlers
This section describes how to set up event handling for either Autodesk
MapGuide Viewer Plug-In, Autodesk MapGuide Viewer ActiveX Control, or
Autodesk MapGuide Viewer, Java Edition, or for all three.
Plug-In and Java Edition Event Handlers
As described in “Browser Differences” on page 71, Autodesk MapGuide
provides observer applets you can use for Autodesk MapGuide Viewer
Plug-In and Autodesk MapGuide Viewer, Java Edition event handling.
■ For Autodesk MapGuide Viewer Plug-In, the applet is called
MapGuideObserver6.class.
■ For Autodesk MapGuide Viewer, Java Edition, the applet is called
MapGuideObserver6J.class.
If your application is supporting both Autodesk MapGuide Viewer Plug-In
and Autodesk MapGuide Viewer, Java Edition, you need to detect which
Autodesk MapGuide Viewer is present on the client’s system. You can do this
by embedding a detection applet provided by Autodesk MapGuide. This
applet is included in an archive file called MGDetectClass.zip. The detection
applet can detect whether or not Autodesk MapGuide Viewer, Java Edition
has been installed on a client system.
To download event observer and detection applet code, choose Help ➤
Contents ➤ Plug-In/Java Edition Downloads in the Autodesk MapGuide
Viewer API Help. You can also download the Java source code for each applet,
edit the code, and then recompile it. However, scripting with Java is highly
browser-specific because of the differences in the Netscape Plug-In and
Microsoft ActiveX Control embedding architectures. Therefore, we recommend that you use the observer applet as provided for event handling only.
Note If you are accessing the Autodesk MapGuide Viewer Plug-In API from a
Java applet, your applet needs to function as an event observer. See “Plug-In
Event Handler Example” on page 83.
72 | Chapter 5 Handling Events
Page 73

To use Autodesk MapGuide detection and event observer applet
1 Embed the observer applet in your Web page, assigning a specific name to
it with the NAME attribute of the <APPLET> tag. If you are going to use
both types of applets, you must give them different names and use the
correct name in your method calls after you have detected which
Autodesk MapGuide Viewer your client is running.
2 Use the detection applet to determine which Autodesk MapGuide Viewer
(Autodesk MapGuide Viewer Plug-In or Autodesk MapGuide Viewer, Java
Edition) is running on the client machine.
3 Once you have detected which Autodesk MapGuide Viewer is running on
a client machine, invoke the event observer applet by calling a set
observer method like setSelectionChangedObserver or a method that
invokes an event, such as digitizePolylineEx.
For example, the following code shows how to check the Autodesk
MapGuide Viewer version and install the appropriate event observer applet
for Autodesk MapGuide Viewer Plug-In or Autodesk MapGuide Viewer, Java
Edition:
Installing Plug-In and Java Editions Observer Applets
<SCRIPT LANGUAGE="JavaScript">
// Embed the detect applet to check if the
// Autodesk MapGuide Viewer, Java Edition is installed
document.write('<APPLET');
document.write(' CODEBASE="detect_class"');
document.write(' ARCHIVE="MGDetectClass.zip"');
document.write(' CODE=MGDetectClass');
// Extract result from detector
tempurl = document.URL;
index = tempurl.indexOf("DETECTED=");
result = tempurl.substring(index, tempurl.length);
if (result == "DETECTED=true")
{
// The Autodesk MapGuide Viewer, Java Edition was installed,
// so we embed the Autodesk MapGuide Viewer, Java Edition
// Observer Applet and name it obsJava
document.write("<Applet CODE=\"MapGuideObserver6J.class\"
WIDTH=2 HEIGHT=2 NAME=\"obsJava\" MAYSCRIPT>");
document.write("</Applet>");
// After the page loads, the browser automatically calls
// the onLoad function.
// onLoad calls the setSelectionChangedObserver method
// from MGMap, providing the
Setting Up Event Handlers | 73
Page 74

Installing Plug-In and Java Editions Observer Applets (continued)
// Autodesk MapGuide Viewer, Java Edition
// with the observer object that handles selection
// changed events.
function onLoad()
{
if (navigator.appName() == "Netscape")
getMap().setSelectionChangedObserver(document.obsJava);
}
function onSelectionChanged(map)
{
alert("Selection Changed");
}
}
// Autodesk MapGuide Viewer, Java Edition was not
// installed so we check to see if the browser is Netscape
else if (navigator.appName() == "Netscape")
{
// The browser is Netscape, so we embed the
// Autodesk MapGuide Viewer Plug-In Observer Applet
document.write("<Java Applet CODE=\"MapGuideObserver6.class\"
WIDTH=2 HEIGHT=2 NAME=\"obs\" MAYSCRIPT>");
document.write("</Java Applet>");
function onLoad()
{
if (navigator.appName() == "Netscape")
getMap().setSelectionChangedObserver(document.obs);
}
function onSelectionChanged(map)
{
alert("Selection Changed");
}
}
</SCRIPT>
74 | Chapter 5 Handling Events
Page 75

ActiveX Control Event Handlers
You can handle events from the Autodesk MapGuide Viewer ActiveX Control
within Microsoft Internet Explorer by defining VBScript functions.
Define VBScript functions in the HTML file where the <OBJECT> tag resides.
Define a function for each of the events that you want to handle. Function
names must begin with the name of the MGMap object, followed by an under-
score (_), followed by the event name and parameter list. For example:
<SCRIPT LANGUAGE="VBScript">
Sub map_onSelectionChanged(map)
onSelectionChanged map
End Sub
</SCRIPT>
When an event occurs, Internet Explorer looks for a VBScript function with
the name of the object in which the event occurred followed by the event.
For example, in response to an onSelectionChanged event, Internet
Explorer looks for a function named mapName_onSelectionChanged. If it
finds such a function, it treats it as the event handler.
Plug-In and ActiveX Control Event Handlers
The following examples support event handling for both Netscape Navigator
and Internet Explorer.
VBScript Example
This VBScript example is designed to handle the onDigitizedPoint event
for both Netscape Navigator and Internet Explorer:
// Internet Explorer Observer
<SCRIPT LANGUAGE="VBScript">
//send onDigitizedPoint events from the
// Autodesk MapGuide Viewer ActiveX Control to the
//event-handling function
Sub map_onDigitizedPoint(Map, Point)
onDigitizedPoint Map, Point
End Sub
</SCRIPT>
// Netscape Navigator Observer Applet: MapGuideObserver6.class
// ...if Netscape, embed event observer
if (navigator.appName == "Navigator")
{
document.write("<APPLET CODE=\"MapGuideObserver6.class\"
WIDTH=2 HEIGHT=2 NAME=\"obs\" MAYSCRIPT>");
document.write("</APPLET>");
}
Setting Up Event Handlers | 75
Page 76

We named the event observer obs. To call this observer for Netscape
Navigator, refer to the observer as document.obs, because in the Netscape
object model the observer is an object of the document. Be sure to copy the
Autodesk MapGuide Viewer Plug-In observer applet code
MapGuideObserver6.class to the same directory as your HTML files, or
this code won’t work. If you were to embed MapGuideObserver6.class in
a different frame or window from the function where you called it, you will
need to specify the full window.frame.document.object name. For
example: parent.mapframe.document.obs.
Now, suppose you have a button named Digitize. This button is set up so
that its onClick event (a browser event) calls a function you created,
DigitizeIt. The DigitizeIt function calls the digitizePoint method,
an Autodesk MapGuide Viewer API method that waits for the user to click a
point on the map and then captures that point. For Netscape Navigator, the
digitizePoint method requires an event observer as a parameter, whereas
Internet Explorer does not. Here is the code for both:
function digitizeIt()
{
if (navigator.appName == "Navigator")
getMap().digitizePoint(document.obs);
else
getMap().digitizePoint();
}
So if the user is viewing the map in Netscape, the observer applet
(document.obs) is passed as a parameter. The browser waits for the user to
click a point on the map, which triggers the onDigitizedPoint event.
Then, one of the two observers picks up the event and tells the browser what
function to call next, namely an event handler function you named
onDigitizedPoint. The onDigitizedPoint function then does whatever
you want with the event, such as retrieving the coordinates of the point the
user clicked.
76 | Chapter 5 Handling Events
Page 77

JavaScript Example
The following JavaScript example shows an HTML page that handles the
onSelectionChanged event for both Netscape Navigator and Microsoft
Internet Explorer browsers:
<SCRIPT LANGUAGE="JavaScript">
if (navigator.appName() == "Netscape")
{
// Embed the Autodesk MapGuide Viewer Plug-In Observer Applet
document.write("<Java Applet CODE=\"MapGuideObserver6.class\"
WIDTH=2 HEIGHT=2 NAME=\"obs\" MAYSCRIPT>");
document.write("</Java Applet>");
}
function onLoad()
{
if (navigator.appName() == "Netscape")
getMap().setSelectionChangedObserver(document.obs);
}
function onSelectionChanged(map)
{
alert("Selection Changed");
}
</SCRIPT>
If this script is loaded in Netscape Navigator, it first adds an <APPLET> tag to
the document, which loads the MapGuideObserver6.class applet. The
<APPLET> tag must be added in this manner or the page will not load
correctly in Internet Explorer. The applet is given the name obs. After the
page loads, the browser automatically calls the onLoad function. onLoad
calls the setSelectionChangedObserver method from MGMap, providing
the Autodesk MapGuide Viewer Plug-In and its observer applet with the
observer object that handles selection changed events. Finally, the
map_onSelectionChanged function is implemented to handle the event in
JavaScript. This one function will now handle selection changed events from
both the Autodesk MapGuide Viewer Plug-In and Autodesk MapGuide
Viewer ActiveX Control.
To see a fully functional event handling example, choose Help ➤ Contents
➤ Examples Advanced ➤ Event Handling in the Autodesk MapGuide Viewer
API Help. This example implements an observer object that supports all of the
observer interfaces by forwarding the events back to JavaScript functions that
have identical semantics to the Autodesk MapGuide Viewer ActiveX Control
event handlers.
Setting Up Event Handlers | 77
Page 78

VBScript and JavaScript Example
The following VBScript and JavaScript example shows an HTML page that
handles the onSelectionChanged event for both Netscape and Microsoft
browsers. This example forwards the event from your VBScript function to a
shared JavaScript function that processes the event. For example, the
following function handles the onSelectionChanged event for an MGMap
object called map:
// This VBScript function handles events from the
// Autodesk MapGuide Viewer ActiveX Control
// control and passes it to the JavaScript function defined
// below. Netscape browsers will ignore the VBScript methods.
<SCRIPT LANGUAGE="VBScript">
Sub map_onSelectionChanged(map)
onSelectionChanged map
End Sub
</SCRIPT>
// The following JavaScript function processes events
// for both the Autodesk MapGuide Viewer ActiveX Control and
// Autodesk MapGuide Viewer Plug-In.
// Autodesk MapGuide Viewer ActiveX Control events
// are forwarded to this function via VBScript, and
// Autodesk MapGuide Viewer Plug-In events are
// forwarded to this function via the
// Autodesk MapGuide Viewer Plug-In observer.
<SCRIPT LANGUAGE="JavaScript">
function onSelectionChanged(map)
{
alert("Selection Changed");
}
</SCRIPT>
Writing Event Handlers
To make an Autodesk MapGuide observer work properly, always give your
event handler the same name as the event it is handling. When the event is
fired, the code in the corresponding observer is executed automatically. This
section describes how to write JavaScript and Java event handlers for the
onBeginLayout and onEndLayout events.
78 | Chapter 5 Handling Events
Page 79

Page Setup Event Handler Example
If you want your application to control settings from the Autodesk
MapGuide Viewer Page Setup dialog box, you can write event handling code
that responds to the onBeginLayout event. When onBeginLayout is triggered, it automatically passes two objects, the MGPageSetup and
MGPrintInfo objects:
void onBeginLayout (MGPageSetup pgSetup, MGPrintInfo info)
The MGPageSetup object describes the state of the Page Setup dialog box
immediately before the user clicked OK in the Print dialog box. The
MGPrintInfo object provides information about the resolution of the
output device and the size of the printable area of the page.
The following example shows one way to write an onBeginLayout event
handler in JavaScript that suppresses all page elements except the map. The
example assumes you’ve set up the event handlers as described in “Setting
Up Event Handlers” on page 72, and enabled print events as described in
“Enabling the Print Events” on page 66.
To suppress page elements except the map
1 Create a button on the HTML page:
<form>
<input type="button" value="Just the Map"
OnClick="print_map_only();" name="myButton">
</form>
2 Create a JavaScript function that the button will call. In this example, the
function sets the state of a boolean variable called map_only. The variable
will be read by our event handler, so we’ve given it global scope by declaring it outside the function body:
var map_only; // put var outside function body
function print_map_only()
{
map_only = "true";
getMap().printDlg();
map_only = "false";
}
Writing Event Handlers | 79
Page 80

3 Write the event handler. It goes in the HTML page (or the JavaScript .js
file), just like any other JavaScript function. This function is executed
automatically every time the onBeginLayout event fires. Note that the
function takes an MGPageSetup object and an MGPrintInfo object as its
parameters:
function onBeginLayout (pgSetup, info)
{
if (map_only == "true")
{
pgSetup.setInclude("mg_legend", false);
pgSetup.setInclude("mg_northarrow", false);
pgSetup.setInclude("mg_scalebar", false);
pgSetup.setInclude("mg_title", false);
pgSetup.setInclude("mg_timestamp", false);
pgSetup.setInclude("mg_url", false);
}
}
The following code shows how to implement the same event handler for the
onBeginLayout event in Java:
public class MyObserver extends Applet implements
MGPrintingObserver
{
public void onBeginLayout(MGPageSetup pgSetup, MGPrintInfo info)
{
// turn off all elements except the map
pgSetup.setInclude("mg_scalebar", false);
pgSetup.setInclude("mg_northarrow", false);
pgSetup.setInclude("mg_title", false);
pgSetup.setInclude("mg_timestamp", false);
pgSetup.setInclude("mg_legend", false);
}
}
Note You can control the Page Setup without using the onBeginLayout
event, but the results are different. In the example above, the Page Setup is modified only for that printout. Because the event handler is working with a copy of
the MGPageSetup object, subsequent printouts from the popup menu don’t
show these changes, and the changes don’t appear in the Page Setup dialog box.
If you were to write a similar function that was not attached to the
onBeginLayout event, the changes would continue to be reflected in both the
printout and the Page Setup dialog box until the map is refreshed.
80 | Chapter 5 Handling Events
Page 81

Print Event Handler Example
If you want your application to change the title font, you can add a custom
symbol, or control the position and size of any page element. To do this, you
need to write event handling code that responds to the onEndLayout event.
When onEndLayout is triggered, it automatically passes two objects,
MGPrintLayout and MGPrintInfo objects:
void onEndLayout (MGPrintLayout prLayout, MGPrintInfo info)
The MGPrintLayout object provides access to printed page elements. You
can then use MGPageElement and MGExtentEx to control how those
elements display. The MGPrintInfo object provides information about the
resolution of the output device and the size of the printable area of the page.
The following example shows one way to write a print event handler in JavaScript that adds a custom symbol (myLogo)to the printout. The example
assumes you’ve set up the event handlers as described in “Setting Up Event
Handlers” on page 72, and enabled print events as described in “Enabling the
Print Events” on page 66.
To add a custom symbol to the printout
1 Create a button on the HTML page:
<form>
<input type="button" value="Add Symbol"
OnClick="add_symbol();" name="myButton">
</form>
2 Create a JavaScript function that the button will call. In this example, the
function sets the state of a boolean variable called new_symbol. The variable will be read by our event handler, so we’ve given it global scope by
declaring it outside the function body:
var new_symbol; // put var outside function body
function print_map_only()
{
new_symbol = "true";
getMap().printDlg();
new_symbol = "false";
}
Writing Event Handlers | 81
Page 82

3 Write the event handler. It goes in the HTML page (or the JavaScript .js
file), just like any other JavaScript function. This function is executed
automatically every time the onEndLayout event fires. Note that the
function takes an MGPrintLayout object and an MGPrintInfo object as
its parameters:
function onEndLayout (layout, info)
{
if (new_symbol == "true")
{
int pixelsPerInch = info.getPageResolution();
// retrieve the page elements from the MGPrintInfo class
MGPageElement mapEle = layout.getPageElement("mg_map");
MGPageElement logoEle = layout.addSymbol("mylogo");
// get the extents of the page elements
MGExtentEx mapExt = mapEle.getExtent()
MGExtentEx logoExt = logoEle.getExtent();
// set the width and height of the logo to 1" by 1"
logoExt.set(mapExt.getMinX(), mapExt.getMinY(),
mapExt.getMinX() + pixelsPerInch,
mapExt.getMinY() + pixelsPerInch);
logoEle.setExtent(logoExt);
}
}
The following code shows how to implement the same event handler for the
onEndLayout event in Java:
public class MyObserver extends Applet implements
MGPrintingObserver
{
public void onEndLayout(MGPrintLayout layout, MGPrintInfo info)
{
int pixelsPerInch = info.getPageResolution();
// retrieve the page elements from the MGPrintInfo class
MGPageElement mapEle = layout.getPageElement("mg_map");
MGPageElement logoEle = layout.addSymbol("mylogo");
// get the extents of the page elements
MGExtentEx mapExt = mapEle.getExtent()
MGExtentEx logoExt = logoEle.getExtent();
// set the width and height of the logo to 1" by 1"
logoExt.set(mapExt.getMinX(), mapExt.getMinY(),
mapExt.getMinX() + pixelsPerInch,
mapExt.getMinY() + pixelsPerInch);
logoEle.setExtent(logoExt);
}
}
82 | Chapter 5 Handling Events
Page 83

Plug-In Event Handler Example
To handle events in an applet for the Autodesk MapGuide Viewer Plug-In,
you need to implement the corresponding Autodesk MapGuide Viewer event
handler interfaces in your applet.
To implement event handler interfaces
1 Implement the interface of the event that you want to handle in your
applet.
For instance, if you want to handle the onDigitizedCircle event, you
need to implement the MGDigitizeCircleObserver interface in your
applet. The MGDigitizeCircleObserver observer contains one
method, onDigitizedCircle. To implement
MGDigitizeCircleObserver, your applet must implement this
method. For example:
public class myApplet extends applet implements
MGDigitizeCircleObserver
{
public void onDigitizedCircle(MGMap map, String units,
MGPoint center, double radius)
{
// Place your event-handling code here
}
...
}
Now your applet can act as an event observer for the
onDigitizedCircle event.
2 Every time you call the method that triggers the event, pass in the name
of your applet as the second parameter.
For example, whenever you call digitizeCircle metho d in your applet,
you must pass in your applet name (in this case, the keyword this since
the applet is referring to itself) as the second parameter. For example:
Public void testDigitizedCircle()
{
myUSMap.digitizeCircle("", this);
}
When Autodesk MapGuide Viewer Plug-In triggers the
onDigitizedCircle event, the applet will execute the code you implemented for onDigitizedCircle in your applet.
Writing Event Handlers | 83
Page 84

84
Page 85
Using Reports to Query and
Update Data Sources
6
Your Autodesk MapGuide® applications can include
reports that enable users to display and modify database
information associated with a map. This chapter explains
how Autodesk MapGuide generates reports and shows
you how to create report scripts using two popular server-
side technologies, Macromedia
Microsoft
®
Active Server Pages.
®
ColdFusion® and
■ Overview
■ Introducing ColdFusion and
ASP
■ Creating report scripts with
ColdFusion
■ Creating report scripts with
ASP
85
Page 86

Overview
When creating a map, you can add reports to the map. Typically, a report is
an HTML page that displays information about the selected map features on
the layer. However, because the power behind the report is a report script
that you create using a third-party tool like ColdFusion, Active Server Pages
(ASP), Java, LiveWire™, or dbWeb™, the report can do much more than
display information—it can perform any number of tasks that you can code
into the script. For example, in this chapter you will see a sample application
that allows the user to click a point on the map and then updates the source
database with that point, so that any map layer that uses that database as its
data source will now display that point on the map. This chapter focuses on
these types of advanced applications performed by the report script.
How Reports Are Generated
The role of Autodesk MapGuide in generating reports is to construct a URL
dynamically and send it as an HTTP request to a Web server. This URL is
composed of a path to an application on the Web server along with a set of
parameters. The server, in turn, will process the request and send (or post)
the results.
Autodesk MapGuide can generate two distinct types of requests by passing
unique parameters, along with the URL, to the server. The first type of URL
request passes key values of the selected map features. These key values are
the keys that are defined in the data source. The second type of URL request
passes a point feature and its location.
Specifying the Report Script
The report script contains the necessary code to connect to the appropriate
database, build the query, and display the results. For example, the script
might be a ColdFusion template file (CFM) or Active Server Page (ASP) that
resides on the Web server. The Reports tab in the Map Window Properties
dialog box in Autodesk MapGuide Author allows you to specify the report
script, as well as set other properties of the report. In the URL text box, you
specify the name and path of the script you want to use to pass the report
information to your reporting engine.
86 | Chapter 6 Using Reports to Query and Update Data Sources
Page 87

The Request
Autodesk MapGuide® Author will use the report settings defined in the Map
Window Properties dialog box to construct the URL that is sent to the server.
For example, after all of the settings are specified, the URL code might look
like this:
http://www.myserver.com/reports/
report.cfm&OBJ_TYPE=landuse&OBJ_KEYS='01235639','01235640','01235641'
This URL code is a request to launch a ColdFusion template called report.cfm.
The template file and the two parameters OBJ_TYPE and OBJ_KEYS are
passed to the ColdFusion engine by the Web server. The parameters will serve
as arguments or variables that can be used by the ColdFusion template file.
Note By default, Autodesk MapGuide Author sends map feature key values to
the URL as characters. However, if you specify another data type for the key column, Autodesk MapGuide will send the keys as that type instead. You set the key
column type by selecting it from the Type list box on the Data Sources tab of the
Map Layer Properties dialog box in Autodesk MapGuide Author.
Launching the Report
You can launch the View Reports dialog box from Autodesk MapGuide
Viewer by right-clicking the map and choosing View ➤ Reports, or by
clicking the Report button on the Autodesk MapGuide
methods will display a dialog box that shows a list of available reports
defined for the map. Using the Autodesk MapGuide Viewer API, you can also
launch reports programmatically; you call the View Reports dialog box using
viewReportsDlg and launch the report directly using viewReport.
Note Autodesk MapGuide Viewer ActiveX Control cannot open reports whose
names contain double quotation marks, such as “Server Report”. Therefore, if
you are developing for Autodesk MapGuide Viewer ActiveX Control, do not use
double quotation marks in your report names. Autodesk MapGuide Viewer
ActiveX Control can open reports whose names contain single quotation marks,
such as ‘Server Report’.
®
Viewer toolbar. Both
Overview | 87
Page 88

Introducing ColdFusion and ASP
The examples in this chapter were created using two report engines,
Macromedia ColdFusion and Microsoft Active Server Pages (ASP). ColdFusion and ASP are application servers. An application server is an application
that works with the Web server to provide additional Web functionality. Like
the Web server, it runs in the background as a Windows
Both products work essentially the same way. You build Web pages that
include special tags, and when a Web browser requests one of those pages,
the application server interprets the tags, replaces them with the results of
the specified calculations or database queries, and then sends the completed
page to the Web server. The Web server then sends the page to the browser
to be displayed. Because the processing is done by the server, the end-user
sees only the final HTML output, not the code used to create that output. (Of
course, the HTML can include anything—even client-side scripting code!)
Although end-users can view the source of your HTML output, they never see
the server-side scripting code used to create that output.
This developer’s guide uses ColdFusion and ASP for its examples because
developing with these products is easier than writing your own Perl scripts or
Visual Basic/C++ DLLs, and because these products are by far the most
common platforms for Autodesk MapGuide server-side application development. ColdFusion is available from Macromedia, and ASP is included as part
of Windows 2000 and Windows NT Server 4.0 with the Windows NT 4.0
Option Pack. Although the examples are specific to ColdFusion and ASP, the
concepts are general, applying to Common Gateway Interface (CGI) and to
other application servers as well.
®
ColdFusion supports both Microsoft
the Netscape
map applications, can only be run on the Microsoft Web server. Keep in
mind, though, that this does not affect your users; the HTML pages you
produce can be read by any Web browser. The limitation exists only for the
Web server.
®
Web servers. ASP supports IIS only, meaning that it, and your
Internet Information Server® (IIS) and
®
NT service.
88 | Chapter 6 Using Reports to Query and Update Data Sources
Page 89

Creating Report Scripts with ColdFusion
A ColdFusion script, or template, is essentially a standard HTML file that
includes extra tags written in a server-side markup language called CFML
(ColdFusion Markup Language). CFML tags begin with the letters CF, and are
used to tell ColdFusion to process either a calculation or a query. The tags can
also tell ColdFusion which data source you want to use and how you want to
manipulate or display the information in that data source. A template uses
the file extension .cfm to identify itself and let the Web server know that it
should be passed to the ColdFusion service for processing.
ColdFusion was designed to provide database connectivity to your Web
pages. It is a full-fledged development environment that includes functions,
operators, variables, control structures, and more. You can use ColdFusion to
create powerful and complex Web applications. But simple applications have
their uses too, as we’ll see later in this chapter. Despite its power, ColdFusion
is fairly easy to learn; if you’re familiar with HTML coding, you’ll get up to
speed quickly.
The following examples show how to create report scripts with ColdFusion.
We recommend that you read them in order.
Note For ASP versions of the same examples, see “Creating Report Scripts with
ASP” on page 109.
Listing File Contents with ColdFusion
This example shows a simple template that lists the contents of a map
resource database. Note that this template accesses the database directly,
instead of using the Autodesk MapGuide reporting feature. Later, we’ll see
how Autodesk MapGuide fits into the picture.
Let’s say you have an MWF file that points to a database containing parcel
information, such as the lot number, street address, owner’s name, and so
on. If you want to list the contents of that database at the bottom of an
HTML page displaying the map, you would first rename the HTML file with
a .cfm extension and place it in a directory with script or execute permissions.
Then you would add <CFQUERY> and <CFOUTPUT> statements to the file. The
<CFQUERY> tag tells ColdFusion which database to use and which records to
select from that database. You can place <CFQUERY> anywhere in the page,
as long as it appears before <CFOUTPUT>. The <CFOUTPUT> tag controls how
the database output will be displayed on the page. You place this tag within
<BODY>, at the location you want the database output to appear.
The next sections describe each of these tasks in more detail.
Creating Report Scripts with ColdFusion | 89
Page 90

Setting Up the Query
First we’ll build the <CFQUERY> statement. If your map links to a table called
Parcel_Data through a data source Assessor, <CFQUERY> will look like
this:
<CFQUERY NAME="get_parcel_info" DATASOURCE="Assessor">
SELECT * FROM Parcel_Data
</CFQUERY>
The NAME attribute specifies the name of the ColdFusion query. This name
can be anything you want, as long as it matches the name specified later in
<CFOUTPUT>. The DATASOURCE attribute is the OLE DB data source name
(DSN), in this case Assessor. Between the <CFQUERY> beginning and end
tags is a SQL statement specifying which part of the table you want to look
at (this selection is known as a recordset.) In this case, we’re selecting everything (*) from the Parcel_Data table.
Controlling the Output
Now we’ll assemble the <CFOUTPUT> statement. If you want to display the
parcel number, owner’s name, and year built, your tag will look like this:
<CFOUTPUT QUERY="get_parcel_info">
<P>Parcel Number: #APN#<BR>
<P>Owner Name: #Owner_Name#<BR>
<P>Year Built: #Year_Built#</P>
</CFOUTPUT>
The QUERY attribute tells ColdFusion which recordset you’d like to display;
this attribute matches the NAME you specified in <CFQUERY>. The names
within pound signs (#APN#, #Owner_Name#, #Year_Built#) are
ColdFusion variables that match column names in the database table (for
example, #APN# refers to the APN column). Everything else is straight HTML.
Seeing the Results
Now we’re ready to load the page in the browser.
However, because this particular table has more than 5,000 records, selecting
everything in it might not be such a good idea. Let’s limit the output by
showing only houses built in 1963. To do so, go back to <CFQUERY> and
change the SQL statement to the following:
SELECT * FROM Parcel_Data Where Year_Built = '1963'
90 | Chapter 6 Using Reports to Query and Update Data Sources
Page 91

Here’s a listing of the complete CFM file called parcel_report.cfm:
<HTML>
<HEAD>
<!-- ColdFusion query -->
<CFQUERY NAME="get_parcel_info" DATASOURCE="Assessor">
SELECT * FROM Parcel_Data Where Year_Built = '1963'
</CFQUERY>
<TITLE>ColdFusion Example</TITLE>
</HEAD>
<BODY>
<H1>Listing File Contents with ColdFusion</H1>
<!-- ColdFusion output tags -->
<CFOUTPUT QUERY="get_parcel_info">
<P>Parcel Number: #APN#<BR>
Owner: #Owner_Name#<BR>
Year Built: #Year_Built#</P>
</CFOUTPUT>
</BODY>
</HTML>
The following shows the page as it appears in a browser.
The HTML output
In this example, the database happens to be an Autodesk MapGuide resource,
but it could be anything: a Microsoft
their phone numbers, a Microsoft
account balance, or anything else you might store in a table.
®
Access database listing employees and
®
Excel spreadsheet showing your checking
Creating Report Scripts with ColdFusion | 91
Page 92

In most cases, you’ll want to access your database resources through
Autodesk MapGuide Viewer, by linking them to features and layers in the
map. The next two examples show you how to do this.
Querying and Displaying Data via the Map with
ColdFusion
Now that we’ve seen how ColdFusion works, let’s use it with Autodesk
MapGuide. This example uses the StarterApp.mwf file from the Autodesk
MapGuide Web site. Note that the full set of Starter Application files is available for download at http://www.autodesk.com/mapguidedemo.
Setting Up the Report in Autodesk MapGuide Author
We’ll start by specifying report information in Autodesk MapGuide Author.
Our report will be called Parcel Data (CF), and it will access a CFM file whose
URL is http://www.yourserver.com/parcel_report.cfm. We want the CFM file
to display information about user-selected features on a layer called
Assessment. The Map Window Properties dialog box shows our selection.
Dialog box specifications for Parcel Data (CF)
92 | Chapter 6 Using Reports to Query and Update Data Sources
Page 93

Here are descriptions of how we used the options on the Reports tab:
■ Report—Specifies the report name as it appears in Autodesk MapGuide
Viewer. Our report is Parcel Data (CF).
■ URL— Specifies the name and location of the report script, in this case
parcel_report.cfm on www.yourserver.com.
■ Data—We left this field blank but could have used it to pass additional
URL parameters to parcel_report.cfm. For example, if our ColdFusion file
contained definitions for more than one query, we could have passed a
parameter telling the file which of the queries to run, such as
report = 'A'.
■ Type —Specifies whether the report is based on the keys of selected fea-
tures (as this one is), or on the coordinates of a point the user clicks.
■ For Map Layers—Specifies the layer or layers you want the report to be
linked to. Our report operates only on features on the Assessment layer.
■ Parameter—Specifies the name of the URL parameter used to send the
feature key (or keys) to parcel_report.cfm. The name can be anything you
want, as long as it matches the name you specified in parcel_report.cfm.
We’ve selected the Autodesk MapGuide Author default, OBJ_KEYS.
When a user selects one or more features from the Assessment layer and
runs the Parcel Data (CF) report, Autodesk MapGuide constructs a URL that
invokes parcel_report.cfm and tells it to generate a report on the selected
features, which are identified by their OBJ_KEY values. If the user selected a
single feature whose key was 941-0176-003-00, the URL would look like
this:
http://www.yourserver.com/parcel_report.cfm?OBJ_KEYS='941-0176003-00'
If the user selected multiple features, the URL could look like this:
http://www.yourserver.com/
parcel_report.cfm?OBJ_KEYS='941-0176-003-00','941-0176-006-00','941-0176-004-00'
Note that OBJ_KEYS is represented as a standard URL parameter. To
ColdFusion, this parameter is no different from one submitted by an HTML
form element. As we’ll see in the next section, ColdFusion processes it
accordingly.
Creating Report Scripts with ColdFusion | 93
Page 94

Creating the Report Script
Now let’s create the ColdFusion template that will process the Autodesk
MapGuide report. The following code listing is for the parcel_report.cfm file:
<HTML>
<HEAD><TITLE>ColdFusion Report Data</TITLE></HEAD>
<BODY>
ColdFusion-- ColdFusion query -->
<CFQUERY DATASOURCE="assessor" NAME="get_parcel_info">
SELECT * FROM Parcel_Data Where APN IN
(#PreserveSingleQuotes(OBJ_KEYS)#)
</CFQUERY>
<H1>ColdFusion Report Data</H1>
<!-- ColdFusion the output tags -->
<CFOUTPUT QUERY="get_parcel_info">
<P>Parcel Number: #apn#<BR>
Owner: #owner#<BR>
Year Built: #yearblt#</P>
</CFOUTPUT>
</BODY>
</HTML>
Note that CFML tags are almost identical to those in the first example
(“Listing File Contents with ColdFusion,” on page 89). The only change is to
the <CFQUERY> tag, which uses a different SQL statement:
SELECT * FROM Parcel_Data Where APN IN
(#PreserveSingleQuotes(OBJ_KEYS)#)
As with the previous example, the statement is selecting records from the
Parcel_Data DSN. The difference is that the SQL statement now points to
a ColdFusion variable, #PreserveSingleQuotes(OBJ_KEYS)#. The
OBJ_KEYS values refer to the parameter of the same name we specified in
Autodesk MapGuide Author. As its name suggests, the
PreserveSingleQuotes function tells ColdFusion to keep the singlequotes surrounding each feature key, instead of removing them automatically as it normally would.
The SQL statement is basically saying in Parcel_Data to select all records
whose APN field matches OBJ_KEYS. In other words, select the records that
correspond to the selected features on the map. If OBJ_KEYS contains
multiple keys, ColdFusion outputs the feature data associated with each key.
94 | Chapter 6 Using Reports to Query and Update Data Sources
Page 95

Creating an HTML Page to Display the Map
The last step is to create an HTML page to display our map. The following is
for the parcel_map.htm file:
<HTML>
<HEAD><TITLE>ColdFusion Example</TITLE></HEAD>
<BODY>
<H1>Querying and Displaying Data via the Map</H1>
<P>This example uses <b>ColdFusion</b> to access an Autodesk
MapGuide Report</P>
<!-- embedded map -->
<OBJECT ID="map" WIDTH=600 HEIGHT=250
CLASSID="CLSID:62789780-B744-11D0-986B-00609731A21D">
<PARAM NAME="URL"
VALUE="http://www.yourserver.com/maps/StarterApp.mwf>
<EMBED SRC="http://www.yourserver.com/maps/StarterApp.mwf
NAME="map" WIDTH=600 HEIGHT=250>
</OBJECT>
</BODY>
</HTML>
Seeing the Results
Users can now generate a report for one or more map features by selecting
the map features, right-clicking and choosing View ➤ Reports from the
popup menu, and then selecting Parcel Data (CF).
The following illustration shows parcel_map.htm in the Web browser.
Creating Report Scripts with ColdFusion | 95
Page 96

Displaying the parcel data report in a new window
Redirecting Report Output
To avoid cluttering the desktop, let’s generate the report in the current
browser window, instead of displaying it in a new instance of the browser.
Go back to the parcel_map.htm file and modify the embedded map code:
<OBJECT ID="map" width=600 height=250
CLASSID="CLSID:62789780-B744-11D0-986B-00609731A21D">
<PARAM NAME="URL"
VALUE="http://www.yourserver.com/maps/StarterApp.mwf?ReportTarget=_self>
<EMBED src="http://www.yourserver.com/maps/StarterApp.mwf?ReportTarget=_self
NAME="map"WIDTH=600 HEIGHT=250>
</OBJECT>
Notice that we’ve added a Autodesk MapGuide Viewer URL parameter to the
map reference:
http://www.yourserver.com/maps/StarterApp.mwf?ReportTarget=_self
96 | Chapter 6 Using Reports to Query and Update Data Sources
Page 97

ReportTarget specifies the window or frame in which you’d like your
report to display. By specifying _self, we redirect the report output so that
it displays in the current window.
Displaying the parcel data report in the current window
At first glance this appears to be a good solution, but it has some problems.
Users might get confused about where they are. Worse yet, when they click
the Back button, they will find that the map has been reloaded and the location they zoomed to has been lost. A better approach is to display the map
and the report in two frames of the same window.
Creating Report Scripts with ColdFusion | 97
Page 98

Start by creating a standard HTML file that defines a frameset. The frameset
should display the map on the left and a blank page on the right:
<HTML>
<HEAD>
<TITLE>ColdFusion Report Data</TITLE>
</HEAD>
<!-- frames -->
<FRAMESET COLS="65%,*">
<FRAME NAME="Left" SRC="parcel_map.htm" MARGINWIDTH="10"
MARGINHEIGHT="10" SCROLLING="auto" FRAMEBORDER="yes">
<FRAME NAME="Right" SRC="about:blank" MARGINWIDTH="10"
MARGINHEIGHT="10" SCROLLING="auto" FRAMEBORDER="yes">
</FRAMESET>
</HTML>
Notice that we have assigned the names Left and Right to the frames. The
source for Left is parcel_map.htm, the file containing our embedded map.
The source for Right is about:blank, a standard browser function whose
purpose is to display a blank window or frame.
Now that we have the frameset, let us go back to the parcel_map.htm file and
change the ReportTarget parameter to Right, the name we assigned to our
right-hand frame:
<OBJECT ID="map" WIDTH=600 HEIGHT=250
CLASSID="CLSID:62789780-B744-11D0-986B-00609731A21D">
<PARAM NAME="URL"
VALUE="http://www.yourserver.com/maps/StarterApp.mwf?ReportTarget=Right>
<EMBED
SRC="http://www.yourserver.com/maps/StarterApp.mwf?ReportTarget=Right
NAME="map" WIDTH=600 HEIGHT=250>
</OBJECT>
98 | Chapter 6 Using Reports to Query and Update Data Sources
Page 99

The following illustration shows the map and the report in two frames of the
same window.
Displaying the map and report in frames
Users can now invoke as many reports as they want, without losing their
place in the map or calling a new instance of the browser.
Creating Report Scripts with ColdFusion | 99
Page 100

Adding a Button with the Viewer API
An Autodesk MapGuide report is generated by right-clicking the map and
then choosing View ➤ Reports from the popup menu. This interface is not
immediately apparent to users, so we’ll make it easier by creating a Parcel
Report button that will display the report.
First we’ll add the following <SCRIPT> tag to the parcel_map.htm file:
<SCRIPT>
function getMap()
{
if (navigator.appName == "Netscape")
return parent.Left.document.map;
else
return parent.Left.window.map;
}
function runReport()
{
parent.Right.document.write("<P>Select one or more parcels first.</P>");
getMap().viewReport('Parcel Data (CF)');
}
</SCRIPT>
The <SCRIPT> tag holds two JavaScript functions. The first function is
getMap. The second, runReport, displays our Autodesk MapGuide report.
The runReport function consists of two statements. The first statement
writes a line of text to the right-hand frame of our report application. You
will notice that the text instructs users to select one or more map features.
This instruction displays each time runReport is invoked, regardless of
whether the user has selected features. If features are selected, the instructions are replaced in the frame by the contents of the newly generated report;
otherwise the instructions remain in the frame to provide feedback.
Note parent refers to the top-level frame and Right is the name we specified
for our right-hand frame in parcel_frames.htm. Refer to third-party JavaScript documentation for more information on writing to frames and windows.
The second statement uses the viewReport method to run our report. The
statement begins by calling getMap, which returns the map object in the
Web page. The map object is then passed to viewReport, which directs
Autodesk MapGuide to display Parcel Data (CF).
Now that our function is defined, we need a way to call it, adding a <FORM>
element to parcel_map.htm:
<FORM>
<INPUT TYPE="button" VALUE="Parcel Report" ONCLICK="runReport()"</INPUT>
</FORM>
100 | Chapter 6 Using Reports to Query and Update Data Sources
 Loading...