

Page 1

Stand
Adjustment
To adjust the height of
the stand, loosen the
locking collar by turning
it anti-clockwise then
raise the stand to the
desired height. Align
the centre of the glass
with the speaker’s eye
line.
Glass Angle Adjustment
To adjust the angle of the
glass, turn the adjustment
knob while supporting the
weight of the glass and
set the glass angle to
approximately 45°. The
image should be in the
centre of the glass
Display Compatibility
MSP 17”/20”
Manual
Conference
System
Guide
Locking Collar
PSP 17” Monitor
SSP 17” Monitor
autocue .com
Page 2
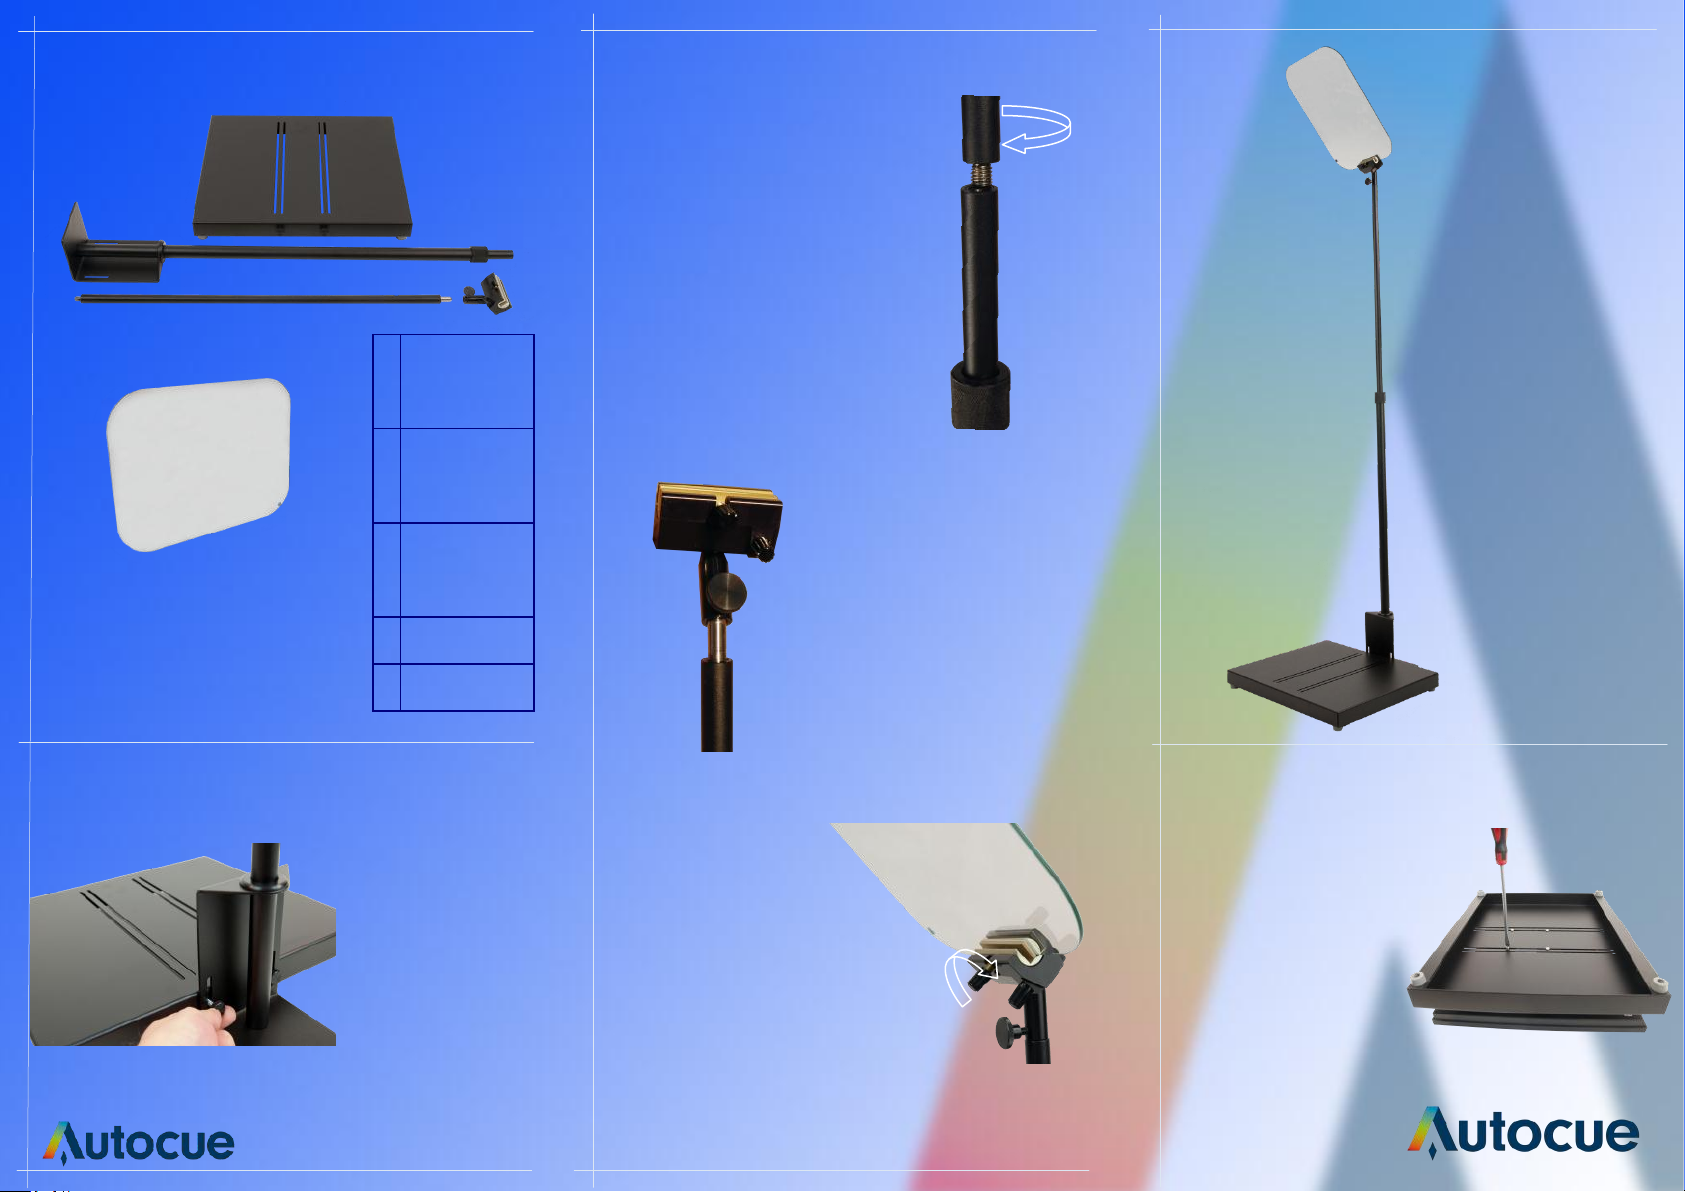
Components
Assembly
1. Secure the lower
glass stem to the
monitor mounting
base using the two
thumbscrews.
2. Mount the upper stem to
the lower stem by screwing
the two components
together.
3. Mount the glass holder to
the upper stem and secure by
tightening the thumb screw (A)
A
4. Install the glass by
inserting It into the
clamp and secure in
place by tightening
the clamp knob. (A)
The blue dot should
face the speaker.
Place the monitor on a flat
surface with the monitor
fixing holes facing upwards
and secure the monitor
mounting base using four
screws.
Note: MSP Monitors do not
need fixing to the monitor
mounting base.
A
Monitor Mounting
Completed unit
A
B
C
D
E
Monitor
A
mounting
base
Conference
B
Stand lower
stem
Conference
C
Stand upper
stem
Glass Holder
D
E
Glass
 Loading...