

Page 1

USE AND MAINTENANCE INSTRUCTION MANUAL
CABLE-LAYING MACHINE
Autocable
Drop-in 6
BEFORE USING THE MACHINE, READ THE INSTRUCTION
MANUAL.
www.Autocable.be
TRANSLATION OF THE ORIGINAL INSTRUCTIONS
Page 2

DECLARATION OF CONFORMITY
The Company
CARAVAGGI Srl
REGISTERED OFFICE, FACTORY AND ADMINISTRATION :
20, Via Monte Adamello, 25037 Pontoglio (BS), ITALY
Declares under its own responsibility that the
CABLE-LAYING MACHINE DROP-IN
Model Drop-In 6 petrol
Serial number: see rating plate
Year built: see rating plate
Complies with all the provisions regarding the following European
Directives:
Machinery Directive 2006/42/CE as an amendment to Directive 95/16/CE
And since the machine has been adapted to the following harmonized
standards and specifications, where applicable:
UNI EN ISO 12100-1-2: Machine safety – Basic concepts, general design
principles, basic terminology, methodology, technical principles.
UNI EN ISO 4254-1: Farming machinery - Safety - Part 1: General requirements.
UNI EN 13683: Garden machines - Shredders / Chippers with built-in motor -
Safety.
ISO 11684: Tractors, machinery for agriculture and forestry, powered lawn and
garden equipment - Safety signs and hazard pictorials – General principles.
Person authorised to draw up the declaration of conformity: Valerio Gianpaolo
Caravaggi
The Legal Representative
( Valerio Gianpaolo Caravaggi )
Pontoglio, 01 / 01 / 2015
Page 3

1. HAZARD PICTORIALS
Warning!
Wear a hard hat, hearing protectors and protective
glasses or goggles.
Warning!
Wear protective gloves.
Warning!
Wear safety shoes.
Warning!
Wear clothes that are suitable for work on machines
with moving parts.
Page 4
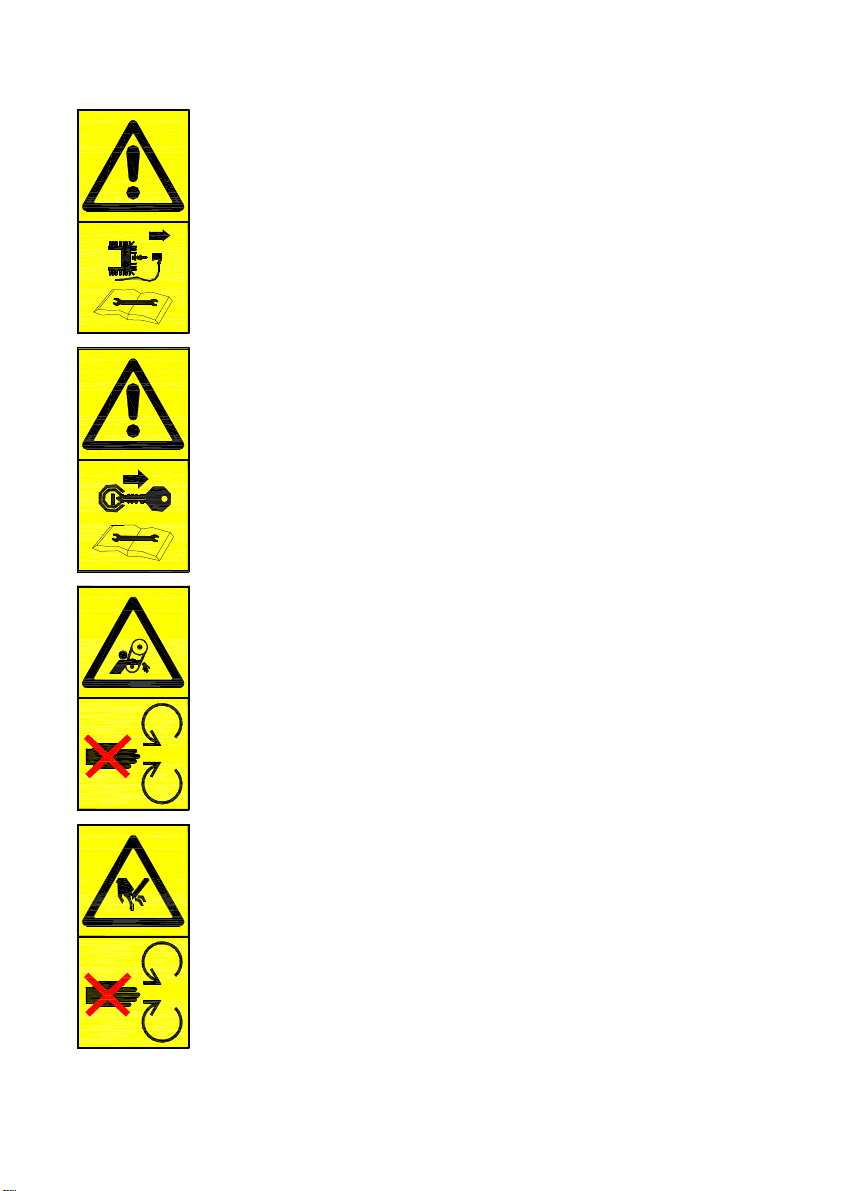
Warning!
Remove the engine spark plug before carrying out any
maintenance.
Warning!
Switch off the engine before carrying out any
maintenance.
Hazard!
Projection of splinters. Keep to a safety distance from
loading and unloading equipment.
Hazard!
Keep fingers well away from cutting elements.
Page 5

Hazard!
Make sure the blades have stopped completely before
approaching.
STOP
Caution!
Only one person must operate the machine.
Caution!
Do not use petrol engines in closed environments. Risk
of intoxication.
Caution!
Machine lifting point.
Page 6

2. HOW TO USE AND KEEP THE INSTRUCTION MANUAL
This instruction manual is aimed at the user of the machine, the owner, the
maintenance cleaning operator and the repair technician and must always be
available for consultation.
The instruction manual shows the user for which the machine was designed and
the machine’s technical characteristics. It also supplies instructions for transport,
cleaning adjustment, use, personal information maintenance, spare parts
ordering and residual risk, and warnings with regard to operations that must be
carried out with particular care.
The machine is for professional use, so the instruction manual can never be a
substitute for suitable user experience.
The manual should be considered a part of the machine and must by kept for
future reference until the machine is demolished.
The instruction manual must always be available for consultation and must be
kept in a dry, protected place.
In the case of loss or damage the user may request a replacement from the
manufacturer, quoting the series reference, type and year of construction which
are shown on the plate fixed to the Autocable machine (section 5).
The manufacturer reserves the right to update production and manual without the
obligation to update earlier production and manuals.
The manufacturer is relieved from all responsibility in cases of:
• improper use of the Autocable machine;
• uses not conforming with what is expressly specified in this documentation;
• serious deficiencies in prescribed and recommended maintenance;
• unauthorised modifications or interferences;
• use of spare parts that are not original or model specific;
• total or partial failure to follow the instructions;
• force major;
Page 7

3. IDENTIFICATION OF MAIN PARTS
1. Handle
2. Position handle adjustment
3. Regulating working depth
6. Blade
7. Cable housing
8. Graduated rod
4. Set screw
5. Engine
3
8
1
2
4
Fig. 1a
7
5
6
Fig. 2a Fig. 2b
Page 8

4. CORRECT USE OF THE MACHINE
This machine must be used by a single operator, who must remain in his work
position at the control handle during operation.
The operator must be have read and fully understood the instructions in this
manual in order to use the machine correctly.
The operator must be ensure that person or animals do not come within the field
of action while the machine is running.
The Autocable machine was built to bury the wire guide robotic mower
underground gardens.
The machine is not suitable for use in locations other than those listed above.
To work with other products, contact the machine manufactures or authorised
dealers.
The operator must be aware of all the instructions given in the instruction manual.
Fig.3
Page 9

5. UNPACKING AND PREPARATION
The Autocable machine is delivered partially dismantled. Can be supplied assembled or
packaged in cardboard to facilitate the operations of handling and transport before the
operation by the user.
To transport the machine in these conditions it is indispensable to use a transpallet or
similar with a load capacity of around 70 kilos.
Avoid:
• hoisting the autocable machine with ropes or unsuitable hoists;
• drag Autocable machine with the device in contact with the burial ground;
• bumps or shocks;
• exposing the machine to rain, frost or any bad weather.
On taking delivery check that the contents correspond with the delivery note.
Should damage or deformity due to transport be noted, make an immediate compliant to
the carrier and advise the authorised dealer or the manufacturer. In particular, check that:
• there are no dents, signs of bumps or deformations;
• there are no damp areas or signs the may lead to suppose that the pack has been
exposed to foul weather;
• there are no signs of tampering;
After checking that transport has been carried out correctly, proceed to assembling the
machine as shown in figures 5a/b/c.
• Open the box, making sure that the card is oriented in the right direction.
• Remove the machine from packing.
• Place the handle in the transport position and lock it securely.
All the machines can be lifted and transported by means of cranes or winches, using hooks
and cables, which must be approved and of an adequate capacity. Hook up to the lugs, as
shown in the pictogram affixed to the machine.
Only safe hooks, such as snap hooks, must be used for lifting. Take great care and
exercise extreme caution when loading and unloading the machine. These operations must
only be carried out by qualified personnel (slingers, truck operators, etc.). Never pass or
stand underneath the machine when it has been raised off the ground.
To transport the machine, grasp the handle and push in the desired direction with the
engine switched off.
1
Fig.4
Page 10

Fig. 5a Fig. 5b
Closure lock
Fig. 5c
Page 11

6. TECHNICAL CHARACTERISTICS
The EC identification plate is clearly visible on the Autocable Machine Drop-In 5
(fig. 6).
In all communications with the manufacturer state the serial number on the
identification plate.
www.Autocable.be
Type
2006/42
Serial No.
Year
Fig. 6
Version
Power HP (kw)
Autocable DROP-IN 6 5.5 (4.1) Petrol
Supply
Page 12

6.1 Overall dimensions
Model Bre Len Hig
DROP-IN 6 670 1000 950
Weight (kg.): ~ 70
L
WA MAX
(dB): 104
Fig. 7
Page 13

7. SAFETY RULES
This handbook contains rules on how to use the machine properly and details of
the hazards that may be encountered. Besides following the rules, the operator
should use the machine sensibly, based on his experience, and adopt all the
necessary precautions to prevent accident or injury.
The manufacturer cannot be held liable for any alterations to the machine that are
not authorised in advance in writing.
This machine is only designed for laying boundary cable in the ground in stonefree gardens and lawns. It must never be used for any other purposes.
The machine must only be operated by a fully qualified person who is authorised
to do so and is thoroughly acquainted with the operating principles and the
inherent hazards.
Read through the manual before setting to work. The machine must not be
operated by children.
7.1 GENERAL SAFETY AND ACCIDENT PREVENTION RULES
• Basic rules: check the machine carefully each time before starting up.
• Besides following the recommendations contained in this handbook, it is
important to follow the general safety and accident-prevention rules. Before
using the machine, the operator must be fully acquainted with its features,
devices, controls and functions.
• Before starting working, make sure the blades are firmly secured to the vanes.
If they look damaged, they need to be sharpened or replaced. Mount the blades
as instructed and only use original spares supplied by the manufacturer (or an
authorised dealer).
• Before and after each work session, check that the guards, covers and safety
devices are correctly installed and integral, and are properly secured with nuts
and bolts.
• The notices on the machine provide a series of important instructions. They are
there to enable you to work in complete safety. Read all the safety stickers on
the machine and follow the instructions on them. If they become damaged or
unreadable, they need to be cleaned or replaced in the exact position as
described in the relevant section.
• The machine must only be used in an open space, on flat, firm ground that is
free from obstacles.
• Do not use the machine in the rain.
Page 14

• Anyone approaching the machine enters the danger area and hence becomes
an EXPOSED PERSON. It is up to the operator to prevent other people from
entering the danger area and he himself must act with extreme caution. Stop
the machine immediately if anyone enters the danger area.
• Caution: the blades continue to turn for several seconds after the engine has
been switched off.
• Keep the handbook readily available so that you can consult it for details of the
operating cycle and maintenance instructions. If it gets lost or damaged, a
replacement copy can be obtained from the manufacturer.
• This machine must be used by a single operator, who must remain in his work
position at the control handle.
• Do not wear items of clothing that are likely to get caught up in the mechanism,
such as long wide sleeves, belts, and necklaces.
• Hearing protectors and protective goggles must always be worn when operating
the machine.
• Do not leave the machine unattended while it is running.
• Do not place any tools or other objects on the machine as they could damage it
or injure the operator.
• Use only original spares.
Safety rules during operation
• Before setting to work, check there is enough cable in the housing and the
laying device.
• Keep the face and arms well away from the cable-laying device.
• Make sure there are no stones or rocks in the way, as they would blunt the
blades.
• Try to maintain an even balance while operating the machine.
• In the event of a malfunction, excessive vibration or strange noises, switch off
the engine. Disconnect the power supply (remove the sparkplug) and establish
the cause of the problem.
Page 15

7.2 SPECIFIC SAFETY AND ACCIDENT PREVENTION RULES
7.2.1 Petrol version
• If there is a malfunction, and prior to any maintenance, adjustment and cleaning
operations (e.g. removing foreign bodies from the blades), switch off the motor
and remove the spark plug cable.
• Before setting to work, read through and follow the instructions in this handbook
and the accompanying engine handbook.
• Never use the machine in enclosed or poorly ventilated areas (even if the doors
and windows are open), as the exhaust fumes are toxic.
• Avoid smoking and lighting flames when filling with petrol.
• Always fill the fuel tank in an open area with the engine switched off.
Remember that petrol is highly flammable and explosive under certain
conditions. Fuel must be stored in suitable canisters.
• Never place anything on the engine as it could catch fire.
• Never remove the fuel tank cap or top up with petrol with the engine running or
when it is still hot.
• If any petrol gets spilt, do not attempt to start the engine immediately.
• The exhaust pipe gets very hot when the engine is running and remains hot for
some time after it is switched off. Never touch the exhaust pipe. Keep to a
safety distance.
Page 16

8. START-UP
Caution! Before starting up the engine/motor check that the Autocable machine
is on a stable surface and that there are no animals or unauthorised persons in
the work zone.
• Read the engine manufacturer’s instruction book carefully.
• Check that there is oil and fuel in the tank. Fill if necessary.
• Adjust the control handle in the most appropriate, the relevant working the
lever.
• Adjust the height of the wheel from the ground, acting in the relevant handle
clamping.
• Hold the safety lever (Fig. 8c) and grasp the starting knob (fig.8a / 8b) and pull
the cord without force until you feel the resistance caused by compression,
release the knob and then give a sharp tug to start the engine. The release of
safety lever will cause the engine to stop.
• Before beginning work let the engine idle for about 1 minute then take it to
maximum revs (using accelerator lever) and proceed with normal use, after
grip and turn the knob to the start of self-propelled.
Lever in the
home position
Starting Knob
Fig. 8a
Page 17

Accelerator
lever
Self-
propelled
knob
Fig. 8b
Safety lever
Fig. 8c
IMPORTANT!
To stop the engine, even in emergency conditions, release the safety lever.
Page 18

8.1 Use of the machine
• This machine is designed to work at a depth of 3-5 cm. The precise depth can
be regulated via the lever.
• Adjust the depth of the blades, the relevant action lever.
• Regulate the set screw to record the lever position, and hence the working
depth. The purpose of this is to optimise and speed up the cable-laying
operation.
• Regulate the graduated rod to set the distance between cables (see 8.1.1).
Depth adjustment
lever
Set screw
Blades
Fig. 9a
MAX 10° MAX 10°
Fig. 9b
IMPORTANT!
Never exceed an angle of inclination of 10°, otherwise the blades or the
transmission unit could get damaged.
Page 19
8.1.1 Adjusting the graduated rod
• Loosen the wing nut on the graduated rod.
• Pull the rod out the required distance.
• Tighten the wing nut to secure the rod.
Wing nut
Graduated
rod
Fig. 10
Page 20

8.1.2 Operation
• Grasp the handle and regulate the speed control knob as required.
Patch wire
Fig. 11
• When using close to trees, hedges or fences, the handle can be tilted by
raising and then moving to the left. Return the handle to the most comfortable
work position and secure.
1 2 3 4
In order to avoid a rupture of the blades or the transmission, you must use
the machinery on land and gardens free of rocks in the subsurface.
Fig. 12
IMPORTANT!
Page 21

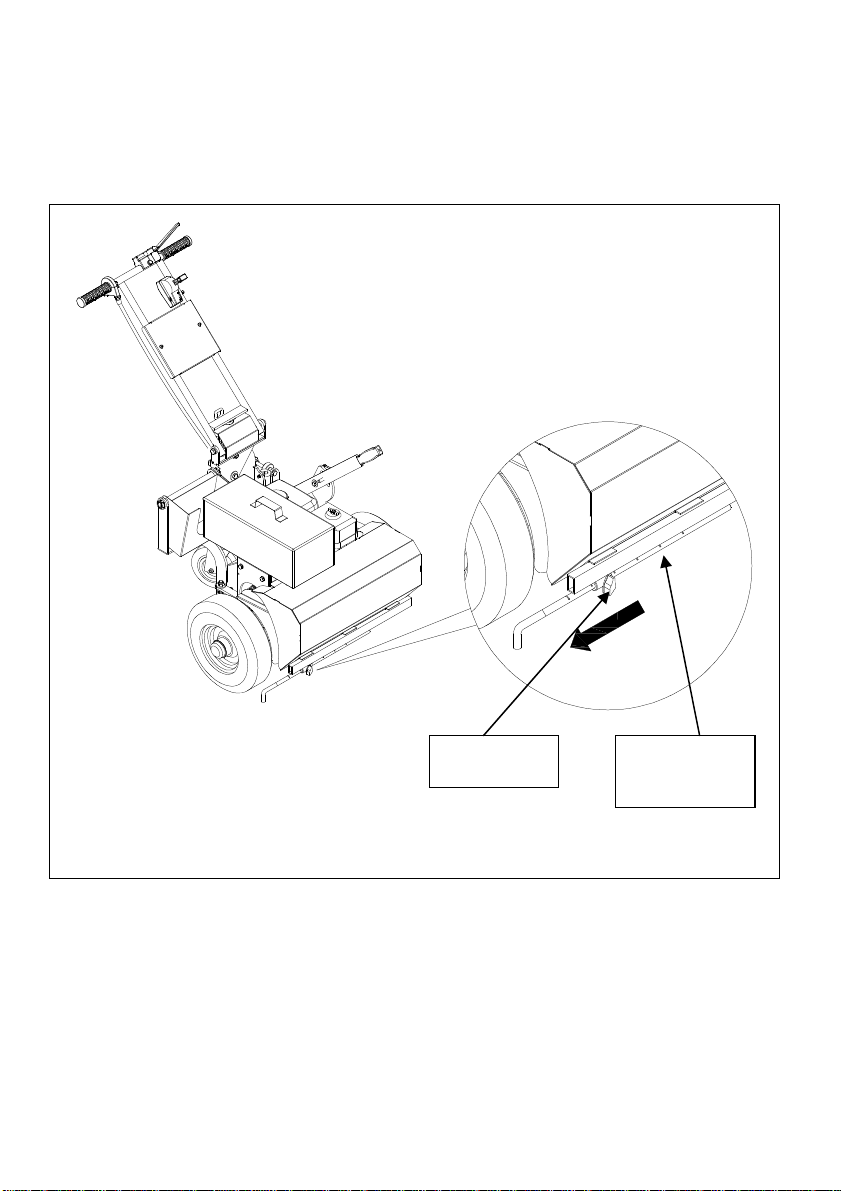
9. MAINTENANCE
Caution! Before proceeding with any maintenance operation switch off the
engine / motor and in any case ensure that there is no possibility of the machine
functioning. Suitable gloves are obligatory for all maintenance operations.
9.1 Replacing the blade
• Unscrew the screw and remove the blade.
• Replacing the blade.
• Fit and tighten the screw.
Securing
screw
Blade
Fig. 13
Page 22

9.2 Tensioning the drive chains
• Remove the front guard.
• Tighten the eccentric hex pin to get the optimal chain tension.
• Remount the guard.
Drive chains
Front
casing
Pin with eccentric
hole
Fig. 14
Fig. 15
Page 23

9.3 Tensioning the drive belts
Drive belts
• Remove the front guard.
• Loosen the screws securing the engine to the base and adjust the engine to
get optimal belt tension.
• Tighten the screws and remount the guard.
Front
casing
Fig. 16
Securing engine
screws
Fig. 17
Page 24

9.4 Routine maintenance
Check engine oil level
Check screws, tightness, casing, etc.
Check belts tension and state of wear
Check chains tension and state of
wear
Check wear on blade
Clean machine
Greasing transmission group with fat
Texaco Metalgrease AC (fig. 18).
Beginning
of season
See
booklet
♦
♦
♦
♦
♦
Before
each job
See
booklet
♦
♦
♦
♦
End of
season
See
booklet
♦
♦
Greaser
Fig. 18
Page 25

10. TROUBLESHOOTING-REMEDIES
Troubleshooting Remedies
Abnormal noise
The machine does not
start
Difficult start-up or loss
of power
The machine loses
revs and functions
irregularly
Excessive vibration
Check cutters and transmission group.
Cleaning and greasing of the machine in the group of
transmission.
Check cutters and transmission group.
Check state of engine/motor (consult the instruction
manual supplied).
Check state of engine/motor (consult the instruction
manual supplied).
Check cutters and transmission group.
Check state of engine/motor (consult the instruction
manual supplied).
Check cutters and transmission group.
Page 26

11. GUARANTEE
1. The Manufacturer hereby guarantees its Autocable machines against
breakage caused by faulty materials or workmanship.
2. This warranty is valid for the first owner only for 12 months as from the date of
purchase and/or delivery.
3. The Manufacturer is entitled to inspect the Autocable machine and any
components for which a claim has been made under the guarantee, in order
to determine the validity of the claim.
4. This warranty covers replacements free of charge only of components found
to be defective due to faulty materials or workmanship under the guarantee
period.
5. This warranty does not cover reimbursement for labour, consumables or
transport charges for repairs under guarantee.
THIS WARRANTY DOES NOT APPLY IN THE FOLLOWING CASES
1. The Manufacturer may in no way held liable for general damage, including
damage or injury, loss due to halts in production, loss of earnings, leasing
costs or any moral or commercial damage.
2. All claims concerning motors or engines mounted on Autocable machines will
be handled by the relevant Manufacturers’ after-sales service.
3. This warranty does not cover damage caused by misuse, abuse, insufficient
maintenance, accident or damage caused during transport.
4. Parts which are subject to war, such as blades, etc. are not covered under
this guarantee.
5. All expenses for setting the machine to work will be charged to the distributor
or dealer.
6. This warranty is not valid if the repairs, maintenance or modifications are
performed by an unauthorised persons or dealers.
7. The owner is responsible for routine maintenance and settings, which are
thus excluded herefrom.
8. The use or fitting or components and accessories that are not original will
immediately invalidate this warranty.
PROCEDURE FOR MAKING CLAIMS UNDER THIS WARRANTY
If the Autocable machine is found to be defective due to faults material or
workmanship, you are required to send the Manufacturer a written claim and
proceed as follows:
1. The machine must be returned to the Seller or the authorised importer.
2. You are required to present the guarantee duly filled in or the bill, if this is not
available.
3. The claim will be completed by the Dealer, who will forward it to the
Manufacturer.
The Manufacturer alone reserves the right to determine whether to accept the
claim or otherwise.
Page 27

NOTES
______________________________________________
______________________________________________
______________________________________________
______________________________________________
______________________________________________
______________________________________________
______________________________________________
______________________________________________
______________________________________________
______________________________________________
______________________________________________
______________________________________________
______________________________________________
______________________________________________
______________________________________________
______________________________________________
______________________________________________
______________________________________________
______________________________________________
______________________________________________
______________________________________________
______________________________________________
______________________________________________
______________________________________________
______________________________________________
______________________________________________
______________________________________________
______________________________________________
______________________________________________
______________________________________________
Page 28

www.autocable.be
Rev.1-2015
 Loading...