

Page 1
Pan/Tilt/Zoom Camera
Model
XX21A
● Built -in 310 MHz Receiver to work with CR1 5A Remote (sold separately).
● CR15A Remot e lets y ou Pan the camera from sid e to sid e, T ilt it up and down, and Zoom in remot ely .
● Can be turned on and off remo t ely (remote controlled power supply included).
● Use it outdoors to monitor your front door, back yard, or indoors to monit or a child’ s b edroom, etc .
The XX21A includes the XC21A Pan/Tilt/Zoom Camera and XM15A remote controlled power supply . You can remotely
control the camera’ s position, etc., using a CR15A remote control (sold separately). The camera sends the picture and sound
to a receiver that you connect to your TV , up to 100 ft. away . (Receivers and Remote Controls sold separately).
1. Refer to the setup and operating instructions that came
with the Video Receiver , (VR31A or VR36A) and CR15A
remote control (all sold separately)..
2. Install the camera in a suitable location. If you install it
outdoors, run the jack through a hole in the wall, or through
a window, so you can plug the power supply into an AC
outlet indoors.
3. Plug the XM15A power supply’s jack into the cable on the
Pan/Tilt/Zoom camera.
4. Set the Housecode dial to a letter between A and P that
matches the Housecode dial on the X10 remote controls
you want to use it with. Set the Unit Code dial to a number
between 1 and 4. This lets you turn the camera connected
to the XM15A on and off by remote control, using the
CR15A remote.
5. Plug the power supply into any 120V AC outlet.
6. Set the channel switch on the camera to the same setting as
the one on the VR31A or VR36A Video Receiver (A, B, C, or
D).
7. Adjust the antenna if necessary to aim it in the direction of
the TV that you will view the camera on.
See CR15A remote control’s instructions for Pan ‘n T ilt, and
zoom operation.
F .C.C. CAUTION - THIS DEVICE COMPLIES WITH PA RT 15
OF THE FCC RULES. OPERA TION IS SUBJECT TO THE
FOLLOWING TWO CONDITIONS: (1) THIS DEVICE MA Y
NOT CAUSE HARMFUL INTERFERENCE, AND (2) THIS
DEVICE MUST ACCEPT ANY INTERFERENCE RECEIVED,
INCLUDING INTERFERENCE THA T MA Y CAUSE
UNDESIRED OPERA TION.
NOTE: NO CHANGES OR MODIFICA TIONS MA Y BE MADE
TO THE UNITS. ANY CHANGES MADE TO THE UNITS
WILL VOID THE USER'S AUTHORITY TO OPERA TE THE
EQUIPMENT.
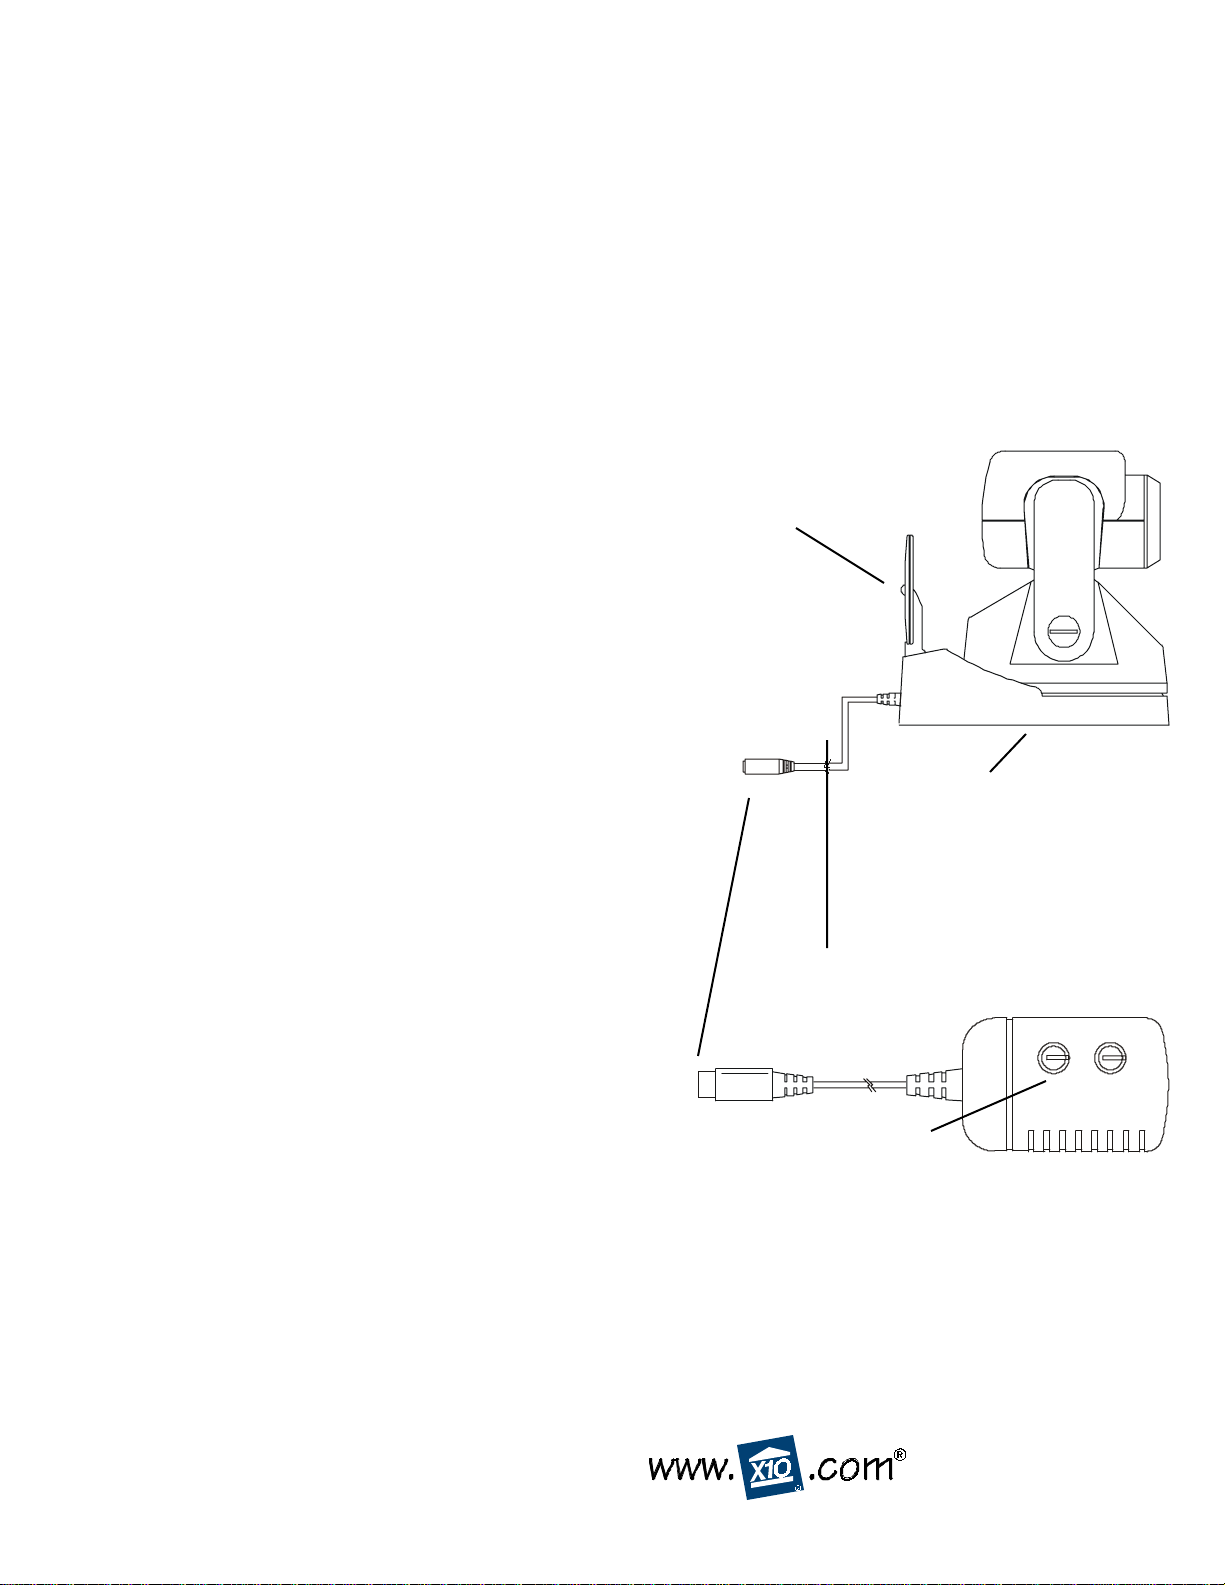
Point the raised dimple
7
on the antenna towards
the Receiver’s location.
XC21A
Cable
adapter.
Indoors
6
Indoors or
Set ABCD channel
switch (underneath)
to match setting on
VR31A or VR36A
Receiver.
Outdoors
3
Plug power supply
in here.
Set the code used to
4
turn on and off from
X10 remote controls.
LIMITED 1-YEAR WARRANTY
Please visit www.x10.com/warranty
to complete your on-line warranty registration. Thank you.
5
Plug into any AC outlet
XM15A
M
.
.
K
O
.
HOUSE
A
I
.
..
CEG
.
.
13
.
11
UNIT
9
..
.
15
.
.
1
.
357
.
X10.com, a Div. of X10 Wireless Technology, Inc.
For additional help, visit www.x10.com/support
For help or more information on setup, please visit:
XX21A-03/02
 Loading...