

Page 1
™
XCam2 InstantON Video Camera
● Extremely small size.
● Built-in 2.4 GHz Video Sender.
● Can be turned on and off remotely (remote controlled power supply included).
● Use it outdoors to monitor your front door, back yard, etc.
● Use it indoors to monitor a child’s bedroom, etc.
The XX16A includes the XC18A camera and XM13A r emote controlled power supply . The XC18A is a very small
and compact color video camera with built-in 2.4 GHz transmitter. Y ou can attach it to a w all an ywhere you want to
monitor. The XC18A transmits video and sound to the VR31A, or video only to the VR36A receiver which is
connected to your TV located anywhere in your home (up to 100 ft. away). The XM13A power supply lets you turn
the camera on and off r emotely, from X10 remote contr ols (sold separately).
1. Refer to the setup and operating instructions that came
with the 2.4 GHz Video Receiver, Model VR31A or
VR36A (sold separately) to set up the Receiver.
2. Mount the camera in a suitable location with the antenna
on top so the camera is the right way up. If you install
it outdoors, run the small cable adapter through a hole
in the wall so you can plug the power supply into an
AC outlet indoors.
3. Plug the power supply’s jack into the adapter cable on
the camera.
4. Set the Housecode and Unit Code. (See instructions
included with X10 remote controls).
5. Plug the power supply into any 120V AC outlet.
6. Set the channel switch on the camera to the same setting
as the one on the VR31A or VR36A Video Receiver.
7. Adjust the antenna on the camera if necessary to aim
it in the direction of the VR31A/VR36A Receiver that
you have connected to your TV or monitor.
LIMITED 1-YEAR WARRANTY
X10 Wireless Technology, Inc. (X10WTI) warrants X10
products to be free from defective material and workmanship
for a period of one (1) year from the original date of purchase
at retail. X10WTI agrees to repair or replace, at it’s sole
discretion, a defective X10 product if returned to X10WTI
within the warranty period and with proof of purchase.
If service is required under this warranty:
1. Call 1-800-675-3044 or e-mail sales@x10.com for
details on how to return your unit(s).
2. Enclose a check for $4.00 for postage and handling.
3. Enclose a dated proof of purchase.
4. X10 is not responsible for shipping damage.
Units to be returned should be packed carefully.
5. For additional warranty information, contact X10.
F .C.C. CAUTION - THIS DEVICE COMPLIES WITH P ART 15 OF THE FCC RULES. OPERATION IS SUBJECT TO THE FOLLOWING
TWO CONDITIONS: (1) THIS DEVICE MAY NOT CAUSE HARMFUL INTERFERENCE, AND (2) THIS DEVICE MUST ACCEPT
ANY INTERFERENCE RECEIVED, INCLUDING INTERFERENCE THAT MAY CAUSE UNDESIRED OPERATION. NOTE: NO
CHANGES OR MODIFICATIONS MAY BE MADE TO THE UNITS. ANY CHANGES MADE TO THE UNITS WILL VOID THE
USER'S AUTHORITY TO OPERATE THE EQUIPMENT.
3
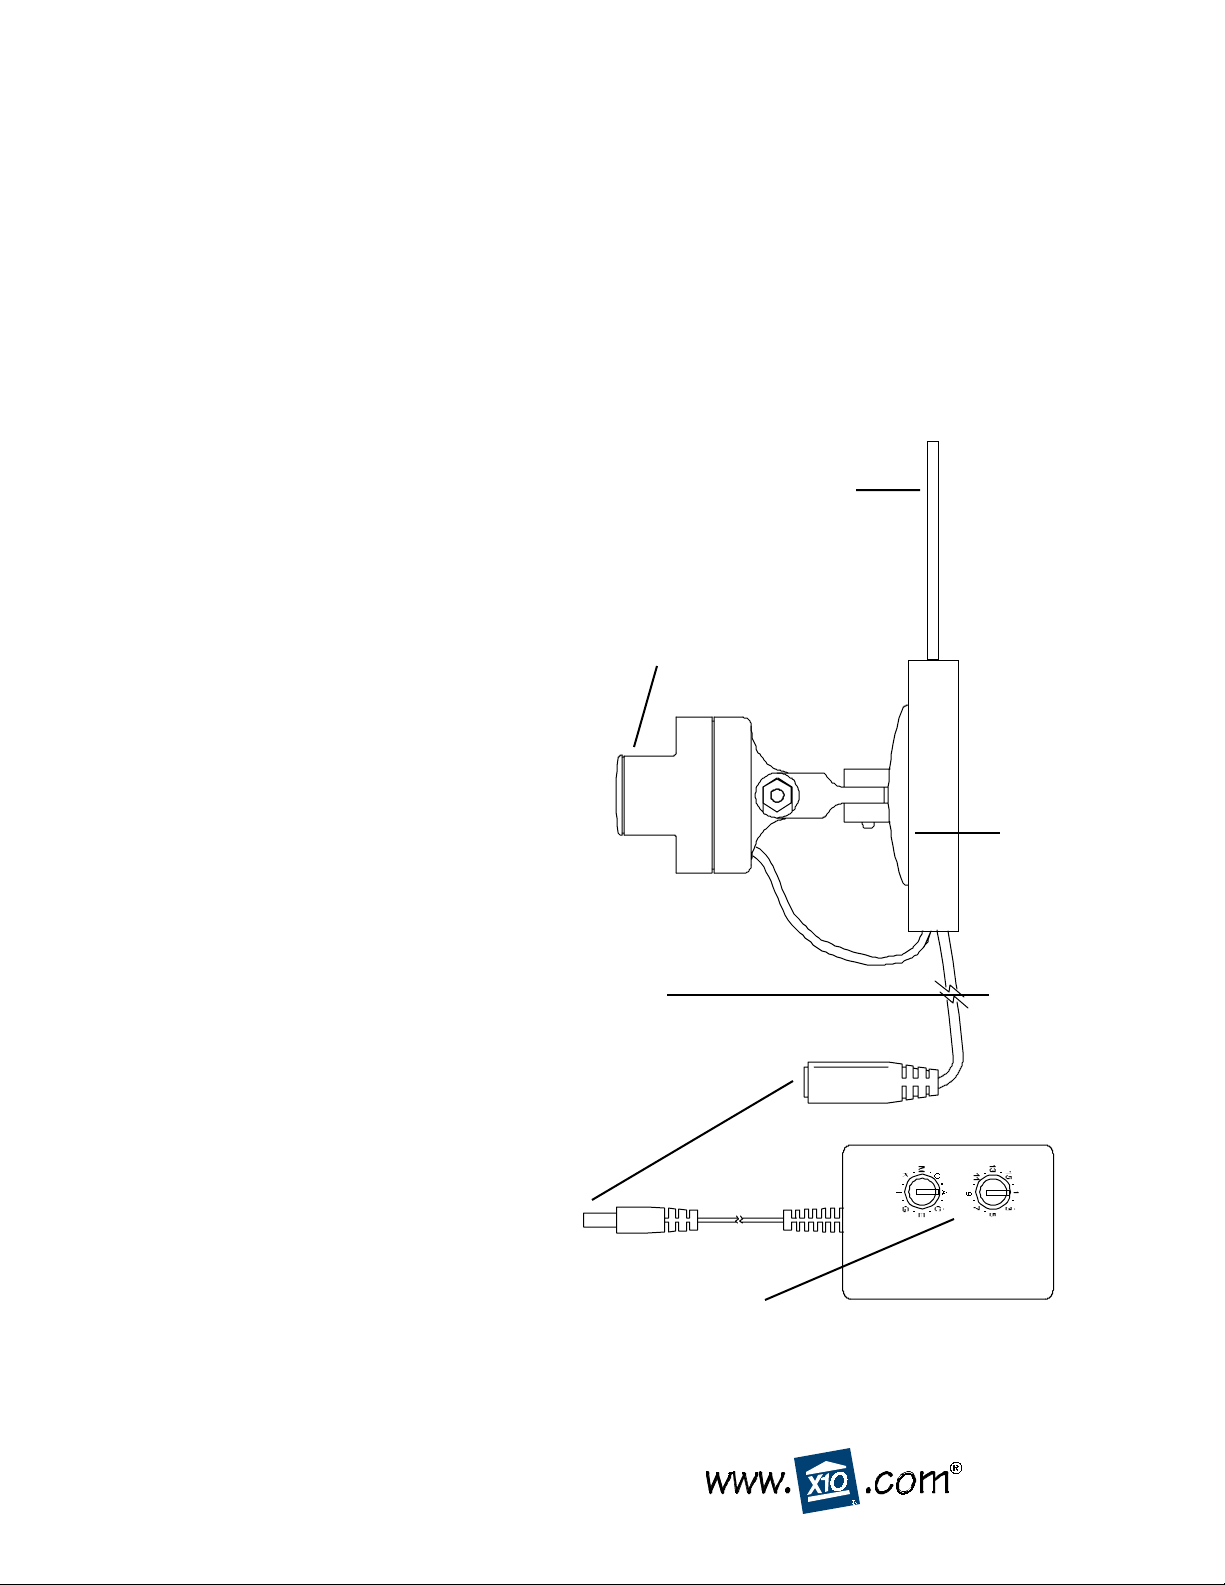
Plug power
supply in
here.
Set the code used to turn
on an off from X10
remote controls.
Adjust antenna.
7
Remove clear cap
and turn lens to
focus (replace cap
for outdoor use).
XC18A
Outdoors
Indoors
4 XM13A
Model XX16A
Attach the
2
to a wall.
6
Set channel
switch to
match setting
on VR31A or
VR36A
Receiver . (A is
at bottom, D is
at top).
Cable adapter.
5
Plug into
any AC
outlet
X10.com, a Di v. of X10 Wireless T ec hnology, Inc.
For additional help, visit www.x10.com/support
XX16A-07/01
 Loading...