

Page 1
Universal Learning
Remote with
TOUCHSCREEN
User’s Guide
Limited 90 Day Warranty RCU900RF
remote
Page 2

Table of Contents
Introduction . . . . . . . . . . . . . . . . . . . . . . . . . . . . . . . . . . . . . . . . . . . .3
Battery Information . . . . . . . . . . . . . . . . . . . . . . . . . . . . . . . . . . . . . .3
Battery Installation . . . . . . . . . . . . . . . . . . . . . . . . . . . . . . . . . . . . . .3
Battery Saver . . . . . . . . . . . . . . . . . . . . . . . . . . . . . . . . . . . . . . . . . . .3
Code Saver . . . . . . . . . . . . . . . . . . . . . . . . . . . . . . . . . . . . . . . . . . . . .3
Power-on Default . . . . . . . . . . . . . . . . . . . . . . . . . . . . . . . . . . . . . . .3
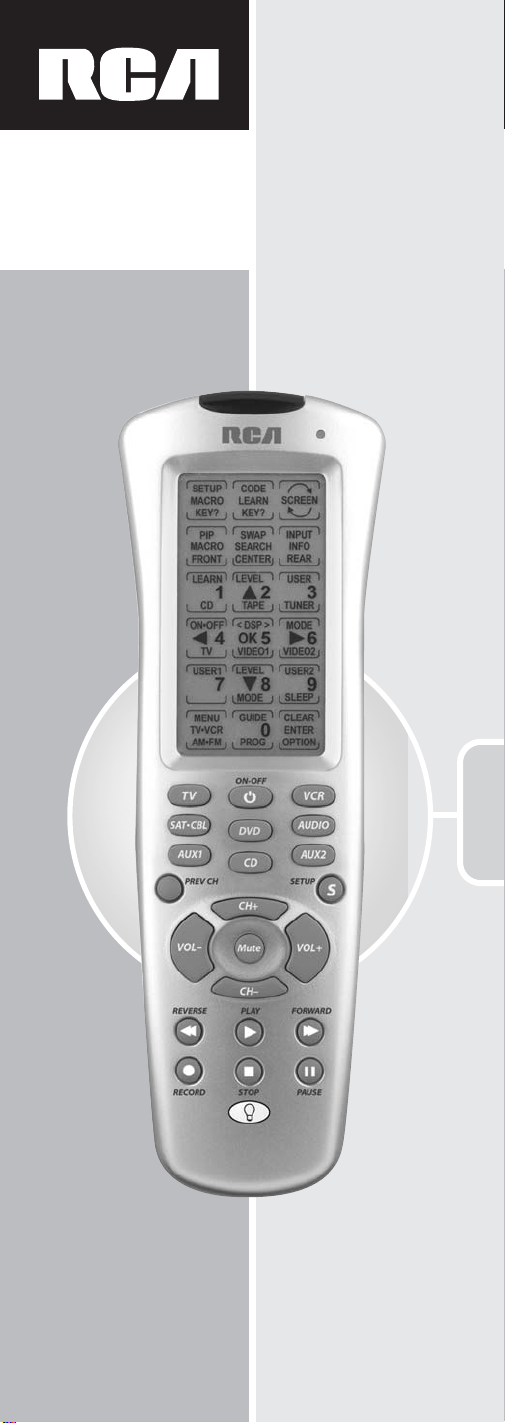
Product Diagram . . . . . . . . . . . . . . . . . . . . . . . . . . . . . . . . . . . . . . . .4
LCD Touchscr een . . . . . . . . . . . . . . . . . . . . . . . . . . . . . . . . . . . . . . . .4
LED Indicator Light . . . . . . . . . . . . . . . . . . . . . . . . . . . . . . . . . . . . .4
Setup Routine and Procedures . . . . . . . . . . . . . . . . . . . . . . . . . . . .5
Device Control Screens . . . . . . . . . . . . . . . . . . . . . . . . . . . . . . . . . . .6
Code Entry . . . . . . . . . . . . . . . . . . . . . . . . . . . . . . . . . . . . . . . . . . . . .7
Library Code Entry . . . . . . . . . . . . . . . . . . . . . . . . . . . . . . . . . . . . . .7
Code Search . . . . . . . . . . . . . . . . . . . . . . . . . . . . . . . . . . . . . . . . . . . .9
Code Autosearch . . . . . . . . . . . . . . . . . . . . . . . . . . . . . . . . . . . . . . .10
Code Identification . . . . . . . . . . . . . . . . . . . . . . . . . . . . . . . . . . . . .11
Key Label Options . . . . . . . . . . . . . . . . . . . . . . . . . . . . . . . . . . . . . .12
Learned Key Reference Pages . . . . . . . . . . . . . . . . . . . . . . . . . . . .14
Learn Commands . . . . . . . . . . . . . . . . . . . . . . . . . . . . . . . . . . . . . .16
Learning Tips . . . . . . . . . . . . . . . . . . . . . . . . . . . . . . . . . . . . . . . . . .16
Code Learning . . . . . . . . . . . . . . . . . . . . . . . . . . . . . . . . . . . . . . . . .16
Learn Commands . . . . . . . . . . . . . . . . . . . . . . . . . . . . . . . . . . . . . .17
Clear All Stored Learned Commands Under A Mode . . . . . . .18
Master Clear . . . . . . . . . . . . . . . . . . . . . . . . . . . . . . . . . . . . . . . . . . .18
Smart Macro Key Operations . . . . . . . . . . . . . . . . . . . . . . . . . . . .19
Program A Smart Macro . . . . . . . . . . . . . . . . . . . . . . . . . . . . . . . . .19
Delete A Smart Macro . . . . . . . . . . . . . . . . . . . . . . . . . . . . . . . . . . .21
Sleep Timer . . . . . . . . . . . . . . . . . . . . . . . . . . . . . . . . . . . . . . . . . . . .21
Method 1 (From Normal Operation) . . . . . . . . . . . . . . . . . . . . . .21
Method 2 (From Setup Routine) . . . . . . . . . . . . . . . . . . . . . . . . . .22
TV or CD/Audio Volume Punch-through . . . . . . . . . . . . . . . . .22
VCR Punch-through . . . . . . . . . . . . . . . . . . . . . . . . . . . . . . . . . . . .23
Record Key . . . . . . . . . . . . . . . . . . . . . . . . . . . . . . . . . . . . . . . . . . . .23
Additional Features . . . . . . . . . . . . . . . . . . . . . . . . . . . . . . . . . . . . .23
Keypress Beep Feature . . . . . . . . . . . . . . . . . . . . . . . . . . . . . . . . . .23
LCD Touchscr een Display T ime . . . . . . . . . . . . . . . . . . . . . . . . . .23
Backlighting . . . . . . . . . . . . . . . . . . . . . . . . . . . . . . . . . . . . . . . . . . .24
Master Reset . . . . . . . . . . . . . . . . . . . . . . . . . . . . . . . . . . . . . . . . . . .24
RCAAll Power Off Feature . . . . . . . . . . . . . . . . . . . . . . . . . . . . . .24
Glossary of Terms . . . . . . . . . . . . . . . . . . . . . . . . . . . . . . . . . . . . . .25
Troubleshooting . . . . . . . . . . . . . . . . . . . . . . . . . . . . . . . . . . . . . . . .28
Code List . . . . . . . . . . . . . . . . . . . . . . . . . . . . . . . . . . . . . . . . . . . . . .29
Helpline . . . . . . . . . . . . . . . . . . . . . . . . . . . . . . . . . . . . . . . . . . . . . . .36
Limited 90-Day Warranty . . . . . . . . . . . . . . . . . . . . . . . . . . . . . . .36
2
Page 3

Universal Touchscreen Learning Remote
Congratulations on your purchase of the RCU900RF by
RCA. The RCU900RF is one of the most sophisticated, yet easy
to use, remote control units available today. With the RCU900RF,
juggling multiple remote controls is a thing of the past!
Your RCU900RF controls up to eight devices, including the most
popular brands of TV, VCR, DVD, SAT/CBL, CD and
audio equipment. The RCU900RF has the ability to learn
commands from your existing remotes, and the Smart Macro
feature allows multiple commands to be executed with a single
keypress. The RCU900RF is easy to use, easy to program, and it
gives you total control—at the touch of your fingertips!
Battery Information
Your RCU900RF Universal Learning Remote with Touchscreen
requires four AAalkaline batteries (sold separately).
Battery Installation
To install the batteries:
1. Turn the to the bottom side, pull on the tab and lift off
the cover.
2. Insert the batteries, matching the batteries to the (+) and (-)
marks inside the battery compartment.
3. Slide the battery cover back into place.
Battery Saver
Your RCU900RF saves battery power by automatically turning off
if any button is pressed for more than 30 seconds. This saves
your batteries should your remote get stuck in a place where the
buttons remain depressed, such as under a book or between the
sofa cushions.
Code Saver
With the RCU900RF, you don’t have to worry about losing
programmed information when you change batteries.
All programmed parameters are retained indefinitely in
the event of battery replacement.
Power-on Default
When you replace batteries, your RCU900RF remote always
powers on in the TV Mode. If your TV, VCR and satellite
receiver are RCA, ProScan or GE brands, you may not even need
to set up the RCU900RF to control them. In these instances, the
remote should work as soon as the batteries are installed.
3
Page 4

LCD Touchscreen
The LCD (Liquid Crystal Display) touchscreen on your RCU900RF
acts as a “virtual keypad.” This touchscreen makes it easy to
program and use your remote with many devices. Once you
select a device key, you put the remote in that device mode and
it will remain in that mode until you press another device key.
When you put the remote in a specific device mode, the menu
that is activated on the touchscreen will be the menu for that
mode. For example, if you put the remote in TV Mode, the menu
you see on the touchscreen is for the TV Mode. For each mode,
the LCD touchscreen includes two control screens, and you can
easily switch between the two by pressing the SCREEN key at
the upper right-hand corner of the LCD touchscreen. Each LCD
touchscreen has an 18-position segmented keypad.
The LCD touchscreen remains blank when the remote is not in
use. The LCD touchscreen turns on automatically when you
press the SETUP key, any device key or the LIGHT key on the
rubber keypad, or any LCD touchscreen key. The remaining
rubber keys do not activate the LCD touchscreen.
LED Indicator Light
The LED (Light Emitting Diode) indicator light, located at the
upper right-hand side of the RCU900RF, lights up whenever a
rubber key or any LCD touchscreen key is pressed. The LED
indicator flashes and beeps three times (approximately two
seconds) to indicate any error condition.
4
Page 5

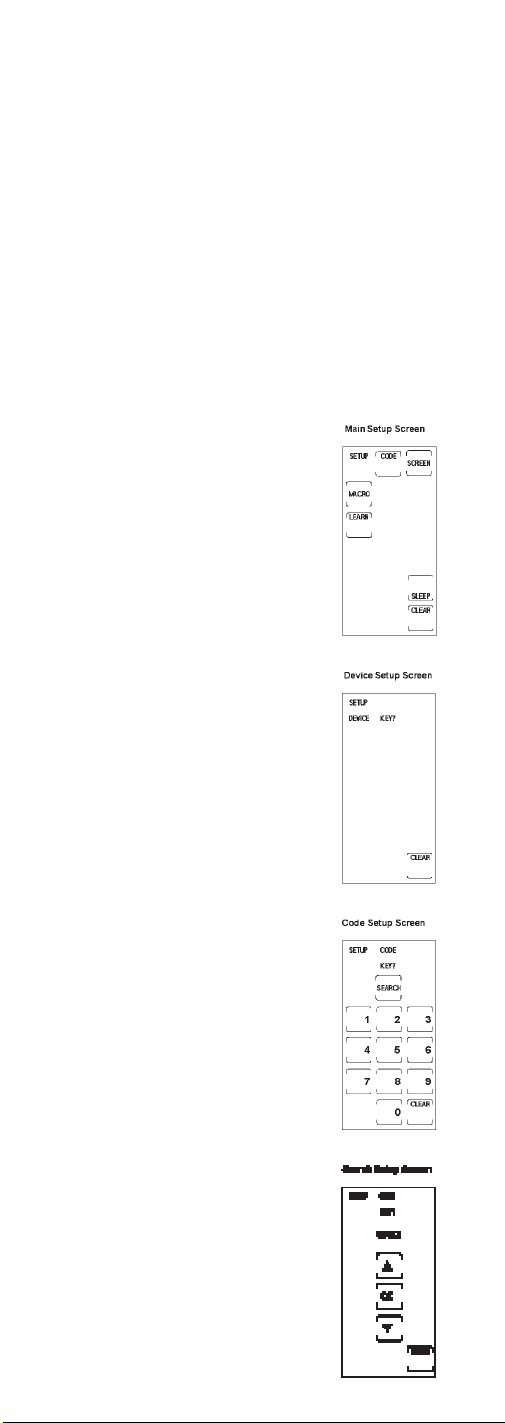
Setup Routine and Procedures
The SETUP key is located towards the middle of the RCU900RF
unit, on the right-hand side of the rubber keypad. The SETUP
key is used to walk you through the steps in setting up the
remote. To enter the Setup Mode, press and hold the SETUP key
until the LED indicator light remains on. At that time, the Main
Setup Screen appears. Setup is used for Library Code Entry,
Code Search, Code Identification and other functions.
During a Setup function, if no button is pressed for 60 seconds,
the unit automatically exits from the Setup process. The LED
indicator light flashes an error in this instance, and any
operation that is not completed when the time-out occurs is
not programmed.
During the Setup function, if you press any key not shown on
the touchscreen or a key not expected as part of a Setup routine,
the RCU900RF ignores that keypress. Pressing the LCD CLEAR
key in a Setup routine returns the touchscreen to the Main Setup
Screen. When you press the CLEAR key, any changes made up
to that point are discarded. Also, where specifically indicated,
pressing the SETUP key in a Setup routine discards any changes
and returns the remote to the Main Setup Screen.
To exit the Setup function and return to normal operation, press
the CLEAR key on the Main Setup Screen.
5
Page 6
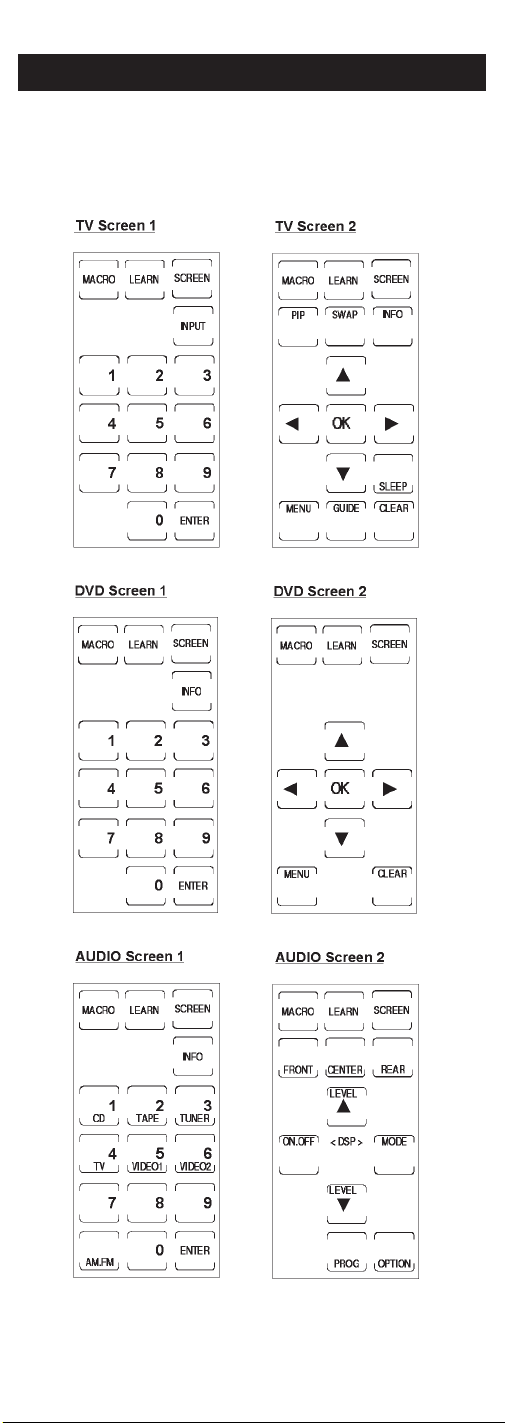
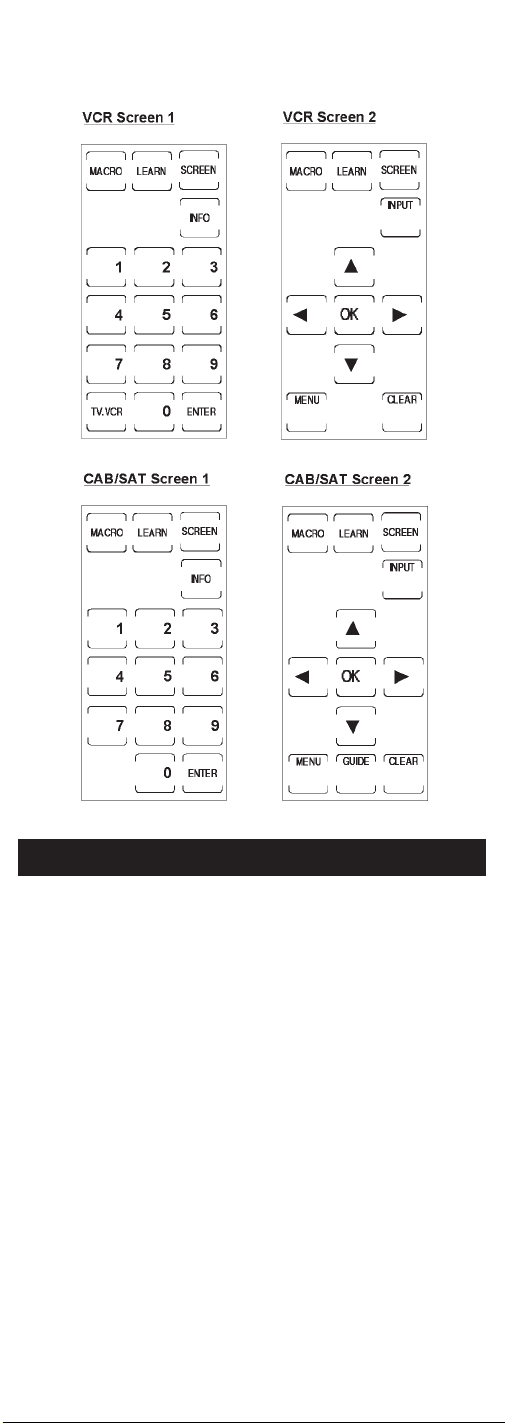
Device Control Screens
Your RCU900RF displays different control screens for each device.
There are two screens needed to control each device. You can
easily switch between these two screens by simply pressing the
LCD SCREEN key at the top right of the touchscreen.
6
Page 7
Code Entry
In order for the RCU900RF to control your devices (TV, VCR, DVD,
etc.), you must program it with the library code for each device.
This enables the RCU900RF remote to control your device with the
proper commands. If your TV, VCR, DVD, or satellite receiver is
an RCA, ProScan or GE brand, the RCU900RF may not need any
programming to control them. To program the remote with the
codes for your devices, you can use one of three methods:
Library Code Entry, Code Search or Code Autosearch.
Library Code Entry
You can enter codes in your RCU900RF from the Code List using
the SETUP key on the rubber keypad. (See the Code List of the
most popular brands on page 29.) When you enter a valid code
for any given mode (e.g., when you enter a code for a TV), the
Default Key Label Screen is used and any previously Learned
functions for that mode are deleted. The mode is reset to its
power-on default state. However, Macro settings remain
unchanged and now include the new code just entered.
7
Page 8

Library Code Entry (continued)
To enter a code directly from the Code List, follow these steps:
1. Manually turn on the device to be
controlled (TV, VCR, DVD, etc.).
2. Press and hold the SETUP key on
the rubber keypad until the LED
indicator light remains on and the
touchscreen shows the Main Setup
Screen. This process takes
approximately 2-3 seconds.
3. Release the SETUP key.
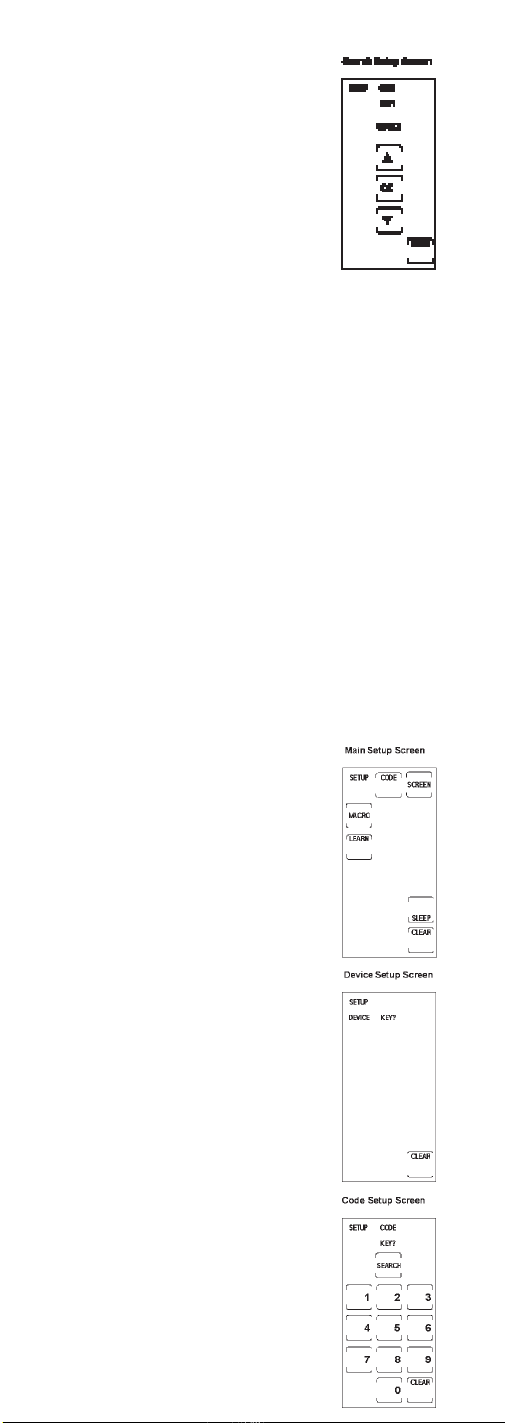
4. Press and release the LCD CODE
key. The LED indicator light blinks
off once to indicate acceptance of
the keypress.
5. The touchscreen now shows the
Device Setup Screen. Press and
release the device key on the rubber
keypad for the device whose code
you want to enter (TV, VCR,
SAT/CBL, etc.). The LED indicator
light blinks once to indicate
acceptance of the keypress.
6. For AUX1 or AUX2, press the AUX
device key, followed by the desired
device key to be programmed under
AUX (TV, VCR, SAT/CBL, etc.).
7. The touchscreen now shows the
Code Setup Screen. Find the
three-digit code for your device
brand from the Code List at the back
of the manual. If your brand has
more than one code listed, begin with
the first code. Enter the three-digit
code from the Code List. When a
valid code from the list is entered, the
LED indicator light blinks off after
the last digit is entered. For an
invalid code, the LED indicator light
flashes rapidly and beeps for two
seconds before going off. In both
cases, the touchscreen returns to the
Main Setup Screen.
8. Before the code can be tested on the
chosen device, you must exit back
to normal operation by pressing
the CLEAR key on the Main
Setup Screen.
9. With the device on, aim the RCU900RF
at the device and press the ON•OFF
or the CH+key on the rubber
keypad. If you have entered the
correct number for your device, it
will respond to the ON•OFF or CH
key. If the device responds, no
further programming is required.
10.If your device does not respond, try
the next code in the list for your
brand by repeating the procedure
starting at step 2. If no other codes
exist for your brand, try the Code
Search or Code Autosearch methods.
+
8
Page 9
Code Search
If the device you wish to control does not respond to any of the
codes you have entered using the Library Code Entry, you can
search the entire code library for a particular device that might
not be listed in the Code List or might be listed under a
different brand.
When you enter a valid code for any given mode (e.g., when
you enter a code for a TV), the default key labels are displayed
on the touchscreen and any previously Learned functions for
that mode are deleted. The mode is reset to its power-on default
state. However, Macro settings remain unchanged and now
include the new code just entered.
To search for a specific code in the Code List, follow these steps:
1. Manually turn on the device to be
controlled (TV, VCR, DVD, etc.).
2. Press and hold the SETUP key on
the rubber keypad until the LED
indicator light remains on and the
touchscreen shows the Main Setup
Screen. This process takes
approximately 2-3 seconds.
3. Release the SETUP key.
4. Press and release the LCD CODE
key. The LED indicator light blinks
off once to indicate acceptance
of the keypress.
5. The touchscreen now shows the
Device Setup Screen. Press and
release the device key on the rubber
keypad for the device whose code
you want to enter (TV, VCR, SAT,
etc.). The LED indicator light
blinks once to indicate acceptance
of the keypress.
6. For AUX1 or AUX2, press the AUX
device key. Select the desired device
key to be programmed under AUX
(TV, VCR, SAT/CBL, etc.).
7. The touchscreen now shows the
Code Setup Screen. Press and release
the LCD SEARCH key.
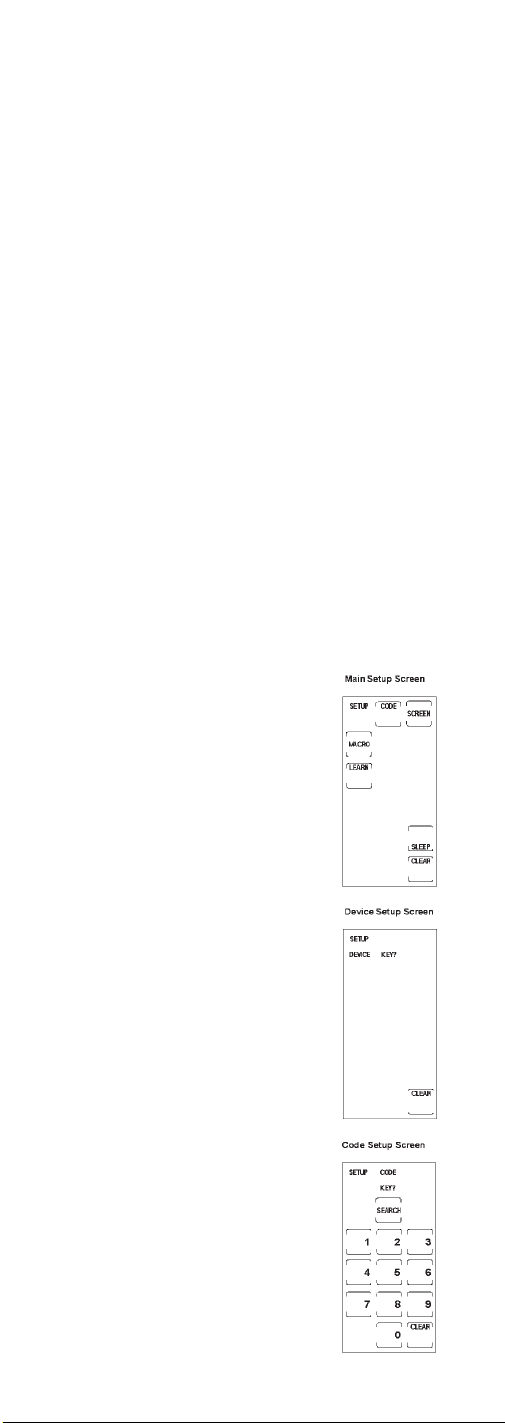
8. The touchscreen shows the Search
Setup Screen. Press the ON•OFF key
on the rubber keypad repeatedly,
until the device to be controlled
responds to the command and
turns off.
Note: The Code Search starts from the
currently stored code under that
mode. For example, if the device code
list contains 100 codes and the
currently stored code is 050, the Code
Search starts from 051 and continues
to 100 before looping back to 000 and
finishing at 050. This speeds up the
process of finding the correct code for
9
Page 10
Code Search (continued)
your device, since you may discover
that some codes can turn on and
off your device but are not able to
control its other functions. This
process allows you to bypass codes
you’ve already tried.
Note: If your device responds and
you accidentally overshoot that code
by pressing the ON•OFF key again,
press the CH-key or DOWN
ARROW key to backtrack through
the code library. You can change the
direction to forward once again by
pressing the ON•OFF, CH+, UP
ARROW, or LCD PLAY keys.
9. Once the device to be controlled
responds to the commands,
press and release the LCD OK key
to install the code. The touchscreen
returns to the Main Setup Screen. The
Code Search entry is now complete.
Code Autosearch
Your RCU900RF has the ability to automatically scroll through
the entire code library by using the Autosearch feature.
To start a Code Autosearch, follow these steps:
1. Manually turn on the device to be
controlled (TV, VCR, DVD, etc.).
2. Press and hold the SETUP key on
the rubber keypad until the LED
indicator light remains on and the
touchscreen shows the Main Setup
Screen. This process takes
approximately 2-3 seconds.
3. Release the SETUP key.
4. Press and release the LCD CODE
key. The LED indicator light blinks
off once to indicate acceptance of
the keypress.
5. The touchscreen now shows the
Device Setup Screen. Press and
release the device key on the rubber
keypad for the device whose code
you want to enter (TV, VCR,
SAT/CBL, etc.). The LED indicator
light blinks once to indicate
acceptance of the keypress.
6. For AUX1 or AUX2, press the AUX
device key. Select the desired device
key to be programmed under AUX
(TV, VCR, SAT/CBL, etc.).
7. The LCD touchscreen shows the
Code Setup Screen. Press and release
the LCD SEARCH key.
8. The LCD touchscreen shows the
Search Setup Screen. Press the
ON•OFF key on the rubber keypad
just once. If you do not press any
other keys, the Autosearch feature
automatically starts in six seconds.
10
Page 11
9. The Autosearch sends the next code
in the list every three seconds.
Note: The Autosearch can take a
significant amount of time, since
there are many codes in the list.
10.To speed up the Autosearch, you can
manually override the process and
temporarily speed it up by pressing
the normal search keys (CH+, CH-,
ON•OFF, PLAY, LCD UP, and LCD
DOWN keys) in both forward and
reverse directions.
11. If your device responds to the command,
and the RCU900RF sends the next code
before you have a chance to press the
LCD OK key, you can backtrack
through the code library by pressing
-
CH
or the DOWN ARROW.You can
change the direction to forward once
again by pressing the ON/OFF, CH+,
UP ARROW, or LCD PLAY keys.
12.Once the device to be controlled responds
to the commands, press and release the
LCD OK key to install the code.
13.The touchscreen returns to the Main
Setup Screen. The Code Search entry
is now complete.
Code Identification
Code Identification allows you to find out what codes are
programmed in the remote under a given mode (TV, VCR, DVD, etc.).
To find out the currently programmed code, follow these steps:
1. Press and hold the SETUP key on
the rubber keypad until the LED
indicator light remains on and the
touchscreen shows the Main Setup
Screen. This process takes
approximately 2-3 seconds.
2. Release the SETUP key.
3. Press and release the LCD CODE
key. The LED indicator light blinks
off once to indicate acceptance of
the keypress.
4. The touchscreen now shows Device
Setup Screen. Press and release the
device key on the rubber keypad for
the device whose code you want to
identify (TV, VCR, SAT/CBL, etc.).
The LED indicator light blinks
once to indicate acceptance of
the keypress.
5. The touchscreen now shows the
Code Setup Screen. Press and release
the SETUP key. The LED indicator
light blinks off once to indicate
acceptance of the keypress.
6. The touchscreen now shows the
Code ID Setup Screen (initially blank
except for LCD SETUP, INFO and
CODE keys). The touchscreen then
shows the code, using the LCD
digits. The digits in the three-digit
code are shown in sequence for
11
Page 12
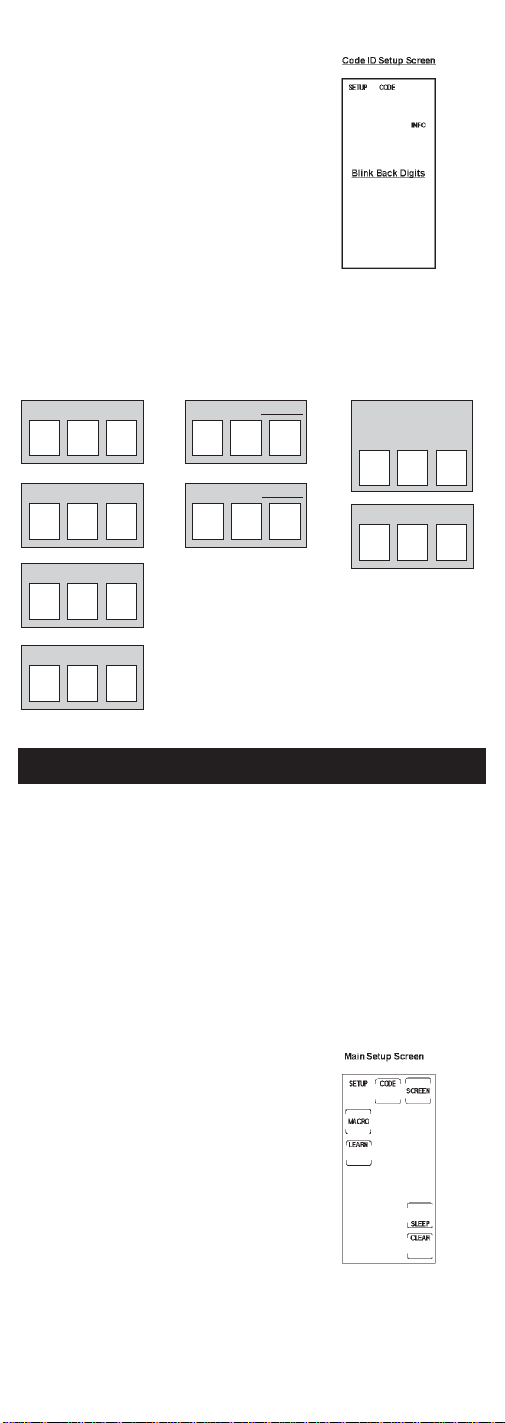
Code Identification (continued)
one second each, followed by a 0.5
second gap where no digits are
shown. The LED indicator light
blinks off for each digit display. The
sequence is completed once and then
the touchscreen returns to the Main
Setup Screen.
7. The Code Identification process is
now complete. You can write this
Code ID in the Code ID Chart for
easy reference.
Code Identification Chart
Enter your codes here for easy reference:
TV CODE
VCR CODE
SAT/CBL CODE
DVD CODE
AUX 1 device: AUDIO
AUX 2 device:
Tuner❒ AMP ❒
Tape ❒
CDCODE
Key Label Options
With the RCU900RF, you have the ability to customize
individual keys and key label segments to meet your needs.
It is recommended that the Key Label Options feature only be
used after you have finished programming all your devices. This
feature lets you select preset key options to be shown on the
touchscreen. You can change any LCD panel key except the
SCREEN, LEARN and MACRO keys. Any one of the available
label options can be chosen for each key. You can also choose to
show only the key frame or hide the key completely.
To choose preset key label options for LCD keys, follow
these steps:
1. Press and hold the SETUP key on
the rubber keypad until the LED
indicator light remains on and the
touchscreen shows the Main Setup
Screen. This process takes
approximately 2-3 seconds.
2. Release the SETUP key.
3. Press and release the LCD SCREEN
key. The LED indicator light blinks
off once to indicate acceptance of
the keypress.
12
Page 13

4. The touchscreen now shows the
Device Setup Screen. Press and
release the device key on the rubber
keypad for the device whose keys
you want to customize (TV, VCR,
SAT/CBL, etc.). The LED indicator
light blinks once to indicate
acceptance of the keypress.
5. The touchscreen now shows the Key
Label Screen. This screen shows the
current screen labels for the device
you have chosen (TV, VCR,
SAT/CBL, etc.). The LCD SETUP
and SCREEN labels are also shown.
6. Press any of the LCD panel keys
within the current mode to select the
individual key label desired. Use the
SCREEN key to switch back and
forth between the two screens for
that mode.
Note: The LCD SLEEP, MACRO and
LEARN keys are displayed but
cannot be edited as part of the Key
Label Options routine.
7. The LED indicator light blinks off to
indicate acceptance of the keypress.
Note: If, at any time during Key Label
editing, you wish to reset the current
device keys to their default settings,
press and hold the current device key
for three seconds. Resetting any
device key to its power-on default
setting results in an automatic save
for that mode. This will not affect
your program codes or any
Learned commands.
8. To save your new label selections for
the current mode, press another
device key or the SETUP key. If you
press another device key, the current
mode screens are saved and the
touchscreen shows the screen for the
new mode chosen. For example, if
you have been customizing keys for
the TV Mode, pressing the VCR key
on the rubber keypad results in
saving the TV key labels and placing
the unit in the VCR Mode. If the
SETUP key is pressed, you exit the
Key Label Options process and
the touchscreen returns to Main
Setup Screen.
9. The relabeling of keys is
now complete.
13
Page 14

Learned Key Reference Pages
IMPORTANT NOTE: You cannot learn any commands under the
LEARN, MACRO, SCREEN, SETUP or any Device key.
Device:
Device:
14
Page 15

Device:
Device:
15
Page 16

Learn Commands
Learning Tips
Before transferring commands from your original remote to
the RCU900RF, check out these useful tips on Learning.
1. Make sure you are using fresh batteries in both the
RCU900RF and the original remote.
2. It is recommended that a Master Clear be
done before attempting any Learning. This
clears all Learned commands for all device
modes. (See section on Master Clear).
3. Point the top of the original remote at the
base of the RCU900RF so the IR LED on the
original remote is in line with the RCU900RF
Learning sensor, located at the bottom of
the remote.
4 The distance between the two remotes
should be approximately two inches.
5. To ensure that your units are compatible
and to increase your familiarity with the
unit, you may wish to experiment by
learning two or three keys initially. Then,
carry out a Master Clear before learning
all the desired functions from your
original remote.
6. Incandescent or low-energy light can cause interference
with the IR transmissions. When using the Learning
function, keep the remotes at least three feet away from
such light sources.
7. When learning a key, do not release the key on your original
remote until the LED indicator light remains on, which takes
2-3 seconds.
8. No commands may be learned under the LCD LEARN,
MACRO, SCREEN or SETUP keys or the device keys on
the rubber keypad (such as TV, VCR, DVD, SAT/CBL,
AUDIO keys).
9. If there is a problem with the Learning process, the LED
indicator light flashes for two seconds but still remains in
Learning Mode.
10. All Learned keys are saved automatically.
Code Learning
Codes from the Code List include basic functionality for each
device they control. Once you have programmed in the library
code for your specific device, you can customize the RCU900RF
touchscreen to include certain functions from your original
remote that were not embedded in the preset code.
Your RCU900RF has the ability to learn and store commands
from your original remotes under the mode of your choice. The
RCU900RF can store up to 40 key commands for each original
remote. Only one original remote can be stored under any one
mode (i.e., the RCU900RF can learn the commands for one TV
remote, one VCR remote, one DVD remote, etc.).
Once you have set your Key Label Options and have taught
your RCU900RF any additional commands from the original
remotes, use the chart on the previous page to enter your
customized options for each mode.
16
Page 17

Learn Commands
Now you’re ready to have your RCU900RF learn the commands
from your existing remotes. All Learned keys are saved
automatically. Remember, only one original remote can be stored
under any one mode. The RCU900RF can learn the commands for
one TV remote, one VCR remote, one DVD remote, etc.
1. Point the top of the original remote at
the base of the RCU900RF so the IR
LED on the original remote is in line
with the RCU900RF Learning sensor,
located at the bottom of the remote.
2. Press and hold the SETUP key on
the rubber keypad until the LED
indicator light remains on and the
touchscreen shows the Main Setup
Screen. This process takes
approximately 2-3 seconds.
3. Release the SETUP key.
4. Press and release the LCD LEARN
KEY?. The LED indicator light blinks
once to indicate acceptance of
the keypress.
5. The touchscreen now shows the
Device Setup Screen. Press and
release the device key on the rubber
keypad that corresponds to the
remote you want the RCU900RF to
learn (TV, VCR, SAT/CBL, etc.). The
LED indicator light blinks once to
indicate acceptance of the keypress.
6. The touchscreen now shows the
Learn Setup Screen 1, which displays
the current screen keys for the mode
you have chosen. The LCD SETUP
and LEARN keys are also shown.
7. Press and release the key on the
RCU900RF to be taught. (Remember:
You can switch between the screens
displayed by pressing the LCD
SCREEN key.) The LED indicator
light blinks to indicate acceptance
of each keypress.
8. Now, press and hold the key on
the original remote until the LED
indicator blinks off once and the
touchscreen shows Learn Setup
Screen 2. This process takes
2-3 seconds to complete.
9. To learn another key, press and
release the LCD LEARN key and
repeat from Step 7.
10.If a problem occurs with the
Learning process, the LED indicator
light flashes for two seconds and
you hear three beeps, but the unit
remains in the Learn routine with
Learn Setup Screen 1 displayed.
Repeat from Step 6.
17
Page 18

Learn Commands (continued)
11.To save and exit from the Learn routine, press and release the
LCD OK key. The touchscreen returns to the Main
Setup Screen.
12.The Learning process is now complete.
Clear All Stored Learned Commands
Under a Mode
If you want to clear all of the Learning commands under one
mode, such as TV, VCR or DVD, follow these steps:
1. Press and hold the SETUP key on
the rubber keypad until the LED
indicator light remains on and the
touchscreen shows the Main
Setup Screen. This process takes
approximately 2-3 seconds.
2. Release the SETUP key.
3. Press and release the LCD LEARN
key. The LED indicator light blinks
off once to indicate acceptance of
the keypress.
4. The touchscreen now shows the
Device Setup Screen. Press and
release the device key on the rubber
keypad for the mode commands you
want the RCU900RF to clear (TV, VCR,
SAT/CBL, etc.). The LED indicator
light blinks once to indicate
acceptance of the keypress.
5. The touchscreen now shows the
Learn Setup Screen 1. Press and hold
the SETUP key until the Main Setup
Screen is displayed. All Learned
commands that were previously
stored under that mode are
now cleared.
Master Clear
Clearing all stored Learned commands is recommended before
first-time Learning. To clear all Learned commands, follow
these steps:
1. Press and hold the SETUP key on
the rubber keypad until the LED
indicator light remains on and the
touchscreen shows the Main Setup
Screen. This process takes
approximately 2-3 seconds.
2. Release the SETUP key.
18
Page 19

3. Press and hold the LCD LEARN key until the Main Setup
Screen is displayed. This process takes approximately
5 seconds.
4. All Learned command entries are now cleared for all
device modes.
Smart Macro Key Operations
Your RCU900RF’s Smart Macro feature allows you to execute a
sequence of commands with one keypress. ASmart Macro learns
any sequence of original remote commands. Atotal of 20 learned
commands can be stored under each of the nine available LCD
MACRO keys. The sequence of commands you want a Smart
Macro to execute must be programmed in correct sequential
order. Any sequence of commands that you regularly perform
can be stored as a Smart Macro and reduced to a single
keypress. You cannot program a Macro within a Macro.
Program a Smart Macro
Example of Programming a Macro
1. Turn on the TV and set it to channel 3.
2. Turn on the satellite receiver and set it to channel 57.
3. Turn on the VCR.
4. Now you’re ready to record your favorite satellite program
with just a press of a button.
To program a Smart Macro, follow these steps:
1. Gather all your original remotes that
contain functions you would like to
add to a Smart Macro.
2. Place the first original remote in the
Learning position. Point the top of
the original remote at the base of the
RCU900RF so the IR LED on the
original remote is in line with the
RCU900RF Learning sensor, located at
the bottom of the remote.
3. Press and hold the SETUP key on
the rubber keypad until the LED
indicator light remains on and the
touchscreen shows the Main Setup
Screen. This process takes
approximately 2-3 seconds.
4. Release the SETUP key.
5. Press and release the LCD MACRO
key. The LED indicator light blinks
off once to indicate acceptance of
the keypress.
6. The touchscreen now shows the
Macro Setup Screen 1. Press and
release the digit key under which
you want to store the Smart Macro
(from 1-9). The LED indicator light
blinks off once to indicate acceptance
of the keypress.
7. The touchscreen now shows the
Macro Setup Screen 2. Press and
release the LCD LEARN KEY?.
The LED indicator light blinks off
once to indicate acceptance of
the keypress.
19
Page 20

Program a Smart Macro (continued)
8. Macro Setup Screen 3 now appears
on the touchscreen. Press and hold
the key on the original remote until
the LED indicator light on the
RCU900RF blinks off once. This process
takes 2-3 seconds to complete.
9. The touchscreen now shows Macro
Setup Screen 4. Release the original
remote key.
10.Program additional commands in the
order you want them to be stored in
the Smart Macro. To add commands
to the Smart Macro, repeat numbers 7
and 8 above, using original remotes
to program.
Note: It may be necessary to add
a delay in between the Macro
commands to allow your TV
warm-up time. The default delay
between each Macro command is 0.5
seconds. Delays can be added by
pressing and releasing the SETUP
key during the Macro learn sequence.
The Digit Select Screen is shown.
Press and release a digit key (1-9) to
indicate the delay time required (1=1
second; 2=2 seconds; 3=3 seconds,
etc.). The maximum delay is 9
seconds. Pressing the CLEAR key
will give the default delay of 0.5
seconds. Any delay added to the
Macro sequence is counted as one
keystroke of the possible 20
keystrokes for a Smart Macro.
11. Continue to repeat this procedure for
other keys to be stored. You can store
up to 20 learned commands under
one Smart Macro.
Note: If a problem occurs with the
Learning, the LED indicator light
flashes for two seconds but remains
in the Smart Macro routine.
12.Once you are finished programming
the macro, press and release the
LCD OK key .
13.The touchscreen returns to the Main
Setup Screen.
14.The Smart Macro programming
is complete.
15.If you program all 20 keys into a
Smart Macro, the Macro is
automatically stored after the 20th
learned command is completed.
20
Page 21

Delete a Smart Macro
To delete a previously programmed Smart Macro, follow
these steps:
1. Press and hold the SETUP key on
the rubber keypad until the LED
indicator light remains on and the
touchscreen shows the Main
Setup Screen. This process takes
approximately 2-3 seconds.
2. Release the SETUP key.
3. Press and hold the LCD MACRO
key until Macro Setup Screen 7 is
shown. The LED indicator light blinks
to indicate acceptance of the keypress.
Release the LCD MACRO key. Only
the programmed Macro key numbers
will be shown.
4. Press and release the digit key for the
Macro you wish to delete. The LED
indicator light blinks off once to
indicate acceptance of the keypress.
5. The Macro deletion is complete and
the Main Setup Screen will be shown.
6. If you are in the process of deleting
a Smart Macro and you decide
not to delete it, you can abort the
deletion process by pressing the
LCD CLEAR key.
Sleep Timer
Love to go to sleep with the TV on in the background? With the
RCU900RF, you can program your TV to turn off after a period of
time (from one to 99 minutes). The LCD SLEEP key is used to
set the Sleep Timer and is only available in the main TV Mode.
The SLEEP key is not displayed for any mode other than TV.
The TV Off command is sent at the end of the time period to
turn the TV off. You can set the Sleep Timer in two ways.
Method 1 (From Normal Operation)
To set your Sleep Timer from normal operation, follow
these steps:
1. Press the TV device key on the rubber keypad.
2. Press the LCD SCREEN key to switch to the second TV
screen on the touchscreen, which shows the LCD SLEEP key.
3. Press and hold the LCD SLEEP key in TV Screen 2 until the
LED indicator light remains on and the touchscreen shows
the Sleep Setup Screen. This process takes approximately
2-3 seconds.
4. Press and release the numeric keys indicating the number of
minutes (01-99) you wish to set on the Sleep Timer. The LED
indicator light blinks off once to indicate acceptance of the
keypress and the screen returns to normal operation.
5. The Sleep Timer is now set.
6. When using the Sleep Timer feature, leave the remote
pointing towards the TV with an unobstructed path.
21
Page 22

Method 2 (From Setup Routine)
To set your Sleep Timer from the Setup routine, follow
these steps:
1. Press the TV device key on the rubber keypad.
2. Press and hold the SETUP key on the rubber keypad until
the LED indicator light remains on and the touchscreen
shows the Main Setup Screen. This process takes
approximately 2-3 seconds.
3. Release the SETUP key.
4. Press and release the SLEEP key. The LED indicator light
blinks off once to indicate acceptance of the keypress.
5. The touchscreen now shows the Sleep Setup Screen. Press
and release the numeric keys indicating the number of
minutes (01-99) you wish to set on the Sleep Timer. The LED
indicator light blinks off once to indicate acceptance of the
keypress and the screen returns to normal operation.
6. The Sleep Timer is now set.
7. When using the Sleep Timer feature, leave the remote
pointing towards the TV with an unobstructed path.
Notes
• To cancel the Sleep Timer, press and release the ON•OFF key on
the rubber keypad in TV Mode or press and hold the LCD
SLEEP key in TV Screen 2 until the remote beeps twice. The
LED indicator light blinks to indicate acceptance of the keypress.
• The Sleep Timer settings are cleared when you enter Setup
using the SETUP key on the rubber keypad. The Sleep Timer is
also cleared when you enter the Macro Activation Screen.
• You can return to normal operation any time without setting
the Sleep Timer by pressing the LCD CLEAR key.
TV or CD/Audio Volume
Punch-Through
Your RCU900RF’s Punch-through command allows you to choose
which device mode (either TV or AUDIO/AUX) controls the
+
VOL
, VOL-, and MUTE keys on the rubber keypad. With this
feature, your TV volume can work even when you are in VCR
Mode, because it “punches through” from one device to another.
The device you select for Volume Punch-through control must
be either the TV or the AUDIO/AUX device programmed with
the CD/Audio unit. Any other selection (VCR, DVD, CAB,
SAT/CBL) is denied and the LED indicator light flashes to
indicate an error. The power-on default for volume control is TV
Volume Punch-through.
Note: All CD/Audio Modes take any Volume/Mute keypress
commands from the CD/Audio code, even when the TV is
programmed as the Punch-through device. All other devices
punch-through to the TV Volume/Mute control. When the
CD/Audio option is chosen as the Punch-through device, all
modes take any Volume/Mute keypress commands from the
CD/Audio code.
To change the device that controls the VOLUME and MUTE
keys Punch-through, follow these steps:
1. Press and hold the SETUP key on the rubber keypad until the
LED indicator light remains on and the Main Setup Screen is
shown. This process takes approximately 2-3 seconds.
22
Page 23

2. Release the SETUP key.
3. Press and hold the device key on the rubber keypad for
approximately 5 seconds (TV or AUDIO/AUX) for volume
control until the LED indicator light blinks and the Main
Setup Screen is shown.
4. The default volume control is now set for the mode you
have chosen.
VCR Punch-through
The RCU900RF punches through the six transport keys (REVERSE,
PLAY, FORWARD, RECORD, STOP, and PAUSE) to VCR or
DVD Mode, whichever was used most recently. Punch-through
to VCR/DVD transport keys on the rubber keypad is only
allowed for TV, VCR, DVD, and Cable-coded Modes.
AUX, SAT and CD/Audio are dedicated to their
programmed modes.
Record Key
In the VCR and AUDIO/CD Modes (including Punch-through),
the RECORD key on the rubber keypad must be pressed twice
before the command is sent. This is also true if a VCR device is
programmed under any other mode. The exceptions are for
DVD and SAT codes, where the RECORD key transmits the
command after only a single RECORD keypress.
Additional Features
Keypress Beep Feature
Your RCU900RF beeps whenever a key is pressed to acknowledge
the keypress. You can turn this feature on or off. The default
setting is On.
To turn the Keypress Beep on or off, follow these steps:
1. Press and hold the SETUP key on the rubber keypad until
the LED indicator light remains on and the touchscreen
shows the Main Setup Screen. This process takes
approximately 2-3 seconds.
2. Release the SETUP key.
3. Press and hold the MUTE key on the rubber keypad for
approximately 5 seconds until the LED blinks and the Main
Setup Screen is displayed.
4. The Keypress Beep feature is now turned on or off,
depending on the previous state it was in.
LCD Touchscreen Display Time
You can choose the length of time the touchscreen remains on
after the last keypress. The power-on default is 30 seconds from
the last keypress. Setting the LCD Touchscreen Display Time also
changes the length of time the Backlight stays on, if activated.
To change the LCD Touchscreen Display Time, follow these steps:
1. Press and hold the SETUP key on the rubber keypad until
the LED indicator light remains on and the touchscreen
shows the Main Setup Screen. This process takes
approximately 2-3 seconds.
23
Page 24

LCD Touchscreen Display Time (continued)
2. Release the SETUP key.
3. Press and release the SETUP key. The LED indicator light
blinks to acknowledge the keypress and the Digit Setup
Screen is shown.
4. Press and release a digit key (1-9) to indicate the length of
time you wish the touchscreen to remain on. (The RCU900RF
can only accept the following options: 1=10 seconds; 2=20
seconds; 3=30 seconds, etc.) Ninety seconds is the longest
length of time allowable. The LED indicator blinks to
acknowledge the keypress.
5. Press and release the LCD ENTER key to save the setting.
The touchscreen returns to the Main Setup Screen.
6. The LCD Touchscreen Display Time setting is now complete.
Backlighting
Backlight illumination is only activated when you press the
LIGHT key on the rubber keypad. Pressing the LIGHT key will
also activate the LCD touchscreen display. After you press the
LIGHT key, the light remains on for 30 seconds, or however
long the LCD Touchscreen Display Time is set to, if no other
commands are given.
If a command is entered after the LIGHT key has been pressed,
the illumination continues for a further 30 seconds after the
command is completed. Once the Backlight time has run out,
the Backlight does not re-activate until the LIGHT key is pressed
again. If the Backlight illumination is on, and the LIGHT key is
pressed again, the Backlight turns off.
Master Reset
A Master Reset returns all the RCU900RF defaults back to the
original factory settings. The Master Reset clears all customerprogrammed codes, Learned commands and Smart Macros,
and resets all key labels.
To perform a Master Reset, follow these steps:
1. Press and hold the SETUP key on the rubber keypad until
the LED indicator light remains on and the touchscreen
shows the Main Setup Screen. This process takes
approximately 2-3 seconds.
2. Release the SETUP key.
3. Press and hold the SETUP key for approximately 5
seconds until the LED indicator light turns off.
4. The default reset is now complete and the remote is in
normal TV Mode (screen is blank).
RCA All Power Off Feature
The RCAAll Power Off feature is available in all normal
operating modes. If the ON•OFF key on the rubber keypad is
pressed twice consecutively (within two seconds), all RCA
equipment is turned off.
24
Page 25

Glossary
AUDIO FEATURES (ACTIVE LCD KEYS IN AUDIO
DEVICE MODE)
AM.FM
The AM.FM allows you to select the AM or FM band on
your audio system.
CD, TAPE, TUNER, TV, VIDEO1 & VIDEO2
Use the CD, TAPE, TUNER, TV, VIDEO1 & VIDEO2 keys
to select the device you want to control.
CENTER, FRONT, REAR & OPTION
You can adjust the levels of the center, front and rear
speakers by using the LEVEL▲/LEVEL▼ keys. For RCA
audio receivers, the OPTION key is used to command your
audio receiver to generate a test tone in order to make
speaker balance adjustments to maximize your audio
system performance.
DSP
When the Digital Signal Processing (DSP) Mode is enabled,
pressing this key allows you to cycle through the various
DSP Modes.
LEVEL▲ & LEVEL▼
The LEVEL keys are used to make adjustments on delay
time, center speaker output level, rear speaker output level
or front speaker output level.
PROG
The PROGRAM key allows you to program your audio
preset channels.
DEVICE KEYS
The device keys on the rubber keypad change the device
currently being controlled by the remote (e.g., TV, VCR,
SAT/CBL, DVD, AUDIO, CD, AUX 1, AUX 2).
ENTER
The LCD ENTER key is used to complete channel selections for
some brands of TVs. It is also used to complete the highlighted
sections in the Main Menu.
GUIDE
If your device is equipped with this feature, the LCD GUIDE
key brings up the on-screen program listing.
25
Page 26

Glossary (continued)
INPUT
The LCD INPUT key selects the video inputs of your device,
if the device is equipped with this feature.
LCD
The Liquid Crystal Display (LCD) acts as a “virtual keypad” on
the remote. The touchscreen is normally blank when not
in use. Pressing any of the LCD keys or the SETUP key, a
device key, or the LIGHT key on the rubber keypad turns the
touchscreen on. The remaining rubber keys do not activate
the touchscreen.
LEARN
The Learn feature is used to supplement the pre-programmed
code library. The standard code library provides the basic
functions needed, and you can add a small number of
additional functions of your choice.
MENU
The LCD MENU key brings up the Main Menu. If you are
already in the menu system, press the LCD OK or MENU keys
to select a highlighted choice. Use the LCD NAVIGATION keys
(UP, DOWN, LEFT, and RIGHT ARROW keys) to move through
the menu selections.
Note: With some brands, the CH
-
VOL
keys on the rubber keypad navigate through the
highlighted choices. Once you select a device key, you put the
remote in that device mode and it will remain in that mode
until you press another device key. When you put the remote
in a specific device mode, the menu that is activated on the
touchscreen will be the menu for that mode. For example,
if you put the remote in TV Mode, the menu you see on the
touchscreen is for the TV Mode.
MUTE
The LCD MUTE key mutes the volume on your device with
volume control.
NAVIGATION KEY & OK KEYS
Use the LCD NAVIGATION keys (UP, DOWN, LEFT, and
RIGHT ARROW keys) to move through the on-screen menu and
guides. The NAVIGATION keys may also be used to move
through the highlighted choices. The LCD OK key chooses the
highlighted choice.
Note: With some manufactured models, the LCD MENU or
ENTER key should be used to select the highlighted choices.
PIP & SWAP
The LCD Picture-in-Picture (PIP) and SWAP keys operate your
TV’s Picture-in-Picture features.
+
and CH-and VOL+and
PREVIOUS CHANNEL (PREV CH)
The PREV CH key on the rubber keypad lets you access the
previous channel you selected. It operates the same way as the
LAST CHANNEL or RECALL keys do on many remotes.
26
Page 27

PUNCH-THROUGH
A Punch-through command has the ability to punch-through
from one device to another, (e.g., the TV volume can work while
the remote is in the VCR Mode).
SETUP KEY
The SETUP key on the rubber keypad is used to walk you
through the steps in setting up the remote. Setup is used for
Library Code Entry, Code Search, Code Identification and other
functions. During a Setup function, if no button is pressed for 60
seconds, the unit automatically exits from the Setup routine.
SLEEP KEY
The LCD SLEEP key allows you to turn your TV off
automatically at a predetermined time.
SLEEP TIMER
The Sleep Timer allows you to program your TV to turn off
after a period of time (from one to 99 minutes). The LCD
SLEEP key is used to set the Sleep Timer and is only available
in the main TV Mode.
SMART MACRO
The Smart Macro function, when programmed, causes a series
of events to occur in sequential order. Pressing the LCD
MACRO key activates a screen that allows you to select any of
your programmed Macros. An example of a Macro sequence
could be “Turn on the TV; then set it to channel 3; then turn on
the satellite receiver; then set it to Channel 57.” You can
program and store nine Smart Macros, with each consisting of
up to 20 commands.
TRANSPORT KEYS
The transport keys are located on the rubber keypad. Transport
keys include the REVERSE, PLAY, FORWARD, RECORD,
STOP and PAUSE keys.
TV/VCR
The LCD TV/VCR key operates the TV/VCR function of
your VCR.
VOLUME AND CHANNEL KEYS
The VOLUME and CHANNEL keys (VOL+, VOL-, CH+,
and CH-keys) on the rubber keypad increase and decrease
the volume level and channel numbers.
Note: With some brands, these keys also navigate through
highlighted choices in Menu Mode.
27
Page 28

Troubleshooting
PROBLEM
The touchscreen does not show
anything when you touch it or
when you press the SETUP or
LIGHT keys.
The remote does not operate your
audio or video devices.
You have problems programming
a TV/VCR combination unit.
Your VCR is not recording.
You have trouble changing the
channels on your TV.
The LCD OK key is not
responding.
The Learning or Smart Macro
processes cannot be completed
successfully.
SOLUTION
A) Replace the batteries with four
new AA alkaline batteries.
B) Check to make sure batteries
are properly installed.
A) Try all code programming
procedures with all the codes
from the appropriate part of
the Code List.
B) Make sure the remote is in the
correct mode for the device
you are attempting to control
(TV,VCR,DVD, etc.).
A) Try the VCR code for your
brand. Some combination
units, however, may require
both a TV and a VCR code for
full operation. To do this,
program the TV code under
the TV key and the VCR under
the VCR key.
A) As a safety feature on your
remote, you must press the
REC key on the rubber
keypad twice.
A) If the original remote requires
the ENTER key to be pressed
after a channel is selected,
press the LCD ENTER key
on the RCU900RF to select
the channel.
A) Try using the LCD MENU,
GUIDE, or ENTER key to
make the selection.
A) Replace batteries in the
RCU900RF and the remote from
which you are trying to learn.
B) The distance between the
remotes should be
approximately two inches.
C) Do not conduct the Learning
process near an
incandescent lamp.
D) Memory capacity is full (20
learned commands for each
of nine modes).
E) Original remote might not
be compatible with
Learning procedure.
28
Page 29

Code List
Te levisions
Abex . . . . . . . . . . . . . . . . . . . . . . . . . . . . . . . . . . . . . . . . . . . . . . . . . . . . . . . . . . . . . .185
Acme . . . . . . . . . . . . . . . . . . . . . . . . . . . . . . . . . . . . . . . . . . . . . . . . . . . . . . . . .021 ,050
ADA . . . . . . . . . . . . . . . . . . . . . . . . . . . . . . . . . . . . . . . . . . . . . . . . . . . . . . . . . . . . . .013
ADC . . . . . . . . . . . . . . . . . . . . . . . . . . . . . . . . . . . . . . . . . . . . . . . . . . . . . . . . . .006 ,002
Admiral . . . . . . . . . . . . . . . . . . . . . . . . . . . . . . . . . . . . . . . . . . . . . . . . . . . . . . .001 ,173
Adventura . . . . . . . . . . . . . . . . . . . . . . . . . . . . . . . . . . . . . . . . . . . . . . . . . . . . . . . . .174
Aiko . . . . . . . . . . . . . . . . . . . . . . . . . . . . . . . . . . . . . . . . . . . . . . . . . . . . . . . . . . . . . .058
Aiwa . . . . . . . . . . . . . . . . . . . . . . . . . . . . . . . . . . . . . . . . . . . . . . . . . . . . . . . . . .195, 196
Alleron . . . . . . . . . . . . . . . . . . . . . . . . . . . . . . . . . . . . . . . . . . . . . . . . . . . . . . . . . . . .046
Amark . . . . . . . . . . . . . . . . . . . . . . . . . . . . . . . . . . . . . . . . . . . . . . . . . . . . . . . . . . . .020
Amtron . . . . . . . . . . . . . . . . . . . . . . . . . . . . . . . . . . . . . . . . . . . . . . . . . . . . . . . . . . .053
Akai . . . . . . . . . . . . . . . . . . . . . . . . . . . . . . . . . . . . . . . . . . . . . . . . . . . . . . . . . . . . . .002
Amstrad . . . . . . . . . . . . . . . . . . . . . . . . . . . . . . . . . . . . . . . . . . . . . . . . . . . . . . . . . . .189
Anam National . . . . . . . . . . . . . . . . . . . . . . . . . . . . . . . . . . . .003, 025, 042, 053, 193
AOC . . . . . . . . . . . . . . . . . . . . . . . . . . . . . . . . .004 ,005 ,007 ,009 ,014 , 132 ,156 ,175
Archer . . . . . . . . . . . . . . . . . . . . . . . . . . . . . . . . . . . . . . . . . . . . . . . . . . . . . . . . . . . .020
Audiovox . . . . . . . . . . . . . . . . . . . . . . . . . . . . . . . . . . . . . . . . . . . . . . . . . . . . . . . . . .053
Bang & Olufsen . . . . . . . . . . . . . . . . . . . . . . . . . . . . . . . . . . . . . . . . . . . . . . . . . . . .190
Belcor . . . . . . . . . . . . . . . . . . . . . . . . . . . . . . . . . . . . . . . . . . . . . . . . . . . . . . . . . . . . .004
Bell & Howell . . . . . . . . . . . . . . . . . . . . . . . . . . . . . . . . . . . . . . . . . . . . . .000, 001 ,049
Bradford . . . . . . . . . . . . . . . . . . . . . . . . . . . . . . . . . . . . . . . . . . . . . . . . . . . . . . . . . .053
Broksonic . . . . . . . . . . . . . . . . . . . . . . . . . . . . . . . . . . . . . . . . . . . . . . . . . . . . . .136, 147
Brokwood . . . . . . . . . . . . . . . . . . . . . . . . . . . . . . . . . . . . . . . . . . . . . . . . . . . . . . . . .004
Candle . . . . . . . . . . . . . . . . . . . . . . . . . . . . . . . . . . . . . . . . . . . . . . . .004 ,008, 009, 174
Capehart . . . . . . . . . . . . . . . . . . . . . . . . . . . . . . . . . . . . . . . . . . . . . . . . . . . . . . . . . .175
Celebrity . . . . . . . . . . . . . . . . . . . . . . . . . . . . . . . . . . . . . . . . . . . . . . . . . . . . . . . . . .002
Centurion . . . . . . . . . . . . . . . . . . . . . . . . . . . . . . . . . . . . . . . . . . . . . . . . . . . . . . . . .009
Cetronic . . . . . . . . . . . . . . . . . . . . . . . . . . . . . . . . . . . . . . . . . . . . . . . . . . . . . . . . . . .042
Citizen . . . . . . . . . . . . . . . . . . . . . . .001, 004, 008, 009, 042, 053, 058 ,105, 109, 177
Clairtone . . . . . . . . . . . . . . . . . . . . . . . . . . . . . . . . . . . . . . . . . . . . . . . . . . . . . . . . . .014
Classic . . . . . . . . . . . . . . . . . . . . . . . . . . . . . . . . . . . . . . . . . . . . . . . . . . . . . . . . . . . .042
Colortyme . . . . . . . . . . . . . . . . . . . . . . . . . . . . . . . . . . . . . . . . . . . . . . . . .004, 009, 010
Concerto . . . . . . . . . . . . . . . . . . . . . . . . . . . . . . . . . . . . . . . . . . . . . . . . . . . . . .004, 009
Concierge . . . . . . . . . . . . . . . . . . . . . . . . . . . . . . . . . . . . . . . . . . . . . . . . . . . . . . . . . .121
Contec/Cony . . . . . . . . . . . . . . . . . . . . . . . . . . . . . . . . . . . . . .012, 013, 014, 042, 053
Craig . . . . . . . . . . . . . . . . . . . . . . . . . . . . . . . . . . . . . . . . . . . . . . . . . . . . . . . . . .042, 053
Crown . . . . . . . . . . . . . . . . . . . . . . . . . . . . . . . . . . . . . . . . . . . . . . . . . . . . . . . .042, 053
Curtis Mathes . . . . . . . . . . . . . . . . . . . . .000, 001, 004, 009, 015, 031, 049, 105, 109
CXC . . . . . . . . . . . . . . . . . . . . . . . . . . . . . . . . . . . . . . . . . . . . . . . . . . . . . . . . . .042, 053
Daewoo . . . . . . . . . . . . . . . . . . . . . . . . . . . . . .004, 005, 009, 017, 018, 019, 042, 058,
. . . . . . . . . . . . . . . . . . . . . . . . . . . . . . . . . .082,083, 085, 097, 100, 126, 127, 130, 138
Daytron . . . . . . . . . . . . . . . . . . . . . . . . . . . . . . . . . . . . . . . . . . . . . . . . . . . . . . .004, 009
Dimensia . . . . . . . . . . . . . . . . . . . . . . . . . . . . . . . . . . . . . . . . . . . . . . . . . . . . . .000, 031
Dumont . . . . . . . . . . . . . . . . . . . . . . . . . . . . . . . . . . . . . . . . . . . . . . . . . . . . . . .004, 121
Dynasty . . . . . . . . . . . . . . . . . . . . . . . . . . . . . . . . . . . . . . . . . . . . . . . . . . . . . . . . . . .042
Elektra . . . . . . . . . . . . . . . . . . . . . . . . . . . . . . . . . . . . . . . . . . . . . . . . . . . . . . . . . . . .001
Electroband . . . . . . . . . . . . . . . . . . . . . . . . . . . . . . . . . . . . . . . . . . . . . . . . . . . .002, 014
Electrohome . . . . . . . . . . . . . . . . . . . . . . . . . . . . . . . . . . . . . . .003, 004, 009, 022, 133
Emerson . . . . . . . . . . . . . . . . . . . . . .004, 009, 014, 023, 024, 025, 026, 027,030, 032
. . . . . . . . . . . . . . . . . . . . . . . . . . . . . . 033, 034, 035, 36, 037, 038, 039, 040, 041,042,
. . . . . . . . . . . . . . . . . . . . . . . . . . . . . 043, 045, 046, 049, 053, 116, 135, 147, 177, 179
Envision . . . . . . . . . . . . . . . . . . . . . . . . . . . . . . . . . . . . . . . . . . . . . . . . . . . . . . .004, 009
Fisher . . . . . . . . . . . . . . . . . . . . . . . . . . . . . . . . . . . . . . . . . . . . .013, 049, 050, 180, 209
Fujitsu . . . . . . . . . . . . . . . . . . . . . . . . . . . . . . . . . . . . . . . . . . . . . . . . . . . . . . . .046, 197
Funai . . . . . . . . . . . . . . . . . . . . . . . . . . . . . . . . . . . . . . . . . . . . . . . . . . . . .042, 053, 046
Futuretec . . . . . . . . . . . . . . . . . . . . . . . . . . . . . . . . . . . . . . . . . . . . . . . . . . . . . .042, 053
GE . . . . . . . . . . . . . . . . . . . . . . . . . . . . . . .000, 003, 004, 009, 022, 031, 044, 052, 054,
. . . . . . . . . . . . . . . . . . . . . . . . . . . . . . . . . . . . . .055, 087, 092, 103, 107, 125, 164, 181
Gibralter . . . . . . . . . . . . . . . . . . . . . . . . . . . . . . . . . . . . . . . . . . . . . . . . . . . . . .004, 121
Goldstar . . . . . . . . . . . . . . . . . . . . . . . . . .004, 005, 009, 056, 057, 133, 155, 156, 172
Grundy . . . . . . . . . . . . . . . . . . . . . . . . . . . . . . . . . . . . . . . . . . . . . . . . . . . . . . .046, 053
Hallmark . . . . . . . . . . . . . . . . . . . . . . . . . . . . . . . . . . . . . . . . . . . . . . . . . . . . . .004, 009
Harvard . . . . . . . . . . . . . . . . . . . . . . . . . . . . . . . . . . . . . . . . . . . . . . . . . . . . . . . . . . .053
Hitachi . . . . . . . . . . . . . . . . . . . . . . .001, 004, 009, 013, 059, 060, 061, 088, 091, 137,
. . . . . . . . . . . . . . . . . . . . . . . . . . . . . .139, 140, 141, 142, 143, 144, 145, 146, 179, 210
IMA . . . . . . . . . . . . . . . . . . . . . . . . . . . . . . . . . . . . . . . . . . . . . . . . . . . . . . . . . . . . . .053
Infinity . . . . . . . . . . . . . . . . . . . . . . . . . . . . . . . . . . . . . . . . . . . . . . . . . . . . . . . . . . . .062
Inteq . . . . . . . . . . . . . . . . . . . . . . . . . . . . . . . . . . . . . . . . . . . . . . . . . . . . . . . . . . . . . .121
Janeil . . . . . . . . . . . . . . . . . . . . . . . . . . . . . . . . . . . . . . . . . . . . . . . . . . . . . . . . . . . . . .174
JBL . . . . . . . . . . . . . . . . . . . . . . . . . . . . . . . . . . . . . . . . . . . . . . . . . . . . . . . . . . . . . . .062
JCB . . . . . . . . . . . . . . . . . . . . . . . . . . . . . . . . . . . . . . . . . . . . . . . . . . . . . . . . . . . . . . .002
JC Penny . . . . . . . . . . . . . . . . . . . . . . . . .000, 004, 005, 008, 009, 022, 031, 052, 054,
. . . . . . . . . . . . . . . . . . . . . . . . . . . . . . . . . . . . . 055, 063, 087, 105, 107, 109, 172, 181
Jensen . . . . . . . . . . . . . . . . . . . . . . . . . . . . . . . . . . . . . . . . . . . . . . . . . . . . . . . . .004, 009
JVC . . . . . . . . . . . . . . . . . . . . . . . . . . . . . . . . . . . . . .013, 054, 055, 060, 065, 067, 089
Kawasho . . . . . . . . . . . . . . . . . . . . . . . . . . . . . . . . . . . . . . . . . . . . . . . . . .002, 004, 009
Kaypani . . . . . . . . . . . . . . . . . . . . . . . . . . . . . . . . . . . . . . . . . . . . . . . . . . . . . . . . . . .175
KEC . . . . . . . . . . . . . . . . . . . . . . . . . . . . . . . . . . . . . . . . . . . . . . . . . . . . . . . . . . . . . .042
Kenwood . . . . . . . . . . . . . . . . . . . . . . . . . . . . . . . . . . . . . . . . . . . . . . . . . .004, 009, 133
Kloss Novabeam . . . . . . . . . . . . . . . . . . . . . . . . . . . . . . . . . . . . . . . . . . .068, 069, 174
Konka . . . . . . . . . . . . . . . . . . . . . . . . . . . . . . . . . . . . . . . .016, 047, 066, 157, 158, 176
KTV . . . . . . . . . . . . . . . . . . . . . . . . . . . . . . . . . . . . . .014, 021, 042, 053, 070, 116, 177
Lodgenet . . . . . . . . . . . . . . . . . . . . . . . . . . . . . . . . . . . . . . . . . . . . . . . . . . . . . .000, 001
Loewe . . . . . . . . . . . . . . . . . . . . . . . . . . . . . . . . . . . . . . . . . . . . . . . . . . . . . . . . .062, 211
Logik . . . . . . . . . . . . . . . . . . . . . . . . . . . . . . . . . . . . . . . . . . . . . . . . . . . . . . . . .000, 001
Luxman . . . . . . . . . . . . . . . . . . . . . . . . . . . . . . . . . . . . . . . . . . . . . . . . . . . . . . .004, 009
LXI . . . . . . . . . . . . . . . . . . . . . . . . . . . . . . .000, 004, 009, 031, 049, 062, 107, 109, 181
Magnavox . . . . . . . . . . . . . . . . . . . . . . . . . . . . . . . .004, 008, 009, 062, 068, 069, 074,
. . . . . . . . . . . . . . . . . . . . . . . . . . . . . . . . . . . . . . . . . .075, 076, 077, 089, 133, 163, 165
29
Page 30

Televisions (continued)
Majestic . . . . . . . . . . . . . . . . . . . . . . . . . . . . . . . . . . . . . . . . . . . . . . . . . . . . . . .000, 001
Marantz . . . . . . . . . . . . . . . . . . . . . . . . . . . . . . . . . . . . . . . . . . . . . . . . . . .004, 009, 062
Megatron . . . . . . . . . . . . . . . . . . . . . . . . . . . . . . . . . . . . . . . . . . . . . . . . . .004, 009, 059
MEI . . . . . . . . . . . . . . . . . . . . . . . . . . . . . . . . . . . . . . . . . . . . . . . . . . . . . . . . . . . . . . .014
Memorex . . . . . . . . . . . . . . . . . . . . . . . . . . . . .000, 001, 004, 009, 046, 049, 051, 135
MGA . . . . . . . . . . . . . . . . . . . . . . . . . . . . . . . . . . . . .004, 005, 009, 022, 046, 133, 180
Midland . . . . . . . . . . . . . . . . . . . . . . . . . . . . . . . . . . . . . .054, 055, 107, 121, 172, 181
Minutz . . . . . . . . . . . . . . . . . . . . . . . . . . . . . . . . . . . . . . . . . . . . . . . . . . . . . . . . . . . .052
Mitsubishi . . . . . . . . . . . . . . . . . . . .004, 005, 009, 022, 046, 081, 089, 132, 133, 180
Montgomery Ward . . . . . . . . . . . . . . . . . . . . . . . . . . . . . . . . . . . . . . . . . . . . .000, 001
Motorola . . . . . . . . . . . . . . . . . . . . . . . . . . . . . . . . . . . . . . . . . . . . . . . . . . . . . .003, 173
MTC . . . . . . . . . . . . . . . . . . . . . . . . . . . . . . . . . . . . . . . . . .004, 005, 009, 014, 105, 109
Multitech . . . . . . . . . . . . . . . . . . . . . . . . . . . . . . . . . . . . . . . . . . . . . . . . . . . . . . . . . .053
Multivision . . . . . . . . . . . . . . . . . . . . . . . . . . . . . . . . . . . . . . . . . . . . . . . . . . . . . . . .084
NAD . . . . . . . . . . . . . . . . . . . . . . . . . . . . . . . . . . . . . . . . . . . . . . . . .004, 009, 109, 185
NEC . . . . . . . . . . . . . . . . . . . . . . . . . . . . . . . . . .003, 004, 005, 009, 010, 085, 089, 095
Nikei . . . . . . . . . . . . . . . . . . . . . . . . . . . . . . . . . . . . . . . . . . . . . . . . . . . . . . . . . . . . . .042
Nikko . . . . . . . . . . . . . . . . . . . . . . . . . . . . . . . . . . . . . . . . . . . . . . . . . . . . .004, 009, 058
NTC . . . . . . . . . . . . . . . . . . . . . . . . . . . . . . . . . . . . . . . . . . . . . . . . . . . . . . . . . . . . . .058
Onking . . . . . . . . . . . . . . . . . . . . . . . . . . . . . . . . . . . . . . . . . . . . . . . . . . . . . . . . . . . .042
Onwa . . . . . . . . . . . . . . . . . . . . . . . . . . . . . . . . . . . . . . . . . . . . . . . . . . . . . . . . .042, 053
Optimus . . . . . . . . . . . . . . . . . . . . . . . . . . . . . . . . . . . . . . . . . . . . . . . . . . . . . . .170, 185
Optonica . . . . . . . . . . . . . . . . . . . . . . . . . . . . . . . . . . . . . . . . . . . . . . . . . . . . . .095, 173
Orion . . . . . . . . . . . . . . . . . . . . . . . . . . . . . . . . . . . . . . . . . . . . . . . . . . . . .035, 121, 135
Panasonic . . . . . . . . . . . . . . . . . . . . . . . . .003, 054, 055, 062, 070, 148, 149, 170, 171
Philco . . . . . . . . . . . . . . . .003, 004, 005, 008, 009, 062, 068, 069, 074, 075, 077, 133
Philips . . . . . . . . . . . . . . . . . . .003, 004, 006, 008, 062, 068, 069, 074, 075, 076, 086,
. . . . . . . . . . . . . . . . . . . . . 087, 089, 133, 163, 183, 184, 205, 206, 207, 208, 212, 213
Philips/Magnavox . . . . . . . . . . . . . . . . . . . . . . . . . . . . . . . . . . . . .183, 184, 208, 213
Pilot . . . . . . . . . . . . . . . . . . . . . . . . . . . . . . . . . . . . . . . . . . . . . . . . . . . . . . . . . . . . . .004
Pioneer . . . . . . . . . . . . . . . . . . . . . . . . . . . . . . . . . . . . . . . . . . .004, 009, 090, 179, 185
Portland . . . . . . . . . . . . . . . . . . . . . . . . . . . . . . . . . . . . . . . . . . . . . . .004, 005, 009, 058
Precision . . . . . . . . . . . . . . . . . . . . . . . . . . . . . . . . . . . . . . . . . . . . . . . . . . . . . . . . . .166
Price Cub . . . . . . . . . . . . . . . . . . . . . . . . . . . . . . . . . . . . . . . . . . . . . . . . . . . . . . . . . .105
Prism . . . . . . . . . . . . . . . . . . . . . . . . . . . . . . . . . . . . . . . . . . . . . . . . . . . . . . . . . . . . .055
Proscan . . . . . . . . . . . . . . . . . . . . . . . . . . . . . . . . . . . . . . . . . . . . . . .000, 031, 107, 181
Proton . . . . . . . . . . . . . . . . . . . . . . . . . . . . . . . . . . . . . . . .004, 009, 093, 175, 186, 192
Pulsar . . . . . . . . . . . . . . . . . . . . . . . . . . . . . . . . . . . . . . . . . . . . . . . . . . . . . . . . . . . . .121
Pulser . . . . . . . . . . . . . . . . . . . . . . . . . . . . . . . . . . . . . . . . . . . . . . . . . . . . . . . . . . . . .004
Quasar . . . . . . . . . . . . . . . . . . . . . . . . . . .003, 054, 055, 062, 070, 148, 149, 170, 171
Radio Shack . . . . . . . . . . . . . . . . . . . . . . . . . .000, 004, 009, 031, 041, 042, 048, 049,
. . . . . . . . . . . . . . . . . . . . . . . . . . . . . . . . . . . . . . . . . 053, 095, 133, 155, 170, 172, 194
RCA . . . . . . . . . . . . . . . . . . . . .000, 003, 004, 005, 007, 009, 011, 048, 078, 082, 083,
. . . . . . . . . . . . . . . . . . . . . . . . . 092, 094, 096, 098, 099, 101, 102, 103, 107, 113, 125,
. . . . . . . . . . . . . . . . . . . . . . . . . . . . . . . . . . . . . 129, 133, 167, 179, 181, 187, 188, 194
Realistic . . . . . . . . . . . . . . . . . . . . . . . . . . . . . .000, 004, 009, 031, 041, 042, 048, 049,
. . . . . . . . . . . . . . . . . . . . . . . . . . . . . . . . . . . . . . . . . 053, 095, 133, 155, 170, 172, 194
Rhapsody . . . . . . . . . . . . . . . . . . . . . . . . . . . . . . . . . . . . . . . . . . . . . . . . . . . . . . . . .014
Runco . . . . . . . . . . . . . . . . . . . . . . . . . . . . . . . . . . . . . . . . . . . . . . . . . . . . . . . . . . . . .121
Sampo . . . . . . . . . . . . . . . . . . . . . . . . . . . . . . . . . . . . . . . . . . . . . . . .004, 009, 172, 175
Samsung . . . . . . . . . . . . . . . . . . . . . . . . . . . . . . . . . . . . . . . . . .004, 005, 009, 015, 104
. . . . . . . . . . . . . . . . . . . . . . . . . . . . . . . . . . . . . . . . . . . . . . . . . .105, 106, 109, 133, 172
Samsux . . . . . . . . . . . . . . . . . . . . . . . . . . . . . . . . . . . . . . . . . . . . . . . . . . . . . . . . . . . .009
Sansui . . . . . . . . . . . . . . . . . . . . . . . . . . . . . . . . . . . . . . . . . . . . . . . . . . . . . . . . .135, 136
Sanyo . . . . . . . . . . . . . . . . . . . . . . . . . . . . . . . . . . . . .004, 013, 049, 108, 110, 180, 209
Scotch . . . . . . . . . . . . . . . . . . . . . . . . . . . . . . . . . . . . . . . . . . . . . . . . . . . . . . . . .004, 009
Scott . . . . . . . . . . . . . . . . . . . . . . . . . . . . . . . . . . . . . .004, 009, 024, 035, 042, 046, 053
Sears . . . . . . . . . . . . . . . . . . . . . . . . . . . . .000, 004, 009, 013, 031, 046, 049, 105, 107,
. . . . . . . . . . . . . . . . . . . . . . . . . . . . . . . . . . . . . . . . . . . . . . 109, 110, 133, 180, 181, 189
Sharp . . . . . . . . . . . . . . . . . . . . .004, 009, 079, 095, 111, 112, 114, 122, 123, 124, 173
Shogun . . . . . . . . . . . . . . . . . . . . . . . . . . . . . . . . . . . . . . . . . . . . . . . . . . . . . . . . . . . .004
Signature . . . . . . . . . . . . . . . . . . . . . . . . . . . . . . . . . . . . . . . . . . . . . . . . . .000, 001, 023
Simpson . . . . . . . . . . . . . . . . . . . . . . . . . . . . . . . . . . . . . . . . . . . . . . . . . . . . . . . . . . .008
Sonic . . . . . . . . . . . . . . . . . . . . . . . . . . . . . . . . . . . . . . . . . . . . . . . . . . . . . . . . . . . . . .014
Sony . . . . . . . . . . . . . . . . . . . . . . . . . . . . . . . . . . . . . . . . . . . . . . . . . .002, 006, 071, 128
Soundesign . . . . . . . . . . . . . . . . . . . . . . . . . . . . . . . . . . . .004, 008, 009, 042, 053, 046
Spectravision . . . . . . . . . . . . . . . . . . . . . . . . . . . . . . . . . . . . . . . . . . . . . . . . . . . . . .203
Squareview . . . . . . . . . . . . . . . . . . . . . . . . . . . . . . . . . . . . . . . . . . . . . . . . . . . . . . . .189
SSS . . . . . . . . . . . . . . . . . . . . . . . . . . . . . . . . . . . . . . . . . . . . . . . . . . . . . . .004, 042, 053
Starlite . . . . . . . . . . . . . . . . . . . . . . . . . . . . . . . . . . . . . . . . . . . . . . . . . . . . . . . . . . . .053
Supremacy . . . . . . . . . . . . . . . . . . . . . . . . . . . . . . . . . . . . . . . . . . . . . . . . . . . . . . . .174
Supreme . . . . . . . . . . . . . . . . . . . . . . . . . . . . . . . . . . . . . . . . . . . . . . . . . . . . . . . . . . .002
Sylvania . . . . . . . . . .004, 008, 009, 062, 068, 069, 074, 075, 076, 077, 133, 161, 163
Symphonic . . . . . . . . . . . . . . . . . . . . . . . . . . . . . . . . . . . . . . . . . . . . . . . .033, 053, 189
Tandy . . . . . . . . . . . . . . . . . . . . . . . . . . . . . . . . . . . . . . . . . . . . . . . . . . . . . . . . . . . . .173
Tatung . . . . . . . . . . . . . . . . . . . . . . . . . . . . . . . . . . . . . . . . . . . . . . . . . . . . . . . . . . . .003
Technics . . . . . . . . . . . . . . . . . . . . . . . . . . . . . . . . . . . . . . . . . . . . . . . . . . . . . . .054, 055
Techwood . . . . . . . . . . . . . . . . . . . . . . . . . . . . . . . . . . . . . . . . . . . . .004, 009, 054, 055
Teknika . . . . . . . . . . . . . . . . . . . . . . . . . .000, 001, 004, 005, 008, 009, 013, 042, 046,
. . . . . . . . . . . . . . . . . . . . . . . . . . . . . . . . . . . . . . . . . 053, 058, 076, 105, 109, 170, 174
Telecaption . . . . . . . . . . . . . . . . . . . . . . . . . . . . . . . . . . . . . . . . . . . . . . . . . . . . . . . .117
Telerent . . . . . . . . . . . . . . . . . . . . . . . . . . . . . . . . . . . . . . . . . . . . . . . . . . . . . . .000, 001
Tera . . . . . . . . . . . . . . . . . . . . . . . . . . . . . . . . . . . . . . . . . . . . . . . . . . . . . . . . . . .004, 186
TMK . . . . . . . . . . . . . . . . . . . . . . . . . . . . . . . . . . . . . . . . . . . . . . . . . . . . . . . . . .004, 009
Toshiba . . . . . . . . . . . . . . . . . . . . . . .013, 049, 089, 105, 109, 117, 118, 120, 159, 178
Universal . . . . . . . . . . . . . . . . . . . . . . . . . . . . . . . . . . . . . . . . . . . . . . . . . . . . . .052, 087
Victor . . . . . . . . . . . . . . . . . . . . . . . . . . . . . . . . . . . . . . . . . . . . . . . . . . . . . . . . . . . . .060
Vidtech . . . . . . . . . . . . . . . . . . . . . . . . . . . . . . . . . . . . . . . . . . . . . . . . . . . .004, 005, 009
Viking . . . . . . . . . . . . . . . . . . . . . . . . . . . . . . . . . . . . . . . . . . . . . . . . . . . . . . . . . . . . .174
Wards . . . . . . . . . . . . . . . . . . . . . . . .000, 001, 004, 005, 009, 024, 031, 033, 046, 052,
. . . . . . . . . . . . . . . . . . . . . . . . . . . . . 062, 068, 069, 074, 075, 076, 087, 095, 119, 133
White Westinghouse . . . . . . . . . . . . . . . . . . . . . . . . . . . . . . . . . . . . . . . . . . . .097, 100
Yamaha . . . . . . . . . . . . . . . . . . . . . . . . . . . . . . . . . . . . . . . . . . . . . . .004, 005, 009, 133
Zenith . . . . . . . . . . . . . . . .000, 001, 004, 023, 038, 058, 059, 064, 121, 135, 136, 153
30
Page 31

VCR/PVR
Admiral . . . . . . . . . . . . . . . . . . . . . . . . . . . . . . . . . . . . . . . . . . . . . . . . . . . . . . . . . . .001
Adventura . . . . . . . . . . . . . . . . . . . . . . . . . . . . . . . . . . . . . . . . . . . . . . . . . . . . . . . . .026
Aiko . . . . . . . . . . . . . . . . . . . . . . . . . . . . . . . . . . . . . . . . . . . . . . . . . . . . . . . . . . . . . .027
Aiwa . . . . . . . . . . . . . . . . . . . . . . . . . . . . . . . . . . . . . . . . . . . . . . . . .002, 020, 026, 044
Akai . . . . . . . . . . . . . . . . . . . . . . . . . . . . . . . . . .003, 004, 005, 006, 008, 029, 111, 112
Allegro . . . . . . . . . . . . . . . . . . . . . . . . . . . . . . . . . . . . . . . . . . . . . . . . . . . .018, 022, 104
American High . . . . . . . . . . . . . . . . . . . . . . . . . . . . . . . . . . . . . . . . . . . . . . . . .021, 060
ASHA . . . . . . . . . . . . . . . . . . . . . . . . . . . . . . . . . . . . . . . . . . . . . . . . . . . . . . . . . . . . .013
Audio Dynamics . . . . . . . . . . . . . . . . . . . . . . . . . . . . . . . . . . . . . . . . . . . . . . .009, 123
Audiovox . . . . . . . . . . . . . . . . . . . . . . . . . . . . . . . . . . . . . . . . . . . . . . . . . . . . . . . . . .014
Bell & Howell . . . . . . . . . . . . . . . . . . . . . . . . . . . . . . . . . . . . . . . . . . . . . . . . . . . . . .043
Beaumark . . . . . . . . . . . . . . . . . . . . . . . . . . . . . . . . . . . . . . . . . . . . . . . . . . . . . . . . .013
Broksonic . . . . . . . . . . . . . . . . . . . . . . . . . . . . . . . . . . . . . . . . .012, 025, 031, 064, 085
Calix . . . . . . . . . . . . . . . . . . . . . . . . . . . . . . . . . . . . . . . . . . . . . . . . . . . . . . . . . . . . . .014
Candle . . . . . . . . . . . . . . . . . . . . . . . . . . . . . . . . . . . .009, 013, 014, 015, 016, 017, 019
Cannon . . . . . . . . . . . . . . . . . . . . . . . . . . . . . . . . . . . . . . . . . . . . . . .021, 060, 114, 115
Capehart . . . . . . . . . . . . . . . . . . . . . . . . . . . . . . . . . . . . . . . . . . . . . . . . . . . . . .104, 110
Carver . . . . . . . . . . . . . . . . . . . . . . . . . . . . . . . . . . . . . . . . . . . . . . . . . . . . . . . . . . . .062
CCE . . . . . . . . . . . . . . . . . . . . . . . . . . . . . . . . . . . . . . . . . . . . . . . . . . . . . . . . . .027, 061
Citizen . . . . . . . . . . . . . . . . . . . . . . . . . . . . . . . .009, 013, 014, 015, 016, 017, 019, 027
Colortyme . . . . . . . . . . . . . . . . . . . . . . . . . . . . . . . . . . . . . . . . . . . . . . . . . . . . . . . . .009
Colt . . . . . . . . . . . . . . . . . . . . . . . . . . . . . . . . . . . . . . . . . . . . . . . . . . . . . . . . . . . . . . .061
Craig . . . . . . . . . . . . . . . . . . . . . . . . . . . . . . . . . . . . . . . . . . . . . . . . .013, 014, 023, 061
Curtis Mathes . . . . . . . . . . . . . . . . . . . . .000, 002, 009, 013, 016, 021, 024, 060, 115
Cybernex . . . . . . . . . . . . . . . . . . . . . . . . . . . . . . . . . . . . . . . . . . . . . . . . . . . . . . . . . .013
Daewoo . . . . . . . . . . . . . . . . . . . . . . . . . . .015, 017, 019, 025, 026, 027, 028, 054, 110
Daytron . . . . . . . . . . . . . . . . . . . . . . . . . . . . . . . . . . . . . . . . . . . . . . . . . . . . . . . . . . .110
DBX . . . . . . . . . . . . . . . . . . . . . . . . . . . . . . . . . . . . . . . . . . . . . . . . . . . . . . . . . .009, 123
Dimensia . . . . . . . . . . . . . . . . . . . . . . . . . . . . . . . . . . . . . . . . . . . . . . . . . . . . . . . . . .000
Dynatech . . . . . . . . . . . . . . . . . . . . . . . . . . . . . . . . . . . . . . . . . . . . . . . . . . . . . .002, 026
Electrohome . . . . . . . . . . . . . . . . . . . . . . . . . . . . . . . . . . . . . . . . . . . . . . . . . . .014, 029
Electrophonic . . . . . . . . . . . . . . . . . . . . . . . . . . . . . . . . . . . . . . . . . . . . . . . . . . . . . .014
Emerson . . . . . . . . . . . . . . . . . . . . .002, 006, 012, 014, 015, 021, 024, 025, 026, 029,
. . . . . . . . . . . . . . . . . . . . . . . . . . . . .030, 031, 032, 033, 034, 035, 036, 037, 038, 039,
. . . . . . . . . . . . . . . . . . . . . . . . . . . . . 040, 041, 043, 044, 045, 047, 060, 065, 105, 116
Fisher . . . . . . . . . . . . . . . . . . . . . . . . . . . . . . . .009, 023, 042, 043, 048, 049, 050, 062
Fuji . . . . . . . . . . . . . . . . . . . . . . . . . . . . . . . . . . . . . . . . . . . . . . . . . . . . . . .004, 021, 060
Funai . . . . . . . . . . . . . . . . . . . . . . . . . . . . . . . . . . . . . . . . . . . . . . . . . . . . .002, 008, 026
Garrard . . . . . . . . . . . . . . . . . . . . . . . . . . . . . . . . . . . . . . . . . . . . . . . . . . . . . . . . . . .026
GE . . . . . . . . . . . . . . . . . . . . . . . . . . . . . . . . . . .000, 013, 021, 053, 060, 115, 117, 120
Goldstar . . . . . . . . . . . . . . . . . . . . . . . . . . . . . . . . . . . . . . . . . . . . . . . . . . .009, 014, 121
Gradiente . . . . . . . . . . . . . . . . . . . . . . . . . . . . . . . . . . . . . . . . . . . . . . . . . . . . . . . . . .026
Go-Video . . . . . . . . . . . . . . . . . . . . . . . . . . . . . . . . . . . . . . . . . . . . . . . . . . . . . .134, 143
Harley Davidson . . . . . . . . . . . . . . . . . . . . . . . . . . . . . . . . . . . . . . . . . . . . . . . . . . .026
Harman Kardon . . . . . . . . . . . . . . . . . . . . . . . . . . . . . . . . . . . . . . . . . . . . . . . .009, 068
Harwood . . . . . . . . . . . . . . . . . . . . . . . . . . . . . . . . . . . . . . . . . . . . . . . . . . . . . . . . . .061
Headquarter . . . . . . . . . . . . . . . . . . . . . . . . . . . . . . . . . . . . . . . . . . . . . . . . . . . . . . .043
Hitachi . . . . . . . . . . . . . . . . . . . . . . . . . . . .002, 055, 057, 107, 111, 120, 122, 144, 145
Hi-Q . . . . . . . . . . . . . . . . . . . . . . . . . . . . . . . . . . . . . . . . . . . . . . . . . . . . . . . . . . . . . .023
Instant Replay . . . . . . . . . . . . . . . . . . . . . . . . . . . . . . . . . . . . . . . . . . . . .008, 021, 060
Inteq . . . . . . . . . . . . . . . . . . . . . . . . . . . . . . . . . . . . . . . . . . . . . . . . . . . . . . . . . . . . . .014
JCL . . . . . . . . . . . . . . . . . . . . . . . . . . . . . . . . . . . . . . . . . . . . . . . . . . . . . . . . . . .021, 060
JC Penney . . . . . . . . . . . . . . . . .009, 013, 014, 043, 055, 060, 107, 111, 115, 118 123
Jensen . . . . . . . . . . . . . . . . . . . . . . . . . . . . . . . . . . . . . . . . . . . . . . . . . . . . . . . . .055, 111
JVC . . . . . . . . . . . . . . . . . . . . . . . . . . . . . . . . . . . . . . .009, 022, 043, 111, 123, 151, 152
Kenwood . . . . . . . . . . . . . . . . . . . . . . . . . . . . . . . . . . . . . . . . . .009, 016, 043, 111, 123
KLH . . . . . . . . . . . . . . . . . . . . . . . . . . . . . . . . . . . . . . . . . . . . . . . . . . . . . . . . . .061, 131
Kodak . . . . . . . . . . . . . . . . . . . . . . . . . . . . . . . . . . . . . . . . . . . . . . . . . . . .014, 021, 060
Lloyd . . . . . . . . . . . . . . . . . . . . . . . . . . . . . . . . . . . . . . . . . . . . . . . . . . . . . . . . .002, 026
Logik . . . . . . . . . . . . . . . . . . . . . . . . . . . . . . . . . . . . . . . . . . . . . . . . . . . . . . . . . . . . .061
LXI . . . . . . . . . . . . . . . . . . . . . . . . . . . . . . . . . . . . . . . . . . . . . . . . . . . . . . . . . . . . . . .014
Magnavox . . . . . . . . . . . . . . . . . . . . . . . . . . . . . . . . .021, 060, 062, 104, 106, 115, 124
Magnin . . . . . . . . . . . . . . . . . . . . . . . . . . . . . . . . . . . . . . . . . . . . . . . . . . . . . . . . . . . .013
Marantz . . . . . . . . . . . . . . . . . . . . . . . . . .009, 016, 021, 043, 060, 062, 064, 114, 123
Marta . . . . . . . . . . . . . . . . . . . . . . . . . . . . . . . . . . . . . . . . . . . . . . . . . . . . . . . . . . . . .014
Matsushita . . . . . . . . . . . . . . . . . . . . . . . . . . . . . . . . . . . . . . . . . . . . . . . . . . . . .021, 060
MEI . . . . . . . . . . . . . . . . . . . . . . . . . . . . . . . . . . . . . . . . . . . . . . . . . . . . . . . . . . .021, 060
Memorex . . . . . . . . . . . . . . . . .001, 002, 013, 014, 021, 023, 026, 043, 060, 104, 112
MGA . . . . . . . . . . . . . . . . . . . . . . . . . . . . . . . . . . . . . . . . . . . . . . . . . . . . . . . . .029, 065
MGN Technology . . . . . . . . . . . . . . . . . . . . . . . . . . . . . . . . . . . . . . . . . . . . . . . . . . .013
Midland . . . . . . . . . . . . . . . . . . . . . . . . . . . . . . . . . . . . . . . . . . . . . . . . . . . . . . . . . . .053
Minolta . . . . . . . . . . . . . . . . . . . . . . . . . . . . . . . . . . . . . . . . . . . . . . . . . . . . . . .055, 107
Mitsubishi . . . . . . . .029, 051, 052, 055, 065, 066, 068, 069, 070, 071, 073, 074, 123
Montgomery Ward . . . . . . . . . . . . . . . . . . . . . . . . . . . . . . . . . . . . . . . . . . . . .001, 075
Motorola . . . . . . . . . . . . . . . . . . . . . . . . . . . . . . . . . . . . . . . . . . . . . . . . . .001, 021, 060
MTC . . . . . . . . . . . . . . . . . . . . . . . . . . . . . . . . . . . . . . . . . . . . . . . . . . . . . .002, 013, 026
Multitech . . . . . . . . . . . . . . . . . . . . . . . . . . . . . . . . . . . . . . . . . .002, 013, 026, 053, 061
NEC . . . . . . . . . . . . . . . . . . . . . . . . . .009, 016, 024, 043, 064, 076, 077, 078, 11 1, 123
Nikko . . . . . . . . . . . . . . . . . . . . . . . . . . . . . . . . . . . . . . . . . . . . . . . . . . . . . . . . . . . . .014
Noblex . . . . . . . . . . . . . . . . . . . . . . . . . . . . . . . . . . . . . . . . . . . . . . . . . . . . . . . . . . . .013
Olympus . . . . . . . . . . . . . . . . . . . . . . . . . . . . . . . . . . . . . . . . . . . . . . . . . . . . . .021, 060
Optimus . . . . . . . . . . . . . . . . . . . . . . . . . . . . . . . . . .001, 014, 109, 134, 136, 137, 138
Optonica . . . . . . . . . . . . . . . . . . . . . . . . . . . . . . . . . . . . . . . . . . . . . . . . . . . . . .075, 134
Orion . . . . . . . . . . . . . . . . . . . . . . . . . . . . . . . . . . . . . . . . . . . . . . . . . . . . . . . . . . . . .031
Panasonic . . . . . . . . . . . . . . . . . . . . . . . . . . . . .021, 060, 109, 115, 125, 138, 148, 149
Pentax . . . . . . . . . . . . . . . . . . . . . . . . . . . . . . . . . . . . . . . . . . . . . . . .016, 055, 107, 120
Pentex Research . . . . . . . . . . . . . . . . . . . . . . . . . . . . . . . . . . . . . . . . . . . . . . . . . . . .009
Philco . . . . . . . . . . . . . . . . . . . . . . . . . . . . . . . . . . . . . . . . . . . . . . . . .021, 060, 062, 115
Philips . . . . . . . . . . . . . . . . . . . .021, 060, 062, 063, 075, 103, 106, 108, 124, 146, 153
Philips/Magnavox . . . . . . . . . . . . . . . . . . . . . . . . . . . . . . . . . . . . . . . . . . . . .108, 103
Pilot . . . . . . . . . . . . . . . . . . . . . . . . . . . . . . . . . . . . . . . . . . . . . . . . . . . . . . . . . . . . . .014
31
Page 32

VCR/PVR (continued)
Pioneer . . . . . . . . . . . . . . . . . . . . . . . . . . . . . . . . . . . . . . . . . . . . . . .055, 080, 081, 123
Portland . . . . . . . . . . . . . . . . . . . . . . . . . . . . . . . . . . . . . . . . . . . . . . .016, 017, 019, 110
Proscan . . . . . . . . . . . . . . . . . . . . . . . . . . . . . . . . . . . . . . . . . . . . . . . . . . . . . . . . . . . .000
Protec . . . . . . . . . . . . . . . . . . . . . . . . . . . . . . . . . . . . . . . . . . . . . . . . . . . . . . . . . . . . .061
Pulsar . . . . . . . . . . . . . . . . . . . . . . . . . . . . . . . . . . . . . . . . . . . . . . . . . . . . . . . . . . . . .104
Quarter . . . . . . . . . . . . . . . . . . . . . . . . . . . . . . . . . . . . . . . . . . . . . . . . . . . . . . . . . . . .043
Quartz . . . . . . . . . . . . . . . . . . . . . . . . . . . . . . . . . . . . . . . . . . . . . . . . . . . . . . . . . . . .043
Quasar . . . . . . . . . . . . . . . . . . . . . . . . . . . . . . . . . . . . . . . . . . . . . . . .021, 060, 115, 125
RCA . . . . . . . . . . . . . . . . . . . . . . . . . . . . .000, 003, 013, 021, 053, 055, 082, 083, 084,
. . . . . . . . . . . . . . . . . . . . . . . . . . . . . . . . . 086, 087, 088, 089, 090, 091, 120, 125, 137
Radioshack . . . . . . . . . . . . . . . . . . .000, 001, 002, 013, 014, 021, 023, 026, 029, 043,
. . . . . . . . . . . . . . . . . . . . . . . . . . . . . 049, 050, 060, 075, 109, 112, 115, 136, 137, 138
Radix . . . . . . . . . . . . . . . . . . . . . . . . . . . . . . . . . . . . . . . . . . . . . . . . . . . . . . . . . . . . .014
Randex . . . . . . . . . . . . . . . . . . . . . . . . . . . . . . . . . . . . . . . . . . . . . . . . . . . . . . . . . . . .014
Realistic . . . . . . . . . . . . . . . . . . . . . .000, 001, 002, 013, 014, 021, 023, 026, 029, 043,
. . . . . . . . . . . . . . . . . . . . . . . . . . . . . 049, 050, 060, 075, 109, 112, 115, 136, 137, 138
Replay . . . . . . . . . . . . . . . . . . . . . . . . . . . . . . . . . . . . . . . . . . . . . . . . . . . . . . . . . . . .148
Ricoh . . . . . . . . . . . . . . . . . . . . . . . . . . . . . . . . . . . . . . . . . . . . . . . . . . . . . . . . . . . . .128
Runco . . . . . . . . . . . . . . . . . . . . . . . . . . . . . . . . . . . . . . . . . . . . . . . . . . . . . . . . . . . . .104
Samsung . . . . . . . . . . . . . . . . . . . . . . . . . .005, 013, 015, 033, 053, 055, 112, 129, 134
Sanky . . . . . . . . . . . . . . . . . . . . . . . . . . . . . . . . . . . . . . . . . . . . . . . . . . . . . . . . .001, 104
Sansui . . . . . . . . . . . . . . . . . . . . . . . . . . . . . . . . . . . . . . . . . . . . . . . . . . . . .092, 111, 123
Sanyo . . . . . . . . . . . . . . . . . . . . . . . . . . . . . . . . . . . . . . . . . . . . . . . . .013, 023, 042, 043
Scott . . . . . . . . . . . . . . . . . . . . . . . . . . . . . . . . . .012, 015, 025, 032, 038, 065, 093, 116
Sears . . . . . . . . . . . . . . . . .014, 021, 023, 043, 048, 049, 050, 055, 060, 062, 107, 118
Sharp . . . . . . . . . . . . . . . . . . . . . . . . . . . . . . . . .001, 002, 017, 029, 075, 135, 136, 142
Shintom . . . . . . . . . . . . . . . . . . . . . . . . . . . . . . . . . . . . . . . . . . .004, 055, 061, 128, 132
Shogun . . . . . . . . . . . . . . . . . . . . . . . . . . . . . . . . . . . . . . . . . . . . . . . . . . . . . . . . . . . .013
Signature . . . . . . . . . . . . . . . . . . . . . . . . . . . . . . . . . . . . . . . . . . . . . . . . . . . . . . . . . .002
Singer . . . . . . . . . . . . . . . . . . . . . . . . . . . . . . . . . . . . . . . . . . . . . . . . . . . . .021, 060, 061
Sony . . . . . . . . . . . . . . . . . . . . . . . . . . . . . . . . . . . . . .004, 099, 128, 139, 140, 141, 147
STS . . . . . . . . . . . . . . . . . . . . . . . . . . . . . . . . . . . . . . . . . . . . . . . . . . .021, 055, 060, 107
Sylvania . . . . . . . . . . . . . . . . . . . . . . . . . . . . . . . . . .002, 026, 060, 062, 065, 115, 124
Symphonic . . . . . . . . . . . . . . . . . . . . . . . . . . . . . . . . . . . . . . . . . . . . . . . .002, 011, 026
Tandy . . . . . . . . . . . . . . . . . . . . . . . . . . . . . . . . . . . . . . . . . . . . . . . . . . . . . . . . .002, 043
Tashiko . . . . . . . . . . . . . . . . . . . . . . . . . . . . . . . . . . . . . . . . . . . . . . . . . . . . . . . . . . . .014
Tatung . . . . . . . . . . . . . . . . . . . . . . . . . . . . . . . . . . . . . . . . . . . . . . . . . . . . . . . . . . . . .111
Teac . . . . . . . . . . . . . . . . . . . . . . . . . . . . . . . . . . . . . . . . . . . . . . . . . . . . . . .002, 026, 111
Technics . . . . . . . . . . . . . . . . . . . . . . . . . . . . . . . . . . . . . . . . . . . . . . . . . . .021, 060, 109
Teknika . . . . . . . . . . . . . . . . . . . . . . . . . . . . . . . . . . . . . . .002, 014, 021, 026, 060, 100
TiVo . . . . . . . . . . . . . . . . . . . . . . . . . . . . . . . . . . . . . . . . . . . . . . . . . . . . . . . . . .146, 147
Toshiba . . . . . . . . . . . . . . . . . . . . . . . . . . . . . . . . . . .015, 049, 055, 062, 065, 093, 116
Totevision . . . . . . . . . . . . . . . . . . . . . . . . . . . . . . . . . . . . . . . . . . . . . . . . . . . . .013, 014
TMK . . . . . . . . . . . . . . . . . . . . . . . . . . . . . . . . . . . . . . . . . . . . . . . . . . . . . .013, 024, 047
Unitech . . . . . . . . . . . . . . . . . . . . . . . . . . . . . . . . . . . . . . . . . . . . . . . . . . . . . . . . . . . .013
Vector Research . . . . . . . . . . . . . . . . . . . . . . . . . . . . . . . . . . . . . . . .009, 015, 016, 123
Victor . . . . . . . . . . . . . . . . . . . . . . . . . . . . . . . . . . . . . . . . . . . . . . . . . . . . . . . . . . . . .123
Video Concepts . . . . . . . . . . . . . . . . . . . . . . . . . . . . . . . . . . . .009, 015, 016, 029, 123
Videosonic . . . . . . . . . . . . . . . . . . . . . . . . . . . . . . . . . . . . . . . . . . . . . . . . . . . . . . . . .013
Wards . . . . . . . . . . . . . . . . . . . . . . . . . . . .001, 002, 013, 014, 015, 021, 023, 026, 029,
. . . . . . . . . . . . . . . . . . . . . . . . . . . . . . . . . . . . . . . . . . 055, 060, 061, 075, 101, 107, 116
White Westinghouse . . . . . . . . . . . . . . . . . . . . . . . . . . . . . . . . . . . . . . . . . . . .002, 008
XR-1000 . . . . . . . . . . . . . . . . . . . . . . . . . . . . . . . . . . . . . . . . . . . . . . .021, 026, 060, 061
Yamaha . . . . . . . . . . . . . . . . . . . . . . . . . . . . . . . . . . . . . . . . . . . . . . .009, 043, 111, 123
Zenith . . . . . . . . . . . . . . . . . . . . . . . . . . .001, 004, 007, 010, 014, 018, 022, 056, 058,
. . . . . . . . . . . . . . . . . . . . . . . . . . . . . . . . . . . . . . 059, 085, 104, 119, 123, 128, 133, 145
DVD
Aiwa . . . . . . . . . . . . . . . . . . . . . . . . . . . . . . . . . . . . . . . . . . . . . . . . . . . . . . . . . . . . . .189
Akai . . . . . . . . . . . . . . . . . . . . . . . . . . . . . . . . . . . . . . . . . . . . . . . . . . . . . . . . . . . . . .170
Apex . . . . . . . . . . . . . . . . . . . . . . . . . . . . . . . . . . . . . . . . . . . . . . . . . . . . . . . . . . . . . .199
Daewoo . . . . . . . . . . . . . . . . . . . . . . . . . . . . . . . . . . . . . . . . . . . . . . . . . . .215, 216, 219
Denon . . . . . . . . . . . . . . . . . . . . . . . . . . . . . . . . . . . . . . . . . . . . . . . . . . . . . . . .175, 196
Elta . . . . . . . . . . . . . . . . . . . . . . . . . . . . . . . . . . . . . . . . . . . . . . . . . . . . . . . . . . .209, 210
Emerson . . . . . . . . . . . . . . . . . . . . . . . . . . . . . . . . . . . . . . . . . . . . . . . . . . . . . . . . . . .171
Fisher . . . . . . . . . . . . . . . . . . . . . . . . . . . . . . . . . . . . . . . . . . . . . . . . . . . . . . . . . . . . .191
GE . . . . . . . . . . . . . . . . . . . . . . . . . . . . . . . . . . . . . . . . . . . . . . . . . . . . . . . . . . . . . . . .205
Go-Video . . . . . . . . . . . . . . . . . . . . . . . . . . . . . . . . . . . . . . . . . . . . . . . . . . . . . .182, 201
Harman/Kardon . . . . . . . . . . . . . . . . . . . . . . . . . . . . . . . . . . . . . . . . . . . . . . . . . . .202
Hitachi . . . . . . . . . . . . . . . . . . . . . . . . . . . . . . . . . . . . . . . . . . . . . . . . . . . .179, 194, 214
Integra . . . . . . . . . . . . . . . . . . . . . . . . . . . . . . . . . . . . . . . . . . . . . . . . . . . . . . . . . . . .197
JVC . . . . . . . . . . . . . . . . . . . . . . . . . . . . . . . . . . . . . . . . . . . . . . . . . . . . . . . . . . .181, 193
Kenwood . . . . . . . . . . . . . . . . . . . . . . . . . . . . . . . . . . . . . . . . . . . . . . . . . . . . . .175, 204
Konka . . . . . . . . . . . . . . . . . . . . . . . . . . . . . . . . . . . . . . . . . . . . . . . .185, 186, 187, 188
Magnavox . . . . . . . . . . . . . . . . . . . . . . . . . . . . . . . . . . . . . . . . . . . . . . . . .173, 177, 183
Marantz . . . . . . . . . . . . . . . . . . . . . . . . . . . . . . . . . . . . . . . . . . . . . . . . . . . . . . .173, 183
Mitsubishi . . . . . . . . . . . . . . . . . . . . . . . . . . . . . . . . . . . . . . . . . . . . . . . . . . . . . . . . .177
Mustek . . . . . . . . . . . . . . . . . . . . . . . . . . . . . . . . . . . . . . . . . . . . . . . . . . . . . . . . . . . .206
NAD . . . . . . . . . . . . . . . . . . . . . . . . . . . . . . . . . . . . . . . . . . . . . . . . . . . . . . . . . . . . . .208
Nakamichi . . . . . . . . . . . . . . . . . . . . . . . . . . . . . . . . . . . . . . . . . . . . . . . . . . . . . . . . .207
Onkyo . . . . . . . . . . . . . . . . . . . . . . . . . . . . . . . . . . . . . . . . . . . . . . . . . . . . . . . . . . . .197
Optimus . . . . . . . . . . . . . . . . . . . . . . . . . . . . . . . . . . . . . . . . . . . . . . . . . . . . . . .179, 214
Oritron . . . . . . . . . . . . . . . . . . . . . . . . . . . . . . . . . . . . . . . . . . . . . . . . . . . . . . . . . . . .190
Panasonic . . . . . . . . . . . . . . . . . . . . . . . . . . . . . . . . . . . . . . . . . . . . . . . . . . . . .175, 176
Philips . . . . . . . . . . . . . . . . . . . . . . . . . . . . . . . . . . . . . . . . . . . . . . . . . . . .173, 183, 198
Pioneer . . . . . . . . . . . . . . . . . . . . . . . . . . . . . . . . . . . . . . . . . . . . . . . . . . . . . . . .179, 214
Proscan . . . . . . . . . . . . . . . . . . . . . . . . . . . . . . . . . . . . . . . . . . . . . . . . . . . . . . . . . . . .184
Radioshack . . . . . . . . . . . . . . . . . . . . . . . . . . . . . . . . . . . . . . . . . . . . . . . . . . . .117, 218
RCA . . . . . . . . . . . . . . . . . . . . . . . . . . . . . . . . . . . . . . . . . . . . . .117, 178, 184, 205, 218
Samsung . . . . . . . . . . . . . . . . . . . . . . . . . . . . . . . . . . . . . . . . . . . . . . . . . . . . . . . . . .182
32
Page 33

Sampo . . . . . . . . . . . . . . . . . . . . . . . . . . . . . . . . . . . . . . . . . . . . . . . . . . . . . . . . . . . .192
SEG . . . . . . . . . . . . . . . . . . . . . . . . . . . . . . . . . . . . . . . . . . . . . . . . . . . . . . . . . . . . . . .203
Sharp . . . . . . . . . . . . . . . . . . . . . . . . . . . . . . . . . . . . . . . . . . . . . . . . . . . . . . . . . . . . .172
Sherwood . . . . . . . . . . . . . . . . . . . . . . . . . . . . . . . . . . . . . . . . . . . . . . . . . . . . . . . . .200
Shinco . . . . . . . . . . . . . . . . . . . . . . . . . . . . . . . . . . . . . . . . . . . . . . . . . . . . . . . . . . . . .205
Sony . . . . . . . . . . . . . . . . . . . . . . . . . . . . . . . . . . . . . . . . . . . . . . . . . . . . . . . . . . . . . .174
Teac . . . . . . . . . . . . . . . . . . . . . . . . . . . . . . . . . . . . . . . . . . . . . . . . . . . . . . . . . . .179, 214
Theta Digital . . . . . . . . . . . . . . . . . . . . . . . . . . . . . . . . . . . . . . . . . . . . . . . . . . .179, 214
Toshiba . . . . . . . . . . . . . . . . . . . . . . . . . . . . . . . . . . . . . . . . . . . . . . . . . . . . . . . .173, 211
Wharfedale . . . . . . . . . . . . . . . . . . . . . . . . . . . . . . . . . . . . . . . . . . . . . . . . . . . . . . . .217
Yamaha . . . . . . . . . . . . . . . . . . . . . . . . . . . . . . . . . . . . . . . . . . . . . . . . . . . . . . .175, 195
Yamakawa . . . . . . . . . . . . . . . . . . . . . . . . . . . . . . . . . . . . . . . . . . . . . . . . . . . . . . . . .213
Zenith . . . . . . . . . . . . . . . . . . . . . . . . . . . . . . . . . . . . . . . . . . . . . . . . . . . .171, 180, 212
Satellite Receivers
Amplica . . . . . . . . . . . . . . . . . . . . . . . . . . . . . . . . . . . . . . . . . . . . . . . . . . . . . . . . . . .115
Channel Master . . . . . . . . . . . . . . . . . . . . . . . . . . . . . . . . . . . . . . . . . . . .117, 118, 119
Chapparal . . . . . . . . . . . . . . . . . . . . . . . . . . . . . . . . . . . . . . . . . . . . . . . . .100, 101, 120
Cheyenne . . . . . . . . . . . . . . . . . . . . . . . . . . . . . . . . . . . . . . . . . . . . . . . . . . . . . . . . . .101
Drake . . . . . . . . . . . . . . . . . . . . . . . . . . . . . . . . . . . . . . . . . . . . . . . . . . . . .102, 114, 127
Dish Network . . . . . . . . . . . . . . . . . . . . . . . . .128, 129, 130, 153, 168, 187, 188, 194
DX Antenna . . . . . . . . . . . . . . . . . . . . . . . . . . . . . . . . . . . . . . . . . . . . . . . . . . .108, 122
Echosphere . . . . . . . . . . . . . . . . . . . . . . . . . . . . . . . . . . . . . . . . . . . . . . . . . . . . . . . .168
Echostar . . . . . . . . . . . . . . . . . . . . . . . . . . . . . . . . . .128, 129, 130, 153, 168, 187, 194
Expressvu . . . . . . . . . . . . . . . . . . . . . . . . . . . . . . . . . . . . . . . . . . . . .153, 168, 187, 194
Fujitsu . . . . . . . . . . . . . . . . . . . . . . . . . . . . . . . . . . . . . . . . . . . . . . . . . . . . . . . .131, 132
GE . . . . . . . . . . . . . . . . . . . . . . . . . . . . . . . . . . . . . . . . . . . . . . . . . . . . . . . . . . . .176, 162
General Instruments . . . . . . . . . . . . . . .104, 105, 106, 133, 180, 182, 183, 184, 185
DSS Hitachi . . . . . . . . . . . . . . . . . . . . . . . . . . . . . . . . . . . . . . . . . . . . . . . . . . . .172, 181
DSS Hughes Satellite . . . . . . . . . . . . . . . . . . . . . . . . . . . . . . .169, 170, 172, 173, 178
Janeil . . . . . . . . . . . . . . . . . . . . . . . . . . . . . . . . . . . . . . . . . . . . . . . . . . . . . . . . . . . . . .136
Jerrold . . . . . . . . . . . . . . . . . . . . . . . . . . . . . . . . . . . . . . . . . . . . . . . . . . . . . . . . . . . .137
JVC . . . . . . . . . . . . . . . . . . . . . . . . . . . . . . . . . . . . . . . . . . . . . . . . . . . . . . . . . . . . . . .188
Kenwood . . . . . . . . . . . . . . . . . . . . . . . . . . . . . . . . . . . . . . . . . . . . . . . . . . . . . . . . . .138
Luxor . . . . . . . . . . . . . . . . . . . . . . . . . . . . . . . . . . . . . . . . . . . . . . . . . . . . . . . . . . . . .139
DSS Magnavox . . . . . . . . . . . . . . . . . . . . . . . . . . . . . . . . . . . . . . . . . . . . .116, 152, 179
Macom State . . . . . . . . . . . . . . . . . . . . . . . . . . . . . . . . . . . . . . . . . . . . . . . . . . . . . . .140
Norstat . . . . . . . . . . . . . . . . . . . . . . . . . . . . . . . . . . . . . . . . . . . . . . . . . . . . . . . .141, 142
Pace . . . . . . . . . . . . . . . . . . . . . . . . . . . . . . . . . . . . . . . . . . . . . . . . . . . . . .154, 155, 186
DSS Panasonic . . . . . . . . . . . . . . . . . . . . . . . . . . . . . . . . . . . . . . . . . . . . . . . . .126, 166
Primestar . . . . . . . . . . . . . . . . . . . . . . . . . . . . . . . . . . . . . . . . . . . . . . . . . . . . . .167, 180
Philips . . . . . . . . . . . . . . . . . . . . . . . . . . . . . . . . . . . . . . . . . . . . . . . . . . . .116, 152, 179
Philips/Magnavox . . . . . . . . . . . . . . . . . . . . . . . . . . . . . . . . . . . . . . . . . .116, 152, 179
Pioneer . . . . . . . . . . . . . . . . . . . . . . . . . . . . . . . . . . . . . . . . . . . . . . . . . . . . . . . . . . . .124
Proscan . . . . . . . . . . . . . . . . . . . . . . . . . . . . . . . . . . . . . . . . . . . . . . . . . . . . . . .162, 176
DSS RCA . . . . . . . . . . . . . . . . . . . . . . . . . . . . . . . . . . . . . . . . . . . . . .176, 189, 192, 193
Realistic . . . . . . . . . . . . . . . . . . . . . . . . . . . . . . . . . . . . . . . . . . . . . . . . . . . . . . .107, 143
Samsung . . . . . . . . . . . . . . . . . . . . . . . . . . . . . . . . . . . . . . . . . . . . . . . . . . . . . . . . . .134
Scientific Atlanta . . . . . . . . . . . . . . . . . . . . . . . . . . . . . . . . . . . . . . . . . . . . . . . . . . .147
Aharp . . . . . . . . . . . . . . . . . . . . . . . . . . . . . . . . . . . . . . . . . . . . . . . . . . . . . . . . . . . . .144
Aierra I, II, III . . . . . . . . . . . . . . . . . . . . . . . . . . . . . . . . . . . . . . . . . . . . . . . . . . . . . .101
DSS Sony . . . . . . . . . . . . . . . . . . . . . . . . . . . . . . . . . . . . . . . . . . . . . . . . . . . . . .125, 163
Starchoice . . . . . . . . . . . . . . . . . . . . . . . . . . . . . . . . . . . . . . . . . . . . . . . . . . . . .167, 180
Star Sight . . . . . . . . . . . . . . . . . . . . . . . . . . . . . . . . . . . . . . . . . . . . . . . . . . . . . . . . .173
Star Trak . . . . . . . . . . . . . . . . . . . . . . . . . . . . . . . . . . . . . . . . . . . . . . . . . . . . . . . . . .148
STS . . . . . . . . . . . . . . . . . . . . . . . . . . . . . . . . . . . . . . . . . . . . . . . . . . .108, 109, 110, 111
Super Guide . . . . . . . . . . . . . . . . . . . . . . . . . . . . . . . . . . . . . . . . . . . . . . . . . . . . . . .149
Thomson . . . . . . . . . . . . . . . . . . . . . . . . . . . . . . . . . . . . . . . . . . . . . . . . . . . . . . . . . .154
Toshiba . . . . . . . . . . . . . . . . . . . . . . . . . . . . . . . . . . . . . . . . . . . . . . . . . . . . . . . . . . . .112
Toshiba DSS . . . . . . . . . . . . . . . . . . . . . . . . . . . . . . . . . . . . . . . . . . . . . . .164, 165, 171
Uniden . . . . . . . . . . . . . . . . . . . . . . . . . . . . . . . . . . . . . . . . . . . . . . . . . . . . . . . .113, 151
DSS Uniden . . . . . . . . . . . . . . . . . . . . . . . . . . . . . . . . . . . . . . . . . . . . . . . . . . . . . . . .173
Video Cipher II . . . . . . . . . . . . . . . . . . . . . . . . . . . . . . . . . . . . . . . . . . . . . . . . . . . . .114
Zenith . . . . . . . . . . . . . . . . . . . . . . . . . . . . . . . .102, 103, 114, 127, 155, 174, 175, 186
Cable Boxes
ABC . . . . . . . . . . . . . . . . . . . . . . . . . . . . . . . . . . . . . .001, 002, 003, 004, 005, 006, 007
Allegro . . . . . . . . . . . . . . . . . . . . . . . . . . . . . . . . . . . . . . . . . . . . . . . . . . . . . . . .064, 065
Americast . . . . . . . . . . . . . . . . . . . . . . . . . . . . . . . . . . . . . . . . . . . . . . . . . . . . . . . . .067
Antronix . . . . . . . . . . . . . . . . . . . . . . . . . . . . . . . . . . . . . . . . . . . . . . . . . . . . . .008, 009
Archer . . . . . . . . . . . . . . . . . . . . . . . . . . . . . . . . . . . . . . . . . . . . . . . .008, 009, 010, 011
AT&T . . . . . . . . . . . . . . . . . . . . . . . . . . . . . . . . . . . . . . . . . . . . . . . . . . . . . . . . . . . . .051
Cabletenna . . . . . . . . . . . . . . . . . . . . . . . . . . . . . . . . . . . . . . . . . . . . . . . . . . . . . . . .008
Cableview . . . . . . . . . . . . . . . . . . . . . . . . . . . . . . . . . . . . . . . . . . . . . . . . . . . . . . . . .008
Century . . . . . . . . . . . . . . . . . . . . . . . . . . . . . . . . . . . . . . . . . . . . . . . . . . . . . . . . . . .011
Citizen . . . . . . . . . . . . . . . . . . . . . . . . . . . . . . . . . . . . . . . . . . . . . . . . . . . . . . . . . . . .011
Colour Voice . . . . . . . . . . . . . . . . . . . . . . . . . . . . . . . . . . . . . . . . . . . . . . . . . . .012, 013
Comtronics . . . . . . . . . . . . . . . . . . . . . . . . . . . . . . . . . . . . . . . . . . . . . . . . . . . .014, 015
Contec/Cony . . . . . . . . . . . . . . . . . . . . . . . . . . . . . . . . . . . . . . . . . . . . . . . . . . . . . .016
Eastern . . . . . . . . . . . . . . . . . . . . . . . . . . . . . . . . . . . . . . . . . . . . . . . . . . . . . . . . . . . .017
Garrard . . . . . . . . . . . . . . . . . . . . . . . . . . . . . . . . . . . . . . . . . . . . . . . . . . . . . . . . . . .011
GC Electronics . . . . . . . . . . . . . . . . . . . . . . . . . . . . . . . . . . . . . . . . . . . . . . . . . . . . .009
Gemini . . . . . . . . . . . . . . . . . . . . . . . . . . . . . . . . . . . . . . . . . . . . . . . . . . . . . . . .018, 019
GE . . . . . . . . . . . . . . . . . . . . . . . . . . . . . . . . . . . . . . . . . . . . . . . . . . . . . . . . . . . . . . . .089
General Instrument . . . . . . . . . . . .003, 049, 051, 053, 054, 058, 068, 069, 070, 071
Hamlin . . . . . . . . . . . . . . . . . . . . . . . . . . . . . . . . . . . . . . . . . . . . . . . . . . . .020, 021, 022
Hitachi . . . . . . . . . . . . . . . . . . . . . . . . . . . . . . . . . . . . . . . . . . . . . . . . . . . . . . . . . . . .003
Hytex . . . . . . . . . . . . . . . . . . . . . . . . . . . . . . . . . . . . . . . . . . . . . . . . . . . . . . . . . . . . .002
Jasco . . . . . . . . . . . . . . . . . . . . . . . . . . . . . . . . . . . . . . . . . . . . . . . . . . . . . . . . . . . . . .011
Jerrold . . . . . . . . . . .001, 003, 004, 005, 007, 018, 024, 049, 050, 051, 066, 068, 069
33
Page 34

Cable Boxes (continued)
Magnavox . . . . . . . . . . . . . . . . . . . . . . . . . . . . . . . . . . . . . . . . . . . . . . . . . . . . . . . . .025
Memorex . . . . . . . . . . . . . . . . . . . . . . . . . . . . . . . . . . . . . . . . . . . . . . . . . . . . . . . . . .026
Movie Time . . . . . . . . . . . . . . . . . . . . . . . . . . . . . . . . . . . . . . . . . . . . . . . . . . . .002, 027
NSC . . . . . . . . . . . . . . . . . . . . . . . . . . . . . . . . . . . . . . . . . . . . . . . . . . . . . . . . . .002, 027
OAK . . . . . . . . . . . . . . . . . . . . . . . . . . . . . . . . . . . . . . . . . . . . . . . . . . . . . .002, 016, 029
Pace . . . . . . . . . . . . . . . . . . . . . . . . . . . . . . . . . . . . . . . . . . . . . . . . . . . . . . . . . . . . . .072
Panasonic . . . . . . . . . . . . . . . . . . . . . . . . . . . . . . . . . . . . . . . . . . . . . . . . . . . . .000, 048
Paragon . . . . . . . . . . . . . . . . . . . . . . . . . . . . . . . . . . . . . . . . . . . . . . . . . . . . . . . . . . .026
Philips . . . . . . . . . . . . . . . . . . . . . . . . . . . . . . . .011, 012, 013, 019, 025, 030, 031, 032
Philips/Magnavox . . . . . . . . . . . . . . . . . . . . . . . . . . . . . . . . . . . . . . . . . . . . .045, 074
Pioneer . . . . . . . . . . . . . . . . . . . . . . . . . . . . . . . . . . . . . . . . . . . . . . . . . . . .033, 034, 038
Pulsar . . . . . . . . . . . . . . . . . . . . . . . . . . . . . . . . . . . . . . . . . . . . . . . . . . . . . . . . . . . . .026
Radio Shack . . . . . . . . . . . . . . . . . . . . . . . . . . . . . . . . . . . . . . . . . . . . . . .045, 065, 074
RCA . . . . . . . . . . . . . . . . . . . . . . . . . . . . . . . . . . . . . . . . . . . . . . . . . . . . . . . . . .000, 047
Realistic . . . . . . . . . . . . . . . . . . . . . . . . . . . . . . . . . . . . . . . . . . . . . . . . . . . . . . . . . . .009
Regal . . . . . . . . . . . . . . . . . . . . . . . . . . . . . . . . . . . . . . . . . . . . . . . . . . . . . . . . . . . . .022
Regency . . . . . . . . . . . . . . . . . . . . . . . . . . . . . . . . . . . . . . . . . . . . . . . . . . . . . . . . . . .017
Rembrandt . . . . . . . . . . . . . . . . . . . . . . . . . . . . . . . . . . . . . . . . . . . . . . . . . . . . . . . .003
Runco . . . . . . . . . . . . . . . . . . . . . . . . . . . . . . . . . . . . . . . . . . . . . . . . . . . . . . . . . . . . .026
Samsung . . . . . . . . . . . . . . . . . . . . . . . . . . . . . . . . . . . . . . . . . . . . . . . . . . . . . .014, 034
Scientific Atlanta . . . . . . . . . . . . . . . . . . . . . . . . . . . . . . . . . . . . . . .006, 036, 037, 038
Signal . . . . . . . . . . . . . . . . . . . . . . . . . . . . . . . . . . . . . . . . . . . . . . . . . . . . . . . . .014, 018
Signature . . . . . . . . . . . . . . . . . . . . . . . . . . . . . . . . . . . . . . . . . . . . . . . . . . . . . . . . . .003
SL Marx . . . . . . . . . . . . . . . . . . . . . . . . . . . . . . . . . . . . . . . . . . . . . . . . . . . . . . . . . . .014
Sprucer . . . . . . . . . . . . . . . . . . . . . . . . . . . . . . . . . . . . . . . . . . . . . . . . . . . . . . . . . . . .000
Standard Components . . . . . . . . . . . . . . . . . . . . . . . . . . . . . . . . . . . . . . . . . . . . . .039
Starcom . . . . . . . . . . . . . . . . . . . . . . . . . . . . . . . . . . . . . . . . . . . . . . . . . . .001, 007, 018
Stargate . . . . . . . . . . . . . . . . . . . . . . . . . . . . . . . . . . . . . . . . . . . . . . . . . . . . . . .014, 018
Star Sight . . . . . . . . . . . . . . . . . . . . . . . . . . . . . . . . . . . . . . . . . . . . . . . . . . . . . . . . . .060
Star Sight Cable Service . . . . . . . . . . . . . . . . . . . . . . . . . . . . . . . . . . . . . . . . . . . . .047
Starquest . . . . . . . . . . . . . . . . . . . . . . . . . . . . . . . . . . . . . . . . . . . . . . . . . . . . . . . . . .018
Star Trak . . . . . . . . . . . . . . . . . . . . . . . . . . . . . . . . . . . . . . . . . . . . . . . . . . . . . . . . . .056
Tandy . . . . . . . . . . . . . . . . . . . . . . . . . . . . . . . . . . . . . . . . . . . . . . . . . . . . . . . . . . . . .040
Teleview . . . . . . . . . . . . . . . . . . . . . . . . . . . . . . . . . . . . . . . . . . . . . . . . . . . . . . . . . . .014
Telewest . . . . . . . . . . . . . . . . . . . . . . . . . . . . . . . . . . . . . . . . . . . . . . . . . . . . . . . . . . .072
Texscan . . . . . . . . . . . . . . . . . . . . . . . . . . . . . . . . . . . . . . . . . . . . . . . . . . . . . . . . . . . .039
Tocom . . . . . . . . . . . . . . . . . . . . . . . . . . . . . . . . . . . . . . . . . . . . . . . . . . . .004, 041, 053
Toshiba . . . . . . . . . . . . . . . . . . . . . . . . . . . . . . . . . . . . . . . . . . . . . . . . . . . . . . . . . . . .026
Tusa . . . . . . . . . . . . . . . . . . . . . . . . . . . . . . . . . . . . . . . . . . . . . . . . . . . . . . . . . . . . . .018
TV86 . . . . . . . . . . . . . . . . . . . . . . . . . . . . . . . . . . . . . . . . . . . . . . . . . . . . . . . . . . . . . .027
Unika . . . . . . . . . . . . . . . . . . . . . . . . . . . . . . . . . . . . . . . . . . . . . . . . . . . . .008, 009, 011
United Artists . . . . . . . . . . . . . . . . . . . . . . . . . . . . . . . . . . . . . . . . . . . . . . . . . . . . . .002
United Cable . . . . . . . . . . . . . . . . . . . . . . . . . . . . . . . . . . . . . . . . . . . . . . . . . . . . . . .001
Universal . . . . . . . . . . . . . . . . . . . . . . . . . . . . . . . . . . . . . . . . . .008, 009, 010, 011, 042
Videoway . . . . . . . . . . . . . . . . . . . . . . . . . . . . . . . . . . . . . . . . . . . . . . . . . . . . . . . . .044
Viewstar . . . . . . . . . . . . . . . . . . . . . . . . . . . . . . . . . . . . . . . . . . . . . .015, 025, 027, 040
Video Tech . . . . . . . . . . . . . . . . . . . . . . . . . . . . . . . . . . . . . . . . . . . . . . . . . . . . . . . . .090
Zenith . . . . . . . . . . . .026, 028, 043, 057, 059, 060, 061, 062, 063, 064, 065, 067, 073
Audio Systems
Aiwa . . . . . . . . . . . . . . . . . . . . . . . . . . . . . . . . . . . . . . . . . . . . . . . . .179, 182, 191, 200
Carver . . . . . . . . . . . . . . . . . . . . . . . . . . . . . . . . . . . . . . . . . . . . . . . . . . . . . . . . . . . .165
Citizen . . . . . . . . . . . . . . . . . . . . . . . . . . . . . . . . . . . . . . . . . . . . . . . . . . . . . . . . . . . .166
Denon . . . . . . . . . . . . . . . . . . . . . . . . . . . . . . . . . . . . . . . . . . . . . . . . . . . . . . . .143, 157
Fisher . . . . . . . . . . . . . . . . . . . . . . . . . . . . . . . . . . . . . . . . . . . . . . . . . . . . . . . . .154, 161
Goldstar . . . . . . . . . . . . . . . . . . . . . . . . . . . . . . . . . . . . . . . . . . . . . . . . . . . . . . . . . . .106
Harman Kardon . . . . . . . . . . . . . . . . . . . . . . . . . . . . . . . . . . . . . . . . . . . . . . . .144, 158
JVC . . . . . . . . . . . . . . . . . . . . . . . . . . . . . . . . . . . . . . . . . . . . . . . . . . . . . . .130, 153, 159
Kenwood . . . . . . . . . . . . . . . . . . . . . . . . . . . . . . . . . . . . . . . . .023, 148, 156, 168, 172
Magnavox . . . . . . . . . . . . . . . . . . . . . . . . . . . . . . . . . . . . . . . . . . . . . . . . . . . . .136, 154
Marantz . . . . . . . . . . . . . . . . . . . . . . . . . . . . . . . . . . . . . . . . . . . . . . . . . . . . . . .028, 164
NAD . . . . . . . . . . . . . . . . . . . . . . . . . . . . . . . . . . . . . . . . . . . . . . . . . . . . . .061, 079, 083
Onkyo . . . . . . . . . . . . . . . . . . . . . . . . . . . . . . . . . . . . . . . . . . . . . . . . . . . .145, 151, 152
Optimus . . . . . . . . . . . . . . . . . . . . . . . . . .007, 087, 088, 089, 090, 091, 092, 094, 133
Panasonic . . . . . . . . . . . . . . . . . . . . . . . . . . . . . . . . . . . . . . . . . . . . . . . . . . . . .150, 155
Philips . . . . . . . . . . . . . . . . . . . . . . . . . . . . . . . . . . . . . . . . . . . . . . . .154, 163, 164, 165
Pioneer . . . . . . . . . . . . . . . . . . . . . . . . . . . . . . . . . . . . . . . . . . . . . . .177, 206, 207, 218
Radioshack . . . . . . . . . . . . . . . . . . .046, 094, 133, 146, 205, 206, 207, 215, 218, 219
RCA . . . . . . . . . . . . .057, 112, 121, 135, 167, 206, 207, 210, 211, 212, 215, 218, 219
Realistic . . . . . . . . . . . . . . . . . . . . . . . . . . . . . . . . . . . . . . . . . . . . . . . . . . . . . . . . . . .162
Sanyo . . . . . . . . . . . . . . . . . . . . . . . . . . . . . . . . . . . . . . . . . . . . . . . . . . . . . . . . . . . . .045
Scott . . . . . . . . . . . . . . . . . . . . . . . . . . . . . . . . . . . . . . . . . . . . . . . . . . . . . . . . . . . . . .108
Sharp . . . . . . . . . . . . . . . . . . . . . . . . . . . . . . . . . . . . . . . . . . . . . . . . . . . . .011, 037, 149
Sherwood . . . . . . . . . . . . . . . . . . . . . . . . . . . . . . . . . . . . . . . . . . . . .046, 159, 198, 199
Sony . . . . . . . . . . . . . . . . . . . . . . . . . . . . . .118, 137, 138, 139, 173, 174, 175, 176, 183
Teac . . . . . . . . . . . . . . . . . . . . . . . . . . . . . . . . . . . . . . . . . . . . . .050, 147, 195, 196, 197
Technics . . . . . . . . . . . . . . . . . . . . . . . . . . . . . .056, 076, 131, 150, 155, 163, 203, 204
Venturer . . . . . . . . . . . . . . . . . . . . . . . . . . . . . . . . . . . . . . . . . . . . . . . . . . . . . . . . . . .085
Yamaha . . . . . . . . . . . . . . . . . . . . . . . . . . .141, 142, 178, 180, 181, 186, 187, 188, 189
Zenith . . . . . . . . . . . . . . . . . . . . . . . . . . . .016, 070, 089, 099, 105, 106, 124, 154, 190
CD Players
ADC . . . . . . . . . . . . . . . . . . . . . . . . . . . . . . . . . . . . . . . . . . . . . . . . . . . . . . . . . . . . . .000
Adcom . . . . . . . . . . . . . . . . . . . . . . . . . . . . . . . . . . . . . . . . . . . . . . . . . . . . . . . .001, 054
Aiwa . . . . . . . . . . . . . . . . . . . . . . . . . . . . . . . . . . . . . . . . . . . . . . . . .002, 003, 182, 201
Akai . . . . . . . . . . . . . . . . . . . . . . . . . . . . . . . . . . . . . . . . . . . . . . . . . . . . . .055, 077, 170
Audio Technica . . . . . . . . . . . . . . . . . . . . . . . . . . . . . . . . . . . . . . . . . . . . . . . . . . . . .005
California Audio Labs . . . . . . . . . . . . . . . . . . . . . . . . . . . . . . . . . . . . . . . . . . . . . . .056
Capetronic . . . . . . . . . . . . . . . . . . . . . . . . . . . . . . . . . . . . . . . . . . . . . . . . . . . . . . . . .009
34
Page 35

Carver . . . . . . . . . . . . . . . . . . . . . . . . . . . . . . . . . . . . . . . . . . . . . . . .006, 007, 008, 165
Casio . . . . . . . . . . . . . . . . . . . . . . . . . . . . . . . . . . . . . . . . . . . . . . . . . . . . . . . . . . . . . .117
Citizen . . . . . . . . . . . . . . . . . . . . . . . . . . . . . . . . . . . . . . . . . . . . . . . . . . . . . . . . . . . .166
Curtis Mathes . . . . . . . . . . . . . . . . . . . . . . . . . . . . . . . . . . . . . . . . . . . . . . . . . . . . . .117
Denon . . . . . . . . . . . . . . . . . . . . . . . . . . . . . . . . . . . . . . . . . . . . . . . . . . . . . . . . . . . . .010
Emerson . . . . . . . . . . . . . . . . . . . . . . . . . . . . . . . . . . . . . . . . . . . . . . . . . .001, 012, 013
Fisher . . . . . . . . . . . . . . . . . . . . . . . . . . . . . . . . . . . . . . . . . . . . .007, 015, 016, 017, 058
GE . . . . . . . . . . . . . . . . . . . . . . . . . . . . . . . . . . . . . . . . . . . . . . . . . . . . . . . . . . . . . . . .065
Genexxa . . . . . . . . . . . . . . . . . . . . . . . . . . . . . . . . . . . . . . . . . . . . . . .012, 013, 018, 059
Goldstar . . . . . . . . . . . . . . . . . . . . . . . . . . . . . . . . . . . . . . . . . . . . . . . . . . . . . . . . . . .060
Harman Kardon . . . . . . . . . . . . . . . . . . . . . . . . . . . . . . . . . . . . . . . . . . . . . . . .020, 031
Hitachi . . . . . . . . . . . . . . . . . . . . . . . . . . . . . . . . . . . . . . . . . . . . . . . . . . . . . . . . . . . .018
Inkel . . . . . . . . . . . . . . . . . . . . . . . . . . . . . . . . . . . . . . . . . . . . . . . . . . . . . . . . . . . . . .021
JC Penney . . . . . . . . . . . . . . . . . . . . . . . . . . . . . . . . . . . . . . . . . . . . . . . . . . . . .030, 117
JVC . . . . . . . . . . . . . . . . . . . . . . . . . . . . . . . . . . . . . . . . . . . . . . . . . . . . . . . . . . .022, 153
Kenwood . . . . . . . . . . . . . . . . . . . . . . . . . . . . . . . . . . . . .023, 024, 025, 067, 068, 168
Krell . . . . . . . . . . . . . . . . . . . . . . . . . . . . . . . . . . . . . . . . . . . . . . . . . . . . . . . . . . . . . .006
Kyocera . . . . . . . . . . . . . . . . . . . . . . . . . . . . . . . . . . . . . . . . . . . . . . . . . . . . . . . . . . .000
Luxman . . . . . . . . . . . . . . . . . . . . . . . . . . . . . . . . . . . . . . . . . . . . . . .026, 027, 069, 078
LXI . . . . . . . . . . . . . . . . . . . . . . . . . . . . . . . . . . . . . . . . . . . . . . . . . . . . . . . . . . .012, 117
Magnavox . . . . . . . . . . . . . . . . . . . . . . . . . . . . . . . . . . . . . . . . . . . . . . . . .006, 071, 140
Marantz . . . . . . . . . . . . . . . . . . . . . . . . . . . . . . . . . . . . . . . . . . . . . . .006, 028, 029, 072
MCS . . . . . . . . . . . . . . . . . . . . . . . . . . . . . . . . . . . . . . . . . . . . . . . . . . . . . . . . . .030, 117
MGA . . . . . . . . . . . . . . . . . . . . . . . . . . . . . . . . . . . . . . . . . . . . . . . . . . . . . . . . . . . . .031
Mission . . . . . . . . . . . . . . . . . . . . . . . . . . . . . . . . . . . . . . . . . . . . . . . . . . . . . . . . . . .006
Mitsubishi . . . . . . . . . . . . . . . . . . . . . . . . . . . . . . . . . . . . . . . . . . . . . . . . . . . . .031, 032
NAD . . . . . . . . . . . . . . . . . . . . . . . . . . . . . . . . . . . . . . . . . . . . . . . . . . . . . . . . . .061, 083
Nakamichi . . . . . . . . . . . . . . . . . . . . . . . . . . . . . . . . . . . . . . . . . . . . . . . . .033, 034, 171
NEC . . . . . . . . . . . . . . . . . . . . . . . . . . . . . . . . . . . . . . . . . . . . . . . . . . . . . . . . . . . . . .030
Nikko . . . . . . . . . . . . . . . . . . . . . . . . . . . . . . . . . . . . . . . . . . . . . . . . . . . . .005, 013, 016
NSM . . . . . . . . . . . . . . . . . . . . . . . . . . . . . . . . . . . . . . . . . . . . . . . . . . . . . . . . . . . . . .006
Onkyo . . . . . . . . . . . . . . . . . . . . . . . . . . . . . . . . . . . . . . . . . . . . . . . .035, 036, 062, 151
Optimus . . . . . . . . . . . . . .007, 008, 012, 018, 024, 037, 038, 039, 040, 084, 087, 091
Panasonic . . . . . . . . . . . . . . . . . . . . . . . . . . . . . . . . . . . . . . . . . . . . . . . . .056, 073, 080
Philips . . . . . . . . . . . . . . . . . . . . . . . . . . . . . . . . . . . . . . . . . . . . . . . . . . . .006, 071, 165
Pioneer . . . . . . . . . . . . . . . . . . . . . . . . . . . . . . . . . . .018, 041, 042, 059, 090, 177, 216
Proton . . . . . . . . . . . . . . . . . . . . . . . . . . . . . . . . . . . . . . . . . . . . . . . . . . . . . . . . . . . . .006
Quasar . . . . . . . . . . . . . . . . . . . . . . . . . . . . . . . . . . . . . . . . . . . . . . . . . . . . . . . . . . . .056
Radioshack . . . . . . . . . . . . . . . . . . . . . . . . . . . . . . . . . . . . . . . .008, 046, 090, 214, 216
RCA . . . . . . . . . . . . . . . . . . . . . . . . . . . . . . . . . .043, 063, 090, 135, 184, 213, 214, 216
Realistic . . . . . . . . . . . . . . . . . . . . . . . . . .001, 007, 009, 012, 013, 018, 029, 037, 039
Rotel . . . . . . . . . . . . . . . . . . . . . . . . . . . . . . . . . . . . . . . . . . . . . . . . . . . . . . . . . . . . . .006
SAE . . . . . . . . . . . . . . . . . . . . . . . . . . . . . . . . . . . . . . . . . . . . . . . . . . . . . . . . . . . . . . .006
Samsung . . . . . . . . . . . . . . . . . . . . . . . . . . . . . . . . . . . . . . . . . . . . . . . . . . . . . . . . . .081
Sansui . . . . . . . . . . . . . . . . . . . . . . . . . . . . . . . . . . . . . . . . . . . .006, 012, 044, 063, 074
Sanyo . . . . . . . . . . . . . . . . . . . . . . . . . . . . . . . . . . . . . . . . . . . . .007, 045, 058, 075, 082
Scott . . . . . . . . . . . . . . . . . . . . . . . . . . . . . . . . . . . . . . . . . . . . . . . . . . . . . .001, 012, 013
Sears . . . . . . . . . . . . . . . . . . . . . . . . . . . . . . . . . . . . . . . . . . . . . . . . . .012, 024, 029, 117
Sharp . . . . . . . . . . . . . . . . . . . . . . . . . . . . . . . . . . . . . . . . . . . . . . . . . . . . .024, 019, 029
Sherwood . . . . . . . . . . . . . . . . . . . . . . . . . . . . . . . . . . . . . . . . .021, 029, 038, 046, 199
Shure . . . . . . . . . . . . . . . . . . . . . . . . . . . . . . . . . . . . . . . . . . . . . . . . . . . . . . . . . . . . .030
Sony . . . . . . . . . . . . . . . . . . . . . . . . . . . . . . . . . . . . . . . . . . . . . .047, 048, 132, 134, 140
STS . . . . . . . . . . . . . . . . . . . . . . . . . . . . . . . . . . . . . . . . . . . . . . . . . . . . . . . . . . . . . . .000
Sylvania . . . . . . . . . . . . . . . . . . . . . . . . . . . . . . . . . . . . . . . . . . . . . . . . . . . . . . . . . . .006
Symphonic . . . . . . . . . . . . . . . . . . . . . . . . . . . . . . . . . . . . . . . . . . . . . . . . . . . . . . . .049
Teac . . . . . . . . . . . . . . . . . . . . . . . . . . . . . . . . . . . . . .016, 029, 039, 049, 050, 051, 196
Technics . . . . . . . . . . . . . . . . . . . . . . . . . . . . . . . . . . . . . . . . . . . . . . .056, 073, 160, 202
Theta Digital . . . . . . . . . . . . . . . . . . . . . . . . . . . . . . . . . . . . . . . . . . . . . . . . . . . . . . .071
Toshiba . . . . . . . . . . . . . . . . . . . . . . . . . . . . . . . . . . . . . . . . . . . . . . . . . . . . . . . . . . . .061
Victor . . . . . . . . . . . . . . . . . . . . . . . . . . . . . . . . . . . . . . . . . . . . . . . . . . . . . . . . . . . . .022
Yamaha . . . . . . . . . . . . . . . . . . . . . . . . . . . . . . . . . . . . . . . . . . .005, 052, 053, 064, 186
Zenith . . . . . . . . . . . . . . . . . . . . . . . . . . . . . . . . . . . . . . . . . . . .016, 070, 099, 124, 190
Laser Disc Players
Denon . . . . . . . . . . . . . . . . . . . . . . . . . . . . . . . . . . . . . . . . . . . . . . . . . . . . . . . . . . . . .080
Pioneer . . . . . . . . . . . . . . . . . . . . . . . . . . . . . . . . . . . . . . . . . . . . . . . . . . . . . . . . . . . .080
Proscan . . . . . . . . . . . . . . . . . . . . . . . . . . . . . . . . . . . . . . . . . . . . . . . . . . . . . . . . . . . .083
RCA . . . . . . . . . . . . . . . . . . . . . . . . . . . . . . . . . . . . . . . . . . . . . . . . . . . . . . . . . . . . . .083
Sanyo . . . . . . . . . . . . . . . . . . . . . . . . . . . . . . . . . . . . . . . . . . . . . . . . . . . . . . . . . . . . .007
Sony . . . . . . . . . . . . . . . . . . . . . . . . . . . . . . . . . . . . . . . . . . . . . . . . . . . . . . . . . . . . . .098
Zenith . . . . . . . . . . . . . . . . . . . . . . . . . . . . . . . . . . . . . . . . . . . . . . . . . . . . . . . . . . . . .007
35
Page 36

Helpline
If you need additional setup assistance, please call the Helpline
at: 1-800-420-7968.
Limited 90-Day Warranty
Thomson multimedia Inc. warrants that for 90 days from date
of purchase, it will replace this product if found to be defective
in materials or workmanship. Return it postage paid to the
Product Exchange Center address for prompt, no-charge
replacement with a current equivalent. This replacement is
Thomson multimedia Inc.’s sole obligation under this warranty.
Thomson multimedia Inc. will not be responsible for any
incidental or consequential damages, or for any loss arising in
connection with the use or inability to use this product. Some
states do not allow the exclusion or limitation of incidental or
consequential damages, so the above limitation or exclusion
may not apply to you. This warranty excludes defects or
damage due to misuse, abuse, or neglect. This warranty gives
you specific legal rights, and you may also have other rights,
which vary from state to state.
Specifications and features are subject to change without
notice. Product may vary from that shown. Logos are
registered trademarks of their respective companies.
©2002 Thomson multimedia Inc.
Product Exchange Center
11721 Alameda Ave.
Socorro, TX 79927
Trademark(s) ® Registered
Marca(s) Registrada(s)
www.rca.com
THIS DEVICE COMPLIES WITH PART 15 OF THE FCC RULES.
OPERATION IS SUBJECT TO THE FOLLOWING
TWO CONDITIONS:
(1) THIS DEVICE MAY NOT CAUSE HARMFUL INTERFERENCE, AND
(2) THIS DEVICE MUST ACCEPT ANY INTERFERENCE RECEIVED,
INCLUDING INTERFERENCE THAT MAY CAUSE UNDESIRED
OPERATION.
This equipment generates and uses radio frequency energy, and if not
installed and used properly, that is, in strict accordance with the manufacturers instructions, it may cause interference to radio and television reception. It has been type tested and found to comply with the limits for
remote control devices in accordance with the specifications in Sub-Parts B
and C of Part 15 of FCC Rules, which are designed to provide reasonable
protection against such interference in a residential installation. However,
there is no guarantee that interference will not occur in a particular installation. If this equipment does cause interference to radio or television
reception, which can be determined by unplugging the equipment, try to
correct the interference by one or more of the following measures.
• Reorient the antenna of the radio/TV experiencing the interference.
• Relocate the equipment with respect to the radio/TV.
• Move the equipment away from the radio/TV.
• Plug the equipment into an outlet on a different electrical circuit from
the radio/TV experiencing the interference.
• If necessary, consult your local dealer for additional suggestions.
NOTE: Modifications to this product will void the user’s authority
to operate this equipment.
 Loading...