

AUSTRALIAN MONITOR AM42P, AM22P, AM41P, AM21P Installation And Operation Manual

INSTALLATION AND OPERATION MANUAL
AMP SERIES
CONSTANT VOLTAGE INSTALLATION
AUDIO POWER AMPLIFIERS
AM42P
AM41P
AM22P
AM21P
PAGE 2
AMP SERIES CONSTANT VOLTAGE INSTALLATION AUDIO POWER AMPLIFIERS INSTALLATION AND OPERATION MANUAL
IMPORTANT SAFETY INFORMATION PRÉCAUTIONS DURANT UTILISATION
1. Read these instructions.
2. Keep these instructions.
3. Heed all warnings.
4. Follow all instructions.
5. Do not use this apparatus near water.
6. Clean only with dry cloth.
7. Do not block any ventilation openings. Install in accordance with the
manufacturer’s instructions.
8. Do not install near any heat sources such as radiators, heat registers,
stoves, or other apparatus (including amplifiers) that produce heat.
9. Do not defeat the safety purpose of the polarized or grounding-type
plug. A polarized plug has two blades with one wider than the other. A
grounding type plug has two blades and a third grounding prong. The wide
blade or the third prong are provided for your safety. If the provided plug
does not fit into your outlet, consult an electrician for replacement of the
obsolete outlet.
10. Protect the power cord from being walked on or pinched particularly
at plugs, convenience receptacles, and the point where they exit from
the apparatus.
11. Only use attachments/accessories specified by the manufacturer.
12. Use only with the cart, stand, tripod, bracket, or table specified by the
manufacturer, or sold with the apparatus. When a cart is used, use caution
when moving the cart/apparatus combination to avoid injury from tip-over.
13. Unplug this apparatus during lightning storms or when unused for long
periods of time.
14. Refer all servicing to qualified service personnel.
Servicing is required when the apparatus has been
damaged in any way, such as power-supply cord or plug
is damaged, liquid has been spilled or objects have fallen
into the apparatus, the apparatus has been exposed to
rain or moisture, does not operate normally, or has been dropped.
15. This appliance shall not be exposed to dripping or splashing water and
that no object filled with liquid such as vases shall be placed on the
apparatus.
16. Plug this apparatus to the proper wall outlet and make the plug to be
disconnected readily operable.
17. Mains plug is used as disconnected device and it should remain readily
operable during intended use. In order to disconnect the apparatus from
the mains completely, the mains plug should be disconnected from the
mains socket outlet completely.
18. WARNING: To reduce the risk of fire or electric shock, do not expose this
apparatus to rain or moisture.
19. An appliance with a protective earth terminal should be connected to a
mains outlet with a protective earth connection.
20. The apparatus should be disconnected from the mains completely before
speaker wiring. The speaker output should be proper protected from
direct contact and pay attention to speaker connections, terminals and
speaker wiring during normal operation.
1. LISEZ ces instructions.
2. Tenez ces instructions.
3. Notez tous les avertissements.
4. Suivez toutes les avertissements.
5. N’utilisez pas ce produit près de l’eau (la piscine, la plage, le lac, etc.).
6. Nettoyez seulement avec une étoffe sèche.
7. Ne bloquez aucuns troux de ventilation. Installez en accord avec les
instructions du manufacturier.
8. N’installez près aucunes sources de chaleur comme radiateurs, registres
de chaleur, fours ou les autres équipements (y compris amplificateurs) qui
produisent la chaleur.
9. Ne défaites pas le but de sécurité de la fiche polarisée ou base-type. Une
fiche polarisée a deux tranchants avec un plus large que l’autre. Une fiche
de base type a deux a deux tranchants et une troisième pointe de base,
le tranchant large ou la troisième pointe est fourni pour votre sécurité. Si
la fiche donnée ne conforme pas votre prise de contact, consultez un
électricien pour remplacement de la prise de contact obsolète.
10. Protegez le cordon de secteur contre être marchée dessus ou pincez en
particulier aux fiches, aux douilles de convenance, et au point où ils
sortent de l’appareil.
11. Seulement utilisez attachements/accessoires spécifiés par le manufacturier.
12. Utilisez seulement avec un chariot, un stand, un trépied, un support ou
une table indiquée par le manufacturier, ou vendue avec l’appareil. Quand
un chariot est utilisé, faites attention en déplaçant la combinaison
d’appareil/chariot pour éviter de se déséquilibrer.
13. Arrachez la fiche du dispositif durant éclair et orage ou quand pas utilisé
pour longues périodes de temps.
14. Référez au personnel qualifié de service pour toutes
réparations. La réparation est donnée quand le système
a été endommagé à n’importe façon, par exemple un fil
ou une fiche endommagé(e) de la source d’alimentation.
Avoir été exposé à pluie ou humidité, n’opère pas
normalement, ou avoir été tombé.
15. L’appareil ne doit pas être exposé aux écoulements ou aux éclaboussures
et aucun objet ne contenant de liquide, tel qu’un vase, ne doit être placé
sur l’objet.
16. Branchez l’appareil à une source appropriée et faire que la prise à
débrancher soit facilement accessible.
17. La prise du secteur ne doit pas être obstruée ou doit être facilement
accessible pendant son utilisation. Pour être complètement déconnecté
de l’alimentation d’entrée, la prise doit être débranchée du secteur.
18. AVERTISSEMENT: Pour éviter le risque d’incendie ou de chocs électriques,
ne pas exposer cet appareil à la pluie ou à l’humidité.
19. Un appareil avec la borne de terre de protection doit être connecté au
secteur avec la connexiion de terre de protection.
20. Assurez-vous que l’appareil est hors tension avant de connecter les hauts
parleurs. Verifiez que la sortie des enceintes soit protégées contre un
contact physique. Respecter les polarités des terminaux ainsi que le
câblage des enceintes pendant le fonctionnement afin d’assurer une
utilisation sécurisee.
PAGE 3
AMP SERIES CONSTANT VOLTAGE INSTALLATION AUDIO POWER AMPLIFIERS INSTALLATION AND OPERATION MANUAL
Revision 1.0: Nov 2014
INTRODUCTION 3
FEATURES & PROTECTION FEATURES 4
CONTROLS, CONNECTORS & INDICATORS 5
INSTALLATION 8
OPERATION 10
MAINTENANCE 11
SPECIFICATIONS 12
WARNING!
TO PREVENT FIRE OR SHOCK HAZARD, DO NOT USE THE PLUG WITH
AN EXTENSION CORD, RECEPTACLE OR OTHER OUTLET UNLESS THE BLADES
CAN BE FULLY INSERTED TO PREVENT BLADE EXPOSURE.
TO REDUCE THE RISK OF FIRE OR ELECTRIC SHOCK, DO NOT EXPOSE
THIS APPLIANCE TO RAIN OR MOISTURE.
TO PREVENT ELECTRICAL SHOCK, MATCH WIDE BLADE PLUG TO WIDE SLOT & FULLY INSERT.
CAUTION
THESE SERVICING INSTRUCTIONS ARE FOR USE BY QUALIFIED SERVICE PERSONNEL ONLY.
TO REDUCE THE RISK OF ELECTRIC SHOCK DO NOT PERFORM ANY SERVICING OTHER THAN THAT
CONTAINED IN THE OPERATING INSTRUCTIONS UNLESS YOU ARE QUALIFIED TO DO SO.
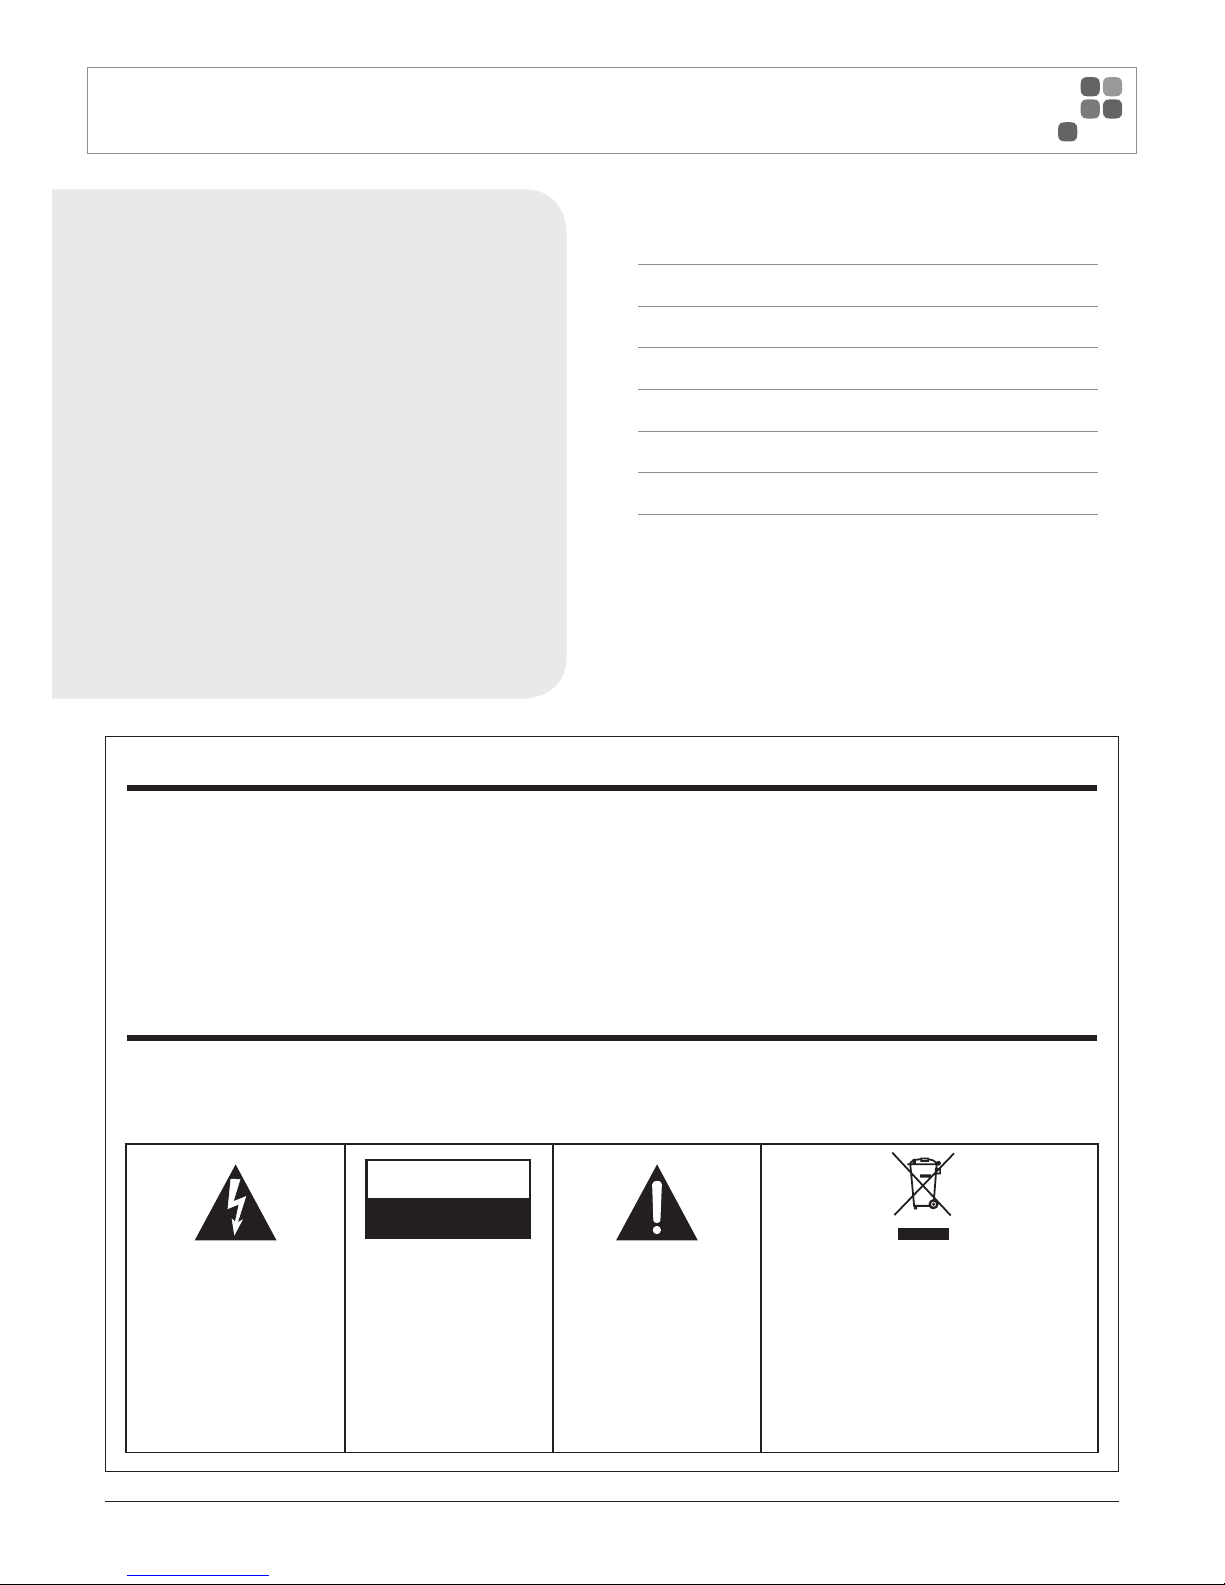
CAUTION
RISK OF ELECTRIC SHOCK
DO NOT OPEN
The lightning flash with
arrowhead symbol, within an
equilateral triangle, is intended to
alert the user to the presence of
uninsulated “dangerous voltage”
within the product’s enclosure
that may be of sufficient
magnitude to constitute a risk
of electric shock to persons.
WARNING:
TO REDUCE THE RISK OF
ELECTRIC SHOCK, DO NOT
REMOVE COVER (OR BACK).NO
USER SERVICEABLE PARTS
INSIDE. REFER SERVICING TO
QUALIFIED SERVICE
PERSONNEL.
The exclamation point within an
equilateral triangle is intended
to alert the user to the
presence of important operating
and maintenance (servicing)
instructions in the literature
accompanying the appliance.
For European Union countries: This symbol on
the product or its packaging indicates that this
product must not be disposed of with other waste.
Instead, it is your responsibility to dispose of your
waste equipment by handing it over to a designated
collection point for the recycling of waste electrical
and electronic equipment.
Please contact your local authority for further details
of your nearest designated collection point.
Rating plate and caution marking are marked on the back enclosure of the apparatus
INTRODUCTION AND CONTENTS
AMP SERIES
Congratulations on choosing Australian Monitor for your professional
amplification requirements.
The design of our AMP constant voltage installation series audio
power amplifiers embraces all the aspects of a well designed amplifier.
The visual design, mechanical, electrical and sonic parameters, along
with our dedicated manufacturing process, have all been optimized to
provide a professional tool that exhibits quality, reliability and longevity.
The AMP series amplifiers are 1 unit 1.75” high, 19” wide, rack
mountable units.
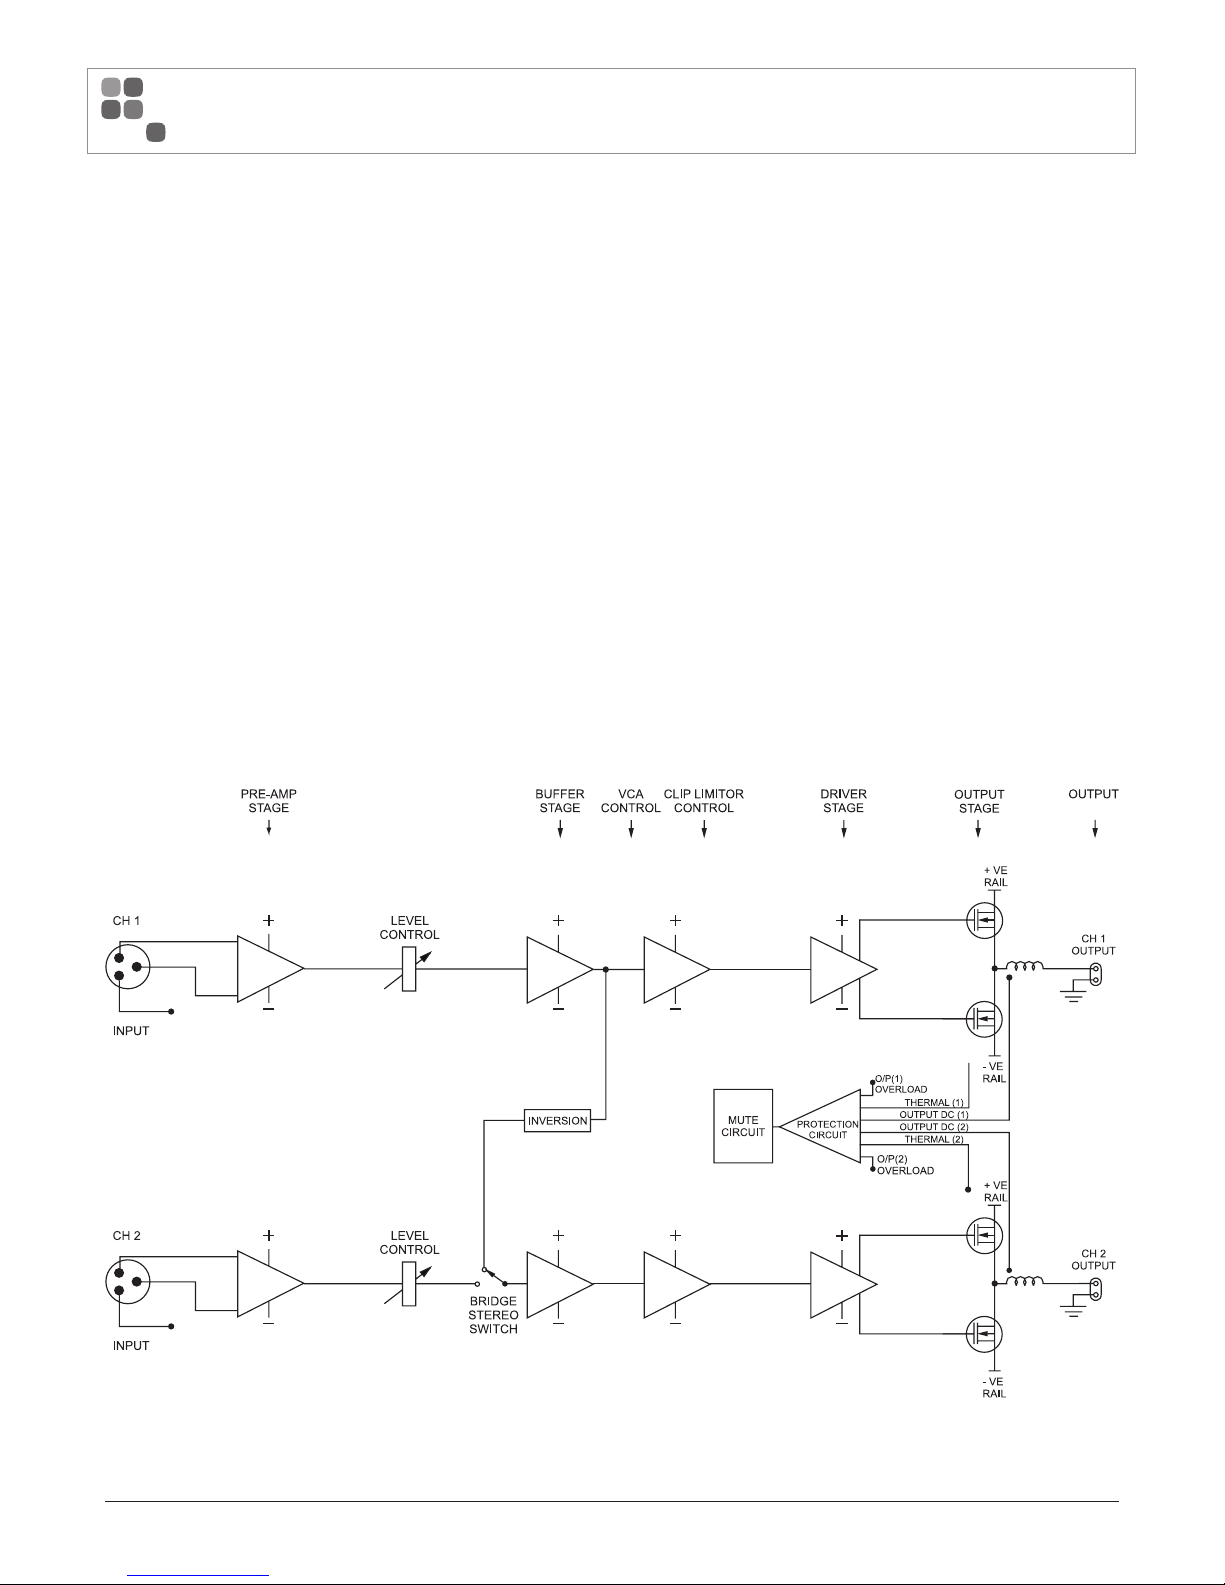
Each channel of the amplifier comprises a balanced active input, level
potentiometer, voltage controlled attenuator and fan-cooled class D
output stage. The amplifier operates from a power factor corrected
switch mode power supply.
These amplifiers have been specifically designed to deliver their high
power output with minimal distortion, and provide the critical degree
of control required by your speakers.
PAGE 4
AMP SERIES CONSTANT VOLTAGE INSTALLATION AUDIO POWER AMPLIFIERS INSTALLATION AND OPERATION MANUAL
FEATURES & PROTECTION FEATURES
FEATURES
•
Class-D amplification
•
4Ω/70V/100V Operation
•
Balanced inputs
•
Output Limiter
•
Ground Lift
•
Bridge mode
•
Voltage controlled attenuation (VCA)
•
Protect/Clip and Signal LED indicators
•
Power factor corrected universal switch mode power supply
•
Efficient front to back cooling
•
Dual, twin speed axial fans.
•
6 pin output screw terminal per channel
•
Custom designed, 1RU heavy-duty steel chassis
•
Front rack mount ears
•
Symmetrical layout – even weight distribution
PROTECTION FEATURES
•
Short-circuit protection
•
Suppression of inrush current at mains turn-on
•
Internal, independent DC supply rail fuses
•
Radio-frequency interference suppression
Amplifier Block Diagram

PAGE 5
AMP SERIES CONSTANT VOLTAGE INSTALLATION AUDIO POWER AMPLIFIERS INSTALLATION AND OPERATION MANUAL
CONTROLS, CONNECTORS & INDICATORS
FRONT PANEL
The AMP Series differ only slightly across all models and all share the same
features on their front panels.
The functions of the controls and indicators are as follows:
1
Power Switch
Press the switch to up for power on and down for power off. At start-up
(turn-on), the input to the amplifier is muted for approximately two seconds.
2
Power Indicator
This blue LED will illuminate and indicates that the amplifier is on and receiving
mains power.
3
Protect Indicator
This yellow LED indicates a problem with the amplifier or that it has over
heated. In the advent of a thermal overload, the internal operating temperature
of one or both amplifier channels has exceeded a safe level of operation and
the channel will be automatically muted. The fans will continue to run and once
the effected channel/s have cooled, they will unmute and return to normal
operation.
The AMP series is also fitted with DC protection, if there is a DC voltage at the
output the protection LED will glow yellow.
It should be noted that the minimum load for the amplifier is 4 ohms per
channel (8 ohms bridged).
If an overload occurs, the amplifier will run into a current limit mode, restricting
the excess current beyond set limits.
4
Clip Indicator
This red LED will illuminate when clipping occurs. Clipping can occur under
extreme operating conditions such as:
•
complex or very low loads
•
over driving the amplifier
NOTE: The amplifier is not damaged by running into clipping, but
speakers may be. To maximise the life of your speakers, try to keep
clipping infrequent.
5
Signal Indicator
This green LED will illuminate when an input signal is detected.
6
Fan Grill
This is where air is drawn into the amplifier for cooling.
NOTE: You should always ensure that the fan grille is kept clean
and the foam is free from dust or lint. This will ensure longer operation
of your amplifier and reduce the possibility of it prematurely going into
thermal shutdown mode. Refer to the “Maintenance” section on page 11
for further information.
5 6
1
2
3 4
 Loading...