

Aussie Scud 350, Scud 351, Scud 400, Ultra, Predator Plus Operation & Maintenance Manual
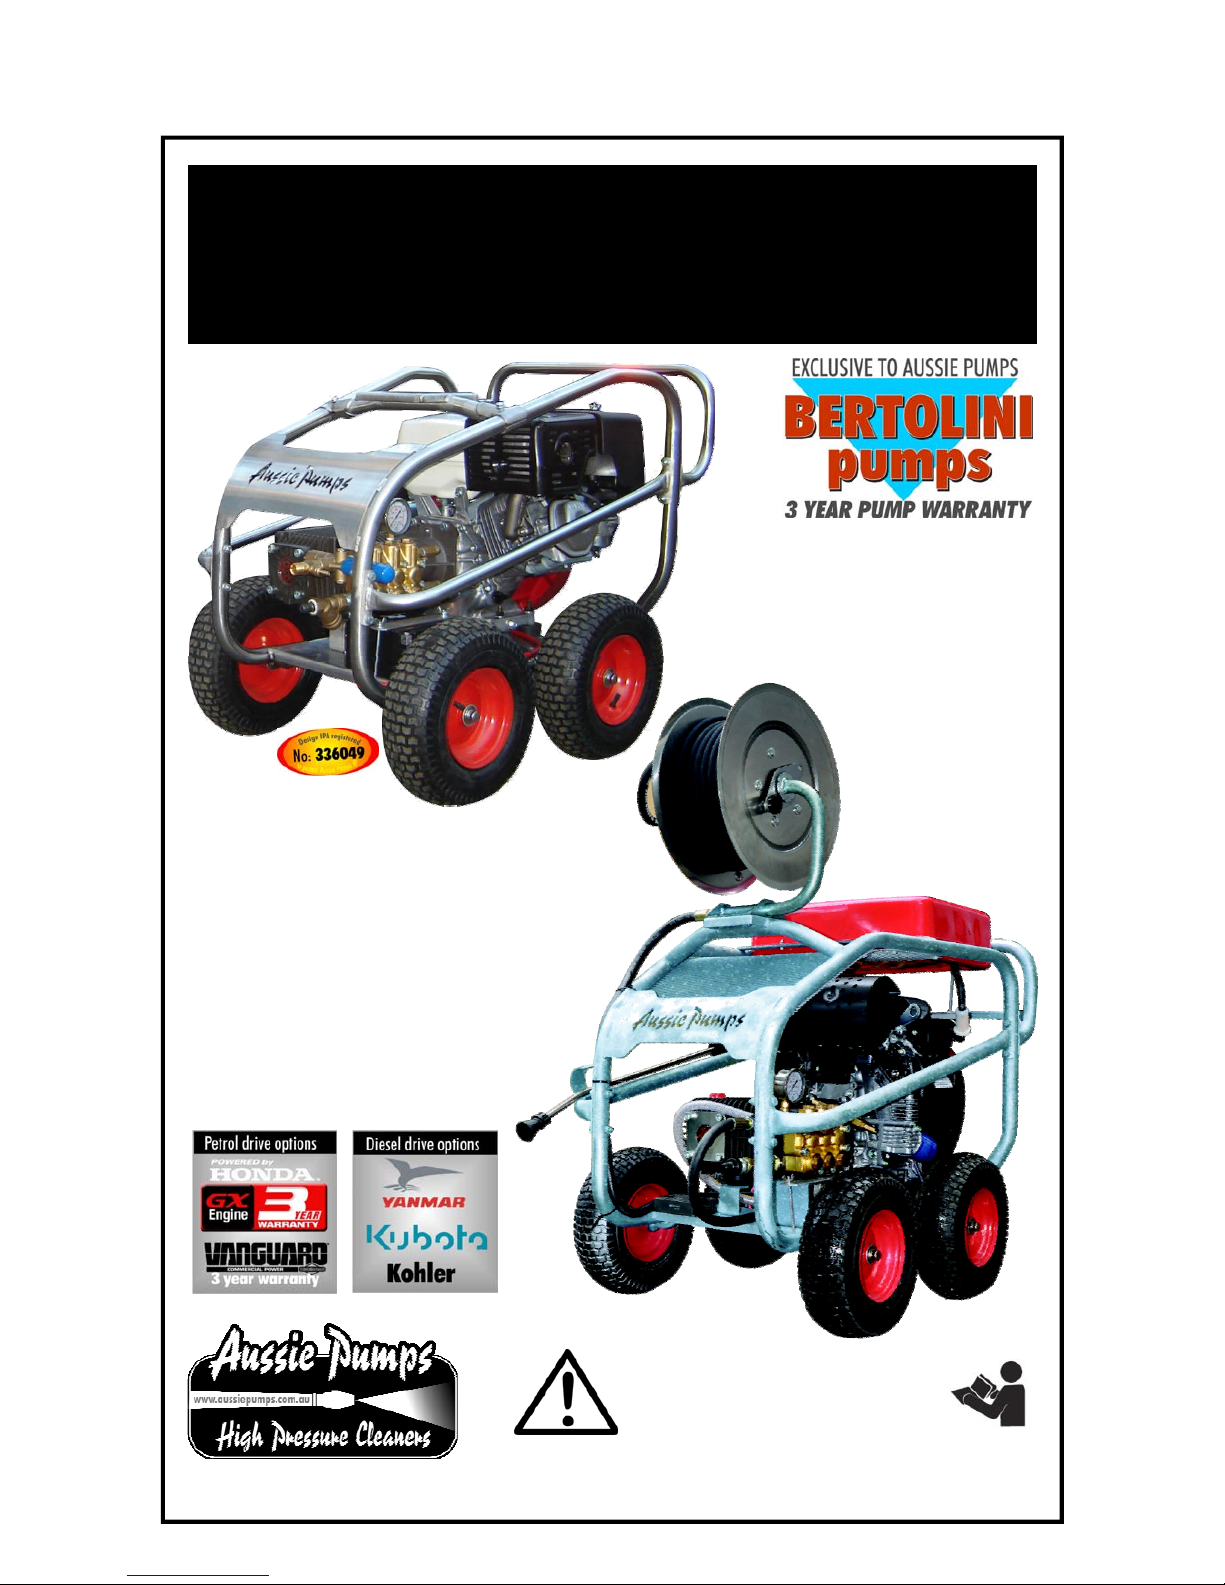
Aussie Pumps
Scud & Ultra Series High Pressure Blasters
OPERATION & MAINTENANCE MANUAL
Feb 2012
Covers:
Scud 350
Scud 351
Scud 400
Ultra
Predator Plus
IMPORTANT:
TO REDUCE RISK OF INJURY, READ
OPERATING INSTRUCTIONS CAREFULLY
BEFORE USING EQUIPMENT
Aussie Scud & Ultra … Operation & Maintenance Manual
2
Aussie Pumps
Feb 2012
Before attempting to operate your machine please read this Instruction Manual thoroughly following all
directions carefully. By doing so you will ensure safe operation of the unit and will enjoy long and trouble free
service from your heavy duty water blaster.
GUARANTEE … EXCLUSIVE 3 YEAR PUMP + 3 YEAR ENGINE WARRANTY
This Aussie Eco Clean product is guaranteed against faults in manufactur e for two years from purchase. The Bertolini pump
has a three year warranty, but must be serviced by an authorised service agent every six months to maintain this warranty.
Keep your receipt as proof of purchase and all service receipts. This guarantee is invalid if the product is found to h ave been
abused in any way, or not used for the purpose for which it was intended.
Routine maintenance is the owner=s responsibility. Failure to maintain the machine in lin e with the services outlined on the
back page will invalidate warranty. High pressure accessories carry a 3 month warranty.
Where possible return faulty goods to the place of purchase. No products can be returned to us without our prior permission.
The reason for return must be clearly state.
N.B. Warranty is not transferrable to third parties in the event of sale of the machine within the w arranty period.
Please note that any parts used in warranty repairs are guaranteed for a period limited by the original
warranty of the parent product.
Engine warranty is the responsibility of the engine manufacturer. Unit must be returned to authorised engine dealer
for evaluation of engine warranty. (Refer to engine handbook).
Battery warranty is covered by Federal/Ryde Batteries, call (02) 9879 5422 for your near est outlet.
Our goods come with guarantees that cannot be excluded under the Australian Consumer Law. You are entitled to a
replacement or refund for a major failure and for compensation for any other reasonabl y foreseeable loss or damage. You
are also entitled to have the goods repaired or replaced if the goods fail to be of accept able quality and the failure does not
amount to a major failure.
The benefits under the Aussie Pump warranty are in addition to other rights under Australian Consumer Law.
SAFETY PRECAUTIONS - IMPORTANT
1. NEVER direct the spray jet at any person or animal. Keep hands and feet clear of the cleaning
nozzle at all times.
2. NEVER direct spray jet at any surface that may contain asbestos material.
3. NEVER hold a finger over the high pressure nozzle.
4. NEVER direct the spray jet at the machine itself or any electrical equipment.
5. After use release the pressure in the high pressure hose by operating the gun trigger.
6. DO NOT attempt any mechanical repair. If you have a problem with your machine contact your local Aussie
Eco Clean Service Division, phone (02) 8865 3500.
7. NEVER supply any liquid other than water to the pump inlet.
8. DO NOT run dry
9. NEVER pull the high pressure hose if it has formed kinks or nooses.
10. NEVER pull the hose over sharp objects.
11. DO NOT attempt to disconnect any hose or coupling with pressure still in the hose.
12. DO NOT operate the machine whilst standing on ladders, use a pla tform tower or scaffolding.
13. Operate in well ventilated areas only.
14. DO NOT fill the fuel tank while engine is running
15. DO NOT try to repair a leak in the hose or connection while the system is unde r pressure.
16. DO NOT substitute any component part on this machine. Use of incorrect parts could cause
serious personal injury.
17. Children should NOT be allowed to use the machine.
18. We recommend the use of safety goggles and steel cap boots when using the machine.
AUSSIE ECO CLEAN SCUD & ULTRA SERIES OPERATING AND MAINTENANCE INSTRUCTIONS
* * W A R N I N G * *
AUSSIE SCUD SERIES HIGH PRESSURE WATER BLASTERS ARE DESIGNED
FOR PROFESSIONAL OPERATORS ONLY
IMPORTANT
INSTRUCT OPERATORS IN CARE AND USE OF THE MACHINE BEFORE USE!
Aussie Scud & Ultra … Operation & Maintenance Manual
3
Aussie Pumps
Feb 2012
C
D
B
A
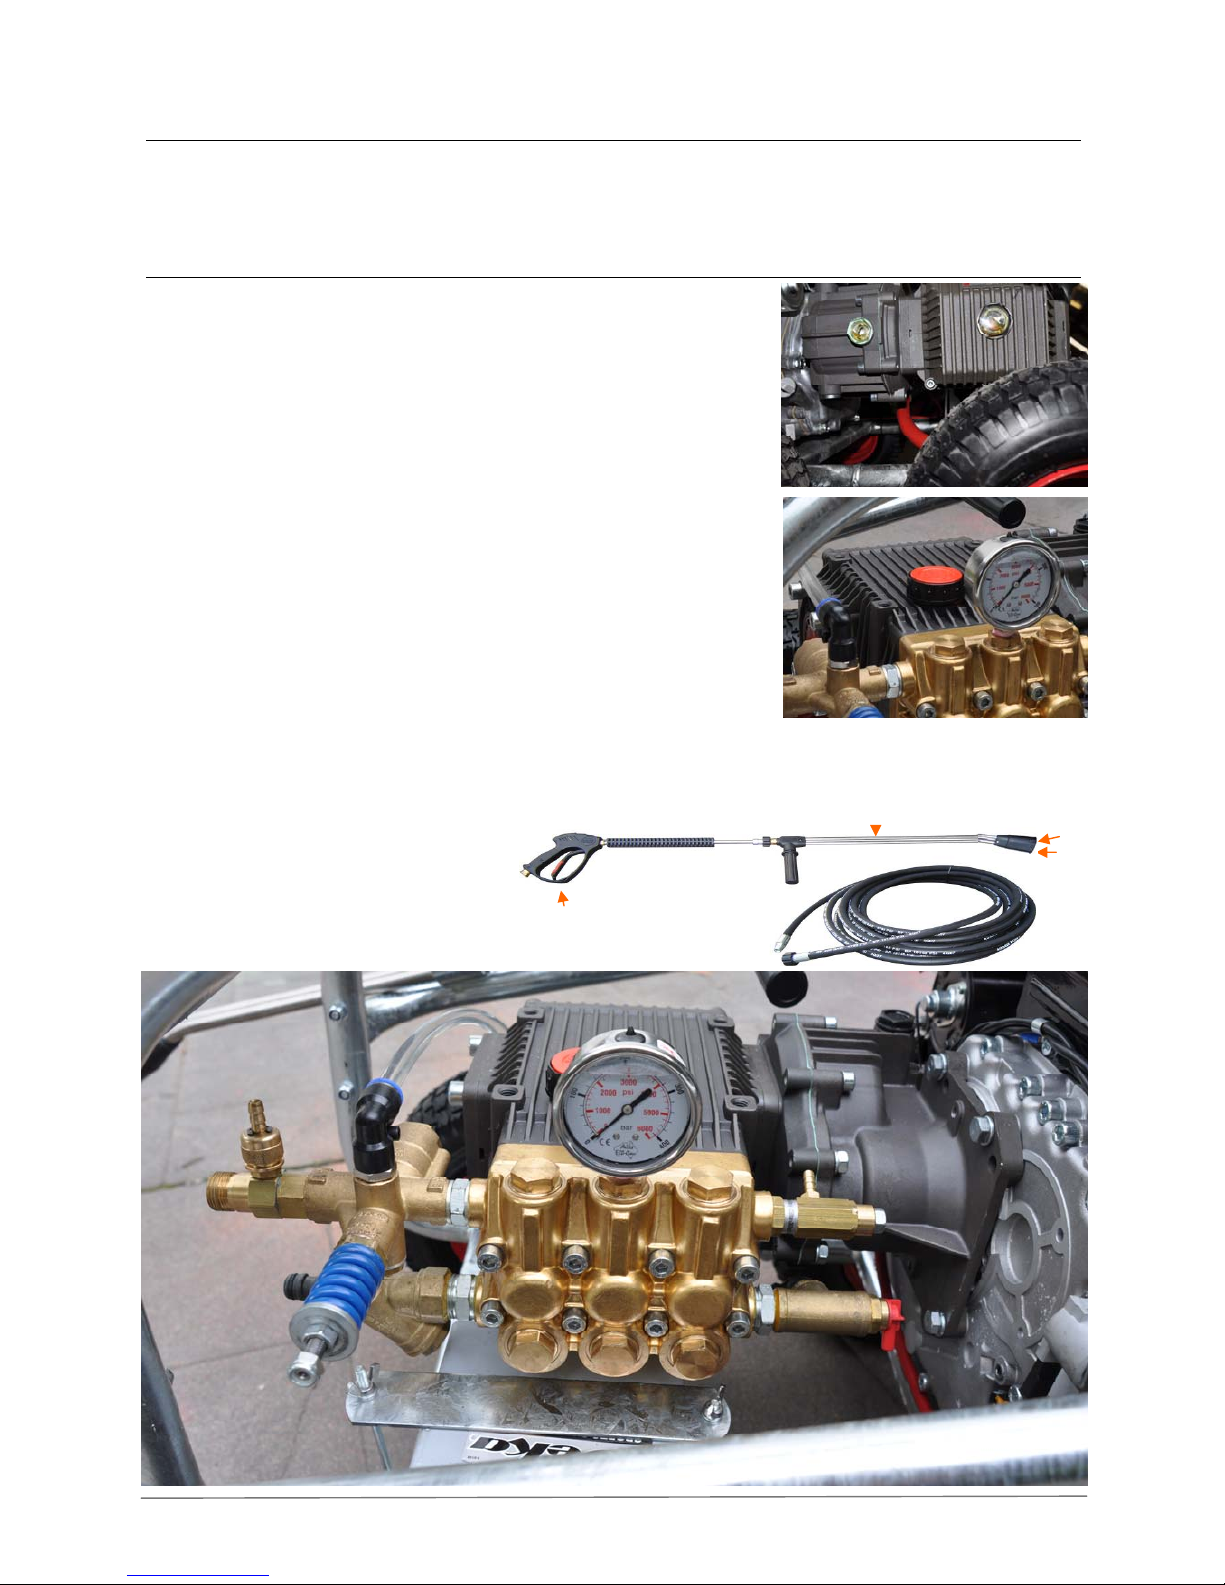
ASSEMBLY AND PREPARATION FOR USE
Before proceeding with assembly of your new Aussie Eco AB high pressure blaster, check that all parts listed
below are included.
1 Gun handle assembly and high pressure hose
1 Lance and nozzle assembly
A. Machine Preparation (initial start-up)
1. Check the oil in the pump and gearbox.
Note separate reservoirs. With the machine on a level surface the oil
lever should cover the red spot in the oil level sight glass on the side
of the machine. If necessary, top up with SAE 75W-90. Do not mix
different grades of oil as this may affect the machines performance.
If alternative oil is used, first empty out oil by unscrewing drain plug
in bottom of machine.
2. Ensure breather plug is fitted to pump.
WARNING: Before operation ensure top mounted travel plug is
replaced by breather plug. Failure to fit breather and keep clean can
result in over pressuring of oil chamber (crank case) and can blo w oil
seals. This will void warranty.
3. Note that the gearbox has a separate oil reservoir. Gearbox oil is
SAE 90 gear oil.
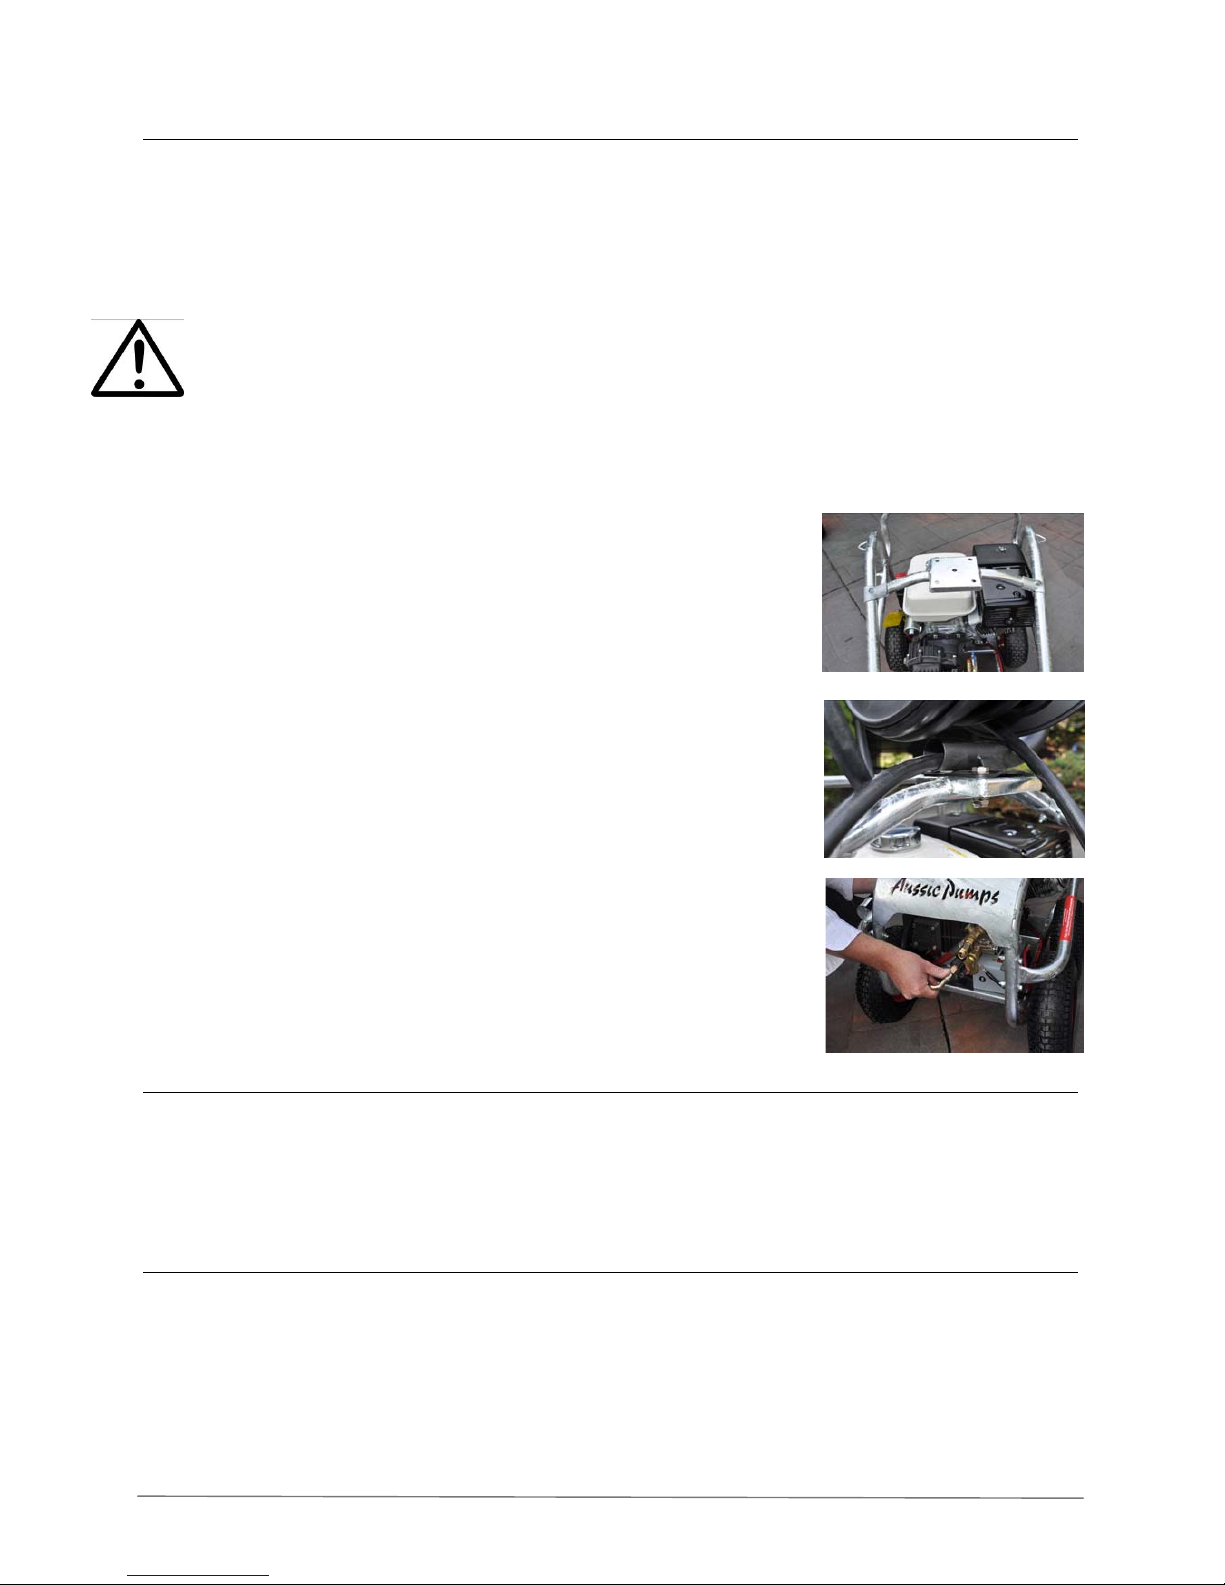
4. Connect battery leads on electric start machines.
5. Check oil level in engine and fill with proper grade oil if necessary.
(SAE 10W-30 for Honda engines, check engine manual for other
makes)
6. Check fuel level and fill if necessary. (unleaded petrol)
7. Assemble gun/lance assembly.
HEAVY DUTY LANCE: To assemble the lance, insert Section B into Section A and screw together and check
nozzles have been fitted to end of lance (C & D).
Detergent injector
Unloader - factory set,
DO NOT adjust
Thermal dump
Safety valve
Aussie Safety Protection Kit
HP hose
connection
Supply hose
connection
Breather plug
Aussie Scud & Ultra … Operation & Maintenance Manual
4
Aussie Pumps
Feb 2012
B. Hose Connections
1. Connect high pressure hose to machine outlet.
2. If optional low pressure downstream, in-line chemical injector is to be used, connect the injector tube to
the detergent inlet and place the other end of the tube, with the strainer attached, in the chemical
container (not supplied).
3. Connect gun/lance assembly to high pressure hose.
4. Check inlet water filter is clean then connect water supply hose to machine. Use a 25mm (minimum)
hose .
Incoming water supply must deliver double the flow of the machine. If questionable, check supply at
machine. If supply is insufficient, do not operate from this outlet. For residential use, the outlet closest to
the meter will usually deliver the highest flow rate. Connect only to clean town water supply.
Warning: Do not operate from tank or pond. Doing so will cavitate the pump causing damage. Cavitation
or pump starvation is not covered by warranty. Cavitation is a phenomenon causing vacuum pockets to
form within the pump that eventually implode under pressure pitting the internal pump surfaces.
Fitting instructions for optional hose reel
, Securely clamp the hose reel mounting bar across the top of the Scud
frame using the two sets of nuts and bolts supplied. Aussie Pumps
recommends using Loctite on the bolts to prevent them vibrating loose.
, Fit hose reel to the mounting bar using the four sets of nuts and bolts
supplied. Ensure all bolts are securely tightened and use Loctite to
prevent them vibrating loose.
The reel should be positioned so that it rotates fore/aft to aid fitting
whip hose.
, Connect whip hose to high pressure outlet on pump.
, Fit handle to reel.
, Fit gun to hose using C1500.24 nipple.
Start up machine (see below) and check for leaks. All leaks must be
rectified before using machine.
C. Before starting the machine
OPERATE IN WELL VENTILATED AREAS ONLY.
1. Ensure machine is level
2. Turn on water supply.
3. Pull gun trigger until water starts to flow in a steady steam then release trigger.
D. Starting the engine (for Honda , refer to engine manual for other engine options)
1. Ensure fuel valve is open
2. Move the choke on the engine to the closed position (see fig. 1). If engine is warm, move choke half-way.
3. Turn engine ON/OFF switch to ON
4. Hold the gun trigger on.
5. Start engine, either turn engine key or pull the recoil starter grip lightly until resistance is felt, then pull
briskly.
6. After engine starts, release the gun trigger and slowly open the choke.
7. Warm up engine for 3 minutes without load.
 Loading...