

Aussie AS-360P-IP Installation Manual

- 1 -
Installation Warning
Do not touch the camera during lighting storm.
Do not drop the camera when installing.
Power off the camera as soon as possible when the smoke or
abnormal odors are detected.
Please place the camera tight and steady.
Do not strike the camera when installing.
Do not abrade the transparent case of the camera.
Package Contents
Fisheye Panoramic Camera
1pcs
Plastic Bag
1pcs
Screws
3pcs
Installation Guide
1pcs
Software CD
1pcs
Warranty Card
1pcs
Installation Sticker
1pcs
Plastic Anchors
3pcs
Focus Tool
1pcs
- 2 -
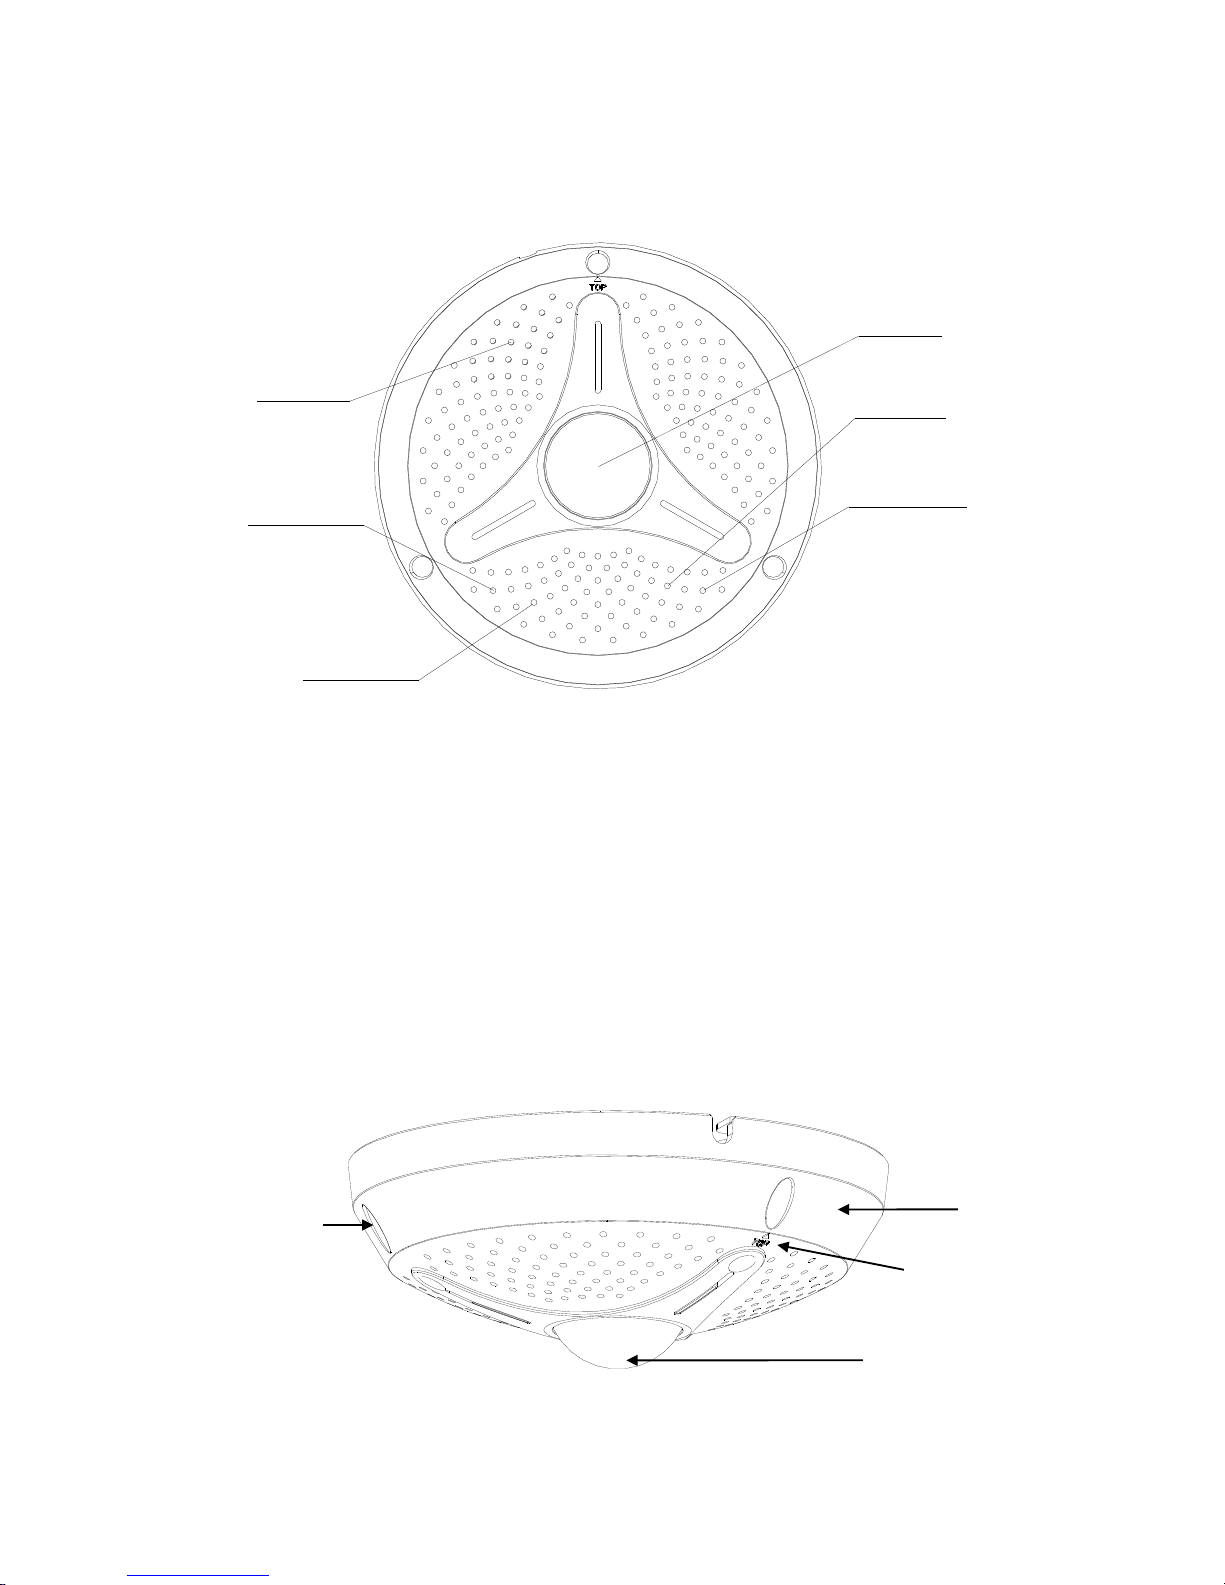
Physical Description
Front View
Power LED: always Red, it will light up after connecting the power
supply.
Network LED: Green, it will light up after connecting the power
supply, and it will be blink when the network is workable.
Reset Button: Use a sharp and thin stick to push the button with 5
seconds to reset the IP address to default. Only the IP address will
be reset.
Side View
Speaker
Lens
Network LED
Power LED
Mic
Reset Button
Mounting
Holes
Cover
Lens
FOV Top Arrow

- 3 -
Top Arrow: it shows the direction of the camera video for wall
installation. Please keep the arrow toward the ceiling when the
camera is stalled on a wall.
Vertical View
Connector Define
Connector Define
Back
Cover
Mounting
Holes
TF card slot
Line
Outlet
DC12V
Jack
Network
RJ45
 Loading...