

Page 1
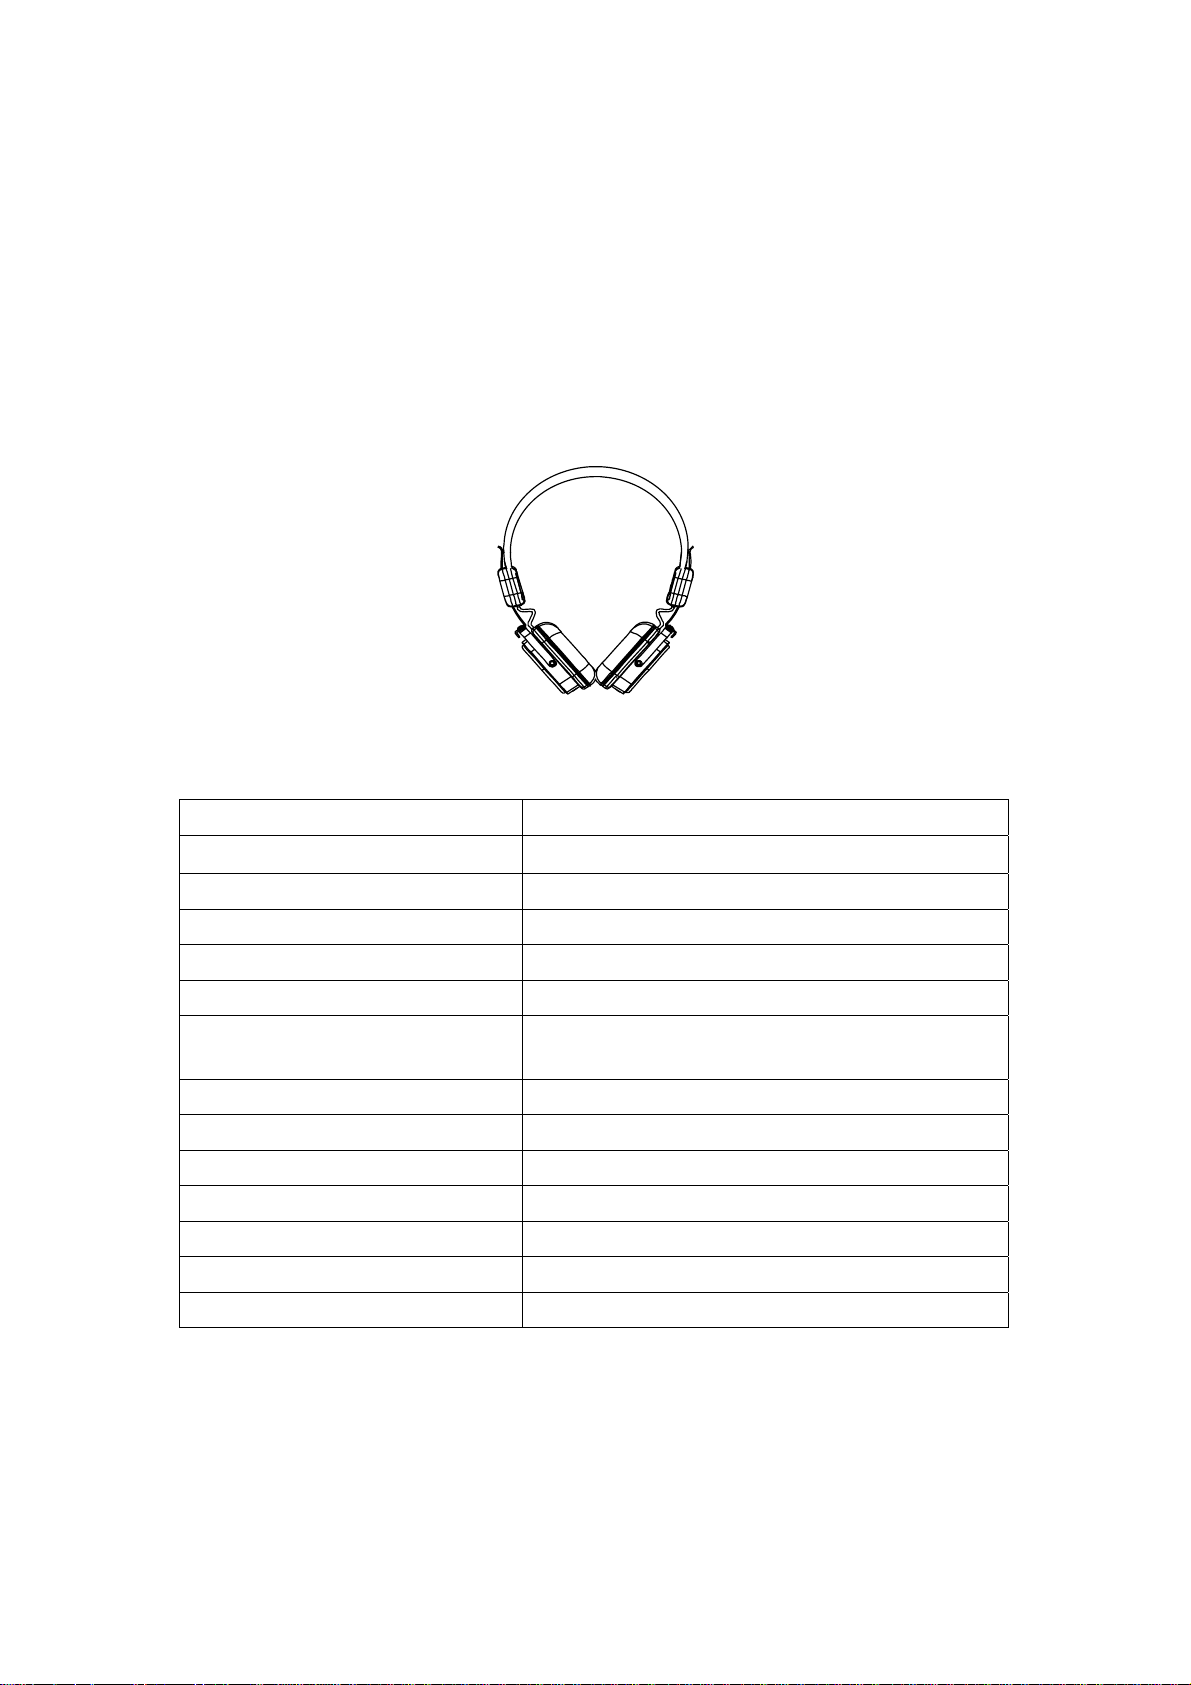
Bluetooth headphone
Manual
L6
SPECIFICATIONS
Bluetooth version: Bluetooth V3.0
Effective transmission range: 8m
Battery: 380mAh Li-polymer battery
Charging time: 2.5 hours (maximum)
Playing time: 8 hours
Stand-by time: up to 30 days
LED indicator status:
Diameter of driver unit: 40mm
Frequency range: 20Hz~20kHz
Sensitivity at 1KHz 110+/-5 dB
Impedance: 32+/-15% Ω
Distortion: ≤1% at 1KHz
Rated power input 10mW
Net Weight: Approx. 160g
Blue LED for power and BT pairing indicator
Red LED for charging indicator
ACCESSORIES
Micro USB charging cable
3.5mm audio cable
Instruction Manual
Page 2
Important Safety Information
Listen Responsibly
To avoid hearing damage, make sure that the volume on your music player is
turned down before connecting your headphones. After placing headphones
in/on your ears, gradually turn up the volume until you reach a comfortable
listening level. Noise levels are measured in decibels (dB), exposure to any
noise at or above 85 dB can cause gradual hearing loss. Monitor your use;
hearing loss is a function of loudness versus time. The louder it is, the less
time you can be exposed to it. The softer it is, the more time you can listen to it
Use Responsibly
Do not use headphones when it’s unsafe to do so—while operating a vehicle,
crossing streets, or during any activity or in an environment where your full
attention to your surroundings is required
It’s dangerous to drive while wearing headphones, and in many places, illegal
because it decreases your chances of hearing life-saving sounds outside of
your vehicle, such as another car’s horn and emergency vehicle sirens. Please
avoid wearing your headphones while driving
CHARGING THE HEADPHONES
Use the Micro USB cable and connect headphones to you computer or
adaptor device made for USB charging. A red LED indicator will turn on when
the headphones are charging. The red LED light will turn off when headphones
are fully charged.
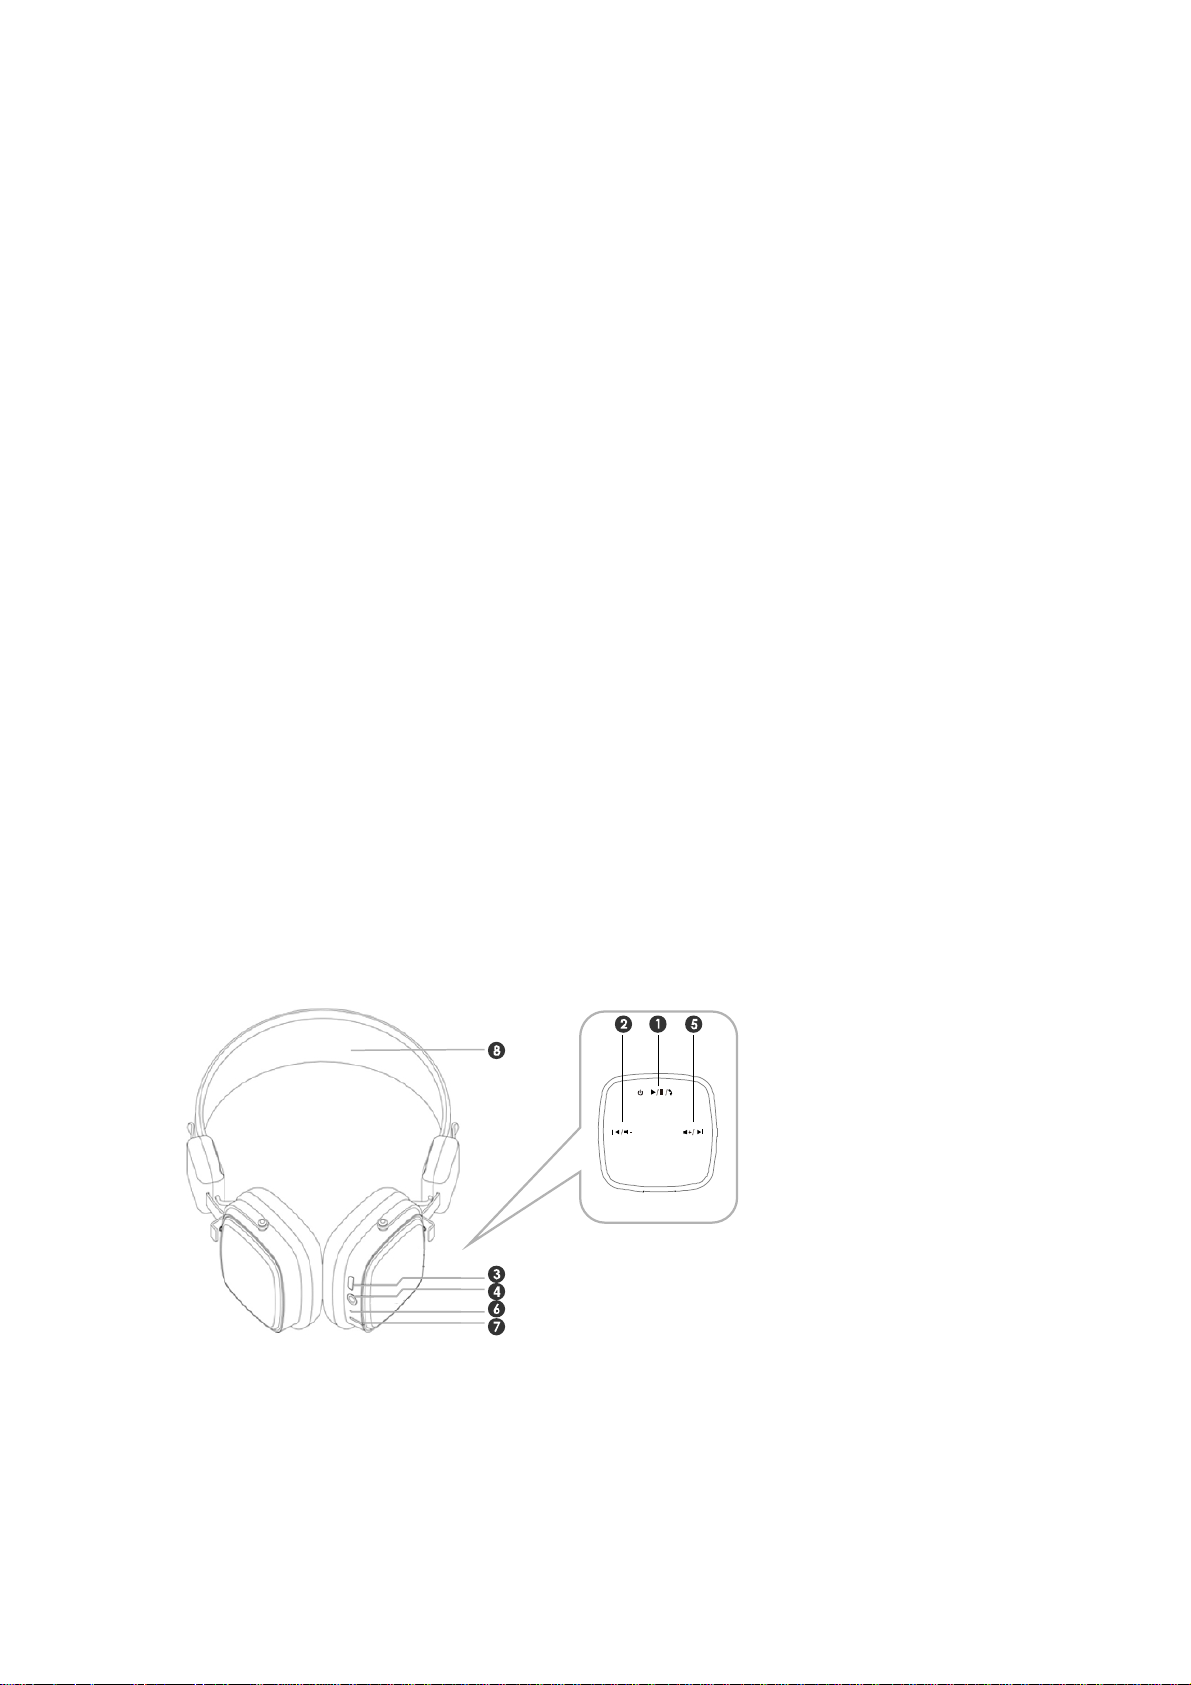
1. On / Off / Call / Play / Pause
2. Volume Down / Fast Forward
3. Micro USB charging port
4. 3.5mm audio jack
5. Volume Up / Rewind
Page 3

6. Microphone
7. LED indicator
PAIRING
1. Make sure your phone, computer or music device is turned on and
within 1 meter of each other.
2. Hold down Multifunction On/Off button (1) for about 3 seconds until LED
light starts to flash BLUE quickly.
3. Activate the Bluetooth feature on your phone or device and set it to
search for Bluetooth devices (Discoverable).
4. Select ‘L6’ from the list of found devices.
5. If necessary, enter passcode ‘0000’ to pair and connect the headphones
to your device.
6. Once successfully paired, the LED light will flash BLUE once every few
seconds
PLAYBACK / CONTROLS
1. Press Multifunction button Play/Pause (1) to start and pause audio.
2. Press (button 5) to skip forward to next track. Press and hold down
button to increase volume.
3. Press (button 2) to go back to previous track. Press and hold down
button to decrease volume.
Note: The controls will not function when charging.
CALLS
1. To answer an incoming call, press the Multifunction Play/Pause (button
1)
2. To end call, press the same button again
3. To decrease or increase the volume during the call, press and hold
down button 2 or button 5
POWER ON
Press and hold the Multifunction button (1) to turn the headphones on. The
LED indicator will flash BLUE when headphones are on.
POWER OFF
Press and hold the Multifunction button (1) to turn the headphones off. The
LED indicator will stop flashing when off.
Page 4
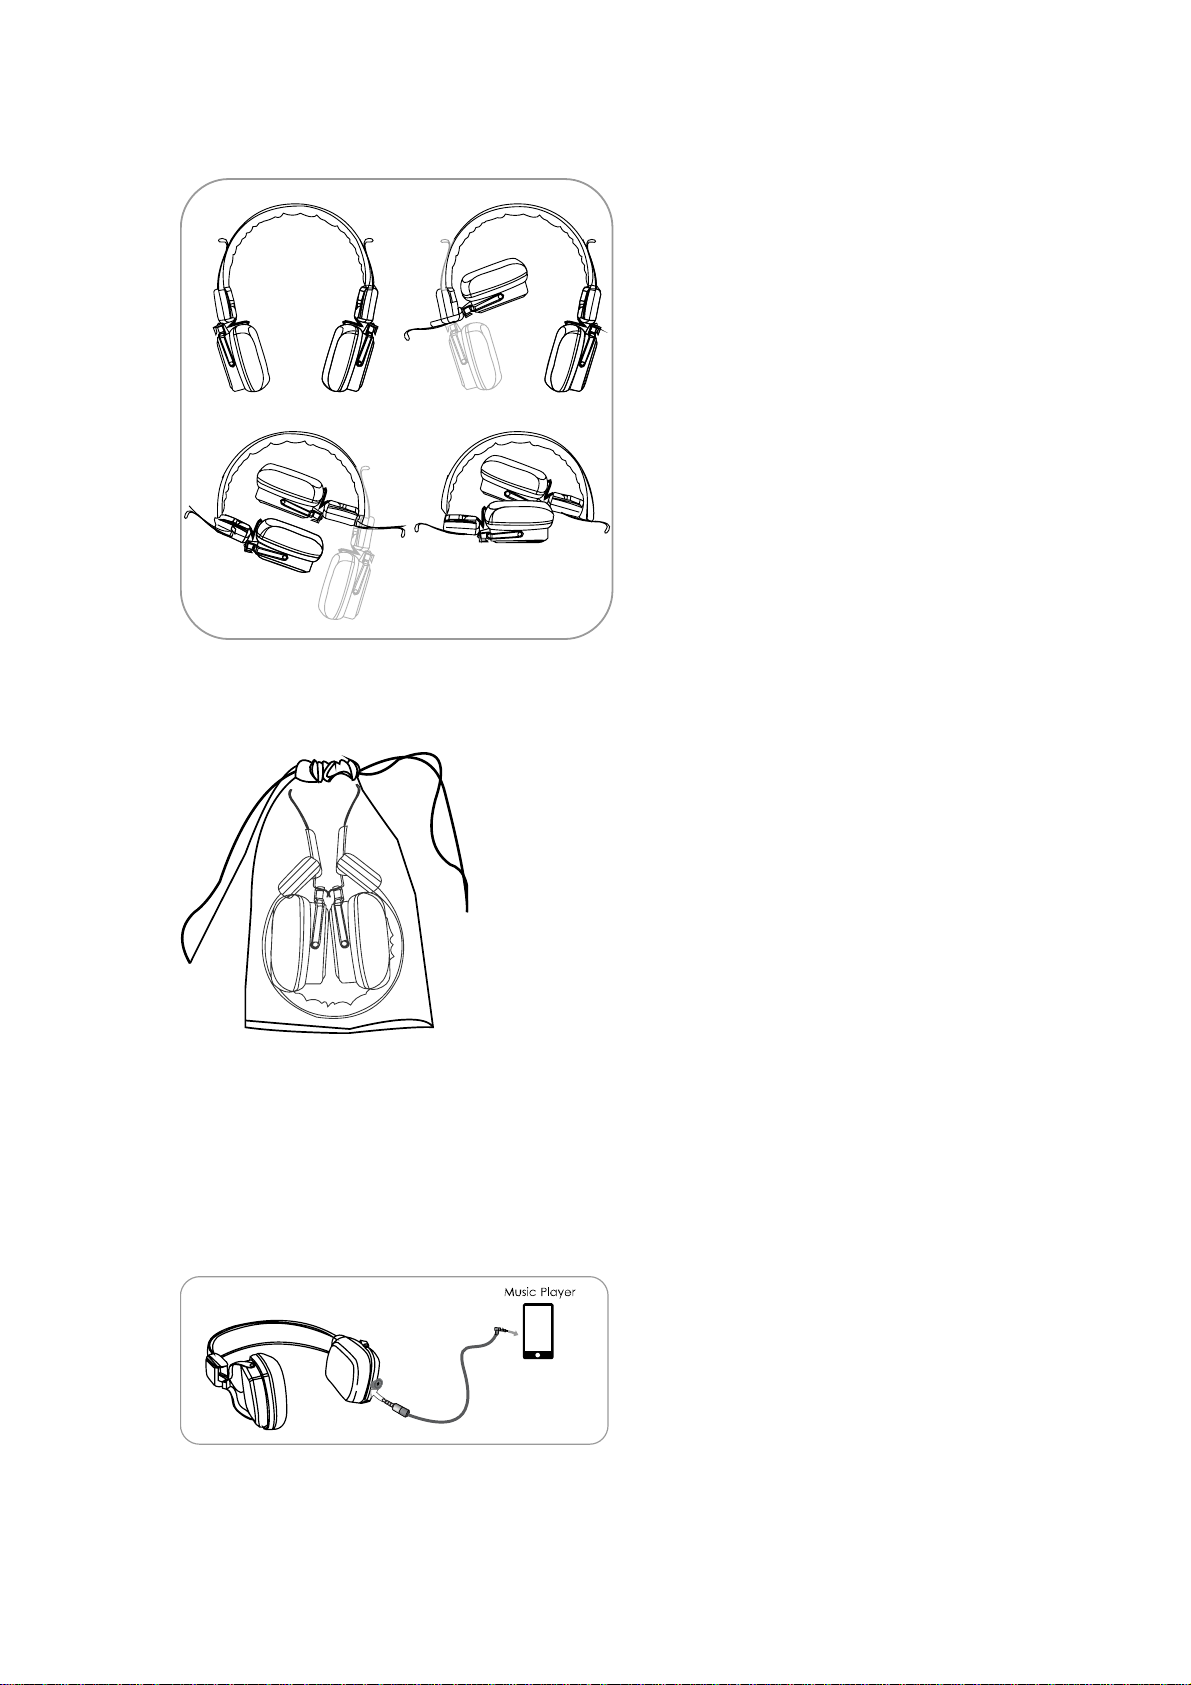
How to Fold the headphone
How to keep it in a bag( if there is )
Using headphones in Passive Mode (Wired)
You can use the headphones as a wired headphone to save battery. Simply connect one end of the
3.5mm cable to the bottom of the ear cushion and the other end to your phone or device.
Note: Inserting an audio cable disables wireless functionality.
Page 5

FCC Information and Copyright
This equipment has been tested and found to comply with the limits for a Class B digital device,
pursuant to part 15 of the FCC Rules.
These limits are designed to provide reasonable protection against harmful interference in a residential
installation. This equipment generates,
uses and can radiate radio frequency energy and, if not installed and used in accordance with the
instructions, may cause harmful interference
to radio communications. However, there is no guarantee that interference will not occur in a particular
installation. If this equipment does
cause harmful interference to radio or televi si on rece pt i on , whi ch can be determined by turning the
equipment off and on, the user is
encouraged to try to correct the interference by one or more of the following measures:
—Reorient or relocate the receiving antenna.
—Increase the separation between the equipment and receiver.
—Connect the equipment into an outlet on a circuit different from that to which the receiver is
connected.
—Consult the dealer or an experienced radio/TV technician for help.
15.19 Labelling requirements.
This device complies with part 15 of the FCC Rules. Operation is subject to the
following two conditions:
(1)This device may not cause harmful interference, and
(2) this device must accept any interference received, including interference that may
cause undesired operation.
changes or modifications not expressly approved by the party responsible for compliance could
void the user's authority to operate the equipment.
FCC RF warning statement: the device has been evaluated to meet general RF exposure
requirement , The device can be used in portable exposure condition without restriction.
 Loading...