

Page 1
Quick Installation Guide
Indoor HD Pan/Tilt Wireless Cloud IP Camera
Model: D2
Page 2
Package Contents
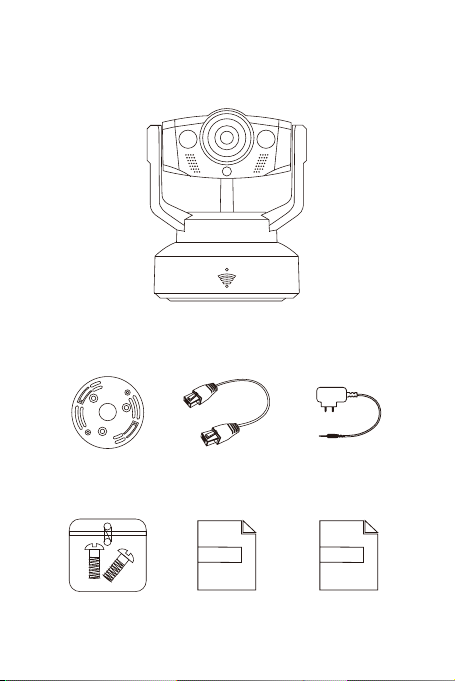
Wireless IP Camera-D2
Mounting Bracket
Screw Package Quick Installation
Ethernet Cable
Warranty Card
Power Adapter
Guide
Page 3
Physical Description
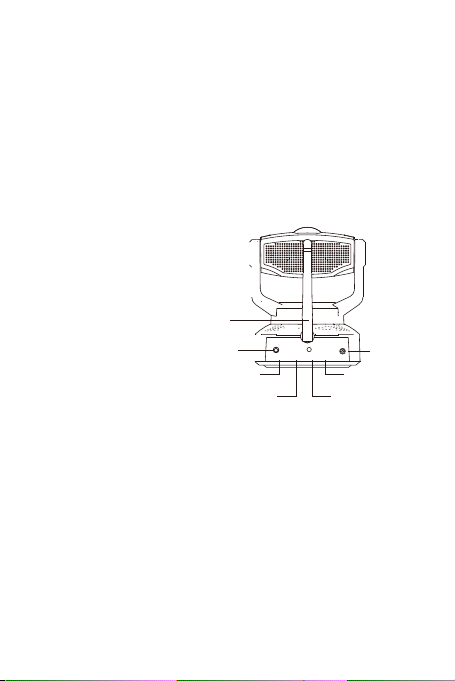
Infrared LEDs
Lens
Speaker
Microphone
Indicator
Antenna
Audio output
Micro SD slot
Speaker: Built-in speaker
Lens: adjustable focus lens
Infrared LDs: Infrared LEDs for night vision
Microphone: Built-in microphone
Indicator: Power and network indicator
Lan: 10/100Mbps RJ-45 port for wired connection
Power: DC5V/2A Power supply
WPS/Reset: Wi-Fi Protected Set-up/Reset
Micro SD slot: Support Micro SD Card (up to 32GB)
Audio Output: External microphone jack
I/O Alarm: 1,2 alarm output; 3,4 input
Antenna: Wireless antenna
Power
LAN
WPS/RESETI/O Alarm
Page 4
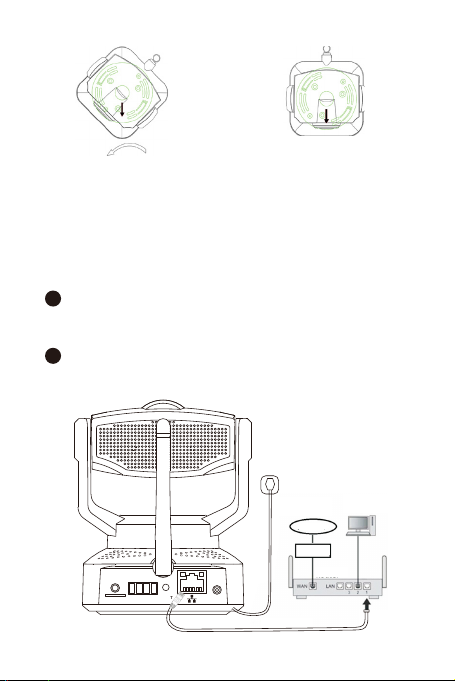
3.Hang the camera on the mounting
bracket at a 45-degree angle.
Then,counter rotate the device 45
degrees or so.
4. Finish
Note: A drill or screwdriver is required for installation
1.Equipment Installation
1
Connect the Power Supply
Attach the DC 5V power cable from the back of
the camera into a power outlet.
2
Connect to the Internet
You just need to choose either Wired Connection or Wireless
Connection.
AUDIO
MICRO SD
1 2 3 4
I/O Alarm
Power Supply
WPS
RESET
DC 5V
Ethernet Kabel
Computer
Internet
Modem
Router
Page 5
· Wired Connection (Recommended) :
Connect the included Ethernet cable to the port located on the
back of the camera and connect it to your router.
( If you want to switch from Wired Connection to Wireless
Connection, please refer to Switch to Wi-Fi for Wireless
Connection.)
· Wireless Connection :
Press the WPS (Wi-Fi Protected Set-up) button on your router.
Then, press and hold the WPS button on the back of the camera
for two seconds.
Note: If you do not want connect to the Internet, please choose
the local mode at the login screen.
· Local Mode :
Internet and Registration is not required, as long as your mobile
device and camera are in the same network (LAN).
2.Download and Install
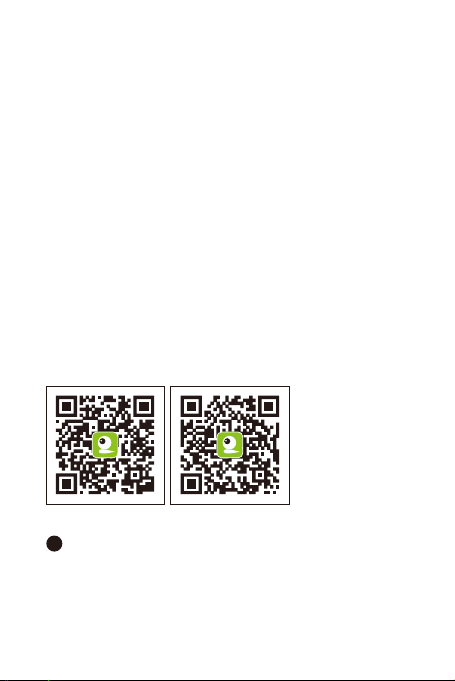
Android APP iOS APP
1
Download
The Ausdom App can be installed on iOS, Android 4.0+,
Windows 7 +, and Mac OS X.
Download and install the Ausdom app by scanning the QR code.
You can also download the app from the Google Play Store or
Apple App Store.
Page 6
PC Download:
To download the software for Windows or MacOS, please visit
www.ausdom.com/support.
2
Install
3
Start the App
Start the Ausdom app and you will be directed to the login
screen.
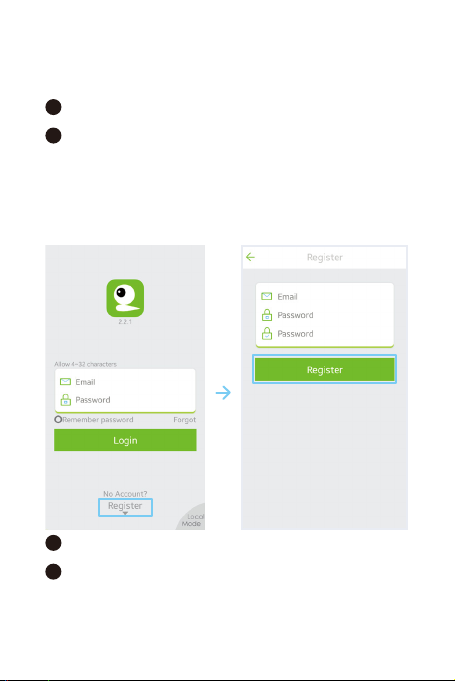
3. Register
· Smart Device Registration
1
Click ‘Register’
2
Fill in Your Information
Enter your email and password into the boxes
provided for you. Once completed, click ‘Register’
Page 7
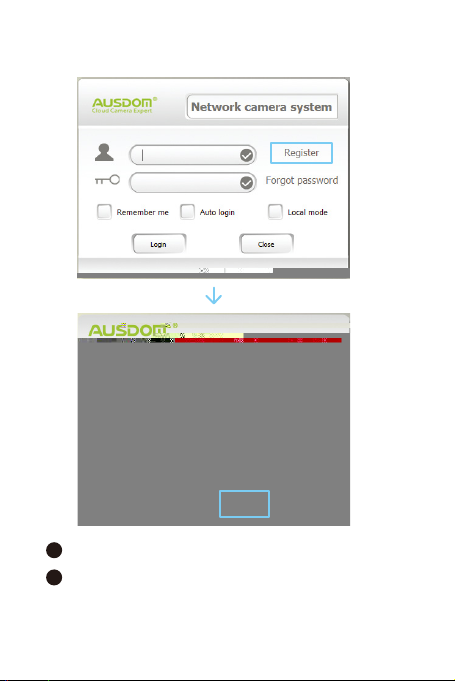
· PC Registration
1
Click ‘Register’
2
Fill in Your Information
Enter your username, password, and email into the boxes
registration process.
Page 8
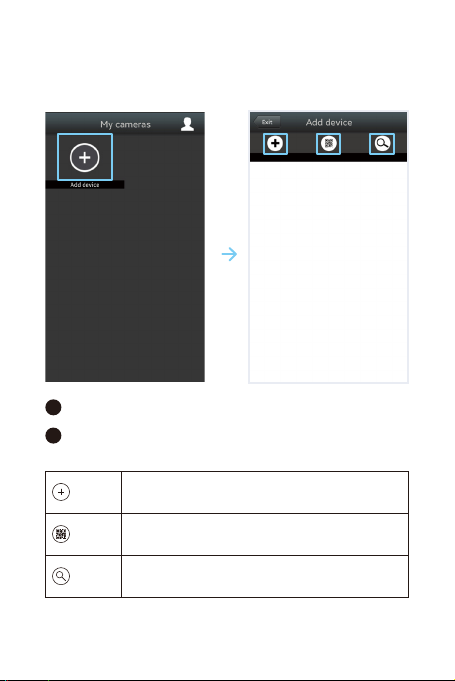
4. Add Cameras
· Smart Device Setup
1
Login
2
Click ‘Add Device’
There are three methods to add a device.
Add
QR code
Search
Note: The default password for the camera is “888888”
Manually enter the camera’s UID and password,
located on the bottom.
Scan the QR code on the bottom/back of the
camera.
Search for cameras that are connected to the
same local LAN as your smart device.
Page 9
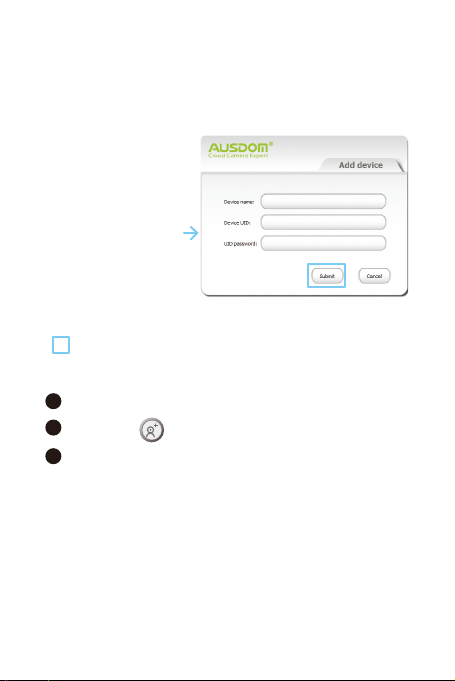
· PC Setup
1
Login
2
Click the Icon
3
Fill in Your Information
Enter your camera’s name, UID, and password into the boxes
provided for you. The UID and password is located on the bottom
your camera.
Page 10
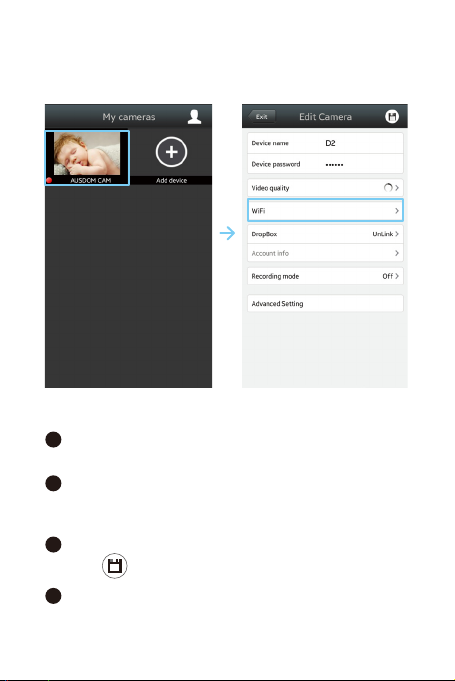
5. Switch to Wi-Fi for Wireless Connection
· Smart Device Setup
camera. If the window does not appear:
1
Tap and Hold the Picture
This will bring up the settings menu. Click ‘Settings’.
2
Click Wi-Fi
Choose the network you wish to connect to and
enter the Wi-Fi password.
3
Save
Click the icon at the top right to save.
4
Disconnect the Ethernet cable
After setting up the Wi-Fi successfully, camera can be accessed
without the Ethernet cable.
Page 11
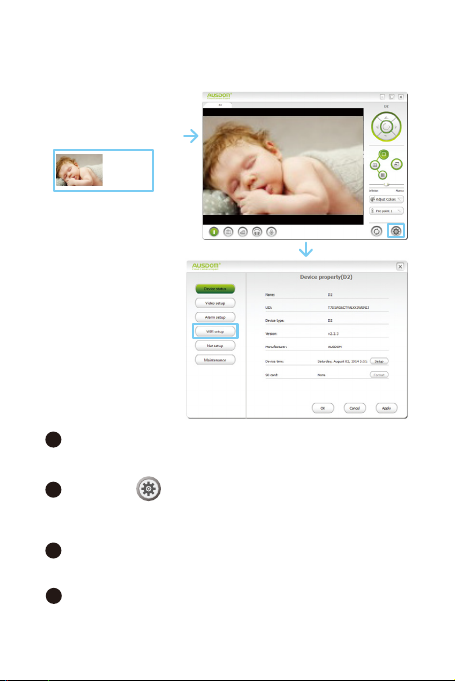
· PC Setup
Ausdom Cam
Online
1
Double click your new camera
This will bring up the video interface.
2
Click the Icon
In the settings menu, click ‘Wi-Fi setup’. Then, choose the network
you wish to connect to and enter the Wi-Fi password.
3
Save
Click ‘Apply’ to save the changes.
4
Disconnect the Ethernet cable
After setting up the Wi-Fi successfully, camera can be accessed
without the Ethernet cable.
Page 12
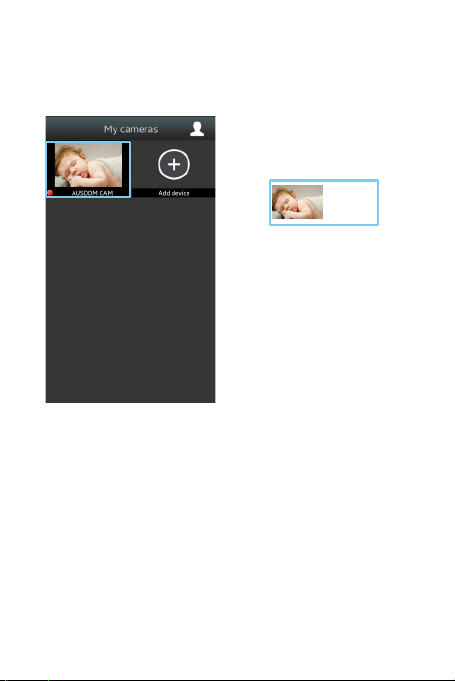
6. View Video
· Smart Device · PC
Ausdom Cam
Online
Double tap/click your newly added camera to viewlive video.
Page 13

Tips
Please adjust the lens manually if the image
is not clear enough.
Technical Support
If you have problems with your AUSDOM IP camera, please
contact the AUSDOM reseller you purchased from, or you can
e-mail our AUSDOM support team at [email protected].
Your valuable comments and suggestions on improving AUSDOM
products are welcomed.
Shenzhen Ausdom Cloud Technology Co.,Ltd
Tel : 0086-755-29190430
Email : [email protected]
Web : www.ausdom.com
 Loading...