

Aurum Electronics AEC9331CU 8 User Manual
THE INTELLIGENT MOTION SENSOR TRACKING LIGHT
INSTALLATION INSTRUCTIONS
Read all instructions before proceeding with the installation
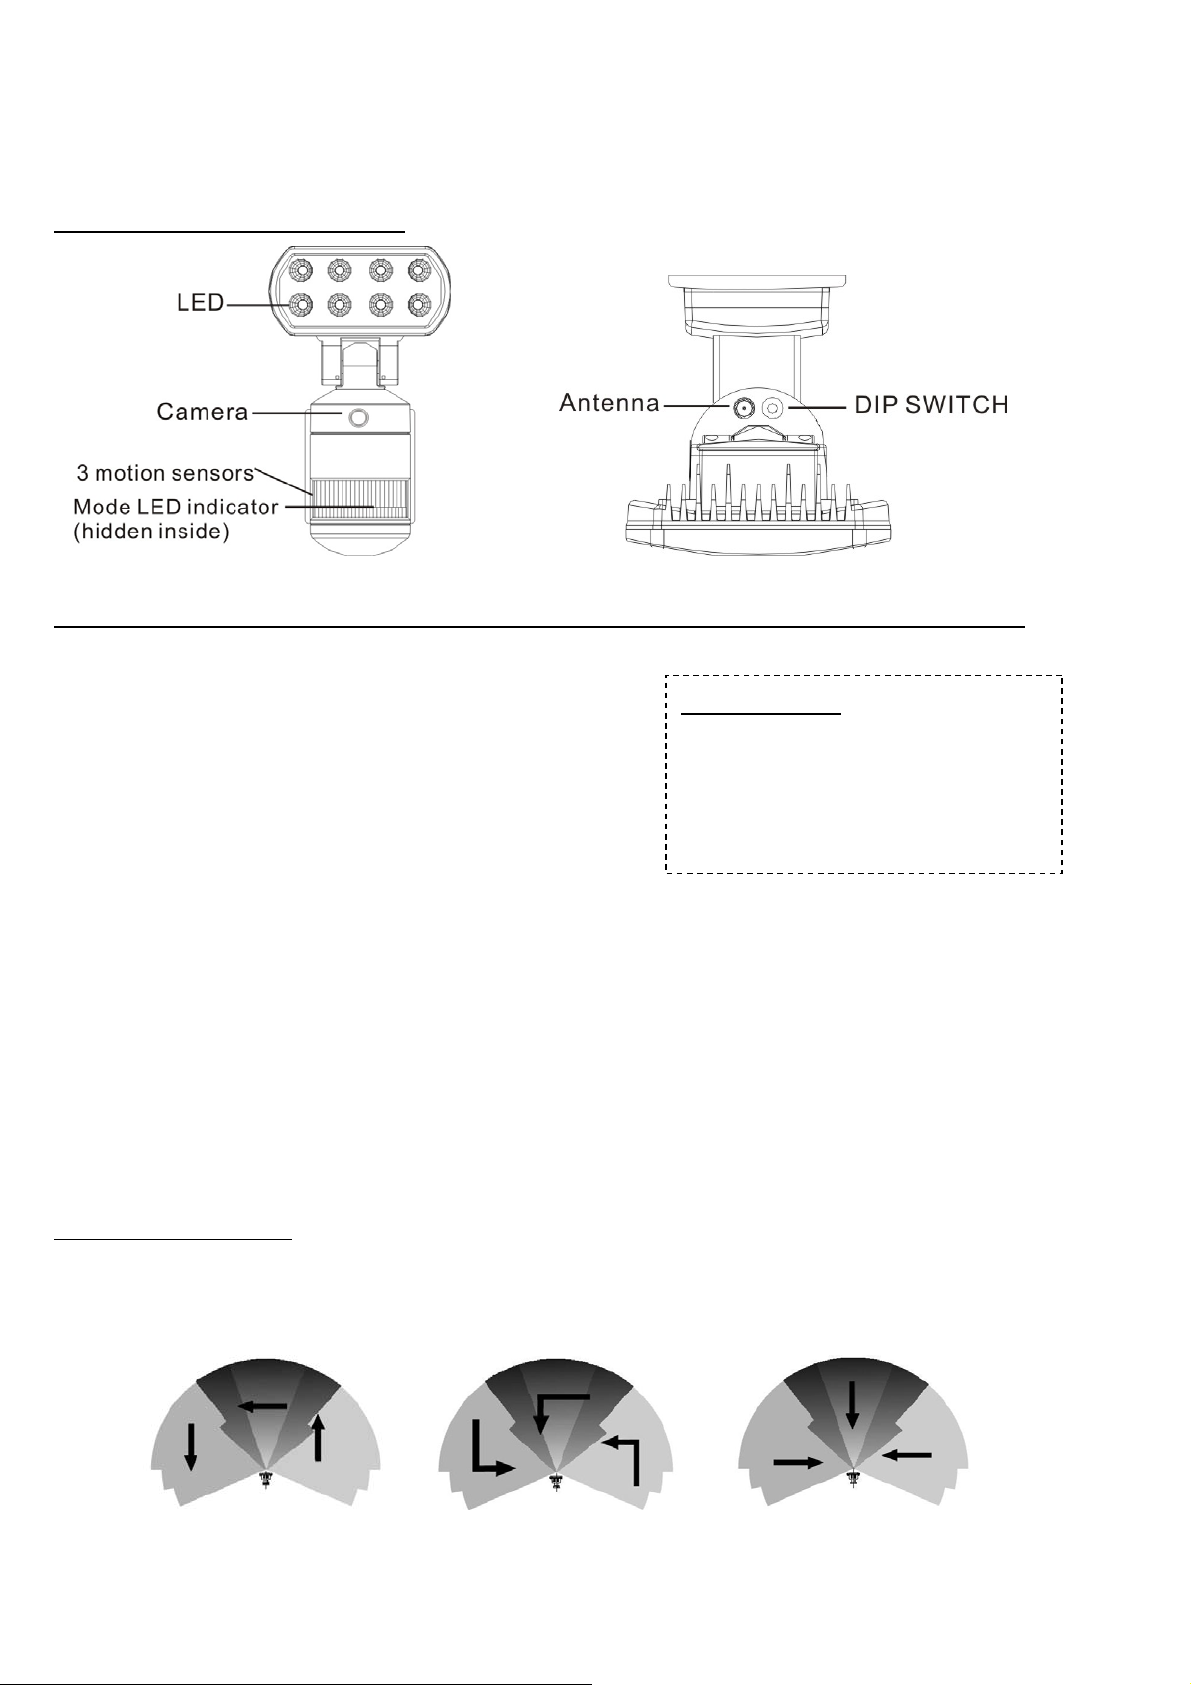
OVERVIEW OF AEC-9331CU-SP8
IMPORTANT: THE INTALLATION OF THIS FITTING MUST BE DONE BY A QUALIFIED ELECTRICIAN.
This fitting must be earthed.
Do not mount the luminaire against inflammable surfaces.
The motion detector will not operate correctly if it is installed:
( ) Near the outlet of a central heating boiler Ⅰ
( ) Near air conditioning plant Ⅱ
( ) Pointing directly at moving vehicles Ⅲ
( ) Within sight of reflection from moving water Ⅳ
WARNING ! ! !
BEFORE ATTEMPTING ANY INSTALLATION OR
MAINTENANCE, ENSURE THAT THE
ELECTRICAL SUPPLY IS SWITCHED OFF AND
THE CIRCUIT FUSES REMOVED OR THE
CIRCUIT BREAKER IS IN THE “OFF”POSITION.
( ) Where other lamps could shine onto the detectorⅤ
NOTE:
* This highly responsive unit may occasionally activate due to rapid environmental changes. Allow for approximately
30 seconds warm-up time before the sensor resumes normal activity.
* Please make sure the voltage and polarity are correct before connection. Incorrect voltage may cause electric shock.
If you are not sure, please contact your retailer.
* Do Not remove the tape until your finish the installation. If the tape comes off the light, please replace it or hold the
light head to avoid swiveling and damage the product.
MOUNTING THE FITTING
To ensure correct operation of the sensor, mount the luminaire that traffic passes across the detector.
TOP
GOOD SENSITIVITY LESS
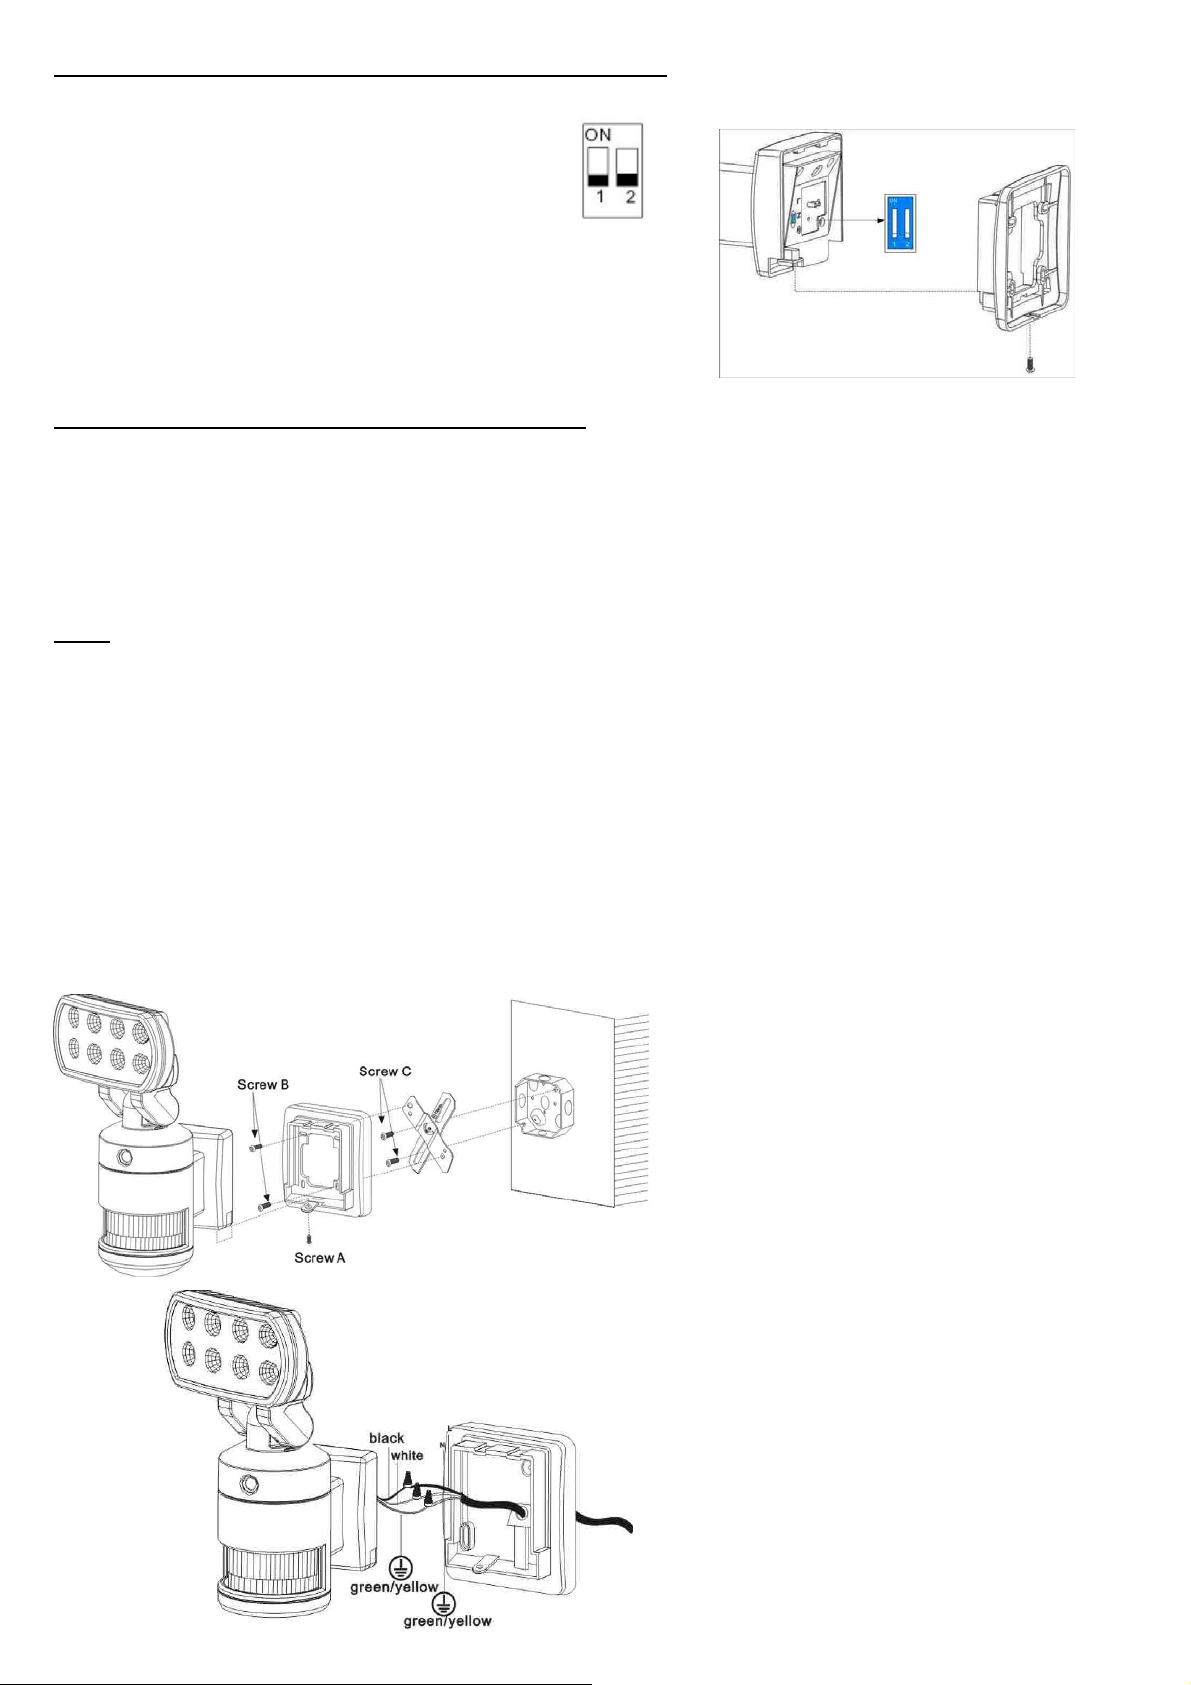
SETTING THE LIGHT UP TIME & SENSITIVITY
Remove the back mounting box from the fixture by unscrewing the screw at the bottom.
Set the Light up time & Sensitivity you preferred
1:Light activation time (OFF:30 seconds/ ON: 60 seconds)
2:Light Sensitivity (OFF: 5m/ ON: 10m)
Re-fit the back mounting box and tighten the screw.
INSTALLATION AND WIRING INSTRUCTIONS
Remove the existing light fixture. Install crossbar lower plate as shown with two screws. Do not completely tighten
central screws. Remove the base bracket from the light fixture. Align base bracket and a crossbar upper plate and
secure it with two screws. Make sure the base bracket is straight. Tighten two central and two base bracket screws.
Do not use excessive force. The recommended installation height of this light fixture is between 6.5 -10 ft.
NOTE: DO NOT REMOVE THE TAPE UNTIL YOU FINISH THE INSTALLATION. IF THE TAPE COMES OFF THE
LIGHT, PLEASE REPLACE IT OR HOLD THE LIGHT HEAD TO AVOID SWIVELING AND DAMAGE TO THE
PRODUCT.
1. Att ach the crossbar to junction box and fix by screw A.
2. Connect the black wire (live wire) from the AC power cord to the single black wire coming from Sensor Tracking
Light using one of the supplied wire nuts.
3. Connect the white wire from the AC power cord to the white wire coming from Sensor Tracking Light using one of
the supplied wire nuts.
4. Connect the green/yellow wire from the AC power cord to the green/yellow wire coming from Sensor Tracking Light
using one of the supplied wire nuts.
5. Make sure the polarity is correct.
6. Attach the unit to the crossbar and fix by screw B and screw C.
 Loading...