

Aurum Electronics AEC9336CU, AEC752C User Manual
MOTION SENSOR TRACKING LIGHT
INSTALLATION INSTRUCTIONS
Read all instructio ns before proceeding with the in stallation
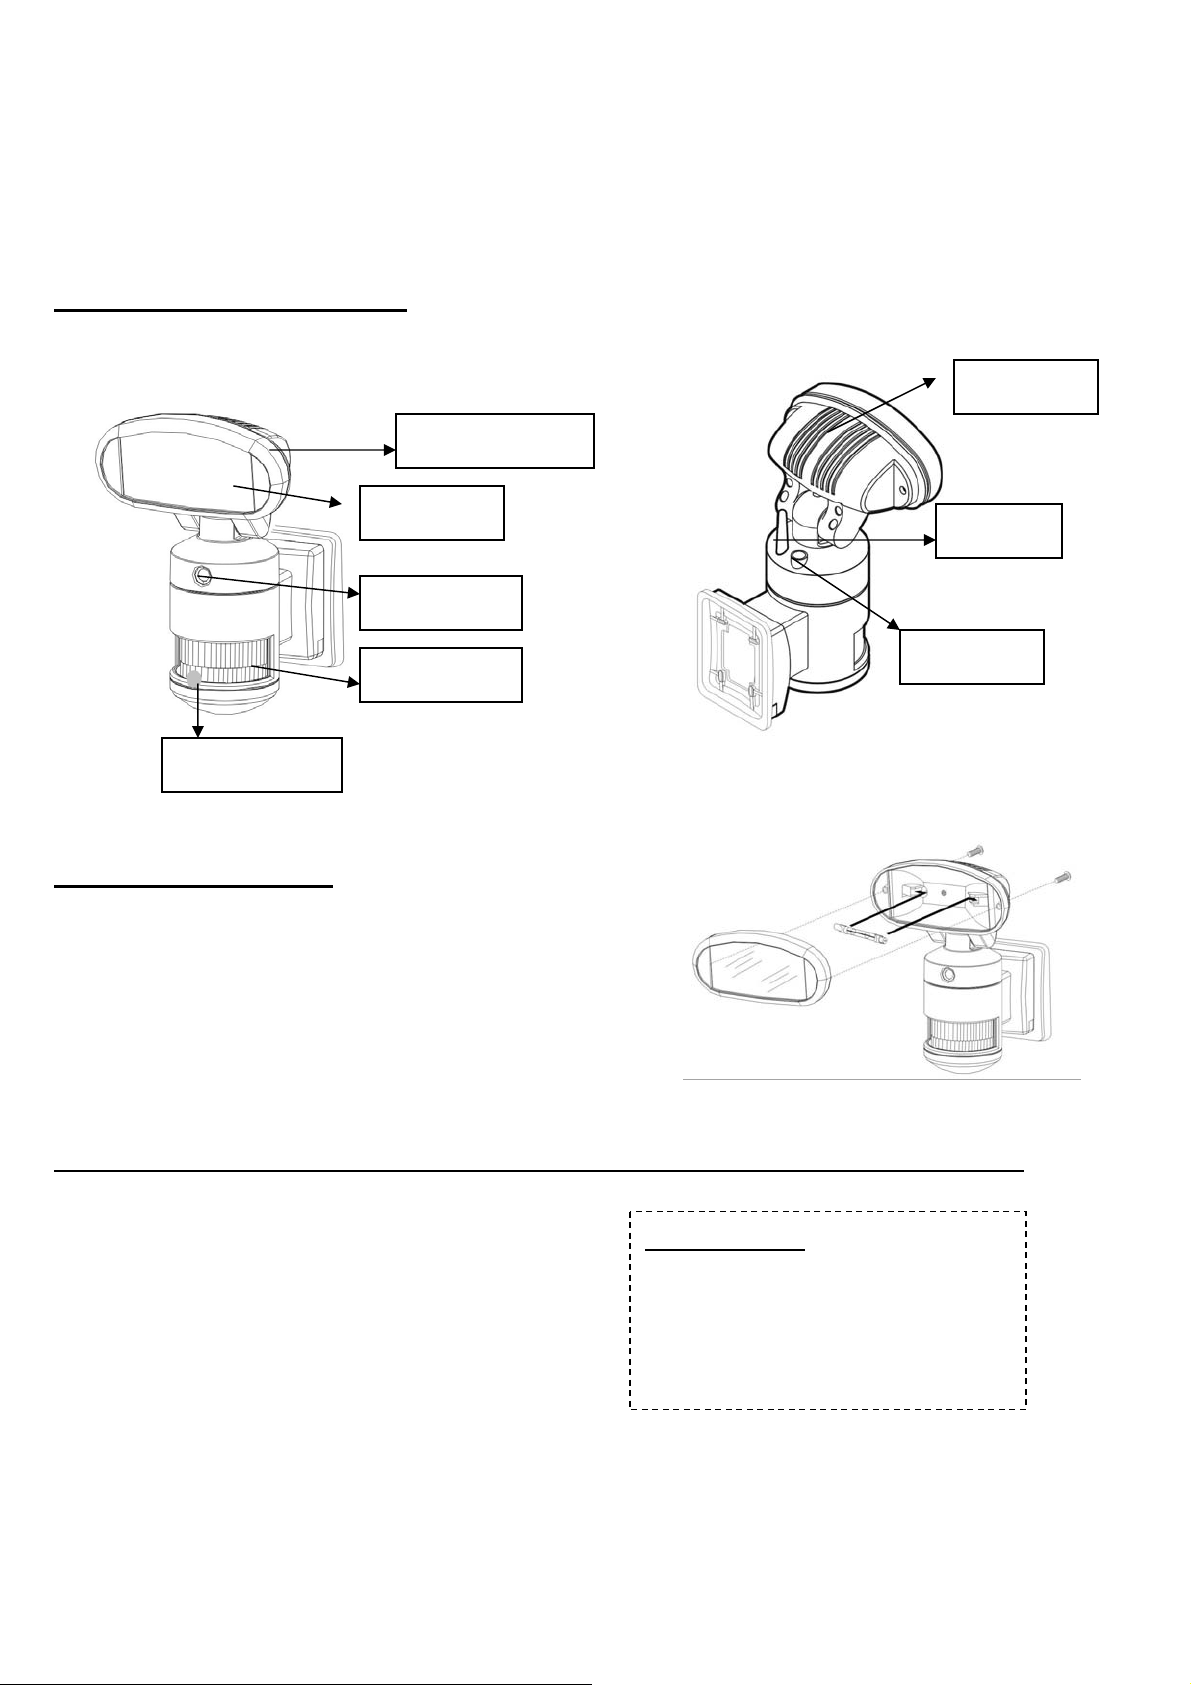
OVERVIEW OF AEC-9336CU
THE INTELLIGENT
Lamp Cover
Front housing
Lamp 150W
Video Camera
Sensor
LED indicator
INSTALLING THE BULB
Unscrew the lamp cover of the luminaire and install a 150W J-type lamp.
Re-fit the lamp cover and tighten the screws.
Antenna
Dip Switch
IMPORTANT: THE INTALLATION OF THIS FITTING MUST BE DONE BY A QUALIFIED ELECTRICIAN.
This fitting must be earthed.
Do not mount the luminaire against inflammable surfaces.
The motion detector will not operate correctly if it is installed:
( ) Near the outlet of a central heating boiler Ⅰ
( ) Near air conditioning plant Ⅱ
( ) Pointing directly at moving vehicles Ⅲ
( ) Within sight Ⅳ of reflection from moving water
( ) Where other lamps could shine onto the detectorⅤ
The maximum rating of this luminaire is 150 Watts. Check that the total load of the circuit. Including this luminaire. Does not
exceed the rating of the circuit cable.
NOTE: This highly responsive unit may occasionally activate due to rapid environmental changes. Allow for approximately 30
seconds warm-up time before the sensor resumes normal activity.
WARNING ! ! !
BEFORE ATTEMPTING ANY INSTALLATION OR
MAINTENANCE, ENSURE THAT THE
ELECTRICAL SUPPLY IS SWITCHED OFF AND
THE CIRCUIT FUSES REMOVED OR THE
CIRCUIT BREAKER IS IN THE “OFF”POSITION.

MOUNTING THE FITTING
To ensure correct operation of the sensor, mount the luminaire that traffic passes across the detector.
TOP VIEW
GOOD SENSITIVITY LESS SENSITIVITY
SETTING THE LIGHT UP TIME & SENSITIVTY
Remove the back mounting box from the fixture by unscrewing the screw at the bottom.
Set the Light up time & Sensitivity you preferred
1:Light up time (OFF: 30 seconds/ ON:60 seconds)
2:Sensitivity (OFF: 5m/ ON: 10m)
Re-fit the back mounting box and tighten the screw.
INST ALLA TION AND WIRING INSTRUCTIONS
Installation to a junction box using crossbar mount
1. Att ach the crossbar to junction box and fix by screw A.
2. Connect the black wire (live wire) from the AC power cord to the single black wire coming fro m Sensor Tracking Light
using one of the supplied wire nuts.
3. Connect the white wire from the AC power cord to the white wire coming from Sensor Tracking Light using one of the
supplied wire nuts.
4. Connect the green/yellow wire from the AC power cord to the green/yellow wire coming from Sensor Tracki ng Light
using one of the supplied wire nuts.
5. Make sure the polarity is correct.
6. Attach the unit to the crossbar and fix by screw B and screw C.
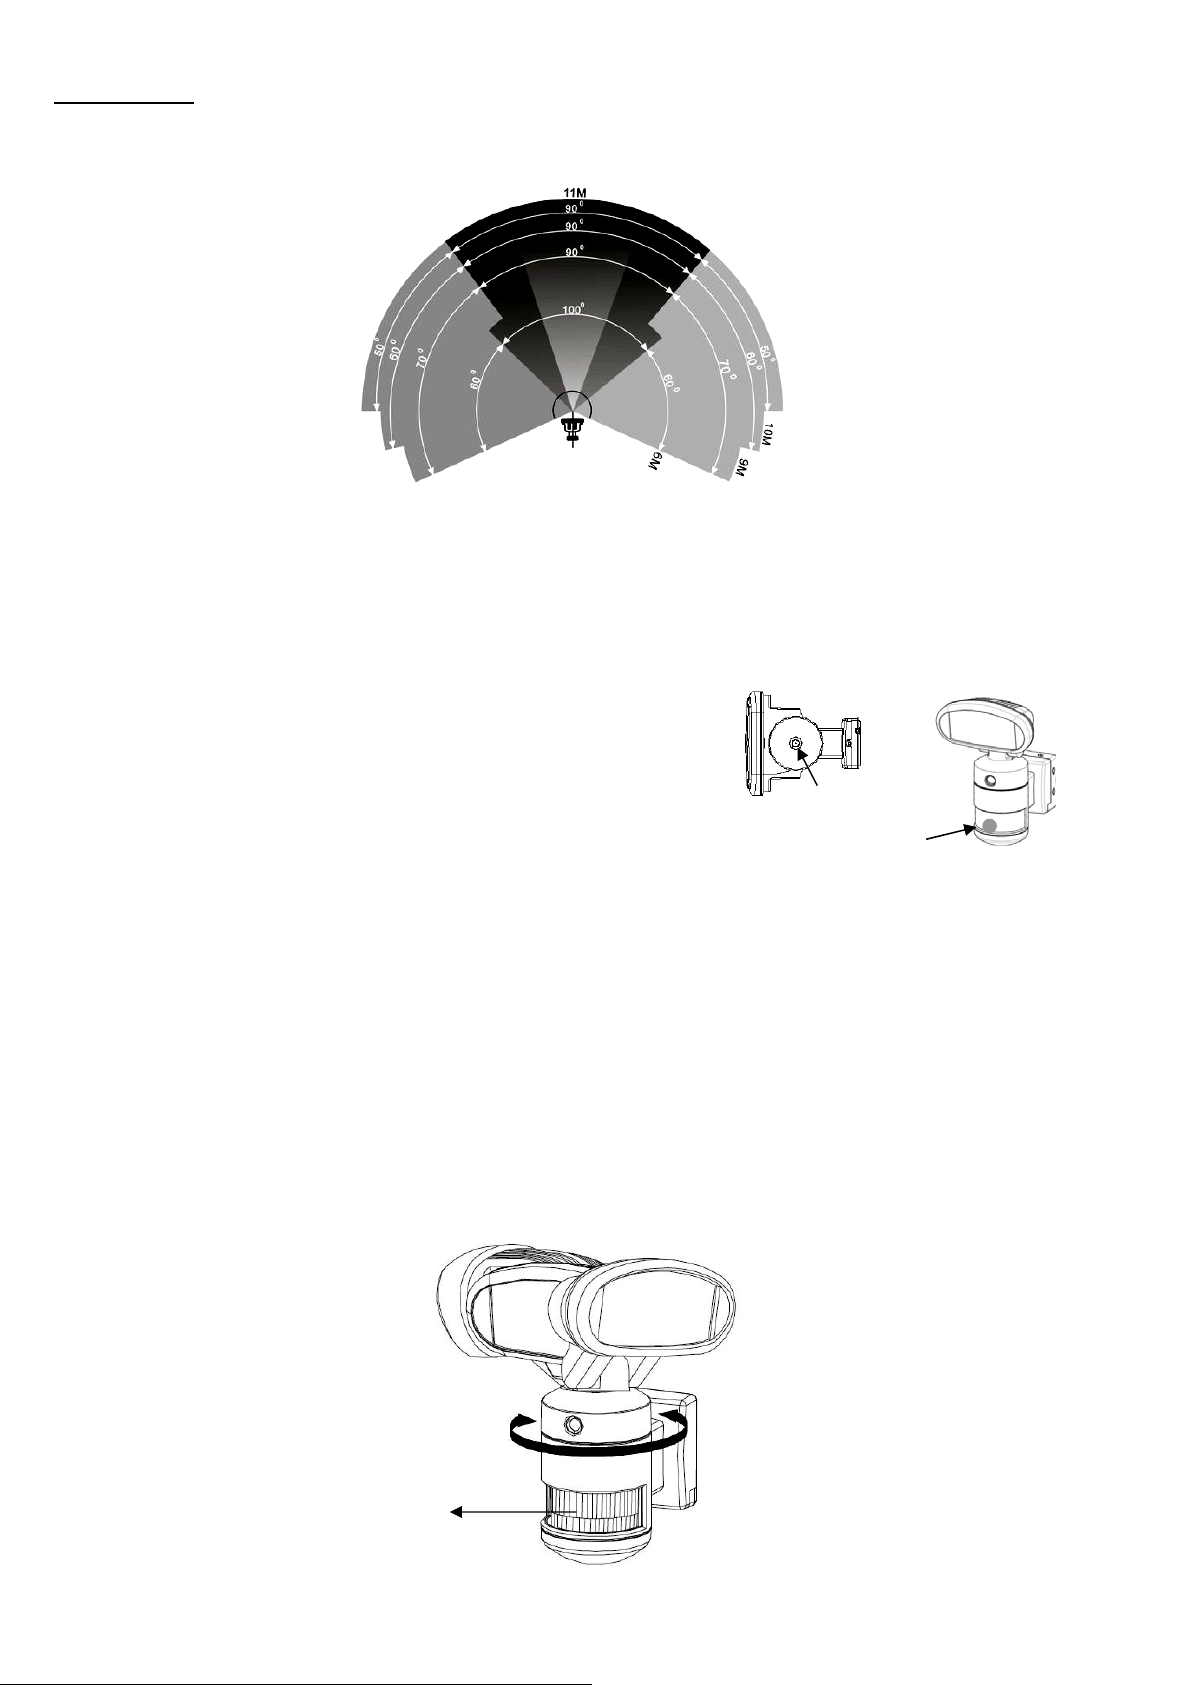
FUNCTION
This light is equipped with 3 motion sensors: zone 1 covers 60 degree, zone 2 covers 100 degrees and zone 3 covers 60 degrees.
220 degrees (maximum) in total for 3 zones.
ZONE 1
TOTAL DETECTION RANGE
ZONE 2
ZONE 3
The light will switch on for 30 /60 seconds and off automatically when heat/ movement is detected.
The factory default: the mode is「Auto mode」for light works at night, camera works all day.
To change the mode to nighttime only(Auto mode), push the button at the bottom of the housing and the hidden LED
indicator will turn off at this mode. The light will be on at 30 /60 seconds when detecting any movement at night.
Push-button for programmable functions:
- Test mode: light and camera work all day
- Auto mode: light works at night, camera works all day
Reset function: If the stepper motor of tracking light works abnormal, the hidden LED indicator will flash in red and the light
will stop turning automatically. In Test mode, the red LED will flash for 3 times and off for 5 seconds; in “Normally mode”,
the red light will flash in regular pattern. Please simply switch off and on the main power to resume the tracking light.
Below are the possible abnormal situations.
- External force: the light head is blocked by objects or is blown by strong wind and is unable to turn properly, the hidden LED
will flash in red to signal users the abnormal situation.
- Stepper motor: when stepper motor is going to be out of its lifetime or is damaged, the hidden LED will flash in red to signal
users the abnormal situation. Please switch off and on the main power, the tracking light now may or may not resume its
operation. If the stepper motor stops working, AEC-9336C becomes a regular motion sensor security light.
Push-button
LED indicator
Hidden LED indicator
Left 70° Right 70°
 Loading...