

auris beamit Quick Start Manual

QUICK START GUIDE
beamit

CONTENTS
Welcome
In the Box
Keys and Parts
Features
Getting Started
Setup: Connecting in TX Mode
Connecting to a TV or Computer
Setup: Pairing in TX Mode
Pairing with a Bluetooth Headphone / Speaker
Multi-point Streaming: Pairing with two Bluetooth Headphones
Setup: Connecting in RX Mode
Connecting to a Home stereo system / Powered speakers
Setup: Pairing in RX Mode
Pairing with a Smartphone / Tablet / Computer
Other Functions
Troubleshooting Tips
Technical Specifications
Product Safety
Safety Instructions
Warranty
2
3
4
5
6
7
9
11
13
14
15
18
20
21
22

WELCOME!
Congratulations on your purchase of the auris beamit Wireless Bluetooth®
Audio Transmitter & Receiver!
The following pages explain the features and operations of beamit. Please
take a few moments to read this quick start guide.
Also read all safety instructions before proceeding. The answers to most
set up and performance questions can be found in this guide. If you have
any further questions about the operation or use of this product, please
contact our customer care team for assistance on support@theauris.com
Overview
beamit is a sleek and compact Bluetooth® audio transmitter that seamlessly
streams Hi-Fi digital audio wirelessly from your TV or wired music system to
your favorite pair of Bluetooth headphones or speakers.
Also it's a Hi-Fi Bluetooth music receiver that streams high quality audio
wirelessly from any Bluetooth enabled smartphone, computer or tablet to
any music system or powered speakers.
Incorporating the high quality aptX® LOW LATENCY audio streaming codec
and digital TOSLINK connection, beamit provides Hi-Fi digital audio streaming
to up to two Bluetooth headphones or speakers simultaneously.
2
IN THE BOX
3.5mm to RCA
Adapter
3.5mm AUX
Audio Cable
Micro - USB
Charging Cable
Sticky Gel
Mounting Strip
Quick
Start Guide
USB Power
Adapter
TOSLINK Optical
Audio Cable
beamit
Wireless Bluetooth® Audio Transmitter & Receiver
QUICK START GUIDE
beam
it
3
4
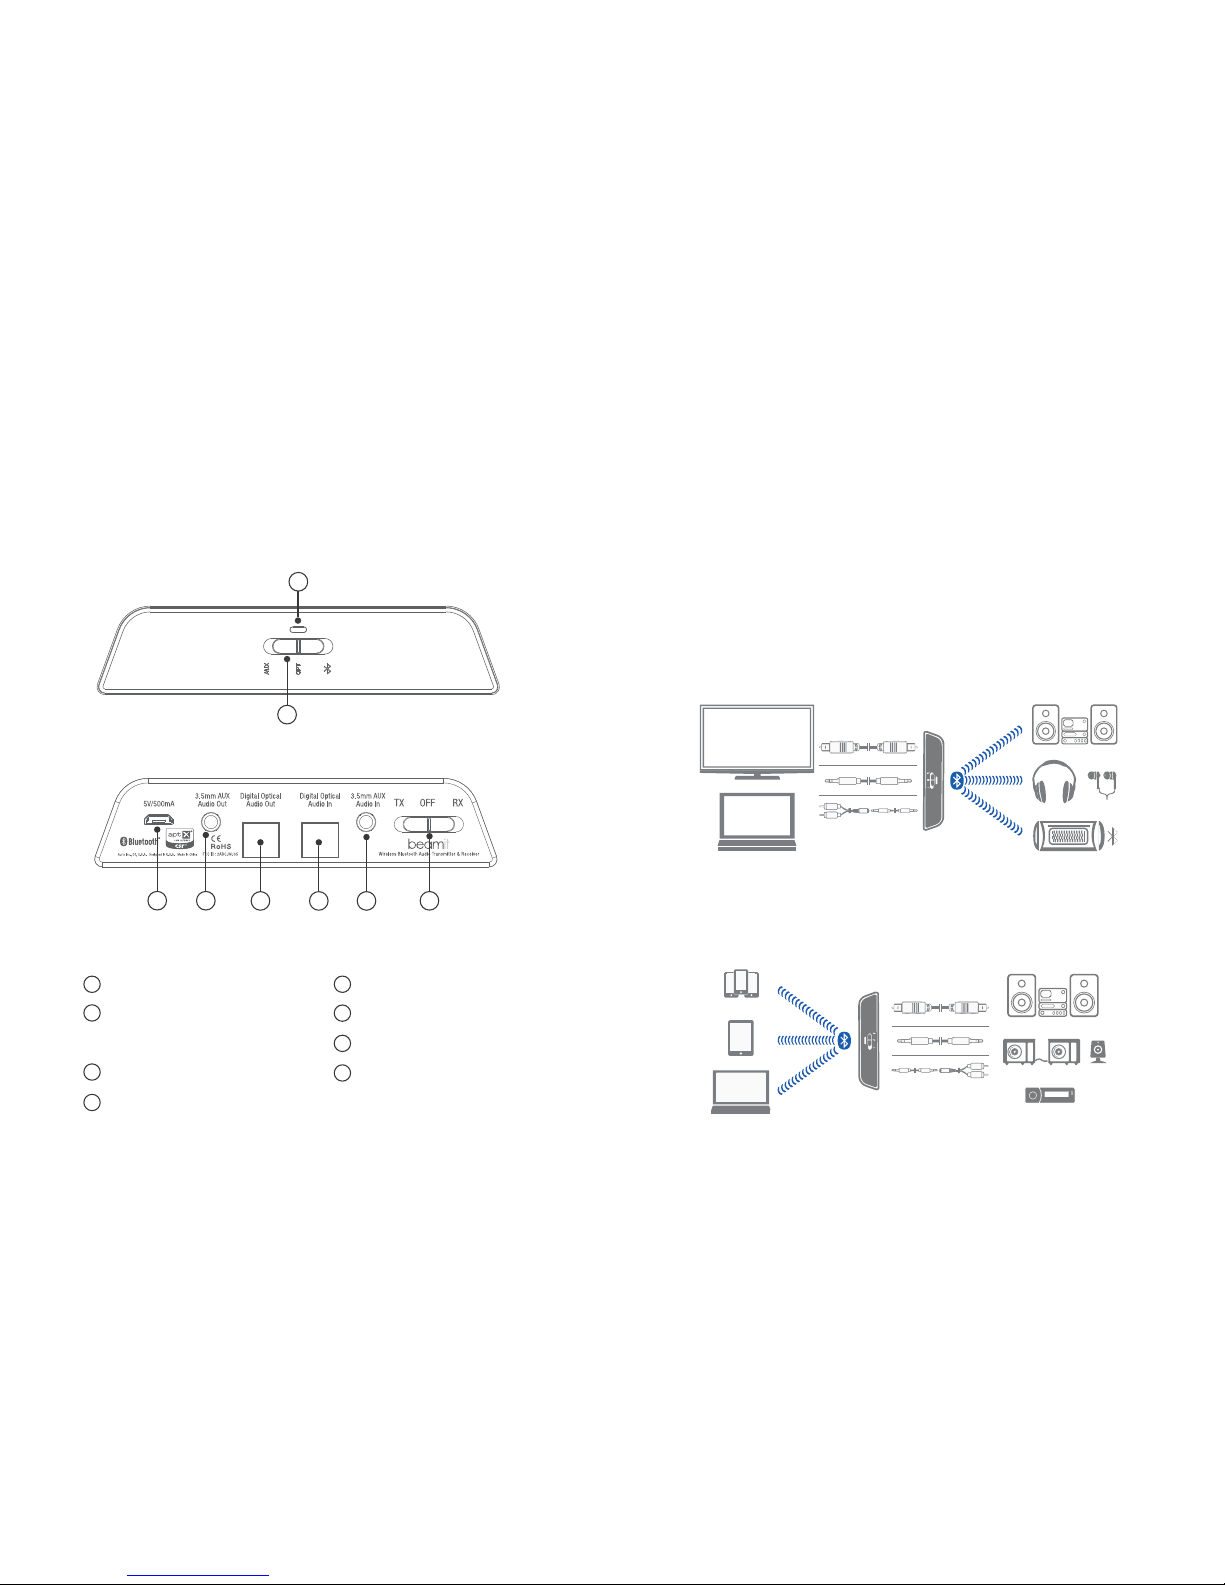
KEYS AND PARTS
Front Panel
Rear Panel
2
1
3
5
LED Indicator
Multifunction Switch (MFS) -
Audio Source Select / Pairing
4
Micro USB power input
3.5mm AUX Audio Out
Toslink Optical Audio Out
6
7
8
Toslink Optical Audio In
3.5mm AUX Audio In
TX / RX toggle and
2
1
3
4 5 6 7
8
Power OFF switch
5
beamit is an audio adapter which can be used in two ways: as a stereo
wireless Transmitter or Receiver, using Bluetooth® wireless technology.
As a Transmitter (TX mode)
In TX mode, beamit can wirelessly stream audio from a non-Bluetooth device
(HDTV / Computer) to any Bluetooth audio receiver that supports the A2DP
Bluetooth profile, such as a Bluetooth headphone, Bluetooth speaker, or
dedicated A2DP receiver.
As a Receiver (RX mode)
In RX mode, beamit enables wireless audio streaming from any Bluetooth
enabled smartphone, computer or tablet to any non-Bluetooth music system
or powered speakers.
FEATURES
HOME AUDIO SYSTEM
SMARTPHONE
TABLET
POWERED SPEAKERS
CAR AUDIO
COMPUTER
TV
COMPUTER
GETTING STARTED
The following instructions will help you get started before connecting beamit
to your devices.
Step 1: Stick one side of the included double sided sticky gel mounting strip to
the bottom of beamit. Mount beamit on to the side or top of your TV or audio
system.
Avoid placing beamit behind the TV or any audio device.
Step 2: Plug the included Micro - USB charging cable into the USB power
adapter / any powered USB port** and the charging port on the rear of the unit.
Step 3: Select your choice of mode (TX / RX) by sliding the toggle switch
situated on the rear of beamit. The LED light will start flashing indicating the
unit is swithed “ON”.
To switch off beamit, slide the TX / RX toggle switch to the “OFF” position.
**The USB outputs of some TVs do not provide a stable current. It is
recommended to use a USB power adapter to power beamit.
TX Mode RX Mode
6
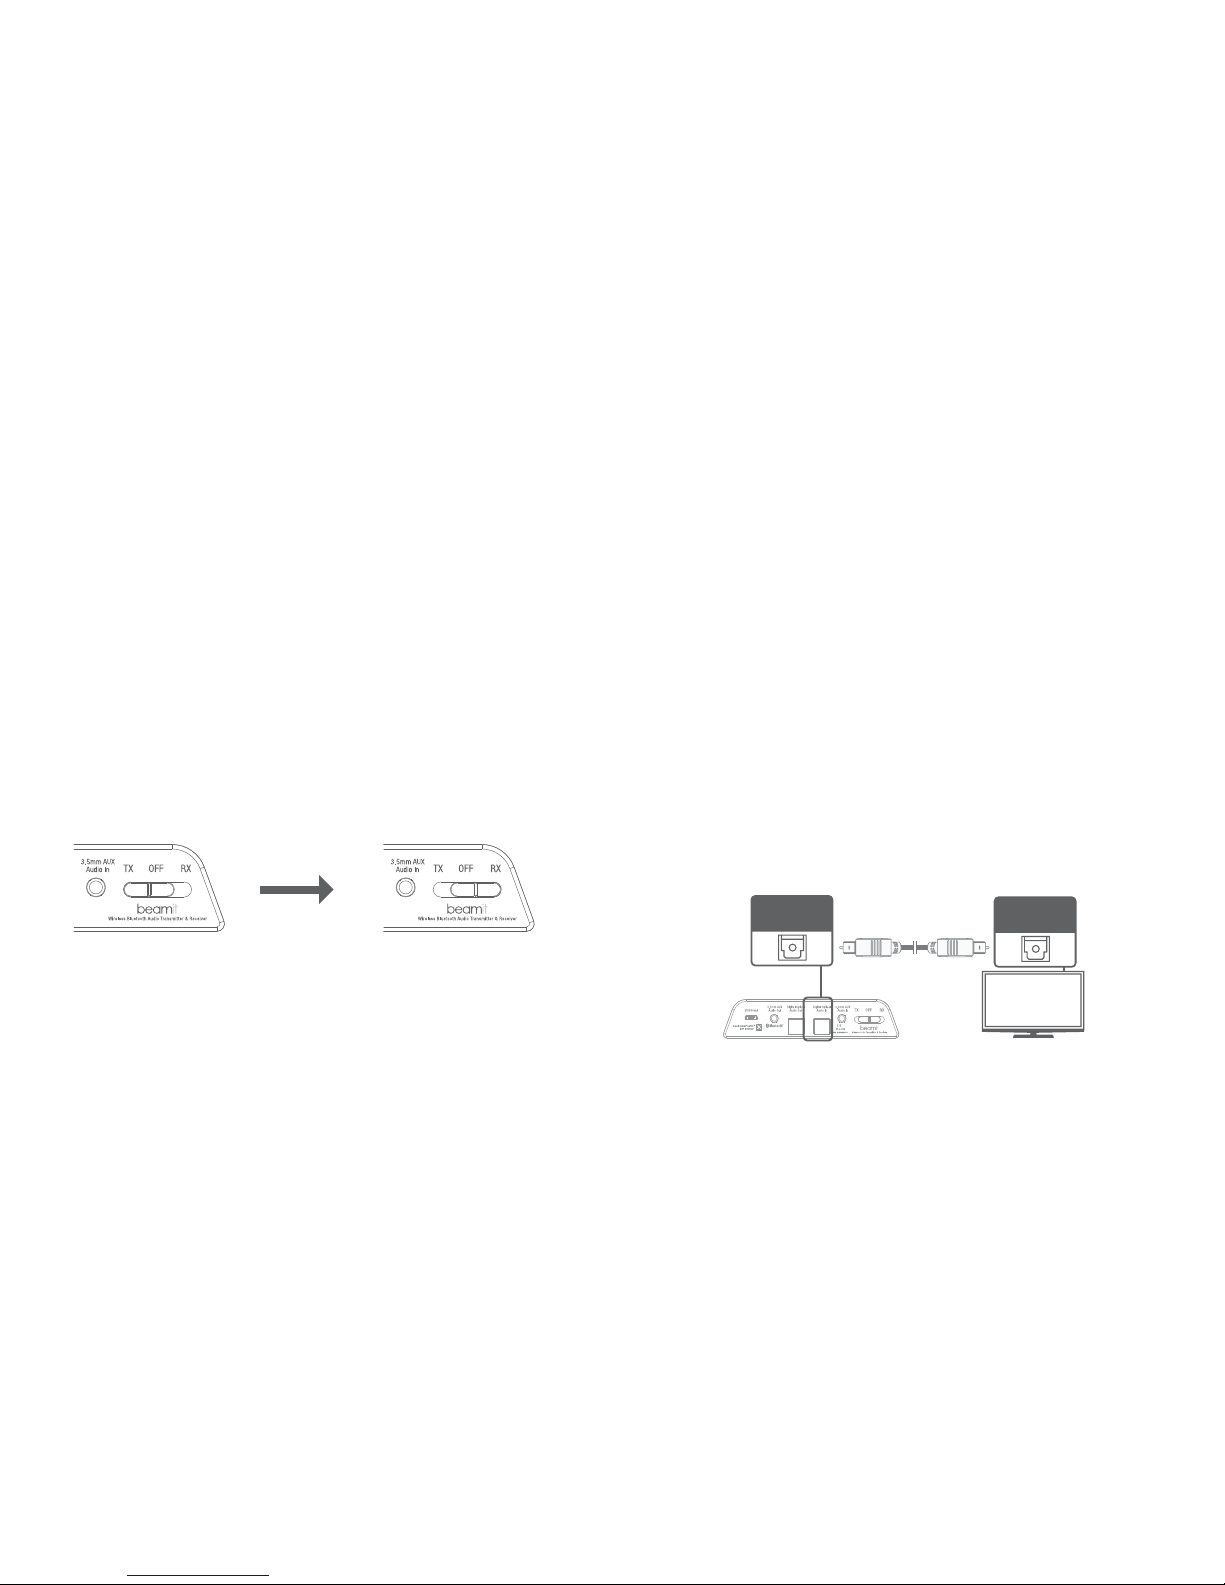
SETUP: CONNECTING IN TX MODE
Connecting to a TV or Computer
AUDIO INPUTS are used with TX MODE ONLY – When in TX mode beamit
needs an audio source to transmit. It must be fed an audio signal from a
connected device such as a television, video game system, computer,
mp3 player, etc.
The following instructions will help you connect beamit to your TV or
computer and pair with your Bluetooth headphones, speakers or receivers.
beamit provides three connection options.
Option 1: Digital Optical Audio Out (TOSLINK)
Newer TV’s are usually outfitted with a TOSLINK digital optical connector.
Plug the included fiber optic TOSLINK cable firmly into the “OPTICAL AUDIO
OUT” on the TV and the “OPTICAL AUDIO IN” of beamit.
If you have successfully connected the TOSLINK cable and you are still not
receiving any sound, please make sure that your audio output settings on
your TV or other relevant device are set to PCM.
Auris Inc., DE, U.S.A.
Designed in U.S.A. Made in China
Digital Optical
Audio In
TV
Digital Optical
Audio Out
7
 Loading...