

Auria EQ276W-1 User Manual
IPS MONITOR
EQ276W-1
USER GUIDE


CONTENTS
Getting Started ........................................................................................... 2
Setting up your Monitor ........................................................................... 3-6
Connecting your Monitor to your computer ............................................. 7-9
Using your Monitor ................................................................................... 10
Adjusting your Monitor’s Settings......................................................... 13-20
............................................................................... 11-12
Troubleshooting .................................................................................. 21-22
Specifications ..................................................................................... 23-24
Preset Display Modes ......................................................................... 24-26
Care and Safety .................................................................................. 26-28
Warranty Statement............................................................................. 29-31
1
Operator Interface

GETTING STARTED
Your IPS Monitor is designed to work seamlessly with Windows
may also use it with Apple devices via Apple’s mini DVI connector.
It features a 27” LED/LCD backlit screen with 2560 x 1440 resolution.
In this user guide you will learn how to:
• Set up your monitor
• Connect your monitor to a computer
• Adjust your monitor’s settings
Important
Carefully read your monitor’s set-up instructions and safety guidelines on
pages 26-28 before you set-up and use your display. To download the
specifications for your monitor please visit www.eqdcorp.com
2
devices that contain a Display Port, HDMI, DVI, or VGA input.You

SET-UP YOUR MONITOR: STEP ONE
Check to make sure your packaging includes each of the following:
1. IPS Monitor / Monitor base
2. Signal Cable (VGA, DVI cables)
3. Power cord
4. AC/DC Adapter
3
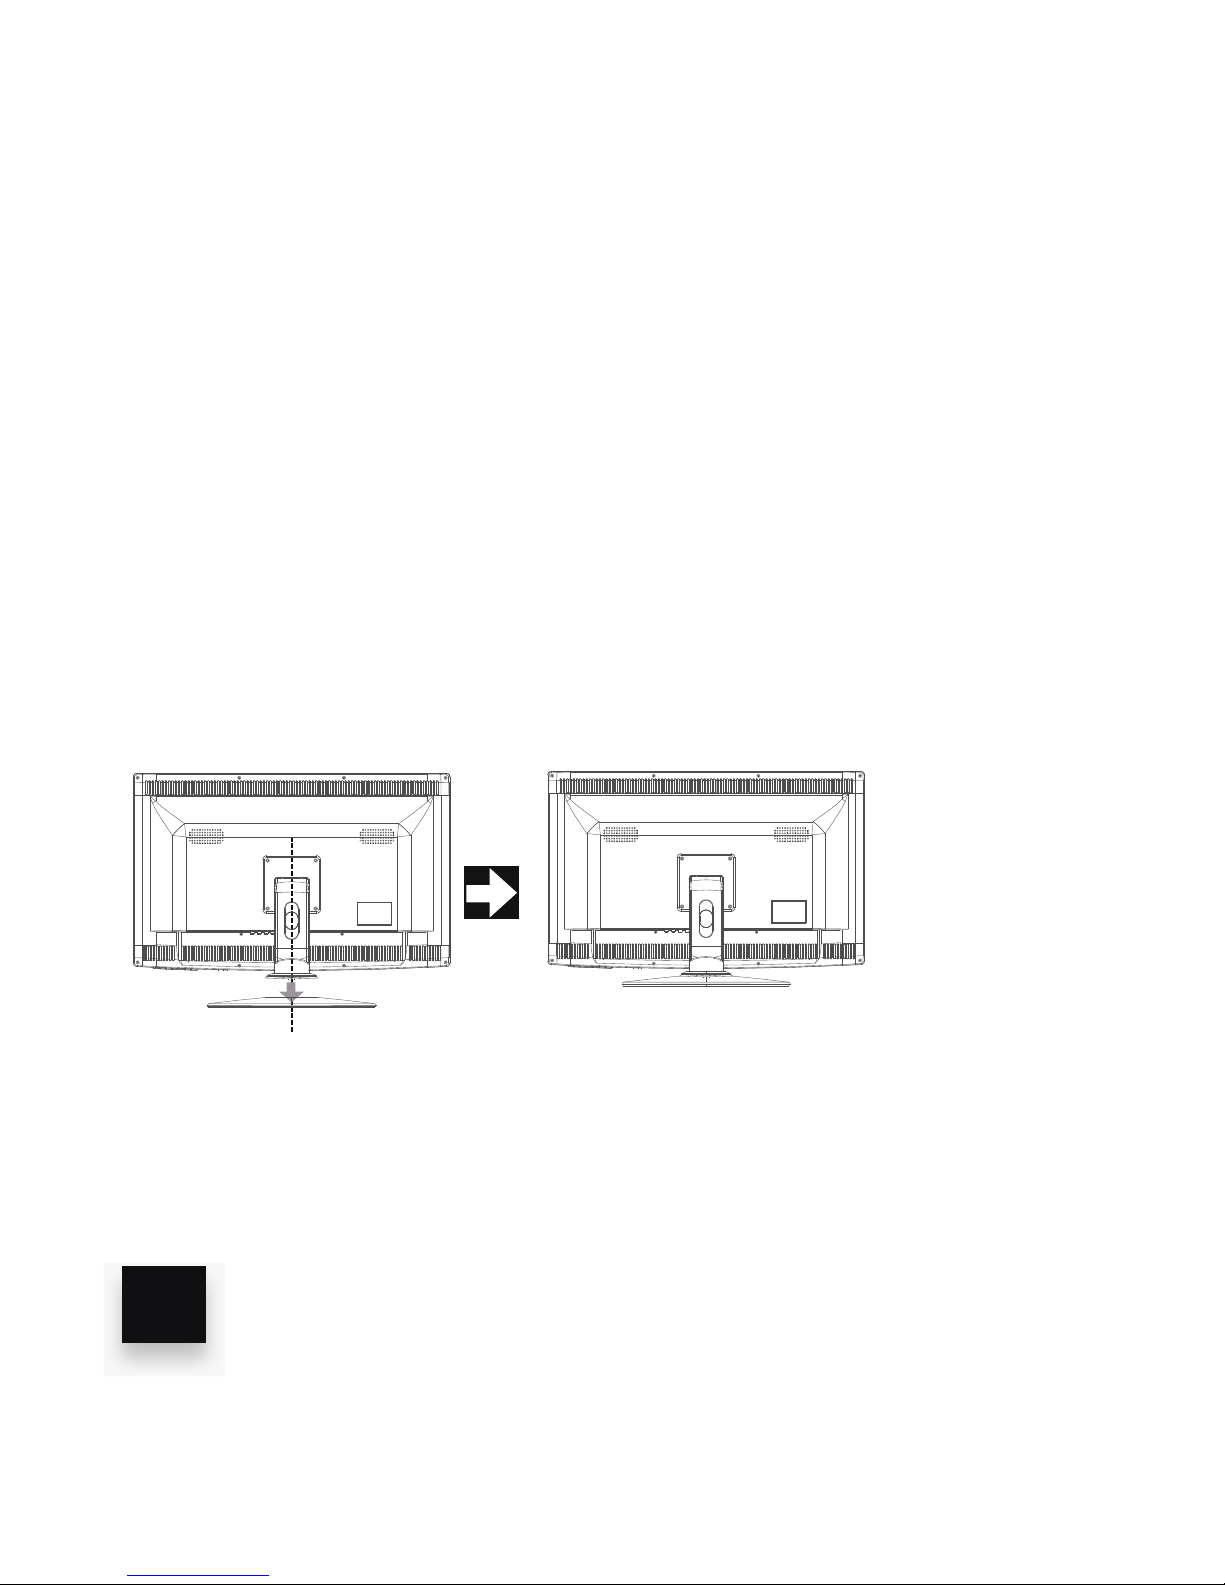
SET-UP YOUR MONITOR: STEP TWO
Connect your monitor to the base.
Unpack the monitor and attach the base. For snap-in models tools and
fasteners are not required. If screws have been provided with your monitor
please connect the base as follows:
1. Cover an even stable surface with a soft cloth.
2. Place the LED/LCD Monitor unit face-down on the cloth,rotate and fit the
stand onto th botton of the LED/LCD Monitor units as shown,until the stand
is firmly fixed.
4
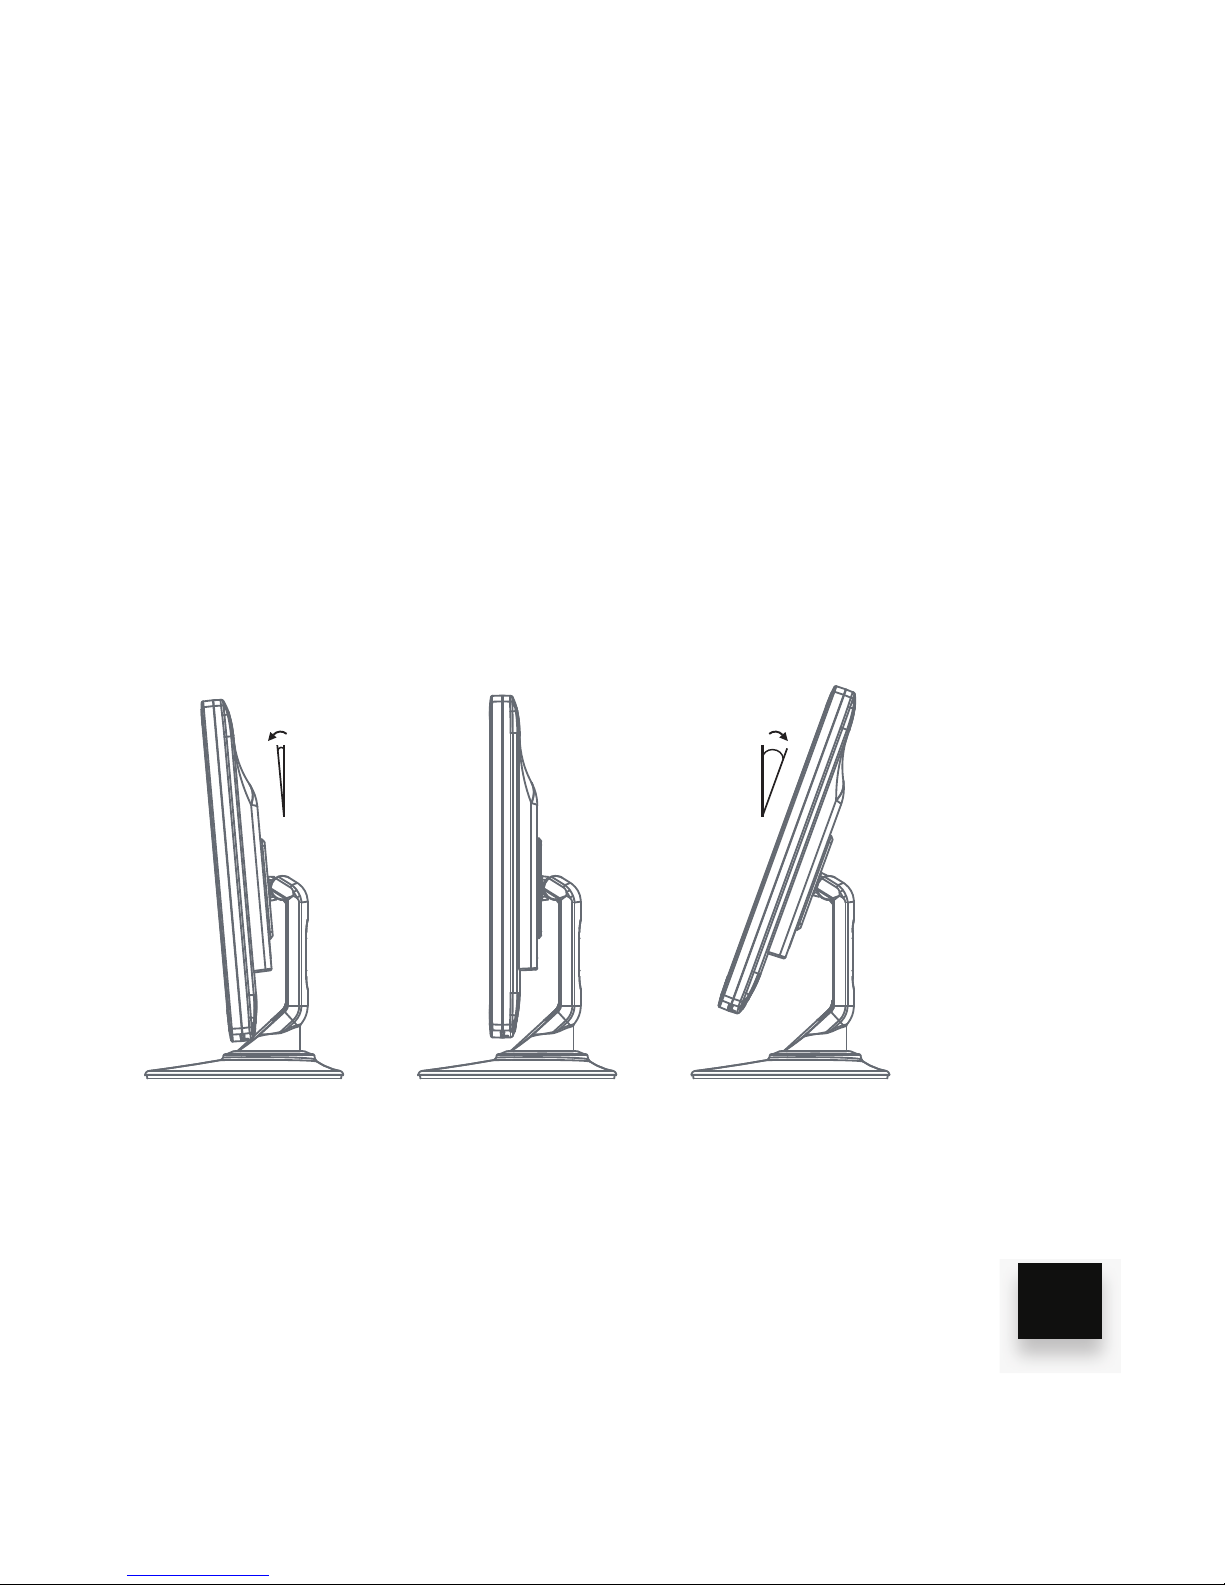
SET-UP YOUR MONITOR: STEP THREE
Follow these instructions to adjust your monitor’s viewing angle:
Hold the base of the monitor with one hand (to keep the screen from shaking)
Using your other hand, grab the side or top of the monitor and tilt the screen
forward or backwards. You may adjust the angle of the display from 5°
(forward) to 20° (back). Do not touch the actual screen when you adjust view
angle of the monitor as this may cause damage or scratching.
5
5° 20°

SET-UP YOUR MONITOR: STEP FOUR
Connect your monitor to a power source.
1. Connect the output cable from the AC Power Adapter (“The Brick”) to the
DC Power In connector (flat side of connector towards the cabinet rear) on the
monitor.
2. Plug in the IEC Power Cord to the input side of The Brick and your
100/120V or 220/240V AC grounded power outlet using the provided power
cord. NOTE: using the device with voltages other than those listed above may
cause permanent damage to the monitor. It is strongly recommend that you
use a power strip with a surge suppressor.
NOTE: It is suggested that you leave the AC Power Adapter (The Brick) plugged
into 120 VAC source all of the time (do not use the switch on the power strip to turn
the monitor On/Off). Please use the Power Button on the monitor to turn On/Off.
When the monitor is off, the Brick goes into “stand-by” mode (burns 1 or 2 watts)
and the Green LED remains lit.
6

CONNECT YOUR MONITOR TO YOUR
COMPUTER OR DEVICE
Plug in the Cable connecting your desktop, laptop or other device
to your monitor.
Using the Display Port will provide for best performance and resolution.
If Display Port is not available, we recommend using Dual Link DVI or
HDMI 1.4 device.
Notes:
• HDMI 1.4 device does support 2560 x 1440 (WQHD/WQXGA). But you have
to check your signal source & HDMI Cable both support HDMI ver.1.4
• Auria does not recommend using VGA for WQHD/WQXGA.
• If you are using the DVI or VGA video cable, be certain to tighten down the
grounding screws on the connector (on both ends of the video cable).
Turn on the source device then turn on the monitor (push power button on
the cabinet). For the best performance, use 2560 x 1440 (WQHD/WQXGA)
graphics’ mode (If supported by your graphics card).
7
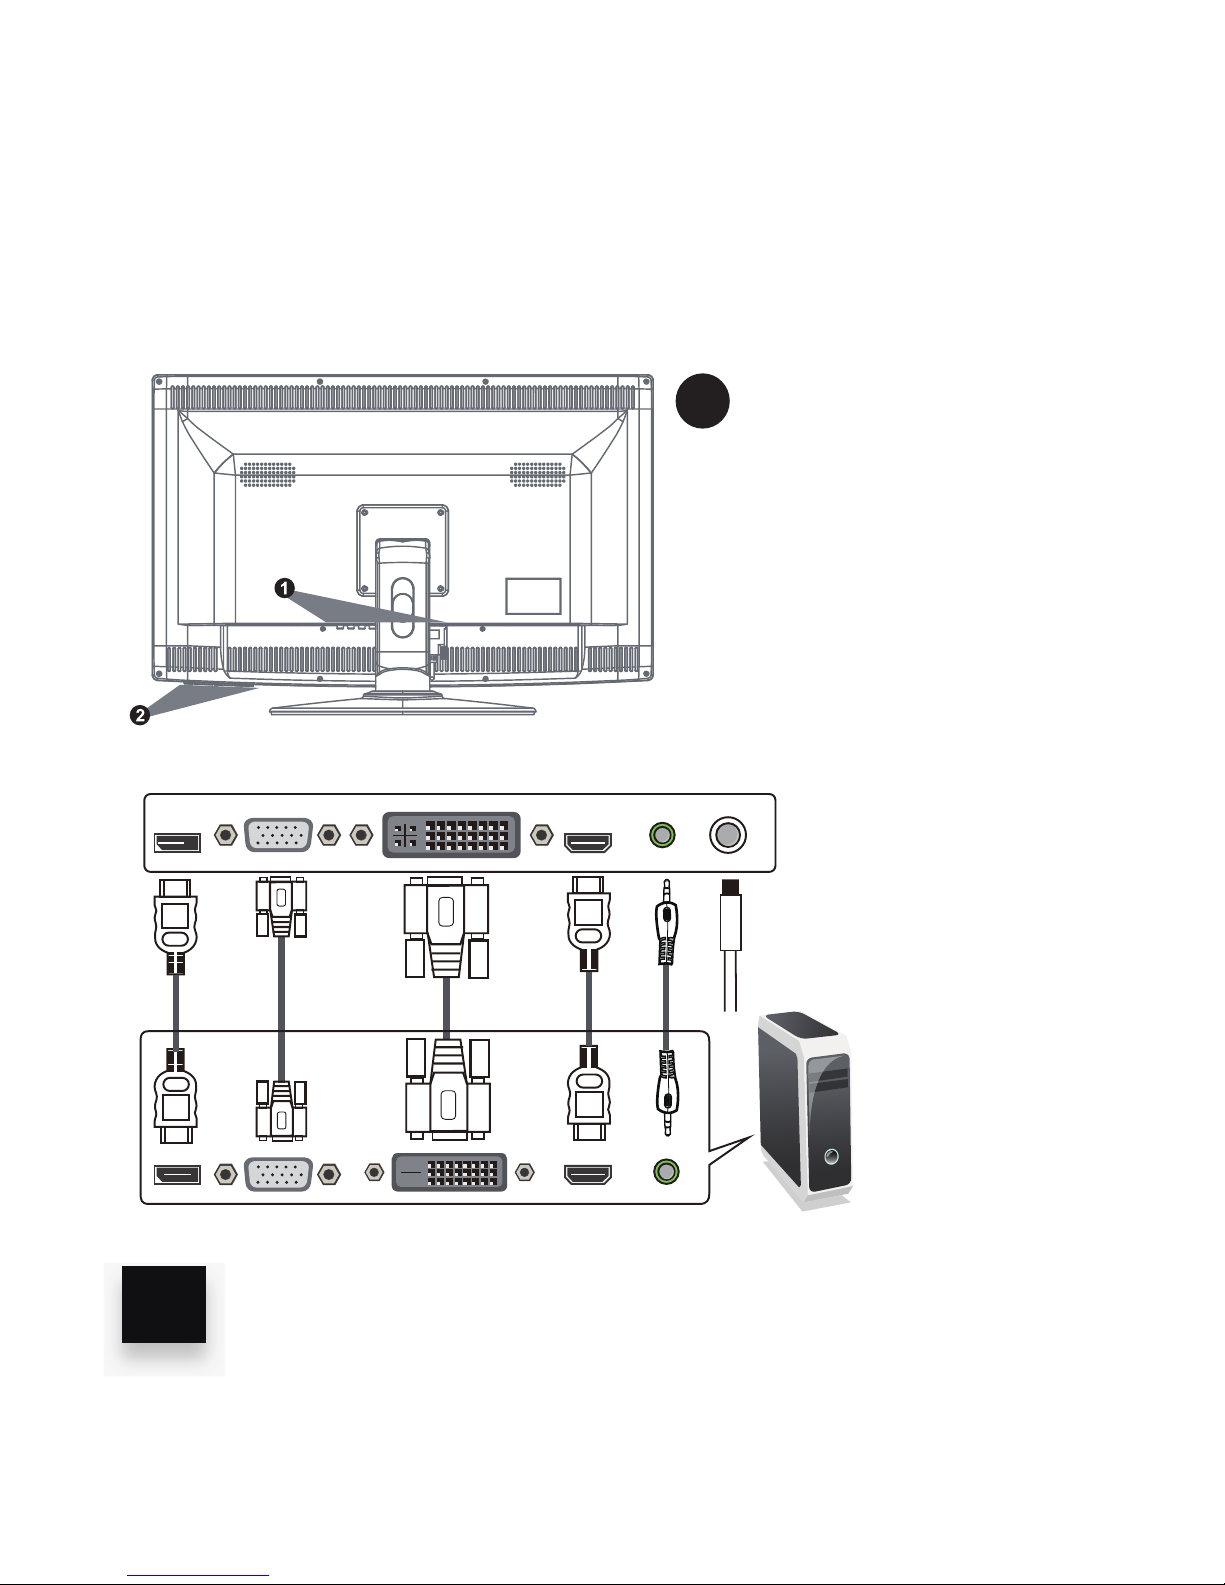
DC Audio HDMI DVI VGADP
Mainframe computer
CONNECTING YOUR MONITOR:
FOR YOUR REFERENCE
Port Connections
(Left to Right)
• DP (Display Port)
• VGA
• DVI
• HDMI
• AUDIO IN
• DC (power)
1
8
CONNECTING YOUR MONITOR:
FOR YOUR REFERENCE
9
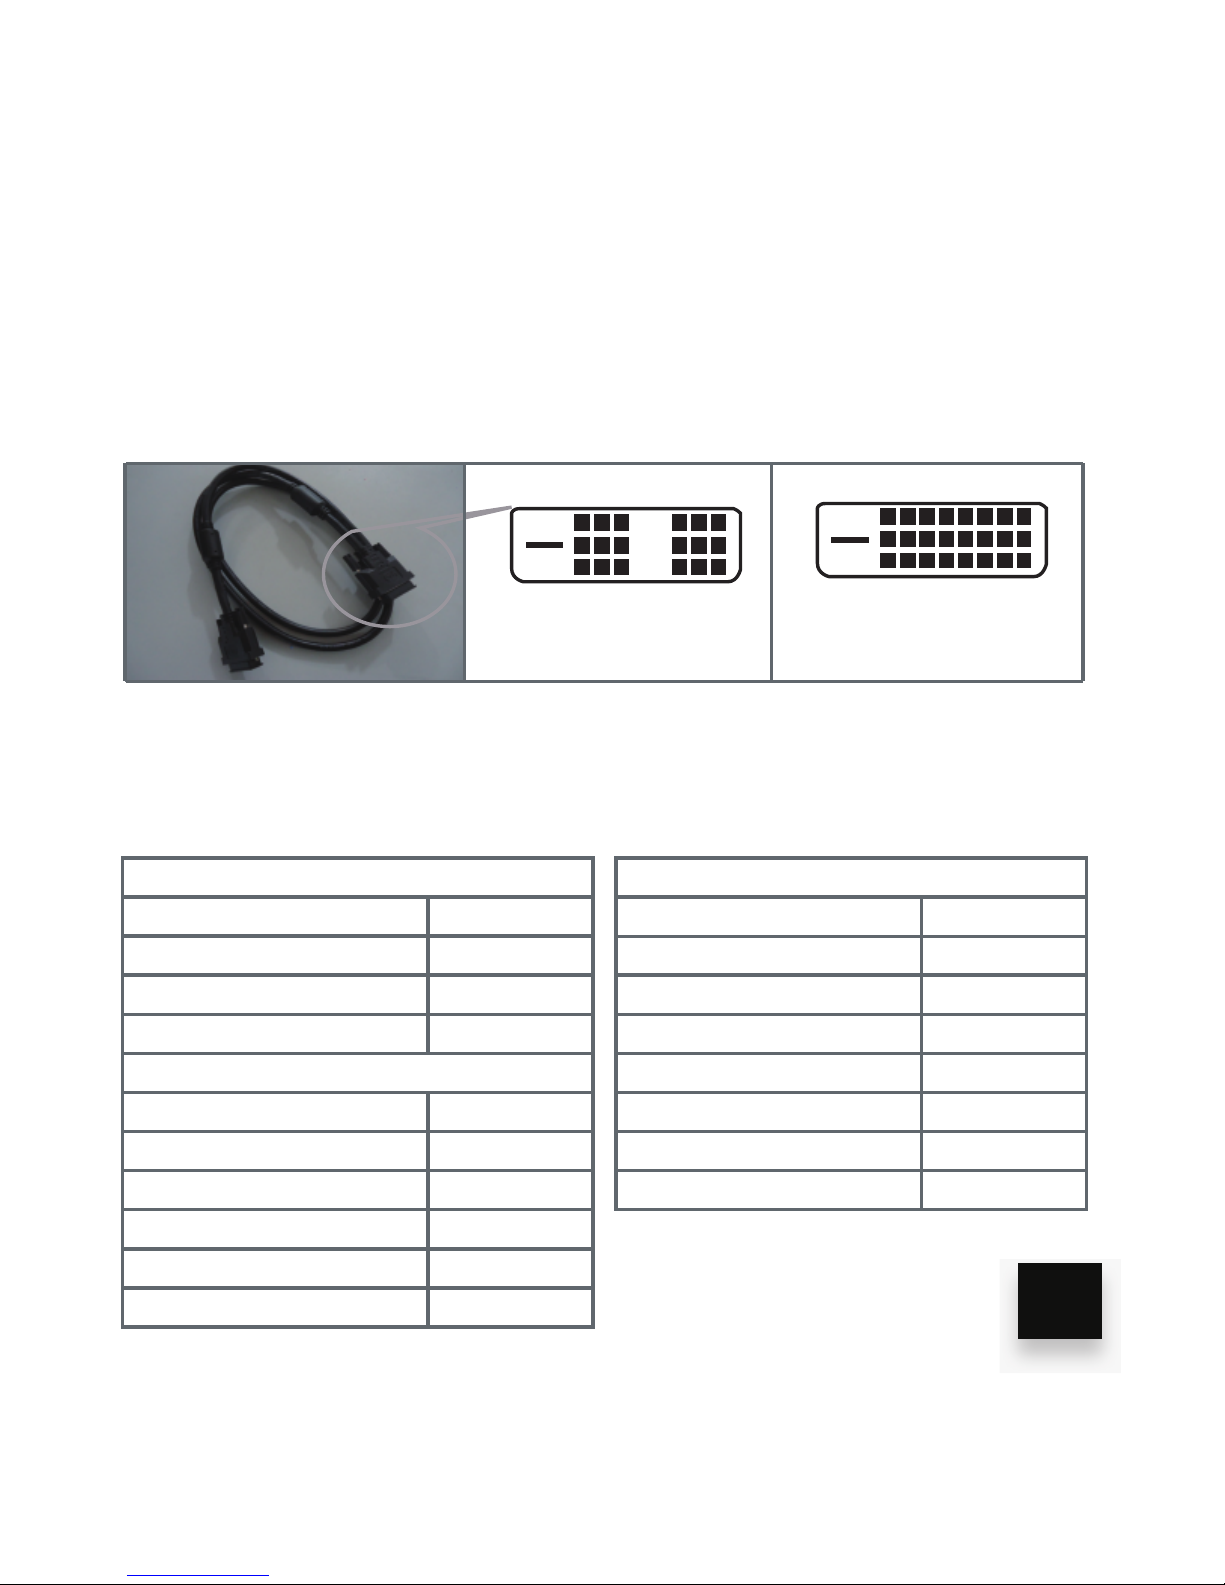
DVI-D(Single Link)
18+1 needle DVI cable
support the resolution 1920 x 1080
DVI-D(Dual Link)
24+1 needle DVI cable
support the resolution 2560 x 1440
When using a DVI cable, make sure it is a dual link cable, as only a dual link
cable will support 2560 x 1440 Resolution. If using a DVI to HDMI cable, the
DVI end must be dual link.
Computer or Signal Source
Mini Display Port
Monitor
Display Port
Computer or Signal Source
Mini Display Port
Monitor
HDMI
Computer or Signal Source
Mini Display Port
Monitor
DVI
1.Not work
Computer or Signal Source
HDMI
Monitor
Display Port
Computer or Signal Source
DVI
Monitor
Display Port
2.Work
HDMI
Computer or Signal Source
Monitor
DVI
Computer or Signal Source
Display Port
Monitor
HDMI
Computer or Signal Source
HDMI
Monitor
DVI
Computer or Signal Source
DVI
Monitor
HDMI
2. work
1.If you want to use transferring cable or connector on the monitor,please refer to
the table and note that some kind of combination is not work.
2.Please also note the table's "DVI" interface all means DVI-D Dual link,as you
choose your transferring cable or connector,please must note it.
 Loading...