

Page 1
Installation Guidelines
SFS-112
SonoFlat Systems
™
Congratulations on purchasing a SonoFlat™ SFS-112™ System from Auralex® Acoustics.
You’re now on your way to creating a world class listening environment.
SonoFlat Systems offer a sophisticated look by utilizing a specialized flat-faced cut of
Auralex’s industry-leading Studiofoam. The SFS-112 system contains both SonoFlat Panels
and SonoColumns, which when used together, provide incredibly effective broadband
absorption in any room. Use the SFS-112 alone for treatment of small to medium-sized
rooms or in combination with other Auralex products for full control of larger spaces.
Thank you for Purchasing Auralex
®
Total Sound Control
SonoFlat SFS-112 System Components
24
SonoFlat Panels™
SonoCollars™
Tubetak Pro™
®
Products!
4
4
5
SonoColumns™
843 -606 | R ev. 1 | 06260 6 EF
Page 2
SonoFlat SFS-112 General Information
Recommended Additional Installation Materials
• Caulk-gun (for Tubetak Pro) • Tape measure
• Carpenters Level • Small ladder (depending on ceiling height)
• Pencil
Optional Additional Installation Materials
• Foamtak Spray Adhesive* • T-Pins
* This system includes Tubetak Pro Adhesive, which is safe to use on all included products. You may wish to use Auralex’s Foamtak Spray Adhesive
for quicker drying times. Foamtak is available through all Auralex authorized dealers.
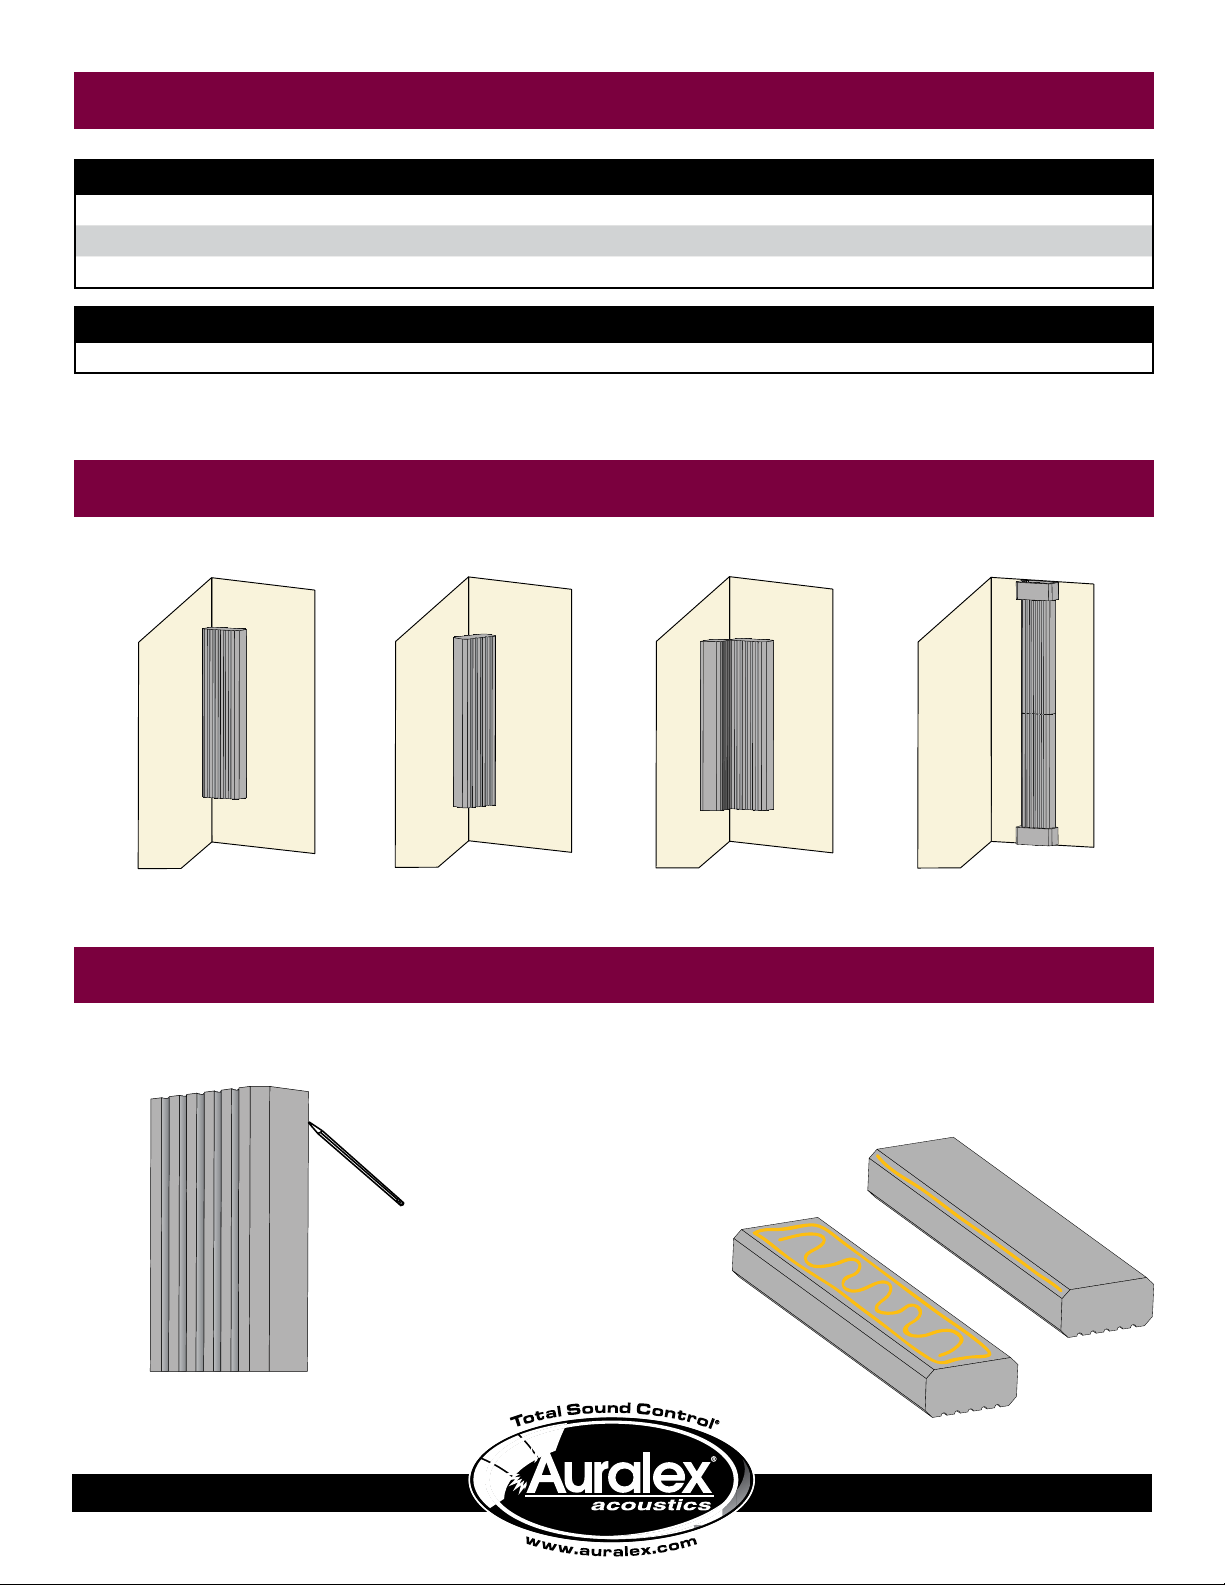
SonoColumn Placement Options
➋➊ ➍➌
Flush in corner At 45° to corner
SonoColumn Installation Guide
Mark intended location of each SonoColumn.
➊
Side-by-side in corner
Apply Tubetak Pro to either the back or the
➋
beveled edge of the SonoColumn, depending
on chosen placement.
On wall w/ Collars
Or
Page 3

SonoColumn Installation Guide Continued
TIP
TIP
Carefully press SonoColumn to the marked
➌
location of the wall or ceiling. Maintain continuous
pressure. Depending on environmental and
surface conditions, it will take anywhere from
2-4 minutes to hold.
For a stronger hold, with the adhesive applied, press
SonoColumn firmly into place, immediately remove it and
press it firmly again into the same spot.
SonoFlat Panel Installation Guide
Mark intended location of each SonoFlat
➊
Panel on the wall or ceiling.
Place SonoCollar around SonoColumn, if
➍
desired. The inside section of each SonoCollar
can also be used to increase the height of the
SonoColumn by 6”.
Or
Apply Tubetak Pro to the back of the SonoFlat
➋
Panel, as pictured.
Carefully press SonoFlat Panel to the marked
➌
location of the wall or ceiling. Maintain continuous
pressure. Depending on environmental and
surface conditions, it will take anywhere from
2-4 minutes to hold.
You can use T-Pins to temporarily hold the panel in place
while the adhesive sets.
Page 4

SonoFlat Installations
SonoFlat System Installations
See the Auralex® Acoustics website, www.auralex.com, for more information
about these and other Total Sound Control® products.
These are general recommendations. Should you have any additional questions about the installation of your
SonoFlat™ System, feel free to contact an Auralex® Application Specialist
via email at appsupport@auralex.com or call 1-800-95-WEDGE.
 Loading...