

Page 1
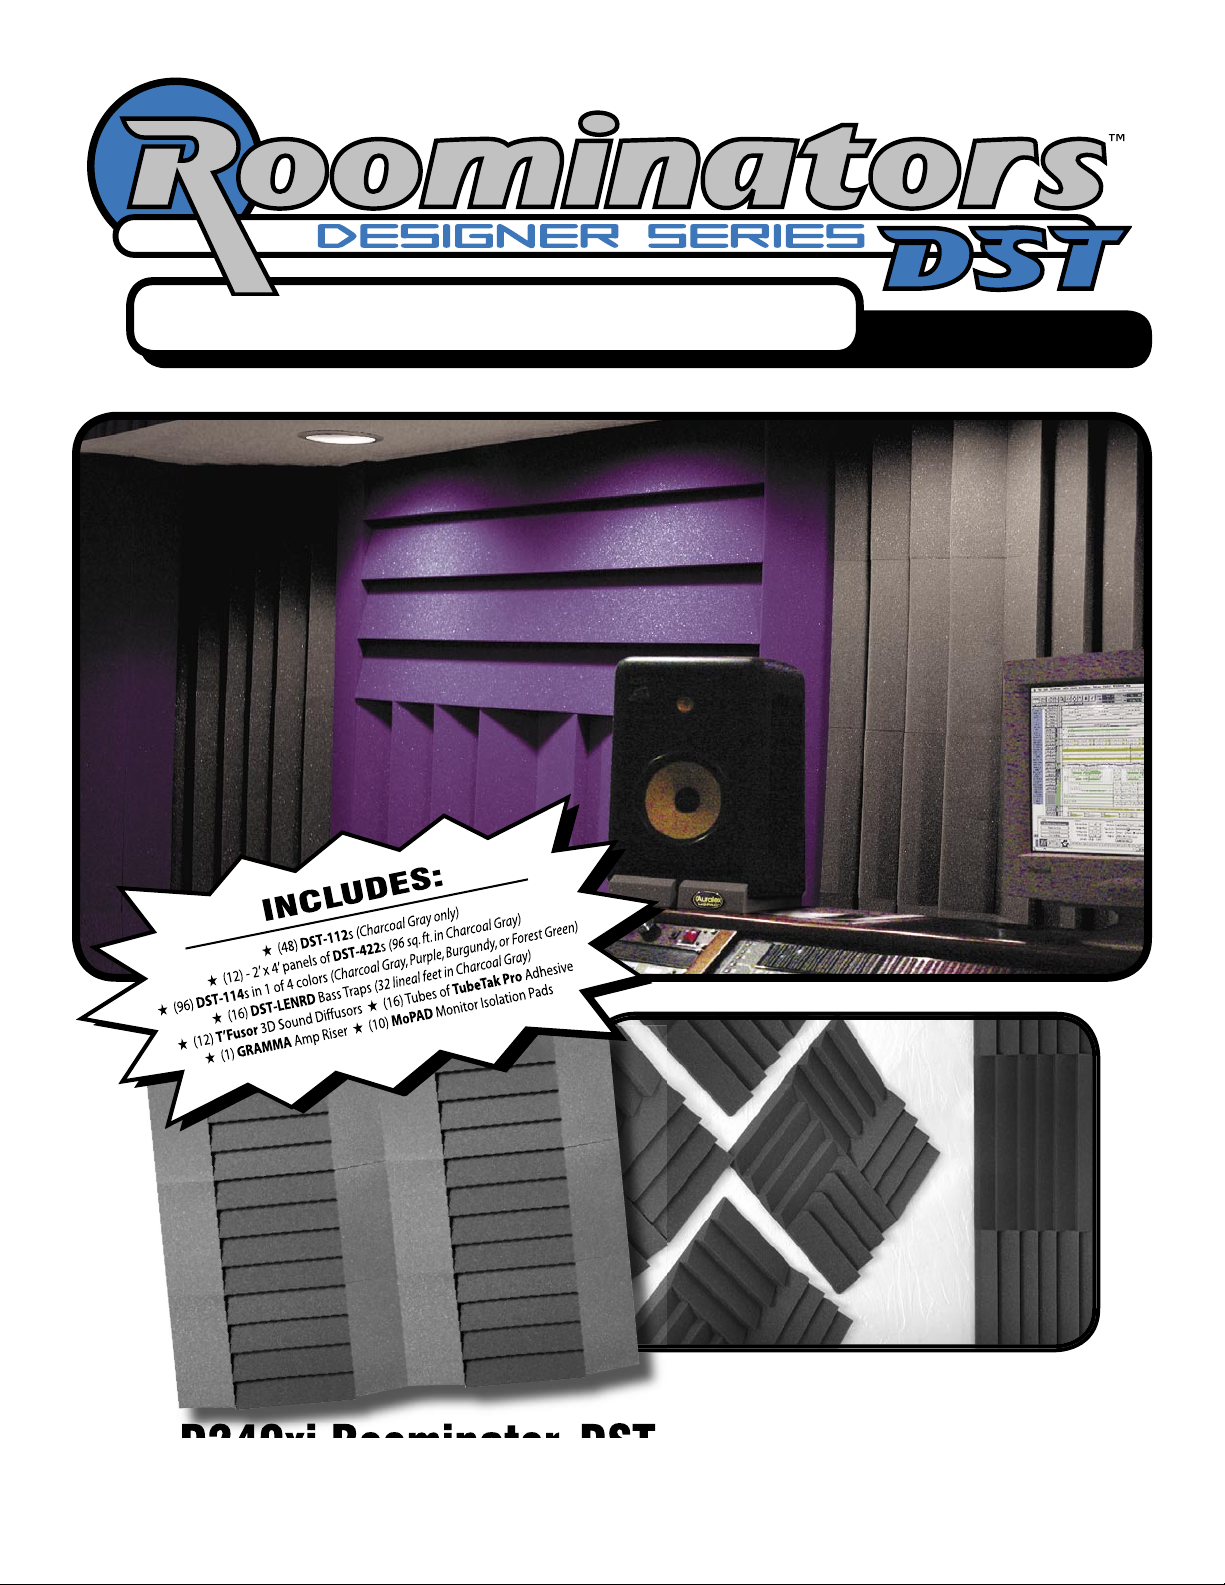
Roominators D240xi-DST™ Kit
Congratulations! You now have a higher quality listening environment.
Proper placement of the Studiofoam-DST™ panels and DST-LENRD™ Bass Traps
will insure greater clarity in your listening environment.
Page 2

Roominators D240xi-DST™ Kit
The Auralex D240xi Roominator-DST™ Kit is
designed to reduce uncontrolled ambience
in control rooms, live rooms and home
theaters while providing a professional,
upscale appearance. Proper placement of
the Studiofoam-DST™ panels, DST-LENRD™
Bass Traps and T’Fusor™ 3D Sound Diffusors
will insure greater clarity in your listening
environment. Please refer to the placement
suggestions included. You’ll end up with the
best room you’ve never “heard.”
D240xi Roominator-DST General Guidelines
For superior acoustics, Auralex suggests mounting DST-LENRD™ Bass Traps in the corners of your room (for
low frequency control), Studiofoam-DST™ panels for absorption and T’Fusor 3D Sound Diffusors for diffusion
on the walls and ceiling.
Please use the following general guidelines when installing your D240xi Roominator-DST Kit:
A. Using Tubetak Pro™, mount DST-LENRD Bass Traps
in each 90° vertical corner. We suggest you install the DSTLENRDs starting at the ceiling and working your way down.
However, we understand that not all corners are the same. If
you have doors, windows or other obstacles blocking your
corners, it is acceptable to place them in the horizontal wall/
ceiling corners as well. You may desire to space out the DSTLENRDs so that you reap the benets from having the edges
exposed.
B. Using Tubetak Pro™, mount Studiofoam-DST
panels on the walls. The pattern in your room does
not have to be identical to those shown in the pictures,
but treatment spread evenly across these surfaces is
strongly encouraged. Creating a border around the
top of the room with DST-422 panels can create a
consistent, upscale look, while the DST-112 and DST114 panels can be used for additional wall and ceiling
treatment. This is the “Designer Series Treatment” so
be creative and have some fun with the design aspect
of the treatment.
Page 3

C. T’Fusors combat hot spots and nulls by alleviating at, reective
room surfaces with scientically designed surfaces of varying shapes,
sizes and angles. Standing waves and utter echoes are minimized
without signicantly reducing acoustic energy in the space. Placement
of T’Fusor 3D Sound Diffusors is largely subjective. The most popular
choices are either on the rear wall and rear portion of the ceiling behind
the listening position or centered between the listening position and the
speakers on the ceiling as pictured. The best way to install the T’Fusors
is with mechanical fasteners such as screws or nails. Be sure to rotate
each T’Fusor 90° from the adjacent one for best results. Also, stuff
the back cavity of each T’Fusor with insulation, extra Studiofoam, or
blankets to reduce resonance and increase T’Fusor performance.
D. GRAMMA is an amplier/subwoofer
otation device that helps reduce sound
transmission (especially low frequencies) by
decoupling the speaker enclosure from the
existing structure utilizing high-density foam.
Players, engineers, and listeners alike should
enjoy increased tonal denition and clarity in
effects/processing. GRAMMA can be used to
isolate instrument ampliers, stage monitors,
and subwoofers from tracking room oors, live
stages, even the oor of a home theater.
E. MoPADS are high-density foam products
that are designed to decouple your speakers
from any surface they set on in your room,
whether that be a desk, shelf or speaker
stands. This will “tighten” the tone of your
monitors - especially at the low end - and help
to reduce the amount of vibration transferred
to other gear that would normally be coupled
with the monitors, thus degrading your sound.
Page 4

Other General Suggestions
1. When treating the front and side walls, try using a mirror to ascertain where reections are coming from.
Simply have a friend move a mirror around the walls and ceiling while you are sitting at the listening position.
Anywhere you can see your speakers in the reection is a likely surface to treat with an Auralex DST panel!
2. Do not worry about placing treatments below approximately 18” on the walls-use them at ear level and on
the ceiling for best results. The number of panels and placement on each surface can vary given your specic
situation. Spread the Studiofoam out to maximize acoustical benets. If you wish, you can cut the Studiofoam
into smaller pieces/shapes using an electric carving knife and a steady hand. E.g. cutting 2’x4’s into 2’x2’s
is quite popular. Try to avoid using the same pattern on parallel walls unless you shift the pattern over. Try to
avoid large amounts of untreated space opposite untreated space.
3. Remember that these are only guidelines. If you have furniture or gear in the way, simply work around it
as best you can. Auralex acoustic control products are very forgiving. Placement on the walls is not an exact
science. Just having DST-LENRDs, DST-Studiofoam and T’Fusor 3D Sound Diffusors in the room will improve
your mixing, recording or listening environment.
4. Other less permanent methods, such as our Vel-X Mounting Kit, nails, pins, screws, etc. can be used to
mount the DST-LENRDs or DST-Studiofoam panels for easy removal later. Also, adhering the treatment to
pegboard or light plywood and mounting these panels with mechanical fasteners can be an easy, temporary
way to mount the products to the wall and ceiling surfaces.
5. Align the panels however you choose—tests have shown that there is no discernable, acoustical difference
between the different alignments of the panels (i.e., horizontal, vertical, or diagonal wedges will all be equally
effective).
Front View
Rear View
Thank you for purchasing the Auralex D240xi Roominators -DST™ Kit!
Check out the Auralex Catalog or go to www.auralex.com for details on all the great Auralex sound control products!
 Loading...