

Page 1

Installation Guidelines
Elite Pro Systems
™
EPS-168
T
Congratulations on purchasing an EPS-168T™ System from Auralex® Acoustics. You’re
now on your way to creating a world class listening environment.
Elite Pro Systems offer a sophisticated look by utilizing products covered with specialized
acoustical fabrics. The EPS-168T system contains B22 ProPanels™, CT45 Bass Traps™ and
ProFusors™, which when used together, provide incredibly effective acoustical control in
any room. Use the EPS-168T alone for treatment of small to medium-sized rooms or in
combination with other Auralex products for full control of larger spaces.
Thank you for Purchasing Auralex
®
Total Sound Control
Elite Pro System EPS-168T Components
20
B22 ProPanels
™
2
Tubetak Pro™
CT45 Bass Traps
8
48
Z-Clips
®
Products!
6
™
ProFusors
80
Impaling Clips
845 -6 06 | Rev. 1 | 07050 6 EF
™
Page 2
Elite Pro System EPS-168T General Information
Marked panel
outline
TIP
CAUTION
Recommended Additional Installation Materials
• Power Drill • Tape measure
• Carpenters Level • Small ladder (depending on ceiling height)
• Nail Set • Hammer
• Pencil • 32 2.5” 4D finish nails
• Straight Edge • 256 .75”-1” drywall screws
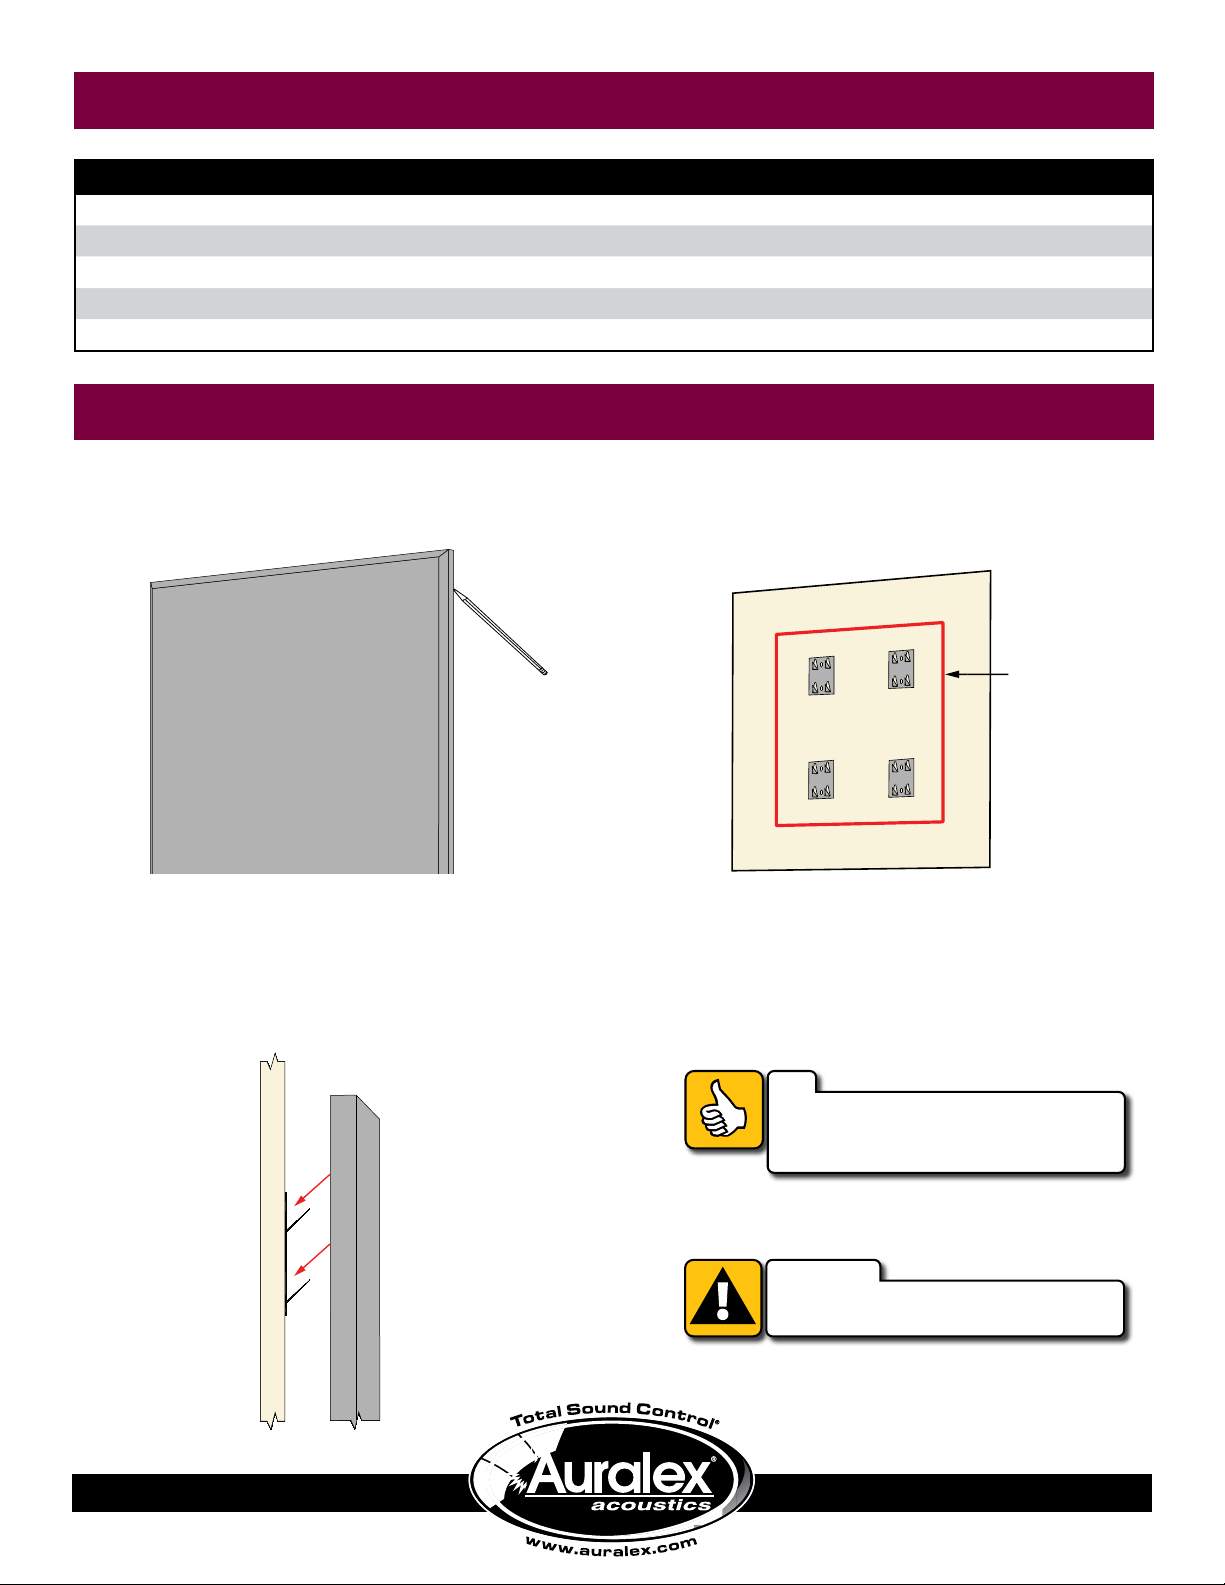
B22 ProPanel Installation Guide
Mark intended location of each B22
➊
ProPanel on the wall or ceiling.
Start the B22 ProPanel 5/8” above its intended
➌
final height and press downward at a 45° angle
until the panel is flush with the wall surface.
Install four impaling clips within marked B22
➋
ProPanel location using drywall screws.
Exact placement of each clip is not necessary.
For permanent mounting, apply Tubetak Pro
adhesive to the back of the B22 ProPanel
before completing Step 3.
Always use Tubetak Pro on the back of the
panel when attaching it to the ceiling.
Page 3

CT45 Bass Trap Installation Guide
16.75”
TIP
Mark a vertical line 16.75” from the intended
➊
placement corner on both sides.
While continuing to hold panel in place, install
➌
one finish nail though the fabric face and the
hardened edge of the CT45. Make sure finish
nail is installed perpendicular to the wall surface.
Repeat in each of the four corners.
Hold CT45 Bass Trap in corner with edges
➋
aligned to the marked vertical lines.
Using a nail set or other finish nail, carefully
➍
countersink installed nail so its head goes
through the fabric surface of the CT45 but not
through the hardened edge.
Once finish nail has been countersunk into the
➎
panel, there may be a small hole remaining in
the fabric covering. Simply scrape the fabric in
this area with your fingernail and the hole will
completely disappear.
When using lighter colored fabrics,
make sure your hands are clean!
Page 4

Elite Pro System Installations
4”
5.25”
2.75”
4”
Marked inner
rectangle
Traced
ProFusor
Outline
4”
4”
4”
4”
Wall
Hold the ProFusor to the wall or ceiling in its
➊
intended location with the back facing out.
Make sure diffusor is level. Completely trace its
outline.
On the back of the ProFusor, mark a rectangle 4”
➌
in from the outer edge on all sides. Install one ZClip in each corner of the marked inner rectangle
using drywall screws, as shown.
Within traced ProFusor outline, mark another
➋
rectangle 4” in from both sides, 5.25” down from
the top and 2.75” up from the bottom. Install one Z-
Clip in each corner of the marked inner rectangle
using drywall screws, as shown.
Set ProFusor into place.
➍
See the Auralex® Acoustics website, www.auralex.com, for more information
about these and other Total Sound Control® products.
These are general recommendations. Should you have any additional questions about the installation of your
Elite Pro System, feel free to contact an Auralex® Application Specialist
via email at appsupport@auralex.com or call 1-800-95-WEDGE.
 Loading...