

Page 1
™
1258-1210 | Rev. 1 | 122110 TME
™
Sustain
Wave6
Wave6™ Installation Guidelines for Cloud Configuration
The following instructions are provided to assist you in configuring the Wave6 System in an overhead ‘cloud configuration’. This
configuration allows the Wave6 to be hung above a mix or any other critical listening position.
If the Wave6 System is to be mounted to the sidewalls, Auralex Mounting Blocks (included in WaveLens packaging) should be used.
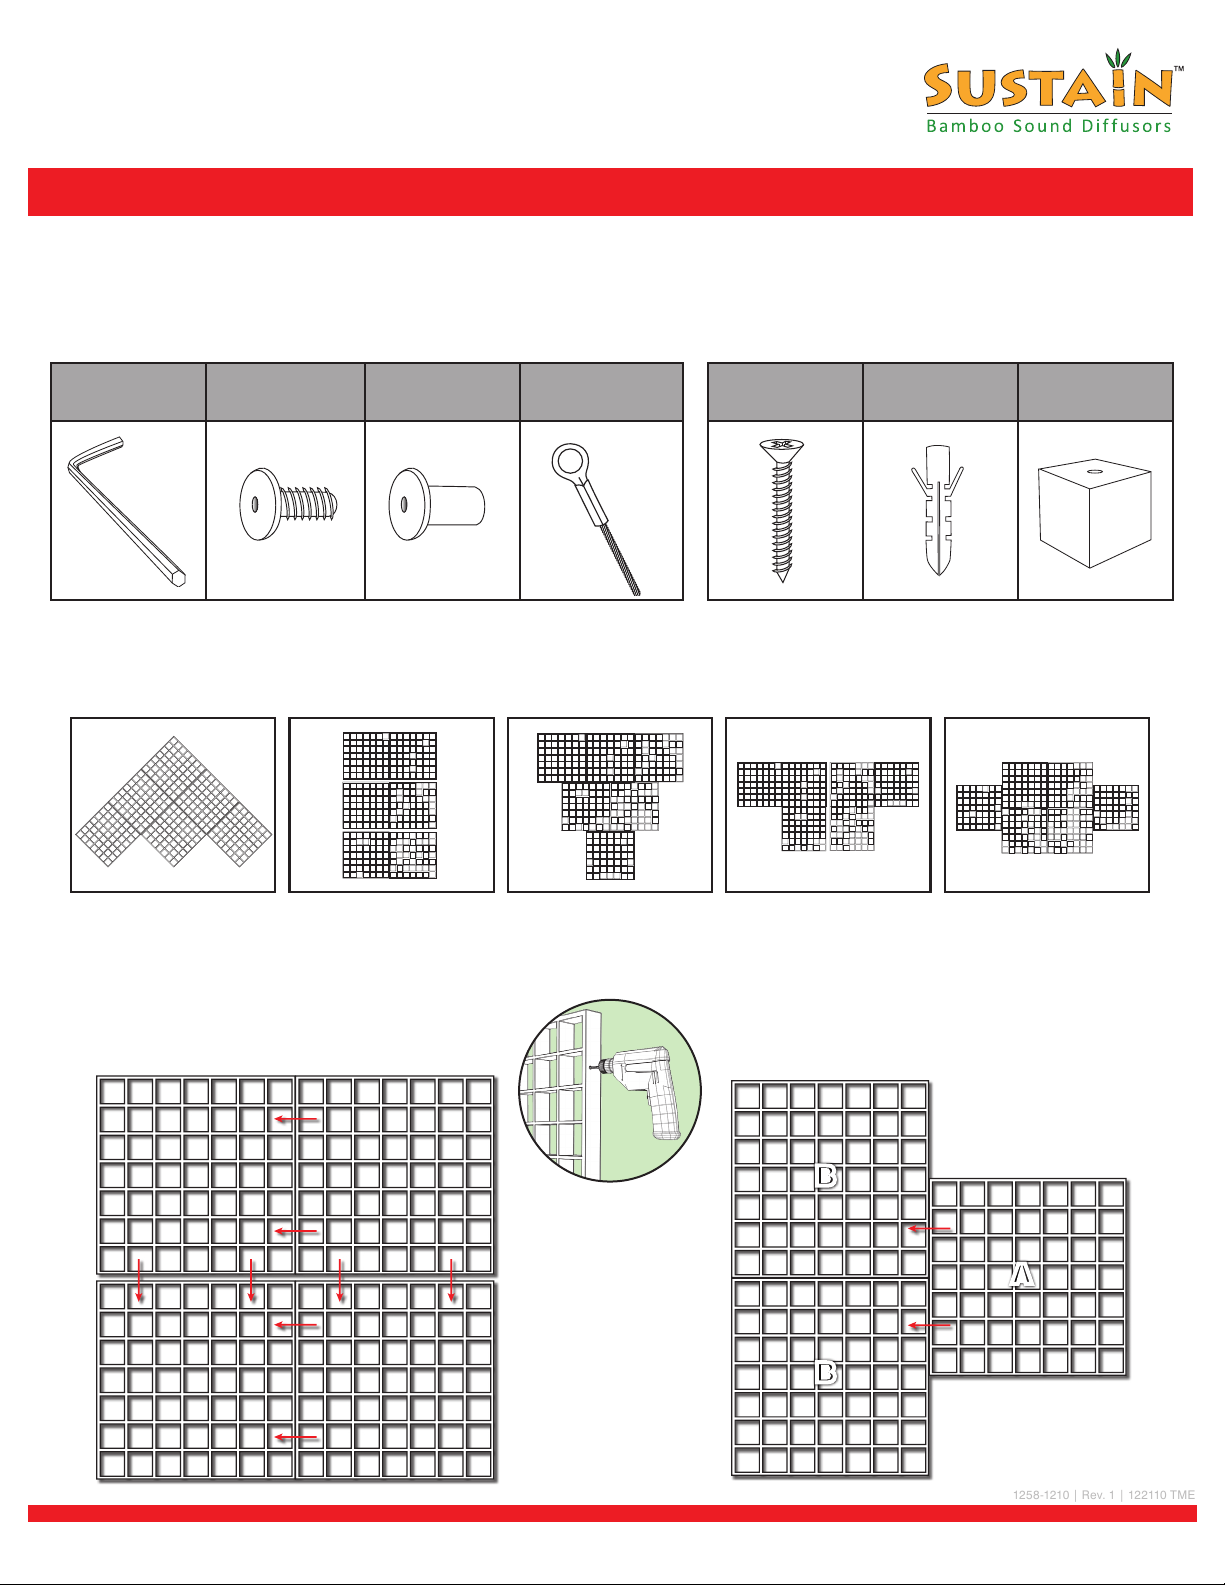
Hanging Hardware Wall Mount Hardware
(2) Hex Wrenches (12) Connector Bolts (12) Connector Nuts (4) Cable Assemblies
Additional items you may need for this install (not included): level, pencil, drill, ladder, drywall screws, cable, chain, aircraft wire, nylon line etc.
CHOOSE LAYOUT: Arrange WaveLens on floor to achieve desired pattern. See below for layout ideas. Ensure the side to be viewed
➊
from below is face down on floor.
(8) Mounting
Screws
(8) Wall Anchors
(24) Mounting
Blocks
➋
MARK & DRILL HOLES: Drill using 1/4” drill bit
Side-By-Side Mounting: Each attached WaveLens should
contain a minimum of 2 connector bolt pairs. Mark the
drill hole position from each end of the WaveLens
using the template on the following page.
Staggered-Mounting: For staggered c onnec tions, mark WaveLens
(A) with the template. Drill holes. Position along side
WaveLens (B) according to desired pattern. Mark drill
hole position for WaveLens (B) through existing drill
hole on WaveLens (A).
B
A
B
www.Auralex.com | 1-800-959-3343 | auralexinfo@auralex.com | Total Sound Control
®
Page 2
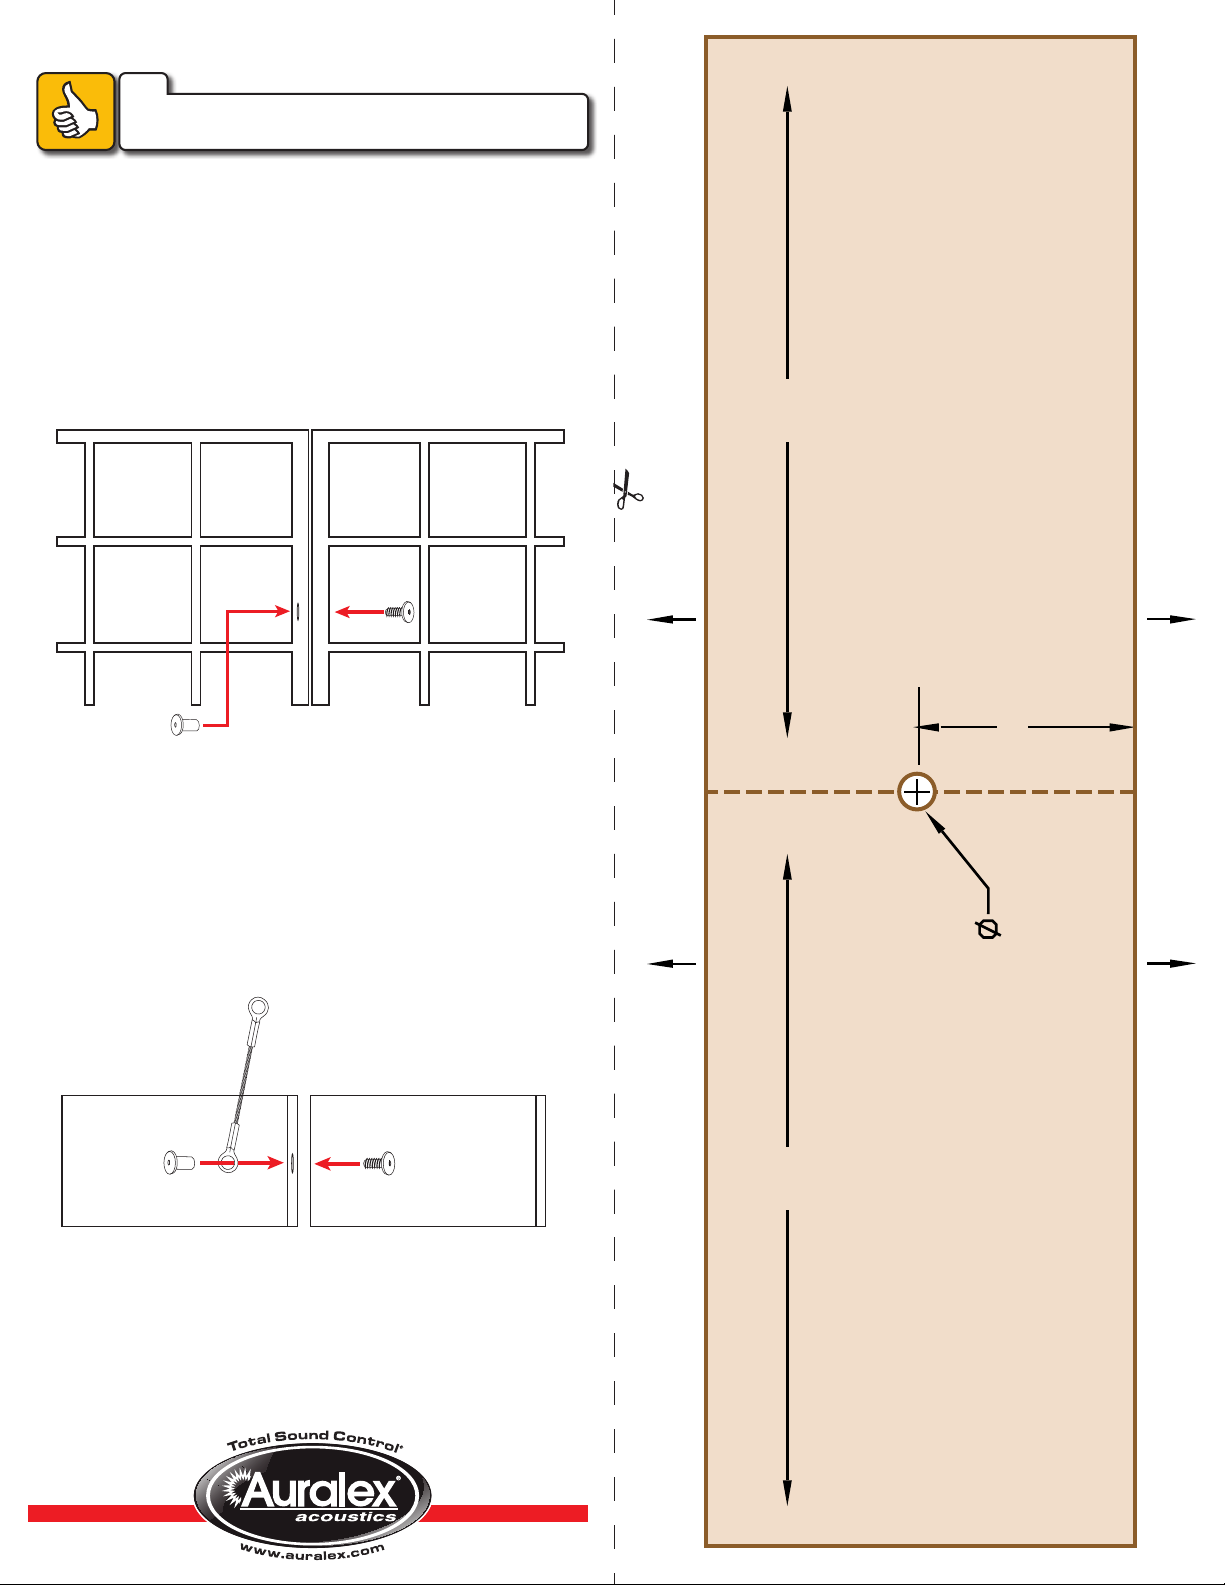
➌
TIP
This side towards ceiling/wall
This side facing towards room
5
1
⁄4" 5
1
⁄4"
From Left Edge
From Right Edge
1
1
⁄2"
use
1
⁄4" drill bit
Do not force connector nut through the WaveLens. If needed,
drill a lit tle bit bigger hole to avoid splitting the bamboo.
BOLT TOGETHER: Prior to assembly, determine which
connector bolt pairs will include the suspension cables.
Assemble these in step 4 below. Insert connector nut
into hole from inside of WaveLens. Line up holes of
opposite WaveLens and thread the connector bolt in
to the connector nut. Secure on both sides with the
supplied hex wrenches. Do not over tighten to avoid
splitting the bamboo. Repeat for each connection.
DRILL TEMPLATE
Use this to drill your Wave Lens
in the correct place. The drilled
hole will be closer to the top
edge of the WaveLens.
Cut along dot ted li ne
➍
HANGING POSITIONS: Thread the connector nut through
the eyelet of the cable assembly and then through the
hole in the WaveLens. Insert the connector bolt into the
matching hole in the adjacent WaveLens. Secure on
both sides with the supplied hex wrenches.
Disclaimer: Auralex Acoustics, Inc. has provided these
instructions as a general installation guide. Auralex is
not responsible for installation of products.
 Loading...