

Page 1
Installation Guidelines
Congratulations on purchasing a TruTraps™ Genesis™ Acoustical Control System from
Auralex
TruTraps Genesis can be a standalone acoustical treatment or can be used to enhance
other Auralex products such as our popular Roominators™ kits. Even if you already
have a great room using other Auralex products, the TruTraps Genesis System can offer
additional acoustical control. TruTraps help clean up specific room mode issues, offer
diffusion options, and provide excellent broadband absorption.
Thank you for Purchasing Auralex
®
Acoustics. You’re on your way to creating a world class listening environment.
®
Total Sound Control
®
Products!
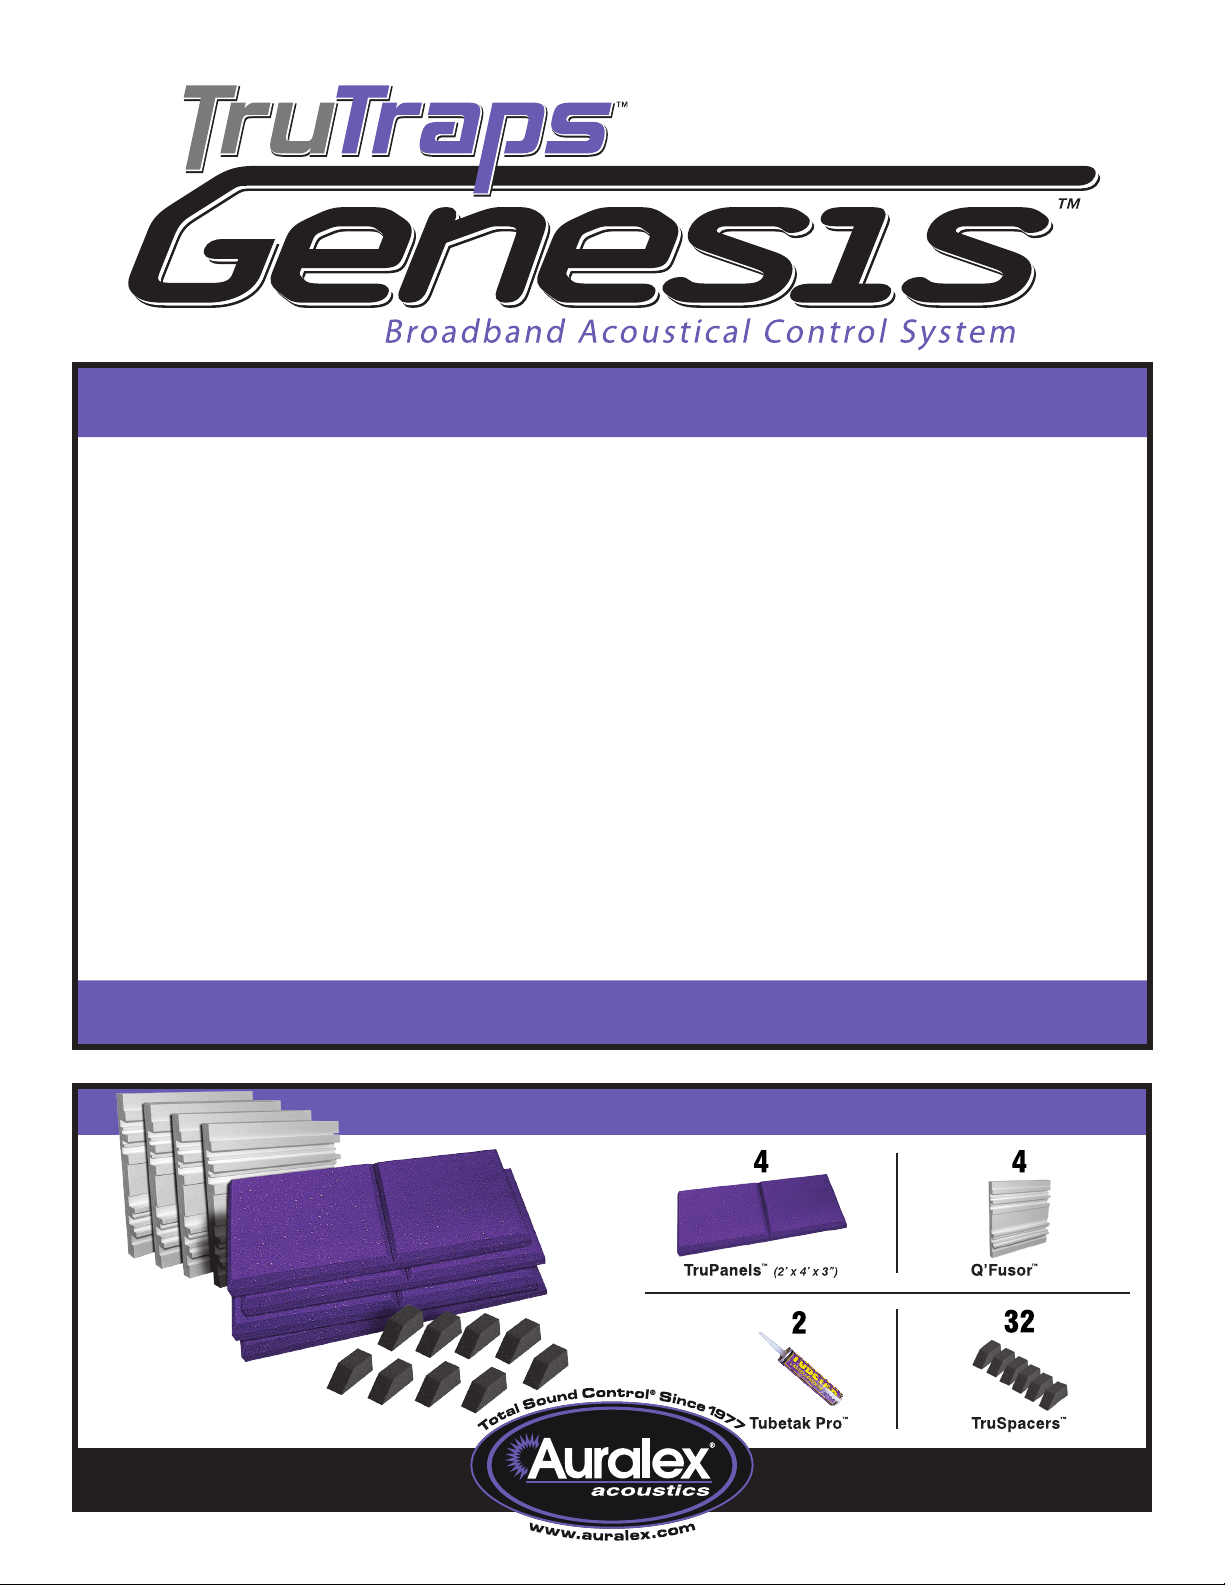
TruTrap Genesis System Components
22
1003-513.TruTraps Install Guide Update.indd ()
Page 2
TruTraps Genesis General Information
Recommended Additional Installation Materials
• Caulk-gun (for Tubetak Pro) • Tape measure
• Carpenters Level • Small ladder (depending on ceiling height)
• Pencil • Straight Edge
Optional Additional Installation Materials
• Foamtak Spray Adhesive*
* This system includes Tubetak Pro adhesive, which is safe to use on all included products. If you wish to use an alternate adhesive, such as
Auralex’s Foamtak Spray Adhesive, for quicker drying times, make sure to still use Tubetak Pro when mounting Q’Fusors, as other adhesives
may cause severe deterioration.
Q’Fusor Installation Guide
Apply Tubetak Pro to the back of the Q’Fusor, as
➊
pictured. Wait at least 60 minutes to allow the Tube t ak
Pro to cure before continuing.
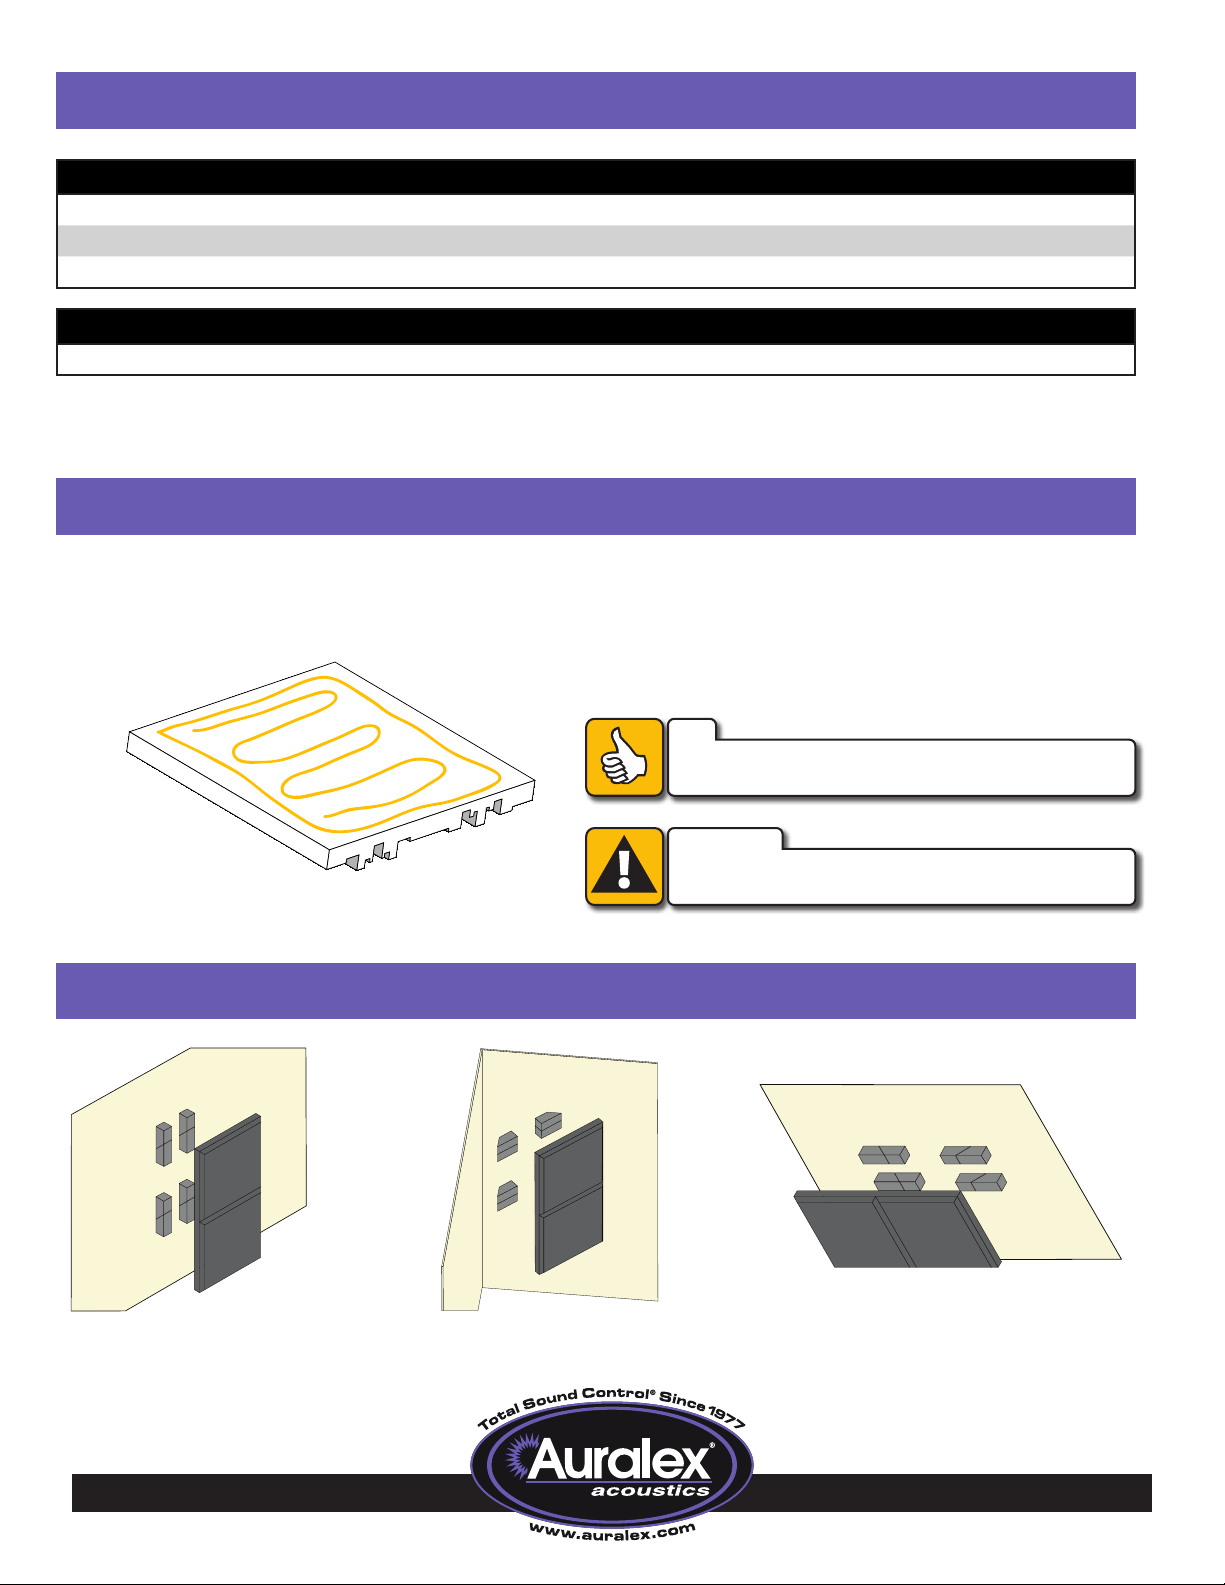
TruPanel Placement Options
Carefully press Q’Fusor onto the rear face of
➋
a TruPanel or directly to the surface of a wall
or ceiling. Since the Q’Fusor 22 is larger than
the beveled face of the TruPanel reverse the
TruPanel and orient the beveled surface toward
the wall or corner.
TIP
If you plan on painting the Q’Fusor, make sure to do so
before applying it to the wall, ceiling or a TruPanel.
CAUTION
Use only water-based paints on the Q’Fusor. Oil-based
paints will cause severe deterioration of the product.
- Wall Placement
I
- Corner Placement
II
- Ceiling Placement
III
Page 3

Marked
I - TruPanel Wall Installation Guide
Attach four TruSpacers to the back of the
➊
TruPanel using Tubetak Pro, as pictured. Let sit
for at least one hour.
18”
➌
4”
Remove TruPanel and attach one TruSpacer to
the wall at each marked location using Tubetak
Pro. Make sure that the TruSpacer lines up
exactly with the line drawn. Let TruSpacers sit
overnight.
3”
TruPanel
Traced
line
Hold TruPanel (with TruSpacers attached) against the
➋
wall in its desired location. Make sure the panel is
exactly level. Without moving the TruPanel, trace
the bottom of each attached TruSpacer.
Trace bottom of
each TruSpacer
After adhesive has fully cured overnight, place
➍
TruPanel in its intended location.
Trace
line
here
II - TruPanel Corner Installation Guide
Attach four TruSpacers to the back of the
➊
TruPanel with Tubetak Pro, as pictured.
18”
6”
Set TruPanel into place.
➌
TruPanel
Top
Mark a vertical line 16.75” from the corner on
➋
both sides. Mark a horizontal line at the intended
top and bottom of installed TruPanel. Attach four
TruSpacers along vertical lines with Tubetak Pro;
two 9” down from intended panel top and two 15”
up from the intended panel bottom, as pictured.
Let set overnight.
vertical
line
Top
9”
16.75”
48”
15”
Page 4

location
Marked inner
rectangle
III - TruPanel Ceiling Installation Guide
➊
➌
Hold the TruPanel to the ceiling in its desired
location. Without moving the TruPanel, trace
completely around it. This will require two people.
Ceiling Surface
Layout eight TruSpacers on the back of the
TruPanel, as pictured. Make sure the TruSpacers
are in the EXACT position diagramed. Attach only
the TruSpacers shown in red to the TruPanel using
Tubetak Pro.
Using a tape measure and straight edge, draw
➋
another rectangle inside the traced TruPanel
position 6” in from each 24” side and 4” in from
each 48” side.
48”
Ceiling Surface
Marked inner
rectangle
Attach the remaining TruSpacers to the ceiling
➍
using the marked inner rectangle, as pictured.
4”
Traced TruPanel
location
TruSpacers attached
to the ceiling
Ceiling Surface
4”
6”
24”
6”
4”
6”
TruPanel
After adhesive has cured overnight, slide TruPanel into place.
➎
Some finesse may be required to position panel correctly.
Traced TruPanel
See the Auralex® Acoustics website, www.auralex.com, for more information
about these and other Total Sound Control® products.
These are general installation suggestions. Should you have any additional questions about the installation of your
TruTr aps™ Gene sis™ Sys tem, feel free to contact an Auralex® Application Specialist • 1-800-95-WEDGE.
 Loading...