

Page 1
Auralex® ProBanner™ / User Guide
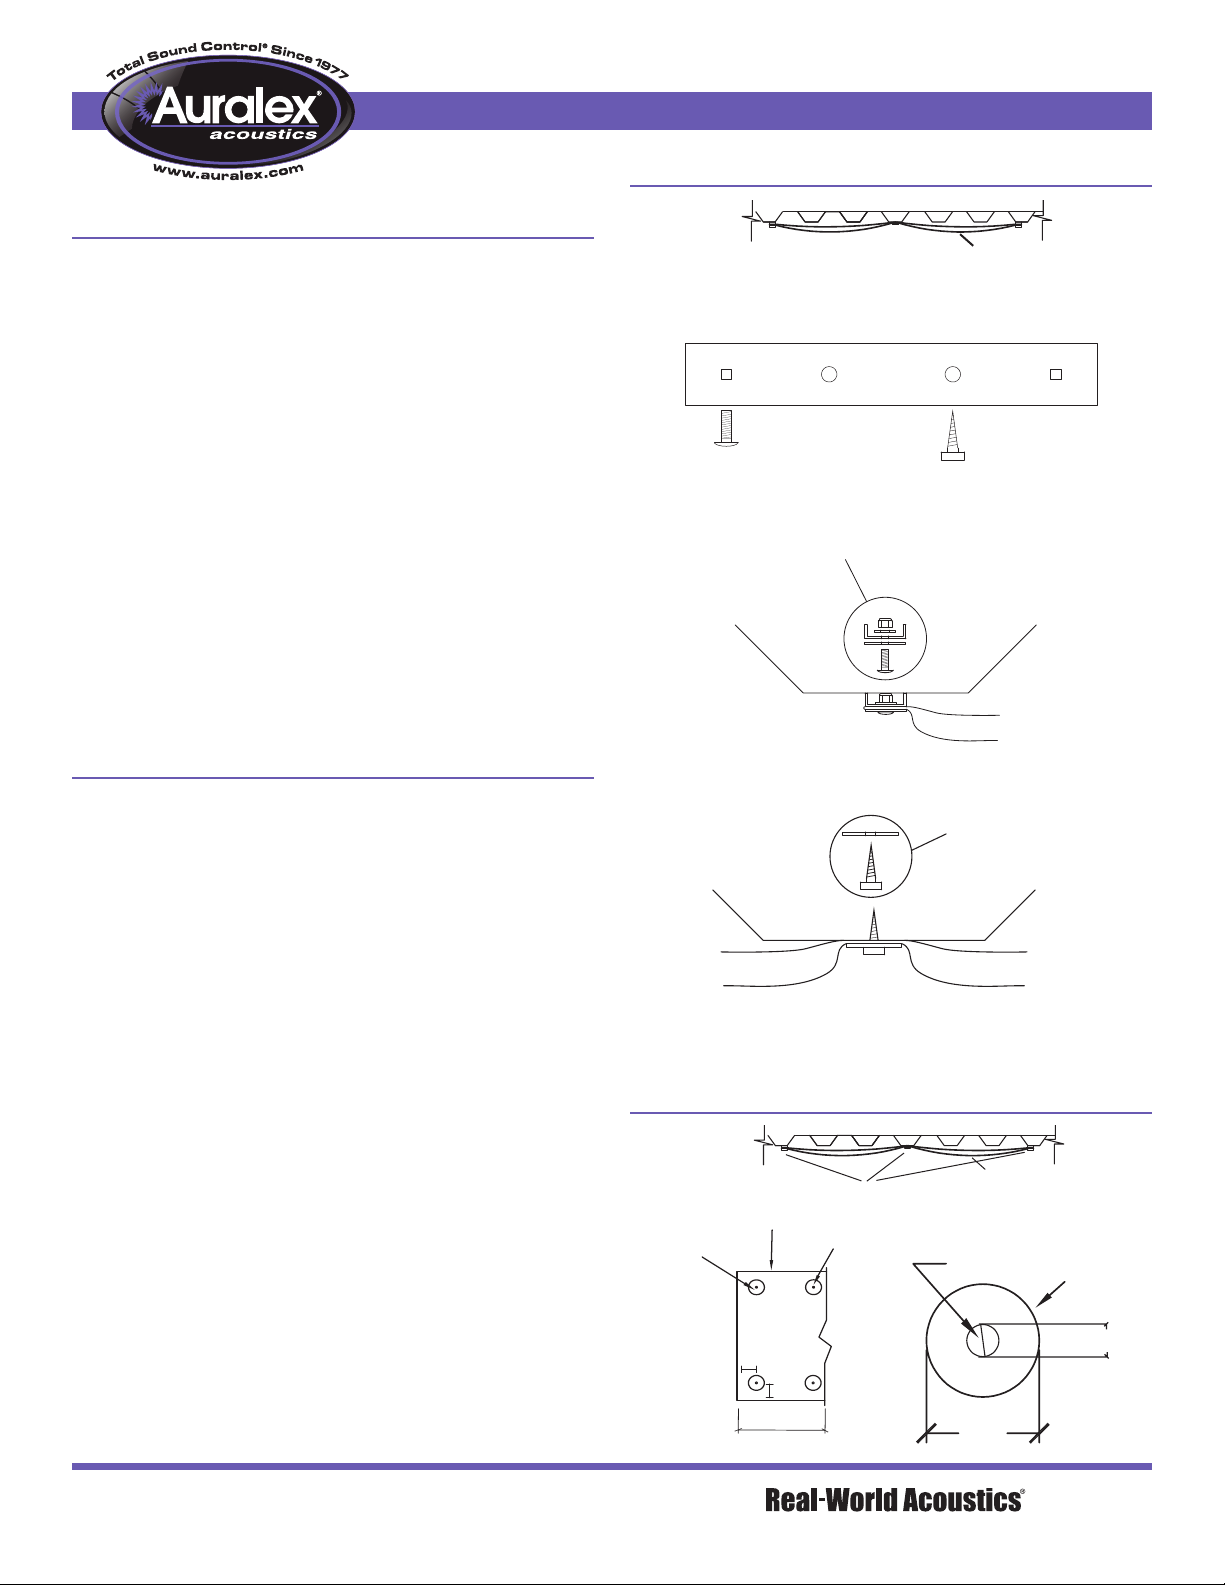
Installing ProBanners Using Stiffener Hardware:
Stiffener Hardware Mounting Detail
ProBanner
• Confirm that each ProBanner has one end stiffener at each end.
• Select appropriate fasteners (not provided by Auralex Acoustics) to
attach the ProBanner to the ceiling. To ensure a secure installation
to the ceiling, use fasteners of the correct type and weight rating for
your ceiling construction. Auralex ProBanners typically weigh 15 lbs
per 10 ft section. We recommend a 100% safety factor so fasteners
rated for at least a 30 lb load should be used. Local building codes
should always be consulted to guide your installation.
• Locate the appropriate starting point and fasten one end of the
ProBanner through the end stiffener. If the ProBanner is 120” or
less, pull the ProBanner to the required drop and fasten the other
end through an additional end stiffener. If the ProBanner is longer
than 120”, use intermediate stiffeners, evenly spaced, one for every
additional 120”.
• Use at least two ceiling fasteners at each stiffener location. For
ProBanners wider than 24”, use three fasteners.
Installing ProBanners Using Painted Washers:
• Confirm that washers are painted to match the ProBanner color.
• Select appropriate fasteners (not provided by Auralex Acoustics) to
attach the ProBanner to the ceiling. To ensure a secure installation
to the ceiling, use fasteners of the correct type and weight rating for
your ceiling construction. Auralex ProBanners are typically 15 lbs
per 10 ft section. We recommend a 100% safety factor so fasteners
rated for at least a 30 lb load should be used. Local building codes
should always be consulted to guide your installation.
• Install your ceiling fasteners through the painted washers and gently
through the ProBanners. The location must be at least 6” from the
end of the ProBanner.
• At one end (or middle) of the ProBanner, screw fasteners to the
ceiling at the selected attachment points. NOTE: Screwing the
fastener too tight will create a wrinkled look on the face of the
ProBanner. Advise installers to use best judgement to properly hold
the ProBanner while giving a pleasing aesthetic look.
• Use two washers at each installation point.
• Avoid pulling the banner too taut.
• If the installation points are 120” or less apart, the ProBanner can
be installed with as little as a 6” drop - but no less.
• If your installation points are greater than 120” apart then the drop
must be greater than 6”.
Mount ing Hole P attern: Inte rmedia te Stiffne r & End Sti ffner
Stiffner Hardware
Bolt Hole
Intermediate Stiffner
Ceiling Hardware
Mounting Hole
End Stiffeners
End Stiffener Hardware Supplied:
• Bar Stiffener
• “C” Channel Stiffener
• Carra ige Bolt
• Flat Washer
• Lock Nu t
Intermediate Stiffeners
Stiffeners are attached at both ends. Intermediate stiffeners are shipped
loose and attached in the field for ProBanners longer than 120”.
Painted Washer Mounting Detail
Painted Metal Washers
Painted Metal
Washer
ProBanner
6”
6”
Intermediate
Attachments
Intermediate Stiffener
Hardware Supplied:
• Bar Stiffener
(Fasteners supplied by others)
ProBanner
Fastener by Others
Painted Metal
Washer
1/4”
1-800-959-3343 / 317-842-2600
9955 Westpoint Drive, Suite 101, Indianapolis IN USA 46256
120” (max)
3”
1203-6 14.ProB anner Use r Guide.indd (09/ 16/2014 - 2:4 6 PM)
 Loading...