

AURA Professional Glueboard Insect Control Instructions
Professional Glueboard Insect Control
Please read these instructions carefully and store in a safe place
for future reference.
™
Aura
As part of the Insect-O-Cutor® brand of insect control products,
™
Aura
is a decorative professional flykiller which utilises a highly
effective Synergetic
®
UV tube and is designed for use with a
high specification glupac® glueboard.
CONTENTS OF PACKAGE
- 1 x Aura™ flykiller
- 1 x glupac® pheromone impregnated glueboard
- 1 x Mains cable (Type X)
- 1 x High powered Synergetic® UV tube (Fitted)
- 2 x Screws and wall plugs
- 1 x Hard wired blanking piece
WARNING - THIS APPLIANCE MUST BE EARTHED (CLASS 1)
INSECT CONTROL PRODUCTS
™
Aura
utilises a high powered ultra violet tube to attract flying
insects and retains the caught insects on a pheromone
impregnated glueboard for inspection or hygienic disposal.
WARNING
™
Aura
is not to be used by children or persons with reduced
physical, sensory or mental capabilities, or lack of experience
and knowledge, unless they have been given supervision or
instruction.
Children should be supervised to ensure they do not play with
the appliance.
If the mains cable is damaged it must be replaced by a
specialist mains cable available from P+L Systems Ltd or your
supplier.
POSITIONING AND GUIDANCE FOR USING AURA™
THIS UNIT IS FOR INDOOR USE ONLY.
For most species of flying insects, Aura™ should ideally be fixed
around two meters above the ground, preferably in the darkest
place within the area to be protected. Do not position the unit
close to windows, skylights or other sources of light, or where it
may be obscured by furniture, doors or other obstacles. Ideally,
™
Aura
should be visible from every part of the area to be
protected.
However, due to its unique circular design, Aura™ can also be
mounted low to the ground, ideal for catching drain flies without
revealing the caught insects to customers.
™
Aura
should ideally be in operation for 24 hours a day, ensuring
your premises are kept free of flying insects. Insects are most
attracted to Aura™ at night when there is no competition from
daylight or other light sources.
INSTALLATION
INSTALLATION SHOULD BE CARRIED OUT BY SERVICE PERSONNEL
ONLY, AFTER ENSURING THAT THE UNIT IS DISCONNECTED FROM
THE MAINS SUPPLY.
™
Aura
has a swing down front guard for easy access to replace
the Synergetic
®
UV tube, glupac
®
glueboard and starter. Aura™
can either be wall mounted by using the two supplied wall
screws or simply located horizontally on a desk.
If wall mounting Aura™, either simply use the supplied removable
IEC mains cable to plug into the nearest power socket, or use the
discreet hard wiring option to provide power directly from a
fixed power supply.
BEFORE HARD WIRING, ENSURE THE MAINS POWER SUPPLY IS
SWITCHED OFF.
For hard wiring, first mark the two fixing points using the ‘Hard
Wired Wall Mount Template’ on the enclosed sheet, before
installing the wall plugs and fixing screws. Remove the front
metal plate of the product by unscrewing the three retaining
fixing screws. (fig 1) Then remove the three short connection
wires which connect the IEC socket to the terminal block by
pressing the three spring retainers. (fig2) & (fig 3) Cover the
redundant IEC socket with the supplied blanking piece. (fig 4)
Next, carefully remove the ‘knock out’ section of the plastic
backplate with a knife, creating the hard wired mains entry port.
(fig 5) Offer the unit up to the two wall screws and feed the
mains wire through the newly created entry port. (fig 6) Insert
the live, neutral and earth wires into the appropriate spring
retainers. (fig 7) Finally replace the front metal plate, (fig 8)
before swinging the front guard back in position. (fig 9)
CLEANING
CLEANING SHOULD BE CARRIED OUT BY SERVICE PERSONNEL
ONLY, AFTER ENSURING THAT THE UNIT IS DISCONNECTED FROM
THE MAINS SUPPLY.
It is recommended that cleaning is carried out regularly when
the glueboard is replaced. Once the glupac® glueboard is
removed, the unit should be thoroughly wiped down with a
damp cloth, removing any build up of dirt. Ensure the unit is
completely dry before reconnecting it to the power supply.
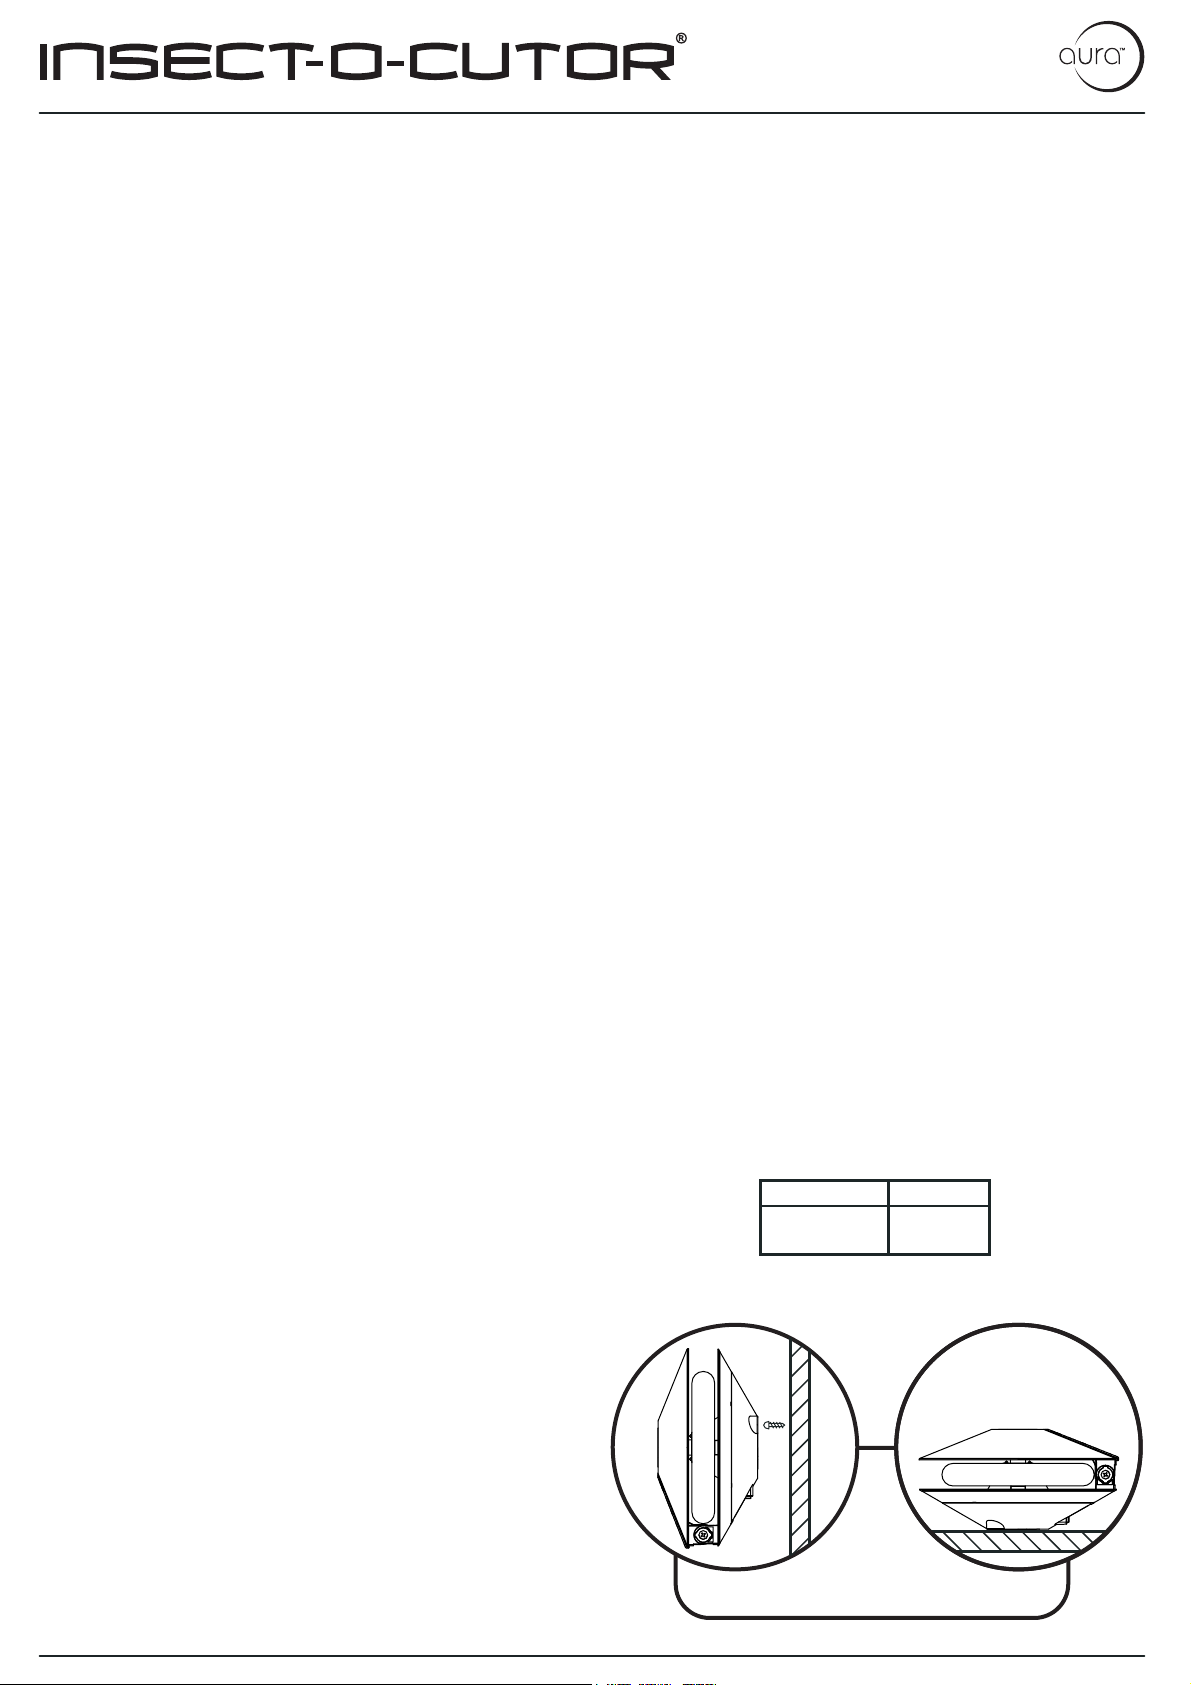
MOUNTING FIXING CENTRES
METHOD Aura
Wall 80mm
Desk -
Wall Desk
GUARANTEE
™
Aura
has a two year guarantee and if maintained as
recommended in these instructions should continue to work for
many years.* Use of non-approved consumables may invalidate
the guarantee. Ensure genuine glupac
®
glueboards are used in
conjunction with this product.
*Excludes tube, glueboard and starter. Does not cover breakdown due to misuse, incorrect
operation or use in an incorrect application.
Mounting Options
Aura
™

GLUEBOARD REPLACEMENT
BEFORE REPLACING THE GLUEBOARD, ALWAYS ENSURE THAT THE UNIT IS DISCONNECTED FROM
THE MAINS SUPPLY.
®
The glueboard should be replaced every month with a genuine glupac
glueboard. Use of
non-approved glueboards may invalidate your guarantee. Aura™ comes supplied with a high
specification yellow glueboard with printed grids for simple insect evaluation and monitoring.
To replace the glueboard…
1. Swing down the front guard.
2. Remove the used glupac® glueboard by carefully pulling it clear of the unit.
3. Remove the protective release paper from the new glupac® glueboard.
4. Maneuver the straight edges of the flat glueboard into the gap between the
horizontal guard and the vertical tube chassis.
5. Then maneuver the glueboard together to forma a conical shape and position the
glueboard under the ‘front’ two metal retaining clips.
6. Finally, tuck the two cardboard ‘corners’ of the glueboard under the ‘back’ two
metal retaining clips.
Always ensure the selected genuine glupac
®
glueboards are compatible with your unit,
available from your pest control operator or P+L Systems Ltd.
TUBE REPLACEMENT
TUBE REPLACEMENT SHOULD BE CARRIED OUT BY SERVICE PERSONNEL ONLY, AFTER ENSURING
THAT THE UNIT IS DISCONNECTED FROM THE MAINS SUPPLY.
To ensure the efficiency of Aura
™
in catching flying insects, the UV tube should be replaced
annually. After twelve months the phosphor coating that emits the correct wavelength of UV
light has burnt away and the UV output is diminished substantially.
To replace the UV tube…
1. Swing down the front guard.
2. Unclip the wire tube clips.
3. Pull the tube away from the chassis.
4. Dispose of the used UV tube in conjunction with local WEEE regulations.
STARTER REPLACEMENT
STARTER REPLACEMENT SHOULD BE CARRIED OUT BY SERVICE PERSONNEL ONLY, AFTER
ENSURING THAT THE UNIT IS DISCONNECTED FROM THE MAINS SUPPLY.
The starter provides an extra spark to initially light the UV tube. The
starter wears out and should be replaced at the same intervals as
the UV tube.
To replace the starter…
Glueboard Replacement
1. Rotate the starter anti-clockwise.
2. Pull the starter free from the unit.
SPECIFICATION / REPLACEMENT PARTS
Unit Aura
Voltage 230V ~ 50Hz
Dimensions(mm) 270 x 270 x 135
Coverage 40 Sq. Meters
Weight 1.9 Kg
Light Output 22W
Tubes 1 x TGX22
Starter 1 x I154
Glueboards (x6) INL198 (Yellow)
R3 06/11
™
P+L Systems Ltd
Ten St James Business Park
Grimbald Crag Court
Knaresborough
HG5 8QB UK
T +44 (0)800 988 5359
F +44 (0)1423 863 497
W www.pandlsystems.com
E info@pandlsystems.com
Tube Replacement
Starter Replacement
WEEE Compliance No. 01576542
Information provided on these instructions is modified and
updated from time to time. This is due to the constant
redevelopment of our products. As such, it is not intended that
you should rely on it or that it should form part of any contract.
P+L Systems Ltd
C
2011
 Loading...