

Aura EC7 Quick Manual

EC7 Quick Guide
Register your device
We strongly suggest that you register your device following the directions provided with the product.
This will allow us to notify you when the latest firmware updates are available.
Before We Get Started
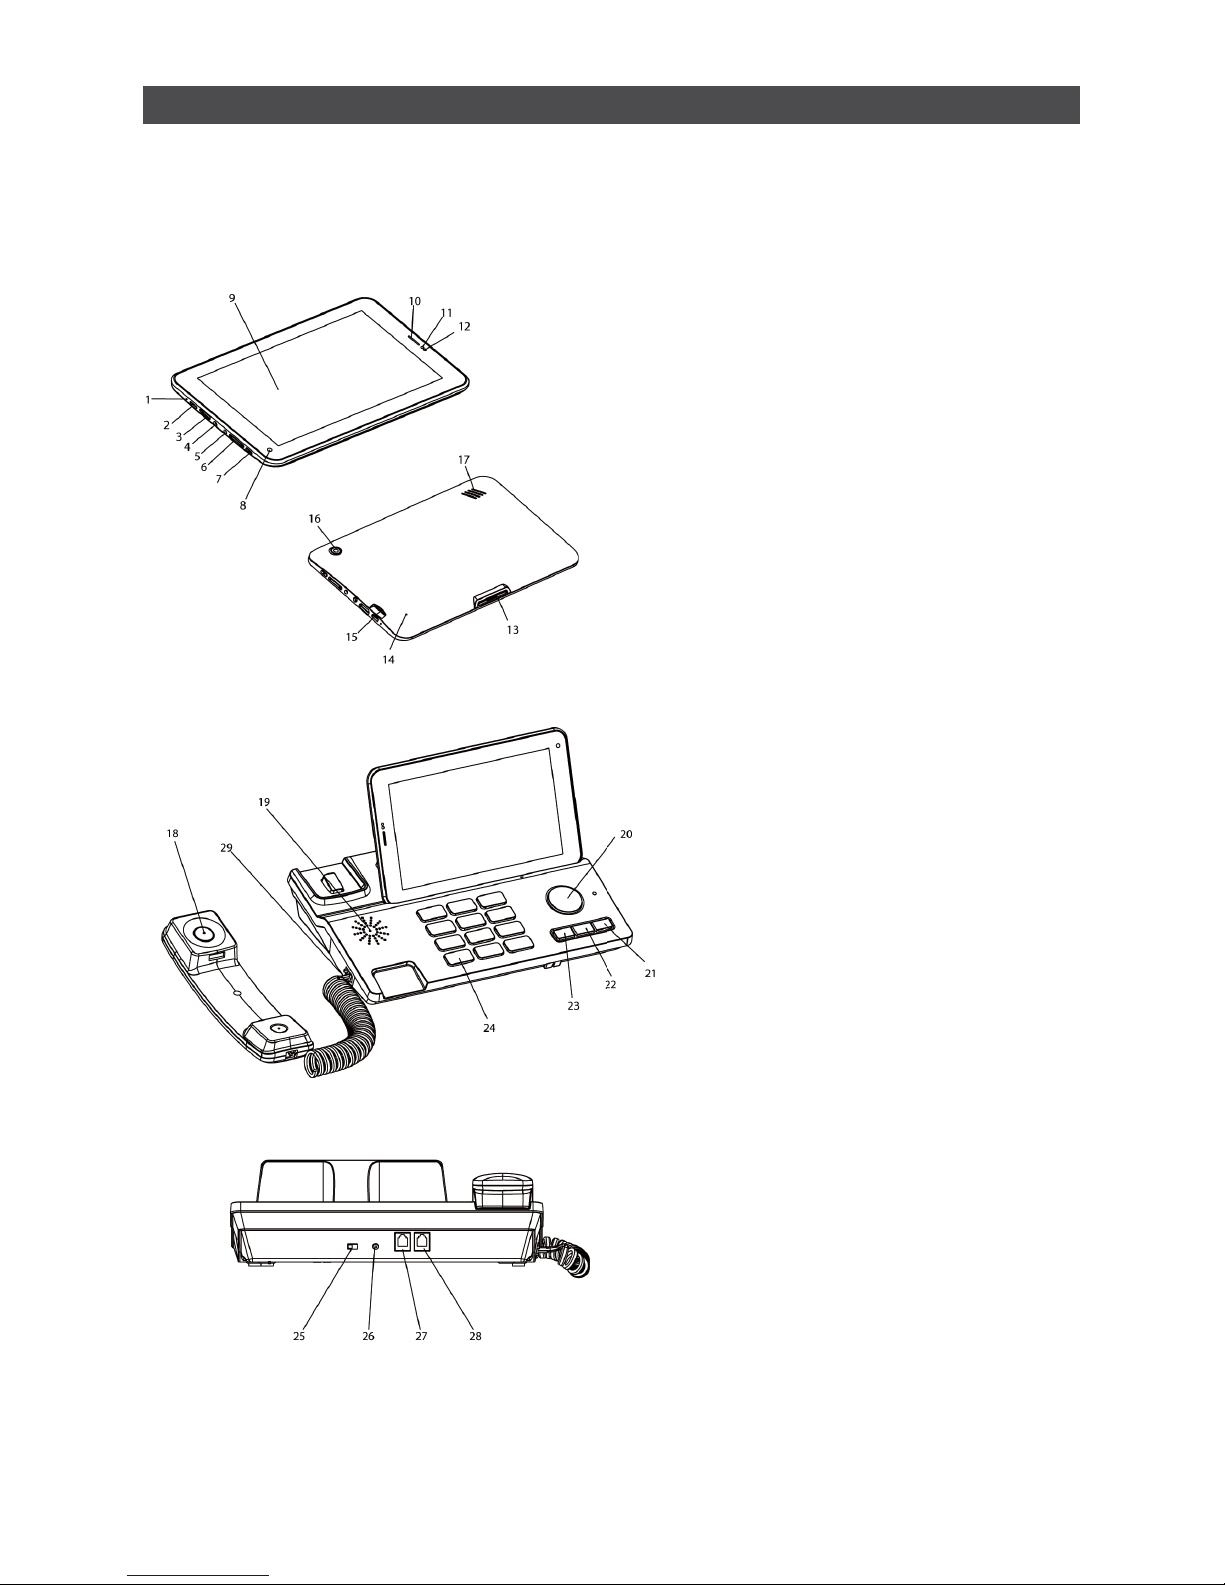
18. Handset
19. Speaker(Phone Set)
20. Handfree key
21. Redial Key
22. Pause Key
23. Flash Key
24. Numeric Keypad
25. Ringtones Volume
26. Direct Current Input Jack
27. Landline Jack
28. Extension Cord Jack
29. Phone Cord Jack
1. Microphone (Tablet)
2. Micro USB Port
3. Mini HDMI Port
4. Headset Jack
5. Power Adapter Jack
6. Volume Button
7. Power Button
8. Front Camera
9. LCD Display
10. Tablet Receiver(for phone calls)
11. Ambient Light Sensor
12. Dis tan ce S ens or
13. Dock Connection Interface
14. Reset Button
15. Micro SD Card Slot
16. Rear Camera
17. Speaker(Tablet)
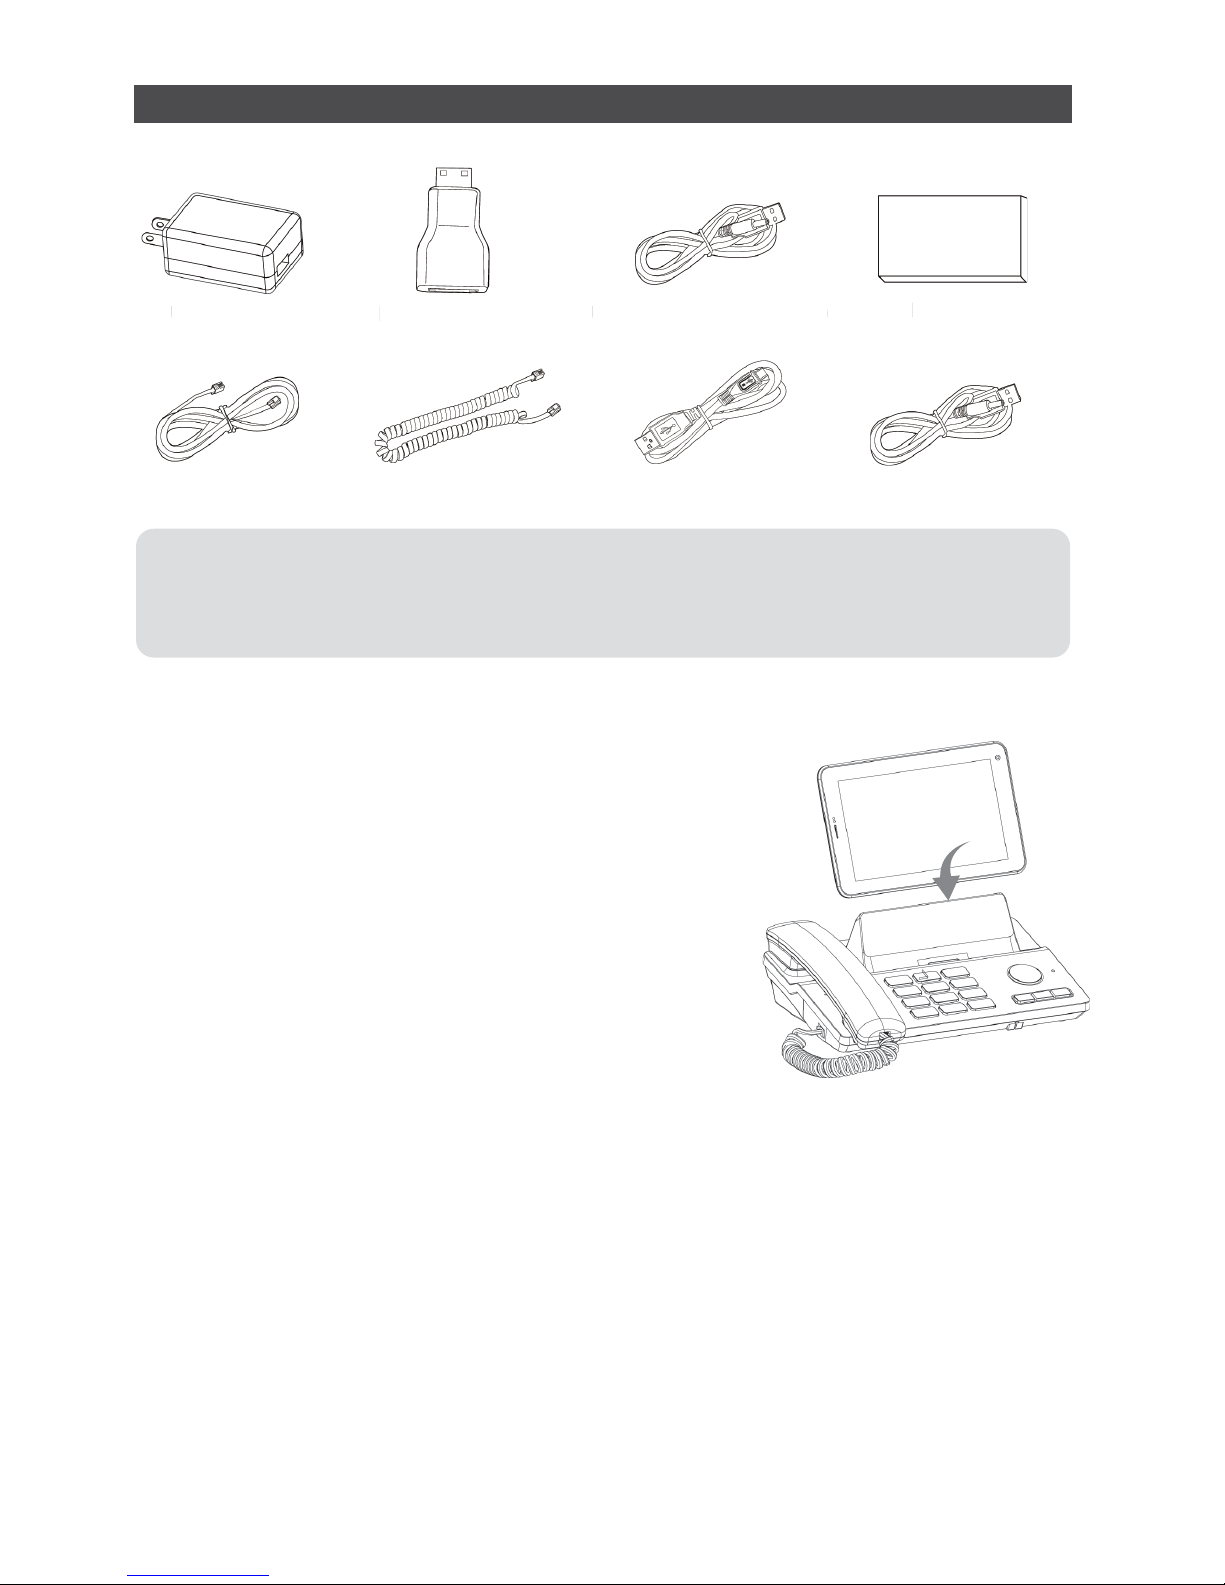
What's in the Box
USB Data Cable
Coiled Phone Cord
Phone Line
HDMI ConverterUSB Charger USB Power Cable DC4.0
Battery
● Phone Handset
● Coiled Phone Cord
● Dock Phone
● USB Power Cable DC4.0
● USB Data Cable
● Power Cable DC 2.5
● USB Charger
● HDMI Converter
● Phone Cord
● Battery
● Tablet
Assembling Your TELP AD
Please refer to the figure:
Insert the tablet into dock, making sure the interfaces on the
tablet and the phone set are properly aligned.
Connecting the phone
1. Connect the DC power adapter and DC power adapter line.
2. Insert the power adapter line into the dock's power line jack.
3. Insert the DC power adapter into the power source/outlet.
4. Insert the phone line into the phone line jack and the unit's phone line socket.
Connecting and Charging
Connecting Extensions
Connect the extension phone cord with the phone set into the extension cord jack.
Charging the Tablet Using the Dock
Connect the phone set to a power source. The Tablet will automatically charge once
it is placed on the dock.
DMI Converter
B Charger
B Power Cable DC4.
0
Batter
y
USB Power Cable DC2.5
 Loading...