

Page 1

Karaboom CD
Karaoketurm
Karaoke Tower
10032105 10032106
www.auna-multimedia.com
Page 2

Page 3
Sehr geehrter Kunde,
wir gratulieren Ihnen zum Erwerb Ihres Geräts. Lesen Sie die folgenden
Hinweise sorgfältig durch und befolgen Sie diese, um möglichen Schäden
vorzubeugen. Für Schäden, die durch Missachtung der Hinweise und
unsachgemäßen Gebrauch entstehen, übernehmen wir keine Haftung.
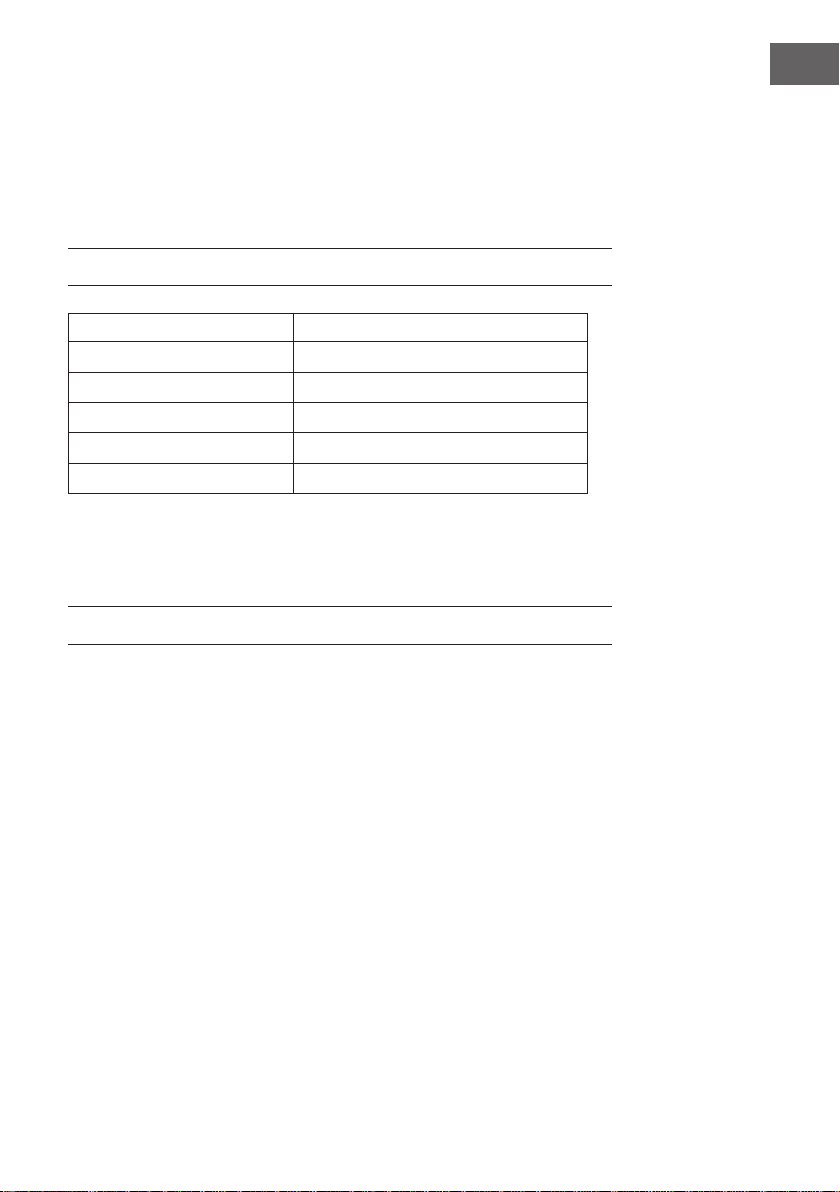
TECHNISCHE DATEN
Artikelnummer 10032105 10032106
Stromversorgung 230 V~ 50 Hz
Gesamtleistung 65 W
RMS-Leistung 60 W
Lautsprecherimpedanz 8 Ohm
Signal-Rausch-Abstand 75 dB
INHALT
DE
Technische Daten 3
Sicherheitshinweise 4
Lieferumfang 4
Geräteübersicht 5
Inbetriebnahme 8
Musik abspielen 9
Radio 10
AUX-Eingang 10
USB/SD-Eingang 10
BT-Betrieb 11
Karaokebetrieb 11
Anschluss an ein Fernsehgerät 12
Hinweise zur Entsorgung 13
3
Page 4

DE
SICHERHEITSHINWEISE
• Lesen diese Hinweise. Bewahren Sie die Bedienungsanleitung auf.
Beachten Sie alle Warnhinweise. Befolgen Sie die Anleitung.
• Verwenden Sie das Gerät nicht in der Nähe von Wasser. Nur mit einem
trockenen Tuch reinigen.
• Nicht die Lüftungsönungen blockieren.
• Nicht in der Nähe von Wärmequellen wie Radiatoren, Heizkörpern,
Öfen und anderen Geräten (inkl. Verstärkern), die Wärme produzieren.
• Schützen Sie das Netzkabel davor, dass darauf getreten wird oder dass
es geknickt wird, insbesondere am Netzstecker und an der Stelle, wo
das Netzkabel aus dem Gerät tritt.
• Verwenden Sie nur vom Hersteller angegebenes Zubehör.
• Nur mit dem Wagen, Ständern, Regalen oder Auagen benutzen, die
vom Hersteller angegeben sind. Beim Bewegen des Gerätes vorsichtig
sein, um ein Umfallen zu vermeiden.
• Ziehen Sie während eines Gewitters den Netzstecker, auch wenn Sie
das Gerät für längere Zeit nicht nutzen.
• Wenden Sie sich bei Reparaturen an qualizierte Fachleute. Reparaturen
werden erforderlich, wenn das Gerät irgendwie beschädigt wurde, das
Netzkabel oder der Netzstecker beschädigt wurden, Flüssigkeit auf dem
Gerät vergossen wurden, Gegenstände hineingefallen sind, das Gerät
Regen oder Feuchtigkeit ausgesetzt wurde, nicht normal funktioniert
oder fallen gelassen wurde.
• Das Gerät darf Wassertropfen und -spritzern nicht ausgesetzt werden.
• Behältnisse mit Flüssigkeiten wie Vasen dürfen nicht auf das Gerät
gestellt werden.
• Die Batterie darf nicht großer Hitze durch Sonneneinstrahlung, Feuer
usw. ausgesetzt werden.
• Das Gerät wird durch den Netzstecker vom Stromnetz getrennt.
• Während des Stromnetzanschlusses bleibt das Gerät betriebsbereit.
LIEFERUMFANG
• Anlage
• Fernbedienung
• Bedienungsanleitung
• Cinch-Kabel
4
• Line-In-Kabel
• 2 Mikrofone
• 2 Mikrofonhalter
• 4 Schrauben
Page 5
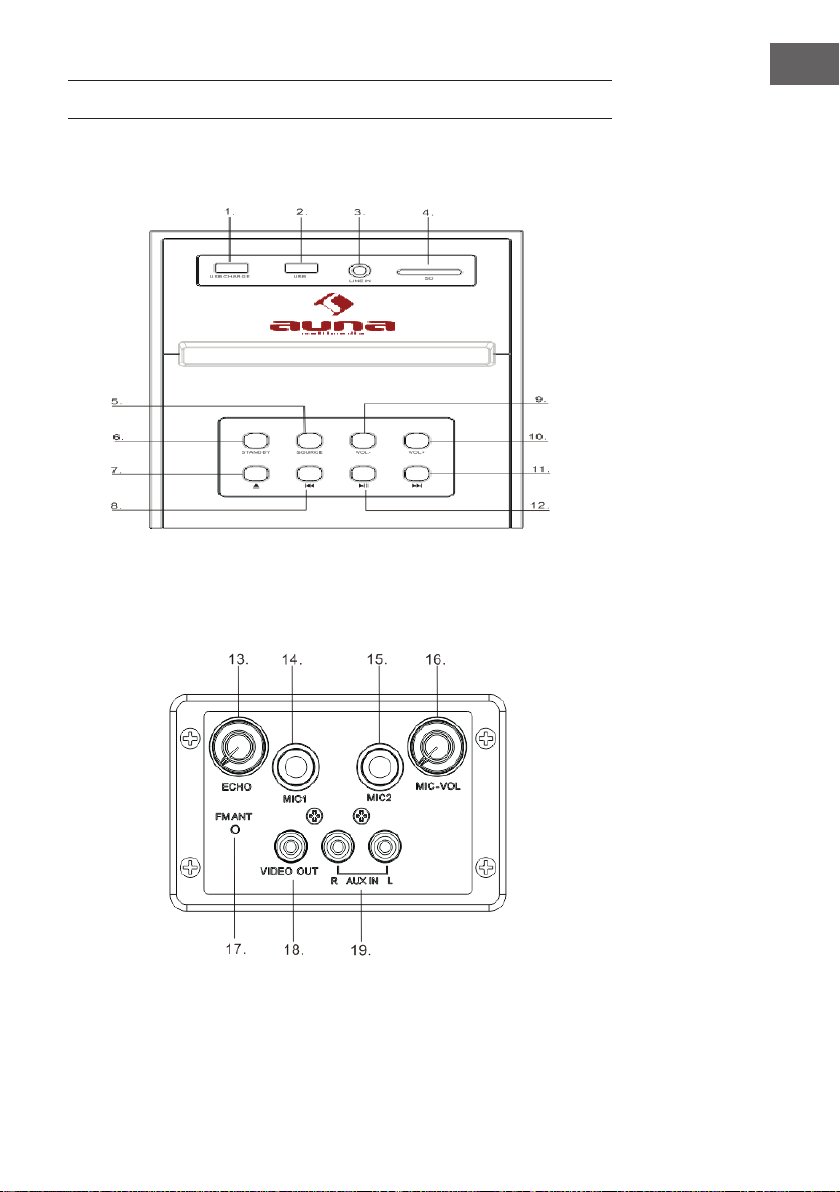
GERÄTEÜBERSICHT
Vorderansicht
Rückseite
DE
5
Page 6

DE
1 USB-Ladeanschluss
2 USB-Anschluss
3 Audio-Eingang
4 SD-Schacht
5 Quelle (SOURCE)
Quelle wählen, CD
6 STANDBY
Standby ein- und ausschalten
7 EJECT
Die Disc auswerfen
8 ZURÜCK
Drücken: Voriger Titel
Einen Radiosender anwählen
Gedrückt halten: Innerhalb eines Titels zurückspulen.
9 Lautstärke 10 Lautstärke +
11 VOR
Drücken: Nächster Titel
Einen Radiosender anwählen
Gedrückt halten: Innerhalb eines Titels vorspulen
12 PLAY/PAUSE/MODE button
Drücken: Den aktuellen Titel wiedergeben oder anhalten
Gedrückt halten: USB/BT-Modus wählen
13 Lautstärkeregelung
Die Lautstärke erhöhen oder verringern
14 MIC1
15 MIC2
16 MIC-Lautstärkeregler
17 UKW-Antenne
18 Videoausgang
19 AUX-Anschluss
An ein externes Audiogerät anschließen
6
Page 7

Übersicht über die Fernbedienung
1 Schlaf
Wiederholt drücken, um den Schlaftimer (Abschaltautomatik)
einzustellen.
2 EIN/AUS
Drücken, um das Gerät einoder auszuschalten
3 AUSWURF
Die CD auswerfen
4 MEM/MEM+/MEM-
MEM drücken, um den
aktuellen Radiosender auf
einen voreingestellten Kanal
einzustellen.
Mit MEM+/MEM- den
Senderplatz wählen.
5 SELECT REPEAT MODE
6 LAUTSTÄRKE +
Die Lautstärke erhöhen
7
Zum vorigen Titel springen
8 PLAY/PAUSE
9 LAUTSTÄRKE -
Die Lautstärke verringern
10 ZEIT/ALARM
11 STUMM
Zum Stummschalten drücken:
Erneut drücken, um Ton wieder herzustellen.
12 Quelle (SOURCE)
Wahl einer Quelle
13 ZUFALLSWIEDERGABE
Zufällige Wiedergabe von CD
14
Anhalten der Wiedergabe
15
Titel überspringen
DE
7
Page 8

DE
INBETRIEBNAHME
Vorsicht: Gefahr eines Stromschlags.
Wenn Sie das Netzkabel von der Stromversorgung trennen,
fassen Sie immer am Netzstecker an. Ziehen Sie nie am
Netzkabel.
Stellen Sie das Gerät in die gewünschte Position.
Auto-Standby
Wenn Sie Medien von einem verbundenen Gerät abspielen, geht die
Anlage automatisch in den Standby-Betrieb, wenn 10 Minuten lang keine
Taste gedrückt wurde oder von dem verbundenem Gerät 10 Minuten keine
Wiedergabe erfolgt ist.
Einstellen der Uhr
Nachdem der Karaoketurm an die Stromversorgung angeschlossen wurde
und nach einem Stromausfall zeigt das Display "0:00" an. Zum Einstellen
der aktuellen Uhrzeit muss das Gerät im Standby sein.
1. Drücken Sie TIME/ALARM. Die Ziern im Display blinken.
2. Drücken Sie
ALARM drücken.
3. Die Ziern der Minuten im Display blinken.
4. Drücken Sie die Tasten
eingestellt wurde.
, bis die richtige Stunde eingestellt ist. Die Taste TIME/
wiederholt, bis die richtigen Minuten
Einstellen des Weckers
Das Gerät kann als Wecker verwendet werden. Die Quellen CD,USB, UKW
werden zur voreinstellten Weckzeit aktiviert.
1. Die EIN/AUS-Taste drücken, um das Gerät in den Standby-Betrieb zu
setzen.
2. Überprüfen, ob die Uhr richtig eingestellt wurde.
3. Die Taste TIME/ALARM gedrückt halten. Im Display blinkt ON. Nun
können Sie die Weckzeit einstellen.
4. Die Taste TIME/ALARM drücken. Das Display blinkt.
5. Wiederholt die Tasten
TIME/ALARM bestätigen.
6. Mit
die Minute einstellen.
7. Zur Bestätigung ALARM drücken und dann über die Tasten
FM/USB wählen.
8. Die Lautstärke auf eine Stufe von 0 bis 20 einstellen.
8
drücken, um die Stunde einzustellen. Mit
, CD/
Page 9

9. Die Taste TIME/ALARM drücken in ausgeschaltetem Zustand drücken. Im
Display blinkt zum Einstellen des Weckers ON.
10. Wecker deaktivieren: Wählen Sie mit den Tasten
deaktivieren.
Schlafmodus
Drücken und halten Sie die SLEEP-Taste gedrückt. Das Display blinkt. Die
Taste wiederholt drücken, bis das Display die Mintute anzeigt. Sie können
10 bis 90 Minuten einstellen.
Bei der Bestätigung blinkt es dreimal und kehrt dann zur vorigen Anzeige
zurück. Wenn Sie den Schlafmodus beenden wollen, drücken Sie OFF.
Nach dreimaliger Leereingabe wird der Schlafmodus beendet.
"OFF".
MUSIK ABSPIELEN
Eine Disk wiedergeben (CD, CD-R, CDR/W, CD+G)
1. Wiederholt die SOURCE-Taste drücken, um CD zu wählen.
2. Eine CD mit der bedruckten Seite nach oben einlegen.
3. Die Wiedergabe startet automatisch. Falls nicht, die Taste
4. Verwenden Sie die Bedienelemente am verbundenen Gerät, um mit
der Wiedergabe der Musik zu beginnen, die atn die Lautsprecher
weitergeleitet wurde.
drücken.
DE
Wiedergabe anhalten/fortfahren
1. Während der Wiedergabe
2. Während der Wiedergabe
zurückzuspulen.
Einen Titel überspringen
CD/MP3-Disk, USB/SD-Datenträger
drücken, um einen anderen Titel zu wählen.
1.
2. VOL-/VOL+ drücken, um die Lautstärke zu regeln.
drücken, um anzuhalten oder fortzufahren.
gedrückt halten, um vor- oder
9
Page 10

DE
RADIO
Es sind bis zu 20 Titel vorprogrammierbar:
1. Mit der der SOURCE-Taste das Radio starten.
2. Mittels
3. Mit den
4. Wenn Sie einen Sender gefunden haben, den Sie speichern wollen,
5. Wenn Sie die MEM-Taste gedrückt halten, startet das Gerät eine
-Tasten einen Sender suchen.
-Tasten die gewünschten Sender einstellen.
drücken Sie die MEM-Taste auf der Fernbedienung. Im Display erscheint
"P01". MEM+/MEM- drücken, bis der gewünschte Speicherplatz
angezeigt wird. MEM drücken, um die gegenwärtige Station zu
speichern.
automatische Sendersuche aller verfügbaren Stationen, die nach
Empfangsstärke sortiert sind.
AUX-EINGANG
(erfordert ein Cinch-Kabel)
Schließen Sie das Cinch-Kabel nicht an den AUX-Eingang an. Verbinden
Sie das andere Ende des Cinch-Kabels mit dem Audioausgang eines DVDPlayers, Stereoanlage, Spielkonsole oder Fernseher.
1. Gerät einschalten: den Ein/Aus-Schalter drücken.
2. Nach Aux wechseln: die SOURCE-Taste drücken.
3. Verwenden Sie das Bedienfeld am angeschlossenen Gerät, um mit der
Videowiedergabe zu beginnen.
USB/SD-EINGANG
1. Schließen Sie das USB-Speichermedium oder die SD-Karte an den
entsprechenden Anschluss an.
2. Drücken Sie die SOURCE-Taste, um den USB- bzw. SD-Betrieb zu
wählen. Das Gerät gibt die Titel automatisch wieder; falls nicht, die
Tasten
3. Mit den Tasten
4. Mit den Tasten VOL+ und VOL-
Hinweis: Der USB-Anschluss und der SD-Steckplatz sind empndliche
10
drücken.
den Titel wählen.
Page 11

Anschlüsse, die zur Instabilität des Geräts führen können.
Auaden von Geräten am USB-Anschluss
Oben am Gerät bendet sich ein USB-Ladeanschluss.
BT-BETRIEB
1. Die SOURCE-Taste drücken und den BT-Modus wählen.
2. Schalten Sie die BT-Funktion auf Ihrem Mediengerät ein, die sich
normalerweise sich in den Einstellungen bendet.
3. Aktivieren Sie den BT-Empfang und machen Sie Ihr Gerät "sichtbar".
Wählen Sie in den Einstellungen Ihres BT-Geräts "Neues Gerät
hinzufügen" oder "BT-Gerät einrichten". Nun wird eine Suche
angestoßen. Mit "CZT-1713" verbinden, sobald es angezeigt wird. Wenn
nach einem Passwort verlangt wird, geben Sie "0000" (vier Nullen) ein.
Wenn der Kopplungsversuch fehlschlägt oder die Zeit abgelaufen ist,
wiederholen Sie die Schritte.
4. Nachdem das Gerät und der Karaoketurm miteinander gekoppelt
wurden, ist ein Signalton zu vernehmen.
5. Überprüfen, ob die BT-Verbindung tatsächlich hergestellt wurde.
6. Drücken Sie PLAY/PAUSE, um die Wiedergabe anzuhalten und
erneut, um mit der Wiedergabe fortzufahren und , um einen Titel
vorzuspringen und , um einen Titel zurückzuspringen.
DE
KARAOKEBETRIEB
1. Schließen Sie das Mikrofon (im Lieferumfang enthalten) an den
Anschluss MIC1 oder MIC2 an. Sicherstellen, dass die Lautstärke auf
niedriger Lautstärke steht.
2. Das Mikrofon auf ON schalten. Zum Ausschalten des Mikrofons wieder
auf OFF stellen.
3. Die Mikrofonlautstärke auf der Rückseite einstellen.
4. Den ECHO-Regler drehen, um den Echoeekt zu erhöhen oder zu
senken.
5. Die gewünschte Wiedergabequelle wählen und mit der Wiedergabe
beginnen.
6. Singen!
7. Nach dem Singen das Mikrofon wieder ausschalten, indem Sie den
Schalter in die Position OFF stellen.
11
Page 12

DE
ANSCHLUSS AN EIN FERNSEHGERÄT
Sie können den Karaoketurm an ein Fernseher anschließen und eine CD+G
abspielen. Sehen Sie nach dem dem CD+G-Symbol auf dem Gerät.
Schließen Sie das gelbe Cinchkabel mit einem Ende an den Karaoketurm
und mit dem anderen Ende an den Fernseher an.
Das Fernsehgerät muss einen Video-Anschluss (gelber Cinch-Stecker)
haben.
12
Page 13
HINWEISE ZUR ENTSORGUNG
Bendet sich die linke Abbildung (durchgestrichene
Mülltonne auf Rädern) auf dem Produkt, gilt die Europäische
Richtlinie 2012/19/EU. Diese Produkte dürfen nicht mit dem
normalen Hausmüll entsorgt werden. Informieren Sie sich
über die örtlichen Regelungen zur getrennten Sammlung
elektrischer und elektronischer Gerätschaften. Richten Sie
sich nach den örtlichen Regelungen und entsorgen Sie
Altgeräte nicht über den Hausmüll. Durch die regelkonforme
Entsorgung der Altgeräte werden Umwelt und die
Gesundheit Ihrer Mitmenschen vor möglichen negativen
Konsequenzen geschützt. Materialrecycling hilft, den
Verbrauch von Rohstoen zu verringern.
Das Produkt enthält Batterien, die der Europäischen
Richtlinie 2006/66/EG unterliegen und nicht mit dem
normalen Hausmüll entsorgt werden dürfen. Bitte
informieren Sie sich über die örtlichen Bestimmungen zur
gesonderten Entsorgung von Batterien. Durch regelkonforme
Entsorgung schützen Sie die Umwelt und die Gesundheit
Ihrer Mitmenschen vor negativen Konsequenzen.
Konformitätserklärung
Hersteller: Chal-Tec GmbH, Wallstraße 16, 10179 Berlin.
Dieses Produkt entspricht den folgenden Europäischen
Richtlinien:
2011/65/EU (RoHS)
2014/53/EU (RED)
2014/35/EU (LVD)
DE
13
Page 14

EN
14
Page 15
Dear Customer,
Congratulations on purchasing this equipment. Please read this manual
carefully and take care of the following hints on installation and use to
avoid technical damages. Any failure caused by ignoring the items and
cautions mentioned in the operation and installation instructions are not
covered by our warranty and any liability.
CONTENTS
Technical Data 15
Safety Instructions 16
Scope of Supply 17
Product Overview 17
Getting Started 20
Play 21
Listening to radio 22
Play from external audio 22
Using the USB/SD input 23
BT Mode 23
Karaoke Mode 24
Connecting to your TV 24
Disposal Considerations 25
EN
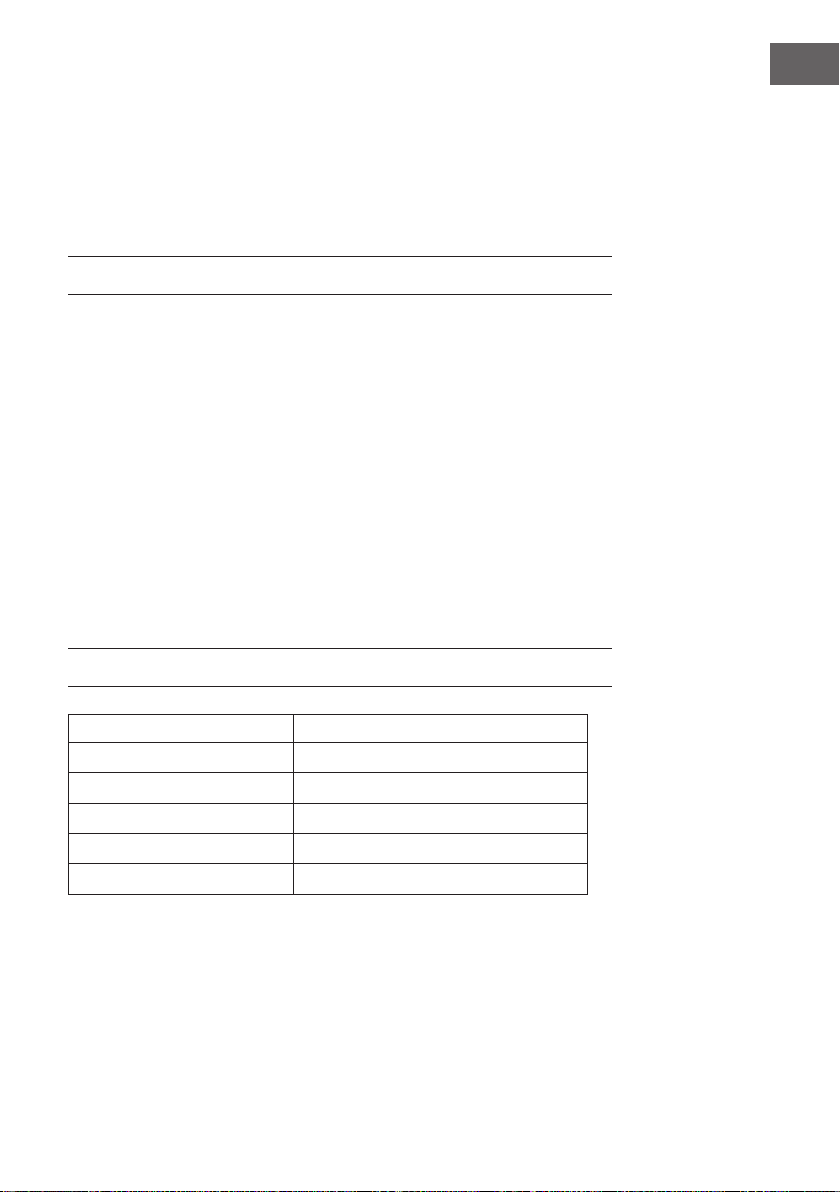
TECHNICAL DATA
Item number 10032105 10032106
Power supply 230 V~ 50 Hz
Total consumption 65 W
RMS power 60 W
Speakers impedance 8 Ω
S/N (A) 75 dB
15
Page 16

EN
SAFETY INSTRUCTIONS
• Read these instructions. Keep these instructions. Heed all warnings.
Follow all instructions.
• Do not use this apparatus near water.
• Clean only with dry cloth.
• Do not block any ventilation openings. Install in accordance with the
manufacturer’s instructions.
• Do not install near any heat sources such as radiators, heat registers,
stoves, or other apparatus (including ampliers) that produce heat.
• Protect the power cord from being walked on or pinched, particularly at
plugs, convenience receptacles, and the Point where they exit from the
apparatus.
• Only use attachments/accessories specied by the manufacturer.
• Use only with the cart, stand, tripod, bracket, or table specied by
the manufacturer or sold with the apparatus. When a cart is used, use
caution when moving the cart/apparatus combination to avoid injury
from tip-over.
• Unplug this apparatus during lightning storms or when unused for long
periods of time.
• Refer all servicing to qualied service personnel. Servicing is required
when the apparatus has been damaged in anyway, such as powersupply cord or plug is damaged, liquid has been spilled or objects have
fallen into the apparatus, the apparatus has been exposed to rain or
moisture, does not operate normally, or has been dropped.
• Apparatus shall not be exposed to dripping or splashing.
• Do not place any sources of danger on the apparatus (e.g. liquid lled
objects, lighted candles).
• Where the MAINS plug or an appliance coupler is used as the
disconnect device, the disconnect device shall remain readily operable.
• Make sure there is enough free space around the product for ventilation.
• Batteries (battery pack or batteries installed) shall not be exposed to
excessive heat such as sunshine, re or the like.
• Do not use this unit in wet or damp conditions.
• Always disconnect the unit from the mains power supply before
cleaning. Clean the appliance with a soft, damp, lint free cloth. Do not
use abrasives or harsh cleaners.
16
Page 17

SCOPE OF SUPPLY
EN
• 1x main unit
• 1x remote control
• 1x user manual
• 1x RCA cable
PRODUCT OVERVIEW
Front
• 1x line in cable
• 2x 6.5mm microphone
• 2x microphone holder
• 4x screw
Rear
17
Page 18

EN
1 USB Charge
2 USB socket
3 Audio in
Connect an external audio device
4 SD slot
5 Source
Select a source: CD, Bluetooth, USB, FM or AUDIO IN
6 Standby
Turn on the unit, switch to Standby mode
7 Eject
Eject the disc
8
Skip to the previous track
Tune to a radio station
Press and hold the key to search within a track / USB
9 VOL -
Adjust the Volume-
10 VOL +
Adjust the Volume+
11
Skip to the next track
12
Tune to a radio station
13. ECHO
Adjust the ECHO volume
14 MIC 1
15 MIC2
16 MIC Volume knob
17 FM antenna
18 VIDEO out
19 RCA jack
Connect an external audio device
18
Page 19

Overview of Remote Control
1 SLEEP
Press repeatedly to set a sleep timer to turn the tower of after a set
amount of time has passed
2 POWER
Press to power the tower o
and on
3 EJECT
Eject the disc
4 TIME/ALARM
Press to set alarm on standby
5 MEM/MEM+/MEM-
Press MEM to save the
current radio station
to a preset channel.
Press MEM+/MEM- to choose
the FM stations.
6 Select the repeat play in CD
mode
7 VOLUME+
8
Skip to the previous track
9
Start or pause play
10 VOLUME-
Press to adjust the volume-
11 ALARM
Press to set alarm on standby mode
12 MUTE
Press to Mute or restore volume
13 SOURCE
Select a source: CD, Bluetooth, USB, FM or Audio in
14. RANDOM
Select the random play mode in CD mode
15.
Stop play
16
Skip to the next track
Use: Use: The remote control operates on 1 pc CR2025 lithium battery
(included).to power up the remote control; remove the insulation tab from
the back unit
EN
19
Page 20

EN
GETTING STARTED
Caution: Danger of electric shock.
When you unplug the AC power cord always pull the plug from
the socket. Never pull the cord. Before connecting the AC power
cord, ensure you have completed all other connections.
Place the unit in the desired position and unravel the mains cable. Insert the
cable into the supply socket and switch on if applicable.
Auto-Standby
When playing media from a connected device, the Tower automatically
switches to standby if
• No button is pressed for 10 minutes,
• No audio from a connected device for 10 minutes.
Setting Clock
After the unit is plugged into a mains supply or mains power failure, the
display will show the “0:00” on the LED display. The unit should be in
standby mode to set the current clock.
1. Press TIME/ALARM button, the digits for the display will blink.
2. Press the , button repeatedly until correct hour is set. Press the
TIME/ALARM to conrm the hour setting.
3. The minute digits on the display will blink.
4. Press the button repeatedly until correct minute is set. Press the
TIME/ALARM to conrm the minute setting.
20
Setting Alarm
This unit can be used as an alarm clock, CD /USB/ FM is activated to play at
a preset time.
1. Press the Standby switch to switch the unit to standby mode.
2. Make sure that you have set the clock correctly.
3. Press and hold TIME/ALARM button in shutdown state, the display will
ash ON to select setting alarm and the display will blink.
4. Press the TIME/ALARM conrm, the time display will blink.
5. Press dbutton repeatedly to set hour. Press TIME/ALARM to
confirm.
6. Press to set minute.
7. Press ALARM to confirm, and then press , to select CD/FM/USB
status. Press TIME/ALARM to confirm.
Page 21

8. The volume would turn up from 0 to 20 gradually.
9. Press TIME/ALARM button in shutdown state, the display will flash ON
to select setting alarm, and the display will blink.
10. Press the "OFF" to select OFF to cancel alarm.
Sleep Mode
Press and hold the SLEEP button, the display will blink. Press the button
repeatedly until the display shows the minute you want to set. You can set
10 to 90 minutes.
It blinks three times to conrm, and then return to the interface before. If
you want to cancel the sleep mode, press to OFF, after blanking three times,
the sleep mode will cancel.
PLAY
Play a disc (CD,CD-R,CDR/W,CD+G)
1. Press SOURCE repeatedly to select DISC source
2. Put on a disc with the printed side facing upward
3. Play starts automatically, if not, Press
4. Press to adjust the volume.
Pause / resume play
1. During play, press
2. During play, long press button to fast forward/fast rewind
to pause/resume play
.
EN
Skip to a track
For CD:
1. Press / to select another track.
2. Press the VOL+/VOL – to adjust the volume
For MP3 disc and USB/SD
1. Press / to select a track or a le.
2. Press the VOL+/VOL- to adjust the volume.
Search within a track
1. During play, press and hold .
2. Release to resume normal play
21
Page 22

EN
LISTENING TO RADIO
You can program a maximum of 20 preset radio stations (FM)
1. Press the SOURCE button to select RADIO mode. The unit will be in FM
radio mode.
2. Press / to search radio station.
3. Select the desired radio station by pressing the / button.
4. Once you nd a station you want to save, press the MEM button on the
remote control, ”P01” will be shown on the display, press MEM+/MEMuntil the desired memory position number appears on the display. Press
the MEM again to conrm and save the current station.
5. (Auto) Press and hole MEM button, The unit will automatically start
and search the frequencies ,all available stations are programmed in
the order of waveband reception strength, the rst programmed radio
station is broadcast automatically.
ATTENTION: For optimal reception, fully extend and adjust the position on
the antenna
PLAY FROM EXTERNAL AUDIO
22
You can play from an external audio device such as MP3 player through this
unit.
Line in Jack (Requires a 3.5mm cable)
1. Connect a 3.5mm cable to the Line jack on top panel. Connect the other
end of the 3.5mm cable to an Mp3 player or other audio device.
2. Press the button to turn the unit on.
3. Press the SOURCE button to switch to Line In mode.
4. Use the controls on the connected device to begin playing audio routed
through the unit.
Auxiliary Input RCA (Requires an RCA cable)
1. Connect an RCA cable to the Auxiliary Input. Connect the other end of
the RCA cable to the audio output on your DVD player, stereo system,
gaming system or television.
2. Press the power button to turn the unit on.
3. Press the SOURCE button to switch to Aux In mode.
Page 23

4. Use the controls on the connected device to begin playing audio routed
through the unit.
USING THE USB/SD INPUT
1. Plug your USB ash drive or SD card to the USB socket or SD slot
2. Press SOURCE button to select USB or SD mode, the unit can play
automatically. If not, press
3. Press the / to select track
4. Press the VOL+/VOL – to adjust the volume
Remarks: USB/SD port is easy to sensitive equipment, will cause the
equipment work is not stable
USB charging
There is a USB charger on the top of the unit to charge small devices such as
smartphones that can be charged via USB
Output power: 5V/2.1A max
BT MODE
EN
1. Press SOURCE button to select BT mode. The LED indicator turns blue.
2. Turn on BT functionality on your BT device. Typically, BT controls are
found on the device’s tools or setting menu (see your user manual).
3. Turn on BT connectivity and make your device ‘discoverable”. Choose
‘add a new BT device’ or ‘setup BT device’ on your device. It will start to
search. Once “CZT-1713” shows on your device, select it. If your device
prompts you for a pass code, please enter 0000. If the pairing attempt
fails or times out, please start pairing procedure again (see steps above).
4. After your device and the tower speaker have connected each other, a
sound can be heard.
5. Make sure the BT connection between the unit and the device is active.
6. Press the Play/Pause button to pause playback, press again to resume
playback and press button to skip forward to next track and to skip
backward to previous track.
23
Page 24

EN
KARAOKE MODE
1. You can plug the microphone (included)in the back MIC JACK 1 or 2. Make
sure the VOLUME control is turned to a low setting
2. Slide the microphone switch to the ON position. To turn the microphone
o, simply side the switch to the OFF position.
3. Adjust the mic volume with the knobs on the back.
4. Rotate the ECHO control left to decrease the echo and right to increase
it
5. Choose your preferred device mode and start play.
6. Sing.
7. When you have nished using the karaoke, remember to turn the
microphone o by sliding the switch to the OFF position.
CONNECTING TO YOUR TV
You can connect your karaoke tower to the TV and play special CD+G
(Graphics) discs so you read the lyrics on screen.
Check your special karaoke compact disc has the CD+G mark on it
Connect the video jacks (yellow RCA plugs) to the karaoke player and TV.
Note: your TV player must have an RCA type VIDEO Input jack, you cannot
connect it to the TV’S aerial terminal
24
Page 25

DISPOSAL CONSIDERATIONS
According to the European waste regulation 2012/19/EU this
symbol on the product or on its packaging indicates that this
product may not be treated as household waste. Instead it
should be taken to the appropriate collection point for the
recycling of electrical and electronic equipment. By ensuring
this product is disposed of correctly, you will help prevent
potential negative consequences for the environment
and human health, which could otherwise be caused by
inappropriate waste handling of this product. For more
detailed information about recycling of this product, please
contact your local council or your household waste disposal
service.
Your product contains batteries covered by the European
Directive. 2006/66/EC, which cannot be disposed of with
normal household waste. Please check local rules on
separate collection of batteries. The correct disposal of
batteries helps prevent potentially negative consequences
on the environment and human health.
Declaration of Conformity
Producer: Chal-Tec GmbH, Wallstraße 16, 10179 Berlin.
Germany
This product is conform to the following European Directives:
2011/65/EU (RoHS)
2014/53/EU (RED)
2014/35/EU (LVD)
EN
25
Page 26

FR
26
Page 27

Chère cliente, cher client,
Toutes nos félicitations pour l’acquisition de ce nouvel appareil. Veuillez
lire attentivement les instructions suivantes de branchement et d’utilisation
an d’éviter d’éventuels dommages. Le fabricant ne saurait être tenu pour
responsable des dommages dus au non-respect des consignes de sécurité
et à la mauvaise utilisation de l’appareil.
FICHE TECHNIQUE
Numéro d‘article 10032105 10032106
Alimentation 230 V~ 50 Hz
Puissance totale 65 W
Puissance RMS 60 W
Impédance des enceintes 8 Ohm
Rapport signal bruit 75 dB
SOMMAIRE
FR
Consignes de sécirité 28
Aperçu de l'appareil 29
Mise en service 32
Lecture de musique 33
Radio 34
Entrée AUX 34
Fonctionnement BT 35
Fonctionnement du karaoke 35
Branchement sur le televiseur 36
Conseils pour le recyclage 37
27
Page 28

FR
CONSIGNES DE SÉCIRITÉ
• Lisez ces indications. Conservez les instructions d'utilisation. Tenez
compte de tous les avertissements. Suivez les instructions.
• N'utilisez pas l'appareil à proximité de l'eau. Nettoyez-le avec un chion
sec uniquement.
• N'obstruez pas les ouvertures de ventilation.
• Tenez l'appareil à l'écart des sources de chaleur telles que les
chauages, radiateurs, cuisinières et autres appareils (y compris les
amplicateurs) produisant de la chaleur.
• Veillez à ce que personne ne marche sur le câble d'alimentation ou ne le
plie, en particulier au niveau de la prise d'alimentation et à l'endroit où
le câble d'alimentation sort de l'unité.
• Utilisez uniquement les accessoires recommandés par le fabricant.
• Utilisez uniquement avec le chariot, les supports, les étagères ou les
coussinets recommandés par le fabricant. Soyez prudent lorsque vous
déplacez l'appareil pour éviter de tomber.
• Débranchez la prise en cas d'orage, de même si vous n'utilisez pas
l'appareil pendant une longue période.
• Adressez-vous à des spécialistes qualiés pour les réparations. Des
réparations seront nécessaires si l'appareil a été endommagé de
quelque façon que ce soit, si le câble d'alimentation ou la prise ont été
endommagés, si des liquides ont été renversés sur l'appareil, si des
objets sont tombés à l'intérieur, si l'appareil a été exposé à la pluie ou à
l'humidité, n'a pas fonctionné normalement ou s'il a fait une chute.
• L'appareil ne doit pas être exposé à l'eau ou à des éclaboussures.
• Les récipients contenant des liquides tels que des vases ne doivent pas
être placés sur l'appareil.
• La batterie ne doit pas être exposée à une chaleur excessive due à
l'ensoleillement, au feu, etc.
• L'appareil se met hors tension en débranchant le câble secteur.
• Pendant la connexion au secteur, l'appareil reste opérationnel. ç
28
LIVRAISON
• Appareil
• Télécommande
• Mode d'emploi
• Câble RCA Câble Line-In
• 2 Micros
• 2 Supports de micros
• 4 Vis
Page 29

APERÇU DE L'APPAREIL
Vue de face
Vue de dos
FR
29
Page 30

FR
1 Port de charge USB
2 Port USB
3 Entrée Audio
4 Lecteur de carte SD
5 Source
Choix de la source, CD
6 STANDBY
Allumer ou éteindre le mode veille
7 EJECT
Ejecter le disque
8 ZURÜCK
Appuyer : titre précédent
Choisir une station de radio
Maintenir enfoncé : retour en arrière à l'intérieur d'un titre
9 Volume 10 Volume +
11 AVANT
Appuyer : titre suivant
Choisir une station de radio
Maintenir enfoncée : avancer à l'intérieur d'un titre
12 PLAY/PAUSE/MODE button
Appuyer : lire ou mettre en pause le titre actuel
Maintenir enfoncé : choisir le mode USB/BT
13 Réglage du volume
Augmenter ou réduire le volume
14 MIC1
15 MIC2
16 Réglage du volume MIC
17 Antenne FM
18 Sortie Vidéo
19 Prise AUX
Pour brancher sur un appareil externe audio
30
Page 31

Aperçu de la télécommande
1 Nuit
Appuyez plusieurs fois pour régler la minuterie de mise en veille (arrêt
automatique).
2 MARCHE/ARRET
Appuyez pour allumer ou
éteindre l'appareil
3 EJECTER
Ejecter le CD
4 MEM/MEM+/MEM-
Appuyez sur MEM pour
sauvegarder la station en cours
sur un canal de préréglage.
Choisissez l'emplacement de la
station avec MEM+/MEM-..
5 SELECT REPEAT MODE
6 VOLUME +
Augmenter le volume
7
Retour au titre précédent
8 PLAY/PAUSE
9 VOLUME -
Réduire le volume
10 HEURE/ALARME
11 MUET
Appuyez pour activer
la fonction muet :
Appuyez à nouveau pour rétablir le son.
12 Quelle (SOURCE)
Choix d'une source
13 LECTURE ALEATOIRE
Lecture aléatoire de CD
14
Lecture aléatoire de CD
15
Saut de titre
FR
31
Page 32

FR
MISE EN SERVICE
Attention : risque d'électrocution.
Lorsque vous débranchez le cordon d'alimentation, touchez
toujours la prise d'alimentation. Ne débranchez jamais le
cordon d'alimentation.
Placez l'appareil dans la position voulue.
Auto-Standby
Lorsque vous lisez un média à partir d'un appareil connecté, le système
passe automatiquement en mode veille si vous n'avez appuyé sur aucune
touche pendant 10 minutes ou si l'appareil connecté n'a lu aucun son depuis
10 minutes.
Réglage de l'heure
Après une coupure de courant, si la tour de karaoké a été connectée à
l'alimentation électrique, l'aichage indique "0:00". Pour régler l'heure
actuelle, l'appareil doit être en mode veille.
1. Appuyez sur TIME / ALARM. Les chires clignotent.
2. Appuyez sur
Appuyez sur la touche TIME/ ALARM.
3. Les chires des minutes clignotent à l'écran.
4. Appuyez plusieurs fois sur les touches
des minutes soit correct.
, jusqu'à ce que le réglage de l'heure soit correct.
jusqu'à ce que le réglage
32
Réglage du réveil
L'appareil peut servir de réveil. Les sources CD, USB, FM peuvent être
activées à l'heure programmée du réveil.
1. Appuyez sur la touche de MARCHE/ARRET pour mettre l'appareil en
mode veille.
2. Vériez que l'heure est réglée correctement.
3. Maintenez la touche TIME/ALARM. ON clignote à l'écran. Vous pouvez
maintenant régler l'heure du réveil.
4. Appuyez sur la touche TIME/ALARM. L'écran clignote.
5. Appuyez de nouveau sur les touches
avec TIME/ALARM.
6. Réglez les minutes avec
7. Appuyez sur ALARM pour confirmer puis choisissez CD/ FM/USB avec
les touches
8. Réglez le volume à un niveau entre 0 et 20.
.
.
pour régler l'heure. Confirmez
Page 33

9. Appuyez sur la touche TIME/ALARM avec l'appareil éteint. ON clignote
pour régler le réveil.
10. Désactiver le réveil : choisissez "OFF" avec les touches
Mode nuit
Appuyez sur le bouton SLEEP et maintenez-le. L'écran clignote. Appuyez
plusieurs fois sur le bouton jusqu'à ce que l'écran aiche les minutes. Vous
pouvez régler de 10 à 90 minutes.
Lors de la conrmation, l'écran clignote trois fois puis revient à l'aichage
précédent. Si vous voulez quitter le mode veille, appuyez sur OFF. Après
trois saisies vides, vous quittez le mode veille.
"OFF".
LECTURE DE MUSIQUE
Lecture d’un disque (CD, CD-R, CDR/W, CD+G)
1. Appuyez plusieurs fois sur la touche SOURCE pour choisir CD.
2. Insérez un CD avec la face imprimée dirigée vers le haut.
3. La lecture commence automatiquement. Dans le cas contraire, appuyez
sur la touche
4. Utilisez les commandes de l’appareil connecté pour lancer la lecture de
la musique retransmise aux enceintes.
Mettre en pause/poursuivre la lecture
1. Pendant la lecture, appuyez sur
poursuivre.
2. Pendant la lecture, maintenez
vers l’arrière.
.
pour mettre en pause ou pour
pour rembobiner vers l’avant ou
FR
Saut d’un titre
CD/ disque MP3, support de données USB/SD
1. Appuyez sur
2. Appuyez sur VOL-/VOL+ pour régler le volume.
pour choisir un autre titre.
33
Page 34

FR
RADIO
Vous pouvez préprogrammer jusqu’à 20 titres :
1. Démarrez la radio avec la touche SOURCE.
2. Recherchez une station avec les touches
3. Réglez les stations souhaitées avec les touches
4. Lorsque vous avez trouvé une station que vous souhaitez mémoriser,
appuyez sur la touche MEM de la télécommande. l’écran aiche «P01».
Appuyez sur MEM+/MEM- jusqu’à ce que l’emplacement mémoire
souhaité soit aiché. Appuyez sur MEM pour mémoriser la station
actuelle.
5. Si vous maintenez la touche MEM, l’appareil lance une recherche
automatique de toutes les stations disponibles triées en fonction de la
force de réception.
.
.
ENTRÉE AUX
(Requiert un câble RCA)
Branchez le câble RCA à l’entrée AUX. Connectez l’autre extrémité du câble
RCA à la sortie audio d’un lecteur DVD, stéréo, console de jeu ou téléviseur.
1. Allumez l’appareil : appuyez sur l’interrupteur marche / arrêt.
2. Passer sur AUX : appuyez sur le bouton SOURCE.
3. Utilisez le panneau de contrôle de l’appareil connecté pour lancer la
lecture de la vidéo.
34
ENTRÉE USB/SD
1. Connectez le périphérique de stockage USB ou la carte SD au port
approprié.
2. Appuyez sur le bouton SOURCE pour sélectionner le mode USB ou
SD. L’appareil joue automatiquement les pistes ; dans le cas contraire,
appuyez sur les touches
3. Choisissez le titre avec les touches
4. Réglez le volume avec les touches VOL+ et VOL-
Remarque : le port USB et le lecteur de cartes SD sont des prises sensibles,
qui peuvent rendre l’appareil instable.
.
.
Page 35

Recharge d’appareils sur le port USB
En haut de l’appareil se trouve un port de charge USB.
FONCTIONNEMENT BT
1. Appuyez sur la touche SOURCE et choisissez le mode BT.
2. Activez la fonction BT sur votre périphérique multimédia, généralement
dans les paramètres.
3. Activez la réception BT et rendez votre appareil «visible». Dans les
paramètres de votre appareil BT, sélectionnez «Ajouter un nouvel
appareil» ou «Congurer un appareil BT». Une recherche est alors lancée.
Connectez-vous avec «CZT-1713» dès que celui-ci est aiché. Si vous
êtes invité à entrer un mot de passe, entrez «0000» (quatre zéros). Si
la tentative d’appairage échoue ou que le délai a expiré, reprenez les
étapes.
4. Une fois l’unité et la tour de karaoké appairées, un bip retentit.
5. Vériez que la connexion BT a bien été établie.
6. Appuyez sur PLAY/PAUSE pour mettre la lecture en pause puis à nouveau
pour la poursuivre, et sur pour sauter un titre vers l’avant, et , pour
sauter un titre en arrière.
FONCTIONNEMENT DU KARAOKE
FR
1. Branchez le micro (fourni) sur la prise MIC1 ou MIC2. Assurez-vous que le
volume est faible.
2. Mettez le micro sur ON. Pour éteindre le micro mettez-le sur OFF.
3. Réglez le volume du micro sur le panneau arrière.
4. Tournez la commande ECHO pour augmenter ou diminuer l’eet d’écho.
5. Sélectionnez la source de lecture souhaitée et démarrez la lecture.
6. Chantez !
7. Quand vous avez terminé de chanter, éteignez le micro en tournant
l’interrupteur sur OFF.
35
Page 36

FR
BRANCHEMENT SUR LE TELEVISEUR
Vous pouvez connecter la tour Karaoké à un téléviseur et lire un CD +G.
Recherchez l'icône CD +G sur l'appareil. Connectez une extrémité du câble
RCA jaune à la tour de karaoké et l'autre extrémité à la télévision.
Le téléviseur doit avoir une connexion vidéo (prise RCA jaune).
36
Page 37

CONSEILS POUR LE RECYCLAGE
Le pictogramme ci-contre apposé sur le produit signie que
la directive européenne 2012/19/UE s‘applique (poubelle à
roues barrée d’une croix). Ces produits ne peuvent être jetés
dans les poubelles domestiques courantes. Renseignezvous concernant les règles appliquées pour la collecte
d’appareils électriques et électroniques. Conformez-vous
aux réglementations locales et ne jetez pas vos anciens
produits avec les ordures ménagères. Le respect des règles
de recyclage des vieux produits aide à la protection de
l’environnement et de la santé de votre entourage contre les
conséquences négatives possibles.
Le recyclage des matériaux aide à réduire l’utilisation des
matières premières.
Le produit contient des piles qui sont soumises à la directive
européenne 2006/66/CE et ne doivent pas être jetées dans
les poubelles à ordures ménagères. Veuillez-vous informer
sur les réglementations locales en vigueur pour le recyclage
des piles. En respectant les règles de recyclage vous
participez activement à la protection de l’environnement et à
la préservation de la santé de vos proches
.
Déclaration de conformité
Fabricant : Chal-Tec GmbH, Wallstraße 16, 10179 Berlin.
Ce produit est conforme aux directives européennes
suivantes :
2011/65/UE (RoHS)
2014/53/UE (RED)
2014/35/UE (LVD)
FR
37
Page 38

IT
38
Page 39

Gentile cliente,
desideriamo congratularci con Lei per l’acquisto del dispositivo. La
preghiamo di leggere con attenzione le seguenti indicazioni e di rispettarle,
in modo da evitare possibili danneggiamenti. Per danneggiamenti causati
dal mancato rispetto delle indicazioni e da un utilizzo improprio, non ci
assumiamo alcuna responsabilità.
DATI TECNICI
Numero articolo 10032105 10032106
Alimentazione 230 V~ 50 Hz
Potenza complessiva 65 W
Potenza RMS 60 W
Impedenza altoparlanti 8 Ohm
Rapporto segnale/rumore 75 dB
ÍNDICE
IT
Dati tecnici 39
INdicazioni di sicurezza 40
Volume die conegna 40
Panoramica del dispositivo 41
Messa in funzione 44
Riproduzione musicale 45
Radio 46
Ingresso AUX 46
Ingresso USB/SD 46
Modalità BT 47
Modalità karaoke 47
Collegamento ad un televisore 48
Indicazioni sullo smaltimento 49
39
Page 40

IT
INDICAZIONI DI SICUREZZA
• Leggere le indicazioni. Conservare il manuale d’uso. Fare attenzioni a
tutti gli avvertimenti. Seguire le indicazioni del manuale d’uso.
• Non utilizzare il dispositivo nelle vicinanze di acqua. Pulire
esclusivamente con un panno asciutto.
• Non bloccare le prese d’aria.
• Non utilizzare nelle vicinanze di fonti di calore come termosifoni,
caloriferi e altri dispositivi (incl. amplicatori), che generano calore.
• Proteggere il cavo di alimentazione in modo da evitare che possa
essere calpestato o piegato, in particolare in corrispondenza della spina
di corrente e nel punto in cui il cavo esce dal dispositivo.
• Utilizzare esclusivamente accessori indicati dal produttore.
• Utilizzare solo carrelli, supporti, scaali o sostegni indicati dal
produttore. Durante lo spostamento del dispositivo prestare molta
attenzione, in modo da evitare cadute.
• In caso di temporali, scollegare la spina della corrente, anche qualora il
dispositivo non venisse utilizzato per un tempo prolungato.
• Per riparazioni, rivolgersi a personale specializzato. Le riparazioni sono
necessarie se si presentano danneggiamenti di qualunque natura,
se il cavo di alimentazione o la spina sono danneggiati, se è stato
versato del liquido sul dispositivo, se vi sono caduti sopra oggetti,
se il dispositivo è stato esposto a pioggia o umidità, se non funziona
normalmente o se è stato fatto cadere.
• Il dispositivo non può essere esposto a spruzzi e gocce d’acqua.
• Non posizionare recipienti con liquidi, come ad es. vasi, sopra al
dispositivo.
• La batteria non deve essere esposta a calore elevato, ad es. attraverso
irradiazione solare, fuoco ecc.
• Il dispositivo viene scollegato dalla rete elettrica attraverso la spina.
• Durante il collegamento alla rete elettrica il dispositivo rimane pronto
all’uso.
40
VOLUME DIE CONEGNA
• Impianto
• Telecomando
• Manuale d’uso
• Cavo RCA
• Cavo Line-In
• 2 microfoni
• 2 supporti per microfono
• 4 viti
Page 41

PANORAMICA DEL DISPOSITIVO
Fronte
Retro
IT
41
Page 42

IT
1 Collegamento di carica USB
2 Collegamento USB
3 Ingresso audio
4 Vano SD
5 Fonte (SOURCE) Selezionare fonte, CD
6 STANDBY
Accendere e spegnere Standby
7 EJECT
Espellere il disco
8 INDIETRO
Premere: titolo precedente
Selezionare un’emittente radio
Tenere premuto: tornare indietro all’interno di un brano
9 Volume 10 Volume +
11 AVANTI
Premere: titolo successivo
Selezionare un’emittente radio
Tenere premuto: avanzare all’interno di un brano
12 Tasto PLAY/PAUSE/MODE
Premere: riprodurre o mettere in pausa il brano attuale
Tenere premuto: selezionare modalità USB/BT
13 Regolazione volume
Aumentare o diminuire il volume
14 MIC1
15 MIC2
16 Regolazione volume MIC
17 Antenna OUC
18 Uscita Video
19 Collegamento AUX
Collegare ad un dispositivo audio esterno
42
Page 43

Panoramica del telecomando
1 Sonno
Premere ripetutamente, per impostare il timer-sonno (spegnimento
automatico).
2 ON/OFF
Premere per accendere o
spegnere il dispositivo.
3 ESPULSIONE
Espellere CD
4 MEM/MEM+/MEM-
Premere MEM, per impostare
l’emittente radio attuale su un
canale preimpostato
Con MEM+/MEM- selezionare
la voce dell‘emittente.
5 SELECT REPEAT MODE
6 VOLUME +
Aumentare il volume
7
Passare a titolo precedente
8 PLAY/PAUSE
9 VOLUME -
Diminuire il volume
10 ORA/ALARM
11 MUTO
Per attivare la funzione muta
premere.
Premere nuovamente per riattivare il suono.
12 Fonte (SOURCE)
Selezionare una fonte
13 RIPRODUZIONE CASUALE
Riproduzione casuale di CD
14
Interrompi riproduzione
15
Saltare titolo
IT
43
Page 44

IT
MESSA IN FUNZIONE
Attenzione: pericolo di folgorazione.
Quando si scollega il cavo di alimentazione dalla rete
elettrica, impugnare sempre la spina di corrente. Non tirare
mai impugnando il cavo di alimentazione.
Mettere il dispositivo nella posizione desiderata.
Auto-Standby
Se si riproducono media da dispositivi collegati, l’impianto entra
automaticamente in modalità standby, se non vengono premuti tasti per
10 minuti o se per 10 minuti non vengono riprodotti brani dal dispositivo
collegato.
Impostare l’orologio
Dopo aver collegato la torre karaoke all’alimentazione e dopo una
mancanza di tensione, lo schermo mostra "0:00". Per impostare l’ora
attuale, il dispositivo deve essere in standby.
1. Premere TIME/ALARM. Le cifre sullo schermo lampeggiano.
2. Premere , no ad aver impostato l’ora esatta. Premere il tasto
TIME/ ALARM.
3. Le cifre dei minuti lampeggiano sullo schermo.
4. Premere ripetutamente i tasti , no ad aver impostato i minuti
esatti.
44
Impostare la sveglia
Il dispositivo può essere utilizzato come sveglia. Le fonti CD, USB, OUC
vengono attivate all’ora impostata per la sveglia.
1. Premere il tasto ON/OFF per mettere il dispositivo in modalità standby.
2. Assicurarsi che sia impostata l’ora esatta.
3. Tenere premuto il tasto TIME/ALARM. Sullo schermo lampeggia ON. Ora
è possibile impostare l’orario della sveglia.
4. Premere il tasto TIME/ALARM. Lo schermo lampeggia.
5. Premere ripetutamente i tasti per impostare l’ora. Confermare con
TIME/ALARM.
6. Impostare i minuti con .
7. Per confermare, premere ALARM e poi con i tasti selezionare CD/
FM/USB.
8. Impostare il volume su un livello da 0 a 20.
Page 45

9. A dispositivo spento, premere TIME/ALARM. Sullo schermo
lampeggia ON per impostare la sveglia.
10. Disattivare sveglia: selezionare con i tasti "OFF".
Modalità sonno
Tenere premuto il tasto SLEEP. Lo schermo lampeggia. Premere
ripetutamente il tasto, no a quando lo schermo mostra i minuti. Possibilità
di impostare tra 10 e 90 minuti.
In caso di conferma, lampeggia tre volte e torna all’indicazione precedente.
Se si desidera terminare la modalità sonno, premere OFF. Dopo aver
realizzato tre inserimenti vuoti, la modalità sonno viene disattivata.
RIPRODUZIONE MUSICALE
Riprodurre un disco (CD, CD-R, CDR/W, CD+G)
1. Premere ripetutamente il tasto SOURCE per selezionare CD.
2. Inserire un CD con la parte stampata verso l’alto.
3. La riproduzione inizia automaticamente. In caso contrario, premere il
tasto
.
4. Utilizzare gli elementi di controllo sul dispositivo collegato per iniziare la
riproduzione musicale, che viene trasmessa agli altoparlanti.
IT
Interrompere/proseguire la riproduzione
1. Durante la riproduzione, premere
2. Durante la riproduzione, tenere premuto
indietro.
Saltare un titolo
Disco CD/MP3, supporto USB/SD
1. Premere
2. Premere VOL-/VOL+ per regolare il volume.
per selezionare un altro titolo.
per interrompere o proseguire.
per andare avanti o
45
Page 46

IT
RADIO
Possibilità di preprogrammare no a 20 titoli:
1. Avviare la radio con il tasto SOURCE.
2. Cercare un’emittente con i tasti
3. Con i tasti
4. Una volta trovata l’emittente che si desidera salvare, premere il tasto
MEM- sul telecomando. Sullo schermo compare “P01”. Premere MEM+/
MEM- no a visualizzare lo spazio di salvataggio desiderato. Premere
MEM per salvare l’emittente attuale.
5. Tenendo premuto il tasto MEM-, il dispositivo attiva una ricerca
automatica di tutte le emittenti disponibili, assortite secondo la potenza
di ricezione.
impostare l’emittente desiderata.
.
INGRESSO AUX
(necessario un cavo RCA)
Non collegare il cavo RCA all’ingresso AUX. Collegare l’altra estremità del
cavo RCA con l’uscita Audio di un lettore DVD, impianto Stereo, console per
videogiochi o televisore.
1. Accendere dispositivo: premere l’interruttore ON/OFF.
2. Passare ad AUX: premere il tasto SOURCE.
3. Utilizzare il pannello di controllo sul dispositivo collegato per iniziare la
riproduzione video.
46
INGRESSO USB/SD
1. Collegare il supporto di memoria USB o la scheda SD all’apposita
connessione.
2. Premere il tasto SOURCE per selezionare la modalità USB o SD. Il
dispositivo riproduce i titoli automaticamente; in caso contrario premere
i tasti
drücken.
3. Selezionare il titolo con i tasti
4. Con i tasti VOL+ e VOL-
Indicazione: il collegamento USB e il vano SD sono connessioni sensibili
che possono comportare instabilità del dispositivo.
.
Page 47

Caricare dispositivi tramite connessione USB
Nella parte superiore del dispositivo si trova un collegamento di carica USB.
MODALITÀ BT
1. Premere il tasto SOURCE e selezionare la modalità BT.
2. Attivare la funzione BT sul dispositivo, che si trova normalmente nelle
impostazioni.
3. Attivare la ricezione BT e rendere il dispositivo “visibile”. Nelle
impostazioni del dispositivo BT selezionare “Aggiungere nuovo
dispositivo“ o “Aprire dispositivo BT”. Inizia la ricerca. Connettere con
"CZT-1713", non appena viene mostrato. Se viene richiesta l’immissione
di una password, inserire “0000” (quattro zeri). Se il tentativo di
accoppiamento non ha successo o il tempo è scaduto, ripetere i
passaggi.
4. Dopo aver accoppiato dispositivo e torre per karaoke, verrà emesso un
segnale acustico.
5. Vericare che il collegamento BT sia eettivamente stabilito.
6. Premere PLAY/PAUSE per interrompere la riproduzione e nuovamente
per riprenderla. Premere per saltare in avanti di un titolo e per
tornare indietro di un titolo..
IT
MODALITÀ KARAOKE
1. Collegare il microfono (incluso in volume di consegna) alla connessione
MIC1 o MIC2. Assicurarsi che il volume sia basso.
2. Posizionare il microfono su ON per accenderlo. Per spegnerlo, tornare su
posizione OFF.
3. Impostare il volume del microfono sul retro.
4. Ruotare la manopola ECHO per aumentare o diminuire l’eetto eco.
5. Selezionare la fonte desiderata e dare inizio alla riproduzione.
6. Cantare a squarcia gola!
7. Spegnere nuovamente il microfono dopo la sessione canora, ritornando
alla posizione OFF.
47
Page 48

IT
COLLEGAMENTO AD UN TELEVISORE
La torre per karaoke può essere collegata ad un televisore e può riprodurre
un CD+G. Cercare il simbolo CD+G sul dispositivo. Collegare il connettore
giallo del cavo RCA ad un’estremità della torre per karaoke e l’altra
estremità al televisore.
Il televisore deve essere provvisto di collegamento Video (connettore RCA
giallo).
48
Page 49

INDICAZIONI SULLO SMALTIMENTO
Se sul prodotto si trova questa immagine (cassonetto dei
riuti su ruote sbarrato) si applica la direttiva europea
2012/19/EU. Questi prodotti non possono essere smaltiti nei
normali riuti di casa. Si prega di informarsi riguardo alle
regolamentazioni locali in tema di raccolta dierenziata di
dispositivi elettrici ed elettronici. Agire sempre nel rispetto
di tali regolamentazioni e non smaltire i vecchi dispositivi
nei normali riuti domestici. Con uno smaltimento conforme
alle regole relative a vecchi dispositivi si tutela l’ambiente e
la salute del prossimo da possibili conseguenze negative. Il
riciclaggio dei materiali aiuta a diminuire lo sfruttamento di
materie prime.
Il prodotto contiene batterie sottoposte alla direttiva
europea 2006/66/EG e che non possono essere smaltiti
nei normali riuti di casa. Si prega di informarsi riguardo
alle regolamentazioni locali in tema di smaltimento di
batterie. Con uno smaltimento conforme alle regole si tutela
l’ambiente e la salute del prossimo da possibili conseguenze
negative.
Dichiarazione di conformità
Produttore: Chal-Tec GmbH, Wallstraße 16, 10179 Berlino.
IT
Questo prodotto rispetta le seguenti direttive europee:
2011/65/EU (RoHS)
2014/53/EU (RED)
2014/35/EU (LVD)
49
Page 50

IT
50
Page 51

Page 52

 Loading...