

Page 1

CM001B
Studio-Kondensatormikrofon
www.auna-multimedia.com10011704 10011705 10011706
Page 2

Bedienungsanleitung 3
Instruction manual 6
Mode d‘emploi 9
Instruzioni 12
Manual de instrucciones 15
2
Page 3

Sehr geehrter Kunde,
zunächst möchten wir Ihnen zum Erwerb Ihres Gerätes gratulieren.
Bitte lesen Sie die folgenden Anschluss- und Anwendungshinweise sorgfältig durch und befolgen Sie diese
um möglichen technischen Schäden vorzubeugen.
Technische Daten
Artikelnummer 10011704, 10011705, 10011706
Typ Kondensator-Mikrofon, 32mm Membran
integrierter -6dB 100Hz Low-Cut-Filter
Charakteristik Niere
Frequenzbereich 20 Hz - 20 KHz
Empndlichkeit 36dB-+ / - 2 dB
Ausgangsimpedanz 200 Ohm
max. Verstärkung 125 dB für 0,5% THD
Anschluss und Stromversorgung XLR, 48V Phantomspeisung
Maße / Gewicht 5 x 15 cm (ØxH), ca. 340g
Lieferumfang
Mikrofon, Spinne, Windschutz, 3/8“ auf 5/8“ - Adapter, Schutztasche, Bedienungsanleitung
Wichtige Hinweise
• Diese Bedienungsanleitung dient dazu, Sie mit der Funktionsweise dieses Produktes vertraut zu machen. Bewahren Sie diese Anleitung daher stets gut auf, damit Sie jederzeit darauf zugreifen können.
• Sie erhalten bei Kauf dieses Produktes zwei Jahre Gewährleistung auf Defekt bei sachgemäßem Gebrauch.
• Bitte verwenden Sie das Produkt nur in seiner bestimmungsgemäßen Art und Weise. Eine anderweitige Verwendung führt eventuell zu Beschädigungen am Produkt oder in der Umgebung des Produktes.
• Ein Umbauen oder Verändern des Produktes beeinträchtigt die Produktsicherheit.
• Önen Sie das Produkt niemals eigenmächtig und führen Sie Reparaturen nie selber aus!
• Behandeln Sie das Produkt sorgfältig. Es kann durch Stöße, Schläge oder den Fall aus bereits geringer
Höhe beschädigt werden.
• Halten Sie das Produkt fern von Feuchtigkeit und extremer Hitze.
• Lassen Sie keine Gegenstände aus Metall in dieses Gerät fallen.
• Stellen Sie keine schweren Gegenstände auf dieses Gerät.
• Reinigen Sie das Gerät nur mit einem trockenen Tuch.
3
Page 4

• Verwenden Sie ausschließlich vom Hersteller oder vom qualizierten Fachhandel empfohlenes Zubehör.
Die Gewährleistung verfällt bei Fremdeingrien in das Gerät.
Kleine Objekte/Verpackungsteile (Plastikbeutel, Karton, etc.)
Bewahren Sie kleine Objekte (z.B. Schrauben und anderes Montagematerial, Speicherkarten) und
Verpackungsteile außerhalb der Reichweite von Kindern auf, damit sie nicht von diesen verschluckt
werden können. Lassen Sie kleine Kinder nicht mit Folie spielen. Es besteht Erstickungsgefahr!
Transport des Gerätes
Bitte bewahren Sie die Originalverpackung auf. Um ausreichenden Schutz beim Transport des Gerätes zu
erreichen, verpacken Sie das Gerät in der Originalverpackung.
Reinigung der äußeren Oberäche
Verwenden Sie keine üchtigen Flüssigkeiten, wie Insektensprays. Durch zu starken Druck beim
Abwischen können die Oberächen beschädigt werden. Gummi- oder Plastikteile sollten nicht über einen
längeren Zeitraum mit dem Gerät in Kontakt sein. Nutzen Sie ein trockenes Tuch.
Hinweise zu Montage und Nutzung
Um den gewünschten Klang zu erreichen, testen Sie verschiedene Position zur Schallquelle. Bewegen Sie
das Mikrofon ruhig im Aufnahmeraum und testen verschiedene Abstände und Winkel. Erst wenn Sie den
passenden Grundton erreicht haben, sollten Sie Equalizer und Klangprozessoren verwenden.
Das Mikrofon verfügt über einen Adapter, der auf europäische und amerikanische Mikrofonhalter passt.
Lösen Sie den Adapter von Mikrofon, befestigen Sie diesen am Mikrofonhalter und xieren dann das Mikrofon auf dem Adapter. Das Mikrofon sollte aufrecht befestigt werden und der Schall sollte in einem rechten
Winkel auf dieses eintreen. Testen Sie verschiedene Positionen bis Sie den gewünschten Klang erzielen.
Falls nötig können Sie es auch mit dem Scharnier vertikal verstellen.
Es ist immer ratsam, einen Popp-Filter (nicht im Lieferumfang enthalten) zu verwenden, um übermäßige
Zisch- und Popplaute zu vermeiden. Das Element schützt auch vor Feuchtigkeit. Es ist immer eine gute Idee
das Mikrofon in seine Schutztasche zu verstauen, wenn sie es nicht benutzen.
Schließen Sie das Mikrofon an ein Mischpult oder Aufnahmegerät mit einem hochwertigen XLR-Kabel, bevor Sie die Phantomspeisung aktivieren. Stellen Sie sicher, dass alle Volumen-und Gain-Regler am Mischpult, Mikrofon-Vorverstärker oder Aufnahmegerät beim Einschalten der Phantomspeisung auf der kleinsten
Lautstärke eingestellt sind. Sobald das CM001 angeschlossen wird und die Phantomspeisung eingeschaltet
ist, bewegen Sie die Kanal-Fader allmählich auf die 0 dB Position.
Behandeln Sie das Mikrofon und den Adapter sorgsam. Setzen Sie die Gewinde keiner zu großen Gewalt
aus. Sie können das Mikrofon natürlich auch ohne diesen Adapter auf einen passenden, von Ihnen gekauften Mikrofonständer montieren.
Low Cut Filter: Schrauben Sie die „Kappe“ an der Unterseite des Mikrofons ab und ziehen Sie die GehäuseRöhre ab. Drücken Sie den blauen Schalter auf der Mitte der Platine, um den Low-Cut-Filter zu aktivieren/
deaktivieren.
4
Page 5
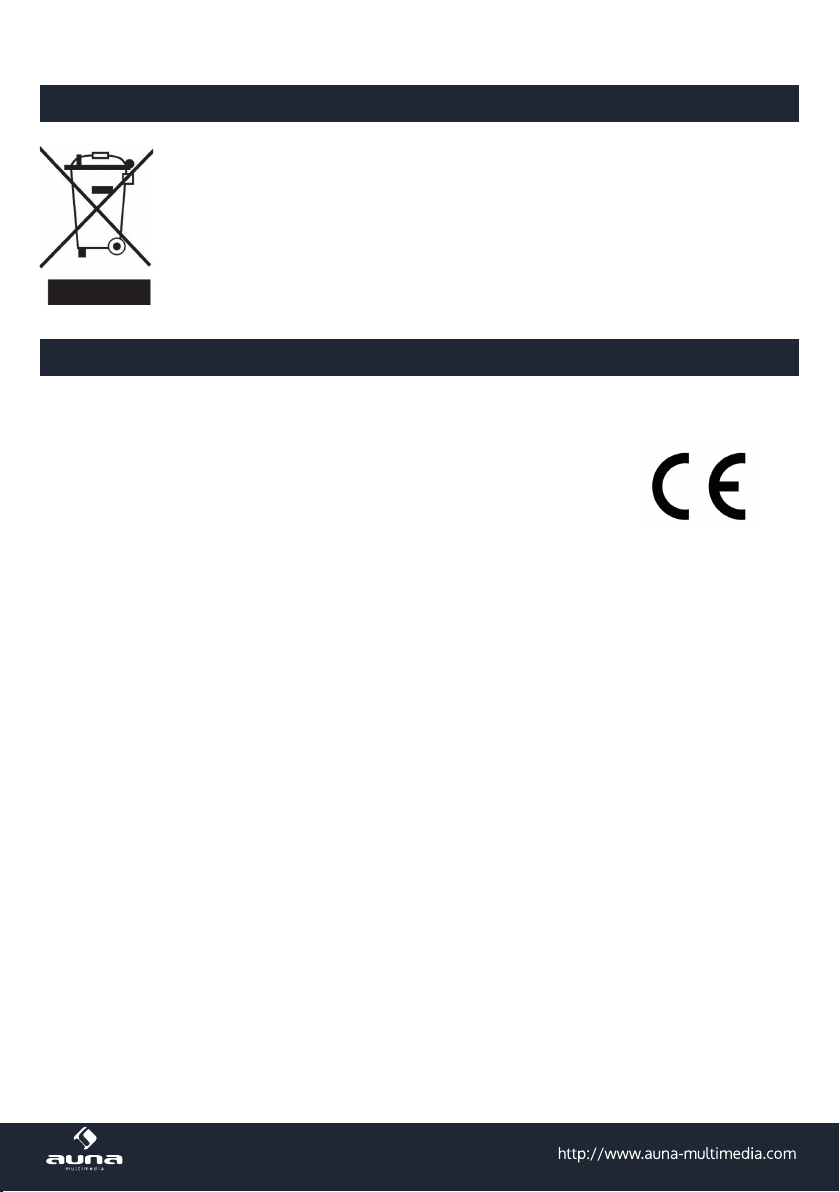
Hinweise zur Entsorgung
Elektroaltgeräte: Bendet sich die diese Abbildung (durchgestrichene Mülltonne auf
Rädern) auf dem Produkt, gilt die Europäische Richtlinie 2002/96/EG. Diese Produkte
dürfen nicht mit dem normalen Hausmüll entsorgt werden. Informieren Sie sich über die
örtlichen Regelungen zur getrennten Sammlung elektrischer und elektronischer Gerätschaften. Richten Sie sich nach den örtlichen Regelungen und entsorgen Sie Altgeräte
nicht über den Hausmüll. Durch die regelkonforme Entsorgung der Altgeräte werden
Umwelt und die Gesundheit ihrer Mitmenschen vor möglichen negativen Konsequenzen
geschützt. Materialrecycling hilft, den Verbrauch von Rohstoen zu verringern.
Konformitätserklärung
Hersteller: CHAL-TEC GmbH, Wallstraße 16, 10179 Berlin, Deutschland
Dieses Produkt entspricht den folgenden Europäischen Richtlinien:
2011/65/EU (RoHS)
2004/108/EG (EMV)
5
Page 6
Dear Customer,
Congratulations on purchasing this product. Please read and follow these instructions, in order to avoid
damaging the item. We do not cover any damages that may arise from improper use of the item or the
disregard of the safety instructions.
Technical Data
Article # 10011704, 10011705, 10011706
Type Condenser mikrophone, 32mm membrane
integrated -6dB 100Hz low cut lter
Pattern Cardioid
Requency range 20 Hz - 20 KHz
Sensitivity 36dB-+ / - 2 dB
Output impedance 200 ohms
max. gain 125 dB for 0.5% THD
Connection and power supply XLR, 48V phantom power
Dimension & weight 5 x 15 cm (ØxH), ~ 340g
Scope of delivery
Microphone, shockmount, adapter (3/8“ to 5/8“),
protective case, manual
Safety advice
• Read all instructions before using.
• To protect against a re, electric shock or personal injury, do not immerse cord, electric plugs or device
in water or other liquids.
• Do not expose the appliance to extreme temperatures. The appliance shall be used in moderate climates.
• The use of attachments that are not recommended by the appliance manufacturer may result in re,
electric shock or personal injury.
• Do not open the unit by removing any cover parts. Do not attempt to repair the unit. Any repairs or
servicing should be done by qualied personell only.
• Only qualied persons may perform technical work on the product. The product may not be opened or changed. The components cannot be serviced by the user. The manufacturer is not responsible
for any radio or TV interference caused by unauthorized modications.
• The appliance is not a toy. Do not let children play with it. Never let children insert foreign objects into
the appliance.
6
Page 7

• Never clean the surface of the device with solvents, paint thinners, cleansers or other chemical products. Instead, use a soft, dry cloth or soft brush.
• This appliance is to be used with 12V car power supply.
• Save these instructions.
Small objects: Keep small objects (i.e. screws, mounting material, memory cards etc.) and packaging out of
the range of children. Do not let Children play with foil. Choking hazard!
Transporting the device: Please keep the original packaging. To gain suicient protection of the device
while shipment or transportation, make sure to put it back in its original packaging.
Cleaning the surface: Do not use any volatile liquids, detergents or the like. Use a clean dry cloth.
Mounting and Operation
To get the sound you want, try changing the mic position relative to the sound source oreven move the
microphone around in the recording room of your studio. Adjusting the angle at which walls face the sound
source can also be helpful.
There is an adapter on your microphone that lets you mount it on mic stands with either metric (Europe) or
imperial-gauge threads (North America).
Basically, the microphone in the stand mount adapter should stand upright and face the sound source at
a right angle. Of course, you can detach the microphone from the stand mount adapter and attach it to a
commercially available suspension mount.
The angle of the microphone to the sound source inuences the sound of the recording; therefore, experiment with dierent positions until you achieve the desired sound. To this end, you can rotate the mic in the
stand mount adapter by loosening the screw somewhat and tightening it again. If necessary, you can bend
the microphone out of its vertical position by using the hinge on the microphone stand.
It is often advisable to use a pop lter (not included) when recording vocals, not only to ovoid overly accentuated ´S, ´P´ and ´B´sounds, but also to protect the mic from moisture. it is always a good idea to store the
microphone in its protection bag when not in use.
Connect the microphone to a mixer or recording device with a high quality XLR cable before turning on the
phantom power. Make sure all volume ond gain controls on your mixer, mic preamp or recording device
are at their minimum volume settings when switching the phantom power on. Once the MCOO1 is plugged
in and the phantom power is switched on, Move the channel fader gradually to the 0dB position adjust the
input gain using your channel peak led or VU-meter.
NOTE: Please make sure to handle the microphone shaft with attention and care to avoid damaging the
screw thread. In no situation should you ever apply excessive force.
Low Cut Filter: To operate the low cut switch, unscrew the bottom of the microphone housing, slide the
microphone body from the chassis.
Look for the blue switch in the middle of the microphone circuit board. Pressing the swith activates the low
cut lter.
7
Page 8

Environment Concerns
According to the European waste regulation 2002/96/EG this symbol on the product
or on its packaging indicates that this product may not be treated as household waste.
Instead it should be taken to the appropriate collection point for the recycling of electrical
and electronic equipment. By ensuring this product is disposed of correctly, you will hep
prevent potential negative consequences for the environment and human health, which
could otherwise be caused by inappropriate waste handling of this product. For more
detailled information about recycling of this product, please contact your local council or
your household waste disposial service.
Declaration of Conformity
Manufacturer: CHAL-TEC GmbH, Wallstraße 16, 10179 Berlin, Germany.
This product is conform to the following European directives:
2004/108/EC (EMC)
2011/65/EU (RoHS)
8
Page 9

Chère cliente, cher client,
Toutes nos félicitations pour l’acquisition de ce nouvel appareil.
Veuillez lire attentivement et respecter les consignes suivantes de branchements et d’utilisation pour éviter
d’éventuels dommages techniques.
Fiche technique
Numéro d’article 10011704, 10011705, 10011706
Type Micro à condensateur, membrane de 32 mm
Filtre passe-haut intégré -6 dB 100 Hz
Caractéristique Cardioïde
Réponse en fréquence 20 Hz - 20 KHz
Sensibilité 36 dB-+ / - 2 dB
Impédance en sortie 200 Ohm
Amplication max. 125 dB pour 0,5 % THD
Connecteur et alimentation électrique XLR, alimentation fantôme 48 V
Dimensions / poids 5 x 15 cm (ØxH), env.340 g
Micro, Araignée micro, Protection vent, Adapta-
Inclus dans la livraison
teur pied 3/8“ vers 5/8“, Etui de protection, Mode
d‘emploi
Consignes importantes
• Ce mode d’emploi sert à vous familiariser aux fonctions de ce produit. Conservez-le bien an de pouvoir vous y référer à tout moment.
• L’achat de ce produit donne droit à une garantie de deux ans en cas de défectuosité de l’appareil sous
réserve d’une utilisation appropriée de celui-ci.
• Veiller à utiliser le produit conformément à l’usage pour lequel il a été conçu. Une mauvaise utilisation
est susceptible d’endommager le produit ou son environnement.
• Tout démontage ou toute modication de l’appareil porte atteinte à la sécurité du produit. Attention
aux risques de blessure !
• Ne jamais ouvrir le produit de son propre chef et ne jamais le réparer soi-même !
• Manipuler le produit avec précaution. Les chocs, les coups ou les chutes - même de faible hauteur peuvent endommager l’appareil.
• Ne pas exposer le produit à l’humidité ou à une chaleur extrême.
• Ne pas introduire d’objets métalliques dans cet appareil.
• Ne pas poser d’objets lourds sur l’appareil.
9
Page 10

• Nettoyer l’appareil uniquement avec un chion sec.
• Utiliser uniquement les accessoires recommandés par le fabricant ou par une entreprise spécialisée et qualiée.
• Toute ouverture non autorisée de l’appareil entraîne l’annulation de la garantie.
Petits objets / éléments d’emballage (sac plastique, carton, etc.) : Tenir les petits objets (par exemple
les vis et le matériel d’assemblage, les cartes mémoire) et le matériel d’emballage hors de la portée des
enfants pour éviter qu’ils ne les avalent. Empêcher les enfants de jouer avec les lms de protection. Il existe
un risque d’étouement !
Transport de l’appareil : Conserver l’emballage d’origine. Pour garantir une protection suisante de
l’appareil pendant son transport, emballer l’appareil dans son emballage d’origine.
Nettoyage en surface de l’appareil : Ne pas utiliser de liquides volatiles comme ceux contenus dans les
bombes insecticides. Une pression trop importante exercée sur la surface de l’appareil pendant le nettoyage peut l’endommager. Éviter le contact prolongé du caoutchouc ou du plastique avec l’appareil. Utiliser
un chion sec.
Consignes de montage et d’utilisation
Pour obtenir le son souhaité, essayer plusieurs positions par rapport à la source sonore. Déplacer lentement le microphone dans la pièce d’enregistrement et tester plusieurs distances et angles. C’est uniquement lorsque le son de base est atteint que l’on doit recourir à l’égalisation et au processeur sonore.
Le microphone est équipé d’un adaptateur s’adaptant aux supports de micro européens et américains.
Détacher l’adaptateur du micro, l’attacher au support de micro puis xer le micro à l’adaptateur. Le micro
doit avoir une position xe et être dirigé vers la source sonore selon un angle adéquat. Essayer diérentes
positions jusqu’à obtenir le son souhaité. Si nécessaire, déplacer le micro verticalement avec la charnière.
Il est toujours judicieux d’utiliser un ltre anti-pop (non fournie) pour atténuer les bruits de soule. Ce ltre
protège également de l’humidité. Il est toujours bon de ranger le microphone dans sa housse de protection
après utilisation.
Brancher le microphone à une table de mixage ou à un appareil d’enregistrement avec câble XLR de qualité,
avant d’activer l’alimentation fantôme. S’assurer que les boutons de réglage du volume et du gain de la
table de mixage, du préamplicateur micro ou de l’appareil d’enregistrement sont réglés au niveau sonore
le plus bas lorsque l’alimentation fantôme est activée. A partir du moment où le CM001 est branché et que
l’alimentation fantôme est allumée, déplacer le curseur du canal sur la position 0 dB.
Manipuler le microphone et l’adaptateur avec précaution. Ne pas forcer sur le pas de vis. Il est également
possible de monter le micro sur un pied de micro classique sans recourir à l’adaptateur.
Filtre passe-haut (Low Cut) : dévisser le « capuchon » sur le dessous du microphone et démonter les tubes
de la coquille. Appuyer sur l’interrupteur bleu au centre du circuit imprimé du micro pour activer/désactiver
le ltre passe-haut.
10
Page 11

Information sur le recyclage
Appareils électriques et électroniques usagés
Vous trouverez sur le produit l’image ci-contre (une poubelle sur roues, barrée d‘une
croix), ce qui indique que le produit se trouve soumis à la directive européenne 2002/96/
CE. Renseignez-vous sur les dispositions en vigueur dans votre région concernant la collecte séparée des appareils électriques et électroniques. Respectez-les et ne jetez pas les
appareils usagés avec les ordures ménagères. La mise au rebut correcte du produit usagé
permet de préserver l’environnement et la santé. Le recyclage des matériaux contribue à
la préservation des ressources naturelles.
Déclaration de conformité
Fabricant : Chal-Tec GmbH, Wallstraße 16, 10179 Berlin, Allemagne.
Ce produit est conforme aux directives européennes suivantes :
2011/65/UE (RoHS)
2004/108/CE (CEM)
11
Page 12

Gentile cliente,
La ringraziamo per aver acquistato il nostro prodotto. La preghiamo di leggere attentamente le seguenti
istruzioni e di seguirle per evitare eventuali danni. Non ci assumiamo alcuna responsabilità per danni derivati da una mancata osservazione delle avvertenze di sicurezza e da un uso improprio del dispositivo.
Dati Tecnici
Articolo numero 10011704, 10011705, 10011706
Tipo Microfono a condensatore, membrana 32mm
Filtro Low-Cut integrato 6dB 100Hz
Caratteristiche Cardioide
Raggio frequenza 20 Hz - 20 KHz
Sensibilità 36dB-+ / - 2 dB
Impedenza di uscita 200 Ohm
Guadano max. 125 dB für 0,5% THD
Attacco e alimentazione Alimentazione phantom XLR, 48V
Dimensioni e peso 5 x 15 cm (ØxH), ca. 340g
Consegna
Microfono, shock mount, protezione, adattatore
(3/8“- 5/8“), custodia, manuale istruzioni
Avvertenze di sicurezza
• Il presente manuale ha lo scopo di illustrare il funzionamento del prodotto. Conservarlo per consultazioni future.
• Questo prodotto ha una garanzia di due anni di conformità. Non sono coperti da garanzia i danni
causati da un utilizzo improprio.
• Utilizzare il prodotto esclusivamente per lo scopo previsto. Un utilizzo improprio può danneggiare il
prodotto o l’ambiente circostante.
• Apportare modiche al prodotto compromette la sua sicurezza. Attenzione pericolo di farsi male!
• Non aprire mai il prodotto e non eseguire mai riparazioni autonomamente.
• Maneggiare il prodotto con cautela. Può danneggiarsi in caso di urti, colpi o cadute anche da altezze
minime.
• Non esporre il prodotto all’umidità e al calore eccessivo.
• Non fare cadere oggetti di metallo nel dispositivo.
• Non fare cadere oggetti pesanti sul dispositivo.
• Pulire il dispositivo solo con un panno asciutto.
12
Page 13

• Non bloccare le fessure di aereazione.
• Utilizzare esclusivamente gli accessori consigliati dal produttore o da un rivenditore qualicato.
• La garanzia decade in caso di intervento di terzi.
Parti più piccole/imballaggio: Conservare le parti più piccole (ad es. viti, materiale di montaggio e di
imballaggio) lontano dalla portata dei bambini, per evitare che le ingeriscano. Non lasciare che i bambini
giochino con il materiale d’imballaggio. Pericolo di soocamento!
Trasporto del dispositivo: Conservare la confezione originale. Per garantire una protezione adeguata del
dispositivo durante il trasporto, riporlo nella confezione originale.
Pulizia delle superci esterne: Non utilizzare liquidi volatili come ad esempio spray per insetti. Le superci si possono danneggiare se si puliscono troppo energicamente. Le parti in plastica o in gomma
non devono restare a contatto con il dispositivo per lungo tempo. Utilizzare un panno asciutto.
Istruzioni per il montaggio e per l’uso
Per raggiungere il suono desiderato, provare a cambiare la posizione del microfono rispetto alla fonte sonora. Spostare il microfono con cautela per provare diverse distanze ed angolazioni.
Il microfono dispone di un adattatore adatto sia per i supporti europei e americani. Rimuovere l‘adattatore
dal microfono, ssarlo al supporto del microfono e poi ssare il microfono all‘adattatore. Il microfono deve
essere montato in posizione verticale sul supporto e di fronte alla fonte sonora ad angolo retto. Provare
diverse posizioni no al raggiungimento del suono desiderato.
Inoltre si consiglia di utilizzare un ltro anti-pop (non incluso nella consegna) durante la registrazione per
evitare suoni distorti e per proteggere il microfono dall‘umidità. Riporre sempre il microfono nella custodia
protettiva quando non lo si utilizza.
Prima di attivare l‘alimentazione phantom, collegare il microfono ad un mixer o ad un dispositivo per la
registrazione tramite un cavo XLR di alta qualità Assicurarsi che tutte le manopole volume e gain del mixer,
del preamplicatore del microfono o del dispositivo di registrazione siano impostate ad un livello basso.
Appena il CM001 è collegato e l‘alimentazione phantom è attiva, spostare gradualmente il fader di canale
in posizione 0dB.
Maneggiare il microfono e l’adattatore con cautela per evitare di danneggiare la lettatura. Non esercitare
mai troppa forza. Inoltre è possibile montare il microfono senza l’adattatore e montarlo su un’asta comprata separatamente.
Filtro Low Cut: per attivare l’interruttore low cut, svitare il tappo sulla parte inferiore del microfono e farlo
scorrere fuori dall’alloggiamento. Individuare l’interruttore blu al centro del circuito stampato del microfo-
no. Premere l’interruttore per attivare/disattivare il ltro low cut.
13
Page 14

Smaltimento
Se sul prodotto è presente la gura a sinistra (il cassonetto dei riuti mobile sbarrato),
si applica la direttiva europea 2002/96/CE. Questi prodotti non possono essere smaltiti
con i riuti normali. Informarsi sulle disposizioni vigenti in merito alla raccolta separata
di dispositivi elettrici ed elettronici. Non smaltire i vecchi dispositivi con i riuti domestici.
Grazie al corretto smaltimento dei vecchi dispositivi, si proteggono il pianeta e la salute
delle persone da possibili conseguenze negative. Il riciclo di materiali aiuta a ridurre il
consumo di materie prime.
Dichiarazione di conformità
Produttore: Chal-Tec GmbH, Wallstraße 16, 10179 Berlino, Germania.
Questo prodotto è conforme alle seguenti direttive europee:
2011/65/UE (RoHS)
2004/108/CE (EMC)
14
Page 15

Estimado cliente,
Le felicitamos por la adquisición de este producto. Lea atentamente el siguiente manual y siga cuidado-
samente las instrucciones de uso con el n de evitar posibles daños. La empresa no se responsabiliza de
los daños ocasionados por un uso indebido del producto o por haber desatendido las indicaciones de
seguridad.
Datos técnicos
Número de artículo 10011704, 10011705, 10011706
Tipo Micrófono de condensador, membrana de 32 mm
Filtro de paso bajo -6dB 100Hz integrado
Características Forma cardioide
Respuesta de frecuencia 20 Hz ~ 20 KHz
Sensibilidad 36dB-+ / - 2 dB
Impedancia de salida 200 Ohmios
amplicación máxima 125 dB para 0,5% THD
Conexión y suministro eléctrico XLR, 48 V alimentación phantom
Dimensiones / peso 5 x 15 cm (ØxH), aprox. 340g
Contenido del envío
Micrófono, araña, paravientos, adaptador 3/8” a
5/8”, bolsa de transporte, manual de instrucciones
Indicaciones importantes
• Este manual de instrucciones tiene como objetivo familiarizarle con el funcionamiento del producto.
Conserve este manual para que pueda realizar futuras consultas.
• Con la compra de este producto obtiene dos años de garantía en caso de defecto o avería provocados
por un uso normal del aparato.
• Utilice el producto solamente tal y como aparece indicado en este manual. Un uso alternativo puede
provocar daños en el mismo o en su entorno.
• La transformación o cambio del producto reduce la seguridad del mismo.
• Nunca abra el aparato ni intente repararlo usted mismo.
• Trate el producto con cuidado. Puede averiarse si recibe golpes, impactos o caídas, incluso desde poca
altura.
• Mantenga el producto alejado de la humedad y del calor extremo.
• No deje caer objetos de metal sobre el aparato.
• No coloque objetos pesados encima del aparato.
• Limpie el aparato utilizando solamente un paño seco.
15
Page 16

• Utilice exclusivamente los accesorios recomendados por el fabricante o por un proveedor cualicado.
• La garantía expirará si abre el aparato.
Piezas pequeñas/partes del embalaje (bolsas de plástico, cartón, etc.): Mantenga las piezas pequeñas
(p.ej. tornillos y otro material de montaje) y las partes del embalaje fuera del alcance de los niños para
evitar que se atraganten. No permita que los niños pequeños jueguen con los plásticos, pueden provocar
riesgo de asxia.
Transporte del aparato: Conserve el embalaje original. Para proteger el aparato durante el transporte,
introdúzcalo en su embalaje original.
Limpieza exterior: No utilice líquidos volátiles, como sprays insecticidas. El exterior del aparato podría dañarse si se frota demasiado fuerte. Evite que el aparato esté en contacto continuado con objetos de goma
o plástico. Utilice un paño seco.
Indicaciones de montaje y utilización
Para conseguir el tono deseado, pruebe distintas posiciones de la fuente de eco. Mueva el micrófono lentamente en la sala de grabación y pruebe distintas distancias y grados. Cuando haya conseguido un tono
base adecuado, deberá utilizar el ecualizador y el procesador de tonos.
El micrófono dispone de un adaptador válido para los soportes europeo y americano. Suelte el adaptador
del micrófono, je este al soporte del micrófono y a continuación je el micrófono al adaptador. El micrófono debe colocarse verticalmente y el eco debe llegar desde el ángulo derecho del mismo. Para conseguir
el tono deseado, pruebe distintas posiciones. Si fuera necesario, puede cambiar las bisagras a una posición
vertical.
Se aconseja utilizar un ltro anti-pop (no incluido en el envío) para evitar crepitaciones y otros sonidos. El
elemento también proteje al micrófono de la humedad. Siempre es buena idea guardar el micrófono en su
bolsa de transporte cuando no lo utilice.
Conecte el micrófono a una mesa de mezclas o a un dispositivo de grabación con un cable XLR de calidad
antes de activar la alimentación phantom. Asegúrese de que el regulador de volumen y ganancia de la
mesa de mezclas, el preamplicador del micrófono o el dispositivo de grabación se encuentran al nivel
mínimo cuando se active la alimentación phantom. Cuando haya conectado el CM001 y la alimentación
phantom se haya activado, mueva el fader de canal hasta la posición 0 dB.
Trate el micrófono y el adaptador con cuidado. No ejerzca demasiada presión ni fuerza. Obviamente, también puede montar el micrófono sin el adaptador en un pie para micrófono que adquiera por separado.
Filtro de paso bajo: desatornille la «tapa» de la parte trasera del micrófono y extraiga el cuerpo del micrófono de su carcasa. Pulse el interruptor azul situado en la parte central de la placa para activar o desactivar
el ltro de paso bajo.
16
Page 17

Indicaciones para la retirada del aparato
Si el aparato lleva adherida la ilustración de la izquierda (el contenedor de basura tachado) entonces rige la normativa europea, directiva 2002/96/CE. Este producto no debe
arrojarse a un contenedor de basura común. Infórmese sobre las leyes territoriales que
regulan la recogida separada de aparatos eléctricos y electrónicos. Respete las leyes territoriales y no arroje aparatos viejos al cubo de la basura doméstica. Una retirada de aparatos conforme a las leyes contribuye a proteger el medio ambiente y a las personas a su
alrededor frente a posibles consecuencias perjudiciales para la salud. El reciclaje ayuda a
reducir el consumo de materias primas.
Declaración de conformidad
Fabricante: Chal-Tec GmbH, Wallstraße 16, 10179 Berlín (Alemania).
Este producto cumple con las siguientes directivas europeas:
2004/108/CE (EMC)
2011/65/UE (refundición RoHS)
17
 Loading...