

Page 1

www.auna-multimedia.com
10028676
XLR -> USB Converter
AI-01
Page 2

2
Sehr geehrter Kunde,
zunächst möchten wir Ihnen zum Erwerb Ihres Gerätes gratulieren.
Bitte lesen Sie die folgenden Anschluss- und Anwendungshinweise sorgfältig durch und befolgen Sie diese
um möglichen technischen Schäden vorzubeugen.
Geräte-Übersicht
Page 3

3
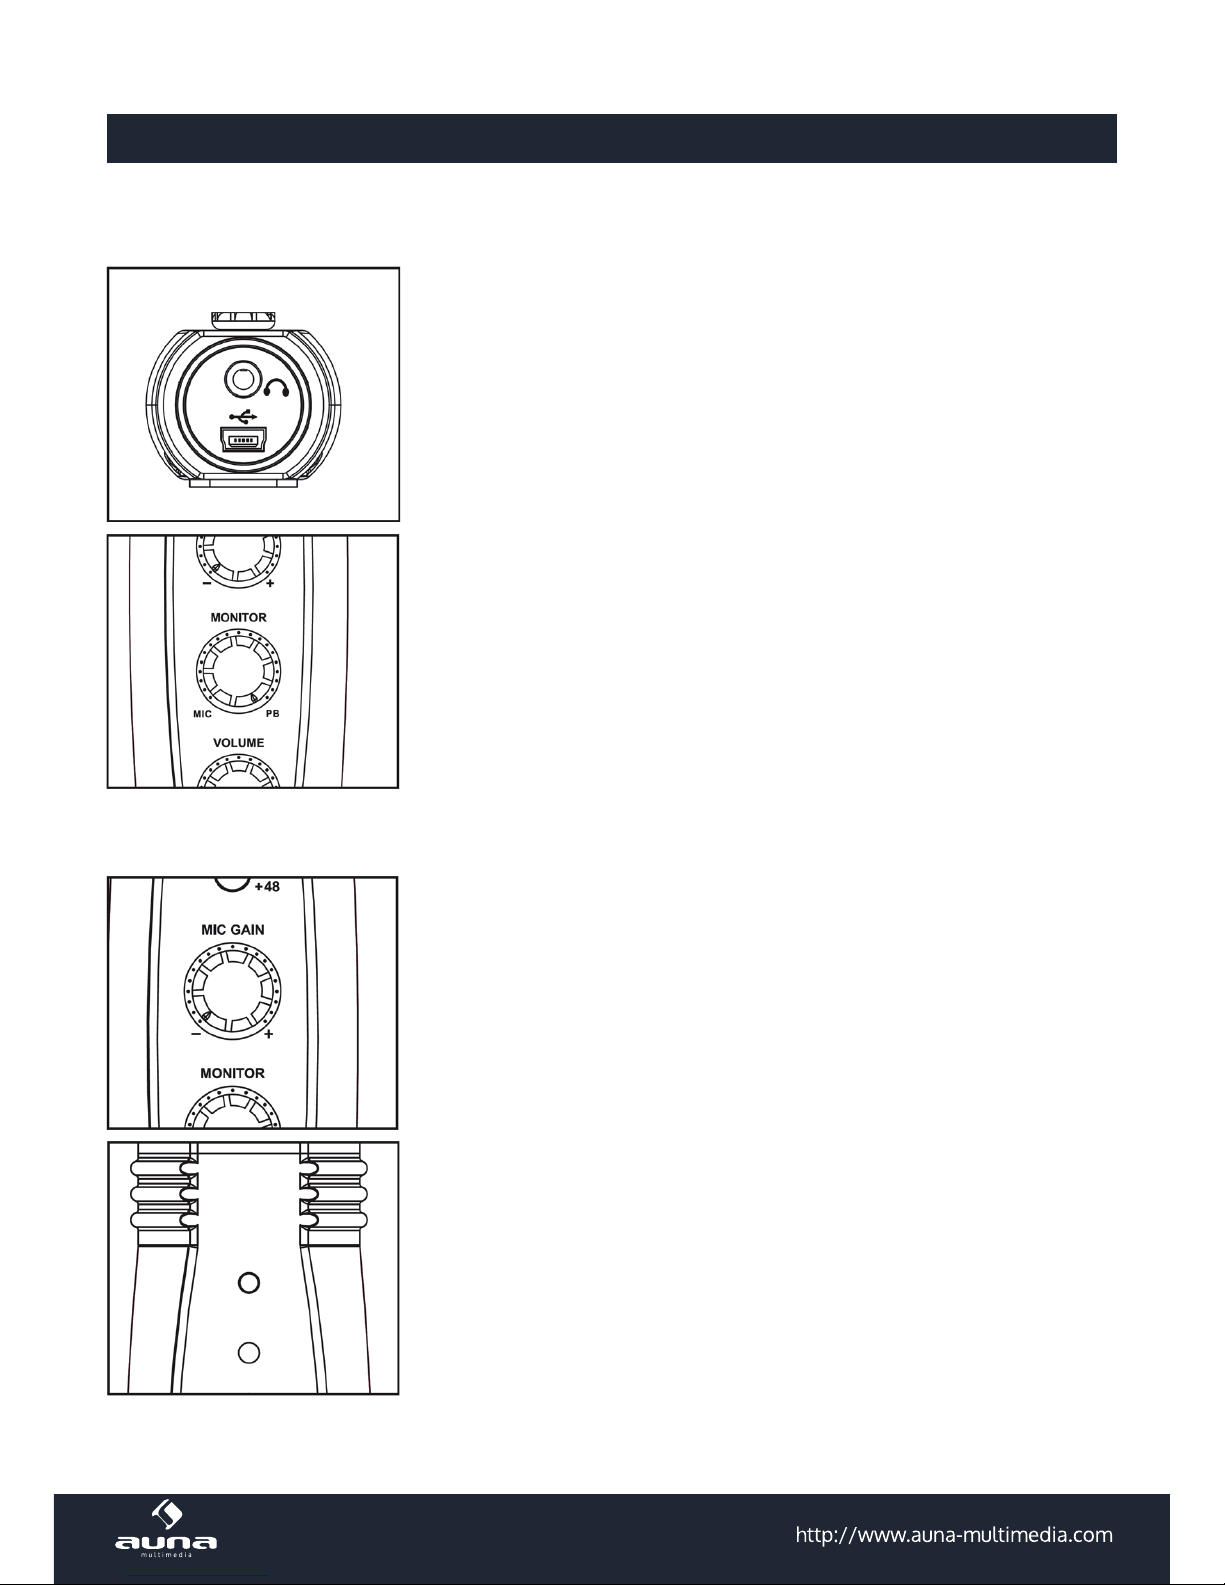
1 XLR-Anschluss
2 Clipping/Peak-LED (grün = Signal; gelb = Peak; rot = Clipping)
3 MIC GAIN: Regler für den Mikrofon-Eingangspegel (vor A-D-Conversion)
4 Kopfhörer-Anschluss (3.5mm-Klinke) für Direkt-Monitoring
5 VOLUME: Regler fpr die Kopfhörer-Lautstärke
6
MONITOR: Regler für die Überblendung von Playback vom Rechner mit dem Live-Signal vom
Mikrofon
7
+48V: Schaltet Phantomspeisung für Kondensatormikrofone (schalten Sie diese aus, wenn Sie
dynamische oder andere, nicht auf Speisung angewiesene Mikrofone verwenden).
8 Blaue Phantomspeisung-LED
9 USB-LED: leuchtet grün, wenn korrekt angeschlossen und verbunden
10 USB-Anschluss
Anschlüsse
XLR-Verbindung
Schließen Sie das AI-01 direkt an einem Mikrofon mit XLR-Anschluss an oder nutzen Sie ein XLR-Kabel für
die Verbindung. In dem Fall können Sie das Interface mit den mitgelieferten Klett-Bändern auch an einem
Mikrofonständer befestigen.
USB-Verbindung
Verbinden Sie das Gerät per Standard-USB-Kabel (mitgeliefert) mit
einem Computer. Die grüne USB-LED
leuchtet auf, sobald die Verbindung
steht. Ein Plug-and-Play-Treiber installiert sich nach einigen Sekunden
automatisch.
Das Gerät ist sodann zur Verwendung bereit.
Page 4
4
Nutzungshinweise
Monitoring
Mittels der Kopfhörer-Buchse können Sie Ihre Aufnahme live und latenzfrei
abhören.
Achtung: Drehen Sie die Lautstärke des Kopfhörer-Ausgangs herunter, bevor Sie den Kopfhörer anschließen.
Ebenfalls können Sie zuvor aufgenommene Spuren abhören, während Sie
eine neue Spur recorden.
Reglen Sie das Mischverhältnis der Wiedergabe mit dem MONITOR-Regler.
Achtung: Stellen Sie sicher, dass in Ihrer Recording-Software das Monitoring für die aktuell aktive Spur abgeschaltet ist (Sie erhalten Sonst Übersprechungen aus Live-Signal und dem nicht latenzfreien Computer-Signal).
Gain-Einstellung:
Für optimale Aufnahmequalität stellen Sie den MIC GAIN - Regler so hoch
wie möglich ein, ohne dass aber die Peak/Clipping-LED gelb oder gar rot
blinkt. Sie sollte, außer bei kurzen Peak-Lautstärken immer grün leuchten.
Spätestens bei rotem Licht von der Peak/Clipping-Led sollten Sie den
GAIN-Regler herunterdrehen.
Page 5

5
Einrichtung am Computer:
Windows: Das AI-01 ist ein Plug-and-Play-Gerät. Für gewöhnlich muss es lediglich angeschlossen werden.
Ist der gewählte USB-Port aktiviert, installiert sich der entsprechende Treiber nach einigen Sekunden automatisch.
Sollte dies nicht passieren (zum Beispiel weil diese Funktion deaktiviert ist), ö nen Sie die Systemsteu-
erung, wählen Sie die Einstellungen „Hardware und Sound“ und anschließend „Sound“. aus . Ein Fenster
ö net sich. Wählen Sie im Reiter „Aufnahme“ in der Scroll-Leiste das XU-2 MKII als Standard-Ein- sowie
-Ausgang aus.
Page 6
6
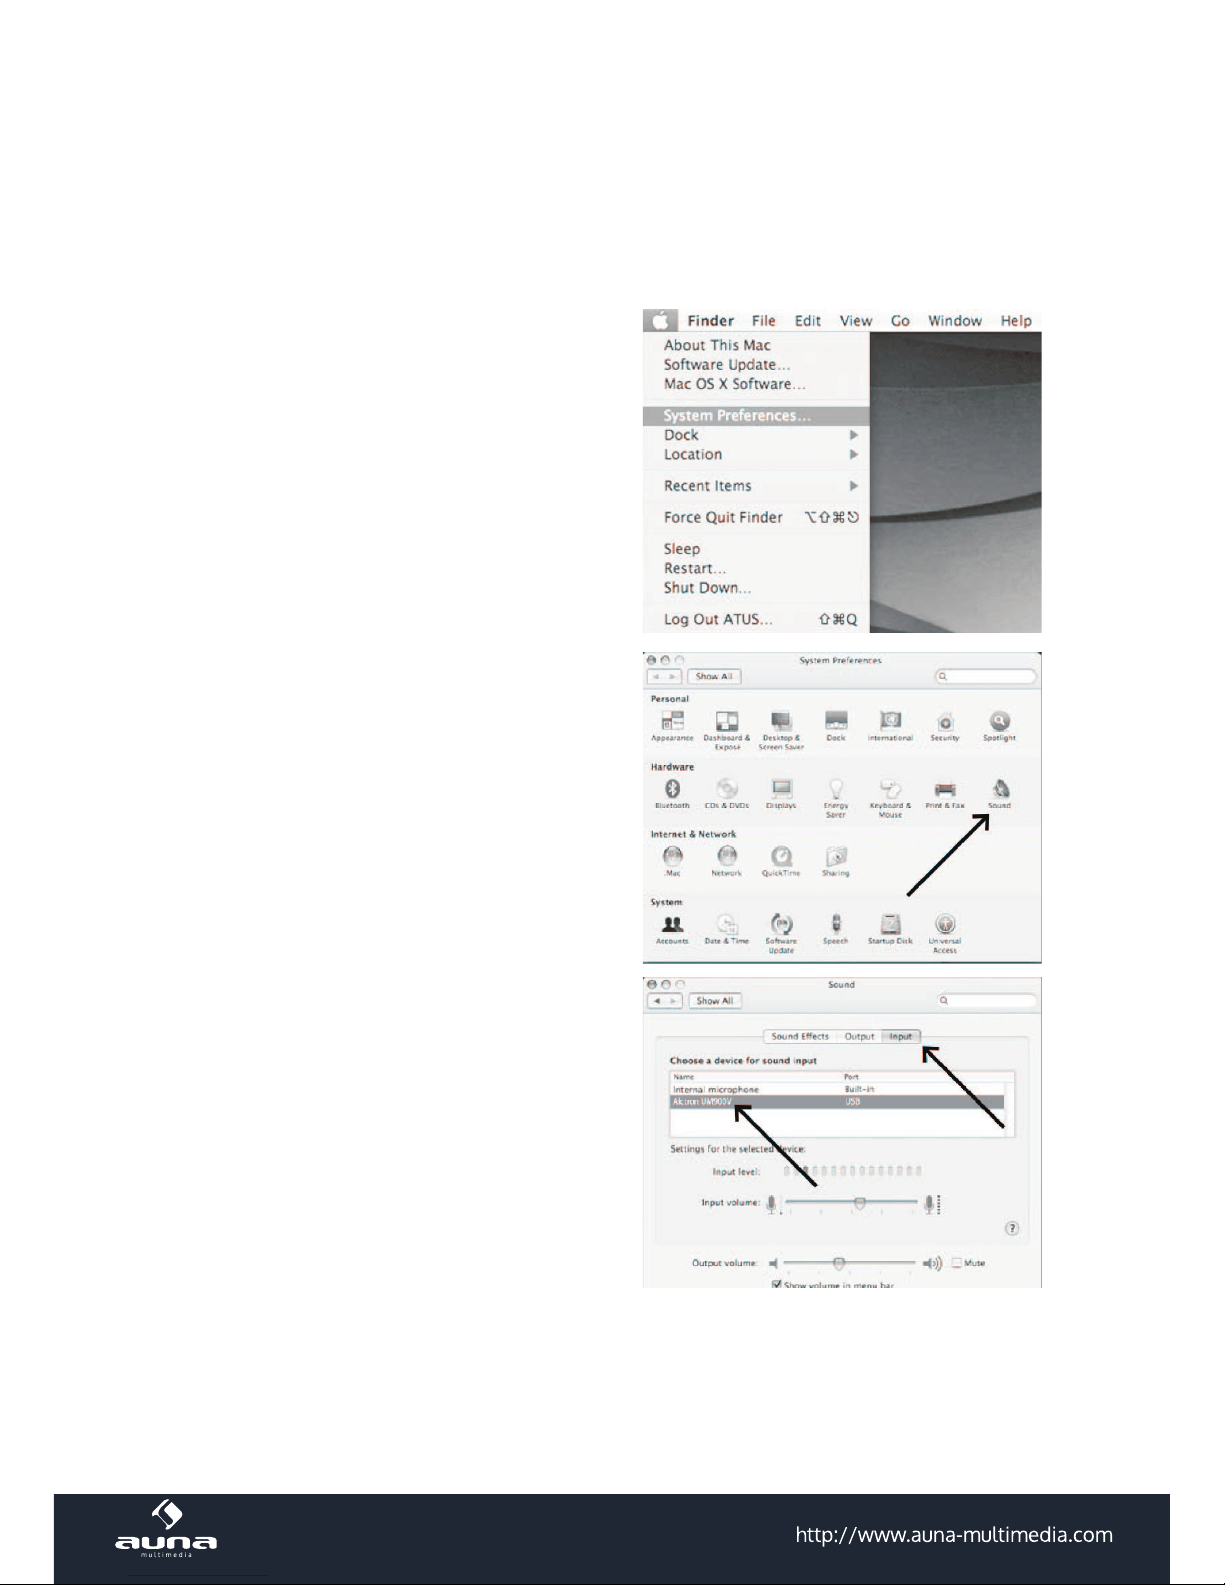
Einrichtung am Mac:
1. Stecken Sie das Gerät in die USB-Schnittstelle des MAC-Computers. Die grüne LED am Mikrofon
leuchtet auf und zeigt so an, dass das Mikrofon mit Strom versorgt wird. Der Computer erkennt
das USB-Gerät automatisch und installiert den Treiber.
2. Um den XU-2 MKII_USB als Ihren Audio-
Eingang zu wählen, önen Sie zuerst die
Systemeinstellungen.
3. Klicken Sie als nächstes auf "Sound", um
die Soundeinstellungen aufzurufen.
4. Klicken Sie auf den Reiter "Eingang" und
wählen Sie als Gerät XU-2 MKII-USB aus.
5. Ihre Einstellungen wurden nun vorgenommen, so dass Ihr Mac zur Verwendung des XU-2 MKII-USB
bereit ist.
Page 7
7
Problembehebung
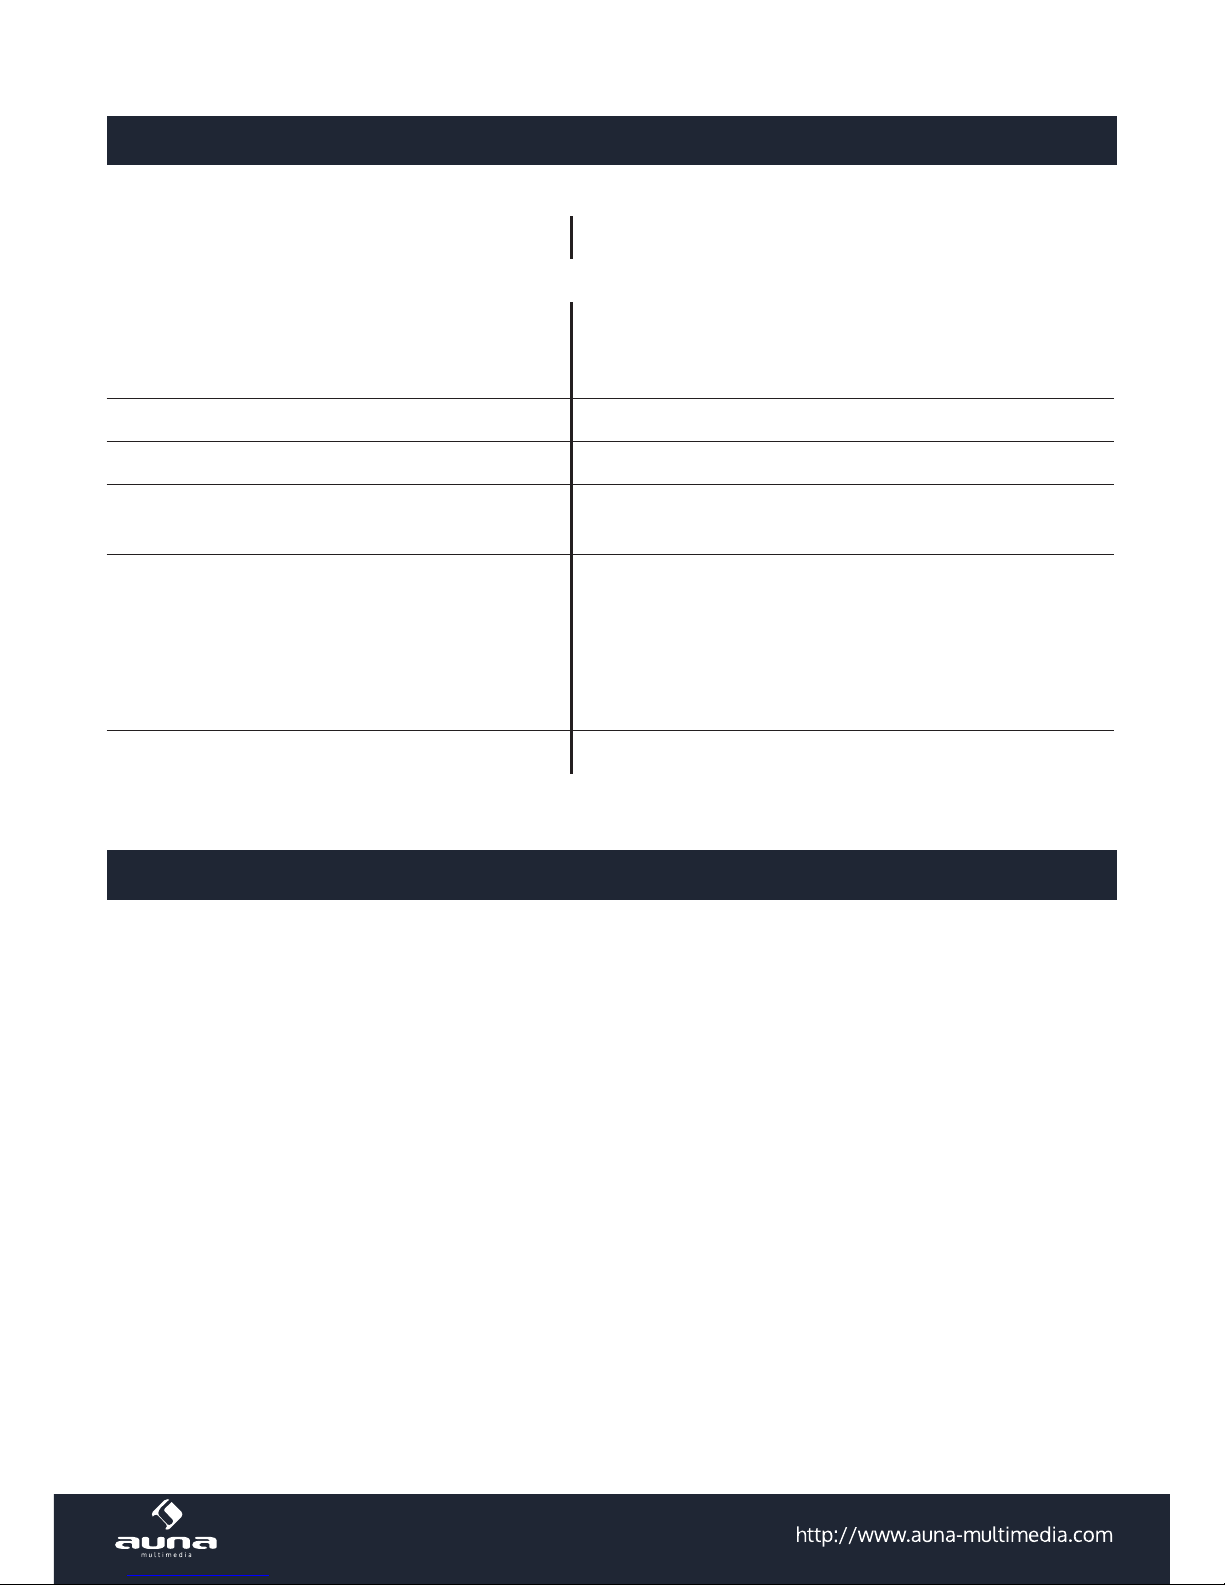
Problem Mögliche Lösung
Die USB-LED leuchtet nicht
Stellen Sie sicher, dass es sich bei den USB-Anschlüssen an Ihrem Computer um USB 1.1 oder 2.0 (mindestens) handelt.
Kein Ton im Kopfhörer Drehen Sie VOLUME oder MIC GAIN höher.
Verzerrter Klang Stellen Sie MIC GAIN niedriger ein.
Verzögerter Klang
Schalten Sie das computerseitige Software-Monitoring
ab.
Kopfhörer klingen sehr leise
Windows: Rufen Sie die Systemsteuerung auf, wählen
Sie „Sound und Audiogeräte“, klicken Sie auf Volume
und stellen Sie die Lautstärke höher ein.
Mac: Rufen Sie die Systemeinstellungen auf und önen
Sie „Sound“. Drehen Sie die Lautstärke im Tab „Output
Volume“ höher.
Der Mikrofon-Sound ist zu leise im Kopfhörer Stellen Sie den MONITOR Regler niedriger ein.
Technische Eigenschaften
• 24 Bit A/D-Wandler, XLR auf USB
• Abtastrate 96 kHz / 48 kHz
• 48 V Phantomspeisung mit Schalter
• Einstellbare Verstärkung
• Einstellbarerer Kopfhöreranschluss.
• LED-Anzeige
• USB-Stromversorgung
• Läuft unter Win10 und MAC ohne Treiber
Page 8

8
Hinweise zur Entsorgung
Be ndet sich die diese Abbildung (durchgestrichene Mülltonne auf Rädern) auf dem Produkt, gilt die Eu-
ropäische Richtlinie 2012/19/EU. Diese Produkte dürfen nicht mit dem normalen Hausmüll entsorgt werden. Informieren Sie sich über die örtlichen Regelungen zur getrennten Sammlung elektrischer und elektronischer Gerätschaften. Richten Sie sich nach den
örtlichen Regelungen und entsorgen Sie Altgeräte nicht über den Hausmüll. Durch die
regelkonforme Entsorgung der Altgeräte werden Umwelt und die Gesundheit ihrer Mitmenschen vor möglichen negativen Konsequenzen geschützt. Materialrecycling hilft, den
Verbrauch von Rohsto en zu verringern.
Konformitätserklärung
Der Hersteller dieses Produktes ist die Chal-Tec GmbH, Wallstraße 16, 10179 Berlin, Deutschland
Dieses Produkt entspricht den folgenden Europäischen Richtlinien:
2011/65/EU (RoHS)
2014/30/EU (EMC)
Page 9

9
Dear Customer,
Congratulations on purchasing this product. Please read and follow these instructions, in order to avoid
damaging the item. We do not cover any damages that may arise from improper use of the item or the
disregard of the safety instructions.
Overview
Page 10

10
1 XLR jack
2 Clipping/Peak LED (green = signal; yellow = peak; red = clipping)
3 MIC GAIN: Adjusts mic input level before the AD conversion
4 Headphone jack for zero-latency direct monitoring
5 VOLUME: Adjusts headphone volume
6
MONITOR: Blends pre-recorded playback track from computer with live signal from the microphone
7 +48V: Phantom power switch for condenser microphones.
8 Blue phantom power indicator LED
9 USB-LED: lights green when properly connected to a powered computer USB port
10 USB connector: Digital audio interface
Connections
XLR Connection
Connect to a microphone directly, or use an XLR cable and secure the adapter to a microphone stand using
the supplied straps.
USB Connection
Connect to a powered USB port using a standard cable (supplied).
The green USB LED should light up
and the plug and play driver will install automatically.
You are then ready to record with
your favourite audio software.
Note: Make sure you use an active
and powered USB port.
Page 11

11
Nutzungshinweise
Monitoring
The headphone jack provides direct monitoring of the mic signal while recording, without any delays that usually occur when using the computer‘s
headphone output for live monitoring.
Note: Turn VOLUME down before plugging in youre headphones.
You can also monitor previously recorded tracks while recording a new
track. Adjust the MONITOR thumb slider to balance levels of pre-recorded
and live audio.
Note: Be sure to have monitoring in your software turned o for the active
track.
Gain Adjustment:
For maximum audio quality, set the MIC GAIN as high as possible. The Clip-
ping/Peak LED should remain a steady green while recording, ickering
yellow at the highest sound volumes.
Lower the MIC GAIN, if the peak level LED shows red at any time during a
performance.
Page 12

12
Setup with Windows 10
Plug the free end of the USB cable into the USB port on your computer. The green light of the microphone will illuminate, indicating that the mic is receiving power. Your computer will automatically
recognize the USB device and install a driver.
Page 13

13
Einrichtung am Mac:
1. Plug the free end of the provided USB cable into the USB port on your computer. The green LED of
the microphone will illuminate, indicating the microphone is receiving power. Your computer will
automatically.
2. To select XU-2 MKII USB as your audio
input, rst, open your System Preferences.
3. Next, click Sound to display the sound
preference pane.
4. Click the input tab and select the .XU-2
MKII USB as the device for sound input.
5. Your preferences are now set to use the XU-2 MKII USB on your Mac with recording program of
your choice.
Page 14

14
Trouble Shooting
Problem Possible Solution
No USB power indicator light Verify port is powered USB 1.1 or 2.0 (or higher).
No sound in headphones Turn up VOLUME or MIC GAIN.
Sound is distorted Turn down MIC GAIN.
Source sounds delayed Turn o software monitoring.
Headphones are not loud enough Turn up the audio level in your operating system.
Microphone input is too low in headphones Turn down MONITOR.
Specications
• 24bit A/S converter, XLR to USB
• 96 kHz / 48 KHz sampling rate
• 48 V phantom power
• Adjustable gain
• Adjustable headphones monitoring out
• LED indicator
• USB powered
• Runs under WIN10 and MAC without any driver
Page 15

15
Environmental Concerns
According to the European waste regulation 2012/19/EU this symbol on the product or
on its packaging indicates that this product may not be treated as household waste.
Instead it should be taken to the appropriate collection point for the recycling of electrical and electronic equipment. By ensuring this product is disposed of correctly, you will
help prevent potential negative consequences for the environment and human health,
which could otherwise be caused by inappropriate waste handling of this product. For
more detailed information about recycling of this product, please contact your local
council or your household waste disposal service.
Declaration of Conformity
Producer: Chal-Tec GmbH, Wallstraße 16, 10179 Berlin, Germany.
This product is conform to the following European directives:
2014/30/EU (EMC)
2011/65/EU (RoHS)
Page 16

16
Chère cliente, cher client,
Toutes nos félicitations pour l’acquisition de ce nouvel appareil.
Veuillez lire attentivement et respecter les consignes suivantes de branchements et d’utilisation pour éviter
d’éventuels dommages techniques.
Aperçu de l’appareil
Page 17

17
1 Connecteur XLR
2 Témoin LED de distorsion (vert = signal ; jaune = niveau de crête ; rouge = clipping)
3 MIC GAIN : bouton de réglage du niveau d’entrée du micro (avant la conversion A-D)
4 Prise casque (jack 3,5 mm) pour le monitoring en direct
5 VOLUME : bouton de réglage du volume au casque
6
MONITOR : bouton de réglage pour le mixage du son diusé par l’ordinateur avec le signal en
direct du microphone.
7
+48V : active l’alimentation fantôme pour les microphones à condensateur (le désactiver pour
l’utilisation de microphones dynamiques ou non adaptés à l’alimentation fantôme.)
8 Témoin lumineux bleu d’alimentation fantôme
9 LED USB : s’allume en vert lorsque le branchement et la connexion sont corrects.
10 Connecteur USB
Branchements
Connexion XLR :
Brancher directement le AI-01 à un microphone avec connecteur XLR ou utiliser un câble XLR pour les raccorder. Dans ce cas, il est possible de xer l’interface à un pied de microphone à l’aide des bandes autoagrippantes fournies.
Connexion USB
Connecter l’appareil à un ordinateur
avec un câble USB standard (fourni).
Le témoin lumineux vert s’allume
quand la connexion est établie. Un
pilote plug-and-play est installé automatiquement après quelques secondes.
L’appareil est alors prêt à l’emploi.
Page 18

18
Consignes d’utilisation
Monitoring
Grâce à la prise casque, il est possible d’écouter les enregistrements en
direct et sans latence.
Attention : baisser le volume de la sortie casque avant de brancher le
casque audio.
De la même manière, il est possible d’écouter les pistes précédemment
enregistrées tout en enregistrant une nouvelle piste.
Modier les valeurs de mixage à l’aide du bouton de réglage MONITOR.
Attention : s’assurer que le monitoring de la piste active en cours est désactivé dans le logiciel d’enregistrement (des interférences interviennent
autrement entre le signal de sortie en direct et le signal avec latence de
l’ordinateur).
Réglage du gain
Pour une qualité d’enregistrement optimale, tourner le bouton de réglage
MIC GAIN jusqu’à un niveau où le témoin LED de distorsion ne clignote pas
encore en jaune ou en rouge. Le témoin lumineux doit toujours être vert,
sauf lors de brefs pics sonores.
Baisser le bouton de réglage GAIN au plus tard lorsque le témoin de distorsion s’allume en rouge.
Page 19

19
Installation sur un ordinateur
Windows : Le AI-01 est un appareil Plug-and-Play. Il su it généralement de le brancher simplement. Si le
port USB choisi est activé, le pilote correspondant s’installe automatiquement après quelques secondes.
Si cela ne se produit pas (par exemple si cette fonction est désactivée), ouvrir les Paramètres Système, sélectionner les paramètres « Matériel et son » ou « Sons et périphériques audio », puis sous l’onglet « Audio
», dé nir AI-01 comme entrée et sortie par défaut en le sélectionnant dans le menu déroulant.
Page 20

20
Mac:
1. Branchez l'appareil dans le port USB de l'ordinateur MAC. Le voyant vert du microphone s'allume,
indiquant que le microphone est alimenté. L'ordinateur détecte automatiquement le périphérique
USB et installe le pilote.
2. Pour sélectionner le XU-2 MKII_USB
comme entrée audio, ouvrez d'abord les
paramètres du système.
3. Ensuite, cliquez sur "Son" pour faire
apparaître les paramètres sonores.
4. Cliquez sur l'onglet "Entrée" et
sélectionnez XU-2 MKII-USB comme
périphérique.
5. Vos paramètres ont maintenant été dénis pour
que votre Mac soit prêt à utiliser le XU-2 MKIIUSB.
Page 21

21
Résolution des problèmes
Problème Solution possible
La LED USB ne s’allume pas
S’assurer que les prises USB de l’ordinateur sont bien
de type USB 1.1 ou 2.0 (minimum).
Aucun son au casque Augmenter le niveau du VOLUME ou du MIC GAIN.
Distorsion sonore Baisser le niveau du MIC GAIN.
Latence sonore Désactiver le monitoring du logiciel de l’ordinateur.
Le volume au casque semble très faible
Windows : sélectionner le panneau de con guration,
puis « sons et périphériques audio », cliquer sur Volume
et augmenter le volume.
Mac : sélectionner les paramètres système et ouvrir le
dossier « Sons ». Augmenter le volume de l’onglet « Volume de sortie » (Output Volume).
Le son du microphone est trop faible dans le
casque
Baisser le niveau du MONITOR.
Information sur le recyclage
Vous trouverez sur le produit l’image ci-contre (une poubelle sur roues, barrée d‘une
croix), ce qui indique que le produit se trouve soumis à la directive européenne
2002/96/CE. Renseignez-vous sur les dispositions en vigueur dans votre région concernant la collecte séparée des appareils électriques et électroniques. Respectez-les
et ne jetez pas les appareils usagés avec les ordures ménagères. La mise au rebut correcte du produit usagé permet de préserver l’environnement et la santé. Le recyclage
des matériaux contribue à la préservation des ressources naturelles.
Déclaration de conformité
Fabricant : Chal-Tec GmbH, Wallstraße 16, 10179 Berlin, Allemagne.
Ce produit est conforme aux directives européennes suivantes :
2011/65/EU (RoHS)
2014/30/EU (CEM)
 Loading...