

Page 1
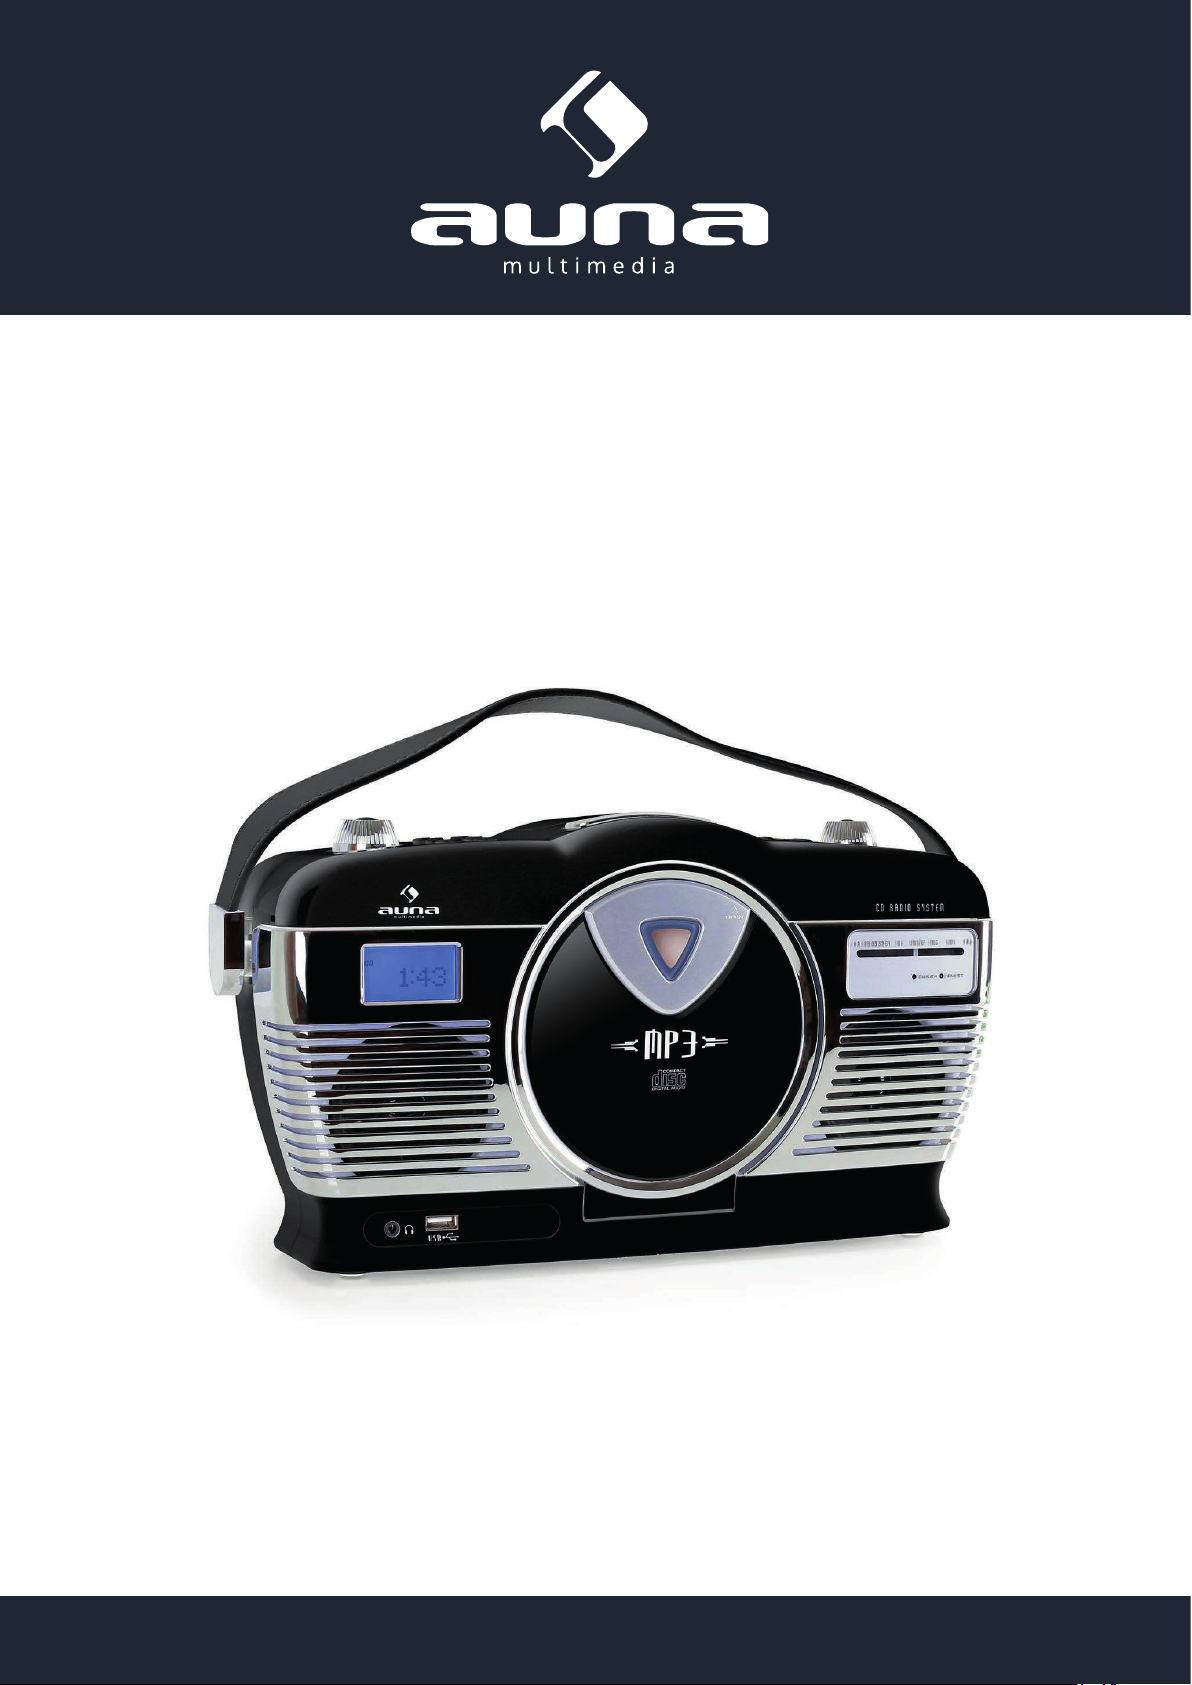
Retroradio
UKW / USB / CD / Batterie
10008986 10009116 10009117 10009118
http://www.auna-multimedia.com
Page 2
Sehr geehrter Kunde,
wir gratulieren Ihnen zum Erwerb Ihres Gerätes. Lesen Sie die folgenden Hinweise sorgfältig durch und
befolgen Sie diese, um möglichen Schäden vorzubeugen. Für Schäden, die durch Missachtung der Hinweise und unsachgemäßen Gebrauch entstehen, übernehmen wir keine Haftung.
Vorsichtmaßnahmen
Gefahr durch elektrischen Strom! Möglicher Stromschlag wenn es geönet wird.
Wichtig! Bitte folgen Sie den Anweisungen oder der Bedienungsanleitung.
Symbol der Schutzklasse 2 (Doppelt isoliert)
WARNUNG:
Um die Gefahr von Feuer oder elektrischen Schlägen zu reduzieren, dürfen Sie das Gerät nicht Regen
oder Feuchtigkeit aussetzen. Önen Sie das Gehäuse nie, da sich Hochspannungsbauteile im Inneren
benden. Nur Fachpersonal darf das Gerät warten.
ACHTUNG:
• Ersetzen Sie den Netzstecker nur mit einem baugleichen oder eine Modell mit den identischen
technischen Daten.
• UM EINEN ELEKTRISCHEN SCHLAG ZU VERMEIDEN STECKEN SIE DEN NETZSTECKER RICHTIG
UND VOLLSTÄNDIG IN DIE STECKDOSE.
• Das Gerät verfügt über Laserbauteile. Verwenden Sie das Gerät nur für den bestimmten Zweck,
anderenfalls kann dies zu Gefahren führen.
• ÖFFNEN UND REPARIEREN SIE DAS GERÄT NIE SELBSTSTÄNDIG. Nur Fachpersonal darf das
Gerät warten.
GEFAHR:
Aus dem geöneten Gehäuse können sichtbare und unsichtbare Laserstrahlen gelangen. Vermeiden
Sie direkte Aussetzung. ÖFFNEN SIE NIE DAS GERÄT.
Sicherheitshinweise
Bitte lesen und verstehen Sie alle Warnungen und Anweisungen, die in dieser Anleitung aufgeführt
sind. Bewahren Sie die Anleitung auf. Das Gerät wurde nach den aktuellen Sicherheitsstandards entwickelt und produziert.
Stromversorgung: Das
Gerät darf nur mit der
passenden Netzspannung
betrieben werden.
Halten Sie das Gerät und
das Netzkabel fern von
Wasser.
Meiden Sie direktes
Sonnenlicht und Hitze.
2
Page 3
Önen Sie nie das Gehäuse.
Es dürfen keine metalernen
Fremdkörper in das Gerät
gelangen.
Schützen Sie das Netzkabel.
Vermeiden Sie hohen Druck
und treten Sie nicht darauf.
Ziehen oder knicken Sie es
nicht.
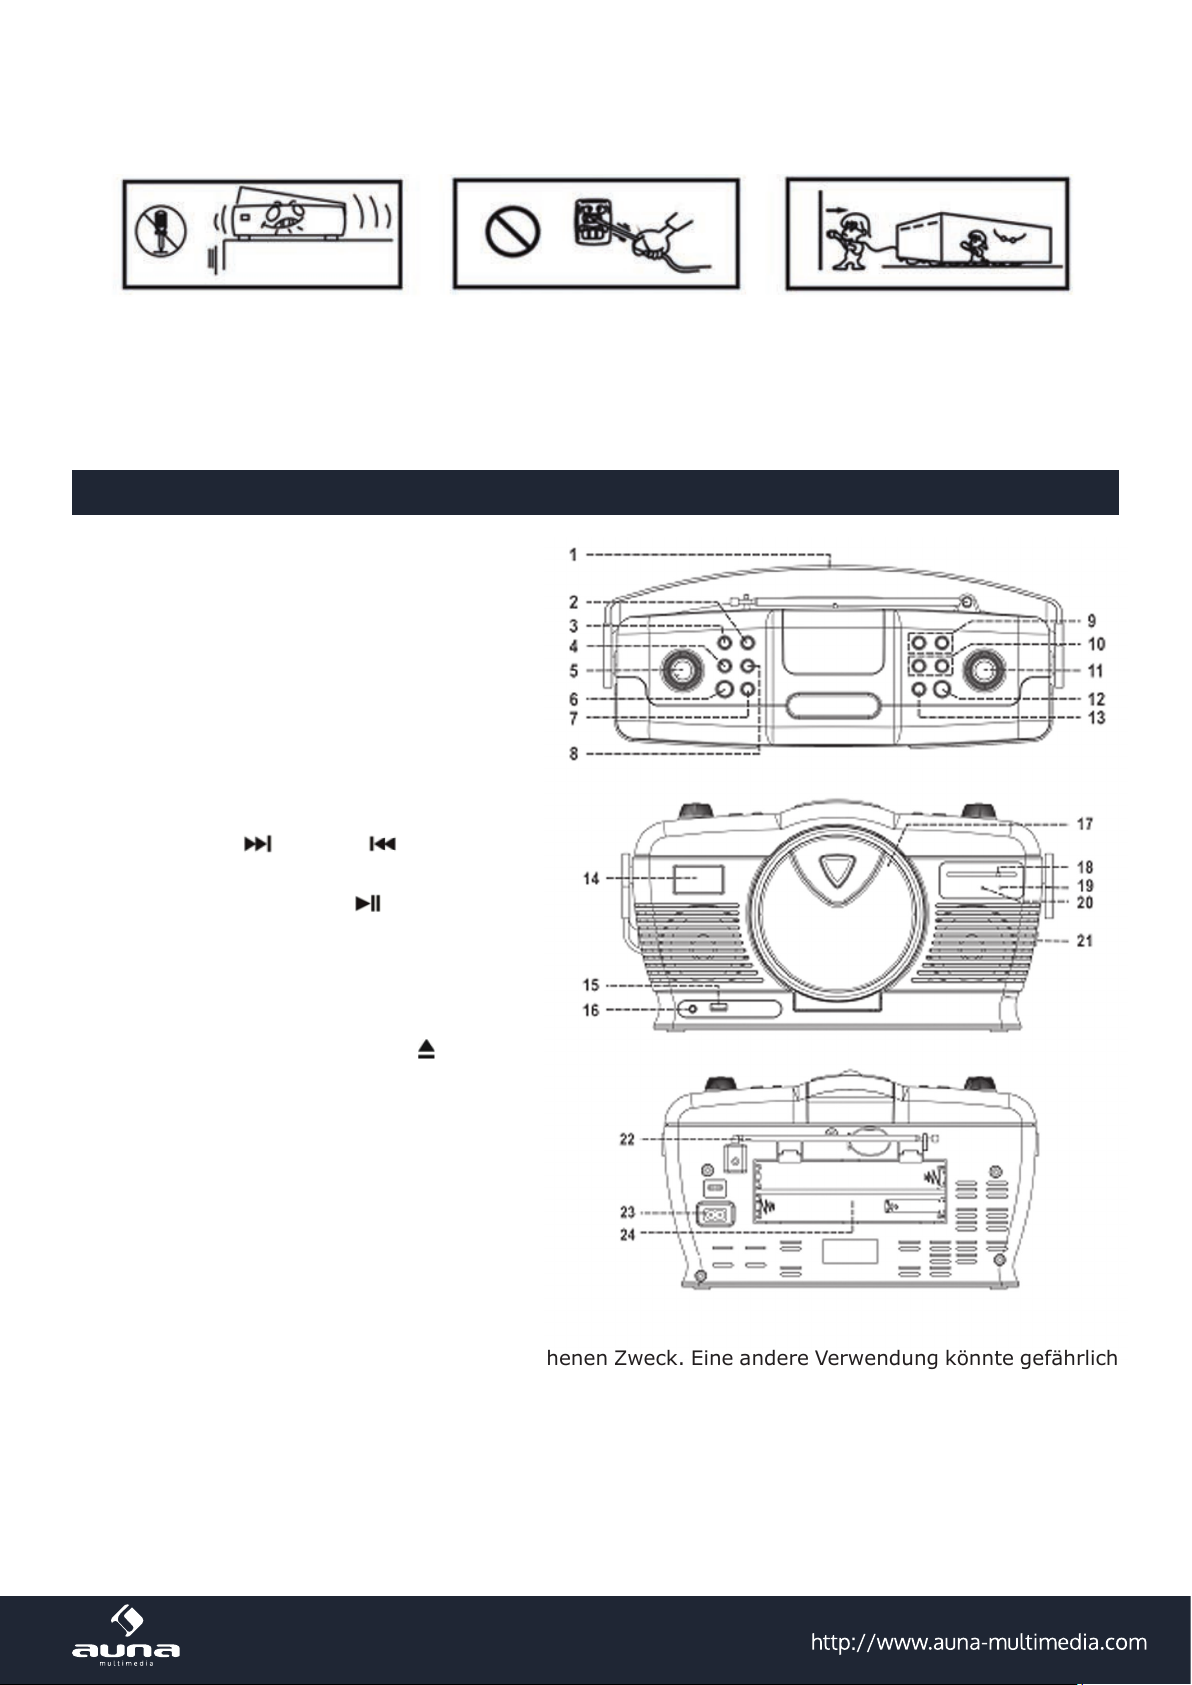
Geräteübersicht
1 Ledergri
2 Speicherfunktionstaste
3 Wiederhol-/Zufallsfunktion-Taste
4 Radio/CD-Taste
5 Lautstärke hoch/runter -Taste
6 Ein-/Standby-Taste
7 Stumm-Taste
8 CD/USB- Taste
9 Ordner vor/zurück
10 Titel vor
11 Frequenzregler
12 Wiedergabe/ Pause -Taste
13 Stopp ▪-Taste
14 LCD-Anzeige
15 USB-Anschluss
16 3.5mm Kopfhöreranschluss
17 CD-Fach önen/schließen -Taste
18 Frequenzbandanzeige
19 Stereo LED-Indikator
20 Radio LED-Indikator
21 Stereo/Mono Wahlschalter
22 FM-Wurfantenne
23 Stromanschluss
24 Batteriefach
/zurück -Taste
Ziehen Sie bei längerer
Nicht-benutzung den
Netzstecker aus der
Steckdose.
ACHTUNG:
Benutzen Sie das Gerät nur für den vorgesehenen Zweck. Eine andere Verwendung könnte gefährlich
sein. Das Gerät darf nur von Fachpersonal eingestellt oder repariert werden.
3
Page 4
Vor dem Gebrauch
Aufbau
• Packen Sie alle Teile aus und entfernen Sie die Verpackung.
• Schließen Sie das Gerät nicht an, bevor die Spannungsversorgung geprüft und sämtliche Kabel
angeschlossen haben.
• Decken Sie keine Belüftungsönungen ab und vergewissern Sie sich, dass rund um das Gerät
mehrere Zentimeter Platz zur Belüftung sind.
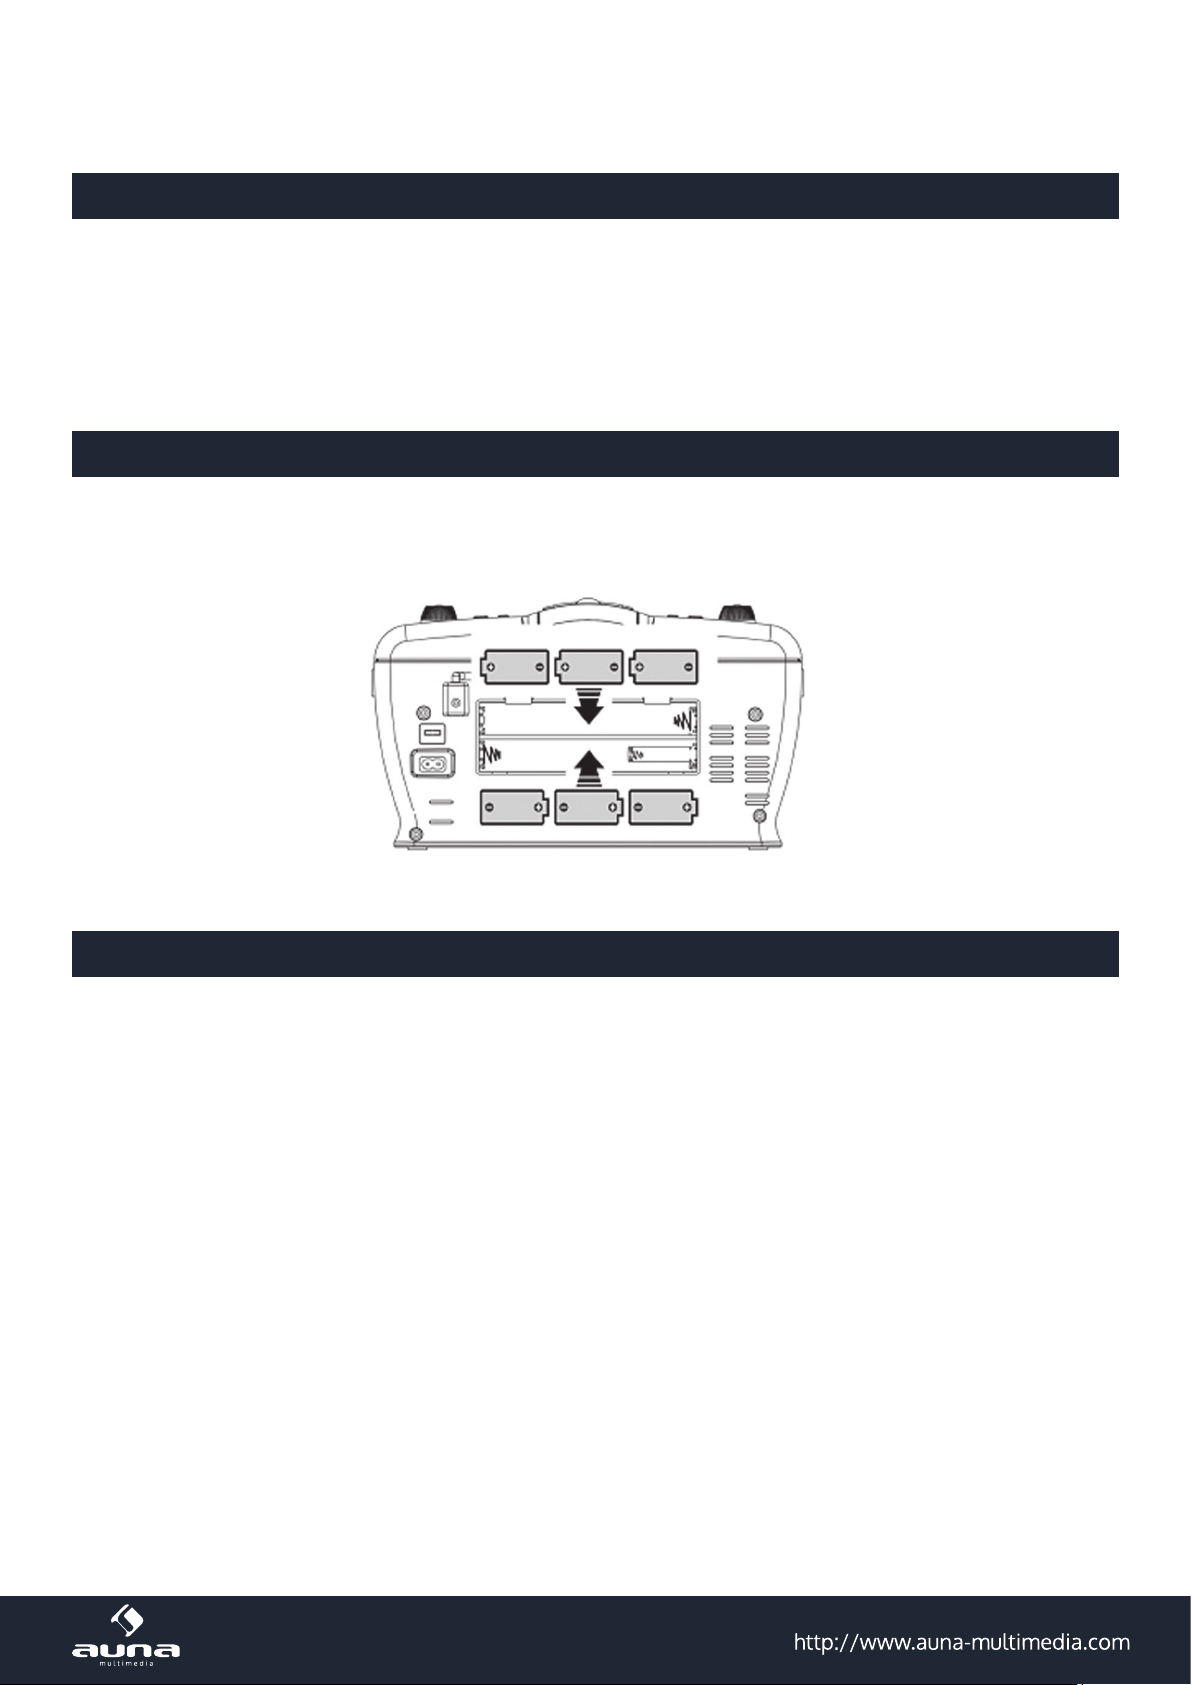
Anschluss(Stromkabel)
Legen Sie die Batterien wie gezeigt in das Batteriefach ein. Es werden 6 Stück Batterien der Größe C
(UM-2) verwendet.
Radio hören
1. Schalten Sie das Gerät mit Hilfe der Ein-/Standby -Taste(6) ein. Standardmäßig startet das Gerät
im Radio-Modus.
2. Stellen Sie mithilfe des Frequenzreglers (11) den gewünschten Radiosender ein.
3. Mit Lautstärke-Tasten (5) können Sie die Lautstärke entsprechend Ihren Hörgewohnheiten anpassen.
FM&FM-Stereo Empfang
• Stellen Sie die Stereo-Mono-Taste(21) auf „FM“, um den Sender in Mono empfangen. Bei schwachen
Sendersignalen ist der Mono-Modus empfohlen.
• Stellen Sie die Stereo-Mono-Taste(21) auf „FM ST“, um den Sender in Stereo empfangen.
• Wird ein Sender als Stereosignal empfangen, leuchtet der Indikator (19) auf.
Hinweise für einen besseren Empfang
Im Gerät ist eine FM-Wurfantenne(19) integriert. Durch eine Positionsänderung der Antenne sowie
des Geräts selbst kann der Empfang verbessert werden.
4
Page 5
CD-Wiedergabe
Vorbereitung
1. Drücken Sie die Taste (4) , um den CD-Modus auszuwählen.
2. Drücken Sie „Open/close“-Taste (17) zum Önen des CD-Fachs.
3. Legen Sie eine CD mit der bedruckten Seite nach oben ein und schließen das Fach.
4. Die CD wird durchsucht und auf der Anzeige erscheinen die Anzahl der Titel.
Wiedergabe/Pause
Um die Wiedergabe zu starten oder zu pausieren, drücken Sie „Play/pause“-Taste(12). Die Abspieldauer hält an.
Wiedergabe stoppen
Drücken Sie die Taste (13) während der Wiedergabe oder Pause zum Stoppen.
Überspringen/Suchmodus (Überspringen/Suche vor / Überspringen/Suche zurück )
1. Drücken Sie während der Wiedergabe wechselt das Gerät zum nächsten Titel.
2. Drücken Sie während der Wiedergabe wechselt das Gerät zum Anfang des Titels.
3. Drücken Sie während der Wiedergabe die oben erwähnten Tasten zwei Mal wechselt das Gerät
zum nächsten oder vorherigen Titel.
Für MP3-CD
1. Es wird die Anzahl aller Titel angezeigt und die Wiedergabe startet automatisch.
3. Drücken Sie oder um die Titelnummer zu ändern und starten Sie die Wiedergabe.
Wiederholung/Intro/Zufallswiedergabe
Drücken Sie „Rep/Ran“-Taste (3) vor oder während der Wiedergabe, um einen Titel, einen Ordner
oder
alle Titel in verschiedenen Modi wiederzugeben.
Für CD: (1) Wiederholung 1 > (2) Wiederholung alle Titel > (3) Zufallswiedergabe > (4) aus.
Wiedergabemodus LCD-Anzeige
Wiederholung Titel REP
Wiederholung alle
Zufallswiedergabe RAN
Aus ------------
REP
5
Page 6
Für MP3/CD: (1) Wiederholung 1 > (2) Wiederholung 1 Ordner > (3) Wiederholung alle > (4 )
Zufallswiedergabe > (5) Aus
Wiedergabemodus LCD-Anzeige
Wiederholung Titel REP
Wiederholung Ordner REP & FOLDER blinkend
Wiederholung alle
Zufallswiedergabe RAN
Aus ------------
Wiederholung
Sie können ununterbrochen einen Titel oder Ordner hören.
Zufallswiedergabe
Sie können sich alle Titel in zufälliger Reihenfolge anhören.
Programmierte CD/MP3-Wiedergabe
Sie können bis zu 20 CD/MP3-Titel in beliebiger Reihenfolge wiedergeben.
Das Gerät muss sich dafür im Stopp-Modus benden:
1. Wechseln Sie in den CD-Modus und stoppen Sie die Wiedergabe.
2. Drücken Sie die Taste (2), “ MEMORY “ & “ P01 ” erscheint blinkend auf der LCD-Anzeige.
3. Wählen Sie den gewünschten Titel mit
4. Drücken Sie die Taste (3), um den Titel der Wiedergabeliste hinzuzufügen.
5. Wiederholen Sie die Schritte 3 und 4 um die gewünschte Wiedergabeliste zu erstellen.
6. Haben Sie alle Titel der Wiedergabeliste hinzugefügt drücken Sie zum Starten der Wiedergabe.
7. Zum Beenden der Wiedergabe drücken Sie .
REP
/ .
Anforderungen an MP3-Titel:
• MP3-Bitrate: 32kbps ~ 256kbps. Sampling-Rate: 32kHz, 44.1kHz und 48 Hz dekodierbar
• Die Wiedergabeleistung variiert je nach Aufnahmequalität. Das Einlesen der MP3-CDs kann länger
dauern als bei normalen CDs.
Wiedergabe von Mp3-Dateien von USB
Anschluss
Das Gerät kann MP3-Dateien USB abspielen.
1. Schalten Sie das Gerät in den Standby-Modus oder in einen anderen Modus außer CD/USB bevor
Sie USB nutzen.
2. Schließen einen USB-Speichermedium an.
6
Page 7

Falls Sie versuchen das Speichermedium falsch herum einzulegen, kann es zu
Schäden am Gerät kommen. Prüfen Sie die richtige Ausrichtung vor dem Einsetzen.
3. Schalten Sie das Gerät ein oder wählen Sie Tuner/CD mithilfe der
Funktionswahl-Taste (4) aus.
4. Das Gerät beginnt automatisch mit dem Laden und zeigt die Anzahl den
MP3-Dateien an.
5. Die Bedienung erfolgt wie bei der CD/MP3-Wiedergabe.
Hinweise
• Das Gerät kann über USB nur MP3-Dateien lesen.
• Sollten Sie einen MP3-Player mittels USB an das Gerät anschließen, wird er unter
Umständen nicht als USB-Speicher erkannt. Dies ist keine Fehlfunktion.
• Der USB-Anschluss ist nicht für USB-Verlängerungen oder den direkten Anschluss an
einen PC ausgelegt.
Entfernen von USB / Speicherkarte
Vor dem Entfernen müssen Sie da Gerät abschalten bzw. den Modus zu CD, AUX oder Radio wech-
seln. Nun können Sie das Speichermedium entnehmen.
Hinweise zur Entsorgung
Bendet sich die linke Abbildung (durchgestrichene Mülltonne auf Rädern) auf dem
Produkt, gilt die Europäische Richtlinie 2012/19/EU. Diese Produkte dürfen nicht mit
dem normalen Hausmüll entsorgt werden. Informieren Sie sich über die örtlichen
Regelungen zur getrennten Sammlung elektrischer und elektronischer Gerätschaften. Richten Sie sich nach den örtlichen Regelungen und entsorgen Sie Altgeräte
nicht über den Hausmüll. Durch die regelkonforme Entsorgung der Altgeräte werden
Umwelt und die Gesundheit ihrer Mitmenschen vor möglichen negativen Konsequen-
zen geschützt. Materialrecycling hilft, den Verbrauch von Rohstoen zu verringern.
Konformitätserklörung
Hersteller: Chal-Tec GmbH, Wallstraße 16, 10179 Berlin, Deutschland.
Dieses Produkt entspricht den folgenden Europäischen Richtlinien:
2014/53/EU (RED)
2014/30/EU (EMV)
2014/35/EU (LVD)
2011/65/EU (RoHS)
7
Page 8

LOCATIONS OF CONTROLS
1) Leather handle
2) Memory button
3) Repeat/Ran button
4) Tuner/CD button
5) Volume up/down knob
6) On/standby button
7) Mute button
8) CD/USB exchange button
9) Folder up/down button
9) Ordner vor/zurück
10) Skip up /down button
11) Tuning knob
12) Play/pause button
13) Stop button
14) LCD display
15) USB socket
16) 3.5mm headphone jack
17) CD door open/close
18) Dial pointer
19) FM-stereo LED indicator
20) Tuner LED indicator
21) FM-St selector
22) Rod antenna
23) Ac socket
24) Battery compartment
Caution:
Usage of controls or adjustments or performance of procedures other than those specied herein may
result in hazardous radiation exposure.
This unit should not be adjusted or repaired by anyone except qualied service personnel.
PRECAUTIONS FOR USE
• Unpack all parts and remove protective material.
• Do not connect the unit to the mains before checking the main voltage and before all other
connections have been made.
• Do not cover any vents and make sure that there is a space of several centimeters at the back of
the unit for ventilation.
AC CONNECTION
1. Connect the one end of the detachable power cord to the ac socket (23) and the other end to the ac
outlet.
2. When you rst plug the unit into the mains, the unit will go into standby mode.
3. Turn on the unit by On/Standby button (6), the TUNER LED indicator (20) will light up.
8
Page 9

DC CONNECTION
For DC operation, please insert 6 pcs size C (UM-2) battery at batter compartment (24) as below direction:
LISTENING TO RADIO
Operation
1. Turn on the unit by On/Standby button (6), unit defaulted on Tuner mode and the TUNER LED
indicator (20) will light up.
2. Turn the tuning knob (11) to set the station frequency as desired.
3. adjust volume know (5) to the desired volume level.
Hints for best reception:
• FM : the receiver has rod antenna (22) hanging at the rear cabinet. this wire should be totally
unraveled and extended for best reception.
FM & FM-stereo reception
• Set the FM-St selector (21) at “ FM ” position. Programs are received in mono mode. In particular
• when stereo signals are weak. It is preferable to receive the program in mono.
• Set the FM-St selector (21) at “ FM ST ” position for receiving stereo programs. The “ FM-ST “
indicator (19) will light up to show the FM stereo program are receiving.
PLAYING COMPACT DISC
Getting start
1. Press Tuner/CD button (4) to select CD mode.
2. Open the CD compartment by pressing the CD door open/close (17). Put a CD disc into the
compartment and close the CD door.
3. Focus search is performance if disc is inside. Total number of tracks is read.
Play / pause mode
1. If Play/Pause button (12) is pressed during stop mode, the rst track will be played .
2. If Play/Pause button (12) is pressed during playback, system go to pause mode and the play
indicator will start ashing at the LCD display (14). Press again to resume normal playback.
Stop mode
If Stop button (13) is pressed during play or pause mode. Go to stop mode and display total
number of track on the LCD display (14).
9
Page 10

Skip mode (skip up /skip down )
1. During play or pause mode, if skip up button (10) is pressed it will go to next track and
display the track no. and then continuous the play or pause mode.
2. During play or pause mode, if Skip down button (10) is pressed, it will go back to the
beginning of the track, same track no. is display and continuous the play or pause mode.
3. After step 2, press skip down button (10) again, it will go to the previous track and
continuous the play or pause mode.
For MP3 disc/le
1. Place the MP3-CD to CD compartment. After focus search is performing, the total number of
track will be shown on the LCD display (14).
2. Press Skip up or Skip down (10) button to select the track number.
3. When the desired track and album is being selected, press the “ Play/Pause ” button (12) to
start playback.
Remark
• Press “ Folder up or down “ button (9) on main unit can select the MP3 folder directly.
• The number of folder will display on LCD (14) for 1-2 seconds selected and then it will resume to
the number of the track being playback
Repeat/Random mode
Press the “ Rep/Ran “ button (3) during playback to select repeat and random function, a single
track, single folder (MP3 only) or all the tracks can be played in dierence mode as follow:
For CD
(1) Repeat 1 > (2) Repeat all track > (3) Random > (4) O mode
Indicator
Play mode on LCD display
Repeat track REP
Repeat all REP
Random RANDOM
O mode
For MP3 disc/le
(1) Repeat 1 > (2) Repeat 1 folder > (3) Repeat all tracks > (4) Random > (5) O mode
Indicator
Play mode on LCD display
Repeat single track REP
repeat single folder REP & folder ashing
Repeat all tracks REP
Random RAN
O mode -----------
----------
10
Page 11

Repeat play
You can listen the desired tracks or folder repeatedly by this function.
Random play
You can listen all the tracks in a random order by this function
CD / MP3 disc programming
Up to 20 tacks can be programmed for disc play in any order. Before use, be sure to press the stop button.
1. Set in CD mode.
2. Press the Memory button (2), “ MEMORY “ & “ P01 ” will appear and ashing on LCD display (14).
3. Select a desired track by using the Skip up /Skip down buttons (10).
4. Press the Memory button (3) to enter the track into the memory.
5. Repeat steps 3 and 4 to enter additional tracks into the memory if necessary.
6. When all the desired tracks have been programmed, press “ Play/Pause “ button (12) to play the
disc in the order you have programmed.
7. Press “ Stop ” button (13) to terminate program play.
• Press “ Stop ” button (13) at CD stop mode to cancel all programmed memory until the “ MEMORY
“ indicator disappear on LCD display (14).
• For MP3 disc / le, press the “ Folder up “ button (9) to select the 1st track of next folder directly
and hence to speed up the song selection.
• The programming mode will automatically stop if no button is being pressed in a period of about
• 30 seconds after pressing the Memory button (3).
Remark:
MP3 track format requirement:
• Bit rate : 32 kbps~320kbps, sampling rate : 32kHz, 44.1kHz and 48 kHz decodable
• The performance of playing MP3 disc is various from the quality of recording disc and the method
of recording. Furthermore, the searching lead-time for MP3-CD is longer than normal CD due to
dierence format.
PLAYBACK OF MP3 SONG VIA USB STORAGE MEDIA
Connecting
The system is able to decode and playback all MP3 le which stored in the memory media with USB
connecting port.
1. Set the system at standby mode rst or other function except USB mode.
2. Plug-in the USB pen-drive with the face up & make sure it going into completely.
Connecting the USB upside down or backwards could damage the
audio system or the storage media (USB thumb driver). Check to be sure
the direction is correct before connection.
3. Turn on the unit again by On/Standby button (6) and set press Tuner/CD
button (4) to select CD mode. Press CD/USB exchange button (8) to change
to USB mode. The system will start reading the storage media automatically
after connecting, and LCD display (14) will show the total number of MP3 les
being detected.
4. Repeat the same playback procedure as playing CD/MP3 disc as above.
11
Page 12

Remark
• The system can detect and read the le under MP3 format only at USB mode but not other music
le format.
• If connect the system to MP3 player via the USB socket, due to variances in MP3 encoding format, some MP3 player may not be able to play via the USB socket. This is not a malfunction of
the system.
• USB port does not support connection with USB extension cable and is not designed for communication with computer directly
• Due to ErP stage two requirement and protect the environment. The unit will switch to standby
mode automatically once no any music playing over 15 minutes.
Removing of USB
To remove the USB turn o the power or switch the function mode to either cd or tuner mode rst.
For USB port – un-plug it by pulling out the USB socket directly
Hints on Disposal
According to the European waste regulation 2012/19/EU this symbol on the product or on its packaging indicates that this product may not be treated as household
waste. Instead it should be taken to the appropriate collection point for the recycling
of electrical and electronic equipment. By ensuring this product is disposed of correctly, you will help prevent potential negative consequences for the environment
and human health, which could otherwise be caused by inappropriate waste handling of this product. For more detailed information about recycling of this product,
please contact your local council or your household waste disposal service.
Declaration of Conformity
Producer: Chal-Tec GmbH, Wallstraße 16, 10179 Berlin, Germany.
This product is conform to the following European Directives:
2014/53/EU (RED)
2014/30/EU (EMC)
2014/35/EU (LVD)
2011/65/EU (RoHS)
12
Page 13

Chère cliente, cher client,
Toutes nos félicitations pour l’acquisition de ce nouvel appareil. Veuillez lire attentivement et respecter les
instructions de ce mode d’emploi an d’éviter d’éventuels dommages. Nous ne saurions être tenus pour
responsables des dommages dus au non-respect des consignes et à la mauvaise utilisation de l’appareil.
Mesures de précaution
Danger d’électrocution ! Risques de décharge électrique si l’appareil est ouvert.
Important ! Respecter les instructions ou le mode d’emploi
Symbole de la classe de protection 2 (isolation double)
AVERTISSEMENT :
Pour réduire les risques de feu ou d’électrocution, ne pas exposer l’appareil à la pluie ou à l’humidité.
Ne jamais ouvrir le boîtier, car des composants de haute tension se trouvent à l’intérieur. Seul un
technicien qualié est habilité à réparer l’appareil.
ATTENTION :
• Remplacer la che d’alimentation par une che d’alimentation identique ou de même modèle
possédant les mêmes caractéristiques.
• POUR ÉVITER TOUTE ÉLECTROCUTION BRANCHER LA FICHE CORRECTEMENT ET ENTIÈREMENT
DANS LA PRISE.
• L’appareil dispose de composants laser. Utiliser l’appareil uniquement aux ns prévues pour éviter
de provoquer tout accident.
• NE JAMAIS OUVRIR ET RÉPARER SOI-MÊME L’APPAREIL. Seul un technicien spécialisé peut répa-
rer l’appareil.
DANGER :
Des rayons laser visibles et invisibles peuvent s’échapper d’un boîtier ouvert. Éviter toute exposition
directe. NE JAMAIS OUVRIR L’APPAREIL.
Consignes de sécurité
Lire et comprendre les avertissements et les instructions développés dans ce mode d’emploi.
Alimentation électrique :
l’appareil doit fonctionner
uniquement sur une tension
adaptée.
Tenir l’appareil et le cordon
d’alimentation à l’écart de
l’eau.
Éviter la lumière directe du
soleil et la chaleur.
13
Page 14

Ne jamais ouvrir le boîtier. Protéger le cordon
d’alimentation. Éviter les
fortes pressions dessus et
ne pas marcher dessus.
Aperçu de l’appareil
1 Poignée en cuir
2 Touche de mémorisation
3 Touche de répétition /
de lecture aléatoire
4 Touche radio/CD
5 Touche volume haut/bas
6 Touche marche/arrêt
7 Touche de mode silencieux
8 Touche CD/USB
9 Dossier suivant/précédent
10 Titre suivant
11 Réglage de la fréquence
12 Lecture / pause
13 Touche stop
14 Écran LCD
15 Prise USB
16 Prise casque 3,5 mm
17 Ouvrir/fermer le compartiment à CD
18 Achage de la bande de fréquence
19 Voyant LED stéréo
20 Voyant LED radio
21 Commutateur de fonction stéréo/mono
22 Antenne laire FM
23 Prise secteur
24 Compartiment des piles
/précédent
▪
En cas d’inutilisation prolongée, débrancher la che
d’alimentation de la prise
ATTENTION :
Utiliser l’appareil uniquement aux ns prévues. Toute autre utilisation peut être dangereuse. L’appa-
reil peut être révisé ou réparé uniquement par un technicien spécialisé.
14
Page 15

Avant utilisation
Montage
• Déballer tous les pièces et retirer les éléments d’emballage.
• Ne pas brancher l’appareil avant d’avoir vérié la tension électrique et branché tous les câbles.
• Ne pas obstruer les ouvertures d’aération et s’assurer qu’il y a un espace de plusieurs centimètres
tout autour de l’appareil pour la ventilation.
Branchements (câble d’alimentation)
Introduire les piles dans le compartiment des piles comme illustré ci-dessous. 6 piles de taille C (UM-
2) sont nécessaires.
Écouter la radio
1. Allumer l’appareil à l’aide de la touche marche/veille (6). L’appareil démarre par défaut en mode
radio.
2. À l’aide de la touche de réglage de la fréquence (11), sélectionner la station radio souhaitée.
3. Les touches de volume (5) permettent d’ajuster le volume au niveau souhaité.
Récption FM&FM stéréo
• Mettre la touche stéréo-mono (21) sur « FM » pour recevoir la station en mono. Le mode mono
est recommandé en cas de faiblesse du signal.
• Mettre la touche stéréo-mono (21) sur « FM ST » pour recevoir la station en stéréo.
• Un voyant lumineux (19) s’allume lorsqu’une station est reçue en signal stéréo.
Remarques pour une meilleure réception
L’appareil est équipé d’une antenne laire FM (22) intégrée. En modiant la position de l’antenne et
de l’appareil, il est possible d’obtenir une meilleure réception.
15
Page 16

Lecture de CD
Préparation
1. Appuyer sur la touche (4) pour sélectionner le mode CD.
2. Appuyer sur la touche « Open/close » (17) pour ouvrir le compartiment à CD.
3. Insérer un CD face imprimée vers le haut et fermer le compartiment.
4. Le CD est analysé et le nombre de titre qu’il contient s’ache sur l’écran.
Lecture/pause
Pour démarrer la lecture ou la mettre en pause, appuyer sur la touche « lecture/pause » (12). L’indication de durée se met en pause.
Arrêter la lecture
Appuyer sur cette touche (13) pendant la lecture ou la pause pour arrêter la lecture.
Saut/recherche (saut/recherche avant / saut/recherche arrière )
1. Appuyer sur la touche pendant la lecture pour passer au titre suivant.
2. Appuyer sur la touche pendant la lecture pour revenir au début du morceau.
3. Appuyer deux fois sur une de ces touches pendant la lecture pour passer au titre suivant ou pré-
cédent.
Pour les CD MP3
1. Le nombre total des titres s’ache et la lecture démarre automatiquement.
2. Appuyer sur ou pour passer d’un morceau à l’autre et démarrer la lecture.
Répétition/intro/lecture aléatoire
Appuyer sur la touche « Rep/Ran » (3) pendant la lecture pour lire un titre, un dossier ou tous les
titres dans un mode particulier.
Pour les CD : (1) Répétition 1 > (2) Répétition de tous les titres > (3) Lecture aléatoire > (4) désactivé.
Mode de lecture Achage LCD
Répétition de titre REP
Répétition de tous les titres
Lecture aléatoire RAN
Désactivé ------------
REP
16
Page 17

Pour les CD/MP3 : (1) Répétition 1 > (2) Répétition 1 dossier > (3) Répétition tous titres > (4)
Lecture aléatoire > (5) Désactivé
Mode de lecture Achage LCD
Répétition de titre REP
Répétition du dossier REP & FOLDER clignotent
Répétition de tous les titres
Lecture aléatoire RAN
Désactivé ------------
Répétition
Permet d’écouter en boucle un morceau ou un dossier.
Lecture aléatoire
Permet d’écouter tous les morceaux selon un ordre aléatoire.
Lecture programmée de CD/MP3
Il est possible de lire jusqu’à 20 morceaux CD/MP3 dans l’ordre souhaité.
L’appareil doit se trouver en mode Stop.
1. Passer en mode CD et arrêter la lecture.
2. Appuyer sur la touche (2), « MEMORY » & « P01 » s’achent en clignotant sur l’écran LCD.
3. Sélectionner le morceau souhaité avec
4. Appuyer sur la touche (3) pour ajouter un morceau à la liste de lecture.
5. Répéter les étapes 3 et 4 pour créer la liste de lecture souhaitée.
6. Lorsque tous les morceaux souhaités ont été ajoutés, appuyer sur pour démarrer la lecture.
7. Pour arrêter la lecture, appuyer sur .
REP
/
Caractéristiques des titres MP3 :
• Taux de compression MP3 : 32 kbps ~ 256 kbps. Taux d’échantillonnage : 32 kHz, 44.1 kHz et 48
Hz décodables.
• La qualité de la lecture dépend de la qualité de l’enregistrement. L’analyse d’un CD-MP3 peut
durer plus longtemps que celle d’un CD classique.
Lecture de chiers MP3 d’un support USB
Branchement
L’appareil peut lire les chiers MP3 d’un support USB.
1. Mettre l’appareil en mode veille ou dans un autre mode excepté le mode CD/USB avant d’utiliser
le support USB.
2. Brancher un support USB
17
Page 18

Brancher le support de stockage dans le bon sens pour éviter d’endommager
l’appareil. Vérier préalablement le sens d’insertion.
3. Allumer l’appareil ou sélectionner Tuner/CD à l’aide de la touche de fonc-
tion (4).
4. L’appareil commence automatiquement à charger et ache le nombre de
chiers MP3.
5. La commande de lecture s’eectue comme avec les CD/MP3.
Remarque
• L’appareil lit uniquement les chiers MP3 depuis un support USB.
• Si un lecteur MP3 est branché à la prise USB de l’appareil, il se peut dans certains cas que le sup-
port USB ne soit pas reconnu. Ceci n’est pas la manifestation d’un dysfonctionnement.
• La prise USB n’est pas conçue pour accueillir une rallonge USB ou pour un branchement direct
avec un PC.
Retrait de la clé USB / carte mémoire
Éteindre l’appareil ou basculer en mode CD, AUX ou radio avant le retrait du périphérique. Une fois
cela fait, il est possible de retirer le support de stockage.
Information sur le recyclage
Vous trouverez sur le produit l’image ci-contre (une poubelle sur roues, barrée d‘une
croix), ce qui indique que le produit se trouve soumis à la directive européenne
2012/19/UE. Renseignez-vous sur les dispositions en vigueur dans votre région
concernant la collecte séparée des appareils électriques et électroniques. Respectez-les et ne jetez pas les appareils usagés avec les ordures ménagères. La mise au
rebut correcte du produit usagé permet de préserver l’environnement et la santé. Le
recyclage des matériaux contribue à la préservation des ressources naturelles.
Déclaration de conformité
Fabricant : Chal-Tec GmbH, Wallstraße 16, 10179 Berlin, Allemagne.
Ce produit est conforme aux directives européennes suivantes :
2014/53/UE (RED)
2014/30/UE (CEM)
2014/35/UE (LVD)
2011/65/UE (RoHS)
18
Page 19

19
 Loading...