

Page 1
Assembly Instructions
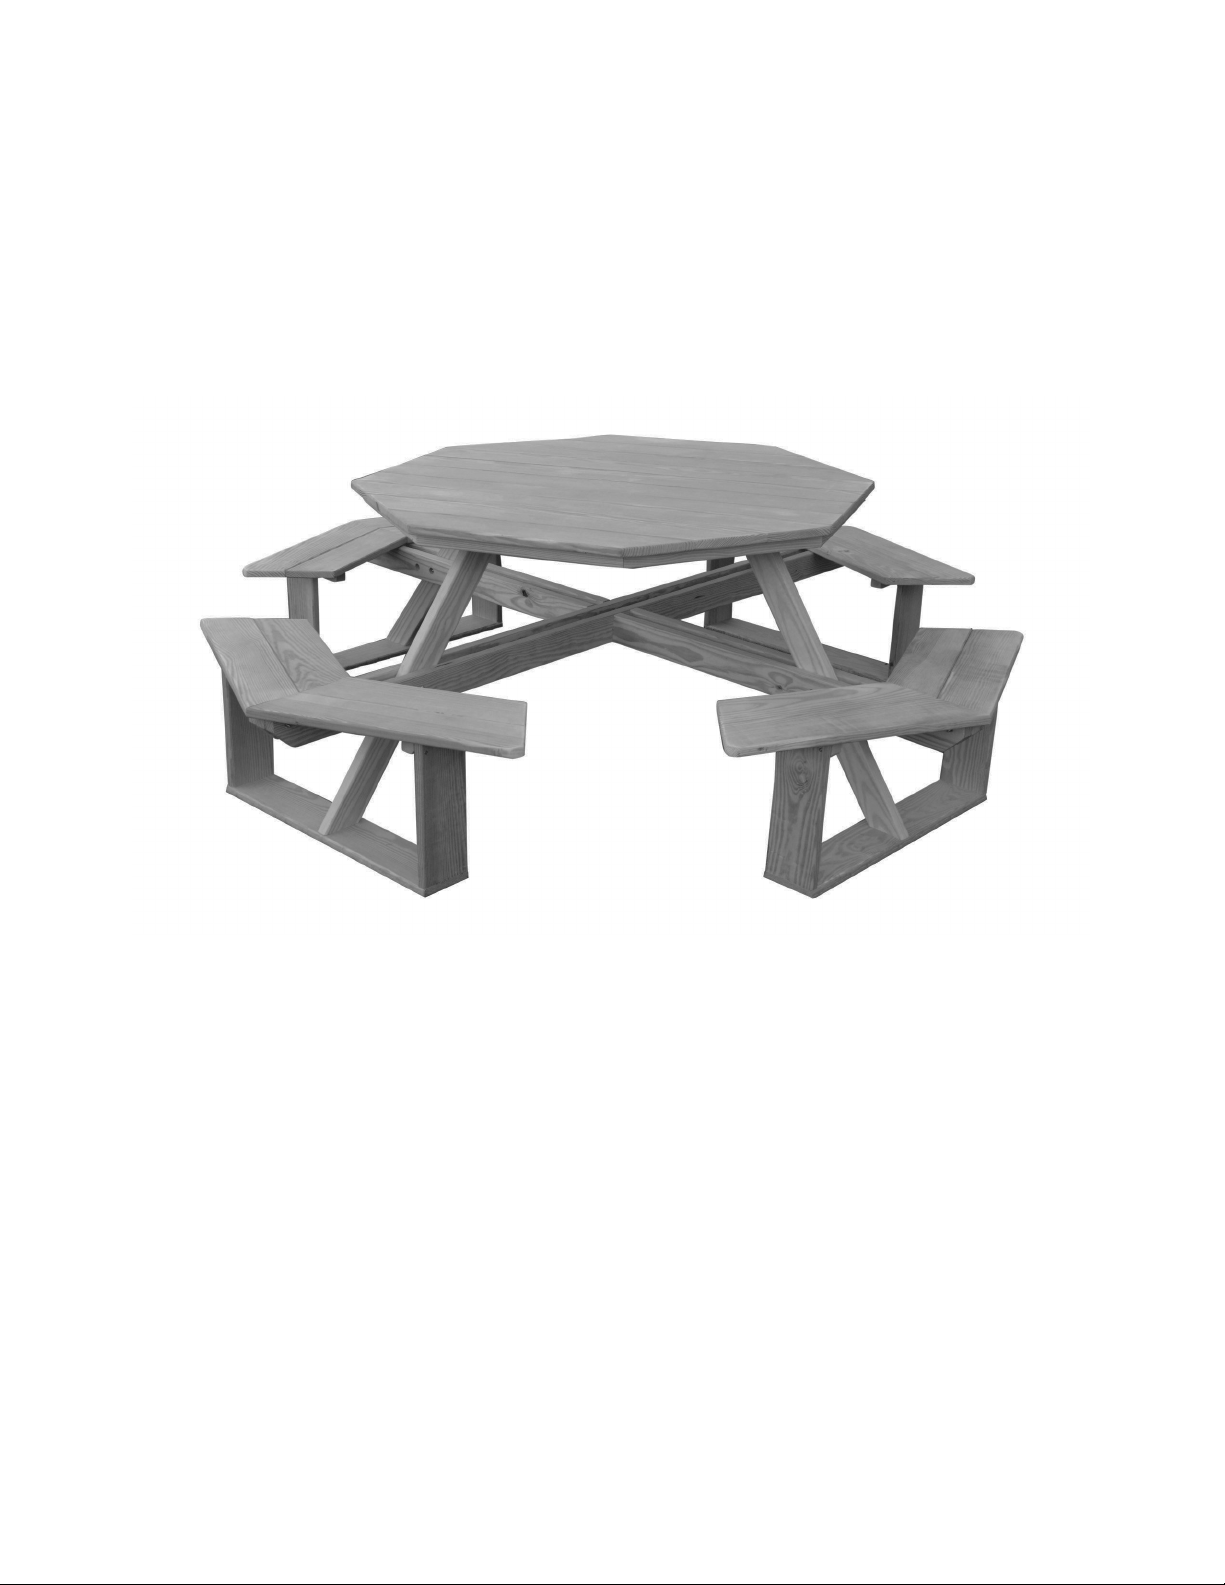
Octagon Walk-in Table
Thank you for
choosing our product.
We hope that this piece brings you many years of enjoyment!
For help with assembling your furniture,
or if you have missing hardware, please email us.
Page 2
PARTS (included)
HARDWARE (included)
Table Top (2)
2”x2”x36” Strips (2)
Table Leg Assemblies (2)
Bench Tops (4)
1”x5½”x14½” Bench Leg Supports (8)
2¾” Wafer Head Bolts (4)
2” Screws (75)
Allen Wrench (1)
Square Drive Bit (1)
TOOLS NEEDED
1”x5½”x32” Bench Bottoms (4)
Power drill or screwdriver
STEP 1
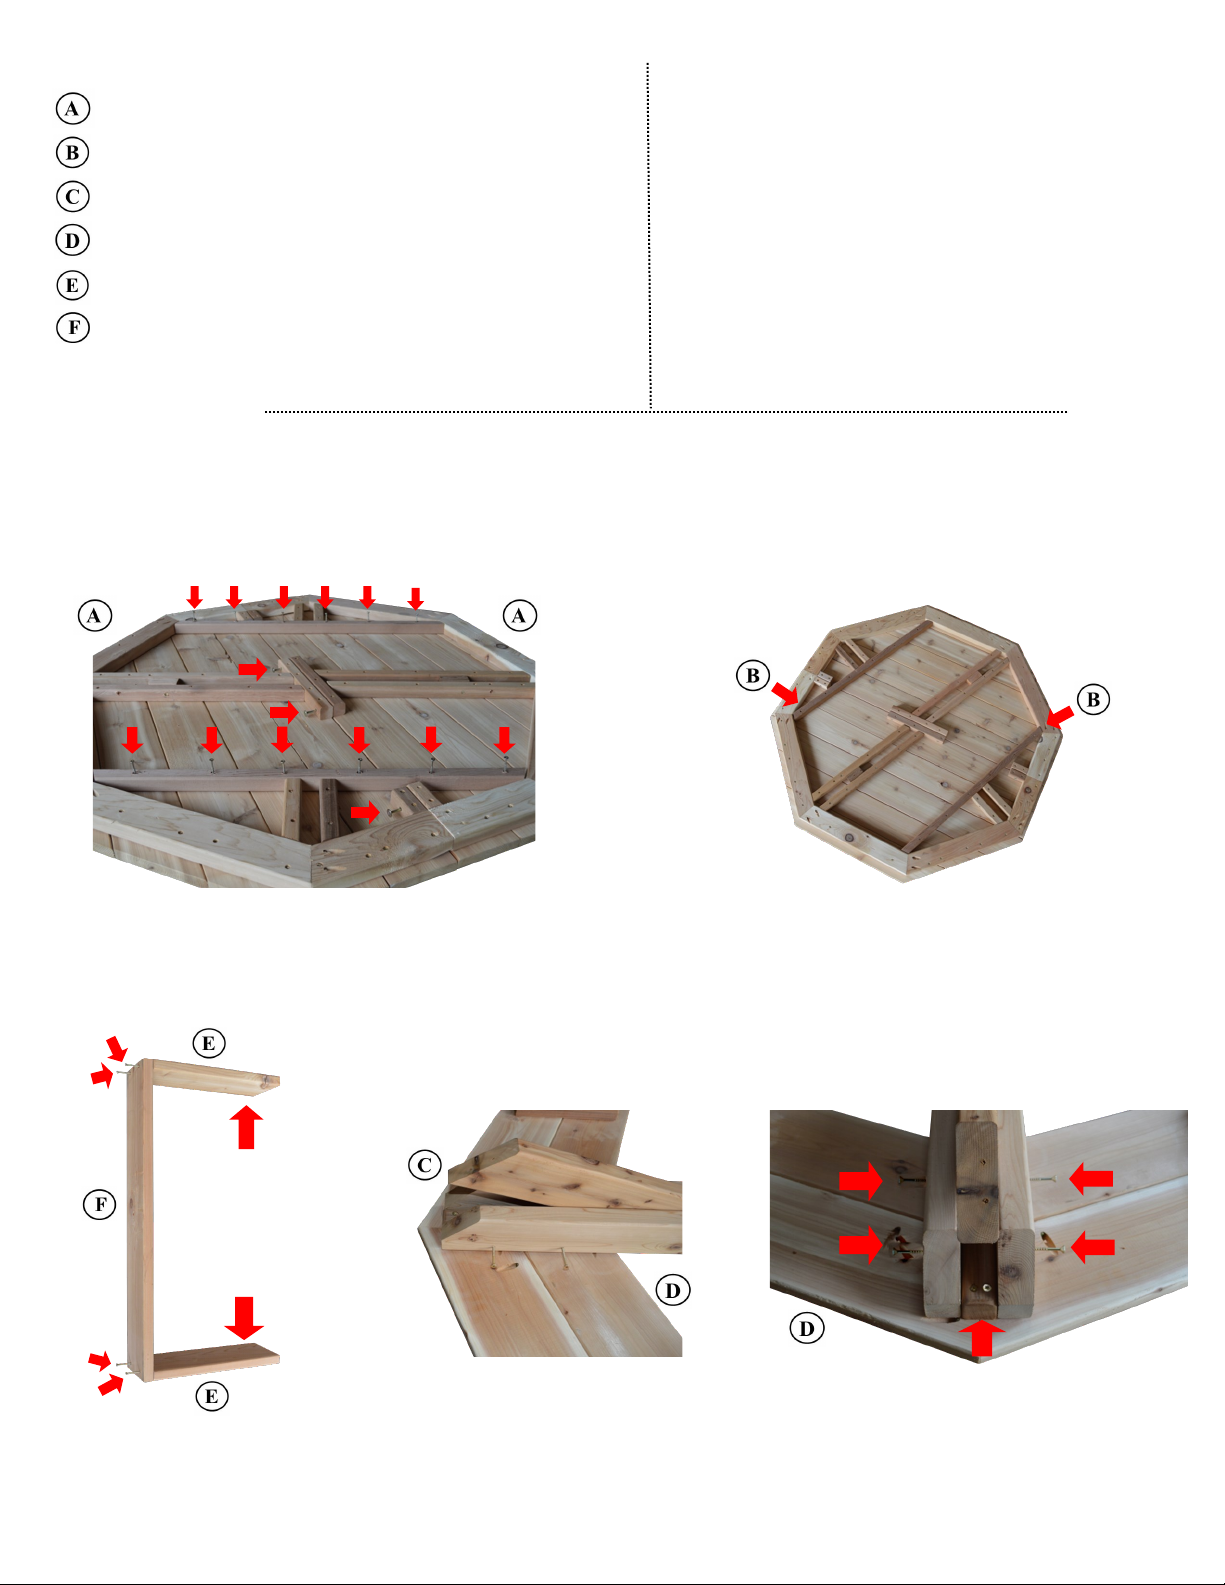
Lay the table tops upside down and bolt together. Insert the four 2¾” bolts in the predrilled holes in one
side and turn into the threaded inserts with the Allen Wrench. (See photo 1.) Now attach the 2”x2”x36”
strips as shown. Place ends in the corners and center of strip against the preinstalled 2x2 strips on the
table top. Fasten with six 2” screws in each strip and turn into the table top. (See photos 1 & 2.)
photo 1 photo 2
STEP 2
Assemble the four bench legs. Take two leg supports and attach to a bench bottom. Put two 2” screws in
the predrilled holes in each end of the bench bottom and screw into one end of the leg supports. (See
photo 3.)
Predrilled
holes in leg
supports
belong at
this end
*Keep 2x2 even with outside edge of leg supports*
photo 3 photo 4 photo 5
STEP 3
Unfold a table leg assembly and place upside down on a table. (See photo 4.) Take a bench top and place
upside down with the center 2x2 between the 2x4 leg support beams. Attach with two 2” screws on each
side. (See photos 4 & 5.)
Page 3
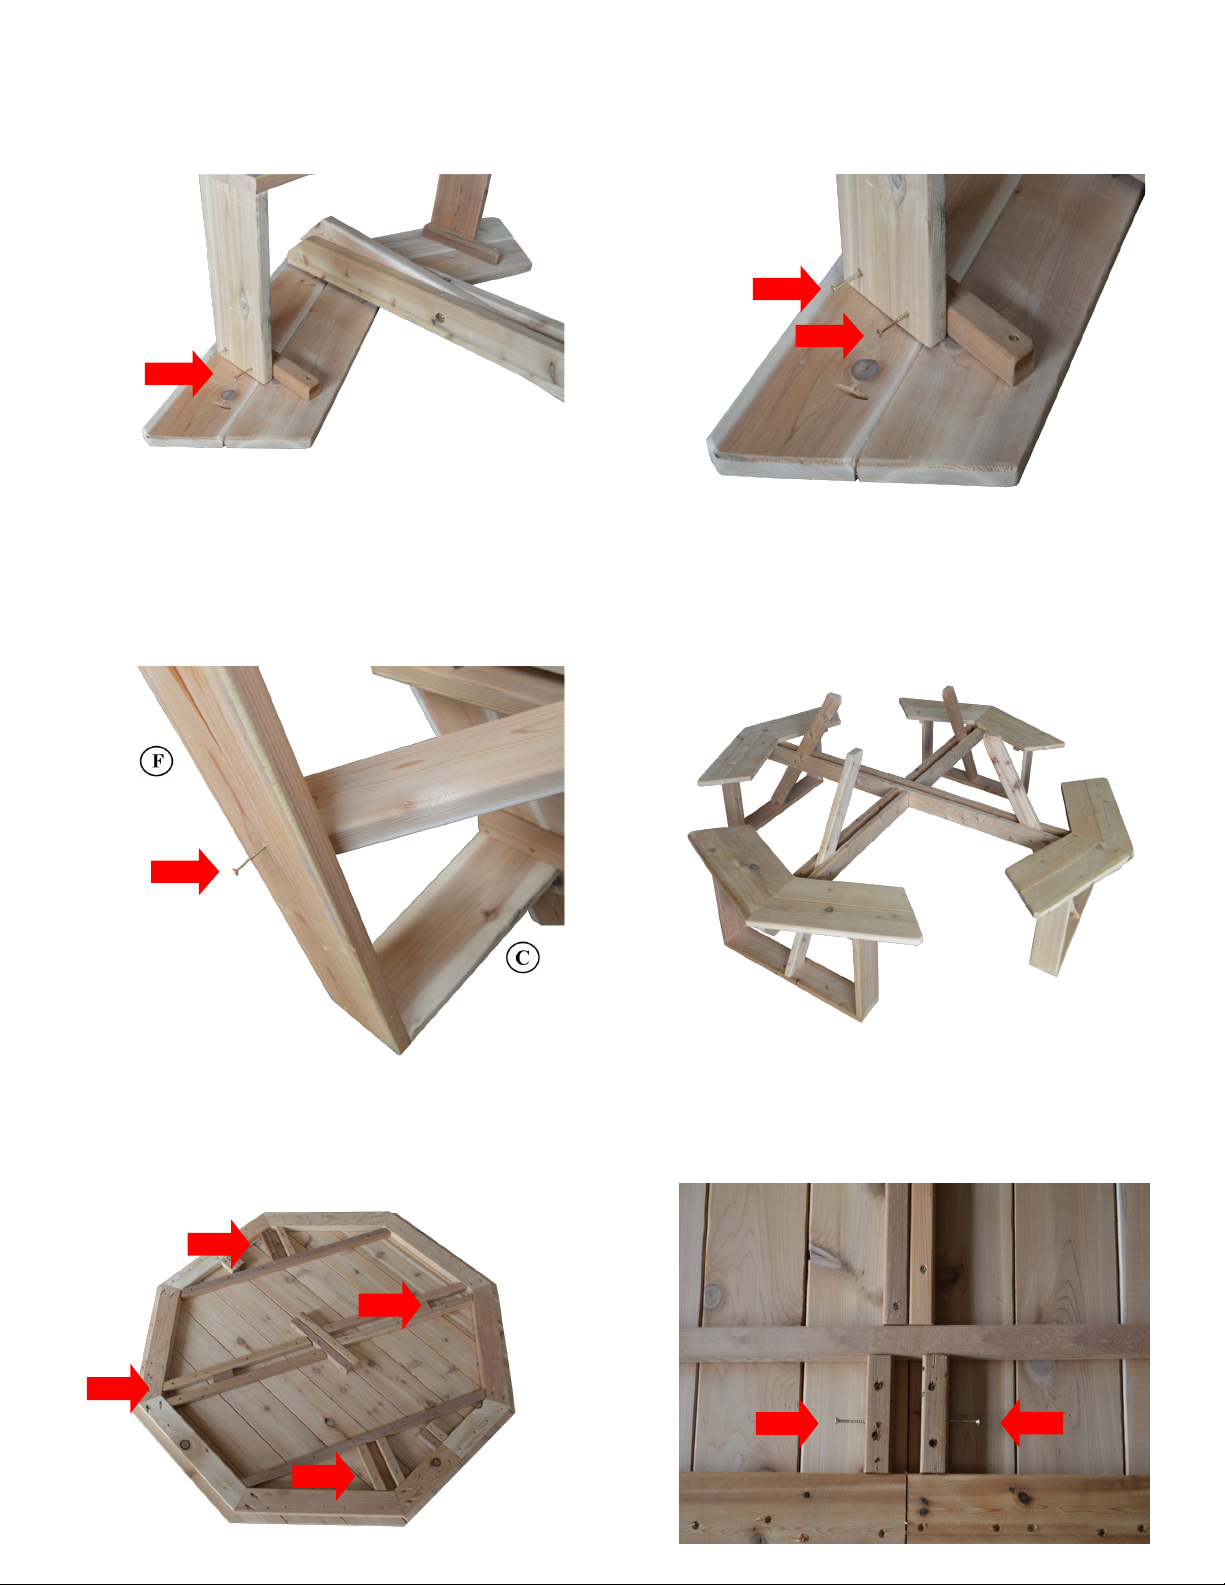
photo 10
photo 6 photo 7
photo 8 photo 9
photo 10
photo 11
STEP 4
Now take the bench leg assemblies from step 2 and place them on the seat. Align with the outside edges of
the 2x2’s. Attach with two 2” screws on each end. (See photos 6 & 7.)
STEP 5
Fold the center leg down and attach to the bench bottom. Put one 2” screw in the predrilled hole in the
center of the bench bottom and screw up into the leg. (See photo 8.) Now put the 2 base assemblies
together and fasten with four 2” screws. (See photo 9.)
STEP 6
Place the table top on the base and latch down into the 4 corners between the 2x2 braces. (See photo 10.)
Put one 2” screw into each 2x2 and screw into the top of the legs. (See photo 11.)
 Loading...